Mystery Model Slides Operation: One Step
Deconstructing the Whole
How do we make big things small?
The Great Sandwich Debate
If you are making a sandwich, what comes first?
The Lettuce?
The Mustard?
The Bread?
🥪
Does the order matter?
Reverse Engineering
Most big tasks are just a bunch of tiny tasks hiding inside one big name.
Example: "Cleaning Your Room"
1. Put Legos in bin.
2. Hang up hoodie.
3. Put book on shelf.
Our Mission Today
We are going to look at a finished product and figure out every single step it took to get there.
Step Scramble Worksheet The Step Scramble
Reverse Engineering Challenge
NAME:
DATE:
Mission Objective
Look at the Finished Product below. Your job is to work backward and figure out the 5 single steps needed to make it. Don't skip any!
✈️
Finished Product: Paper Airplane
Break It Down:
1
2
3
4
5
Brain Check:
Was it harder to think of the first step or the last step? Why?
Reverse Engineering Teacher Guide Teacher Guide
Lesson 1: Deconstructing the Whole
One Step Wonders Sequence
Learning Objective
Students will understand that complex tasks are composed of discrete, single units of work. By "deconstructing" a finished object, they will practice the cognitive skill of isolating single steps to reduce overwhelm.
Materials Needed
Mystery Model Slides
Step Scramble Worksheet
A completed paper airplane
Whiteboard markers
Pacing Guide
The Hook 5 min
Direct Instruction 10 min
Guided Practice 15 min
Reflection 5 min
1. The Hook: The Sandwich Debate
Display the first slide. Ask the class: "If you're making a sandwich, what comes first?" Encourage conflicting opinions (bread vs. condiment vs. plate).
Teacher Script: "When we look at a whole sandwich, our brain just sees 'Sandwich.' But if we want to make one, we have to see the tiny steps. Today, we're becoming deconstruction experts."
2. Guided Practice: Reverse Engineering
Hold up a finished paper airplane. Ask the students to imagine the very last thing you did to it (folding the wings). Then ask what happened before that.
Step 5 (Final): Fold the wings down.Step 4: Fold the body in half.Step 3: Fold the tip into a point.Step 2: Fold the corners to the center.Step 1 (Start): Lay the paper flat.
3. Independent Work: Step Scramble
Students use the worksheet to record their deconstruction. Remind them to think about "micro-steps"—the smallest possible actions.
Memory Support
Provide physical paper to students who struggle with mental visualization. Let them unfold a real airplane to see the creases (steps) in reverse.
Check for Understanding
Can the student identify the "Starting State" (blank paper) and the "Ending State" (airplane)? If not, focus on the extremes first.
Mystery Build Slides Mission: Digital Pacing
Mystery Build Challenge
One Click. One Step. No Cheating!
The Golden Rules
1
Only one person clicks the mouse.
2
You must finish the step on the screen before clicking "Next."
3
If you get lost, go back one slide.
The mouse is your timer. Respect the pace!
Step 01
STATUS: INITIALIZING
Lay one square sticky note flat on your desk in front of you.
📄
Step 02
STATUS: ALIGNING
Fold the top half down to meet the bottom edge. Press the crease hard!
Step 03
STATUS: SECURING
Slide a paperclip onto the left side of the folded paper.
📎
Step 04
STATUS: DETAILING
Draw two small circles (eyes) on the paperclip side.
👀
Mission Complete!
You have built a...
🤖
Pocket Sentry Bot Build Log Sheet System Build Log
Digital Pacing Protocol
PILOT:
UNIT:
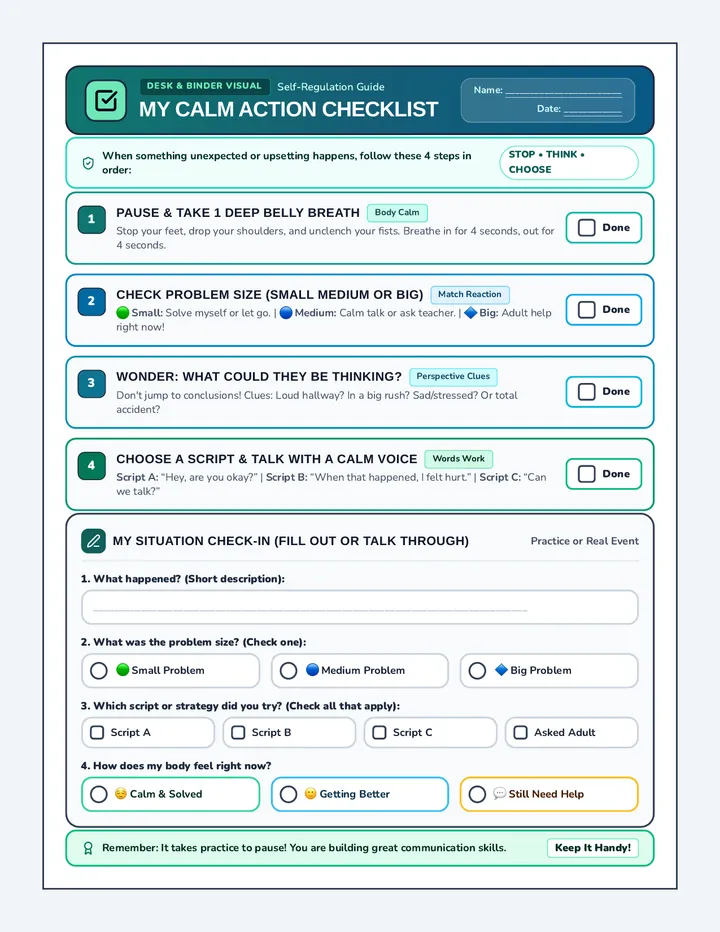
Instructions: As you click through the Digital Challenge, you must check off each step only after it is 100% complete. Do not click "Next" on the screen until you have marked this log.
Sector 01: Base Layer
"Lay one square sticky note flat..."
STBY_INIT
Sector 02: Structural Integrity
"Fold top half down. Press crease hard..."
STBY_FOLD
Sector 03: Component Attachment
"Slide paperclip onto left side..."
STBY_CLIP
Sector 04: Visual Interface
"Draw two small circles (eyes)..."
STBY_DRAW
Post-Build System Review
How did the pacing feel?
TOO SLOW
JUST RIGHT
TOO FAST
Any System Errors?
Protocol 02 // Digital Pacing // Task Segmented
Digital Pacing Teacher Guide Mission Control
Lesson 2: Digital Click-Through
Protocol: Digital Pacing
Why Digital Pacing?
Students with working memory challenges often feel overwhelmed by a "wall of text" or a list of 10 steps. By isolating each step on its own slide, we reduce the cognitive load to one single unit of information at a time.
Setup Instructions
Device Setup
Load the "Mystery Build Slides" on individual tablets or a central smartboard. If using a central board, the teacher controls the clicks.
Supply Kits
Each student needs: 1 square sticky note, 1 paperclip, 1 marker. Do not hand these out until the slides start!
Facilitation Tips
The 1:1 Rule
Ensure every student physically checks their paper log before anyone clicks "Next."
Visual Checks
Walk the room. If a student's project doesn't match the current slide, pause the whole class.
Embrace the Mystery
Do not tell them they are building a robot. The "not knowing" keeps them focused on the current step.
Activity Facilitation
GO
Introduction & Log Distribution
Hand out the Build Log Sheet . Explain that this is their "Mission Data Tracker." If a step isn't checked on the log, it didn't happen in the system.
1
Step-by-Step Execution
"Eyes on the screen. Look at Step 01. Do the action. Now, look at your paper log. Check the box for Sector 01. Once your whole group has a checkmark, we click Next."
?
Handling Over-Eagerness
If a student tries to click ahead, stop them immediately. Explain that "In Mission Control, we never skip a check."
Key Takeaway for Students
"When we only see one step at a time, we can't get confused by the steps that haven't happened yet."
Mastering Checklists Slides Protocol: Verification
The Check-Off Method
Clearing Brain Space for Big Wins
The Pilot's Secret
Even the world's best pilots use a checklist before they fly.
Why?
"So they don't have to use their brain to remember the small stuff, so they can use it for the big stuff."
👨✈️
The Power of the Check
Memory Dump
Once you check the box, your brain can "forget" that step and move on.
Visual Proof
You don't have to wonder "Did I do that?" You can SEE that you did.
Dopamine Hit
Checking a box feels GOOD. It tells your brain: "I am winning!"
The Rule:
You may NOT touch the next task until your pen has physically checked the box of the current task.
STEP 1
STEP 1
Desk Mission Checklist Desk Organization Mission
Protocol: Visual Verification
OPERATOR:
SECTOR:
The Absolute Rule
Do one thing. Check the box. Stop. Breathe. Then do the next thing.
1. Scrap Removal
Pick up every piece of scrap paper or trash on your desk and put it in the bin.
2. Tool Alignment
Line up all your pencils, pens, and markers so they are facing the same direction.
3. Folder Stack
Stack all folders and notebooks in a neat pile on the top-left corner of your desk.
4. Chair Reset
Push your chair in all the way so it is touching the edge of the desk.
5. Desk Check
Wipe the top of your desk with your hand to make sure it is smooth and clean.
Mission Report:
How did it feel to check those boxes as you went? Did it make the cleaning feel faster or slower?
Routine Check-Off Cards Universal Check-Off Cards
Print, Cut, and Tape to Student Desks
Morning Mission
Hang up backpack
Turn in homework
Sharpen two pencils
Read board message
Wait for Further Instructions
Departure Mission
Clear desk surface
Pack folder in bag
Stack chair neatly
Check floor for trash
Safe Travels, Agent!
Writing Check
Name and Date on top
Capital letters start
Punctuation at end
Read it out loud once
Custom Mission
Pro Tip: Laminate these cards so students can use dry-erase markers to check and uncheck boxes every day.
Freeze Frame Slides Protocol: Synchronized Pacing
Freeze Frame!
Building the Block Fortress Together
The Hands-on-Heads Rule
When a step is done, everyone must stop immediately.
Place your hands on your head and look at the teacher.
No touching bricks until the light turns green!
🙆♂️
Action 01
Place four square blocks side-by-side to make a square base.
🧱🧱
FREEZE!
Hands on Heads. Eyes on Teacher.
Action 02
Stack two more blocks on top of the front row.
⬆️🧱 ⬆️🧱
FREEZE!
Hands on Heads. Eyes on Teacher.
Pacing Protocol Cards Pacing Protocol Cards
Print, fold, and stand on student desks
ACTION
Execute Step
PAUSE
Hands on Head
Technician Note
How to use these cards:
When the teacher says "Go," flip your card to the GREEN side.
The moment you finish your single step, flip it to RED immediately.
RED means your hands are off the project. Your brain is resting!
Stop Motion Teacher Guide Pacing Facilitator
Lesson 4: Freeze Frame Project
Protocol: Synchronized Pacing
The "Teacher-as-Clock" Concept
In this lesson, you are the external working memory for the class. Students with ADHD or working memory deficits often struggle to "stop" once they've started. This project forces a cognitive reset after every single unit of work.
Materials & Setup
Lego Bricks or Wooden Blocks (approx 10-15 per student)
Freeze Frame Slides
Pacing Protocol Cards (Red/Green)
The Freeze Drill
1. START: Slide is Green. Students flip cards to Green and work.
2. DETECT: When you see the first 3 students finish, count down: "3... 2... 1... FREEZE!"
3. RESET: Students must flip cards to Red and put hands on heads. They must remain this way for 10 seconds of silence.
Step-by-Step Pacing
A
The Anticipation Hook
Explain that we are building a "Fortress," but we can only move when the "Green Light" is on. If anyone moves during a "Red Light," the whole fortress might collapse (metaphorically).
B
Managing Frustration
Some students will find the waiting difficult. Remind them: "The wait is where your brain cleans out the old info to make room for the new info."
C
Incremental Complexity
Start with 10-second pauses. As the project goes on, try 5-second pauses to see if they can maintain the "Switching" speed without losing the "Stopping" discipline.
Goal: Students should be able to stop mid-action without a physical struggle.
Assembly Line Slides Protocol: Specialized Focus
Assembly Line
The Power of the Single Expert
One Job, Done Right
In a factory, nobody builds the whole car alone.
Each person is an Expert at one single step.
"When you only have one job, your brain can relax and do it perfectly."
🔧
⚙️
🔨
📦
Station Flow
1
Station A
The Folder
2
Station B
The Stamper
3
Station C
The Packer
4
Station D
The Checker
Station Job Cards Station Job Cards
Distribute one card per student in the line
STATION A
The Folder
Your job is the START of the line.
Protocol:
1. Take a fresh piece of paper.
STATION B
The Stamper
Your job is to BRAND the product.
Protocol:
1. Receive folded paper from Station A.
STATION C
The Packer
Your job is to PROTECT the product.
Protocol:
1. Receive stamped paper from Station B.
STATION D
The Checker
Your job is the FINAL quality check.
Protocol:
1. Open the folder and look at the paper.
Efficiency Report Worksheet Efficiency Report
Final Unit Reflection: One Step Wonders
Date: ________
Station ID: ________
The Power of One
Today, you only had one job. Think about how that felt for your brain.
"A focused brain is a fast brain."
How did your focus feel today?
RELAXED
BUSY
CONFUSED
BORED
1. If you had to build the whole product by yourself without any steps or checklists, what would happen?
2. Which "One Step" tool was your favorite this week? (Check one)
Digital Pacing
Check-Off Lists
Freeze Frame
3. What is one "Big and Scary" task at home or school that you could turn into a "One Step" task?
Mission Status: COMPLETED // One Step at a Time