An introductory lesson on soldering copper pipes for 9th-grade plumbing students, focusing on safety, preparation, and the soldering process with accommodations for EL and 504 students.
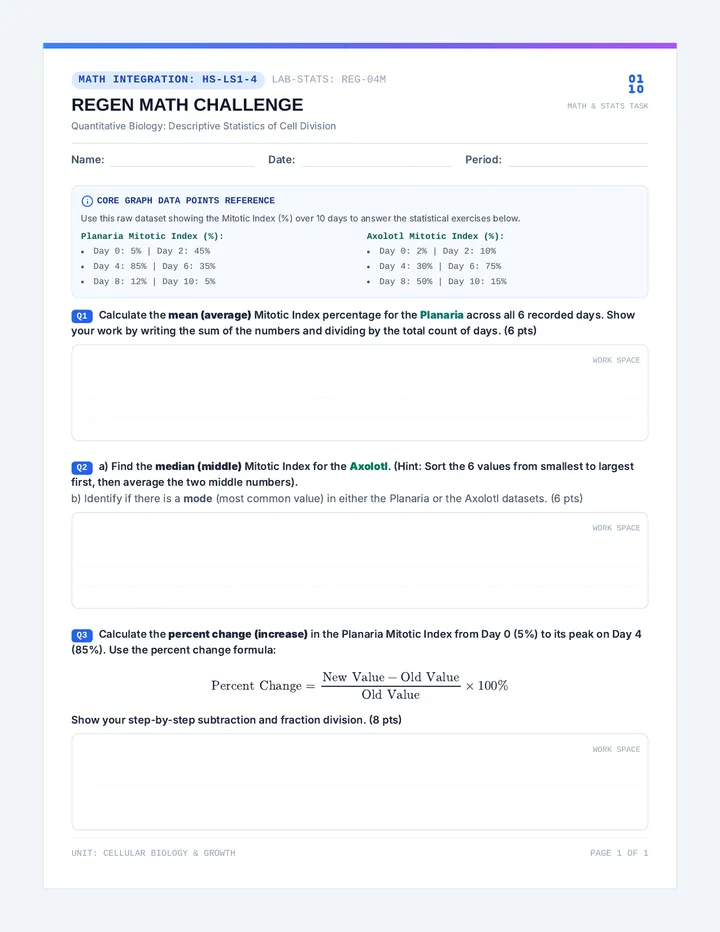
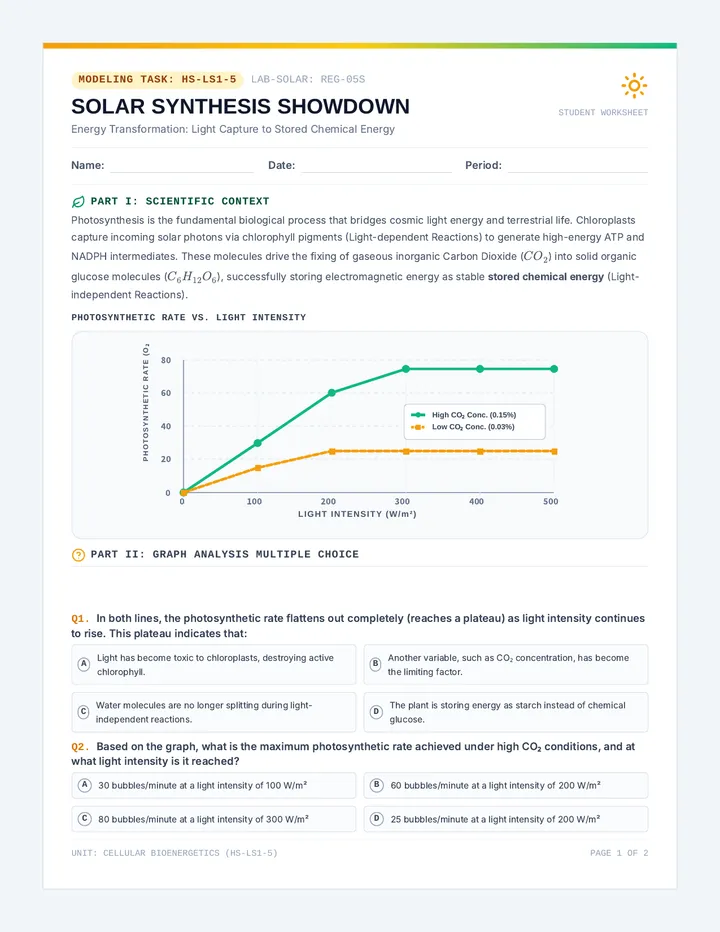
An instructional sequence exploring cellular growth, cell division, and cellular energetics. Students investigate multicellular regrowth and regeneration (HS-LS1-4) and model the transformation of solar energy into chemical energy via photosynthesis (HS-LS1-5).
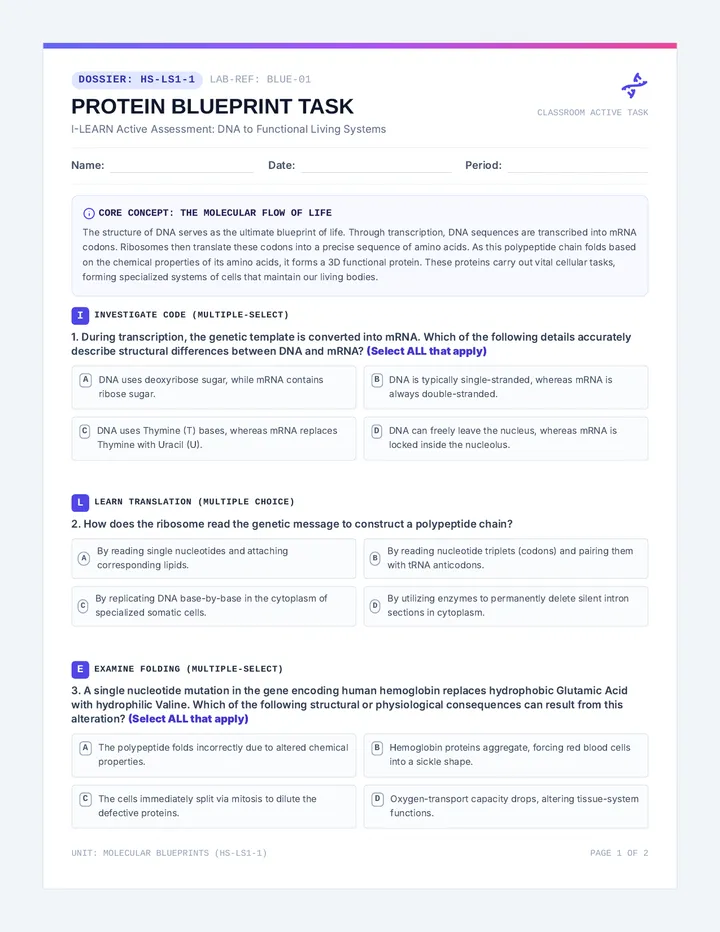
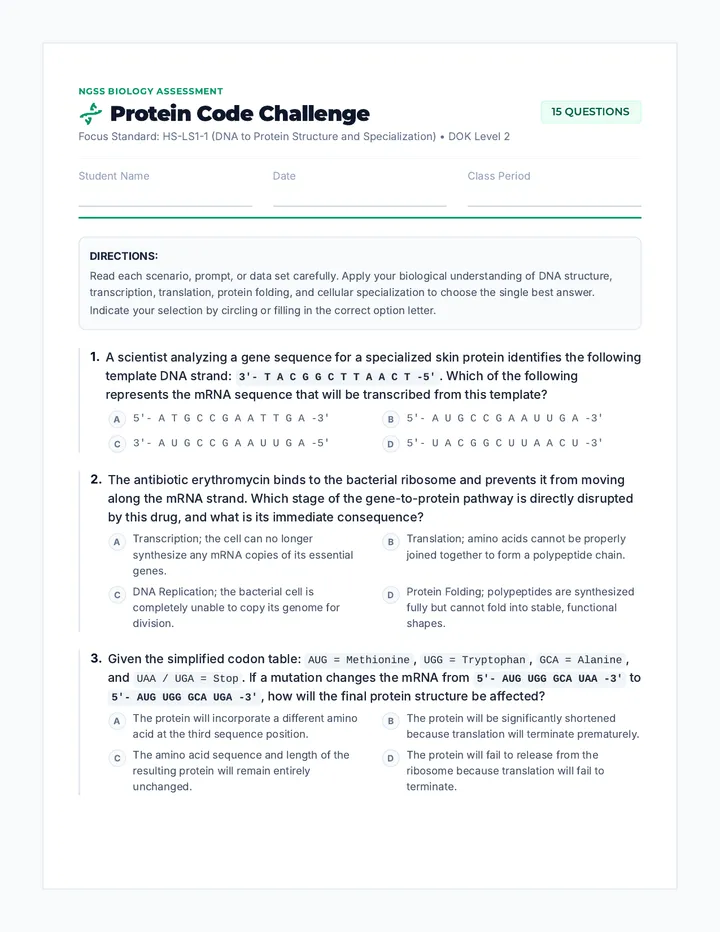
An in-depth lesson on protein synthesis and molecular inheritance (NGSS HS-LS1-1). Students model how DNA sequences determine mRNA codons and final amino acid chains to construct functional proteins that carry out vital cellular tasks.
An 'I-Learn' structured active assessment for HS-LS1-1. Features highly rigorous multiple-choice and multiple-select questions guiding students from DNA transcription to translation, protein folding mutations, and cellular specialization.
A comprehensive high school biology unit investigating the structure, function, and hierarchical organization of living systems, aligned to NGSS standards.
An inquiry-based lesson on cellular energy conversion (NGSS HS-LS1-5). Students investigate how chloroplasts capture and convert solar light energy into stored chemical energy (carbohydrates) through graphical and mathematical modeling.
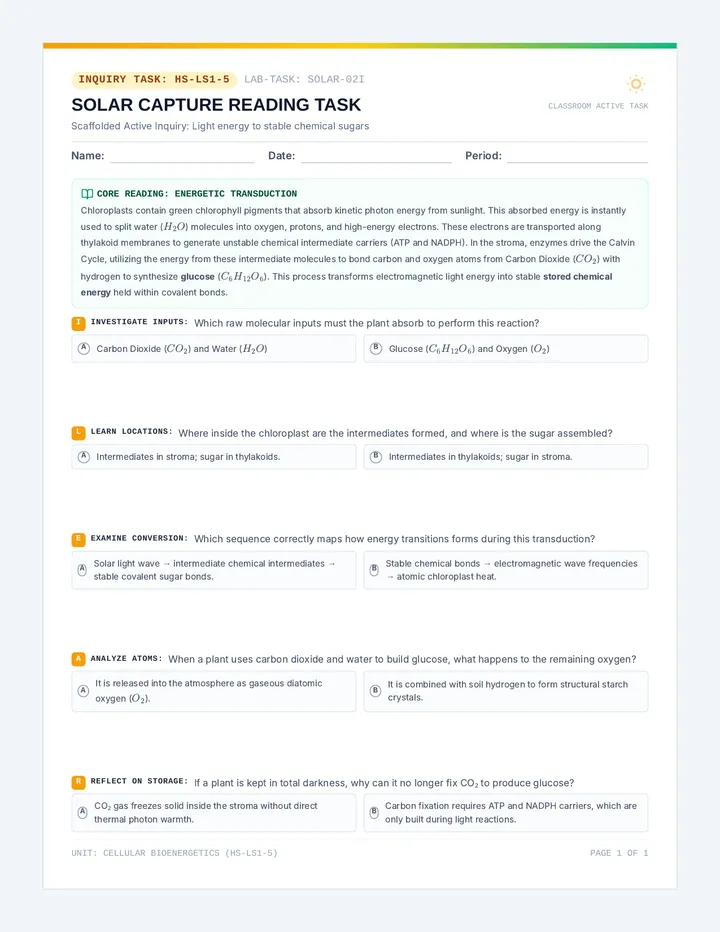
A standalone 1-page active inquiry handout featuring a structured I-LEARN reading task for HS-LS1-5, guiding students through Investigate, Learn, Examine, Analyze, and Reflect multiple-choice questions about energy transduction in photosynthesis.
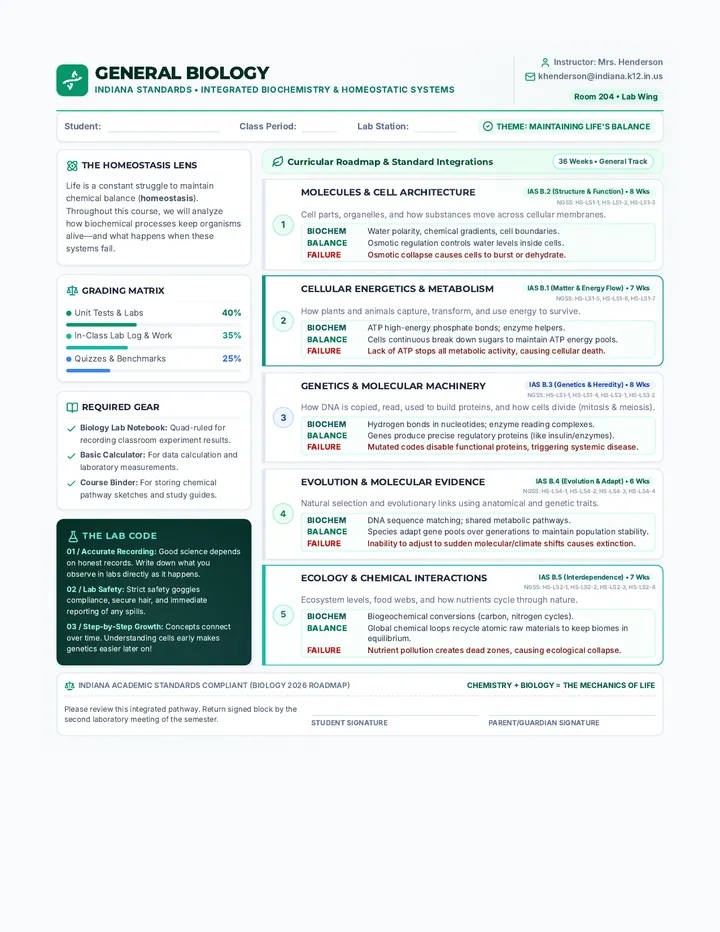
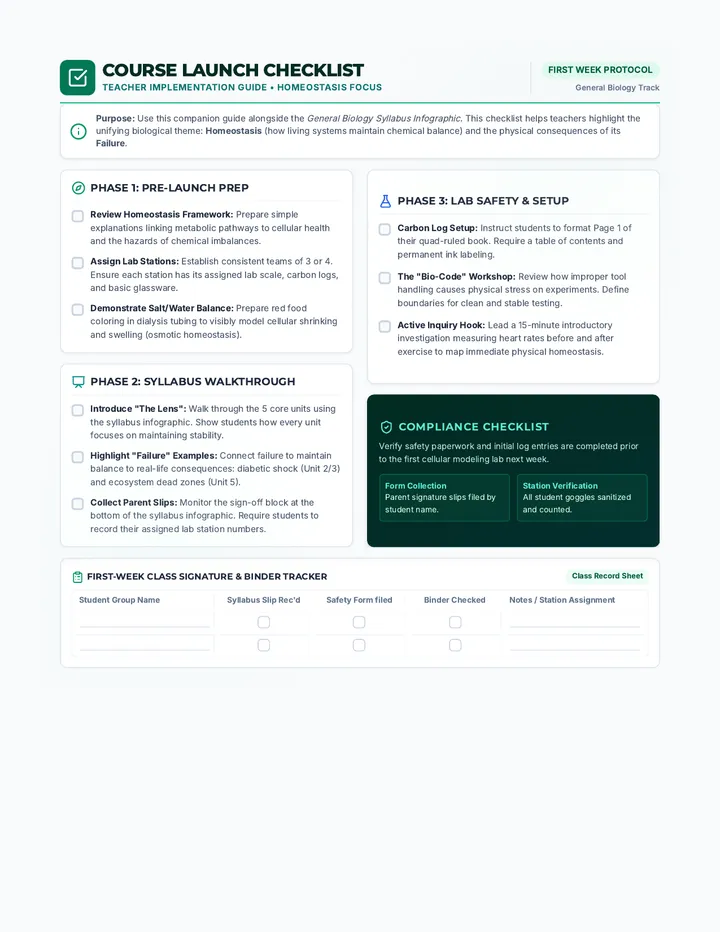
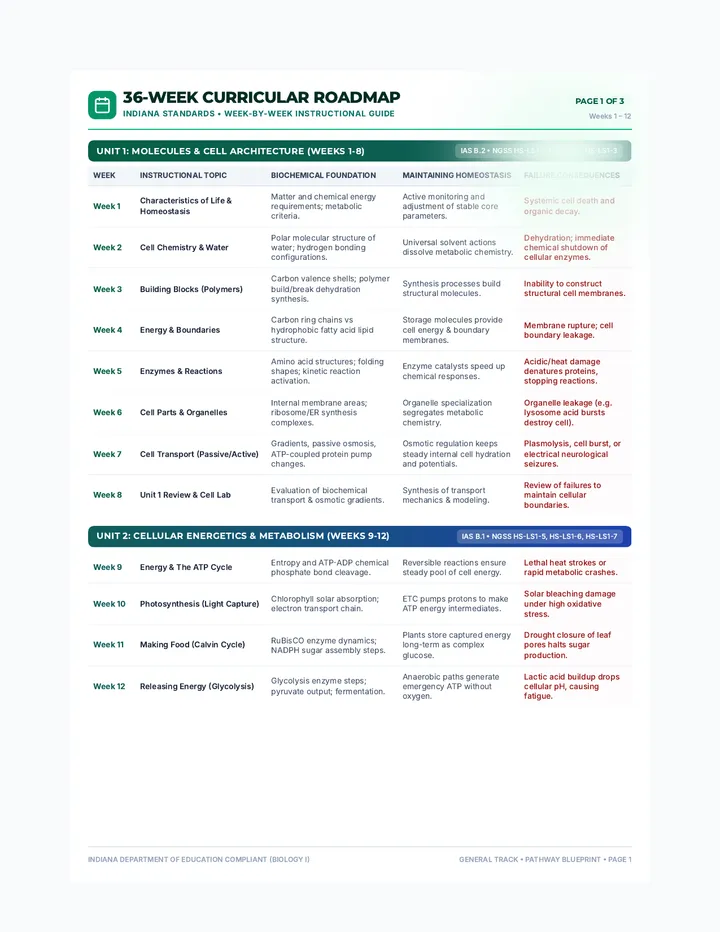
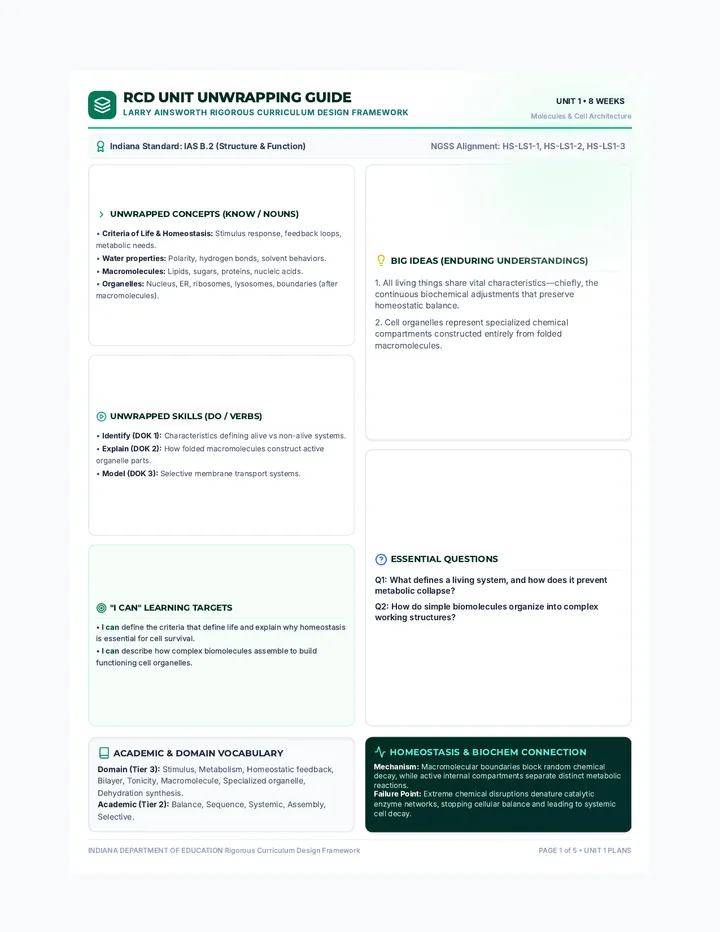
A comprehensive, 36-week General Biology curriculum aligned with Indiana Academic Standards, emphasizing the integration of biochemical foundations and metabolic homeostasis across all units.
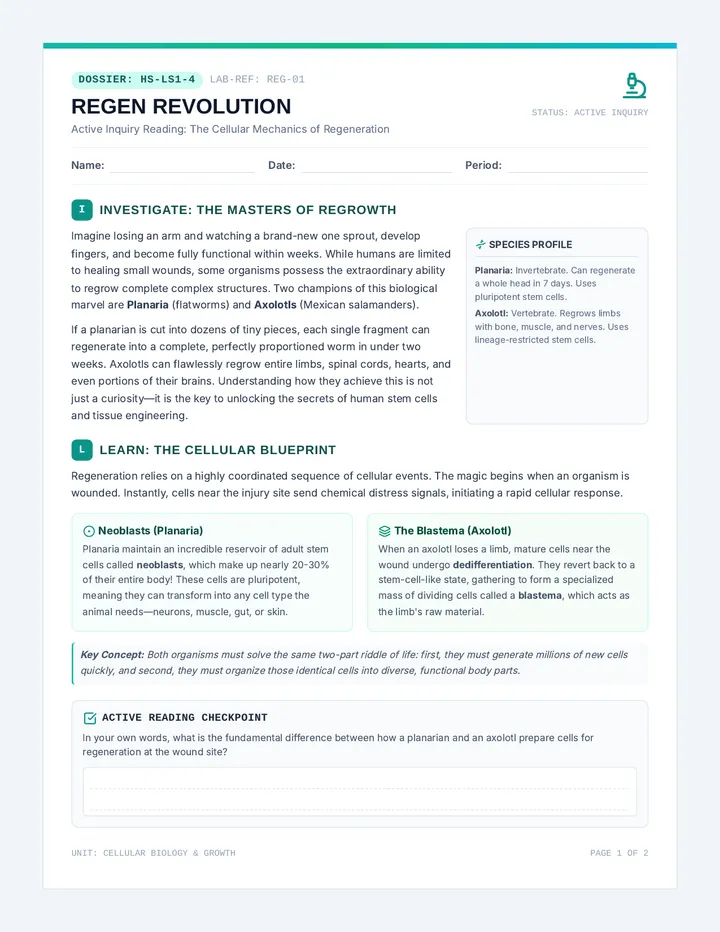
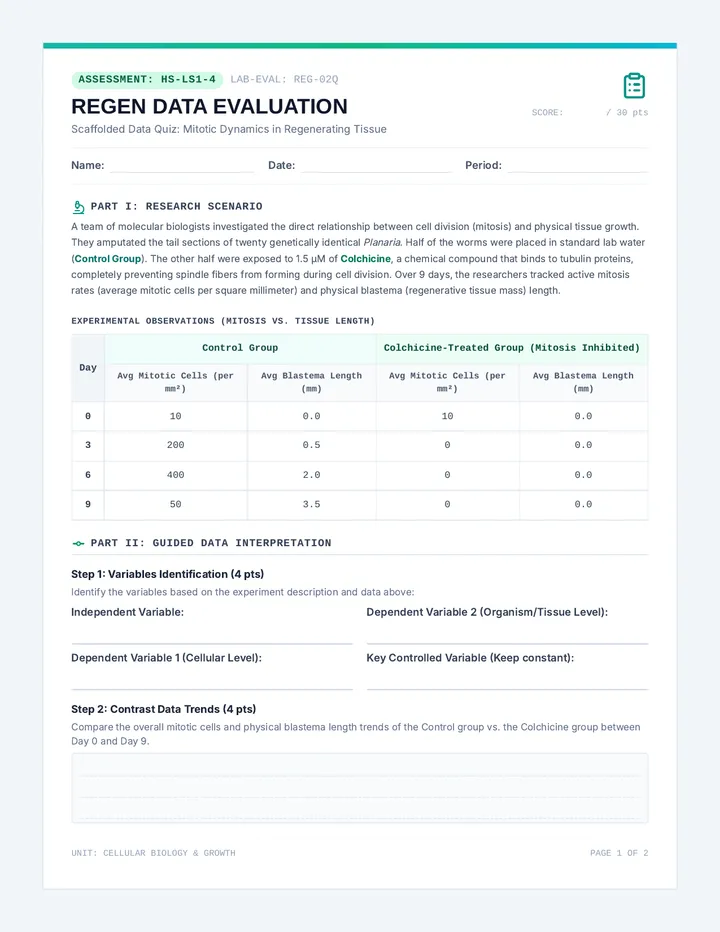
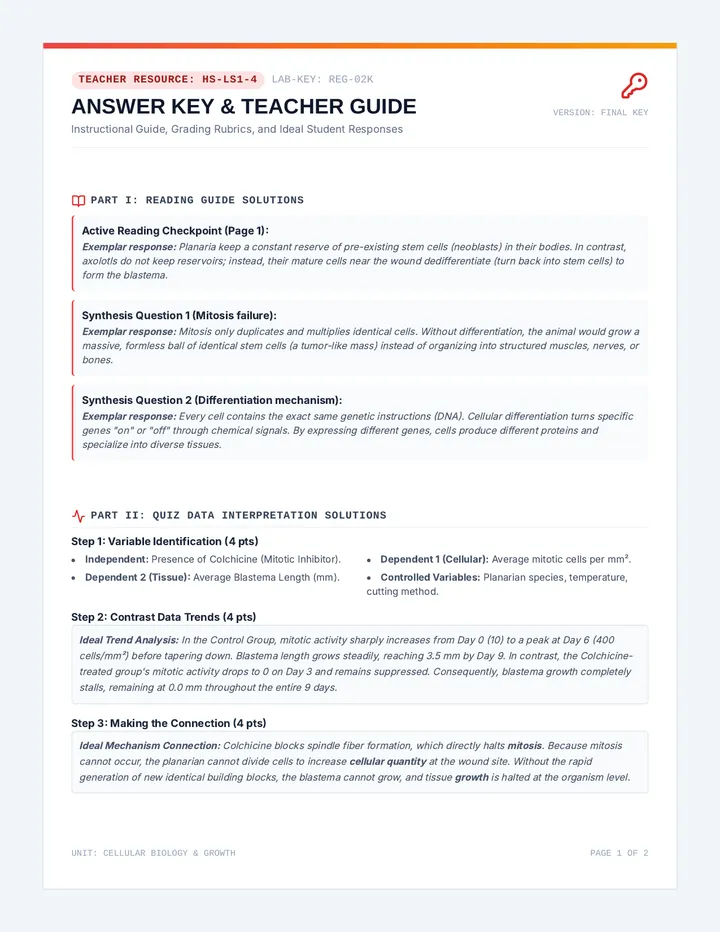
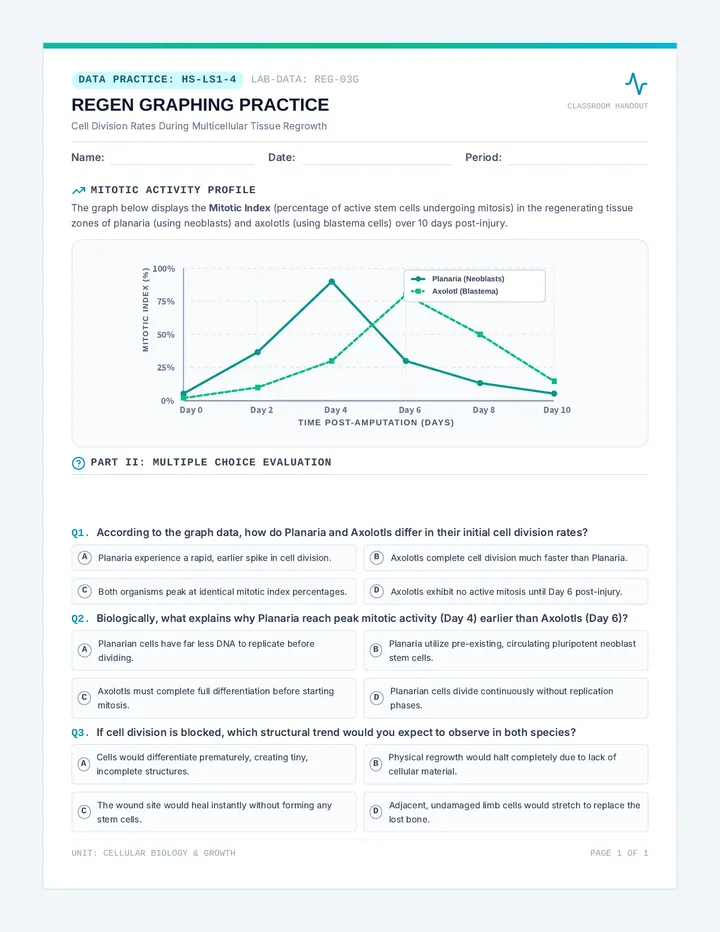
An in-depth lesson exploring tissue regeneration in planaria and axolotls to address NGSS HS-LS1-4. Students engage with an 'I-Learn' style reading on stem cells, mitosis, and differentiation, followed by a scaffolded, data-focused quiz with guided scientific analysis.
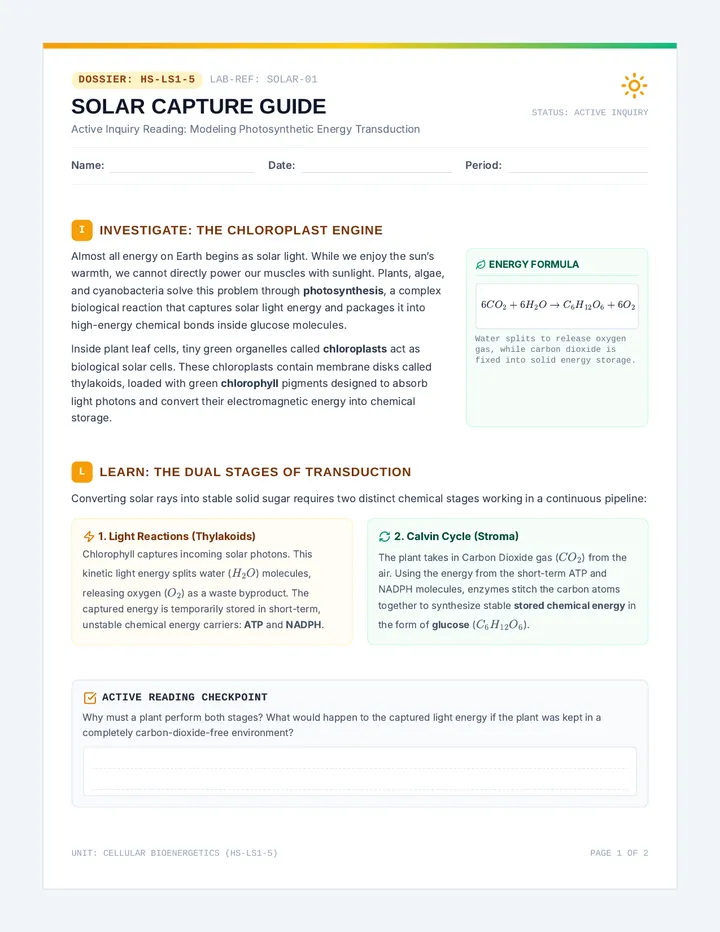
An 'I-Learn' structured active reading guide focusing on the biological and energy conversion mechanisms of photosynthesis, specifically targeting how solar energy is converted into stored chemical energy (NGSS HS-LS1-5). Includes multiple-choice comprehension questions.
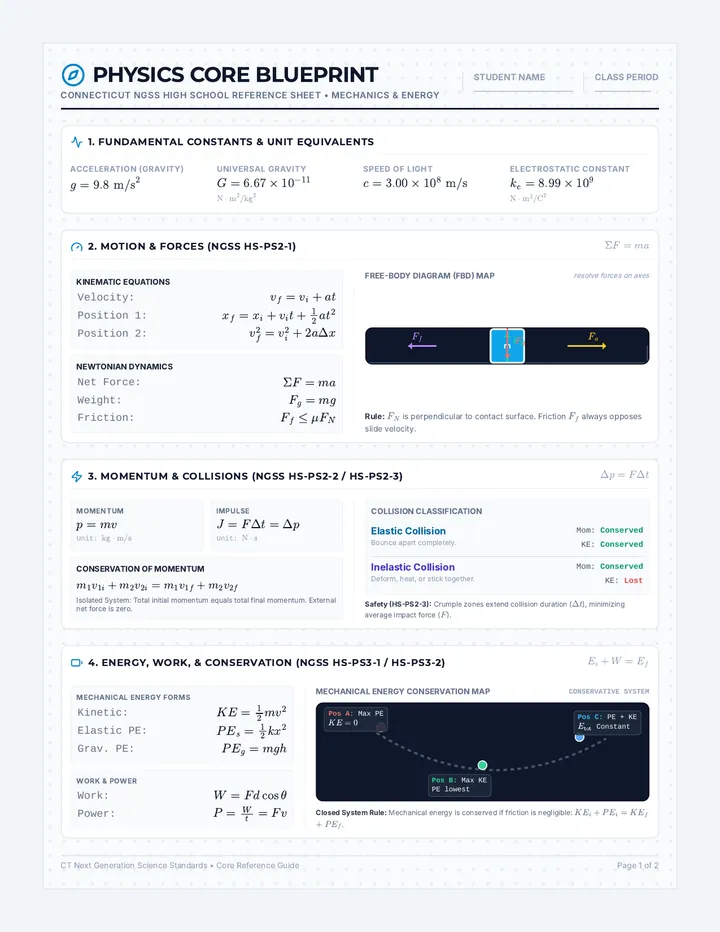
A comprehensive high school physics curriculum sequence aligned with the Connecticut Next Generation Science Standards (CT-NGSS), focusing on core concepts, quantitative problem-solving, and visual models.
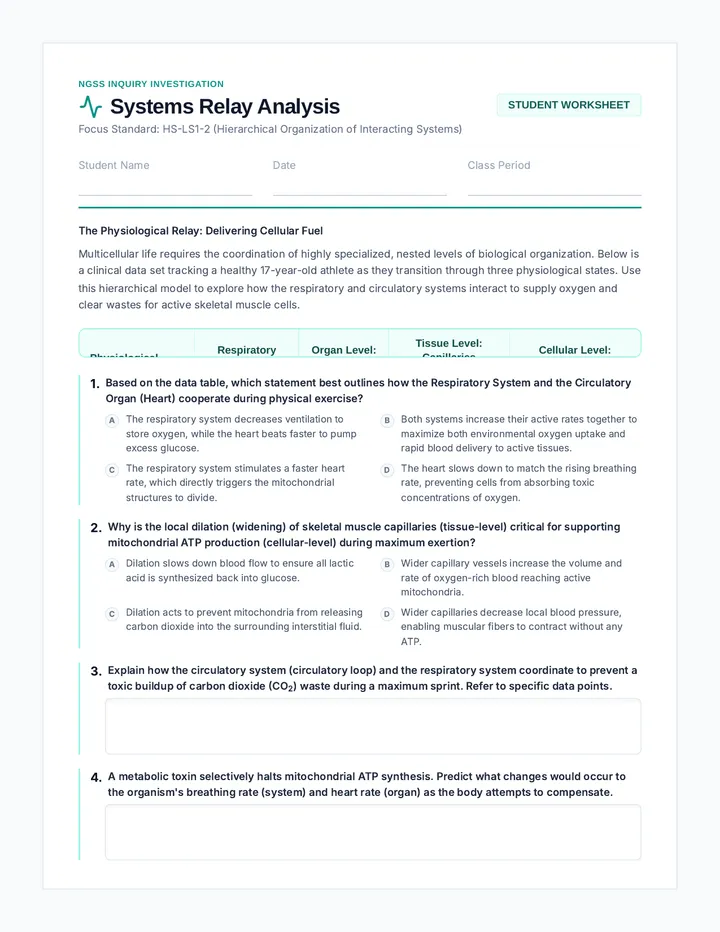
An inquiry-based biology lesson investigating the structural hierarchy and interactions of multicellular organ systems during physiological demands (NGSS HS-LS1-2).
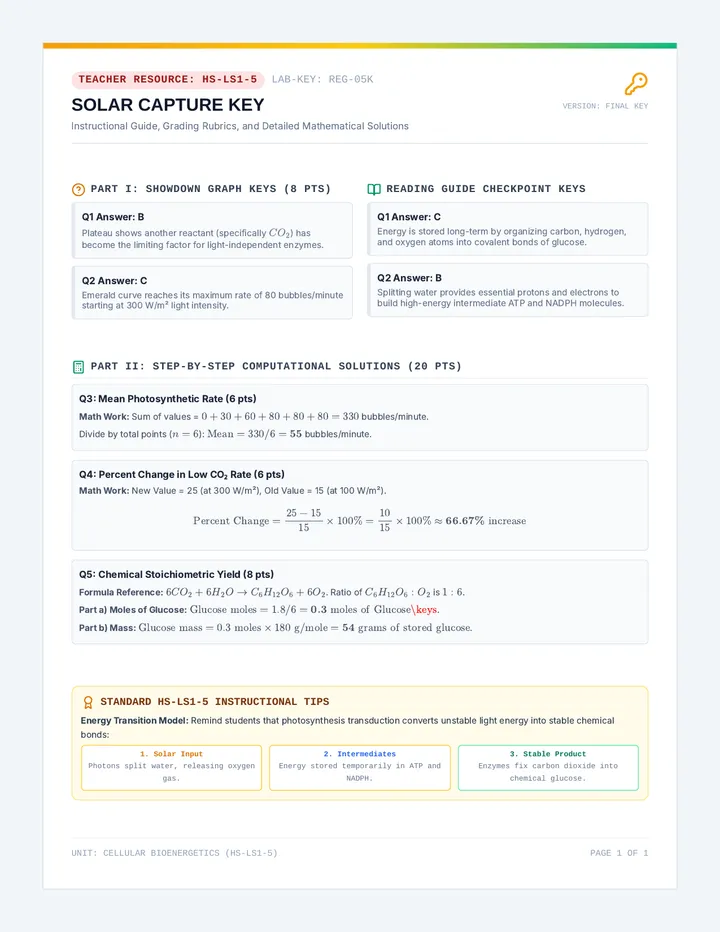
A comprehensive teacher-facing answer key and instructional rubric for the Solar Synthesis Showdown and Reading Guide. Features detailed mathematical solutions, chemical stoichiometry step-by-step breakdowns, and guides on standard HS-LS1-5.