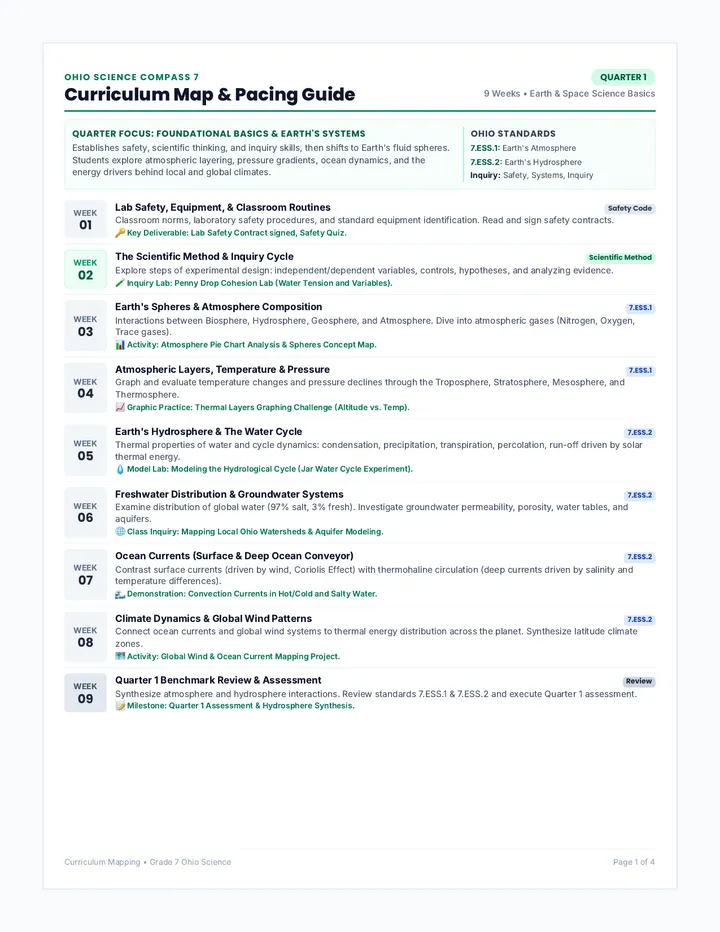
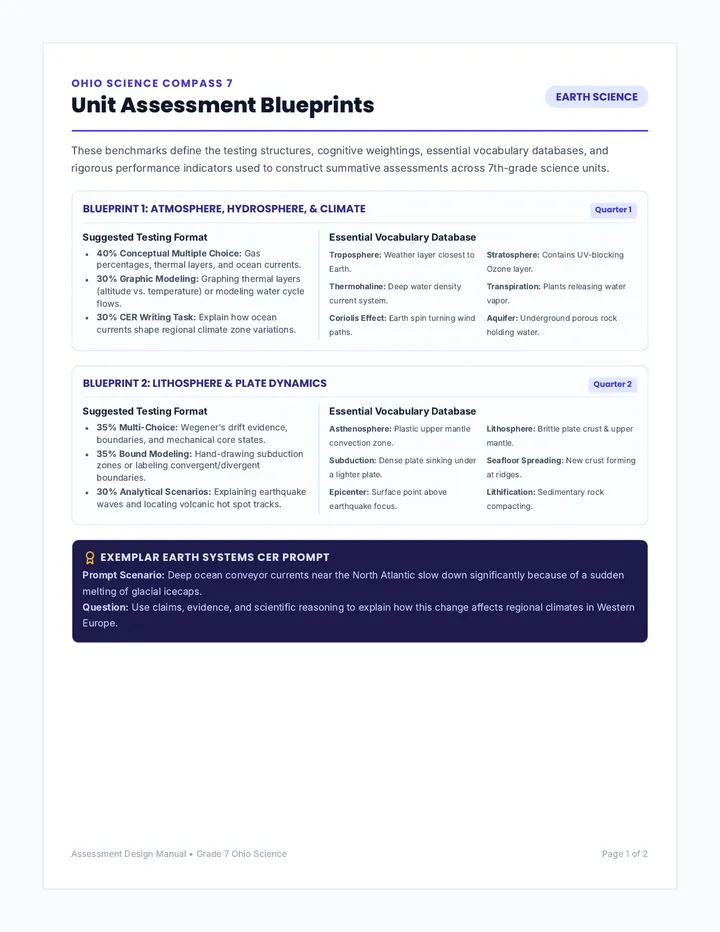
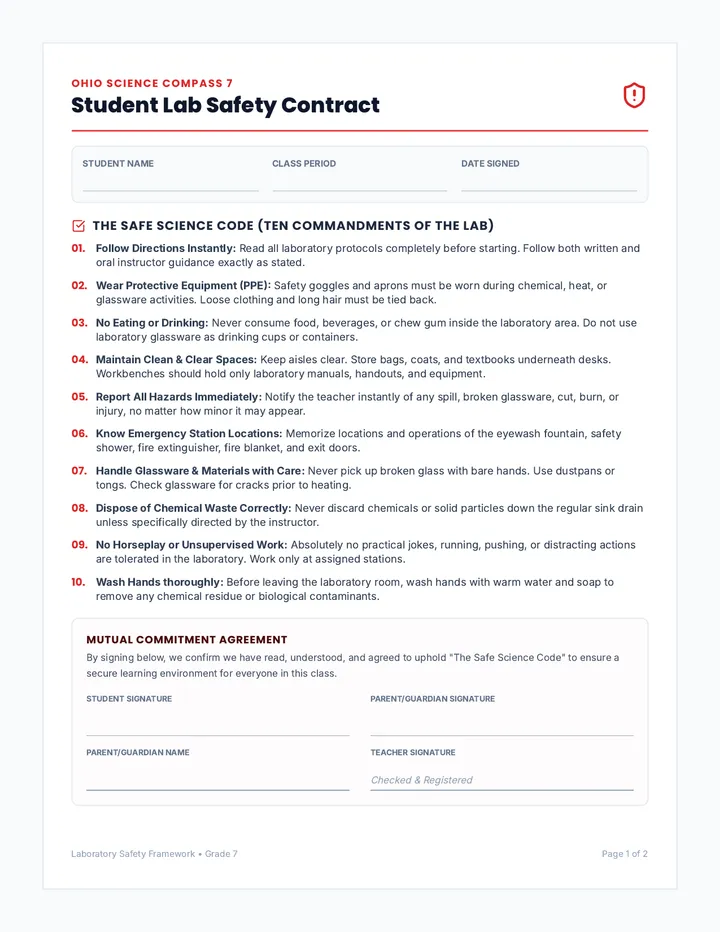
A comprehensive 7th-grade science introduction to safety and lab equipment over two days. Day 1 (Hazard Heroes) focuses on safety protocols, hazard recognition, PPE, and risk assessments. Day 2 (Precision Tools) focuses on hands-on equipment practice, taring, and volumetric reading.
Describe the proper technique the student should use to smell the liquid safely. What is it called and how is it done?
PART 3
Risk Assessment Challenge
Perform a pre-lab Risk Assessment. Identify one potential hidden danger that could occur during this setup (e.g., equipment failure, skin contact, or fumes) and write one preventative measure they must take.
Potential Hidden Danger:
Preventative Measure:
Hazard Hero Honor Pledge:
"I pledge to uphold all safety and attire protocols today and protect myself and my lab group from hazards."
Student Signature: ___________________________
Instructor Verified: _______
SCALE AND SHIELD LAB SERIE • DAY 2 PAGE 2 OF 2
III. Common Student Misconceptions
The "Crocs" Myth: Students frequently believe that putting Crocs into "sport mode" (sliding the strap back) makes them legal closed-toe shoes. Emphasize that the multiple holes on top allow spilled chemicals or dropped needles to easily contact skin. Only continuous solid shoes are permitted.
Wiping Up Spills: 7th graders naturally want to clean up their own spills with paper towels. Stress that they must report it first; some chemical spills will vaporize or react violently with water or generic pulp paper.
Direct Sniffing: Students believe that holding an item away and breathing heavily is equivalent to wafting. Demonstrate the distinct "hand fan" motion which dilutes the air mixture.
IV. Target Differentiation Support
Scaffolding (ELL/SpEd) Pair students with a strong reading buddy. Provide pre-highlighted safety case studies. Emphasize visual symbols on the Anchor Chart (footprints, scissors, shield).
Extensions (Gifted) Ask students to write an active SDS (Safety Data Sheet) outline for the unknown plant extract in the DFA, detailing hypothetical fire, inhalation, and skin danger levels.
V. Day 2 DFA Case Scenario Answer Key
1. Violations Identified (Pick 3): - Student has loose long hair hanging down (needs to be tied back).
- Student is not wearing safety goggles (eyes are completely unprotected).
- Student plans to smell the boiling liquid directly (must waft the fumes).
- Placing face directly above a boiling flask is an immediate splash/fume hazard.
2. Corrective Odor Technique: The technique is called wafting. The student must stand back, hold the flask about 6 inches away, and wave their hand over the top to gently direct a small amount of vapor toward their nose.
3. Pre-lab Risk Assessment: - Hidden Danger: Sudden pressure build-up causing the glass flask to crack/burst, or chemical skin irritation from accidental splashing.
- Preventative Measure: Wearing chemical splash goggles, buttoning up a lab coat, checking the glass flask for hairline cracks before heating, and keeping the open top of the flask pointed away from all students.
SCALE AND SHIELD LESSON IMPLEMENTATION • MRS. PAV PAGE 2 OF 2
"It smells sweet like candy, but now my nose is burning and I feel dizzy!"
Your Directive:
1. Practice the safe hand-waving gesture (wafting) over the closed scent vial. Wave your hand over the top to draw air toward your face.
2. Explain why inhaling chemical fumes directly is highly dangerous for your respiratory system. Record on your Student Log.
SCALE AND SHIELD LAB SERIE • DAY 1 SAFETY PAGE 2 OF 3
Hazard Heroes • Safety Station Cards
Mrs. Pav • Room 148 Setup
Station 5
Pre-Lab Risk Assessment
The Case File: A group is planning an experiment where they will mix baking soda and vinegar inside a narrow test tube and quickly seal the opening with a rubber stopper. They expect carbon dioxide gas to build pressure inside.
"We don't need to do a risk assessment, this is just simple kitchen science! Oh look, the stopper is bulging... POP! It shot off and hit the ceiling!"
Your Directive:
1. What physical danger exists when gas pressure builds inside a sealed glass tube?
2. Describe what preventative steps (e.g., aiming tube away, using correct volumes) they must take. Record on your Student Log.
Mrs. Pav's Station Setup Checklist
To prepare these stations in Room 148, print these cards, cut them out, and place them at designated areas alongside the following props:
Station 1 Props: One pair of safety goggles, a bottle of eye wash solution (or replica), and a diagram of your classroom's sink/eyewash zone.
Station 2 Props: A messy table containing some student bags, pencil cases, 2-3 open drink containers, and a power cable slung carelessly across.
Station 3 Props: An unplugged, cold hot plate next to an empty glass beaker and a pair of beaker tongs.
Station 4 Props: A bottle of vanilla or fruit extract firmly sealed with a cap (do not open until instructed).
Station 5 Props: A rubber stopper, a plastic test tube, and baking soda (for illustration only).
SCALE AND SHIELD LAB SERIE • DAY 1 SAFETY PAGE 3 OF 3
Struggles to select tools; requires constant instructor guidance.
Scale and Shield • Lesson 2 Aim for Score 3.0 or 4.0 today!
Safety Protocols
Slide 6 of 10
Station Safety & Etiquette
Hot Plates
Keep unplugged at all times today! Do not force the temperature or power dials.
Glassware Safety
Keep graduated cylinders and beakers centered on tables at all times to prevent accidental falls.
Triple Beam Balances
Reset riders to zero before moving to the next station. Leave it clean for the next team!
Team Behavior
Handle tools gently, respect school materials, and keep your discussion volume at a professional level.
Scale and Shield • Lesson 2 Respect the equipment, respect your classmates
Roadmap
Slide 7 of 10
7 Scavenger Hunt Stations
Follow the directions exactly at each station and record your observations.
1 Mass Heavyweights: Triple Beam Balance (1 block). Reset riders.
2 Quick Mass: Electric Balance (1 beaker). Use 'Tare/Zero'.
3 Liquid Precision: Graduated Cylinder + Pipette. Fill to exactly 25 mL.
6 Heat Source: Hot Plate (Unplugged). Inspect dial and surface.
7 The Scaffold: Ring Stand + Iron Ring + Clamp. Attach to pole and secure safely.
Scale and Shield • Lesson 2 Follow written procedures step-by-step!
Intermission
Slide 8 of 10
Class Brain Break
Fortunately, Unfortunately
Let's build a wild collaborative science adventure story! We will go around the room, with each student contributing one sentence starting with either "Fortunately" or "Unfortunately" in alternating order.
Example:
"Yesterday, we designed a brand new chemical mixture."
"Unfortunately, the chemical mixture started eating through our table!"
"Fortunately, we had a giant block of Swiss cheese to plug the hole!"
Scale and Shield • Lesson 2 Keep it quick and imaginative!
Science Reference
Slide 9 of 10
Day 2 Reference Guide
Volume Tools
Beaker: Used to hold and pour liquids. Inaccurate for fine measurement.
Grad Cylinder: Accurate tool for reading volume (at meniscus level).
Mass Tools
Digital Scale: Fast, convenient readings. Remember to press 'Tare/Zero'.
Triple Beam Balance: Manual precision. Reset riders to absolute zero.
Support & Heat
Ring Stand: Holds glassware above a burner or hot plate safely.
Hot Plate: Safe electric heating. Inspect surface for cracks before use.
Scale and Shield • Lesson 2 Consult this guide during your scavenger hunt!
Exit Check
Slide 10 of 10
Daily Formative Assessment (DFA)
Write your answers on the back of your Scavenger Hunt Log worksheet.
Question 1
You need exactly 14 mL of liquid for an experiment. Which tool do you pick: a Beaker or a Graduated Cylinder? Explain.
Question 2
You need to quickly find the mass of a rock in grams. Which tool gives you a quick digital reading, and what button resets it?
Question 3
What is the name of the tool used to heat liquids safely at a lab station, and what is the primary safety rule for it today?
Question 4
Why should you use a pipette alongside a graduated cylinder when measuring liquids? How does it help your precision?
Scale and Shield • Lesson 2 Turn in your sheets before leaving Room 148!
Section B: Daily Formative Assessment (DFA)
1. You need exactly 14 mL of liquid for an experiment. Which tool do you pick: a Beaker or a Graduated Cylinder? Explain your scientific choice.
2. You need to quickly find the mass of a rock in grams. Which tool gives you a quick digital reading, and what action must you perform before putting the rock on?
3. Name the tool used to heat liquids safely at a lab station. What is one safety protocol you must follow with it?
4. Why should you use a pipette alongside a graduated cylinder when measuring liquids?