Sprout Lab Setup Guide Botanical Lab Investigation
Sprout Lab Setup Guide
Name: ___________________________
Date: ___________________________
Investigation Question
Do bean seeds sprout faster when planted in soil or sealed in a damp paper towel bag?
Lab Materials Checklist
Setup A: Soil Cup
☐ 1 clear plastic cup (with 2 drainage holes)
☐ 1 cup of potting soil
☐ 2 bean seeds (same kind)
☐ 1 small tray or plate under the cup
Setup B: Damp Bag
☐ 1 clear zip-top sandwich bag
☐ 1 folded paper towel
☐ 2 bean seeds (same kind)
☐ Masking tape & permanent marker
☐ Shared Tools: Spray bottle or spoon with water, ruler (cm/mm), and your Observation Log.
Keep It a Fair Test (Control Variables)
To compare soil and the damp bag fairly, only change where the seeds sit. Keep everything else the same:
Same type and size of bean seeds
Same sunny window or warm spot
Started on the exact same day
Kept damp, never flooded
My Hypothesis (Prediction)
Check one prediction before you plant your seeds:
☐ Soil Cup will sprout first
☐ Damp Bag will sprout first
☐ Both sprout at the same time
Explain why you think this will happen:
Step-by-Step Setup Directions
Day 1 Lab Setup
Setup A
Prepare the Soil Cup
1
Label your cup: Stick masking tape on the cup. Write your name, the date, and "Soil Cup" .
2
Add soil: Fill the cup about three-quarters full with loose potting soil. Do not pack it down tightly.
3
Plant near the edge: Gently push 2 bean seeds about 2 cm deep right against the clear side of the cup so you can peek at them, then cover lightly with soil.
4
Water gently: Add 2–3 spoonfuls of water until the soil feels damp like a wrung-out sponge, then place the cup on a small tray.
Setup B
Prepare the Damp Bag
1
Label your bag: Use a permanent marker to write your name, the date, and "Damp Bag" near the top of the zip-top bag.
2
Moisten the towel: Fold a paper towel so it fits flat inside the bag. Wet it with water, then gently squeeze out extra drips so it is damp, not soaking.
3
Place the seeds: Slide the damp paper towel into the bag. Tuck 2 bean seeds on top of the towel, spaced apart so both are easy to see.
4
Leave a little air: Zip the bag almost closed, leaving a 2 cm gap at one corner for fresh air.
Placement & Daily Care
Tape the Damp Bag onto a sunny window or wall right beside the Soil Cup.
Check moisture daily. If the soil or towel feels dry, add 1–2 sprays of water.
Never let seeds sit in a puddle—too much water can make them rot!
What Counts as a Sprout?
Germination starts the moment the seed coat cracks and a tiny white root (radicle) peeks out.Record the first day you spot a sprout in each setup.
Measure the longest root or green stem in centimeters (cm) each day.
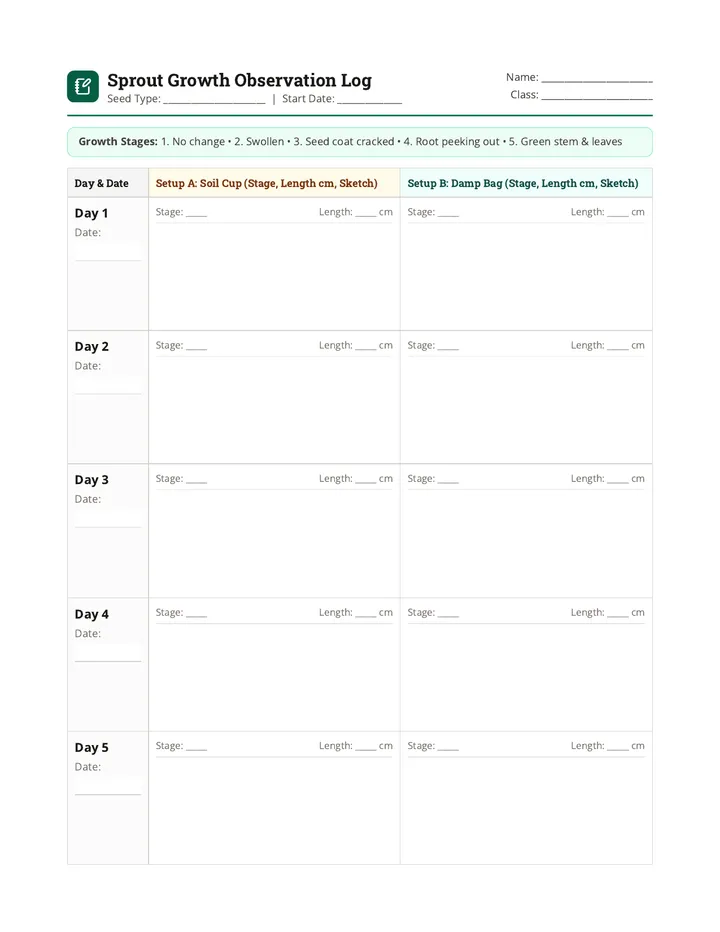
Sprout Growth Observation Log Sprout Growth Observation Log
Seed Type: ______________________ | Start Date: ______________
Name: ________________________
Class: ________________________
Growth Stages: 1. No change • 2. Swollen • 3. Seed coat cracked • 4. Root peeking out • 5. Green stem & leaves
Day & Date
Setup A: Soil Cup (Stage, Length cm, Sketch)
Setup B: Damp Bag (Stage, Length cm, Sketch)
Day 1
Date:
|
Stage: _____ Length: _____ cm
|
Stage: _____ Length: _____ cm
|
|
Day 2
Date:
|
Stage: _____ Length: _____ cm
|
Stage: _____ Length: _____ cm
|
|
Day 3
Date:
|
Stage: _____ Length: _____ cm
|
Stage: _____ Length: _____ cm
|
|
Day 4
Date:
|
Stage: _____ Length: _____ cm
|
Stage: _____ Length: _____ cm
|
|
Day 5
Date:
|
Stage: _____ Length: _____ cm
|
Stage: _____ Length: _____ cm
|
Sprout Growth Observation Log (Days 6–10)
Week 2 Tracking
Day & Date
Setup A: Soil Cup (Stage, Length cm, Sketch)
Setup B: Damp Bag (Stage, Length cm, Sketch)
Day 6
Date:
|
Stage: _____ Length: _____ cm
|
Stage: _____ Length: _____ cm
|
|
Day 7
Date:
|
Stage: _____ Length: _____ cm
|
Stage: _____ Length: _____ cm
|
|
Day 8
Date:
|
Stage: _____ Length: _____ cm
|
Stage: _____ Length: _____ cm
|
|
Day 9
Date:
|
Stage: _____ Length: _____ cm
|
Stage: _____ Length: _____ cm
|
|
Day 10
Date:
|
Stage: _____ Length: _____ cm
|
Stage: _____ Length: _____ cm
|
10-Day Milestone Tally
Soil Cup first sprouted on:
Day _______
Damp Bag first sprouted on:
Day _______
Fastest to sprout:
_____________________
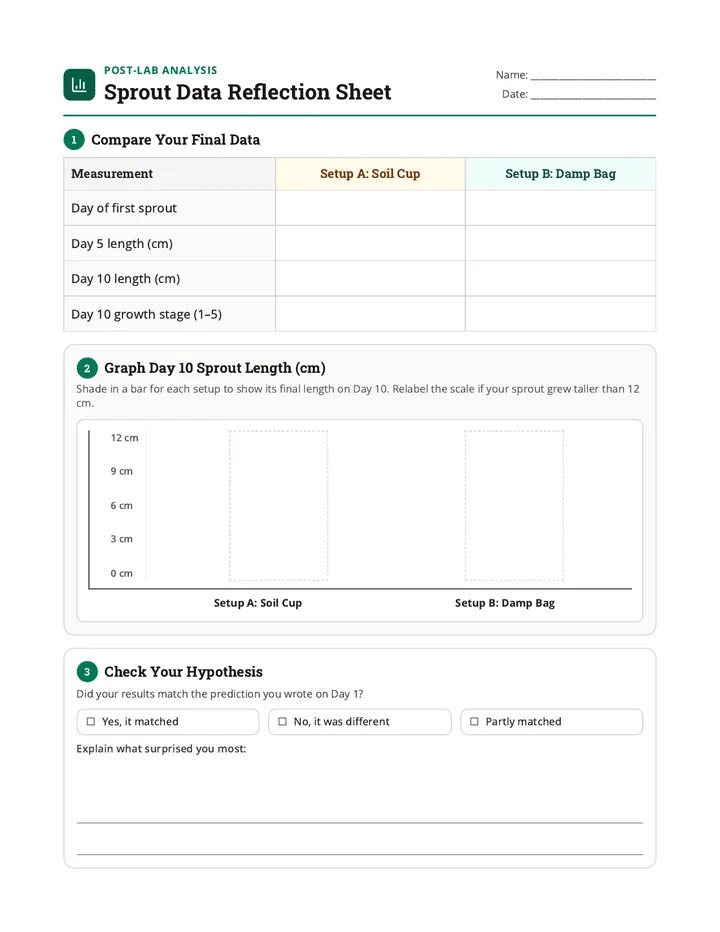
Sprout Data Reflection Sheet Post-Lab Analysis
Sprout Data Reflection Sheet
Name: ___________________________
Date: ___________________________
1 Compare Your Final Data
Measurement
Setup A: Soil Cup
Setup B: Damp Bag
Day of first sprout
Day 5 length (cm)
Day 10 length (cm)
Day 10 growth stage (1–5)
2 Graph Day 10 Sprout Length (cm)
Shade in a bar for each setup to show its final length on Day 10. Relabel the scale if your sprout grew taller than 12 cm.
12 cm 9 cm 6 cm 3 cm 0 cm
Setup A: Soil Cup Setup B: Damp Bag
3 Check Your Hypothesis
Did your results match the prediction you wrote on Day 1?
☐ Yes, it matched
☐ No, it was different
☐ Partly matched
Explain what surprised you most:
Scientific Explanation (CER)
Claim • Evidence • Reasoning
Claim
Answer the investigation question in one clear sentence: Did seeds sprout faster in soil or in a damp bag?
Evidence
Use specific numbers and dates from your Observation Log (which day each sprouted, and how long they grew).
Reasoning
Explain why your evidence supports your claim. Think about how steady moisture, warmth, and air help soften the seed coat so germination can begin.
Think Like a Botanist: Next Experiment
After 10 days, which setup would help the young plant grow healthier for a whole month—the soil cup or the damp bag? Why?
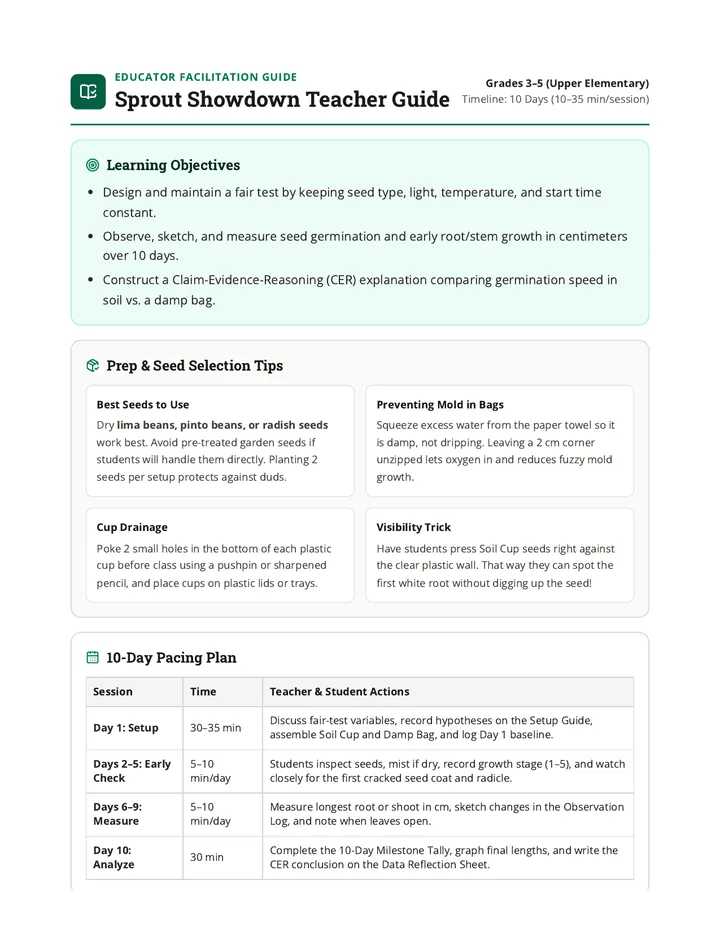
Sprout Showdown Teacher Guide Educator Facilitation Guide
Sprout Showdown Teacher Guide
Grades 3–5 (Upper Elementary)
Timeline: 10 Days (10–35 min/session)
Learning Objectives
Design and maintain a fair test by keeping seed type, light, temperature, and start time constant.
Observe, sketch, and measure seed germination and early root/stem growth in centimeters over 10 days.
Construct a Claim-Evidence-Reasoning (CER) explanation comparing germination speed in soil vs. a damp bag.
Prep & Seed Selection Tips
Best Seeds to Use
Dry lima beans, pinto beans, or radish seeds work best. Avoid pre-treated garden seeds if students will handle them directly. Planting 2 seeds per setup protects against duds.
Preventing Mold in Bags
Squeeze excess water from the paper towel so it is damp, not dripping. Leaving a 2 cm corner unzipped lets oxygen in and reduces fuzzy mold growth.
Cup Drainage
Poke 2 small holes in the bottom of each plastic cup before class using a pushpin or sharpened pencil, and place cups on plastic lids or trays.
Visibility Trick
Have students press Soil Cup seeds right against the clear plastic wall. That way they can spot the first white root without digging up the seed!
10-Day Pacing Plan
Session
Time
Teacher & Student Actions
Day 1: Setup
30–35 min
Discuss fair-test variables, record hypotheses on the Setup Guide, assemble Soil Cup and Damp Bag, and log Day 1 baseline.
Days 2–5: Early Check
5–10 min/day
Students inspect seeds, mist if dry, record growth stage (1–5), and watch closely for the first cracked seed coat and radicle.
Days 6–9: Measure
5–10 min/day
Measure longest root or shoot in cm, sketch changes in the Observation Log, and note when leaves open.
Day 10: Analyze
30 min
Complete the 10-Day Milestone Tally, graph final lengths, and write the CER conclusion on the Data Reflection Sheet.
Science Concepts, Misconceptions & Key
Teacher Reference
What Usually Happens (Expected Results)
In most classrooms, seeds in the damp bag appear to sprout 1–3 days faster . A wet paper towel keeps 100% of the seed coat in constant contact with moisture and oxygen, softening it quickly. In addition, the transparent bag makes the tiny white radicle visible immediately, whereas soil can hide early root growth until the stem pushes above the surface. However, once leaves appear around Days 7–10, soil-grown seedlings become sturdier and greener because soil supplies mineral nutrients and root support that a paper towel cannot provide long-term.
Common Misconceptions to Address
Misconception: "Seeds must have soil and sunlight to sprout."Reality: Seeds contain their own stored food (cotyledons). To germinate , they only need water, warmth, and oxygen . Sunlight and soil nutrients become essential after green leaves unfold.
Misconception: "More water makes seeds sprout faster."Reality: Flooding a cup or bag blocks oxygen from reaching the seed, causing it to rot instead of germinate.
Differentiation Strategies
Language & Writing Support
Provide CER sentence starters: "My data shows seeds sprouted faster in ___." / "On Day ___, the ___ measured ___ cm."
Extension Challenge
Have early finishers calculate average daily growth (Day 10 length ÷ days since sprouting) or transplant bag sprouts into soil on Day 10.
Sample Proficient Student CER (Answer Key)
Claim: Bean seeds sprouted faster in the damp paper towel bag than in the soil cup.
Evidence: The seed in the damp bag cracked and showed a white root on Day 3, reaching 9.5 cm by Day 10. The seed in the soil cup did not show a sprout until Day 5 and reached 7.0 cm by Day 10.
Reasoning: The damp paper towel held steady water and air directly against the seed coat, which softened it quickly so germination could start. Even though the damp bag sprouted first, the soil cup will help the plant grow healthier after Day 10 because soil holds minerals and supports the roots.