Worldly Shapes Slides WORLDLY SHAPES
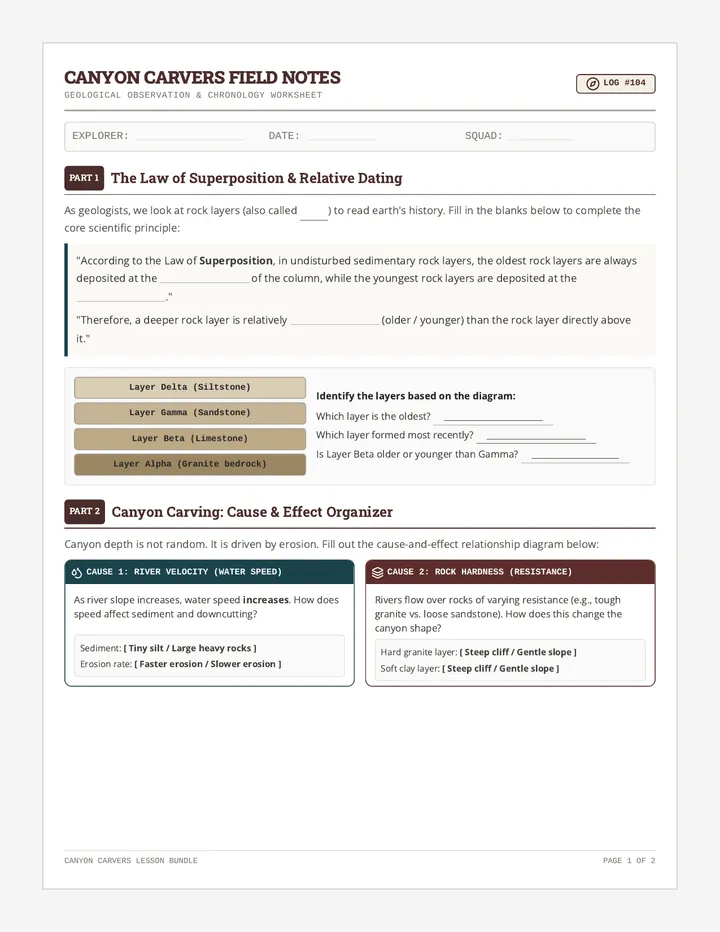
Geometry in Architecture
Structural Design Sequence
Essential Question
"How do the geometric properties of shapes influence the stability and function of physical structures?"
Case Study: Eiffel Tower
Paris, France (1889)
Observation #1
Notice the repeating patterns...
What shapes do you see?
The tower is composed of over 18,000 iron parts held together by 2.5 million rivets. Almost every part is a triangle .
Why Triangles?
They don't shift or deform under weight.
They distribute force evenly through the joints.
Ancient Stability: Giza
The Great Pyramid (2560 BCE)
Observation #2
Pyramids use a square base and four triangular faces that meet at a single point (apex).
PROPERTIES AT WORK:
1. LOW CENTER OF GRAVITY: The weight is concentrated near the ground.
2. LOAD DISTRIBUTION: Weight presses down and out towards the base.
Curves in Stone: The Pantheon
Rome, Italy (126 AD)
Observation #3
KEY STONE
The Power of the Arch
Why use Circles and Arches?
Compression Strength
Arches convert downward force into "lateral" (sideways) force, pushing blocks together.
Spanning Great Gaps
They allow for wide open spaces without the need for pillars in the middle.
What if we used the wrong shape?
Imagine building a skyscraper out of parallelograms instead of rectangles and triangles.
The Danger:
"Shear Force"
Shapes with parallel sides can tilt and collapse without cross-bracing.
The Solution:
"Triangulation"
Turning weak shapes into rigid triangles using internal beams.
LAB MISSION: ARCHITECTURE DETECTIVE
Now it's your turn. Use your worksheet to analyze the buildings on the screen and identify the Hidden Geometry that keeps them standing.
IDENTIFY
Find the core shapes.
ANALYZE
Explain why they were used.
SKETCH
Draw the force paths.
Architectural Detective Worksheet Architectural Detective
Lesson 1: Geometry in Architecture
Agent:
Date:
Part 1: Case Study Briefing
Eiffel Tower
Identify the primary shape used in the bracing of the tower. Why is it used?
Great Pyramid
How does the Center of Gravity change as you move from base to apex?
The Pantheon
Explain where the force goes when it hits the Key Stone of an arch.
Part 2: Hidden Geometry Hunt
Image Source Shapes Identified Purpose in Structure Bridge Support
|
| Skyscraper Window Frame |
|
|
| Construction Crane |
|
|
Part 3: Sketching the Stress
Below is a basic square frame . In the first box, draw how it would deform (change shape) if you pushed on the top corner. In the second box, draw how you could fix it using Triangulation . Use arrows to show where the force goes!
The Wobbly Square
The Rigid Triangle Solution
Final Mission Question:
"If you had to build a tower that was 1,000 feet tall using only 2D shapes, which shape would you rely on the most and why?"
Shape Strength Lab Guide LAB: THE WOBBLY SQUARE
Mission 02: Structural Rigidity
EQUIPMENT LIST
7x Drinking Straws (cut to equal lengths)
12x Metal Brads (or Pipe Cleaners)
1x Scissors
1x Ruler
SAFETY FIRST
Do not force the brads through the straws too hard. Use a pen to poke a small pilot hole if needed. Watch out for sharp edges!
EXPERIMENTAL PROCEDURE
1
Build the Quadrilateral
Connect four straws of equal length using the brads to form a perfect square. Make sure the connections are tight but can still move.
2
The "Wobble" Test
Set the square on the table. Push on one of the top corners from the side. Does it stay a square? What shape does it become?
Record observations on your worksheet
3
Build the Triangle
Connect three straws of equal length to form a triangle. Repeat the "Wobble" test by pushing on a vertex. What happens now?
4
Triangulation Challenge
Take your wobbly square from Step 1. Add a fifth straw diagonally across the middle. Re-test for stability. What changed?
Keyword 01
RIGIDITY
The ability of a structure to resist changing its shape when force is applied.
Keyword 02
VERTEX
A point where two or more lines or edges meet; a "joint" in our structure.
Keyword 03
DEFORMATION
The change in shape of a structural element under an applied force.
Rigidity Analysis Log Rigidity Analysis Log
Experimental Data Recording Sheet // Lab 02
UNIT:
TESTER:
DATE:
Data Table: Stability Observations
Test Subject Vertices Stable? (Yes/No) Description of Deformation Quadrilateral (Square) 4 Triangle 3 Triangulated Square 4 (+1 brace)
Geometric Breakdown
Draw the Square and use arrows to show where you pushed. Then, draw the Rhombus it became.
Draw the Triangle . Try to draw a "deformed" version that still has side lengths of equal size. Is it possible?
Engineering Analysis
1. The "Magic Number" 3:
Based on your tests, why is a triangle inherently rigid while a square is not?
2. Real World Connection:
Look around the classroom or think of a playground structure. Describe one place where you see a "cross-brace" (diagonal beam) being used to create triangles for stability.
Challenge Question:
If a square frame is weak, why do we build so many buildings and houses in the shape of a box (rectangular prism)? How do engineers solve this problem?
Pattern Power Slides PATTERN POWER
Tessellations & Tiling Strength
The Geometry of Efficiency
What is a Tessellation?
A pattern of shapes that fits together perfectly with NO GAPS and NO OVERLAPS.
Translation
Sliding
Rotation
Turning
Reflection
Flipping
The Honeycomb Mystery
Why do bees use hexagons?
CIRCLES?
"Gaps between cells waste precious wax."
SQUARES?
"They tessellate, but aren't as strong as triangles or as spacious as circles."
HEXAGONS!
"The perfect balance: uses the least wax to hold the most honey."
Strength Through Connection
When shapes tessellate, every side is shared. This creates a continuous surface that distributes force across the entire structure.
Impact Resistance
Forces are shared between neighboring shapes.
Weight Efficiency
Thin walls become incredibly strong when tiled.
MISSION: HEXAGON HERO
"Can you design a pattern that fills space perfectly? Your challenge starts now."
Step 01
The Tiling Test
Find which polygons fill the sheet with zero gaps.
Step 02
The Perimeter Race
Calculate which shape uses the least material.
Step 03
The Master Pattern
Create your own structural tiling design.
Hexagon Hero Activity Sheet Hexagon Hero
Efficiency & Tessellation Workshop
Engineer:
Hive ID:
Task 1: The Gap Test
Analyze the shapes below. Which ones can be tiled perfectly without leaving any empty space? Circle YES or NO . If you choose NO, draw a quick sketch of the "gap" that is formed.
YES NO
Sketch gaps here (if any)
YES NO
Sketch gaps here (if any)
Task 2: Perimeter vs. Area
Bees need to store as much honey (Area ) as possible while using the least amount of wax (Perimeter ). Let's compare a Square and a Hexagon that both enclose roughly the same space.
SQUARE CELL
Area = 36 sq units
Each side = 6 units
Calculate Perimeter:
HEXAGON CELL
Area = ~37 sq units
Each side = 3.8 units
Calculate Perimeter:
The Conclusion:
Which shape provides the best "honey-to-wax" ratio?
Task 3: Strength Pattern Design
Design a floor pattern for a futuristic spaceship. It must be a Tessellation of at least two different shapes (e.g., squares and triangles). Ensure there are no gaps!
Design Area
Blueprint Masters Slides Blueprint Masters
Technical Truss Design
Lesson 04
Anatomy of a Truss
A Truss is a structural frame made of straight beams connected in a series of triangles.
Core Principles:
1
Forces only act at the joints (vertices).
2
Beams are in either Tension or Compression .
Compression
"The Squeeze"
Tension
"The Pull"
Choose Your Strategy
WARREN TRUSS
"Equilateral triangles spread weight evenly."
PRATT TRUSS
"Diagonal beams point toward the center."
HOWE TRUSS
"Diagonals point away from the center."
Drafting Standards
01
Scale & Symmetry
Use a ruler! If the left side isn't identical to the right, your bridge will twist.
02
Joint Precision
Mark every node (vertex) with a clear dot. This is where your beams will cross.
03
Labeling Forces
Identify which parts you think will be under the most pressure .
OPEN YOUR TEMPLATE
Drafting begins now.
Truss Design Template TRUSS BLUEPRINT
Project: Built to Last // Phase 01: Drafting
Engineer:
Design #:
CONSTRAINTS
MAX LENGTH: 30 CM
MAX HEIGHT: 10 CM
SYMMETRIC DESIGN
TRUSS DEPTH: 5 CM
BILL OF MATERIALS
STRAWS (BEAMS): / 20
CONNECTORS: / 30
BASE PLATE: 1
DRAFTING NOTE:
Every line represents a beam. Every intersection represents a joint. Use a ruler for all lines.
Elevation: Side View
Scale: 1 square = 1 cm
Plan: Top View
Required for structural width
0
7.5 CM
15 CM
22.5 CM
30 CM
Crush It Challenge Teacher Guide Teacher Resource // Lesson 05
THE CRUSH IT CHALLENGE
Facilitating the Load Test Finale
TESTING STATION SETUP
Gapped Support: Two tables or stacks of books exactly 25cm apart.
Loading Bucket: Small bucket with a "S" hook to hang from the bridge center.
Weights: Sand, pebbles, or standard 1kg weights.
Safety Zone: Cardboard on floor to catch falling bridges/sand.
KEY LEARNING
"The goal isn't just to hold weight; it's to observe the point of failure. Failure is where the best engineering data lives!"
PACING & INSTRUCTIONS
1
The "Weigh-In" (10 mins)
Each team weighs their dry bridge. Record this on the master board. Efficiency is calculated as (Weight Held / Bridge Weight).
2
The "Slow Pour" (30 mins)
Place bridge across the gap. Attach bucket. Students add weights slowly. Important: Students must watch for the "first groan" (cracking or bending).
3
Autopsy & Analysis (15 mins)
Once the bridge snaps, the team must collect the pieces and find the specific beam or joint that failed first. Was it compression or tension?
DISCUSSION PROMPTS
"Did your bridge bend before it broke? (Ductile vs. Brittle failure)"
"Look at the winning bridge. How does its geometry differ from the ones that held less?"
"Where did we see triangles turning into quadrilaterals during the collapse?"
Challenge Scoring Rubric
40%
Structural Integrity
Weight to mass ratio
30%
Geometry Usage
Effective triangulation
20%
Drafting Accuracy
Blueprint matches build
10%
Analysis Lab
Failure report completion
Failure Analysis Report Failure Analysis Report
Project: Built to Last // Case File: #05
CONFIDENTIAL
Engineering Team
Bridge Mass (g)
Predicted Load (kg)
Test Results
Actual Load Held
_____ kg
Recorded at point of total failure
The Efficiency Calculation:
Divide the Actual Load (g) by your Bridge Mass (g) . This tells you how many times its own weight your bridge held!
: 1
STRENGTH-TO-WEIGHT RATIO
Structural Autopsy
Sketch your bridge's remains. Use a Red X to mark the exact beam or joint that snapped or bent first. Use arrows to show where the pressure was too high.
Damage Visualization Area
Failure Mode:
BUCKLING (Beam bent)
SHEARING (Joint snapped)
DEFORMATION (Shape shifted)
TORSION (Bridge twisted)
The "Snap" Observation:
"Describe the sound or movement the bridge made right before it failed."
Geometric Improvement Plan:
If you were given 5 more beams to strengthen your bridge, exactly where would you put them and why? Use the term Triangulation in your answer.
Engineering Department Certified