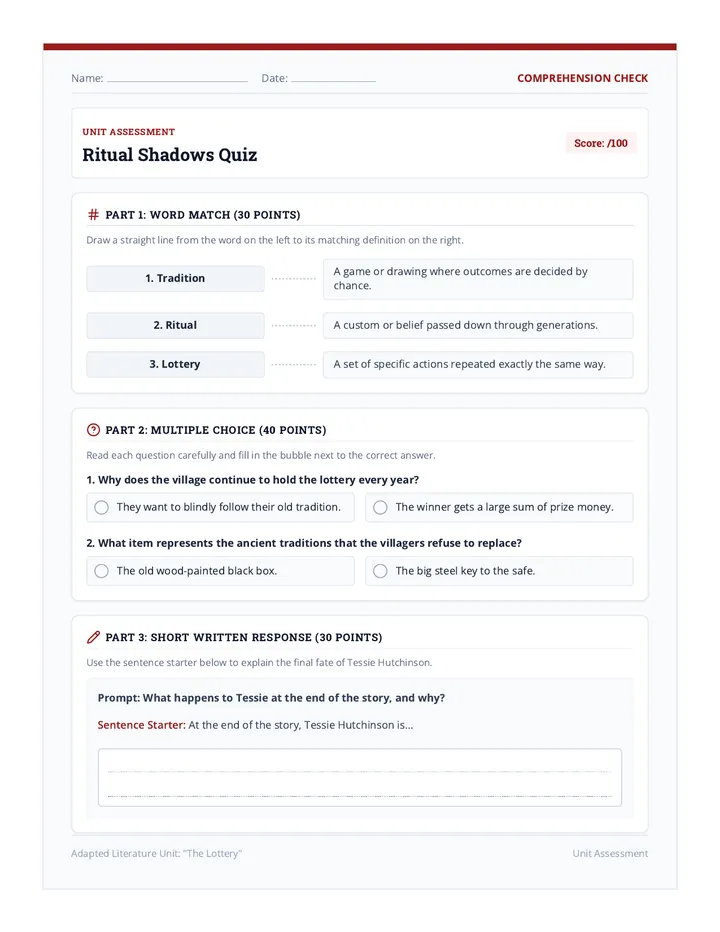
Deconstruction Zone Slides Deconstruction Zone
Lesson 1: Breaking Down the Big Goals
Phase 01: Task Analysis
The Robot Challenge
Your partner is a Human Robot. They have NO internal knowledge.
The Goal:
"Put on your jacket."
Can they do it with just that one direction?
Wait! Robots need tiny, single steps.
Goal vs. Directive
The Goal
The final destination. It tells you WHAT to do, but not HOW.
"Do your homework."
The Directive
A single, executable step. It tells you exactly how to move.
"Open your blue binder."
Step Isolation
To help our brains (and robots), we must isolate steps:
1
One verb (action word) per step.
2
Focus on physical movements.
3
Check it off before moving to the next.
Let's practice in our Blueprint Lab!
Deconstruction Zone Teacher Guide Teacher Guide
Deconstruction Zone
Project: Blueprint for Success
Lesson 1 of 5
Learning Objective
Students will differentiate between broad goals and single-step directives by deconstructing a multi-step task into individual physical actions. This reduces cognitive load for students with working memory challenges.
Essential Question
"How does breaking a task into tiny pieces change how we work?"
The Hook: Robot Programming (10-15 min)
Setup: Pair students up. One is the "Programmer," the other is the "Robot."
Activity: The Robot must put on a jacket (or similar task). The Programmer can ONLY give one-step physical directives (e.g., "Put your left arm in the sleeve"). If the direction is too broad (e.g., "Put on the coat"), the Robot should stand still and beep.
Discussion: Ask: "Why did the Robot fail when I said 'Put on the jacket'?" Emphasize that broad goals require too much memory retrieval at once.
Direct Instruction (10 min)
Use the Deconstruction Zone Slides.
Define Goal: A complex final state (e.g., "Write a paragraph").
Define Directive: A single physical movement (e.g., "Pick up pencil").
Highlight the Rule of One: One verb, one object, one action per step.
Guided Practice (20 min)
Distribute the Deconstruction Zone Worksheet. Guide the class through deconstructing a classroom routine first (e.g., "Packing up for the bus") before having them work independently on a task of their choice.
Support Strategies
For Students Who Struggle:
Provide a list of "Action Verbs" (Open, Write, Move, Click) to jumpstart their directives.
For Quick Finishers:
Challenge them to deconstruct a highly complex task like "Making a Sandwich" using at least 15 steps.
Deconstruction Zone Worksheet Deconstruction Zone
Blueprint Lab Exercise 1.1
Name:
Date:
1
Identify the Big Goal
Choose a task you do every day (like getting ready for school, making a sandwich, or cleaning your desk).
My Big Goal:
2
Deconstruction: Single-Step Directives
Break your goal down into tiny, physical movements. Imagine you are writing code for a robot that doesn't know anything. Use only ONE action word (verb) per step!
The Blueprint Audit
Does each step have only ONE action word?
Are the steps in the correct order?
Is there any "hidden" work that needs its own step?
Could a robot follow this perfectly?
Cognitive Engineering Systems
Ref: 8-SPEC-WM-01 Page 1 of 1
Iconic Instruction Slides Iconic Instruction
Lesson 2: Thinking in Symbols
Phase 02: Visual Anchoring
Visual Language
Can you decipher this directive?
🎒 ➡️ 🚪
"Put your backpack by the door."
Memory Offloading
Faster Processing
Our brains process images 60,000 times faster than text.
Visual Anchors
Icons act as "anchors" for information, keeping it from drifting away.
?
If you forget the words, the symbol reminds you.
The Icon Rulebook
Simple
No complex art. Use basic shapes.
Distinct
Each action gets a unique look.
Consistent
Use the same symbol every time.
Time to Create Your Personal Symbol Legend!
Iconic Instruction Teacher Guide Teacher Guide
Iconic Instruction
Project: Blueprint for Success
Lesson 2 of 5
Learning Objective
Students will develop personal visual icons to represent common classroom directives. These icons serve as external working memory scaffolds, reducing the cognitive effort needed to interpret and recall multi-step instructions.
Essential Question
"How can a simple picture replace a whole sentence?"
The Hook: Emoji Message (5-10 min)
Activity: Display the "Emoji Decipher" slide. Ask students to shout out what they think the message means. Challenge them with a harder one: 📱❌ / 📔✅ / ✏️✍️ (Phone away / Notebook out / Write).
Discussion: Highlight how quickly their brains processed the 🎒 icon compared to reading the word "Backpack." Images are processed up to 60,000x faster than text.
Direct Instruction (10 min)
Use the Iconic Instruction Slides.
Explain the Cognitive Load: When instructions are just text or sound, our working memory has to "translate" them. Icons bypass the translation and go straight to action.
Review the Icon Rulebook: Simple, Distinct, Consistent.
Guided Practice: The Legend (25 min)
Distribute The Icon Legend Worksheet. Students will design symbols for 6 core classroom actions. Encourage them to use symbols that make sense *to them*—there is no "right" way as long as they are consistent.
Teacher Tip: Walk around and ensure students aren't spending too much time on artistic detail. Remind them: "It's a blueprint, not a painting!"
Support Strategies
For Students Who Struggle:
Provide a sheet of pre-made "Lucide Icons" for them to cut and paste if drawing is a barrier.
Visual Reinforcement:
Once legends are complete, have students tape them to the corner of their desks for quick reference during the next lesson.
The Icon Legend Worksheet The Icon Legend
Standard Visual Symbols for Directives
UNIT: VISUAL SCAFFOLDING
PHASE: ANCHORING
SYSTEM ID: 2.1-LEGEND
Engineer:
Date:
Instructions: Design a simple, clear symbol for each classroom directive. These will be your "Anchors" to help you remember exactly what to do when you see them on a list.
READ
Action: Scan text for info
WRITE
Action: Record on paper/laptop
OPEN
Action: Unzip, Click, or Expand
LISTEN
Action: Eyes on speaker
CLEAN
Action: Put away / clear area
STOP
Action: End task immediately
Custom Visual Anchor
Action Name:
Description:
The Linear Path Slides The Linear Path
Lesson 3: Formatting for Flow
Phase 03: Task Serialization
Race to the Finish
SYSTEM A: THE DENSE BLOCK
To start the lab, you must first gather your safety goggles from the bin near the door, then ensure your station is clear of any personal items including bags or phones, then open your lab manual to page forty-two and read the safety warnings, then finally alert the teacher that you are ready to begin the experiment by raising your hand silently at your desk.
SYSTEM B: THE LINEAR PATH
Get safety goggles.
Clear your station.
Open manual to p. 42.
Raise your hand.
Which one is faster for your brain?
Visual Overload
When instructions are in a paragraph, your brain has to search for the next step every time.
This takes energy away from actually doing the task!
Search = Brain Fatigue
Blueprint Standards
One action per line. No exceptions.
Pair every action with an ICON.
Include a checkbox for "Action Complete."
The Linear Path Teacher Guide Teacher Guide
The Linear Path
Project: Blueprint for Success
Lesson 3 of 5
Learning Objective
Students will format instructions into linear, single-step visual checklists. By separating information into one action per line and pairing it with an icon, students reduce the "search and retrieve" load on their working memory.
Essential Question
"How does physical layout affect how our brains process information?"
The Hook: The Race (5-10 min)
Activity: Use the "Race to the Finish" slide. Divide the class. Group A reads the paragraph; Group B reads the list. Ask three questions about the safety lab procedure (e.g., "What page do you open?"). Group B will almost certainly answer faster.
Discussion: Focus on the "Searching" feeling Group A felt. Searching is a high-memory task. Linear paths eliminate the search.
Direct Instruction (10 min)
Use the The Linear Path Slides.
Teach the One Action Rule: Every time a person has to do something different, it needs a new line.
Emphasize the Visual Pair: The icon catches the eye, and the text tells the hand what to do.
Guided Practice: Assignment Conversion (20 min)
Distribute the Linear Checklist Worksheet. Provide students with a "messy" instruction block (like a paragraph from a history project) and help them convert it into a linear, visual blueprint.
"Look for words like 'then,' 'after,' and 'also.' Those are your clues for a new line!"
Support Strategies
Scaffolding:
Provide a highlighter. Have students highlight the action verbs in the dense paragraph *before* they start writing their list.
Visual Cues:
Ensure they have their "Icon Legends" from Lesson 2 on their desks for reference.
Linear Checklist Worksheet Linear Blueprint
Converting Blocks to Paths
Engineer Name
Input: The "Messy" Block
"For your History Project, you must first pick a famous architect from the list on the board, then go to the library and find one book about their most famous building, after that you need to draw a sketch of that building on a 4x6 index card, and finally you must write three bullet points explaining why the building is important on the back of the card."
Output: The Linear Path
Break the paragraph into single actions. Use your icons from Lesson 2!
☐
ICON
☐
ICON
☐
ICON
☐
ICON
☐
ICON
Clarity Check
No "and" or "then" in your lines?
Each line has exactly one icon?
Linear Processing Protocol 3.0 Ref: BLUEPRINT-CONVERT-01
Tracking Progress Slides Tracking Progress
Lesson 4: The Completion Rhythm
Phase 04: Physical Monitoring
The Loop
1
DO
Complete the one single step on your blueprint.
2
CHECK
Mark it as finished physically.
3
MOVE
Shift your focus only to the next line.
Kinesthetic Memory
Closure
Checking off a box or moving a slider gives your brain a sense of completion.
Focus Lock
It locks your eyes on the current task so you don't skip steps.
The Toolshop
Today's Mission:
We are building Physical Task Sliders. You will use these for every checklist from now on to "close out" each step as you finish.
Cut out your slider strip.
Assemble the marker.
Test it on a practice task!
Tracking Progress Teacher Guide Teacher Guide
Tracking Progress
Project: Blueprint for Success
Lesson 4 of 5
Learning Objective
Students will utilize physical manipulatives to mark the completion of individual steps in a linear task. This kinesthetic action reinforces the "completion rhythm" and prevents the cognitive drift common in students with working memory challenges.
Essential Question
"How does a physical action help my brain finish a mental task?"
Modeling the Loop (10 min)
The "Do-Check-Move" Live Demo:
Teacher should model a 3-step task (e.g., "Sharp pencil / Write name / Open book").
Step 1: Point to the line on the board. Sharpen pencil. Move a physical token (like a magnet or post-it).
Step 2: Look ONLY at the next line. Write name. Move the token.
Discussion: "Did I have to remember all 3 steps? No, the token remembered where I was for me."
The Toolshop (20 min)
Distribute the Blueprint Slider Kit. Students will need scissors and tape/glue. This slider is designed to be placed alongside their linear checklists from Lesson 3. As they complete a step, they slide the marker down.
Live Test: Origami or Simple Assembly (15 min)
Give students a very simple assembly task (like making a paper airplane or a simple origami shape). They must use their slider for every single fold. Observe for students who try to skip ahead or work from memory—gently redirect them to the "Do-Check-Move" rhythm.
Troubleshooting
Common Issue:
Students find the slider "too slow."
Teacher Response:
Explain that the slider isn't for speed; it's for accuracy. It's a "safety harness" for their working memory.
Blueprint Slider Kit Worksheet Blueprint Slider Kit
Device: Physical Tracking Anchor v4.0
Instructions: Cut out the components below. Assemble your slider to help you focus on ONE step at a time.
1. The Track
Cut along the SOLID BLUE line. Tape this to the edge of your worksheet.
START
FINISH
2. The Window
Cut the outer box. Fold along dotted lines. Cut out the center "VIEWING HOLE" so you can see your text through it!
VIEWING WINDOW
Fold & Tape to slide over the Track
Practice Mission: Paper Crane Step 1
Use your slider to focus on this single directive:
"Fold the bottom corner to meet the top corner perfectly."
Task Complete?
Engineering Visual Scaffolds SYSTEM-REF: DIY-SLIDER-KIT
Master Architect Slides Master Architect
Lesson 5: Independent Scaffolding
Phase 05: Project Integration
Your Final Mission
You will be given a Complex Prompt for a new project.
Your job is to apply EVERYTHING you've learned:
Deconstruct Goals into Directives.
Anchor actions with Icons.
Design the Linear Blueprint.
The goal is to make the project impossible to fail because the steps are so clear.
Blueprint Audit
The Stress Test
Swap blueprints with a partner. Read their steps silently.
RED FLAG: Did they use "and" or "then"?
Does one line have multiple actions?
Feedback Standards
"I'm confused about step #___."
"This icon doesn't match the verb."
"This is a perfect single directive!"
Final Checklist
"I have externalized my memory."
— The Master Architect's Creed
You are now ready to build your final guide.
Go to your Blueprint Lab!
Master Architect Teacher Guide Teacher Guide
Master Architect
Project: Blueprint for Success
Lesson 5 of 5
Learning Objective
Students will independently convert a multi-step academic prompt into a single-step visual guide. This culminating workshop assesses their ability to deconstruct goals, utilize visual anchors, and format linear paths without teacher assistance.
Essential Question
"Am I ready to build my own systems for success?"
The Independent Workshop (25-30 min)
Distribute the Final Blueprint Project Guide. You may choose to provide a "Standard Prompt" for the whole class (e.g., "Researching a Planet for Science Class") or allow students to use a real prompt from another current class.
The Core Challenge:
Isolate at least 10 single-step directives.
Create icons for every action.
Ensure the layout is perfectly linear (one step per line).
The Stress Test: Peer Audit (15 min)
Students swap blueprints. The "Auditor" must try to find any "memory leaks" (steps that are too broad, missing icons, or messy formatting). Use the "Blueprint Audit" slide to guide the feedback conversation.
Master Architect Certification (Rubric)
1. Task Deconstruction One action per step? No compound directions? / 10
2. Visual Anchoring Icon for every action? Symbols are consistent? / 10
3. Linear Formatting One step per line? Checkboxes included? / 10
Closing (5 min)
Ask: "Which part of this system made the project feel the least stressful?" Encourage students to keep these tools in their binders for all future complex assignments.
The Final Blueprint Worksheet The Final Blueprint
Professional System for Task Completion
Architect:
Project ID:
1
Raw Input (The Goal)
Paste or write the multi-step project prompt here. Look for "messy" paragraphs or complex instructions.
2
Symbols
Create symbols for your actions.
3
Linear Blueprint
Deconstruct into single-step physical directives.
✓
✓
✓
✓
✓
✓
Self-Audit
NO "and/then" used?
Every line has an icon?
Directions are physical?
Peer Approval
Reviewer:
Approved for Construction
Certification of Mastery: LEVEL 05 ARCHITECT SYSTEM-ID: FINAL-BLUEPRINT-2026