Diagram Detectives Slides Diagram Detectives
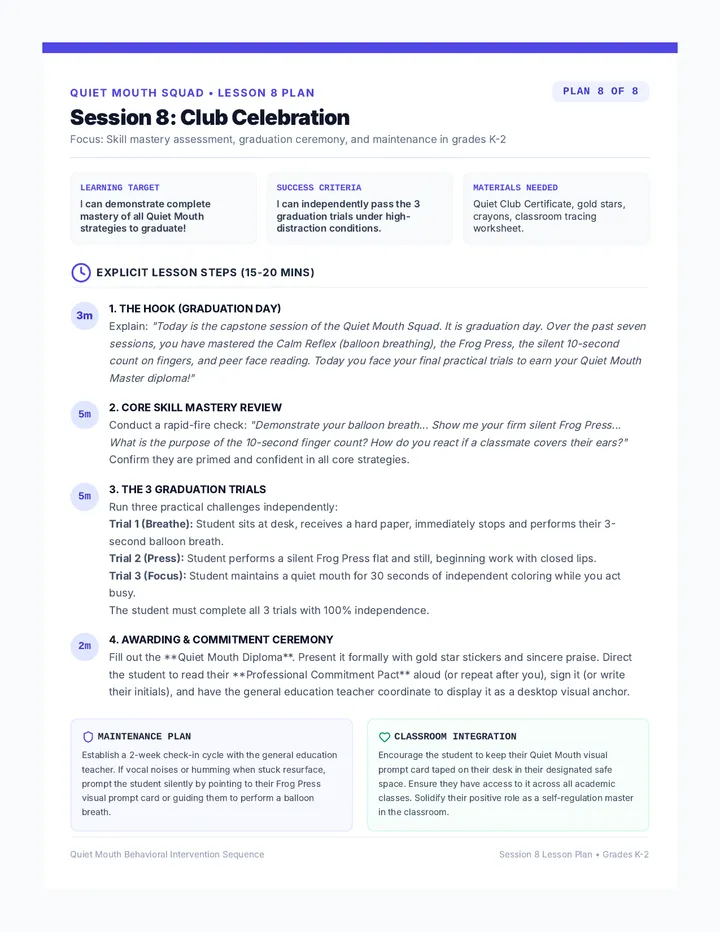
Focus: Single-Step Instruction
Instruction Overload
When we look at a whole manual at once, our brain can feel cluttered.
Too many steps to remember
Eyes skip to the wrong place
Fear of making a mistake
Cognitive Load: HIGH
The Viewfinder Strategy
By masking what we don't need yet, we free up space in our brain for the current step.
1
Isolate
2
Focus
3
Execute
Where do we see this?
Furniture Kits
Hundreds of tiny screws and confusing drawings.
Complex Recipes
Heating, mixing, and timing all at once.
Tech Repair
Handling delicate parts inside a computer.
Office Tasks
Filing, sorting, and data entry procedures.
Let's Try It!
Use your Physical Viewfinder to find Step 1 on your practice sheet. Hide everything else!
Diagram Detectives Worksheet Diagram Detective: Focus Training
Topic: Single-Step Isolation Strategy
Vocational Skill L1
Agent Name
Mission Date
Your Objective
Use your paper viewfinder to isolate ONLY the step requested. Cover all other parts of the diagram to prevent "brain clutter."
Task A: The Cluttered Schematic
STEP 1
Insert bolt (A) into bracket (B)
STEP 2
Tighten clockwise...
FINAL STEP
1. Use your viewfinder to find Step 1.
What is the very first physical action you must take?
2. Visual Filter Test
While looking through the viewfinder, can you see the "Final Step"?
Yes
No
Task B: The Master Chef's View
Recipe: Super Power Smoothie
1. Peel the banana and break it into three pieces.
2. Measure 1 cup of milk and pour it into the blender.
3. Add 1 scoop of protein powder carefully.
4. Blend on 'HIGH' for 30 seconds until smooth.
Isolate Step 2 with your viewfinder and answer:
Tools needed for this step:
Ingredient used in this step:
The Detective's Reflection
Why does covering the other steps help your brain focus on Step 2?
Diagram Detectives Viewfinder Tool Viewfinder Tool Template
Teachers: Print this on cardstock if possible. Students will cut along the solid lines and remove the center rectangle to create their "Focus Filter."
Cut Out This Rectangle
Focus Filter v1.0
Vocational Training Tool
"One Step At A Time"
Cut the outer dark rectangle first, then the inner white window.
Diagram Detectives Teacher Guide Teacher Guide
Lesson 1: Diagram Detectives
Sequence: Procedural Adherence
Target: 8th Grade SpEd / Working Memory
Duration
45-50 Minutes
Core Strategy
Visual Masking
Materials
Viewfinders, Scissors, Worksheet, Slide Deck
1. The Hook (5m)
Show a cluttered LEGO instruction page or a complex IKEA manual on the board. Ask students: "What is the very first thing you need to do?" Observe how their eyes dart around. Discuss how "too much information" makes the brain work harder than it needs to.
2. Direct Instruction (10m)
Use the **Diagram Detectives Slides** to introduce:
Cognitive Load: The idea that our brain is like a bucket that can overflow.
Masking: Physically covering what we don't need to stay focused.
Isolate-Focus-Execute: The 3-step cycle for procedural success.
3. Skill Practice (25m)
Part A: Tool Creation
Distribute the **Viewfinder Tool Template**. Have students cut out their filters. Assist those with fine motor difficulties.
Part B: Guided Application
Work through the first problem on the **Diagram Detectives Worksheet** together. Ensure students are physically holding the viewfinder over the schematic.
Observation Check:
Watch for students who move the viewfinder too early before writing their answer. Prompt them to "Stay in the window" until the task is complete.
4. Debrief (5m)
Essential Question Check:
"How did having the 'rest of the page' hidden change how your brain felt while reading the instructions?"
Differentiation Strategies
For Scaffolded Support
Provide pre-cut viewfinders. Highlight the "Target Step" on the worksheet with a faint yellow marker before the student starts to provide a second visual cue.
For Extension
Challenge students to use their viewfinder on a real instruction manual from the classroom (e.g., a science kit or game) and identify three steps that are easy to confuse.
Part Pro Slides Part Pro
The Art of Component Isolation
Brain Static
When all 50 parts of a kit are spread out on your desk, your brain treats every single one as "Important Now."
The Result: Working Memory Overload.
Too Much!
What is Knolling?
DEFINITION
Organizing related objects in parallel or 90-degree angles to create order.
WHY IT WORKS
If it's not needed for the current step, it stays in the box. Your desk only holds what you need.
Kitchen Knolling
Professional chefs use a strategy called Mise en Place.
Preparation
Measuring ingredients BEFORE you start the stove. If you're looking for the salt while the steak is burning, you've lost focus!
Isolation
Only putting the salt, pepper, and butter on your station for Step 1. The flour stays in the pantry.
Isolation Challenge
You are about to be given a bag of parts. Your goal is NOT to build. Your goal is to KNOLL Step 1.
Ready
Set
Go
Part Pro Worksheet Parts Isolation Log
Operation: Single-Step Knolling
1
2
3
Step Focus Indicator
Technician
Station Number
Current Task
Mission: Prepare for Step 1
Isolation Only
Assembly Step 1 Instruction:
"Gather 4 square bricks, 2 long blue rods, and 1 hexagonal connector. Attach the rods to the connector first."
STOP!
Do not touch any other parts in your kit bag yet. Only find what is listed above.
Isolation Checklist:
4x Square Bricks
2x Long Blue Rods
1x Hexagonal Connector
Supervisor Verification
Initials Here
The Knolling Map
Draw or list how you have arranged your parts on your desk. Remember the rule: Parallel or 90-degree angles. Everything should look neat and separate.
Place parts physically here
or sketch your desk layout
Why wait to gather more parts?
Gathering too many parts at once can cause us to lose track of what we are doing right now. Isolation keeps our workspace and our mind clean.
Mise en Place
Part Pro Station Signs Active
Zone
Single Step Only
Step 1 Components
Staging
Area
Stored Components
Wait for Next Step
Knoll
Station
90° Alignment
No Clutter Allowed
Verify
First
Ready to Build?
Check the List
Cut along the gaps to create individual station signs for student desks.
Part Pro Teacher Guide Teacher Guide
Lesson 2: Part Pro
Sequence: Procedural Adherence
Physical Organization & Knolling
Goal
Reduce visual cognitive load via physical organization.
Prep
Kits of misc. items (LEGO, nuts/bolts, office supplies).
Key Term
Knolling
1. Mise en Place (10m)
Discuss the "Chef's Mise en Place." Imagine a chef trying to chop onions while the garlic is already burning. Why do they chop everything first? Why do they only have the current ingredients on their cutting board?
"If you're hunting for a part, you're not focusing on the build."
2. The Art of Knolling (10m)
Use **Part Pro Slides** to define Knolling. Emphasize the 90-degree angle rule. It's not just about "cleaning up"—it's about making parts easy for the eye to scan without the brain having to process a "mess."
3. The Workshop (25m)
Distribute the **Part Pro Station Signs**. Have students tape these to their desks to define their "Active Zone" vs "Staging Area."
The Isolation Challenge:
Give each student a bag of mixed parts (e.g., 20 items).
Hand out the **Part Pro Worksheet**.
The task is ONLY to isolate the parts for Step 1.
Students must Knoll (arrange neatly) those parts in their Active Zone.
Everything else MUST stay in the bag or the Staging Area.
4. Debrief (5m)
The Brain Check:
"When your desk was messy, how hard was it to find the hexagonal connector? When you 'Knolled' it, how long did it take your eyes to find it?"
Pro-Tips & Differentiation
Handling Impulse
For students who immediately start building, use the "Box Cover" technique: They must keep the kit box lid on the parts bag until you give the "Prepare" command.
Visual Support
Take photos of "Perfectly Knolled" stations to display on the board as a reference. Use color-coded bins for the Staging Area to further separate components.
Double Check Slides Double Check
The Stop-and-Check Protocol
The Error Avalanche
A mistake in Step 1 makes Step 10 impossible.
"I didn't notice the screw was loose at the start. Now the whole table is wobbly."
Leaning Tower of Errors
The Stop-and-Check Rule
STOP
Hands off the parts as soon as the step is finished.
LOOK
Compare your build to the diagram. Does it match?
VERIFY
Check off the step on your log before moving on.
Taming the "Rush"
"I just want to get it finished!"
The "Rush" is the enemy of accuracy. Slowing down for 10 seconds now saves you 10 minutes of fixing it later.
The 10-Second Pause
Verification takes less than a minute
The Unstable Tower
You will build a tower using strict sequencing. If you skip a check, you might find your tower topples at the very end!
Protocol Engaged
Double Check Quality Log Quality Control Log
Verification Required: Mission Alpha
Build ID
Technician Name
Completion Date
Step Action Requirement Build OK? Log OK? 01 Base Assembly
"Gather 3 standard bricks and align them in a straight line."
|
|
|
| 02 |
Support Vertical
"Place the long pillar brick on the center of the base."
|
|
|
| 03 |
Counter-Balance
"Attach one flat wing piece to each side of the pillar."
|
|
|
| 04 |
Final Top
"Snap the small signal cap onto the very top of the pillar."
|
|
|
Technical Reflection
Explain why it is faster to check Step 1 now, rather than waiting until you reach Step 10.
Protocol Version 2.0.3
Do not proceed to the next row until the current row is verified.
Double Check Tower Challenge Card Challenge Card
The Unstable Tower
A Test of Procedural Adherence
The Scenario
"You have been hired as a structural inspector. You are building a prototype 'Communication Tower'. If one piece is off-center by even half a centimeter, the final antenna will cause the tower to collapse."
Success Criteria
The base is perfectly aligned (no gaps).
The pillar is exactly in the center.
Wings are symmetrical (even on both sides).
Log is signed for every single step.
Project Rules
The "Secret" Trap:
The 'Antenna Cap' in Step 4 is top-heavy. If Step 1 or 2 is slightly crooked, the cap will fall off immediately. Slow and steady wins the build!
Double Check Teacher Guide Teacher Guide
Lesson 3: Double Check
Sequence: Procedural Adherence
Quality Control & Impulse Management
Strategy
Stop-and-Check Protocol
Prep
Building blocks (LEGO or similar). Top-heavy caps are best.
Focus
Quality Control
1. The Hook (10m)
Tell the story of a high-tech satellite that failed because of one loose bolt at the start. Ask: "Have you ever gotten to the end of a build and realized the very first piece was wrong?" Let students share their frustrations. Introduce the idea of "The Error Avalanche."
2. The Pause (10m)
Use **Double Check Slides** to introduce the protocol: Stop, Look, Verify. Emphasize that verification is a physical act of checking off a list, not just a mental note.
Key Habit: Hands off the project when checking. This prevents accidental "fixing" while looking.
3. Unstable Tower (25m)
Students build a specific tower using the **Double Check Quality Log**.
Facilitation Notes:
Circulate and ensure students are actually pausing between steps.
Enforce the "Log First" rule: The next part cannot leave the staging area until the current step is checked.
At Step 4, if a student's tower topples, help them trace back to which step was "almost right" but slightly off.
4. Debrief (5m)
The Quality Habit:
"Why do structural engineers get paid so much? Because they verify before the building goes up. You just practiced the exact same skill."
Support & Extension
Peer Verification
Pair students up. Student A builds, Student B acts as the "Inspector" and initials the log. This external focus often helps students who struggle with self-monitoring.
The "Double" Log
For students who rush, add a 10-second timer to the log. They must wait for the sand to run out or the stopwatch to hit 10s before they can mark the 'Verify' column.
Video Pilot Slides Video Pilot
Pacing Your Digital Instructions
The Velocity Gap
Video tutorials are made for watching, not necessarily for doing in real-time.
The host moves too fast
Steps are skipped or "timelapsed"
Hands cover the details
Buffering Brain...
Don't let the video outrun you!
The "One Action" Rule
"Watch ONE specific movement. Then PAUSE. Then repeat that movement with your hands."
Observe
Pause & Copy
Verify & Play
Pro Navigation
Rewind is your friend
If you missed where the thumb went, go back 10 seconds. Don't guess!
Playback Speed
Try 0.75x speed for complex parts like origami or knot-tying.
Fast-Paced Folding
We are watching an origami tutorial. You must manage the playback yourself. If you get ahead of your hands, you lose the challenge!
Start Playback
Video Pilot Log Video Pilot Log
Digital Task: Origami Mission
Pilot Name
Video Title
Target Pacing
0.5x
0.75x
1.0x
The Pilot's Oath
"I will not let the video play for more than 15 seconds without pausing to catch up. I will only move forward when my physical work matches the screen."
01
Timestamp
What was the physical action?
02
03
04
Post-Flight Analysis
Which was more effective: Pausing frequently or using a slower playback speed (0.5x)? Why?
Video Pilot Teacher Guide Teacher Guide
Lesson 4: Video Pilot
Sequence: Procedural Adherence
Digital Literacy & Executive Pacing
Platform
YouTube / Digital Video
Materials
1:1 devices, origami paper or string for knots.
Strategy
The "One Action" Pause
1. The Speed Trap (10m)
Play a 30-second "life hack" video or a fast-paced cooking reel at normal speed. Ask students to list all the steps. They likely can't. Discuss why: Digital media is designed for entertainment, not education. We have to "hack" the video to make it useful.
2. Pilot Training (10m)
Use **Video Pilot Slides** to demonstrate navigation tools. Show how to find the "Settings" gear for playback speed and the "L/J" keys (or tap sides) for 10-second jumps. Introduce the Watch-Pause-Copy cycle.
3. Digital Origami (25m)
Assign a specific video (e.g., "How to fold a paper crane"). Students must use their **Video Pilot Log** to track their progress.
Teacher Intervention:
If you see a student staring at the video while their paper sits untouched, prompt them: "Pause the Pilot. Your hands are still at Step 1."
Check for "Passive Watching" (mind wandering).
Check for "Rushed Guessing" (ignoring details for speed).
4. Debrief (5m)
The Navigation Habit:
"If you were following a YouTube tutorial to fix a broken smartphone, what would happen if you didn't pause? You'd have a lot of extra screws and a broken screen."
Digital Support
Captions & Visuals
Enable "Closed Captions" for students who benefit from reading while listening. For students with high distractibility, use "Theater Mode" or "Full Screen" to hide sidebars and recommended videos.
Pre-Segmented Videos
Use tools like Edpuzzle to physically stop the video at key moments for the student, or provide a list of "Must Pause" timestamps on the whiteboard.
Master Builder Slides Master Builder
Capstone: The Assembly Challenge
Process vs. Product
"It's not just about what you build. It's about how you build it."
Today, your grade isn't based on finishing first. It's based on your adherence to the systems we've learned.
Viewfinder Masking
Knolling / Isolation
Stop-and-Check Protocol
The Professional's Toolkit
You have 3 tools at your station:
The Blueprint
Detailed instructions with masking area.
Active Zone
A clear space for current parts only.
Process Rubric
Your map to a "Master" score.
Beyond the Classroom
Independence
When you can follow a manual perfectly, you don't need to ask for help. You can build your own furniture, cook your own meals, and fix your own gear.
"One step at a time, you can build anything."
Unbox the Challenge
Open your kit. Prepare your station. Mask Step 1. Wait for the signal.
Engage Build Mode
Master Builder Project Guide Master Build
Project: Multi-Stage Technical Assembly
Station ID
The Mission
You are assembling a Hydro-Electric Turbine Unit (LEGO model). Adherence to the Single-Step Protocol is mandatory.
Safety Check
Active Zone Clear?
Viewfinder Ready?
Parts Staged?
Technical Blueprint
1
Foundation Base
"Gather two 2x8 gray plates. Snap them side-by-side using the 2x4 red connector in the center."
2
Core Housing
"Place four 1x1 yellow corner bricks on the four corners of the base plates."
3
Turbine Axle
"Slide the black axle through the blue gear. Place the assembly in the exact center of the housing."
4
Top Enclosure
"Secure the clear 4x4 canopy over the axle and snap into the yellow corners."
Execution Notes
Technician: Briefly record one time you had to "Double Check" or "Rewind" during this build. Why did you do it?
Master Builder Rubric Process Evaluation
Capstone: Master Builder Assessment
"This rubric does NOT grade the finished model. It grades the adherence to the system. A perfect model built with messy desk and skipped steps will score lower than a semi-finished model built with perfect protocol."
Indicator Novice (1) Proficient (2) Master (3) Visual Masking Viewfinder ignored; eyes scanning whole page. Viewfinder used inconsistently or moved too early. Viewfinder strictly covers all steps except the active one. Component Isolation Parts scattered; "clutter" on work surface. Active zone exists but contains unneeded parts. Only Step parts in Active Zone; Knolled at 90°. Stop-and-Check Moves directly to next step without pausing. Pauses occasionally; mental check only. Physically stops for 10s; verifies vs. blueprint. Pacing/Impulse Rushed execution; frustrated by mistakes. Steady pace; corrects errors when prompted. Calm, deliberate pacing; self-corrects early.
Observations & Evidence
SCORE
Total / 12 Points
Master Builder Certification
Adherence >> Velocity
Master Builder Teacher Guide Teacher Guide
Lesson 5: Master Builder
Sequence: Procedural Adherence
Capstone Execution & Assessment
Assessment Type
Process-Based (Observational)
Duration
60-90 Minutes (may span two days)
Final Goal
Protocol Mastery
1. Setting the Stakes (10m)
Use the **Master Builder Slides** to frame the challenge. Emphasize that speed is actually a penalty if it leads to skipping steps. Review the rubric so students know exactly what you are looking for during your walkthroughs.
2. The Execution (30-60m)
Distribute the **Master Builder Project Guide** and the kit materials.
Teacher Role: Inspector
Circulate the room with a clipboard and the **Master Builder Rubric**. Your job is to observe the "unseen" work:
Is the viewfinder physically on the page?
Is the active zone limited to the current step?
Are they pausing and looking at the diagram after a "click" or "snap"?
3. Certification (10m)
Master Builder Review:
Have students display their builds. Instead of "Who finished first?", ask "Who found a mistake during a Stop-and-Check and fixed it before it was too late?" Celebrate those moments of error-detection as the highest level of success.
Support for the Final
Modified Kits
For students with extreme motor or processing needs, reduce the number of steps in the project guide (e.g., provide a partially pre-assembled base) so they can focus entirely on the procedural adherence of the final 2-3 steps.
Visual Anchor
Keep the "Viewfinder Strategy" and "Knolling" posters or slides visible on the board throughout the entire capstone as a constant non-verbal reminder of the expectations.