Distance Detectives Lesson Plan Measure Up • Lesson 1 of 4 • Teacher Guide
Distance Detectives
Grades 6–8 ML
45–50 Minutes
Content Objective
Students will select appropriate tools (ruler, tape measure, meter stick) and measure length and distance in customary (in, ft, yd) and metric (cm, m) units.
Language Objective
Students will explain tool choices and compare measurements orally and in writing using comparative adjectives (longer, shorter ) and unit nouns.
Key Vocabulary
Length: how long an object is
Distance: space between two points
Ruler: tool for short straight lines
Tape Measure: flexible tool for curves/rooms
Metric (cm, m): base-10 system (worldwide)
Customary (in, ft): US measurement system
Materials
Rulers (in & cm)
Meter sticks
Flexible tape measures
Station objects (book, desk, cord, hallway)
Student Worksheets
Instructional Sequence (Part 1)
Minutes 0–22
1. Warm-Up: Mystery Object Estimate 7 min
Hold up a pencil and a classroom broom. Ask: "Which is longer? How could we prove it?" Introduce the word measure and gesture with hands (TPR) for short , long , wide , and far .
ML Support: Allow students to point, gesture, or respond with a partner before sharing aloud.
2. Direct Instruction: Tools & Benchmarks (Slides 1–6) 15 min
Present Distance Detectives Slides . Show real tools alongside each slide. Model the 3 Golden Rules : (1) Start at the 0 mark—not the edge of the ruler, (2) Keep the tool straight, (3) Always say the unit !
Connect units to body/classroom benchmarks: 1 cm ≈ pinky nail width, 1 inch ≈ thumb tip, 1 meter ≈ doorway width, 1 foot ≈ standard ruler.
Measure Up • Lesson 1: Distance Detectives Page 1 of 2
Distance Detectives • Facilitation & Supports
Minutes 23–50
Instructional Sequence (Part 2)
Minutes 23–50
3. Guided Practice: 4 Measurement Stations 15 min
Students rotate in pairs through 4 labeled stations, recording estimates, tools, and measurements on Part 2 of their worksheet:
Station A: Textbook width (Ruler, cm)
Station B: Desk height (Meter stick, cm/m)
Station C: Water bottle around (Tape measure, cm)
Station D: Doorway width (Tape/Meter stick, ft/m)
4. Independent Practice & Language Wrap-Up 13 min
Students complete Parts 3 and 4 of the Distance Detectives Worksheet independently. Close with a 2-minute partner share where each student reads one completed sentence frame aloud.
Tiered ML Sentence Frames (WIDA Aligned)
Emerging: "I use a _____. The _____ is _____ cm."
Expanding: "To measure _____, I chose a _____ because it is _____."
Bridging: "Although both tools measure length, a _____ is more accurate for _____ because _____."
Watch Out For
Starting at the 1 mark or plastic edge instead of 0 .
Forgetting to write the unit (writing "15" instead of "15 cm").
Confusing inches and centimeters on dual-sided rulers.
Quick Differentiation
Newcomers: Color-code the cm side of rulers with green tape; pair with a bilingual/visual buddy.Extension: Have fast finishers convert cm measurements to meters (e.g., 120 cm = 1.2 m).
Measure Up • Lesson 1: Distance Detectives Page 2 of 2
Distance Detectives Slides Measure Up • Lesson 1 📏 Distance & Length
Distance Detectives
How do we measure how long, tall, or far something is?
Content Goal
Choose the right tool and unit to measure length and distance.
Language Goal
Explain tool choices and compare lengths using full sentences.
Key Concepts
Four Ways to Measure Space
↔️
Length
From end to end (a pencil)
↕️
Height
From bottom to top (a door)
📐
Width
From side to side (a book)
🗺️
Distance
Space between two places
Measurement Tools
Pick the Right Tool
📏
Ruler
Best for small, flat objects like books and pencils.
Units: in, cm
🎗️
Tape Measure
Flexible! Best for round objects or long rooms.
Units: in, ft, cm, m
🪵
Meter / Yard Stick
Rigid and long. Best for desks, doors, and hallways.
Units: yd, ft, m, cm
Units & Benchmarks
Metric vs. US Customary
Metric System (Base 10)
1 millimeter (mm) ≈ credit card edge1 centimeter (cm) ≈ pinky nail width1 meter (m) ≈ width of a doorway1 kilometer (km) ≈ 10-minute walk
US Customary System
1 inch (in) ≈ tip of your thumb1 foot (ft) = 12 in (one ruler)1 yard (yd) = 3 ft (arm span)1 mile (mi) ≈ 15-minute walk
Accuracy Check
3 Golden Rules of Measuring
1
Start at ZERO (0)
Line up the object with the 0 mark—not the plastic edge!
2
Keep It Straight
Do not slant the ruler or leave gaps in the tape.
3
Always Include the Unit
Write "12 cm" or "12 in"—never just "12"!
Speak & Write
Talk Like a Detective
Describing a Tool Choice
"To measure ________, I use a ________ because ________."
Stating a Measurement
"The ________ is ________ centimeters / inches long."
Comparing Two Objects
"The ________ is longer / shorter than the ________."
Distance Detectives Worksheet Measure Up • Lesson 1
Distance Detectives Worksheet
Length & Distance
Name:
Date:
Word Bank
ruler tape measure meter stick centimeters (cm) meters (m) inches (in) longer shorter
Part 1: Choose the Best Tool
Circle the best tool for each measurement task.
1. The length of a new pencil
A. Ruler
B. Meter stick
C. Tape measure
2. The distance around a basketball
A. Ruler
B. Meter stick
C. Tape measure
3. The width of your classroom door
A. Ruler
B. Meter stick
C. Small paperclip
4. The length of a hallway
A. Ruler
B. Long tape measure
C. Thumb width
Part 2: Classroom Station Lab
Visit each station. Estimate first, then measure and write the number AND unit.
Object to Measure
My Estimate
Tool Used
Actual Measurement
A. Textbook width
B. Desk height
C. Water bottle (around)
D. Doorway width
Measure Up • Lesson 1: Distance Detectives Page 1 of 2
Distance Detectives • Practice & Language Lab
Name: ________________________
Part 3: Read the Centimeter Ruler
Look at where each bar starts and ends. Write the length in centimeters (cm).
Bar A:
Bar B:
Bar C:
cm
0
1
2
3
4
5
6
7
8
9
10
Bar A length:
Bar B length:
Bar C length (starts at 2):
Part 4: Language Lab — Explain & Compare
Use the Word Bank and sentence frames to write complete sentences.
1. Explain which tool you used at Station C (water bottle) and why.
Frame: To measure the water bottle, I used a _______ because _______.
2. Compare Bar A and Bar B from Part 3 using longer or shorter .
Frame: Bar _______ is _______ than Bar _______ by _______ cm.
3. Why is it important to start at 0 on a ruler?
Measure Up • Lesson 1: Distance Detectives Page 2 of 2
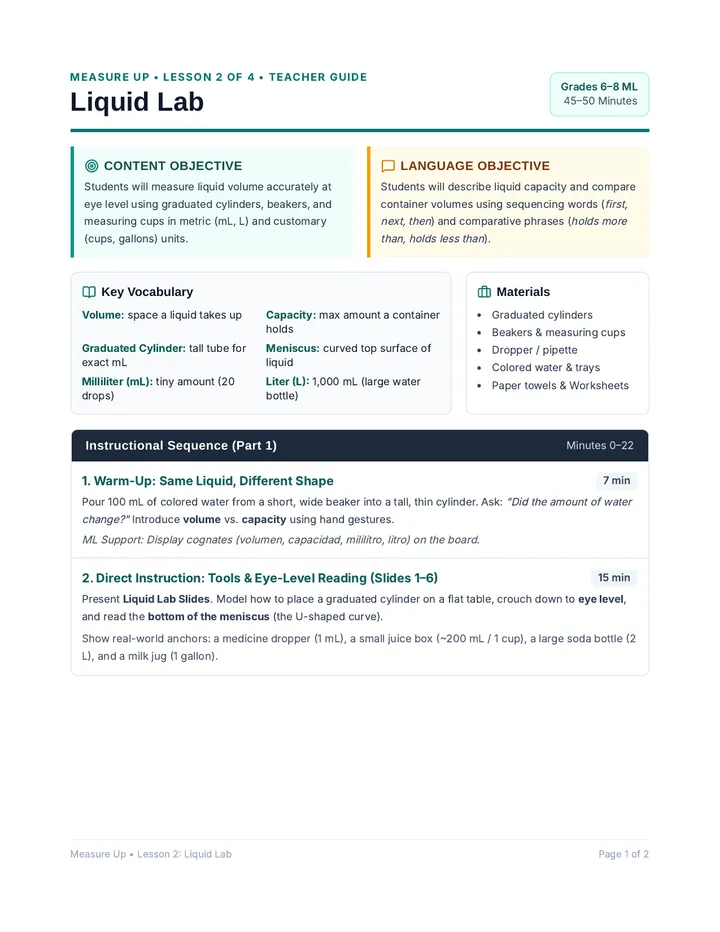
Liquid Lab Lesson Plan Measure Up • Lesson 2 of 4 • Teacher Guide
Liquid Lab
Grades 6–8 ML
45–50 Minutes
Content Objective
Students will measure liquid volume accurately at eye level using graduated cylinders, beakers, and measuring cups in metric (mL, L) and customary (cups, gallons) units.
Language Objective
Students will describe liquid capacity and compare container volumes using sequencing words (first, next, then ) and comparative phrases (holds more than, holds less than ).
Key Vocabulary
Volume: space a liquid takes up
Capacity: max amount a container holds
Graduated Cylinder: tall tube for exact mL
Meniscus: curved top surface of liquid
Milliliter (mL): tiny amount (20 drops)
Liter (L): 1,000 mL (large water bottle)
Materials
Graduated cylinders
Beakers & measuring cups
Dropper / pipette
Colored water & trays
Paper towels & Worksheets
Instructional Sequence (Part 1)
Minutes 0–22
1. Warm-Up: Same Liquid, Different Shape 7 min
Pour 100 mL of colored water from a short, wide beaker into a tall, thin cylinder. Ask: "Did the amount of water change?" Introduce volume vs. capacity using hand gestures.
ML Support: Display cognates (volumen, capacidad, mililitro, litro) on the board.
2. Direct Instruction: Tools & Eye-Level Reading (Slides 1–6) 15 min
Present Liquid Lab Slides . Model how to place a graduated cylinder on a flat table, crouch down to eye level , and read the bottom of the meniscus (the U-shaped curve).
Show real-world anchors: a medicine dropper (1 mL), a small juice box (~200 mL / 1 cup), a large soda bottle (2 L), and a milk jug (1 gallon).
Measure Up • Lesson 2: Liquid Lab Page 1 of 2
Liquid Lab • Facilitation & Supports
Minutes 23–50
Instructional Sequence (Part 2)
Minutes 23–50
3. Guided Practice: Pour & Read Stations 15 min
In pairs, students rotate through 4 tray stations, practicing eye-level reading and recording results on Part 2 of their worksheet:
Station A: Small vial (Graduated cylinder, mL)
Station B: Coffee mug (Measuring cup, mL or cups)
Station C: Spoonful of water (Pipette/dropper, mL)
Station D: Pitcher or bottle (Beaker/jug, L or qt)
4. Independent Practice & Language Wrap-Up 13 min
Students complete Parts 3 and 4 of the Liquid Lab Worksheet (reading cylinder diagrams and writing procedural/comparative sentences). Pair students to check meniscus readings together.
Tiered ML Sentence Frames (WIDA Aligned)
Emerging: "The container holds _____ mL. I used a _____."
Expanding: "First, I poured the liquid into a _____. Then, I read the meniscus at _____ mL."
Bridging: "Container A has a greater capacity than Container B because it holds _____ more mL."
Watch Out For
Reading the cylinder while holding it up in the air (tilted) instead of on a flat table.
Reading the top edge of the meniscus instead of the bottom curve.
Misreading scale intervals (e.g., counting by 1s when each tick mark is 2 mL or 5 mL).
Quick Differentiation
Newcomers: Provide a visual step-by-step card ("1. Flat table → 2. Eye level → 3. Bottom curve").Extension: Challenge students to convert mL to L (e.g., 500 mL = 0.5 L) or compare fl oz to mL.
Measure Up • Lesson 2: Liquid Lab Page 2 of 2
Liquid Lab Slides Measure Up • Lesson 2 🧪 Liquid Volume
Liquid Lab
How do we measure how much liquid a container holds?
Content Goal
Measure liquid volume accurately using lab and kitchen tools.
Language Goal
Describe steps and compare capacities using full sentences.
Key Concepts
Volume vs. Capacity
💧
Liquid Volume
How much space the liquid takes up right now.
Example: 250 mL of water inside a bottle.
🫙
Capacity
The maximum amount a container can hold when full.
Example: A 1-liter bottle has a capacity of 1 L.
Measurement Tools
Pick the Right Tool
🧪
Graduated Cylinder
Tall, thin tube for very exact science measurements.
Units: mL
🥛
Measuring Cup
Used for cooking and larger kitchen liquids.
Units: cups, fl oz, mL
💉
Dropper / Pipette
Used for tiny amounts of liquid, one drop at a time.
Units: mL
Units & Benchmarks
Metric vs. US Customary
Metric System
1 milliliter (mL) ≈ 20 drops of water250 mL ≈ 1 small juice box1 liter (L) = 1,000 mL (reusable bottle)2 liters (L) = large family soda bottle
US Customary System
1 cup (c) = 8 fluid ounces (small mug)1 pint (pt) = 2 cups (ice cream tub)1 quart (qt) = 2 pints (tall milk carton)1 gallon (gal) = 4 quarts (big milk jug)
Lab Technique
3 Steps to Read a Cylinder
1
Place on a Flat Table
Never hold the cylinder in the air while reading it.
2
Look at Eye Level
Bend down so your eyes match the liquid line.
3
Read the Bottom of the Meniscus
Read the lowest point of the U-shaped curve.
Speak & Write
Talk Like a Scientist
Sequencing Your Steps
"First, I poured the liquid. Then, I read ________ mL at eye level."
Comparing Capacity
"The ________ holds more / less liquid than the ________."
Explaining Tool Choice
"I chose a ________ because the amount was ________."
Liquid Lab Worksheet Measure Up • Lesson 2
Liquid Lab Worksheet
Liquid Volume
Name:
Date:
Word Bank
graduated cylinder measuring cup dropper meniscus milliliters (mL) liters (L) capacity
Part 1: Choose the Best Unit or Tool
Circle the best answer for each liquid measurement.
1. Medicine in a small spoon
A. Milliliters (mL)
B. Liters (L)
C. Gallons (gal)
2. Water in a large classroom fish tank
A. Drops
B. Milliliters (mL)
C. Liters (L) or Gallons (gal)
3. Tool for exact 35 mL in science lab
A. Graduated cylinder
B. Soup ladle
C. Gallon jug
4. Tool for 2 cups of milk in a recipe
A. Dropper
B. Measuring cup
C. Ruler
Part 2: Pour & Measure Station Lab
Visit each station. Estimate the capacity, choose a tool, and measure at eye level.
Container
My Estimate
Tool Used
Actual Volume
A. Small test vial
B. Coffee mug
C. Spoonful of water
D. Classroom pitcher
Measure Up • Lesson 2: Liquid Lab Page 1 of 2
Liquid Lab • Practice & Language Lab
Name: ________________________
Part 3: Read the Graduated Cylinders (mL)
Look at the water level in each cylinder. Write the volume in milliliters (mL).
Cylinder A
50 mL 40 mL 30 mL 20 mL 10 mL
Cylinder B
50 mL 40 mL 30 mL 20 mL 10 mL
Cylinder C
50 mL 40 mL 30 mL 20 mL 10 mL
Part 4: Language Lab — Sequence & Compare
Use the Word Bank and sentence frames to write complete sentences.
1. Explain how to read a graduated cylinder accurately.
Frame: First, place the cylinder on a _______. Then, look at the _______ at eye level.
2. Compare Cylinder B and Cylinder C from Part 3.
Frame: Cylinder _______ holds _______ mL more than Cylinder _______.
3. Which container in Part 2 had the greatest capacity? How do you know?
Measure Up • Lesson 2: Liquid Lab Page 2 of 2
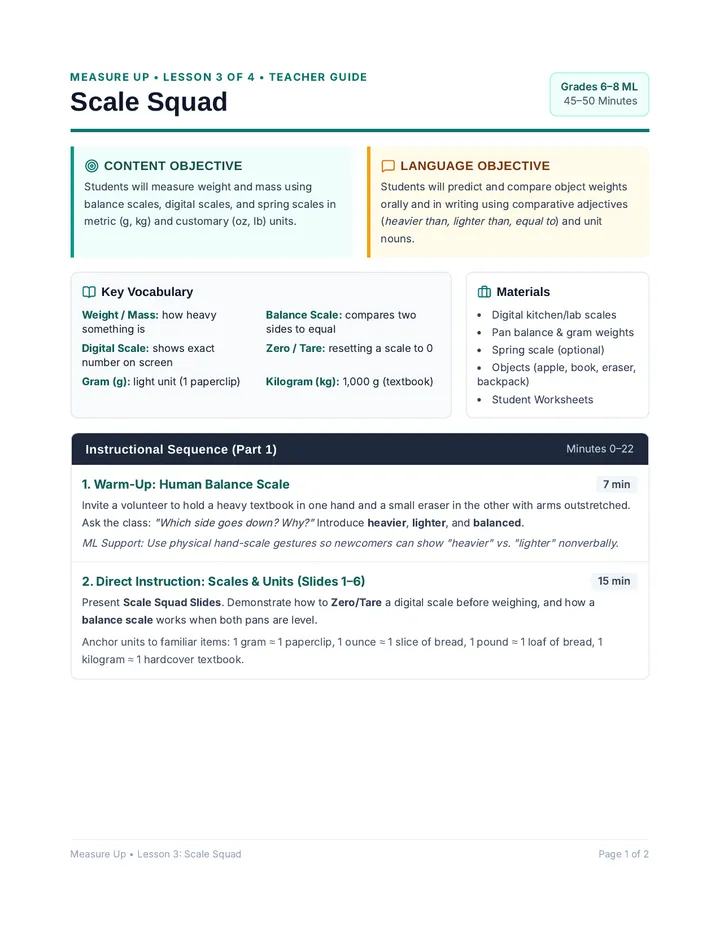
Scale Squad Lesson Plan Measure Up • Lesson 3 of 4 • Teacher Guide
Scale Squad
Grades 6–8 ML
45–50 Minutes
Content Objective
Students will measure weight and mass using balance scales, digital scales, and spring scales in metric (g, kg) and customary (oz, lb) units.
Language Objective
Students will predict and compare object weights orally and in writing using comparative adjectives (heavier than, lighter than, equal to ) and unit nouns.
Key Vocabulary
Weight / Mass: how heavy something is
Balance Scale: compares two sides to equal
Digital Scale: shows exact number on screen
Zero / Tare: resetting a scale to 0
Gram (g): light unit (1 paperclip)
Kilogram (kg): 1,000 g (textbook)
Materials
Digital kitchen/lab scales
Pan balance & gram weights
Spring scale (optional)
Objects (apple, book, eraser, backpack)
Student Worksheets
Instructional Sequence (Part 1)
Minutes 0–22
1. Warm-Up: Human Balance Scale 7 min
Invite a volunteer to hold a heavy textbook in one hand and a small eraser in the other with arms outstretched. Ask the class: "Which side goes down? Why?" Introduce heavier , lighter , and balanced .
ML Support: Use physical hand-scale gestures so newcomers can show "heavier" vs. "lighter" nonverbally.
2. Direct Instruction: Scales & Units (Slides 1–6) 15 min
Present Scale Squad Slides . Demonstrate how to Zero/Tare a digital scale before weighing, and how a balance scale works when both pans are level.
Anchor units to familiar items: 1 gram ≈ 1 paperclip, 1 ounce ≈ 1 slice of bread, 1 pound ≈ 1 loaf of bread, 1 kilogram ≈ 1 hardcover textbook.
Measure Up • Lesson 3: Scale Squad Page 1 of 2
Scale Squad • Facilitation & Supports
Minutes 23–50
Instructional Sequence (Part 2)
Minutes 23–50
3. Guided Practice: Weigh & Compare Stations 15 min
In pairs, students hold each object in their hands to estimate first, then weigh it at 4 stations and record on Part 2 of their worksheet:
Station A: Glue stick (Digital scale, g)
Station B: Apple or orange (Digital scale, g or oz)
Station C: Scissors vs. markers (Balance scale, g)
Station D: Backpack (Spring/floor scale, kg or lb)
4. Independent Practice & Language Wrap-Up 13 min
Students complete Parts 3 and 4 of the Scale Squad Worksheet (reading balance/dial scales and writing comparative sentences). Close with a quick "Heavier or Lighter?" oral partner check.
Tiered ML Sentence Frames (WIDA Aligned)
Emerging: "The _____ weighs _____ grams. It is _____ than the _____."
Expanding: "Before weighing, I pressed zero. Then, I found that the _____ is heavier than the _____."
Bridging: "Even though the _____ is larger in size, it has less mass than the _____."
Watch Out For
Assuming a bigger object is always heavier (size ≠ weight; e.g., sponge vs. rock).
Forgetting to press Zero / Tare when using a cup or tray on a digital scale.
Confusing g (grams) and oz (ounces) on dual-mode digital scales.
Quick Differentiation
Newcomers: Lock digital scales to grams (g) only; provide picture cards for station objects.Extension: Ask students to convert their gram measurements to kilograms (e.g., 250 g = 0.25 kg).
Measure Up • Lesson 3: Scale Squad Page 2 of 2
Scale Squad Slides Measure Up • Lesson 3 ⚖️ Weight & Mass
Scale Squad
How do we measure how heavy or light an object is?
Content Goal
Use scales to measure weight and mass in metric and customary units.
Language Goal
Compare objects using heavier, lighter, and equal in full sentences.
Key Concept
Bigger Does Not Mean Heavier!
🧽
Large & Light
A big sponge or pillow takes up lots of space, but it has very little mass.
🪨
Small & Heavy
A small metal weight or rock is tiny, but it is packed with mass!
Measurement Tools
Three Kinds of Scales
⚖️
Balance Scale
Compares two sides until both pans are level.
Units: g
📟
Digital Scale
Shows the exact weight on a screen. Has a Zero/Tare button.
Units: g, kg, oz, lb
🪝
Spring Scale
Uses a hook and spring to measure hanging objects.
Units: g, kg, lb
Units & Benchmarks
Metric vs. US Customary
Metric System (Mass)
1 gram (g) ≈ 1 metal paperclip100 grams (g) ≈ 1 small apple1 kilogram (kg) = 1,000 g (1 textbook)5 kilograms (kg) ≈ a heavy backpack
US Customary (Weight)
1 ounce (oz) ≈ 1 slice of bread1 pound (lb) = 16 oz (1 loaf of bread)10 pounds (lb) ≈ 1 bowling ball1 ton (T) = 2,000 lb (1 small car)
Accuracy Check
3 Steps for Accurate Weighing
1
Check for ZERO
Make sure the empty scale reads 0 before you start.
2
Center the Object
Place the object gently in the middle and keep hands off.
3
Check the Unit (g, kg, oz, lb)
Look closely at the screen or dial to record the right unit!
Speak & Write
Talk Like a Scientist
Stating Weight or Mass
"The ________ weighs ________ grams / pounds."
Comparing Two Objects
"The ________ is heavier / lighter than the ________."
Explaining a Surprise
"Even though the ________ is bigger, it is lighter than ________."
Scale Squad Worksheet Measure Up • Lesson 3
Scale Squad Worksheet
Weight & Mass
Name:
Date:
Word Bank
balance scale digital scale grams (g) kilograms (kg) pounds (lb) heavier lighter zero / tare
Part 1: Choose the Best Unit
Circle the best unit to measure the weight or mass of each item.
1. One metal paperclip
A. Grams (g)
B. Kilograms (kg)
C. Tons (T)
2. A full school backpack
A. Grams (g)
B. Kilograms (kg) or Pounds (lb)
C. Ounces (oz)
3. A delivery truck
A. Grams (g)
B. Ounces (oz)
C. Tons (T)
4. A slice of bread
A. Ounces (oz)
B. Pounds (lb)
C. Kilograms (kg)
Part 2: Weighing Station Lab
Hold each object to estimate first. Check that the scale starts at 0, then record the weight.
Object
My Estimate
Scale Used
Actual Weight / Mass
A. Glue stick
B. Apple or orange
C. Pair of scissors
D. Textbook or backpack
Measure Up • Lesson 3: Scale Squad Page 1 of 2
Scale Squad • Practice & Language Lab
Name: ________________________
Part 3: Read the Balanced Scales
Each scale is balanced (equal). Add the gram weights on the right to find the mass of the object.
Scale A: Marker
1 Marker
=
10 g 5 g 2 g
Total mass of 1 Marker:
Scale B: Notebook
1 Notebook
=
100 g 50 g 10 g
Total mass of 1 Notebook:
Part 4: Language Lab — Compare & Explain
Use the Word Bank and sentence frames to write complete sentences.
1. Compare the Marker and the Notebook from Part 3 using heavier or lighter .
Frame: The _______ is _______ than the _______ by _______ grams.
2. Explain why you should press Zero / Tare on a digital scale before weighing.
Frame: Before weighing, I press zero because _______.
3. Which object in Part 2 was heavier than you expected? Write a sentence about it.
Measure Up • Lesson 3: Scale Squad Page 2 of 2
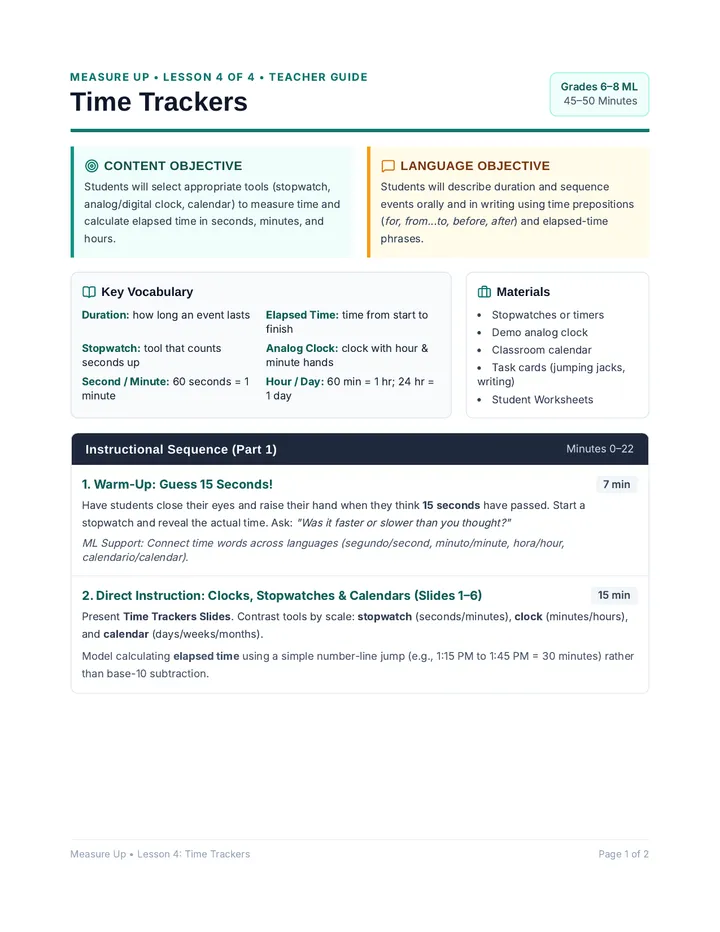
Time Trackers Lesson Plan Measure Up • Lesson 4 of 4 • Teacher Guide
Time Trackers
Grades 6–8 ML
45–50 Minutes
Content Objective
Students will select appropriate tools (stopwatch, analog/digital clock, calendar) to measure time and calculate elapsed time in seconds, minutes, and hours.
Language Objective
Students will describe duration and sequence events orally and in writing using time prepositions (for, from...to, before, after ) and elapsed-time phrases.
Key Vocabulary
Duration: how long an event lasts
Elapsed Time: time from start to finish
Stopwatch: tool that counts seconds up
Analog Clock: clock with hour & minute hands
Second / Minute: 60 seconds = 1 minute
Hour / Day: 60 min = 1 hr; 24 hr = 1 day
Materials
Stopwatches or timers
Demo analog clock
Classroom calendar
Task cards (jumping jacks, writing)
Student Worksheets
Instructional Sequence (Part 1)
Minutes 0–22
1. Warm-Up: Guess 15 Seconds! 7 min
Have students close their eyes and raise their hand when they think 15 seconds have passed. Start a stopwatch and reveal the actual time. Ask: "Was it faster or slower than you thought?"
ML Support: Connect time words across languages (segundo/second, minuto/minute, hora/hour, calendario/calendar).
2. Direct Instruction: Clocks, Stopwatches & Calendars (Slides 1–6) 15 min
Present Time Trackers Slides . Contrast tools by scale: stopwatch (seconds/minutes), clock (minutes/hours), and calendar (days/weeks/months).
Model calculating elapsed time using a simple number-line jump (e.g., 1:15 PM to 1:45 PM = 30 minutes) rather than base-10 subtraction.
Measure Up • Lesson 4: Time Trackers Page 1 of 2
Time Trackers • Facilitation & Supports
Minutes 23–50
Instructional Sequence (Part 2)
Minutes 23–50
3. Guided Practice: Beat the Clock Stations 15 min
In pairs, one student performs the task while the partner operates the stopwatch. Students estimate first, then record actual seconds on Part 2 of their worksheet:
Task A: Write your full name 3 times (sec)
Task B: Do 10 jumping jacks (sec)
Task C: Tie a shoe or zip a jacket (sec)
Task D: Count backward from 20 to 0 (sec)
4. Independent Practice & Sequence Synthesis 13 min
Students complete Parts 3 and 4 of the Time Trackers Worksheet (elapsed-time problems and language frames). Close with a 3-minute 4-corner review: name an item and have students point to Distance, Liquid, Weight, or Time .
Tiered ML Sentence Frames (WIDA Aligned)
Emerging: "It took _____ seconds to _____. I used a _____."
Expanding: "The activity lasted from _____ to _____, which is _____ minutes."
Bridging: "Although I estimated _____ seconds, the actual duration was _____ seconds faster/slower."
Watch Out For
Using base-10 subtraction across the hour (e.g., thinking 2:10 − 1:50 = 60 min instead of 20 min).
Confusing the hour hand (short) and minute hand (long) on analog clocks.
Forgetting to reset the stopwatch to 00:00 between trials.
Quick Differentiation
Newcomers: Use digital clocks/stopwatches and a visual 60-minute timeline strip for elapsed time.Extension: Ask students to calculate total seconds for 3 trials and find the average duration.
Measure Up • Lesson 4: Time Trackers Page 2 of 2
Time Trackers Slides Measure Up • Lesson 4 ⏱️ Time & Duration
Time Trackers
How do we measure how long an event or activity lasts?
Content Goal
Choose time tools and calculate elapsed time in seconds, minutes, and hours.
Language Goal
Describe duration and sequence events using time prepositions.
Measurement Tools
Pick the Right Time Tool
⏱️
Stopwatch / Timer
Best for short races, experiments, and quick tasks.
Units: sec, min
🕒
Analog & Digital Clock
Best for telling the time of day and class schedules.
Units: min, hr
📅
Calendar
Best for long periods of time across days and seasons.
Units: days, wk, mo, yr
Time Units
Time Uses 60, Not 100!
Short Time Units
1 second (sec) ≈ one heartbeat or blink60 seconds = 1 minute (min)60 minutes = 1 hour (hr)24 hours = 1 day
Long Time Units
7 days = 1 week (wk)4 weeks (28–31 days) ≈ 1 month (mo)12 months = 1 year (yr)365 days = 1 year
Problem Solving
Finding Elapsed Time
Example: Science class starts at 1:45 PM and ends at 2:30 PM. How long is class?
Step 1
1:45 → 2:00
+ 15 min
Step 2
2:00 → 2:30
+ 30 min
Total Time
15 + 30 =
45 minutes
Big Picture Review
Four Ways We Measure
📏 Distance / Length
Ruler, tape measure • cm, m, in, ft
🧪 Liquid Volume
Graduated cylinder, cup • mL, L, gal
⚖️ Weight / Mass
Balance, digital scale • g, kg, oz, lb
⏱️ Time / Duration
Stopwatch, clock, calendar • sec, min, hr
Speak & Write
Talk Like a Time Tracker
Stating Duration
"It took ________ seconds / minutes to ________."
Describing Elapsed Time
"From ________ to ________, the elapsed time is ________."
Choosing a Measurement Type
"To measure ________, I use a ________ in ________."
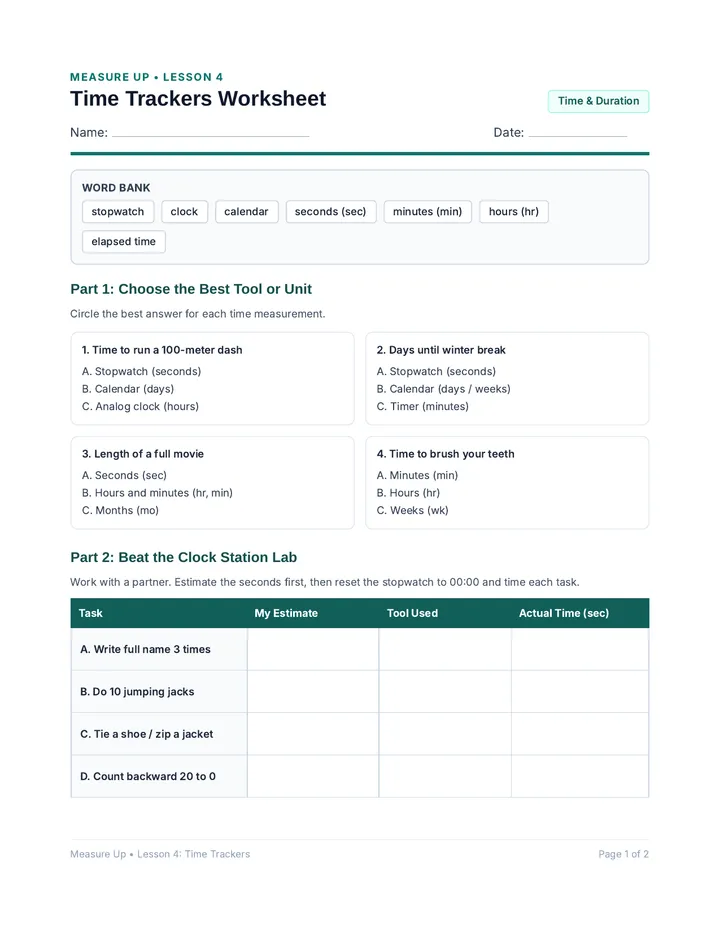
Time Trackers Worksheet Measure Up • Lesson 4
Time Trackers Worksheet
Time & Duration
Name:
Date:
Word Bank
stopwatch clock calendar seconds (sec) minutes (min) hours (hr) elapsed time
Part 1: Choose the Best Tool or Unit
Circle the best answer for each time measurement.
1. Time to run a 100-meter dash
A. Stopwatch (seconds)
B. Calendar (days)
C. Analog clock (hours)
2. Days until winter break
A. Stopwatch (seconds)
B. Calendar (days / weeks)
C. Timer (minutes)
3. Length of a full movie
A. Seconds (sec)
B. Hours and minutes (hr, min)
C. Months (mo)
4. Time to brush your teeth
A. Minutes (min)
B. Hours (hr)
C. Weeks (wk)
Part 2: Beat the Clock Station Lab
Work with a partner. Estimate the seconds first, then reset the stopwatch to 00:00 and time each task.
Task
My Estimate
Tool Used
Actual Time (sec)
A. Write full name 3 times
B. Do 10 jumping jacks
C. Tie a shoe / zip a jacket
D. Count backward 20 to 0
Measure Up • Lesson 4: Time Trackers Page 1 of 2
Time Trackers • Practice & Language Lab
Name: ________________________
Part 3: Find the Elapsed Time
Calculate how much time passes from Start Time to End Time. Remember: 60 minutes = 1 hour.
1. Lunch Break
Start: 11:30 AM
End: 12:05 PM
Elapsed Time:
2. Bus Ride
Start: 3:15 PM
End: 3:50 PM
Elapsed Time:
3. Soccer Practice
Start: 4:20 PM
End: 5:35 PM
Elapsed Time:
Part 4: Language Lab — Describe & Review All 4 Measurements
Use the Word Bank and sentence frames to write complete sentences.
1. Describe how long one task in Part 2 took you.
Frame: It took _______ seconds to _______. I measured it with a _______.
2. Describe the elapsed time for Soccer Practice in Part 3.
Frame: From _______ to _______, soccer practice lasted _______.
3. Sequence Review: Name one tool you would use to measure distance, liquid, weight, or time and tell what unit it uses.
Measure Up • Lesson 4: Time Trackers Page 2 of 2