Safety Squad Teacher GuideWEEK 1: SAFETY SQUAD Kitchen & Knife Fundamentals Teacher Guide Duration: 60-90 Mins Learning Goals Identify potential hazards in a kitchen setting. Demonstrate "Claw" and "Bridge" knife grips. Practice safe knife transport (blade down, by side). Explain the "Blood Circle" (personal space). Prep List Dull plastic knives (or nylon knives). Firm fruits/veggies (apples, cucumbers, celery). Cutting boards (one per student). "Hazard Hunt" worksheets. Instructional Steps 10 MIN The Safety Circle Gather students in a circle. Introduce the "Blood Circle" rule: if you can touch someone with your arm extended, you are too close for knife work. Discuss: Why do we stay focused in the kitchen? 15 MIN Hazard Hunt Activity Distribute worksheets. Students must spot the "Danger Zones" in the illustration (spills, handles facing out, sharp objects). Review answers as a group. 20 MIN Grip It to Rip It Demonstrate the **Claw Grip** (fingertips tucked) and the **Bridge Grip** (knife goes under the "arch" of the hand). Have students practice on "air" before moving to food. 30 MIN Hero Hummus Practice Hand out veggies. Students use their new grips to cut dipping sticks for hummus. Circulate and correct grips constantly. Focus: Consistency, not speed. Kitchen Talk Claw Grip: Holding food with fingertips tucked in away from the blade. Bridge Grip: Forming a bridge with your hand for the knife to pass through. Hazard: Something that could cause an accident or injury.
Hazard Hunter WorksheetHazard Hunter WEEK 1 • SAFETY SQUAD Hero Name Date Kitchen Heroes are always on the lookout for danger! Before we start cooking, we have to make sure our "lab" is safe. Can you spot the mistakes? Grip Match-Up Draw a line to match the grip to its description: Bridge Grip Tucking your fingertips in like a cat's paw to keep them away from the sharp blade. Claw Grip Making a "tunnel" with your hand so the knife can safely slide through underneath. Safety Checklist Never walk with a knife facing out. Keep pot handles turned in. Wipe up spills immediately. Always ask a Hero Captain (Adult) for help. What's wrong with this kitchen? Imagine a kitchen where a pot handle is hanging over the edge and there is water on the floor. What might happen? Certified Safe Chef
Hero Hummus Recipe CardHERO HUMMUS Skills: Knife Grips & Dipping 15 Minutes Ingredients 1 can Chickpeas 1 clove Garlic 2 tbsp Olive Oil 1/2 Lemon (Juiced) Pinch of Salt The "Dippers": Cucumbers Carrots Bell Peppers Hero Instructions 1 Drain & Rinse: Open the chickpeas and wash them in a colander until the bubbles are gone. Hero tip: Rinsing makes them taste better! 2 Smash & Mix: In a bowl, use a fork to smash the chickpeas until they are chunky. Add the oil, lemon, salt, and garlic. 3 Knife Skill Challenge: Use your Bridge Grip to cut the cucumbers in half long-ways. Use your Claw Grip to cut them into sticks. 4 The Plunge: Arrange your veggie sticks on a plate and scoop your hummus into a small bowl. Happy dipping! Lesson Focus: Focus on the Claw and Bridge while cutting the dippers!
Safety Squad Teacher GuideWEEK 1: SAFETY SQUAD Kitchen & Knife Fundamentals Teacher Guide Duration: 60-90 Mins Learning Goals Identify potential hazards in a kitchen setting. Demonstrate "Claw" and "Bridge" knife grips. Practice safe knife transport (blade down, by side). Explain the "Blood Circle" (personal space). Prep List Dull plastic knives (or nylon knives). Firm fruits/veggies (apples, cucumbers, celery). Cutting boards (one per student). "Hazard Hunt" worksheets. Hummus (Store-bought or pre-made using recipe card). Instructional Steps 10 MIN The Safety Circle Gather students in a circle. Introduce the "Blood Circle" rule: if you can touch someone with your arm extended, you are too close for knife work. Discuss: Why do we stay focused in the kitchen? 15 MIN Hazard Hunt Activity Distribute worksheets. Students must spot the "Danger Zones" in the illustration (spills, handles facing out, sharp objects). Review answers as a group. 20 MIN Grip It to Rip It Demonstrate the Claw Grip (fingertips tucked) and the Bridge Grip (knife goes under the "arch" of the hand). Have students practice on "air" before moving to food. 30 MIN Hero Hummus Practice Hand out veggies. Students use their new grips to cut dipping sticks for hummus. Circulate and correct grips constantly. Focus: Consistency, not speed. (Refer to Hero Hummus Recipe Card for specific cuts). Kitchen Talk Claw Grip: Holding food with fingertips tucked in away from the blade. Bridge Grip: Forming a bridge with your hand for the knife to pass through. Hazard: Something that could cause an accident or injury.
Hazard Hunter WorksheetHazard Hunter WEEK 1 • SAFETY SQUAD Hero Name Date Kitchen Heroes are always on the lookout for danger! Before we start cooking, we have to make sure our "lab" is safe. Can you spot the mistakes? Grip Match-Up Draw a line to match the grip to its description: Bridge Grip Tucking your fingertips in like a cat's paw to keep them away from the sharp blade. Claw Grip Making a "tunnel" with your hand so the knife can safely slide through underneath. Safety Checklist Never walk with a knife facing out. Keep pot handles turned in. Wipe up spills immediately. Always ask a Hero Captain (Adult) for help. What's wrong with this kitchen? Imagine a kitchen where a pot handle is hanging over the edge and there is water on the floor. What might happen? Certified Safe Chef
Safety Squad Teacher GuideWEEK 1: SAFETY SQUAD Kitchen & Knife Fundamentals Teacher Guide Duration: 60-90 Mins Learning Goals Identify potential hazards in a kitchen setting. Demonstrate "Claw" and "Bridge" knife grips. Practice safe knife transport (blade down, by side). Explain the "Blood Circle" rule for personal space. Prep List Dull plastic/nylon knives. Firm produce (apples, cucumbers, celery). Cutting boards (one per student). "Hazard Hunt" worksheets. Hummus (refer to recipe card). Instructional Steps Welcome Hero Huddle (5 MIN) Gather in a circle. Introduce yourself and have students share their name and one thing they are excited to cook this semester. Step 1 The Safety Circle (10 MIN) Introduce the "Blood Circle" rule: no knife work if you can touch someone. Discuss: Why do we stay focused in the kitchen? Step 2 Hazard Hunt Activity (15 MIN) Distribute worksheets. Students must spot the danger zones (spills, handles out). Review as a group. Step 3 Grip It to Rip It (20 MIN) Demonstrate Claw Grip and Bridge Grip. Practice on air first before moving to veggies. Step 4 Hero Hummus Practice (20 MIN) Students use their grips to cut dipping sticks. Focus on consistency and safety over speed. Reflect Hero Debrief (5 MIN) Clean up stations. Each student shares one safety rule they will use at home this week. Kitchen Talk Claw Grip: Holding food with fingertips tucked away from the blade. Bridge Grip: Forming a bridge with your hand for the knife to slide under. Hazard: Something that could cause an accident or injury.
Hazard Hunter WorksheetHazard Hunter WEEK 1 • SAFETY SQUAD Hero Name Date Kitchen Heroes are always on the lookout for danger! Before we start cooking, we have to make sure our "lab" is safe. Can you spot the mistakes? Grip Match-Up Draw a line to match the term to the CORRECT definition: Bridge Grip Tucking your fingertips in like a cat's paw to keep them away from the sharp blade. Claw Grip Making a "tunnel" with your hand so the knife can safely slide through underneath. Safety Checklist Never walk with a knife facing out. Keep pot handles turned in. Wipe up spills immediately. Always ask a Hero Captain (Adult) for help. What's wrong with this kitchen? Imagine a kitchen where a pot handle is hanging over the edge and there is water on the floor. What might happen? Certified Safe Chef
Safety Squad Teacher GuideWEEK 1: SAFETY SQUAD Kitchen & Knife Fundamentals Teacher Guide Duration: 60-90 Mins Learning Goals Identify potential hazards in a kitchen setting. Demonstrate "Claw" and "Bridge" knife grips. Practice safe knife transport (blade down, by side). Explain the "Blood Circle" rule for personal space. Prep List Dull plastic/nylon knives. Firm produce (apples, cucumbers, celery). Cutting boards (one per student). "Hazard Hunt" worksheets. Hummus (refer to Hero Hummus Recipe Card). Instructional Steps Warm Welcome Hero Huddle (5 MIN) Gather in a circle. Introduce yourself. Have students share their name and one thing they are excited to cook. Step 1 The Safety Circle (10 MIN) Explain "Blood Circle" rule. Discuss: Why do we stay focused? Practice transport (knife at side). Step 2 Hazard Hunt (15 MIN) Distribute "Hazard Hunter" worksheets. Spot errors in the illustration. Review as a group. Step 3 Grip Training (20 MIN) Demo Claw Grip and Bridge Grip. Practice on apples/cukes. Consistency over speed! Reflect Hero Debrief (5 MIN) Clean up. Ask: "What is one tool we use safely?" and "Name one safety rule to tell your family today." Kitchen Talk Claw Grip: Holding food with fingertips tucked safely away from the blade. Bridge Grip: Forming an arch with your hand for the knife to slide under. Hazard: Anything that could cause an accident, like a spill or a sharp edge.
Germ Buster Teacher GuideWEEK 2: GERM BUSTER LAB Hygiene, Bacteria & The Danger Zone Teacher Guide Duration: 60 Mins Learning Goals Identify the "Danger Zone" (40°F - 140°F). Explain the concept of cross-contamination. Practice 20-second hand washing. Understand proper food storage (Top to bottom). The "Invisible Enemies" Bacteria can't be seen, but they love the kitchen! This lesson focuses on making these invisible germs "visible" through experiments and strict routines. Lesson Flow 00-10 MIN: **Glitter Germs.** Put a tiny bit of glitter on your hand and shake a student's hand. See how it spreads! Explain that germs are like glitter—they stick to everything. 10-25 MIN: **The Danger Zone.** Use a thermometer visual. Explain that between 40°F and 140°F, bacteria "throw a party" and multiply fast. 25-40 MIN: **Cross-Contamination.** Explain why we never put cooked meat back on the plate that held raw meat. Discuss "Cutting Board Colors" (optional). 40-60 MIN: **Veggie Rainbow Wraps.** Practice washing produce thoroughly before prep. Focus on clean stations. 140° Too Hot for Germs ZONE Bacteria Party! 40° Hibernation
Germ Lab Report WorksheetGerm Lab Report WEEK 2 • GERM BUSTER LAB Hero Name Date Challenge 1: The Danger Zone Bacteria love temperatures where they can grow. Color the thermometer below. Use RED for the Danger Zone where bacteria grow the fastest! 212°F 140°F 40°F 32°F What are the two numbers for the Danger Zone? to degrees Fahrenheit How long should you wash your hands? Challenge 2: Cross-Contamination Detective Is the chef being safe or creating a "germ bridge"? Write SAFE or DANGER. 1. Using the same knife to cut raw chicken and then lettuce. 2. Washing a cutting board with hot soapy water after using it. 3. Licking a spoon while cooking and putting it back in the pot. Why is it important to keep cold foods in the refrigerator?
Rainbow Wraps Recipe CardRainbow Wraps Skills: Scrubbing & Veggie Prep 20 Minutes Ingredients Whole Wheat Tortillas Cream Cheese or Hummus Grated Carrots (Orange) Purple Cabbage Spinach (Green) Yellow Bell Pepper Scrub & Prep Steps 1 The Scrub Down: Wash all your vegetables under cool running water. Rub them with your fingers to get rid of any hidden dirt or "glitter germs." 2 Spread It: Lay your tortilla flat. Spread a thin layer of cream cheese or hummus all the way to the edges. 3 Rainbow Row: Arrange your veggies in colorful rows across the middle of the tortilla. Don't overfill, or it won't close! 4 The Hero Roll: Roll it up tight like a sleeping bag. Ask a Hero Captain to help you slice it in half with your Bridge Grip! KEEP REFRIGERATED BELOW 40°F UNTIL READY TO EAT! Germ Buster Approved
Germ Buster Teacher GuideWEEK 2: GERM BUSTER LAB Hygiene, Bacteria & The Danger Zone Teacher Guide Duration: 60 Mins Learning Goals Identify the "Danger Zone" (40°F - 140°F). Explain the concept of cross-contamination. Practice 20-second hand washing. Understand cutting board color standards. Cutting Board Standards <table class="w-full text-[10px] border-collapse"><tbody><tr class="border-b border-orange-200"><td class="py-1 font-bold text-red-600">RED</td><td class="py-1">Raw Red Meat</td></tr><tr class="border-b border-orange-200"><td class="py-1 font-bold text-yellow-600">YELLOW</td><td class="py-1">Raw Poultry (Chicken)</td></tr><tr class="border-b border-orange-200"><td class="py-1 font-bold text-green-600">GREEN</td><td class="py-1">Produce & Fruit</td></tr><tr class="border-b border-orange-200"><td class="py-1 font-bold text-blue-600">BLUE</td><td class="py-1">Cooked Foods / Bread</td></tr></tbody></table> Lesson Flow 00-10 MIN: Glitter Germs. Put a tiny bit of glitter on your hand and shake a student's hand. See how it spreads! Explain that germs are like glitter—they stick to everything. 10-25 MIN: The Danger Zone. Use the thermometer visual below. Explain that between 40°F and 140°F, bacteria "throw a party" and multiply fast. 25-40 MIN: Cross-Contamination. Discuss why we never put cooked food back on a plate that held raw food. Review cutting board colors. 40-60 MIN: Veggie Rainbow Wraps. Practice washing produce thoroughly before prep. Focus on clean stations. 140° Too Hot for Germs ZONE Bacteria Party! 40° Hibernation
Germ Lab Report WorksheetGerm Lab Report WEEK 2 • GERM BUSTER LAB Hero Name Challenge 1: The Danger Zone Bacteria love temperatures where they can grow. Color the thermometer below. Use RED for the Danger Zone where bacteria grow the fastest! 212°F 140°F 40°F 32°F What are the two numbers for the Danger Zone? to degrees Fahrenheit How long should you wash your hands? Challenge 2: Cross-Contamination Detective Is the chef being safe or creating a "germ bridge"? Write SAFE or DANGER. 1. Using the same knife to cut raw chicken and then lettuce. 2. Washing a cutting board with hot soapy water after using it. 3. Licking a spoon while cooking and putting it back in the pot. Why is it important to keep cold foods in the refrigerator?
Germ Buster Teacher GuideWEEK 2: GERM BUSTER LAB Hygiene, Bacteria & The Danger Zone Teacher Guide Duration: 60 Mins Learning Goals Identify the "Danger Zone" (40°F - 140°F). Explain the concept of cross-contamination. Practice 20-second hand washing. Understand cutting board color standards. Board Colors <table class="w-full text-[10px] border-collapse"><tbody><tr class="border-b border-orange-200"><td class="py-1 font-black text-red-600">RED</td><td class="py-1">Raw Red Meat</td></tr><tr class="border-b border-orange-200"><td class="py-1 font-black text-yellow-500">YELLOW</td><td class="py-1">Raw Poultry</td></tr><tr class="border-b border-orange-200"><td class="py-1 font-black text-green-600">GREEN</td><td class="py-1">Produce / Fruit</td></tr><tr><td class="py-1 font-black text-blue-600">BLUE</td><td class="py-1">Cooked / Bread</td></tr></tbody></table> Instructional Steps Welcome: Germ Check (5 MIN). Welcome students. Ask if they know what "glitter germs" are. Play a quick 20-second song to practice hand-wash timing. Step 1: Glitter Germs (10 MIN). Use glitter to show how bacteria spreads through touch. Step 2: The Danger Zone (15 MIN). Bacteria "party" between 40-140 degrees. Use the visual below. Step 3: Cross-Contamination (10 MIN). Review board colors and why washing between tasks matters. Step 4: Rainbow Wraps (15 MIN). Prep wraps with heavy focus on hygiene. Reflect: Germ Buster Pledge (5 MIN). Gather together. Have students raise their right hand and pledge to keep a clean station at home. 140° Too Hot ZONE Germ Party! 40° Hibernation
Germ Lab Report WorksheetGerm Lab Report WEEK 2 • GERM BUSTER LAB Hero Name Challenge 1: The Danger Zone Bacteria love temperatures where they can grow. Color the thermometer below. Use RED for the Danger Zone where bacteria grow the fastest! 212°F 140°F 40°F 32°F Danger Zone Numbers: to Degrees Hand Wash Time: Challenge 2: Cross-Contamination Write SAFE or DANGER in the box: 1. Using the same knife to cut raw chicken and then lettuce. 2. Washing a cutting board with hot soapy water after use. Why is it important to keep cold foods in the refrigerator?
Germ Buster Teacher GuideWEEK 2: GERM BUSTER LAB Hygiene, Bacteria & The Danger Zone Teacher Guide Duration: 60 Mins Learning Goals Identify the "Danger Zone" (40°F - 140°F). Explain cross-contamination concept. Practice 20-second hand washing. Understand cutting board standards. Board Colors <table class="w-full text-xs border-collapse leading-tight font-bold"><tbody><tr class="border-b border-orange-200"><td class="py-1 text-red-600 uppercase">RED</td><td class="py-1 font-medium text-[10px]">Raw Red Meat</td></tr><tr class="border-b border-orange-200"><td class="py-1 text-yellow-600 uppercase">YELLOW</td><td class="py-1 font-medium text-[10px]">Raw Poultry</td></tr><tr class="border-b border-orange-200"><td class="py-1 text-green-600 uppercase">GREEN</td><td class="py-1 font-medium text-[10px]">Produce / Fruit</td></tr><tr><td class="py-1 text-blue-600 uppercase">BLUE</td><td class="py-1 font-medium text-[10px]">Cooked / Bread</td></tr></tbody></table> Instructional Steps Warm Welcome Germ Check (5 MIN) Welcome students. Ask: "Can we see bacteria?" Play a quick 20-second song to practice hand-wash timing. Step 1 Glitter Germs (10 MIN) Use glitter to show how bacteria spreads through touch. Discuss why we wash hands after touching raw meat or hair. Step 2 The Danger Zone (15 MIN) Use the visual below. Bacteria "party" and multiply between 40-140 degrees. Step 3 Rainbow Wraps (20 MIN) Prepare veggie wraps. Focus on thorough produce washing and clean stations. Refer to Rainbow Wraps Recipe Card. Reflect Germ Buster Pledge (5 MIN) Students share one way they will prevent cross-contamination at home this week. 140° Too Hot ZONE Party! 40° Hibernation
Germ Buster Teacher GuideWEEK 2: GERM BUSTER LAB Hygiene, Bacteria & The Danger Zone Teacher Guide Duration: 60 Mins Learning Goals Identify the "Danger Zone" (40°F - 140°F). Explain cross-contamination concept. Practice 20-second hand washing. Understand cutting board standards. Board Colors <table class="w-full text-xs border-collapse leading-tight font-bold"><tbody><tr class="border-b border-orange-200"><td class="py-1 text-red-600 uppercase">RED</td><td class="py-1 font-medium text-[10px]">Raw Red Meat</td></tr><tr class="border-b border-orange-200"><td class="py-1 text-yellow-600 uppercase">YELLOW</td><td class="py-1 font-medium text-[10px]">Raw Poultry</td></tr><tr class="border-b border-orange-200"><td class="py-1 text-green-600 uppercase">GREEN</td><td class="py-1 font-medium text-[10px]">Produce / Fruit</td></tr><tr><td class="py-1 text-blue-600 uppercase">BLUE</td><td class="py-1 font-medium text-[10px]">Cooked / Bread</td></tr></tbody></table> Instructional Steps Warm Welcome Germ Check (5 MIN) Welcome students. Ask: "Can we see bacteria?" Play a quick 20-second song to practice hand-wash timing. Step 1 Glitter Germs (10 MIN) Use glitter to show how bacteria spreads through touch. Discuss why we wash hands after touching raw meat or hair. Step 2 The Danger Zone (15 MIN) Use the visual below. Bacteria "party" and multiply between 40-140 degrees. Step 3 Rainbow Wraps (20 MIN) Prepare veggie wraps. Focus on thorough produce washing and clean stations. Refer to Rainbow Wraps Recipe Card. Reflect Germ Buster Pledge (5 MIN) Students share one way they will prevent cross-contamination at home this week. 140° Too Hot ZONE Party! 40° Hibernation
Allergy Allies Teacher GuideWEEK 3: ALLERGY ALLIES The Big 9 & Hidden Ingredients Teacher Guide Duration: 60 Mins Compassion & Care Food allergies can be scary. This lesson isn't just about science—it's about empathy and learning how to keep our friends and ourselves safe while eating. The "Big 9" Milk Eggs Fish Shellfish Tree Nuts Peanuts Wheat Soy Sesame Instructional Steps 15m What is an Allergy? Explain that an allergy is like a "false alarm" in the body. The body thinks a food is an enemy and tries to fight it. Discuss symptoms (hives, tummy ache, trouble breathing). 15m Label Detective Practice Bring in empty food packages. Show students where the "Contains:" statement is located at the bottom of the ingredient list. Have them hunt for specific allergens. 30m Sunflower Butter Bites Prepare a nut-free snack. Discuss safe substitutions (Sunflower butter instead of Peanut butter). Emphasize: **Always ask before sharing food.** Golden Rule: When in doubt, leave it out!
Label Detective WorksheetLabel Detective Week 3 • Allergy Allies Hero Name Challenge 1: The Allergen Hunt Look at the list of ingredients below. Can you find the "Big 9" allergens hidden in the list? Circle them! INGREDIENTS: WHOLE WHEAT FLOUR, WATER, SUGAR, SOYBEAN OIL, EGGS, YEAST, MILK, SESAME SEEDS, NATURAL FLAVORS. LIST THE ALLERGENS YOU FOUND: WHERE DO YOU USUALLY FIND THE WARNING? Top of the list Bottom of the list Challenge 2: The Allergy Hero Rule Circle the correct word to finish the Kitchen Hero rules: Before sharing food with a friend, I should always ASK / RUN first. If a friend says their tummy hurts after eating, I should find a DOG / HERO CAPTAIN (ADULT). Washing my FEET / HANDS after eating helps keep my friends with allergies safe. Safe Substitutions If your friend is allergic to PEANUTS, what could you use instead of Peanut Butter?
Sunny Butter Bites Recipe CardSunny Butter Bites Skills: Nut-Free Substitution 15 Minutes Safe Mix 1/2 cup Sunflower Butter 1 cup Rolled Oats 2 tbsp Honey or Maple Syrup 1/4 cup Mini Chocolate Chips Pinch of Cinnamon "Always check the oats are Gluten-Free if you have a wheat allergy hero!" Making the Bites 1 The Big Mix: In a medium bowl, stir together the sunflower butter, oats, honey, and cinnamon. It will be very sticky—use a strong spoon! 2 Chip It: Fold in the chocolate chips gently. Folding means stirring slowly in a circle to mix things without smashing them. 3 The Scoop: Use a small spoon to scoop out a golf-ball sized portion. Roll it between your clean hands into a smooth ball. 4 The Chill: Place the bites on a tray. If you can wait, let them chill in the fridge for 10 minutes to help them stay together! 100% NUT-FREE & HERO APPROVED
Allergy Allies Teacher GuideWEEK 3: ALLERGY ALLIES The Big 9 & Hidden Ingredients Teacher Guide Duration: 60 Mins Compassion & Care Allergies can be scary. This lesson isn't just about science—it's about empathy and learning how to keep our friends safe. The "Big 9" Milk Eggs Fish Shellfish Tree Nuts Peanuts Wheat Soy Sesame Instructional Steps Intro Circle of Care (5m) Welcome students. Share a story about helping a friend. Discuss why checking in with friends before sharing food is a "Hero Move." Step 1 False Alarms (10m) Explain that an allergy is like a "false alarm" in the body. Body fights a safe food. Discuss symptoms and staying calm. Step 2 Label Detective Practice (15m) Hunt for "Contains:" statements on empty packages. Identify the Big 9 hidden in ingredient lists. Step 3 Sunflower Butter Bites (25m) Prepare the nut-free snack. Discuss safe substitutions. Always ask before sharing! Reflect Compassion Check (5m) While eating, have each student share one thing they will do to keep their school cafeteria safe for others. Golden Rule: When in doubt, leave it out!
Allergy Allies Teacher GuideWEEK 3: ALLERGY ALLIES The Big 9 & Hidden Ingredients Teacher Guide Duration: 60 Mins Compassion First Allergies can be scary. This lesson focuses on empathy and proactive communication to keep our kitchen community safe for everyone. The "Big 9" Milk Eggs Fish Shellfish Tree Nuts Peanuts Wheat Soy Sesame Instructional Steps Warm Welcome Circle of Care (5m) Welcome students. Share a story about helping a friend. Discuss why checking in with friends before sharing food is a "Hero Move." Step 1 Body False Alarms (10m) Explain allergies as "False Alarms." Discuss symptoms and staying calm. Action: Locate the Big 9 in the room. Step 2 Label Hunting (15m) Examine empty packaging. Identify where "Contains:" statements are found. Practice reading ingredient lists for hidden names. Step 3 Snack Creation (25m) Prepare Sunny Butter Bites (refer to Recipe Card). Discuss safe substitutions. Always ask before sharing! Reflect Compassion Check (5m) Clean up. Ask: "How can you be an Allergy Ally at your school cafeteria lunch table?" Rule: When in doubt, leave it out!
Nutrition Detective Teacher GuideWEEK 4: NUTRITION DETECTIVES Labels, Sugars & Serving Sizes Teacher Guide Duration: 75 Mins Today's Mission Food companies want us to buy their products, but as Nutrition Detectives, we look for the truth on the back of the box! We focus on identifying fiber (The Slow-Go) and added sugars (The Fast-Crash). Vocabulary Serving Size: How much you're "supposed" to eat. Fiber: Helps your tummy stay full and healthy. Added Sugars: Sugar put into food that isn't naturally there. Instructional Steps 15m The Sugar Stack Show a cereal box. Have students guess how many teaspoons of sugar are in one serving. Then, measure it out into a clear glass. Visual impact is key here! 20m Fiber vs. Sugar Game "High Fiber" gives long-lasting energy. "High Sugar" gives a quick burst and a crash. Discuss which snacks give them energy for sports or studying. 40m Overnight Oats Prep A "High-Fiber" champion recipe. Students build their own jars, choosing fruit for natural sweetness instead of added sugar. The Detective's Checklist 1. Look at the serving size first! 2. Check for "Added Sugars." 3. High Fiber = Happy Tummy. Nutrition Facts Serv Size: 1 Cup Fiber: 8g (Good!) Sugar: 20g (Whoa!)
Label Case File WorksheetLabel Case File Week 4 • Nutrition Detective Detective Name Case 1: The Serving Size Trick A Bag of Hero Chips says: Servings Per Container: 3 Sugar per serving: 10g If you eat the WHOLE BAG, how much sugar did you eat? 10g × 3 = Detective Tip: Always check how many servings are in the box! Case 2: The Energy Match Draw a line from the food component to the energy type it provides: FIBER SUGAR Fast burst of energy... then a CRASH. Slow and steady energy all afternoon. Case 3: Mystery Ingredients Ingredients are listed from **MOST** to **LEAST**. If SUGAR is the very first ingredient, what does that tell you? Verified Detective
Hero Fuel Oats Recipe CardHero Fuel Oats Skills: Fiber & Natural Sweetness 10 Minutes The Fuel 1/2 cup Rolled Oats 1/2 cup Milk or Yogurt 1 tsp Chia Seeds Natural Sweeteners: Sliced Berries Mash Banana Apple Chunks Build the Jar 1 Layer 1: Add the oats and chia seeds to a glass jar or plastic container. These are your "Fiber Champions"! 2 Layer 2: Pour in your milk or yogurt. Stir it well so all the oats get wet. 3 Flavor Boost: Add your fruits. If you want it sweeter, mash half a banana and mix it in. No added sugar needed! 4 The Long Nap: Close the lid and put it in the fridge overnight. While you sleep, the oats soften and turn into a delicious pudding. HIGH FIBER ENERGY FOR THE WHOLE DAY!
Nutrition Detective Teacher GuideWEEK 4: NUTRITION DETECTIVES Labels, Sugars & Serving Sizes Teacher Guide Duration: 75 Mins Today's Mission Focus on identifying fiber (The Slow-Go) and added sugars (The Fast-Crash). Teach students to look for the "Power Combo": Fiber + Natural Sugar. Ingredient Ratios • 1/2 Cup Rolled Oats • 1/2 Cup Milk (Dairy or Alt) • 1 Tsp Chia Seeds • 1/4 Cup Berries/Fruit Instructional Steps Welcome Agent Check-in (5m) Welcome your agents. Have them use their hands like binoculars to look for one "healthy" item in the room. Why did they pick it? Step 1 The Sugar Stack (15m) Measure sugar from cereal (1 tsp = 4g). Measure 3-4 tsp into a cup to show a 15g serving. Visual impact is key. Step 2 Fiber vs. Sugar Game (15m) Apple vs. Juice. Ask which gives steady energy? Explain fiber slows absorption. Step 3 Overnight Oats Prep (35m) Assemble jars. Discuss fruit as a "Hero Sweetener." Reflect Agent Debrief (5m) Clean up. Ask: "What was the most surprising thing you found on a label today?" Detective Checklist 1. Serving size first! 2. Check "Added Sugars." 3. High Fiber = Happy Tummy. Nutrition Facts Serv Size: 1 Cup Fiber: 8g (Hero!) Added Sugar: 20g
Label Case File WorksheetLabel Case File Week 4 • Nutrition Detective Detective Name Case 1: The Serving Size Trick A Bag of Hero Chips says: Servings Per Container: 3 Sugar per serving: 10g If you eat the WHOLE BAG, how much sugar did you eat? 10g × 3 = Detective Tip: Always check how many servings are in the box! Case 2: The Energy Match Draw a line from the food component to the energy type it provides: FIBER SUGAR Fast burst of energy... then a CRASH. Slow and steady energy all afternoon. Case 3: Mystery Ingredients Ingredients are listed from MOST to LEAST. If SUGAR is the very first ingredient, what does that tell you? Verified Detective
Label Case File WorksheetLabel Case File WEEK 4 • NUTRITION DETECTIVE Detective Name Case 1: The Serving Trick Servings Per Bag: 3 Sugar per serving: 10g Whole bag total sugar? 10g × 3 = Case 2: The Energy Match FIBER SUGAR Fast burst... then CRASH. Slow and steady energy. Case 3: Ingredient Order Ingredients go from MOST to LEAST. If SUGAR is #1, what does that mean? Verified Detective
Nutrition Detective Teacher GuideWEEK 4: NUTRITION DETECTIVES Labels, Sugars & Serving Sizes Teacher Guide Duration: 75 Mins Today's Mission Focus on identifying Fiber (Steady Energy) and Added Sugars (Quick Crash). Teach students that labels tell the whole story, but only if you look! Ingredient Ratios (per student) • 1/2 Cup Rolled Oats • 1/2 Cup Milk (Dairy or Alt) • 1 Tsp Chia Seeds • 1/4 Cup Berries / Fruit Instructional Steps Agent Welcome Check-in (5m) Welcome agents. Have them use hands like binoculars to find one "Power Choice" in the room (e.g., fruit bowl). Explain why it's fuel. Step 1 Sugar Stack (15m) Measure sugar from cereal (1 tsp = 4g). Put 4 tsp in a cup. Impact: Students see how much sugar is hidden in "one bowl." Step 2 Fiber vs Sugar Game (15m) Hold up two snacks (e.g. Apple vs Fruit Roll-up). Discuss: "Which gives 1 hour of energy? Which gives 15 mins?" Step 3 Oats Prep (30m) Assemble jars (refer to Hero Fuel Oats Recipe Card). Focus on fiber and natural sweetness. Reflect Agent Debrief (10m) Clean up. Ask: "What was the most surprising thing you read on a nutrition label today?" Detective Rules • Serving Size = First Clue • Added Sugar = The Red Flag • Fiber = The Hero Nutrition Facts Fiber: 8g (Hero!) Added Sugar: 20g
Brain Fuel Teacher GuideWEEK 5: BRAIN FUEL CONNECTION Food, Mood & Mental Wellbeing Teacher Guide Duration: 60 Mins Learning Goals Identify foods that support focus and concentration. Understand the connection between hydration and mood. Explain the "Blood Sugar Rollercoaster." Practice mindful eating to recognize body signals. The Brain-Gut Connection Did you know our stomach is sometimes called our "second brain"? The food we eat sends signals to our head that help us feel happy, calm, or energized! Lesson Activities 15m The Focus Factory Discuss "Brain Foods": Berries (memory), Nuts/Seeds (focus), and Water (energy). Why do we feel "hangry" when we skip meals? 15m Mindful Eating Exercise Give each student a single raisin or piece of fruit. Lead them through a sensory experience: How does it look, smell, feel, and finally, taste? Slowing down helps the brain listen to the tummy. 30m "Happy Heart" Salad Assemble a colorful salad with Omega-3 fats (seeds) and antioxidants (berries). Discuss how colorful foods make our brain "smile." Brain Fact: Your brain is about 75% water. Even a tiny bit of dehydration can make you feel grumpy or tired!
Mood Journal WorksheetMood Journal Week 5 • Brain Fuel Connection Hero Name Challenge 1: The Energy Wave Food gives us energy. Different foods give us different "waves." Match the food to the wave! A Candy Bar & Soda B Oatmeal & Fruit "Slow & Steady: Focused for hours." "Spike & Crash: Hyper, then tired." Challenge 2: Brain Power Foods Write down 3 things that happened during your **Mindful Eating** exercise today: I noticed the color was... The smell reminded me of... The taste was... The Water Test Color in the emoji that describes how you feel when you drink enough water vs. when you are thirsty: Dehydrated Hydrated Hero
Brain Fuel Teacher GuideWEEK 5: BRAIN FUEL CONNECTION Food, Mood & Mental Wellbeing Teacher Guide Duration: 60 Mins Materials Needed Raisins or grapes (one per student). Mixed Greens & Berries (Antioxidants). Sunflower seeds (Omega-3s). Lemon/Oil dressing. Water bottles for hydration check. Learning Goals Identify foods that support focus. Connect hydration to mood. Explain the "Sugar Rollercoaster." Practice mindful eating signals. Instructional Steps Welcome Mood Meter (5m) Welcome students. Ask: "How does your brain feel right now? Tired? Hyper? Ready?" Discuss how breakfast affected that feeling. Step 1 The Focus Factory (15m) Discuss "Brain Foods": Berries (memory), Seeds (focus), and Water (energy). Explain how skipping meals makes us "hangry." Step 2 Mindful Eating (15m) Lead the raisin exercise: Look, Smell, Touch, Taste. Explain how this helps the brain hear the "I'm full" signal. Step 3 "Happy Heart" Salad (20m) Assemble salad. Discuss how vibrant colors represent vitamins that make our brains "smile." Reflect Gratitude Circle (5m) While eating, have students share one part of their body they are thankful for today and why. Brain Fact: Your brain is about 75% water. Even a tiny bit of dehydration can make you feel grumpy or make it hard to focus!
Mood Journal WorksheetMood Journal Week 5 • Brain Fuel Connection Hero Name Challenge 1: The Energy Wave Match the food to the type of energy wave it creates: A Candy Bar & Soda B Oatmeal & Fruit "Slow & Steady Energy" "Quick Spike & Crash" Challenge 2: Mindful Eating Reflex Write down your discoveries from our mindful eating exercise: 1. Look closely. What did you notice about the color or texture? 2. Smell carefully. What does it remind you of? 3. Taste slowly. Was it sweet, sour, crunchy, or soft? The Hydration Connection How do you feel when you haven't had enough water?
Mood Journal WorksheetMood Journal WEEK 5 • BRAIN FUEL Hero Name The Energy Match Write A or B in the correct box: A Candy Bar & Soda B Oatmeal & Fruit "Slow & Steady Energy" "Quick Spike & Crash" Mindful Reflection 1. Look closely. What did you notice about the color or texture? 2. Smell carefully. What does it remind you of? 3. Taste slowly. Was it sweet, sour, crunchy, or soft? The Hydration Connection How does your BRAIN feel when you are thirsty?
Brain Fuel Teacher GuideWEEK 5: BRAIN FUEL CONNECTION Food, Mood & Mental Wellbeing Teacher Guide Duration: 60 Mins Prep List Raisins or grapes (Mindful Eating). Mixed Greens & Berries (Focus). Sunflower seeds (Omega-3s). Lemon/Oil Dressing. Water bottles (Hydration check). Goals Identify foods that support focus. Connect hydration to brain mood. Explain the "Sugar Rollercoaster." Practice mindful eating sensory check. Instructional Steps Welcome Mood Meter (5m) Welcome students. Ask: "How does your brain feel right now? Hyper? Tired? Ready?" Discuss breakfast impact. Step 1 The Focus Factory (15m) Brain Foods: Berries (memory), Seeds (focus), Water (energy). Explain "hangry" feelings from skipping meals. Step 2 Mindful Eating (15m) Lead the raisin exercise (Look, Smell, Touch, Taste). Explain hearing the body's "Full" signal. Step 3 Happy Heart Salad (20m) Prep salad. Discuss vibrant colors = brain vitamins. Refer to Mood Journal worksheet for reflection. Reflect Gratitude Circle (5m) Clean up. Every student shares one body part they are thankful for today and why. Brain Fact The brain is 75% water. Dehydration makes solving math problems harder and makes you feel cranky!
Food Friendship Teacher GuideWEEK 6: FOOD FRIENDSHIP CIRCLE Food Neutrality & Body Positivity Teacher Guide Duration: 60 Mins Mission: Food Neutrality In this lesson, we move away from "good" vs "bad" food. We teach that all food has value—some for fuel, some for pleasure, and some for tradition. We focus on listening to our body's "Hunger Hero" and "Fullness Friend." Key Vocabulary Intuitive Eating: Listening to your body to know when and what to eat. Food Neutrality: Seeing food as energy and joy, not a moral choice. Body Gratitude: Being thankful for what our bodies can DO. Instructional Steps 15m The Permission Slip Discuss: Have you ever been told a food is "bad"? How does that make you feel when you eat it? Explain that labeling food often leads to shame, which doesn't help our health. 20m Hunger Hero Scale Introduce a 1-10 scale (1=Starving, 10=Stuffed). Ask students to identify where they are right now. Discuss how to recognize the "gentle nudge" of hunger vs. the "emergency alarm." 25m Taco Party Station Activity: Build-Your-Own Tacos. Encourage students to choose ingredients they actually want to try, focusing on how they taste together rather than what is "healthiest." Materials Needed: • Taco Shells/Tortillas • Protein (Beans or Beef) • Toppings (Cheese, Lettuce, Tomato) • "Hunger Scale" Worksheet
Hunger Hero WorksheetHunger Hero Scale Week 6 • Food Friendship Circle Hero Name Our bodies are super smart! They tell us exactly what they need. Use this scale to check in with your "Hunger Hero" before and after we eat today. The 1 - 10 Hunger Scale 1 Starving 5 Neutral 10 Stuffed BEFORE I ATE: My number was: AFTER I ATE: My number was: Body Gratitude Instead of how our body LOOKS, let's think about what it DOES. Write one thing your body did today that you are thankful for (like running, hugging, or thinking!): "I am a good person no matter what I choose to eat today!"
Hero Tacos Recipe CardHero Taco Party Skills: Building & Tasting 15 Minutes The Buffet Soft or Hard Shells Black Beans (Fuel) Cheese (Joy) Corn & Tomato Mild Salsa Sour Cream Pro Tip: There are no "right" combinations! Listen to your taste buds. Your Creation 1 The Base: Pick your shell. Do you feel like a "crunch" today, or something soft and foldable? 2 The Filling: Scoop in your protein. Beans are great for steady energy! 3 The Rainbow: Add as many or as few toppings as you like. Try one new thing today—just a tiny bit! 4 Mindful Check: Take a bite. Notice the textures. Are you still a "Hunger Hero" (5) or are you becoming a "Fullness Friend"? ALL FOOD IS ENERGY AND JOY!
Food Friendship Teacher GuideWEEK 6: FOOD FRIENDSHIP CIRCLE Food Neutrality & Body Positivity Teacher Guide Duration: 60 Mins Mission: Food Neutrality We move away from "good" vs "bad" food. We teach that all food has value—fuel, pleasure, or tradition. We focus on listening to our body's signals. Vocabulary Intuitive Eating: Listening to body signals for hunger. Food Neutrality: Seeing food without moral labels. Body Gratitude: Thanking our bodies for what they DO. Instructional Steps Intro Warm Welcome (5m) Welcome students. Give each student a "Permission Slip" sticker or card. Explain: "Today, you have permission to enjoy all the flavors we create!" Step 1 Food Labeling (10m) Discuss: Have you been told a food is "bad"? How does that feel? Explain that labeling food often leads to shame, which doesn't help health. Step 2 Hunger Hero Scale (15m) Introduce 1-10 scale. Identify where they are now. Discuss "gentle nudge" vs. "emergency alarm" hunger. Step 3 Taco Party Station (25m) Build tacos. Encourage students to choose ingredients based on taste and joy. No "good" or "bad" combos! Reflect Hero Shout-out (5m) Clean up. Have each student give a "shout-out" to their body for one thing it allowed them to do today (e.g., "Shout-out to my hands for chopping!"). Materials Needed: • Taco Shells/Tortillas • Protein & Toppings • Hunger Scale Worksheet • Permission Slip cards
Food Friendship Teacher GuideWEEK 6: FOOD FRIENDSHIP Neutrality & Listening to Body Signals Teacher Guide Duration: 60 Mins The Mission Shift from "good/bad" labels to neutrality. Some food is for fuel, some for joy. Focus on the Hunger Hero scale. Hero Talk • Intuitive Eating: Body-led choices. • Food Neutrality: Joy without labels. • Body Gratitude: Focus on "DO," not "LOOK." Instructional Steps Welcome Permission Slip (5m) Welcome students. Hand out "Permission Slip" cards. "Today, you have permission to explore all flavors with curiosity!" Step 1 No Bad Foods (10m) Discuss moral labels on food. How does shame affect eating? Teach: "All food has a purpose." Step 2 Hunger Hero Scale (15m) Explain 1-10 Scale (1=Starving, 5=Neutral, 10=Stuffed). Use the Hunger Hero Worksheet. Step 3 Taco Station (25m) Build tacos (refer to Hero Tacos Recipe Card). Choose toppings based on taste and body signals. Reflect Hero Shout-out (5m) Clean up. Students shout-out one thing their body allowed them to do today (e.g. "Chopping vegetables!"). Materials Needed • Taco Shells/Tortillas • Beans, Cheese, Salsa • Hunger Hero Worksheet • Permission Slip cards
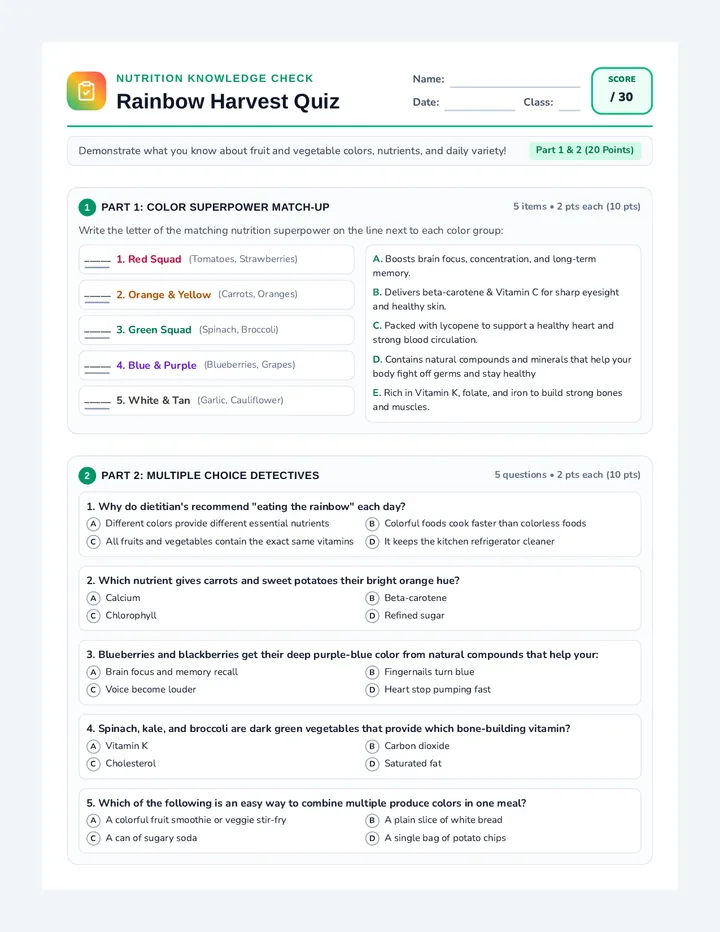
Plate Partners Teacher GuideWEEK 7: PLATE PARTNERS MASTERY Understanding MyPlate & Balanced Meals Teacher Guide Duration: 60 Mins The MyPlate Model This week, we learn to visualize our meals as a "Team." No single food group can win the game alone! We focus on the 5 partners: Fruits, Vegetables, Grains, Protein, and Dairy (or Alts). Team Roles Veggies & Fruit: The "Shields" (Immunity) Grains: The "Gas" (Energy) Protein: The "Bricks" (Muscle Building) Dairy: The "Armor" (Strong Bones) Lesson Flow 00-15 MIN: Plate Puzzle. Use the MyPlate diagram. Explain that 1/2 the plate should be colorful (fruits/veggies). 1/4 grains, 1/4 protein. 15-30 MIN: Partner Sort. Call out foods (e.g., "Chicken!", "Broccoli!") and have students point to the correct section of their worksheet plate. 30-60 MIN: Hero Power Bowls. Students build a bowl that includes at least one teammate from each group. Materials Needed: • Grains (Rice or Quinoa) • Protein (Chicken, Tofu, or Beans) • Veggies (Corn, Peas, Peppers) • Fruit (Apple slices or Grapes) • MyPlate Mastery Worksheet
Plate Power Map WorksheetPlate Power Map Week 7 • Plate Partners Mastery Hero Name Label Your Teammates FRUITS VEGETABLES Grains Protein Dairy What does each partner do for your body? Immunity Energy Muscles Verified Balanced Hero
Hero Power Bowl Recipe CardHero Power Bowl Skills: Balancing Food Groups 20 Minutes The Partners Grain: Brown Rice / Quinoa Protein: Chicken / Chickpeas Veggie: Steamed Broccoli Fruit: Mango or Pineapple Dairy/Alt: Yogurt sauce or Cheese Assembly Steps 1 The Foundation (Grains): Fill 1/4 of your bowl with your cooked grains. These provide the "Gas" for your daily engine! 2 The Build (Protein): Add 1/4 of your protein next to the grains. These are the "Bricks" for your muscles! 3 The Shield (Veggies/Fruit): Fill the remaining HALF of the bowl with your colorful fruits and vegetables. These are your "Shields" against germs! 4 The Finish: Drizzle with a little bit of yogurt sauce or sprinkle cheese on top. Your team is now complete and ready for action! NO PARTNER LEFT BEHIND!
Plate Partners Teacher GuideWEEK 7: PLATE PARTNERS MASTERY Understanding MyPlate & Balanced Meals Teacher Guide Duration: 60 Mins The MyPlate Model This week, we learn to visualize our meals as a "Team." No single food group can win the game alone! We focus on the 5 partners: Fruits, Vegetables, Grains, Protein, and Dairy (or Alts). Team Roles Veggies & Fruit: The "Shields" (Immunity) Grains: The "Gas" (Energy) Protein: The "Bricks" (Muscle Building) Dairy: The "Armor" (Strong Bones) Lesson Flow 00-15 MIN: Plate Puzzle. Proportions: 1/2 plate is Fruits/Veggies, 1/4 Grains, 1/4 Protein. The Dairy Circle: Remind students that Dairy/Alts acts as a "Side Hero" (like a cup of milk or a slice of cheese). 15-30 MIN: Partner Sort. Flashcard game: Point to the plate section for Broccoli (Veggies!), Rice (Grains!), Yogurt (Dairy!). 30-60 MIN: Hero Power Bowls. Students build a balanced bowl. Materials Needed: Grains (Rice/Quinoa) Protein (Beans/Chicken) Veggies (Corn/Peas) Fruit (Apple/Grapes) Plate Power Map Worksheets
Plate Partners Teacher GuideWEEK 7: PLATE PARTNERS Understanding MyPlate & Balanced Meals Teacher Guide Duration: 60 Mins The MyPlate Model This week, we learn to visualize our meals as a "Team." No single food group can win the game alone! We focus on the 5 partners. Team Roles Veggies & Fruit: The "Shields" (Immunity) Grains: The "Gas" (Energy) Protein: The "Bricks" (Muscle Building) Dairy: The "Armor" (Strong Bones) Instructional Steps Intro Team Cheer (5 MIN) Welcome students. Ask: "Who is your favorite sports team?" Explain that our bodies need a "Team" of food groups to win the day. Let's meet the partners! Step 1 Plate Puzzle (15 MIN) Explain proportions: 1/2 plate is Fruits/Veggies, 1/4 Grains, 1/4 Protein. Dairy/Alts is the "Side Hero." Step 2 Partner Sort (10 MIN) Game: Call out foods (e.g., "Apple!") and have students point to the correct section of their plate map. Step 3 Hero Power Bowls (25 MIN) Students build a bowl. Every bowl must have at least one "partner" from each food group. Reflect Partner Review (5 MIN) Clean up. Ask each student to name one "partner" they added to their bowl that they don't usually eat. Materials Needed: • Grains (Rice/Quinoa) • Protein (Beans/Chicken) • Veggies & Fruit • Plate Power Map Worksheets
Plate Partners Teacher GuideWEEK 7: PLATE PARTNERS Understanding MyPlate & Balanced Meals Teacher Guide Duration: 60 Mins The Model Meals are a "Team Effort." We focus on the 5 Partners: Fruit, Veggies, Grains, Protein, and Dairy/Alts. Team Roles • Shields: Veggies & Fruit (Immunity) • Gas: Grains (All-day Energy) • Bricks: Protein (Muscle Build) • Armor: Dairy (Strong Bones) Instructional Steps Intro Team Cheer (5 MIN) Welcome students. Discuss favorite sports teams. Explain that our body needs a team of food groups to "Win the Day." Step 1 Plate Puzzle (15 MIN) Use MyPlate diagram. 1/2 plate colorful (Veg/Fruit), 1/4 Grains, 1/4 Protein. Dairy/Alts is the "Side Hero." Step 2 Partner Sort (10 MIN) Game: Call out "Broccoli!" Students point to Veggie map. "Yogurt!" point to Dairy side cup. Step 3 Power Bowls (25 MIN) Students build bowls (refer to Hero Power Bowl Recipe Card). Must include at least one partner from each team. Reflect Partner Review (5 MIN) Clean up. Every student names one "Shield" (Fruit/Veg) they added to their bowl today. Prep List Grains (Rice/Quinoa) Protein (Beans/Chicken) Veggies & Fruit mix Power Map Worksheets
Budget Boss Teacher GuideWEEK 8: BUDGET BOSS CHALLENGE Smart Shopping & Unit Pricing Teacher Guide Duration: 60-75 Mins Mission: Budgeting Cooking isn't just about the kitchen—it starts in the store! This week, we teach students that eating healthy doesn't have to be expensive. We focus on comparing prices and buying in season. Key Vocabulary Unit Price: The cost per ounce or per pound. Bulk: Buying a large amount of something for a lower price. Generic: The "store brand" that often tastes the same for less money. Instructional Steps 15m The Great Price Debate Show two items: One large box of crackers vs. one individual snack pack. Ask: "Which costs more? Which is a better deal?" Introduce the unit price tag. 20m Unit Price Hunt Use the worksheet. Have students calculate simple unit prices (e.g., $4 for 2 lbs of apples = $2 per lb). Discuss why generic brands are often a better value. 30m Budget Bean Fiesta Activity: Prepare a high-value, low-cost meal using pantry staples (canned beans, rice, spices). Discuss the cost per serving. Materials Needed: • Canned Black Beans • Large bag of Rice • Spice bottles (Cumin, Garlic Powder) • Grocery store "shelf tags" (printed samples) • Budget Boss Worksheet
Budget Boss WorksheetPrice Tag Investigator Week 8 • Budget Boss Challenge Boss Name Challenge 1: The Unit Price Detective Look at these shelf tags. Which one is the better deal? Circle the winner! Hero Apples (Bulk Bag) $4.00 UNIT PRICE: $2.00 / LB Hero Apples (Single) $1.00 UNIT PRICE: $3.00 / LB Why was the winner a better deal? Challenge 2: The Generic Swap If you switch to these "Store Brands," how much money do you save? Brand Name Cereal: $5.00 Store Brand Cereal: $3.00 SAVE $2.00 Brand Name Milk: $4.50 Store Brand Milk: $3.50 SAVE $ ______ List one fruit or vegetable that is cheap to buy right now (Hint: It's "In Season"):
Bean Fiesta Recipe CardBean Fiesta Skills: Pantry Cooking & Budgeting 20 Minutes Budget List 1 cup Cooked Rice 1/2 can Black Beans 1/2 tsp Cumin 1/2 tsp Garlic Powder Squeeze of Lime EST. COST PER SERVING: $0.75 Budget Boss Steps 1 Rinse the Savings: Drain and rinse your beans. Canned beans are one of the cheapest and healthiest foods in the whole store! 2 Flavor Blast: Mix the beans and spices together in a small bowl. Stir well so the spices don't clump together. 3 Assemble: Scoop your warm rice into a bowl and top it with your seasoned beans. The rice and beans together make a "Complete Protein" team! 4 The Squeeze: Add a squeeze of lime on top. Acid (like lime) helps make inexpensive food taste expensive! BUDGET BOSS CERTIFIED
Budget Boss Teacher GuideWEEK 8: BUDGET BOSS CHALLENGE Smart Shopping & Unit Pricing Teacher Guide Duration: 60-75 Mins Mission: Budgeting Healthy eating starts in the store! This week, we teach students that "smart" shopping allows for better cooking. Budget Talk Unit Price: Cost per ounce/pound. Generic: Store brand value. Bulk: Lower price for larger amounts. Instructional Steps Intro Budget Brainstorm (5m) Welcome students. Ask: "If I gave you $5 to buy a snack for 10 friends, what would you buy?" Discuss how to make money stretch. Step 1 The Price Debate (15m) Show two items: large box vs. snack pack. Ask: "Which is a better deal?" Introduce the unit price tag as the "Secret Weapon." Step 2 Unit Price Hunt (15m) Use worksheet to calculate simple prices (e.g. $4 for 2lbs = $2/lb). Review findings. Step 3 Budget Bean Fiesta (25m) Prepare high-value pantry meal. Discuss cost per serving ($0.75!). Reflect Boss Reflection (5m) Clean up. Have each student name one "Store Brand" (Generic) item they think their family should try this week. Materials Needed: • Canned Beans & Rice • Printed shelf tags • Budget Boss Worksheet • Spices (Cumin/Garlic)
Budget Boss Teacher GuideWEEK 8: BUDGET BOSS Smart Shopping & Unit Pricing Teacher Guide Duration: 75 Mins The Mission Eating healthy doesn't have to be expensive. Use "Price Clues" (Unit Price) to make the most of every dollar. Budget Talk • Unit Price: Cost per ounce. • Generic: Store brand value. • Bulk: More for less money. Instructional Steps Intro Budget Brainstorm (5m) Welcome students. Ask: "If you had $5 for a party of 10, what's your plan?" Discuss stretching money for nutrition. Step 1 The Price Debate (15m) Show Big Box vs. Snack Pack. Which is a deal? Introduce Unit Price tags as the "Secret Key." Step 2 Tag Hunting (15m) Use Budget Boss Worksheet. Calculate simple per-pound prices. Review "Generic vs. Brand Name." Step 3 Bean Fiesta (30m) Prepare high-value meal (refer to Bean Fiesta Recipe Card). Discuss the tiny cost per serving ($0.75!). Reflect Boss Reflection (5m) Clean up. Students share one item they will look for the "Unit Price" on next time they shop. Prep List Canned Beans & Rice Spices (Cumin/Garlic) Shelf Tag samples Budget Boss Worksheets
Menu Magic Teacher GuideWEEK 9: MENU MAGIC PLANNER Organization & Waste Reduction Teacher Guide Duration: 60 Mins Mission: Meal Planning A Menu Magic Planner knows that thinking ahead saves time and stops food from going to waste. This week, we learn to use ingredients in multiple ways (e.g., roast chicken one night, chicken tacos the next). The "Magic Three" Check the Fridge (What do I have?) Check the Calendar (When do I have time?) Pick Multi-Use Foods (What can I use twice?) Instructional Steps 15m The Multi-Use Challenge Name an ingredient (e.g., Spinach). Have students brainstorm 3 different meals that use it (Salad, Smoothie, Pasta). Discuss why this reduces waste. 20m Menu Draft Students use the Menu Magic worksheet to plan 3 days of dinners. They must use at least one ingredient in two different ways. 25m Freezer-Friendly Muffins Activity: Bake (or prep for baking) muffins. Discuss how the freezer is a "Menu Magic Tool" for keeping food fresh for later. Materials Needed: • Muffin tins & liners • Flour, Oats, Bananas • Menu Magic Worksheets • Freezer bags for storage
Menu Magic Worksheet3-Day Magic Menu Week 9 • Menu Magic Planner Planner Name Plan 3 days of Hero Meals! Remember the Menu Magic Rule: Try to use one ingredient in two different meals to save time and money. Day 1 Dinner Menu: Hero Ingredients: Day 2 Dinner Menu: Hero Ingredients: Day 3 Dinner Menu: Hero Ingredients: The Magic Connection What ingredient did you use twice? Why was that a smart choice? Multi-Use? Low Waste?
Magic Muffins Recipe CardMagic Muffins Skills: Batch Cooking & Freezing 40 Minutes Multi-Batch 1 1/2 cups Rolled Oats 2 Ripe Bananas (Smashed) 2 Large Eggs 1/4 cup Maple Syrup 1 tsp Baking Powder MENU MAGIC TIP: These stay fresh for 3 months in the freezer! Freeze & Save Steps 1 The Mash: Mash your bananas until they look like chunky pudding. The spottier the banana, the sweeter the muffin! 2 The Stir: Mix in the eggs, syrup, oats, and baking powder. This is one "Hero Ingredient" (Oats) used in a new way! 3 The Scoop: Fill muffin cups to the top. Bake at 350°F for 20 minutes (ask an adult for help with the oven). 4 The Magic Trick: Let them cool, then put half in a bag for the freezer. Now you have breakfast planned for next week! SAVE TIME, EAT BETTER!
Menu Magic Teacher GuideWEEK 9: MENU MAGIC PLANNER Organization & Waste Reduction Teacher Guide Duration: 60 Mins Mission: Meal Planning Planning ahead saves time and stops waste. This week, we learn the "Multi-Use" trick to make one ingredient work twice. The Magic Three Check the Fridge first. Check the Calendar. Pick Multi-Use Foods. Instructional Steps Intro Fridge Reveal (5m) Welcome students. Ask: "What was the last thing you found in your fridge that went bad?" Discuss how planning stops that from happening. Step 1 Multi-Use Challenge (15m) Name an ingredient (e.g. Spinach). Brainstorm 3 meals. Explain how this saves money and effort. Step 2 Menu Draft (15m) Students use worksheet to plan 3 dinners. They must use one "Hero Ingredient" in two different ways. Step 3 Magic Muffins (20m) Bake muffins. Discuss how the freezer is a "Time Machine" for meal planning. Reflect The Magic Circle (5m) Clean up. Each student shares their "Magic Connection" (the ingredient they used twice) from their menu draft. Materials Needed: • Muffin tins & liners • Flour, Oats, Bananas • Menu Magic Worksheets • Freezer bags
Menu Magic Teacher GuideWEEK 9: MENU MAGIC Organization & Waste Reduction Teacher Guide Duration: 60 Mins The Mission Planning ahead saves time and stops waste. Use "Multi-Use" ingredients to make one grocery trip work for two meals. The Magic Three Check the Fridge first. Check the Calendar. Pick Multi-Use Foods. Instructional Steps Welcome Fridge Reveal (5m) Welcome students. Ask: "What was the last thing you threw away from your fridge?" Discuss waste reduction. Step 1 Multi-Use (15m) Pick an ingredient (e.g. Oats). Brainstorm 3 uses (Oatmeal, Muffins, Smoothie). Discuss money saved. Step 2 Menu Magic (15m) Use worksheet to plan 3 dinners. One "Hero Ingredient" must be used twice. Focus on organization. Step 3 Baking Batch (20m) Bake Magic Muffins (Recipe Card). Discuss how freezers act as "Time Machines" for meal planning. Reflect The Circle (5m) Clean up. Students share their "Magic Connection" ingredient from their plan. Materials Needed Muffin tins & liners Oats, Bananas, Syrup Menu Magic Worksheets Freezer storage bags
Menu Magic Teacher GuideWEEK 9: MENU MAGIC Organization & Waste Reduction Teacher Guide Duration: 60 Mins The Mission Planning ahead saves time and stops waste. Use "Multi-Use" ingredients to make one grocery trip work for two meals. The Magic Three Check the Fridge first. Check the Calendar. Pick Multi-Use Foods. Instructional Steps Welcome Fridge Reveal (5 MIN) Welcome students. Ask: "What was the last thing you threw away from your fridge?" Discuss waste reduction. Step 1 Multi-Use Challenge (15 MIN) Pick an ingredient (e.g. Oats). Brainstorm 3 uses (Oatmeal, Muffins, Smoothie). Discuss money saved. Step 2 Menu Magic Drafting (15 MIN) Use worksheet to plan 3 dinners. One "Hero Ingredient" must be used twice. Focus on organization. Step 3 Baking Batch (20 MIN) Bake Magic Muffins (Recipe Card). Discuss how freezers act as "Time Machines" for meal planning. Reflect The Magic Circle (5 MIN) Clean up. Students share their "Magic Connection" ingredient from their plan. Materials Needed Muffin tins & liners Oats, Bananas, Syrup Menu Magic Worksheets Freezer storage bags
Plating Pro Teacher GuideWEEK 10: PLATING PRO STUDIO The Art of Food Presentation Teacher Guide Duration: 60 Mins Mission: Eyes Eat First A Plating Pro knows that if food looks beautiful, it often tastes even better! This week we focus on three principles: **Color**, **Height**, and **Garnish**. We use simple tricks to make healthy food look like high-end art. The Pro Rules The Clock Rule: Protein at 6:00, Veggies at 10:00, Grains at 2:00. Wipe the Rim: Always keep the edges of the plate clean. Odd Numbers: Arranging things in 3s or 5s looks more natural. Instructional Steps 15m The Ugly Plate Challenge Plop some brown beans and rice in a messy pile on a plate. Ask students: "Does this look tasty?" Then, use a small bowl to mold the rice into a dome and garnish with a sprig of parsley. Ask again. 20m The Color Wheel Discuss "High Contrast." A white cauliflower on a white plate is boring. A purple grape on a yellow banana is exciting! Draw a colorful plate on the worksheet. 25m Fruit Mandala Art Activity: Students create symmetrical "Mandalas" using sliced fruit. Focus on patterns and repetition. Materials Needed: • Large white plates • Sliced Fruit (Apples, Berries, Kiwi) • Plating Pro Worksheet • Paper Towels (for rim wiping!)
Plating Pro WorksheetPlate Canvas Design Week 10 • Plating Pro Studio Artist Name Challenge 1: High Contrast Hero Draw 3 colorful fruits or veggies that would look "POP" next to these boring white foods: White Rice I WOULD ADD: Cauliflower I WOULD ADD: Yogurt I WOULD ADD: Challenge 2: The Symmetrical Plate Sketch your design for your Fruit Mandala. Use patterns (ABAB or ABCABC) to make it beautiful! Your Canvas Pro Plating Checklist: Clean Rims High Color Added Garnish
Fruit Mandala Recipe CardFruit Mandala Skills: Symmetry & Patterning 15 Minutes The Palette Strawberry Halves Blueberries Kiwi Slices Banana Rounds Orange Segments The Studio Steps 1 The Centerpiece: Pick your favorite fruit and place it in the exact middle of your plate. This is the "Anchor" of your design. 2 The First Ring: Pick a second color. Arrange the fruit in a circle around the center. Try to keep the spacing equal! 3 Pattern Power: Keep adding rings. Try an ABAB pattern (Blueberry, Banana, Blueberry, Banana) for one of the outer circles. 4 The Clean Up: Check the rim of your plate. If there are any drips, use a clean napkin to wipe them away. A clean plate makes a Pro Hero! EYES EAT FIRST!
Plating Pro Teacher GuideWEEK 10: PLATING PRO STUDIO The Art of Food Presentation Teacher Guide Duration: 60 Mins Mission: Eyes Eat First A Plating Pro knows that if food looks beautiful, it often tastes even better! This week we focus on three principles: Color, Height, and Garnish. The Pro Rules The Clock Rule: Protein @ 6:00, Veggies @ 10:00, Grains @ 2:00. Wipe the Rim: Keep the edges of the plate clean. Odd Numbers: Arrange in 3s or 5s for a natural look. Instructional Steps 15m The Ugly Plate Challenge Messily pile rice/beans on a plate. Ask: "Tasty?" Then, mold the rice into a dome and add a sprig of parsley. Ask again. Discuss the visual impact. 20m The Color Wheel Discuss High Contrast. Contrast makes things stand out! White rice with green peas pops more than white rice with white cauliflower. 25m Fruit Mandala Art Activity: Students create symmetrical designs using sliced fruit on white plates. Use the recipe card for guidance. Materials Needed: Large white plates Paper Towels Sliced Fruit (Kiwi/Berries) Plating Pro Worksheet
Plating Pro Teacher GuideWEEK 10: PLATING PRO STUDIO The Art of Food Presentation Teacher Guide Duration: 60 Mins Mission: Eyes Eat First Beautiful food often tastes better! We focus on three principles: Color, Height, and Garnish. The Pro Rules The Clock Rule: 6:00 Protein, 10:00 Veg, 2:00 Grain. Wipe the Rim: Clean edges always! Odd Numbers: Arrange in 3s or 5s. Instructional Steps Intro Gallery Walk (5m) Welcome students. Show photos of 3 plates (one messy, one okay, one beautiful). Ask: "Which one would you pay $20 for?" Discuss why presentation matters. Step 1 Ugly Plate Challenge (10m) Pile rice/beans. Ask for feedback. Then mold the rice and add garnish. Contrast the two looks. Step 2 Color & Contrast (15m) Discuss the color wheel. Contrast makes food "Pop." Use the worksheet to design a colorful plate. Step 3 Fruit Mandala (20m) Activity: Students create symmetrical designs on white plates. Focus on repetition and clean rims. Reflect Studio Critique (5m) Clean up. Walk around and have students point out one "beautiful detail" on a teammate's plate. Materials Needed: • White plates & Paper towels • Sliced fruit mix • Plate design photos • Plating Pro Worksheet
Plating Pro Teacher GuideWEEK 10: PLATING STUDIO The Art of Food Presentation Teacher Guide Duration: 60 Mins The Mission "Eyes Eat First." Beautiful presentation makes healthy food exciting. Focus on Color, Height, and Garnish. Pro Rules • Clock Rule: 6:00 Prot, 10:00 Veg. • Wipe the Rim: Keep edges clean. • Odd Numbers: Arrange in 3s or 5s. Instructional Steps Welcome Gallery Walk (5 MIN) Welcome students. Show photos of 3 plates (messy vs beautiful). Ask: "Which would you pay $20 for?" Step 1 Ugly Plate Challenge (10 MIN) Pile rice messily. Get feedback. Then mold rice and add garnish. Contrast the two looks. Step 2 Color & Design (15 MIN) Discuss High Contrast (e.g. white rice vs green peas). Use worksheet to design a colorful plate. Step 3 Fruit Mandala (25 MIN) Activity: Create symmetrical designs (refer to Fruit Mandala Recipe Card). Focus on rim wiping. Reflect Studio Critique (5 MIN) Clean up. Walk around and point out one beautiful detail on a teammate's plate. Materials List Large white plates Sliced Fruit Mix Paper Towels Plating Pro Worksheets
Plating Pro Teacher GuideWEEK 10: PLATING STUDIO The Art of Food Presentation Teacher Guide Duration: 60 Mins The Mission "Eyes Eat First." Beautiful presentation makes healthy food exciting. Focus on Color, Height, and Garnish. Pro Rules • Clock Rule: 6:00 Prot, 10:00 Veg. • Wipe the Rim: Keep edges clean. • Odd Numbers: Arrange in 3s or 5s. Instructional Steps Welcome Gallery Walk (5 MIN) Welcome students. Show photos of 3 plates (messy vs beautiful). Ask: "Which would you pay $20 for?" Step 1 Ugly Plate Challenge (10 MIN) Pile rice messily. Get feedback. Then mold rice and add garnish. Contrast the two looks. Step 2 Color & Design (15 MIN) Discuss High Contrast (e.g. white rice vs green peas). Use worksheet to design a colorful plate. Step 3 Fruit Mandala (25 MIN) Activity: Create symmetrical designs (refer to Fruit Mandala Recipe Card). Focus on rim wiping. Reflect Studio Critique (5 MIN) Clean up. Walk around and point out one beautiful detail on a teammate's plate. Materials List Large White Plates Sliced Fruit Mix Paper Towels Plating Pro Worksheets
Flavor Fusion Teacher GuideWEEK 11: FLAVOR FUSION WORKSHOP Skills Integration & Mystery Basket Teacher Guide Duration: 90 Mins Mission: Mastery This is the "Dress Rehearsal" for the final feast! Students will work in teams to prepare a meal using a "Mystery Ingredient." They must demonstrate safe knife work, proper hygiene, balanced MyPlate choices, and beautiful plating. The Hero Scorecard Safety: Did they use the Claw and Bridge? Hygiene: Is their station clean? Balance: Is there a mix of food groups? Plating: Does it look like a Plating Pro made it? Instructional Steps 15m Mystery Reveal Reveal the Mystery Ingredient (e.g., Canned Pineapple or Chickpeas). Teams have 10 minutes to plan how they will "fuse" it into their stir-fry or salad. 50m The Fusion Lab Cooking time! Students prepare their dishes. The teacher circulates with the Scorecard, giving positive feedback on safety and technique. 25m Hero Showcase Each team presents their dish. They must explain one safety rule they followed and one plating trick they used. Materials Needed: • Mystery Ingredient (Pineapple, Chickpeas, or Corn) • Base Stir-fry Veggies (Carrots, Peppers, Peas) • Pre-cooked Grains (Rice) • Flavor Fusion Scorecard
Flavor Fusion Scorecard WorksheetHero Scorecard Week 11 • Flavor Fusion Workshop Team Name You have learned so much! Today, you will combine all your Hero Skills. Use this scorecard to keep track of your team's mission. Technique Handwashing (20 Secs) Claw & Bridge Grips Station Cleanliness Presentation Balanced Food Groups High Color Contrast Clean Plate Rims Fusion Report How did your team use the Mystery Ingredient in your dish? Master Chef Hero
Mystery Stir-fry Recipe CardMystery Stir-fry Skills: Integration & Creativity 25 Minutes The Lab Cooked Rice (Grain) Veggie Mix (Shields) Soy Sauce / Honey THE MYSTERY ITEM: ??? ??? ??? "A Hero uses every skill to make the Mystery Ingredient shine!" The Fusion Steps 1 The Plan: Look at your Mystery Ingredient. Is it sweet? Crunchy? How will you cut it using the Bridge Grip? 2 The Sauté: Heat your veggies and grains with a splash of sauce. Add the Mystery Ingredient halfway through. 3 The Pro Plate: Use your Plating Pro skills. Can you build Height with the rice? Can you add a colorful garnish? 4 The Pitch: Give your creation a name. Present it to the Hero Captains! SKILLS FUSION IN ACTION
Flavor Fusion Teacher GuideWEEK 11: FLAVOR FUSION WORKSHOP Skills Integration & Mystery Basket Teacher Guide Duration: 90 Mins Mission: Mastery The "Dress Rehearsal" for the feast! Teams prepare a meal using a "Mystery Ingredient." They must use every skill learned. Hero Scorecard Safety: Claw and Bridge? Hygiene: Clean stations? Balance: Mixed food groups? Plating: Pro presentation? Instructional Steps Intro Team Huddle (5m) Welcome teams. Have each team come up with a "Secret Chef Handshake." Remind them that today is about teamwork and using ALL their skills. Step 1 Mystery Reveal (10m) Reveal the ingredient (e.g. Pineapple). Teams plan their "fusion" dish for 10 minutes. Distribute scorecards. Step 2 The Fusion Lab (50m) Cooking time! Circulate with the scorecard. Provide positive feedback on safety and station management. Step 3 Hero Showcase (20m) Teams present dishes. They must explain one safety rule used and one plating trick they integrated. Reflect Fusion Feedback (5m) Clean up. Ask: "What was the hardest skill to remember when you were in a hurry? How did your team help you?" Materials Needed: • Mystery Ingredient • Stir-fry veggie base • Pre-cooked rice • Flavor Fusion Scorecards
Flavor Fusion Teacher GuideWEEK 11: FLAVOR FUSION Skills Integration & Mystery Basket Teacher Guide Duration: 90 Mins The Mission The "Dress Rehearsal" for graduation! Teams prepare a meal using a Mystery Ingredient. Mastery of all Hero skills is required. The Scorecard • Safety: Claw & Bridge usage? • Hygiene: Station clean? • Balance: Mixed food groups? • Plating: Pro presentation? Instructional Steps Team Welcome Team Huddle (5m) Welcome teams. Have each team create a "Secret Chef Handshake." Remind them: Teamwork is the #1 Hero Skill. Step 1 Mystery Reveal (10m) Reveal ingredient (e.g. Pineapple). Teams plan their "Fusion Dish." Distribute Hero Scorecards. Step 2 Fusion Lab (50m) Cooking time! Circulate with scorecards. Focus on safety and station management. Step 3 Showcase (20m) Teams present dishes. Explain one safety rule used and one plating trick integrated. Reflect Fusion Feedback (5m) Clean up. Ask: "What was the hardest skill to remember in a rush? How did your team help?" Prep List Mystery Ingredient Grains & Veggie base Soy Sauce / Honey Hero Scorecards
Hero Feast Teacher GuideWEEK 12: HERO FEAST CELEBRATION Graduation & Shared Meal Teacher Guide Duration: 120 Mins Mission: The Grand Feast Today we celebrate the transformation of our students into Kitchen Heroes! The focus is on hospitality, sharing food with others, and reflecting on the "Three Pillars": Safety, Nutrition, and Joy. Graduation Checklist Prepare the "Celebration Sliders" in teams. Set the table using "Plating Pro" principles. Present Hero Certificates. Clean the "Lab" one last time as a team. Instructional Steps 30m Feast Preparation Teams work together to assemble sliders. This is a high-skill task involving knife work (slicing veggies), mixing, and assembly. 60m The Shared Table Gather everyone for the meal. Lead a discussion: "What was your favorite skill to learn? What food makes you feel like a Hero?" Encourage mindful tasting of everyone's work. 30m Awards Ceremony Hand out Hero Graduation Certificates. Final clean-up dance party! Materials Needed: • Slider Buns • Proteins (Turkey or Veggie Patties) • Veggie toppings (Tomato, Spinach) • Hero Graduation Certificates (Printable) • Celebration Sliders Recipe Card
Hero Graduation Reflection WorksheetHero Reflection Week 12 • Graduation Feast Hero Name My Hero Journey Think back to Week 1. What is one thing you can do now that you couldn't do before? "I used to be afraid of ________, but now I can ________!" My Favorite Pillars Color in the pillar that was your favorite part of the academy: Safety Mastering the Claw! Nutrition Fiber & Labels! Joy Flavor & Plating! The Kitchen Hero Oath "I promise to keep my kitchen safe, to choose foods that fuel my brain and body, and to always find joy in the flavors I create. I am a Kitchen Hero!" Hero Signature
Celebration Sliders Recipe CardCelebration Sliders Skills: Hospitality & Graduation Feast 30 Minutes The Feast Mini Slider Buns Cooked Patties (Fuel) Sliced Tomatoes (Shield) Fresh Spinach (Shield) Sliced Pickles (Joy) Hero Special Sauce "The best ingredient in any meal is the team you cooked it with!" Graduation Steps 1 The Prep: Use your Claw Grip to slice the tomatoes and pickles into thin rounds. Remember: slow and steady! 2 The Assembly: Lay out your buns. Spread a tiny bit of sauce on the bottom. Add the patty, then stack your spinach and tomatoes. 3 Plating Mastery: Place two sliders on each plate. Wipe the rims! Garnish with a pickle on top held by a toothpick (ask for help!). 4 The Celebration: Serve your teammates and families. Explain why this plate is a "Balanced Hero Meal"! YOU ARE OFFICIALLY A KITCHEN HERO!
Hero Feast Teacher GuideWEEK 12: HERO FEAST CELEBRATION Graduation & Shared Meal Teacher Guide Duration: 120 Mins Mission: The Grand Feast Today we celebrate! Focus on hospitality, sharing food, and reflecting on the Three Pillars: Safety, Nutrition, and Joy. Graduation Checklist Assemble "Celebration Sliders." Set the table (Plating Pro). Present Hero Certificates. Final team clean-up. Instructional Steps Intro Hero Welcome (10m) Welcome students and visiting families. Have students stand and lead the "Kitchen Hero Oath" (found on reflection worksheet). Celebrate the journey! Step 1 Feast Preparation (30m) Teams assemble sliders. Use Claw grip for veggies. High focus on safety and cleanliness for the guests. Step 2 The Shared Table (50m) The main feast. Discussion: "What was your favorite skill? What makes you feel like a Hero?" Mindful tasting of all team dishes. Step 3 Awards Ceremony (20m) Hand out Graduation Certificates. Group photo. Clean the "Lab" one last time as a team. Reflect The Final Circle (10m) Before leaving, have every student name one person in the room they want to thank for helping them become a Kitchen Hero. Materials Needed: • Slider ingredients • Hero Certificates • Celebration music! • Reflection worksheets
Hero Feast Teacher GuideWEEK 12: GRADUATION FEAST Celebration & Shared Meal Teacher Guide Duration: 120 Mins The Mission Celebrate the transformation into Kitchen Heroes! Focus on hospitality, sharing, and the Three Pillars: Safety, Nutrition, and Joy. Final Checklist • Assemble Celebration Sliders. • Set table using Plating Studio rules. • Present Graduation Certificates. Instructional Steps Intro Hero Welcome (10m) Welcome families. Lead students in the Kitchen Hero Oath: "I promise to keep my kitchen safe and choose food that fuels my body." Step 1 Feast Prep (30m) Teams assemble sliders. Use Claw grip for veggies. High focus on cleanliness for the guests. Step 2 Shared Table (50m) The Feast. Discussion: "What makes you feel like a Hero?" mindful tasting of all team dishes. Step 3 Awards (20m) Present certificates. Final team clean-up and group photo. Reflect Final Circle (10m) Every student names one person they want to thank for helping them during the Academy. Materials Needed Slider ingredients Hero Certificates Reflection sheets Celebration music!