Ready Position Slides Master the Platform
Lesson 1: The Ready Position & Hand Mechanics
Stance • Grip • Platform
The Balloon Challenge
Can you keep a balloon in the air using only your forearms without moving your feet?
Feet Glued
Forearms Only
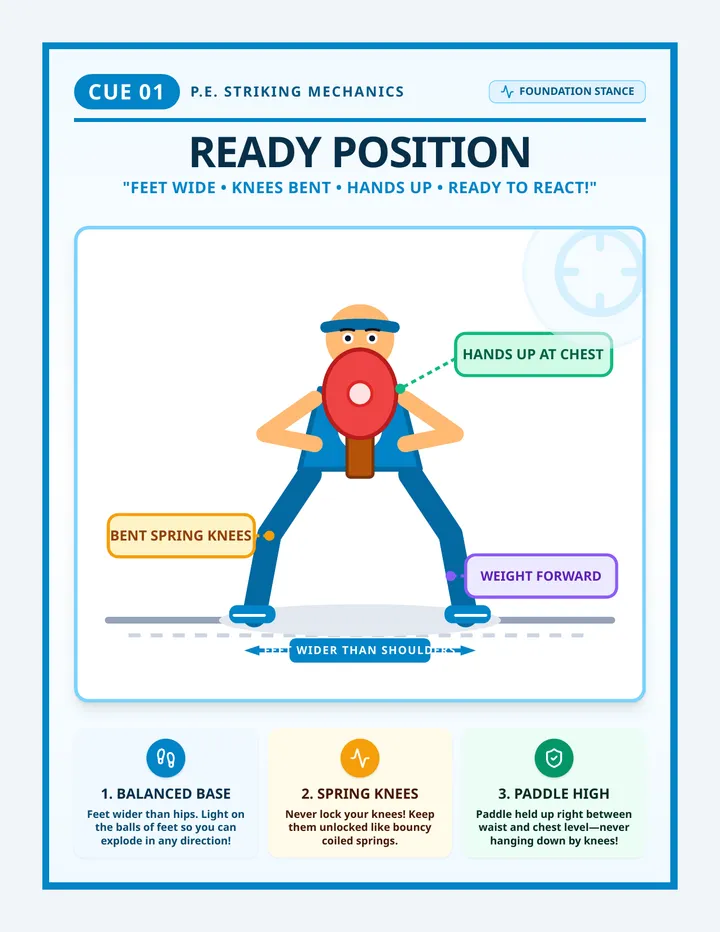
The Ready Position
1
Feet wide & active
Slightly wider than shoulders, weight on balls of feet.
2
Loaded knees
Bent and ready to move in any direction.
3
Neutral spine
Leaning forward slightly, chest up, eyes on the ball.
Base Level
1. Palm in Palm
2. Thumbs Parallel
3. Point Thumbs Down (Locks Elbows)
The Platform
The "Platform" is the flat surface created by your inner forearms.
"Think of your arms as a wooden board. We want it flat, stable, and simple. No swinging allowed—use your legs!"
Don't Break the Board!
The "Clap"
Avoid swinging your arms together to meet the ball. Start with hands together!
Elbow Bends
Bending your elbows creates an uneven surface. Keep those arms 100% straight!
Interlocked Fingers
Never interlock fingers! If the ball hits them hard, it hurts. Use Palm-in-Palm.
Coaching Cues
"Feet Wide"
"Thumbs Down"
"Freeze"
When you hear "FREEZE", check your platform. Is it a flat board or a broken branch?
Platform Blueprint Worksheet Platform Blueprint
Volleyball Mechanics: Lesson 1
Name:
Date:
1. The Ready Position
Look at the description of a perfect ready position. Fill in the missing "Athletic Cues" for each body part.
Feet & Balance
Where should your weight be on your feet?
Knees
What is the "loaded" position for your knees?
The "Base" Rule
"Your feet should be ________ than your shoulders to keep you stable."
2. The Board vs. The Branch
A good platform is like a flat wooden board. A bad platform is like a broken branch. Circle the correct words to complete the instructions for a solid "board."
1
Place your hands in a Palm-in-Palm / Interlocked position.
2
Point your thumbs UP / DOWN to lock your elbows.
3
Keep your elbows BENT / STRAIGHT at all times.
3. Blueprint Drawing
Draw a simple diagram of a "Platform" below. Focus on the thumbs, the wrists, and the long flat surface of the forearms.
Stance Station Teacher Guide Stance Station
Teacher Facilitation Guide • Lesson 1
45-60 Minutes
Instructional Goal
To establish the foundational "Ready Position" and "Forearm Platform" as automatic physical responses. Students should leave this lesson able to demonstrate a stable stance and a flat contact surface without active thought.
Materials
• 1 Balloon per student
• Volleyballs (lightweight/foam)
• Cones for boundaries
• Whistle
Lesson Flow
1. The Hook: Balloon Statues (10 mins)
WARM UP
Challenge students to keep a balloon in the air using only their forearms while keeping their feet "glued" to the floor.
Teacher Cues:
"Who has the stickiest feet?"
"Keep your eyes level with the balloon."
2. Stance Breakdown (15 mins)
DIRECT INSTRUCTION
Guide students through the 3-step platform build: Palm-in-Palm, Thumbs Down, Lock Elbows.
Check For:
Are thumbs parallel? If they overlap, the ball will go sideways.
Common Fix:
"Shoulders to ears!" Shrugging helps create a bigger, flatter platform.
3. Reaction Drill: "Ready, Platform, Freeze" (15 mins)
SKILL PRACTICE
Students jog in place. On whistle 1: Athletic Stance. On whistle 2: Form Platform. On whistle 3: Freeze for a form check.
Walk through the rows and physically nudge their platforms to check for stability.
Modifications
For Students Struggling:
Use beach balls or larger balloons. Have them sit on a chair or bench to focus solely on arm positioning without leg movement.
For Students Advancing:
Introduce "shuffling" feet while maintaining the platform. Toss lightweight foam balls for them to track and make contact with.
Passing Accuracy Slides Angle of Attack
Lesson 2: Accuracy & Platform Steering
Accuracy • Steering • Leg Drive
The Steering Wheel
"Your platform is a steering wheel. Wherever you point it, the ball must go."
Directional Control
Angling the Platform
To send the ball to the left or right, we don't swing our arms. We tilt.
Drop your right shoulder to pass right.
Drop your left shoulder to pass left.
Keep the "Board" flat even when tilted!
TILT = TARGET
Push Up,
Power from the Legs
If you swing your arms, the ball goes wild. If you use your legs, the ball goes where you want it.
Start low in your stance.
Lift through your knees.
"Freeze" your platform at the finish.
Target Practice Drill
Partner Toss
Partner 1: Tosses ball in a high arc.
Partner 2: Passes ball back to Partner 1's chest.
Focus: Leg drive and platform angle.
Scoring
Chest Height = 3 Points
In the general area = 1 Point
Swing your arms = -1 Point
Target Practice Tracker Target Practice Tracker
Forearm Passing Accuracy: Lesson 2
Pro Name:
Partner:
Today's Mission:
Land 10 passes directly into your partner's "Target Zone" (chest height) without swinging your arms.
Round 1: Consistency Check
Have your partner toss 10 balls. Put a check in the box for every successful target hit.
Trial # Hit Target? (Check) Did I swing my arms? (Yes/No) 1 - 5 Be honest! 6 - 10
| |
Angle Analysis
1. When the ball went too far back (behind your partner), what happened to your platform?
2. What did it feel like to use your legs to push the ball instead of your arms?
PRO TIP:
If the ball is flying too high, your platform is angled toward the ceiling. To level it out, push your hands away from your body more!
Leg Drive Teacher Guide Leg Drive Logic
Teacher Facilitation Guide • Lesson 2
Accuracy Mastery
The "Anti-Swing" Philosophy
Most 5th graders intuitively want to swing their arms like a baseball bat. This lesson is about unlearning that instinct and replacing it with leg-driven vertical force.
Key Cues
"Push from the floor"
"Quiet arms"
"Tilt the steering wheel"
"Freeze on target"
Practice Progression
1. The "Human Target" (10 mins)
Partners stand 8-10 feet apart. One tosser, one passer. The tosser holds their hands in a circle at chest height. The passer must guide the ball through the circle.
Focus: Vertical accuracy
2. Steering Left & Right (15 mins)
Tosser moves 3 feet to the left or right after the toss. Passer must tilt their platform without moving their feet to reach the new target.
Observation Tip:
Watch the shoulders. If they pass to the left, the left shoulder should be lower than the right.
3. Accuracy Challenge (15 mins)
Use the "Target Practice Tracker". Students earn points for consistency. Competition builds focus!
Focus: Mastery & data
Common Mistakes Fix-List
Ball goes straight up:
Platform is too horizontal. Tell them to "Push your knuckles away from your belly."
Ball hits them in the face:
They are contacting the ball too close to their body. "Reach for the ball early!"
Pass is too weak:
No leg drive. Encourage a "jump without leaving the floor" feeling.
Underhand Serve Slides The Pendulum
Lesson 3: Underhand Serving Basics
Step
Swing
Contact
Team Advantage
"Every point starts with a single player."
How can you guarantee your team starts with an advantage?
!
The Secret Steps
1
Step Forward
Step with your opposite foot towards the target.
2
Pendulum Swing
Swing your hitting arm straight back like a clock.
3
Palm Strike
Hit the ball out of your hand. Don't toss it!
HIT IT LOW
BULLSEYE
Contact Spot
The Contact Point
"Contact the ball at the bottom 1/3 of the sphere to lift it over the net."
HEEL
of the palm
NO
toss required!
Common Serve Killers
The "High Toss"
If you toss the ball, it's harder to time. Hold it steady!
The "T-Rex Arm"
Bending your hitting arm loses power. Keep it long and straight!
The "Look Away"
If you don't watch the ball hit your hand, you'll miss the bullseye.
Pendulum Swing Sheet The Pendulum
Underhand Serve Mechanics
REFERENCE SHEET
1
The Setup
Opposite foot forward. Ball held in non-hitting hand, waist height, in front of the hitting arm.
2
The Swing
Hitting arm swings back straight like a clock pendulum. Shoulders stay level. Eyes locked on the ball.
3
The Strike
Contact with the heel of your palm. Do not toss the ball. Follow through toward your target.
Pro Serving Checklist
Is my "holding hand" still as a rock?
Am I stepping with the opposite foot?
Is my hitting arm locked and straight?
Did I "hit through" the ball?
Serving Secrets Teacher Guide Serving Secrets
Teacher Facilitation Guide • Lesson 3
Power & Precision
The Goal
Students will master the "No-Toss" underhand serve. Success is defined by consistently making contact with the heel of the palm and lifting the ball over a modified net (or line) with a step-swing motion.
Class Routine
1. Pendulum Warm-Up (5 mins)
Students stand without balls. Practice the arm swing: Back, Step, Swing. Rhythm is key. Encourage a "Tick-Tock" sound effect to reinforce timing.
2. Wall-Strikers (15 mins)
Students stand 5 feet from a wall. Focus only on contact. Hit the ball out of the hand against the wall. Do not worry about distance yet.
"If the ball is spinning, they are hitting with their fingers. Encourage a flat, solid palm 'pop' sound."
3. Net Launchers (20 mins)
Move to the court. Start halfway between the net and the baseline. Serve over the net. Every 3 successful serves, take one giant step back.
Game: "Three and Back"
Verbal Cues
"Opposite foot, opposite foot!"
"Hold the ball like a tray."
"Hit through the center."
Differentiation
Support: Use oversized foam balls. Lower the net or use a ribbon. Allow serving from closer to the net.
Challenge: Aim for specific hula-hoops placed on the floor on the other side of the net.
Serve Receive Slides Read & React
Lesson 4: Receiving the Serve
Movement
Positioning
Taking Control
"The serve is the only time the other team controls the ball completely."
How quickly can we take that control back?
Beat the Ball to the Spot
Passing is 90% footwork. If your feet are still, your platform is weak.
Shuffle, Don't Run
Keep your base wide. Never cross your feet while the ball is in flight.
Stop Before Contact
Try to be "frozen" in your ready position before the ball hits your arms.
Read
React
Target Face
Face Your Target
"Don't just hit the ball. Guide it home. Your belt buckle should point exactly where you want the ball to go."
Passing Target: The Setter Position (Right front of the court)
The No-Swing Challenge
When receiving a fast serve, you don't need to add power. Just create a solid platform and let the ball bounce off you.
Be Patient
Solid Base
Peer Pro Checklist Peer Pro Checklist
Serve Receive Analysis: Lesson 4
Partner Observation
Observer Mission:
Watch your partner receive 5 serves. For each serve, check the boxes for the skills you see them use correctly. Be a supportive coach!
Athlete Name:
Coach Name:
Trial #
Ready Early?
Fast Feet?
Still Platform?
Leg Drive?
Hit Target?
#1
#2
#3
#4
#5
Coach's Corner
What is one thing your partner can do to improve their serve receive in the next round?
Reaction Drill Teacher Guide Defense to Offense
Teacher Facilitation Guide • Lesson 4
The Receptionist
Reading the Flight
The biggest challenge for 5th graders is tracking the ball through the air and estimating where it will land. This lesson prioritizes early movement over ball contact.
Safety Note
Remind students to never serve while anyone is facing away from the net. Ensure clear communication between server and receiver.
Drill Flow
1. Shadow Reading (10 mins)
No Ball
The teacher stands at the net and points to spots on the floor. Students must shuffle to the spot and "frozen" in a perfect ready position before the teacher says "Go!"
2. Catch-and-Pass (15 mins)
Guided Contact
Servers underhand serve (softly). Receivers must catch the ball with their arms extended in a platform (no hands!). Once they catch 3, they switch to forearm passing.
Cradling the ball on the forearms forces them to keep their platform long and stable.
3. Serve Receive Challenge (20 mins)
Skill Integration
Use the "Peer Pro Checklist." Focus on directing the pass toward the "Setter" area (Zone 2/3 on the court).
The "Goldilocks" Movement
Too Late
Reacting only when the ball is over the net.
Too Fast
Running to the spot and swinging wildly.
Just Right
Reading the server's angle and shuffling early.
Volley Challenge Slides The Big Rally
Lesson 5: Continuous Volley Challenge
Control • Communication • Consistency
The Great Challenge
"What is the class record for consecutive passes without the ball touching the floor?"
Today, we find out. Today, we make history.
How to Stay Alive
Call "MINE!"
Loud, early communication prevents collisions and confusion.
Pass it UP
High passes give your partner time to read, move, and react.
Reset the Stance
Immediately go back to your ready position after every touch.
Rally Math
1 + 1 = 100
Teamwork multiplies your skill!
The Ranking System
0-2 Passes
Rookie
Learning the ropes.
3-5 Passes
Controller
Finding the rhythm.
6-10 Passes
Pro Volley
The Gold Standard!
11+ Passes
Legendary
Hall of Fame material.
Game On!
"Ball control isn't just a skill. It's an attitude."
Record Breaker Scorecard Record Breakers
The Volley Challenge Scorecard
Team High Score
---
Squad Member 1:
Squad Member 2:
The Challenge Rules
Use legal forearm passes (bumps) only.
Ball must stay in the air. Every contact counts as 1 point.
Stop and record your score if the ball hits the floor.
Battle Log
Attempt 1
Attempt 2
Attempt 3
Attempt 4
Champion Reflection
1. What was the "Magic Trick" that helped your team get your highest score?
2. If you were coaching a younger team, what is the most important piece of advice you'd give them about control?
Tournament Master Teacher Guide Tournament Master
Teacher Facilitation Guide • Lesson 5
Culminating Event
Challenge Objectives
Mastery of ball control and consistency.
Effective verbal communication under pressure.
Peer-to-peer coaching and encouragement.
Class Atmosphere
"This isn't a competition against others, but a competition with your partner against the force of gravity. Keep the energy high and the focus sharp!"
The Challenge Setup
1. The "Safety Net" Warm-Up (10 mins)
Students find a partner. Practice 2 minutes of "Self-Toss & Pass" (passing to themselves) followed by 2 minutes of "Short-Range Toss" (only 3 feet apart). This recalibrates their "Quiet Arms."
2. The Grand Rally (25 mins)
Start the "Record Breaker Scorecard." Encourage students to aim for at least Controller status (3-5 passes) before trying for Legendary.
Teacher Cue:
"Loud and Proud! I should hear 'Mine' across the entire gym!"
3. The Gallery Walk of Greatness (10 mins)
Select the top 3 pairs to demonstrate their rally technique in front of the class. Discuss what makes their control so effective (e.g., foot movement, platform height, communication).
Formative Assessment Points
Technique
Legs doing the work? Quiet arms?
Teamwork
Communicating every touch?
Growth
Improving score through trials?