Sprint Form Teacher Guide Sprinting Form Lab
Teacher Instruction Guide
Lesson 1: Biomechanics
Track & Field Unit
Learning Objectives
• Demonstrate "Cheek-to-Cheek" arm mechanics.
• Maintain high-knee drive during 20m sprints.
• Coordinate arm and leg movements for efficiency.
Equipment Needed
• Cones (to mark lanes and finish line)
• Stopwatches (for optional extension)
• Speed Secrets Lab Sheets (1 per student)
The Hook: The Robot Race
"Can you run faster by changing how you move your arms? Let's race with our arms glued to our sides like robots and see what happens!"
1. Mechanics Breakdown (10 mins)
Gather students in a circle. Introduce the two pillars of sprinting speed:
Cheek-to-Cheek: Arms bent at 90°. Hands swing from hip (butt cheek) to chin (face cheek). No crossing the midline!
High-Knee Drive: Knees should reach hip height. Imagine breaking a pane of glass with your knees.
2. Stationary Practice (5 mins)
Students practice arm swings while sitting. This isolates the core and upper body. Increase tempo: "Slow... Medium... Turbo!"
3. The Lab Runs (20 mins)
Divide students into lanes. Run three sets of 20-meter sprints:
Run A: Arms at sides (The Robot).
Run B: Focusing ONLY on high knees.
Run C: Full sprinting form (Cheeks & Knees).
Common Misconceptions
Students often clench their fists (causes tension) or let their arms cross their chest (causes trunk rotation/wasted energy).
Differentiation
Provide visual cues (cones) for knee height for students struggling with drive. Allow slower tempos for coordination focus.
Assessment Rubric
Sprinting Form Lab
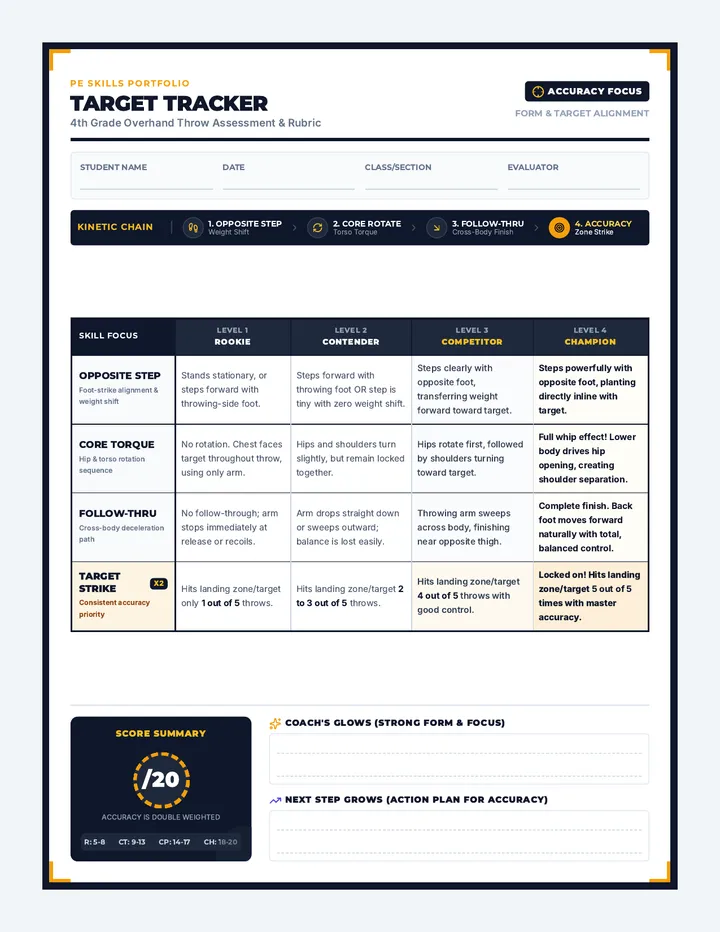
Skill Beginning Developing Mastery Arm Action Arms straight or crossing chest midline. 90° bend present; occasionally crosses midline. Consistent hip-to-chin movement; no crossing. Knee Drive Low knee lift; shuffling gait. Variable knee height; inconsistent drive. Knees consistently reach hip height with power. Coordination Body looks stiff; rhythm is off. Maintains form for half the sprint distance. Fluid coordination of arms and legs through finish.
Teacher Talk: Key Phrases
"Hammer the air!" - To encourage powerful back-swings of the elbows.
"Pockets to Eyebrows!" - An alternative to cheek-to-cheek.
"Drive the nails!" - To encourage forceful downward foot strikes.
Speed Secrets Lab Sheet Speed Secrets
Biomechanical Lab Sheet
Athlete:
Date:
How do proper body mechanics contribute to speed and efficiency?
1
The Robot Race
In this experiment, we run with our arms glued to our sides. No swinging allowed!
Observation: How did your legs feel without your arms helping?
2
The Mechanics Formula
PILLAR 1
Cheek-to-Cheek
Keep elbows at 90°. Hands travel from your hip cheek to your face cheek.
Did I cross the middle of my body?
Yes
No
PILLAR 2
High-Knee Drive
Drive your knees up to hip height with every stride. Don't shuffle!
Did my knees reach hip height?
Yes
No
3
Lab Analysis
When you used full "Cheek-to-Cheek" and "High-Knee" form, what happened to your speed?
Which pillar was harder for you to remember while running fast? Why?
Pro Tip
Keep your hands relaxed like you are holding a potato chip. Don't crush it!
4x100
Sprint Form Slides Speed Lab
Sprint Mechanics
Mastering the Biomechanics of Human Speed
Lesson 01
The Robot Race
Imagine your arms are glued to your sides. You cannot swing them. You cannot use them for balance.
The Question:
"Can you still run at top speed?"
Pillar 1: Cheek-to-Cheek
90°
The Angle
Keep your elbows bent at an "L" shape the whole time.
The Swing
Hand goes from your hip cheek to your face cheek .
The Line
Do not let your arms cross the middle of your chest.
Pillar 2: High-Knee Drive
Hip Height: Your knees should reach your hips on every stride.
Power: Imagine breaking a pane of glass with your knee at the top.
Strike: Put your foot down forcefully right under your center.
POWER DRIVE
It's Lab Time!
Today's Tests:
The Robot Run (Arms Fixed)
The Knee Focus (Drive only)
The Full Sprint (Formula Mix)
"Speed is a science. Observe how your body reacts to each change in form."
Complete your Lab Sheet after each run!
Acceleration Teacher Guide The Launch Pad
Teacher Instruction Guide
Lesson 2: Acceleration
Track & Field Unit
Learning Objectives
• Execute a proper standing start and crouch start.
• Demonstrate reaction to an auditory signal.
• Maintain a low "drive phase" for the first 5-10 meters.
Equipment Needed
• Starter's Pistol (optional) or Whistle/Clacker
• Cones for start/finish lines
• Launch Pad Exit Tickets (1 per student)
The Hook: Reaction Roulette
"Who has the fastest reaction time in the class? Today, we test your brain's speed and your body's power to launch off the line."
1. Start Mechanics (10 mins)
Teach the two primary starts for 4th graders:
Standing Start: One foot forward, knees bent, body leaning forward. Weight on the front foot.
Crouch Start: One knee down, hands behind the line. "Set" position lifts hips high.
2. The "Drive Phase" (10 mins)
Explain that acceleration requires staying low. "Don't pop up like a jack-in-the-box!" Students should look at the ground 2-3 meters ahead for the first 5 meters of the run.
3. Launch Drills (15 mins)
Auditory Reaction: Students line up. Use commands: "On your marks... Get set... GO!" (or a loud clap).
Falling Starts: Students stand tall, lean forward until they *have* to step, and then sprint. This teaches the natural forward lean of acceleration.
10m Dash: Short bursts focused purely on the first 3-5 steps.
Common Misconceptions
Students often stand straight up immediately (losing acceleration) or put their hands on their knees during a standing start.
Differentiation
For students with slower reaction times, allow them to watch a visual signal (dropping a ball) alongside the auditory clap.
Acceleration Rubric
The Launch Pad
Indicator Score 1-3 Observation Notes Body Lean _____ Maintains forward lean during first 5 meters. Reaction Time _____ Moves immediately on the signal without hesitation. Arm Drive _____ Uses powerful "cheek-to-cheek" swings to power out.
Fast Start Slides Speed Lab
The Launch Pad
Mastering Starts and Acceleration
Lesson 02
0.15s
Brain to Body
Reaction time is the speed at which your brain hears a sound and tells your muscles to EXPLODE!
"In a 100m sprint, the first step is the most important one."
Two Ways to Launch
S
Standing Start
Power foot forward
Lean your chest out
Knees bent and ready
C
Crouch Start
Kneel on the track
"Set": Lift hips high
Push off both feet
The Drive Phase
Don't Pop Up!
Keep your eyes looking at the ground for the first 5-10 steps.
Rise up slowly like an airplane taking off.
LOW = POWER
HIGH = SLOW
The Commands
1. On Your Marks
Find your starting spot and get into position.
2. Get Set
Take a breath, lean forward, and lift your hips (if crouching).
3. GO!
Explode forward! Leave the line behind!
Launch Pad Exit Ticket Launch Pad
Exit Ticket • Lesson 02
Athlete Name
Date
1 Which starting position feels more powerful for you?
Standing Start
Crouch Start
2 True or False: "You should stand straight up as fast as possible once the race starts."
True
False
3 Why is it important to stay low during the first 5 steps? Baton Handling Teacher Guide The Blind Pass
Teacher Instruction Guide
Lesson 3: Baton Handling
Track & Field Unit
Learning Objectives
• Demonstrate the "Upsweep" and "Downsweep" baton grip.
• Execute a stationary "blind pass" to a partner.
• Use auditory cues (e.g., "STICK!") for the exchange.
Equipment Needed
• Relay Batons (1 per pair)
• Relay Hand Signals Cards (1 per student)
• Whistle
The Hook: The Blind Challenge
"In a real relay, the runner receiving the baton never looks back. How can we pass an object perfectly without looking? It's all about communication and trust."
1. The Grip (10 mins)
Show students how to hold the baton at the very bottom, leaving as much room as possible for the next runner to grab.
Downsweep: The incoming runner brings the baton down into the palm.
Upsweep: The incoming runner brings the baton up into the "V" of the receiver's hand. (Focus on one for 4th grade, usually Downsweep).
2. Stationary Pairs (15 mins)
Pair students. Student A (Giver) stands behind Student B (Receiver). B reaches back with palm up and thumb out (forming a "V" or "Flat Plate"). A says "STICK!" and passes. Switch roles.
3. The Blind Pass Challenge (15 mins)
Students practice the stationary pass while looking forward. Focus on the "snap" of the baton hitting the palm. "If it doesn't make a sound, it's not a strong pass!"
Common Misconceptions
Receivers often reach back with their arm crossing their body or keep their fingers closed. Givers often try to "hand" the baton rather than "pushing" it.
Differentiation
Students with coordination challenges can start by looking back (visual pass) before moving to the blind pass.
Passing Technique Key
The Blind Pass
The "Plate" Hand (Receiver)
Arm extended back and slightly down. Palm is flat, facing the sky. Thumb is pointed toward the hip. This creates a large target for the baton.
The "Push" (Giver)
"Push it through the hand."
The giver should push the baton firmly into the receiver's palm so they feel it immediately. Never let go until you feel the receiver's grip tighten.
Relay Rule Check
The 20-Meter Zone: Remind students that in a real race, the pass MUST happen inside a specific box on the track. If you pass outside the lines, the team is disqualified!
Baton Basics Slides Speed Lab
The Blind Pass
Mastering Baton Grips and Stationary Exchanges
Lesson 03
The Blind Pass
A "blind pass" means the receiving runner NEVER LOOKS BACK.
Why don't they look?
Looking back slows you down. To stay at top speed, you must trust your teammate!
SPEED IS TRUST
The Baton Grip
1
The Giver
Hold the baton at the very bottom . Leave the rest of the tube open for your partner.
LEAVE SPACE
2
The Receiver
Reach back with your hand in a "V" shape . Thumb toward your hip, palm flat!
FLAT TARGET
Listen for the Signal
"STICK!"
The Giver shouts "STICK!" as they push the baton into the Receiver's hand.
The Receiver snaps their fingers shut as soon as they feel the contact.
Partner Drills
1. Lookie
Practice the pass while looking at each other. Get the grip right!
2. Blind
Receiver looks forward. Giver uses the "STICK!" signal.
3. Speed
How many perfect passes can you make in 30 seconds?
Relay Hand Signals Card Relay Pro Card
Quick Reference Guide
The Grip
Giver: Hold the bottom of the baton.
Receiver: Reach back with a flat palm .
The Command
"STICK!"
Pro Checklist
Don't look back! (Blind pass)
Push it into the palm!
Grip tight when you feel it!
Speed Lab • Track & Field
Relay Pro Card
Quick Reference Guide
The Grip
Giver: Hold the bottom of the baton.
Receiver: Reach back with a flat palm .
The Command
"STICK!"
Pro Checklist
Don't look back! (Blind pass)
Push it into the palm!
Grip tight when you feel it!
Speed Lab • Track & Field
Dynamic Pass Teacher Guide The Exchange Zone
Teacher Instruction Guide
Lesson 4: Dynamic Exchanges
Track & Field Unit
Learning Objectives
• Time acceleration to match the incoming runner's speed.
• Execute a "blind pass" while moving at a jog or sprint.
• Complete a baton exchange within the 20m zone.
Equipment Needed
• Relay Batons (1 per team of 4)
• Cones (to mark 20m exchange zones)
• Zone Master Scorecards (1 per team)
The Hook: Continuous Tag
"We are going to play a game of 'Continuous Tag'. Your team has one baton. How many smooth passes can you make around the loop in 2 minutes without dropping it or stopping?"
1. The "Go Mark" (10 mins)
Teach receivers to start moving *before* the giver reaches them. Set a "Go Mark" (a cone or tape) 5-7 meters before the exchange zone. When the giver hits the mark, the receiver starts accelerating.
2. Jogging Exchanges (10 mins)
Students practice in pairs at 50% speed. Focus on timing the acceleration so the exchange happens in the middle of the zone.
3. Full Speed Zone Drills (20 mins)
Teams of 4 set up in a relay loop. Practice full-speed exchanges. If a baton is dropped: "Keep going! Pick it up and keep your rhythm!"
Common Misconceptions
Receivers often wait too long to start moving or accelerate too fast, leaving the giver behind. Givers often forget to use the "STICK!" command in the noise of the race.
Differentiation
Shorten the exchange zone for teams struggling with timing. Allow "visual passes" (looking back) until they feel confident enough for "blind passes".
The Zone Master Challenge
Scoring Guide
Points System
Pass within the zone (Legal) +10 pts
Blind pass (No looking) +5 pts
Auditory signal ("STICK!") used +2 pts
Dropped baton -5 pts
Teacher Note: The 20m Box
The 20-meter exchange zone is usually marked by large triangles on the track. For class, use cones to make this very obvious. Remind students: "The baton is the athlete. If the baton passes outside the zone, the team is out!"
Exchange Zone Slides Speed Lab
The Exchange Zone
Mastering Timing and High-Speed Exchanges
Lesson 04
The "Box"
In a relay race, the baton MUST be passed inside a 20-meter exchange zone .
DQ Risk!
If the baton is handed over before the zone starts or after it ends, the whole team is disqualified.
20m ZONE
The Exchange Box
The "Go Mark"
The Problem
The incoming runner is fast . The receiving runner starts at zero speed .
The Solution
The Receiver starts accelerating BEFORE the Giver reaches the zone.
When the Giver hits the GO MARK, the Receiver takes off!
MAX SPEED
The Hand-Off
Giver shouts "STICK!" at the perfect moment.
Receiver reaches back with full confidence.
Giver only lets go once they feel the "tug".
The Zone Challenge
Can your team get a perfect score?
Legal Pass +10
Blind Pass +5
"STICK!" Shout +2
Baton Drop -5
Zone Master Scorecard Zone Master
Team Scoring & Practice Log
Team Name
Leg 1 (Start)
Leg 2
Leg 3
Leg 4 (Finish)
Practice Rounds
Round Legal Pass? (+10) Blind Pass? (+5) Shout "STICK!"? (+2) Drops (-5) Total Score 1 2 3 4 Final Practice Score:
What was your biggest timing problem?
How will you fix it for the next round?
Legal Pass Inside the 20m cone zone.
Blind Pass Receiver did not look back.
Signal Giver shouted "STICK!" loudly.
Drop If the baton hits the ground.
Relay Race Teacher Guide Relay Race Finals
Teacher Instruction Guide
Lesson 5: Final Competition
Track & Field Unit
Learning Objectives
• Apply sprinting biomechanics and baton exchanges in a race.
• Strategize runner order based on individual strengths.
• Demonstrate sportsmanship and team collaboration.
Equipment Needed
• Relay Batons (1 per team)
• Cones for exchange zones and lanes
• Team Strategy Planners (1 per team)
The Hook: Final Warm-Up
"It's race day! All the biomechanics, the 'cheek-to-cheek' form, the 'blind passes', and the 'Go Marks' lead to this. Who will be the Speed Lab Champions?"
1. Team Strategy (10 mins)
Teams meet to decide their runner order. Tips for strategy:
Lead Runner: Best starter (explosive from the line).
Second/Third: Consistent passers and strong curve runners.
Anchor (Final): Fastest pure sprinter to the finish.
2. Official Heats (25 mins)
Run the 4x100m (or adjusted distance) relay heats. Enforce legal exchange zones strictly. If a team drops a baton, they can still finish, but they must retrieve it within their lane.
3. Unit Debrief (10 mins)
"What was the most important skill that helped you win or finish the race today? Was it pure speed, or was it the hand-off?"
Common Misconceptions
Students often get overly excited and forget their biomechanics (reverting to shuffling or crossing arms) during the actual race.
Sportsmanship
Model and praise positive "high-fives" between teams regardless of the race outcome. Focus on "Personal Bests" (PBs).
Unit Culmination Checklist
Teacher Observation
Technical Proficiency
Did the team use "Cheek-to-Cheek" form?
Were all passes completed inside the 20m zone?
Did they use the "STICK!" auditory signal?
Team Strategy
Did they assign roles based on strengths?
Did they adjust "Go Marks" between heats?
Closing Words
"Speed is more than just talent—it's technique, timing, and teamwork. You've all graduated from the Speed Lab. Take these biomechanics into every sport you play!"
Race Day Slides Speed Lab
Race Day
The Final Relay Challenge
Lesson 05
The Victory Formula
Speed
"Cheek-to-Cheek" and "High-Knee Drive"
Timing
"Go Marks" and "Blind Passes"
Team Success!
Who Goes Where?
1
The Lead
Best reaction time. Starts with the baton.
2
The Middle
Consistency is key. Great at receiving and giving.
4
The Anchor
Your fastest sprinter to the finish line!
STRATEGY MEETING
The Speed Lab Creed
"We compete with intensity. We win with humility. We lose with grace."
Every athlete is a Speed Lab Pro.
GO TIME!
ON YOUR MARKS
The race starts in 5 minutes...
Team Strategy Planner Reflection Victory Planner
Race Strategy & Unit Reflection
Team Name
The Race Order
Assign your team members based on their unique Speed Lab strengths!
1
Lead-Off (The Starter)
Fastest reaction time. Holds the baton at the start.
2
Leg 2 (The Curve)
Great at receiving AND giving the baton.
3
Leg 3 (The Setup)
Strong acceleration. Sets up the final dash.
4
Anchor (The Finisher)
Fastest pure speed. Races to the finish line!
1. Individual Growth
Which biomechanical skill (Cheek-to-Cheek or High-Knees) improved your personal speed the most?
2. Team Success
What was the "secret sauce" for your team's baton passes today? (Timing, trust, signals?)
Speed Lab Graduate
Track & Field Advanced Mechanics
UNIT 01 COMPLETED