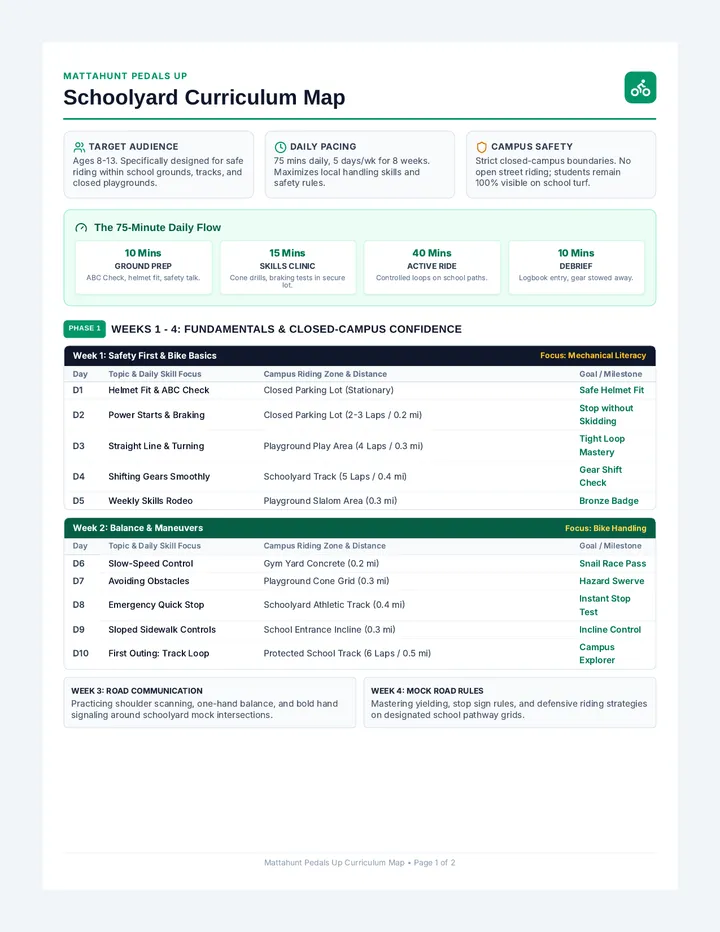
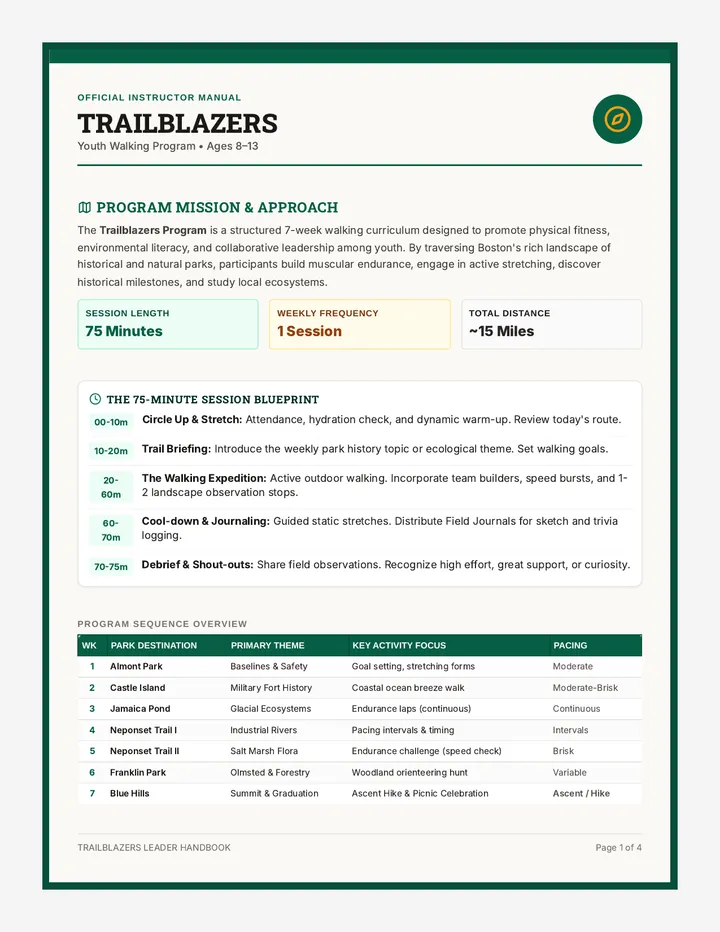
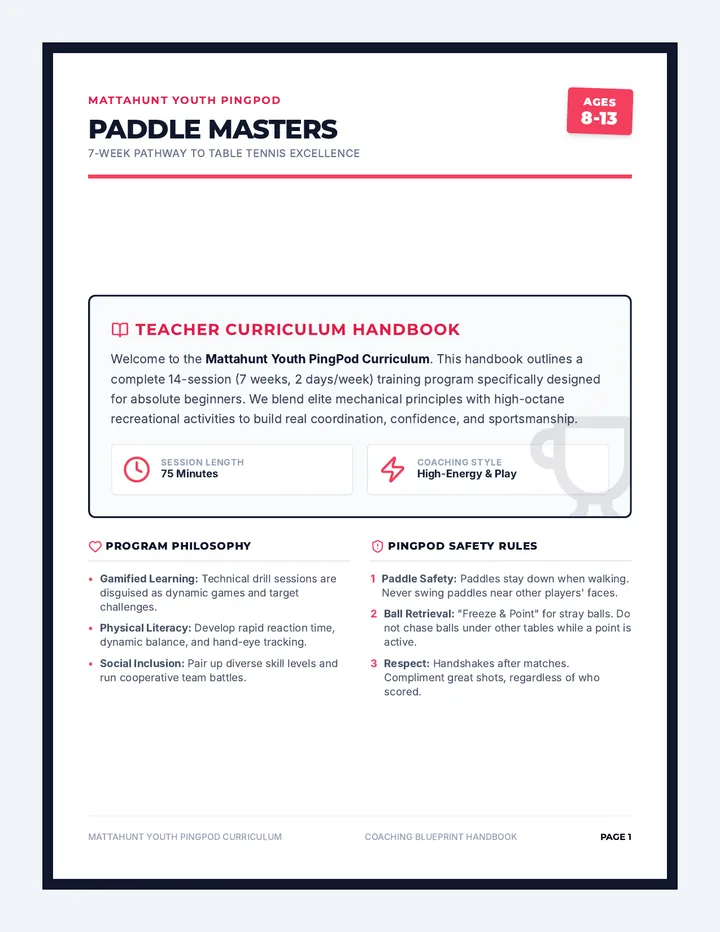
Terrain Tracker Slides Explorer Series
Mountain Makers
Mastering Topographic Maps & Legends
The 3D Puzzle
Reality (3D)
A mountain is steep, tall, and made of rocky terrain. It has peaks and valleys.
The Map (2D)
How do these flat circles tell us how tall the mountain is? That's the secret of Contour Lines !
The Secret Language: Contour Lines
1
Lines Connect Heights
Every point on a single contour line is at the exact same elevation (height above sea level).
2
Spacing Tells the Slope
Close Together: Very Steep (Cliff!)
Far Apart: Gentle Slope (Flat trail!)
3
Concentric Circles
Small circles inside larger circles usually mean a Mountain Peak or Hill.
1000m
Topographic Map Sample
Cracking the Map Legend
What is it?
The "Key" or "Legend" explains what every color and symbol represents on your specific map.
Common Symbols
Forest / Woods
Main Road
Hiking Trail
Water / Lake
The Scale Bar
Tells you how many centimeters on the map equal how many kilometers in real life.
1 km
Ready to Scout?
It's time to test your eyes. You will receive a "Map Master" worksheet. Your mission is to match the map symbols to their real-world twins.
Open Your Explorer Logs!
Map Master Worksheet Map Master Worksheet
Explorer Skills Navigation Series | Lesson 1
Name
Date
Part 1: The Shape of the Land
Topographic maps use contour lines to show elevation. Look at the three hills below. Match each map profile (A, B, or C) to the correct terrain description.
A
B
C
This hill has a very steep cliff on its eastern side, where the lines are very close together.
This hill is a gentle dome . The lines are spaced far apart, meaning the climb is easy.
This is a tall, steep peak . The lines are evenly spaced and get tighter toward the center.
Part 2: Cracking the Legend
Draw a line to match the map symbol to the real-world feature it represents.
Major Highway or Road
Body of Water (Lake/Pond)
Forest or Wooded Area
Hiking Trail / Footpath
Part 3: Scale Detective
Imagine your map scale says: 1 cm = 2 km .
If you measure a trail on the map and it is 4 centimeters long, how far is the hike in real life?
Show your calculation or draw a diagram above!
Map Reading Teacher Guide Teacher Resource
Mountain Makers Lesson Guide
Objective
Students will decode topographic maps by identifying contour lines, symbols, and scales to visualize 3D terrain.
Grade Level
5th Grade (PE/Outdoors)
Duration
45-60 Minutes
The Hook (5-10 mins)
"Show a photo of a steep mountain (like Half Dome) and its topographic map side-by-side. Ask: 'If you were an ant on this piece of paper, how would you know which way is uphill?' Encourage students to look for patterns in the lines before explaining contour lines."
Key Teaching Points
Contour Lines: Explain that lines represent elevation. Close lines = steep. Far lines = flat.
Legend/Key: Like a dictionary for maps. Every map has different colors or icons.
Scale: The tool that converts map distance to real-world distance. Crucial for trip planning.
Common Misconceptions
"Lines are trails"
Students often think contour lines are walking paths. Clarify that they are invisible height markers.
"More lines = bigger area"
Clarify that more lines in a small space just means it's steeper, not that the land is larger.
Answer Key
Part 1: Hill Matching
Steep Cliff: C
Gentle Dome: B
Tall Peak: A
Part 3: Scale Calculation
Calculation: 4 cm × 2 km = 8 km in real life.
Compass Quest Slides Explorer Series
Magnetic North Mission
Anatomy of a Compass & Finding Your Way
The Magic Needle
The Earth is a giant magnet with a North Pole and a South Pole.
How it works:
The magnetic needle inside a compass is weighted so it can spin freely. One end is magnetized to always point toward Magnetic North .
N
The Baseplate Compass
1
Baseplate
The clear plastic body. Keeps the needle flat.
2
Housing
The dial that turns. Has degrees (0-360) and the "Shed".
3
Magnetic Needle
The red end points to Magnetic North.
4
Direction of Travel Arrow
Points exactly where YOU want to go.
The #1 Rule: "Red in the Shed"
To orient your compass, you must turn your whole body until the Red Needle sits inside the Orienting Arrow (The Shed).
How to do it:
Set North (N) to the front index line.
Hold the compass flat in front of your belly.
Spin your feet until the red needle is in the shed.
You are now facing NORTH!
Mission Brief
Pick up your compass. Handle it like a delicate instrument. Our first drill: Finding the four cardinal directions using "Red in the Shed."
North
South
East
West
Navigation Parts Handout Navigation Tool Anatomy
The Baseplate Compass Reference Sheet
Lesson 2 Reference
-0-1-2-3-4-5-6-7-8
Travel Arrow
N
E
S
W
Travel Arrow
Housing / Dial
Magnetic Needle
Baseplate
Direction of Travel Arrow
This arrow is fixed. It points the way you want to walk.
Rotating Housing
The dial used to set your bearing. It rotates 360 degrees.
The "Shed" (Orienting Arrow)
An arrow etched on the bottom of the housing. You put the needle in here!
Scales & Rulers
Used for measuring distance and following map coordinates.
Compass Handling 101
Hold it dead flat . If it tilts, the needle gets stuck.
Keep it away from metal (belt buckles, cars, magnets).
Trust the compass, not your gut feelings!
Finding North Checklist
Rotate the housing until N (0°) aligns with the Travel Arrow.
Hold the compass level in front of you.
Turn your body until the Red Needle is in the Shed .
You are now facing Magnetic North!
North Searcher Activity North Searcher Drill Card
Field Practice: Cardinal Directions & Hand-Eye Coordination
Training Objective
Students will practice fast, accurate orientation using the "Red in the Shed" technique to face North, South, East, and West on command.
Equipment
• 1 Compass per student
• Open space (field/gym)
• Whistle or loud voice
Phase 1: The Basics
Mission: NORTH
Degrees: 0° or 360°
Action: Turn dial to N. Rotate body until red is in the shed. All students should face the same way.
Mission: SOUTH
Degrees: 180°
Action: Turn dial to S. Rotate body until red is in the shed. Class should now face the opposite direction.
Mission: EAST
Degrees: 90°
Action: Turn dial to E. Rotate body until red is in the shed. (Right turn from North).
Mission: WEST
Degrees: 270°
Action: Turn dial to W. Rotate body until red is in the shed. (Left turn from North).
Advanced Game: "Commander North"
A fast-paced reaction game to test orientation speed.
Students stand in a large circle with compasses ready.
Teacher (The Commander) calls out a cardinal direction (e.g., "COMMANDER SAYS... FACE EAST!").
Students must rotate their housing and body correctly.
If a student rotates the wrong way, or finishes last, they must do 5 jumping jacks to "reset" their internal magnet.
Pro Tip: Occasionally call a direction WITHOUT saying "Commander says" to catch them off guard!
Troubleshooting
Needle won't move?
Check if the compass is flat. Even a slight tilt can pin the needle against the housing.
Everyone facing different ways?
Check for metal nearby (jewelry, phones, or even underground pipes if outside near a building).
Degree Diver Slides Explorer Series
Degree Divers
The Math of Bearings & Power of Pacing
What is a Bearing?
A Bearing is a precise direction measured in degrees.
360°
There are 360 individual paths you can take from any spot on Earth.
"North" is just one bearing (0°). But what if your treasure is at 42°? You need a bearing!
0°
90°
180°
270°
45°
Step-by-Step: Taking a Bearing
01
Spin the Dial
Rotate the housing until your desired degree number (e.g., 90°) aligns with the Travel Arrow .
02
Red in the Shed
Turn your whole body until the red magnetic needle is inside the orienting arrow (the shed).
03
Walk the Arrow
The Travel Arrow is now pointing your way. Look up, pick a tree or rock in that direction, and walk!
The Human Ruler: Pacing
How do you know if you've walked 100 meters? You count your Paces !
A "Pace" is 2 Steps
Count every time your LEFT foot hits the ground.
Right... LEFT (1), Right... LEFT (2)
The 100m Challenge
Everyone's legs are different lengths. We are going to measure how many paces it takes YOU to walk 100 meters.
Walk the Shape
Your mission: Start at a cone. Walk 10 paces at 0°, then 10 paces at 90°, then 10 at 180°, and 10 at 270°. If you are accurate, you'll end up right where you started!
Start Your Engines!
Pace Power Log Pace Power Log
Calculating Your Personal Distance Multiplier
Lesson 3 Lab
Explorer Name
Field Date
The Pacing Rule
A Pace is two steps. Start with your right foot. Every time your LEFT foot hits the ground, count "One... Two... Three...". We will walk a 50-meter course twice to find your average.
Trial Data
Trial # Distance Paces Counted Trial 1 50 Meters Trial 2 50 Meters
Average for 50m
(Trial 1 + Trial 2) ÷ 2 =
Your 100m Pace Count
Multiply your 50m average by 2
Distance Estimator
Use your 100m Pace Count from above to estimate how many paces you need for these distances:
200 Meters
Paces
500 Meters
Paces
1 Kilometer
Paces
Pathfinder Practice Card Pathfinder Practice Card
Field Simulations: Geometric Navigation & Bearing Drills
The Setup
Students should work in pairs. Each pair needs a starting cone. Ensure enough space (approx. 20m x 20m per pair) to avoid collisions.
The Golden Rule
"Don't look at the compass while walking. Look at the compass, pick a landmark, then walk to the landmark."
MISSION 1: THE SQUARE WALK Beginner Level
A simple 90-degree turn sequence. If students are accurate, they should finish exactly at their starting cone.
1 Walk 15 paces at 0° (North)
2 Walk 15 paces at 90° (East)
3 Walk 15 paces at 180° (South)
4 Walk 15 paces at 270° (West)
START/FINISH
MISSION 2: THE TRIANGLE CHALLENGE Intermediate Level
Tests students' ability to handle 120-degree shifts. More difficult than the square!
1 Walk 20 paces at 0°
2 Walk 20 paces at 120°
3 Walk 20 paces at 240°
Expert Facilitation
If a student misses their starting mark by more than 2-3 meters, have them check their Level . Many 5th graders tilt the compass toward their eyes to read it, which locks the needle. Remind them: "Belly level, eyes up!"
Wilderness Wise Slides Explorer Series
Wilderness Wisdom
Safety, Gear, & Leave No Trace Ethics
The 10 Essentials
The "10 Essentials" are the items every hiker should carry to stay safe and handle emergencies.
"Even for a short day hike, the weather can change or you might take longer than expected. Be prepared!"
Navigation
Sun Protection
Insulation (Layers)
Illumination
First Aid Kit
Fire
Repair Kit/Tools
Nutrition (Food)
Hydration (Water)
Emergency Shelter
Leave No Trace
Pack It In, Pack It Out
If you brought it with you (even orange peels or granola bar wrappers), take it back home!
Respect Wildlife
Observe from a distance. Never feed animals—it makes them sick and teaches them bad habits.
Stick to Trails
Walk in the center of the trail, even if it's muddy, to avoid crushing plants on the edges.
Leave What You Find
Don't pick flowers, take cool rocks, or carve into trees. Leave nature exactly as you found it.
Plan Ahead
Know where you are going and what the weather will be like. Avoid busy times.
Be Considerate
Respect other hikers. Keep voices low and yield the trail to those going uphill.
What Would You Do?
You are 3 miles into a hike. The sun is setting, you are out of water, and your phone battery just died. Which of your "10 Essentials" will save the day?
Analyze the Scenarios
Explorer Essentials Checklist Explorer Essentials
Safe Packing & Leave No Trace Reference
Lesson 4 Handout
The 10 Essentials Checklist
Navigation
Map, Compass, or GPS device.
Headlamp/Flashlight
Plus extra batteries!
Sun Protection
Sunscreen, hat, and sunglasses.
First Aid Kit
Including foot care and insect repellent.
Knife / Tools
Multi-tool and gear repair kit (duct tape!).
Fire
Matches or lighter in a waterproof case.
Emergency Shelter
Space blanket or light tarp.
Extra Food
Energy bars and trail mix.
Extra Water
Carry more than you think you need.
Extra Clothes
Extra socks and a rain shell.
The 7 Principles of Leave No Trace
1
Plan Ahead and Prepare
2
Travel and Camp on Durable Surfaces
3
Dispose of Waste Properly (Pack it out!)
4
Leave What You Find
5
Minimize Campfire Impacts
6
Respect Wildlife
7
Be Considerate of Other Visitors
Trail Ethics Scenarios Trail Ethics Scenarios
Leave No Trace Discussion Cards
Cut out these cards and distribute to small groups. Discuss the situation and decide which Leave No Trace principle(s) apply and what the team should do.
SCENARIO A
It rained last night and the trail is very muddy. There is a large puddle right in the middle of the path. To keep your boots clean, you want to walk around the puddle through the grass and bushes.
Question:
Is walking around the mud the right move? Why or why not?
SCENARIO B
While eating lunch, a cute chipmunk comes very close to your group. You have a few crumbs of your granola bar left. Your friend says, "It’s okay to feed him just a tiny bit, he looks hungry!"
Question:
How does feeding wildlife affect the animals and the environment?
SCENARIO C
You find a beautiful, sparkly purple rock near a stream. It would look perfect on your bookshelf at home. There are thousands of rocks in the stream, so taking one won't matter, right?
Question:
What would happen if every hiker took just one rock or flower?
SCENARIO D
Your group is really excited and having a great time. You are shouting and laughing loudly while playing music on a portable speaker. You see another hiker up ahead who looks annoyed.
Question:
Which LNT principle covers this situation? How can you still have fun?
Mission Brief Slides Final Challenge
The Great Schoolyard Quest
Applying Your Map, Compass, & Pacing Skills
Your Mission Brief
You and your partner will navigate a course of Control Points hidden around the school grounds.
The Goal:
Find every station, record the secret code, and return to base. Accuracy is more important than speed!
Course Rules:
Stay with your partner at all times.
Do NOT share codes with other teams.
Leave the control points exactly where you found them.
Respect the boundaries!
The Navigator's Toolkit
The Map
Identify symbols and terrain to plan your route between controls.
The Compass
Set your bearing and follow the travel arrow precisely.
Pacing
Count your paces to know when you have reached the target area.
What to Look For
A Control Point is a small orange and white marker.
Each marker has a Letter Code . When you find one, write that letter in the matching box on your scorecard!
A
Ready to Quest?
Team up, grab your maps, and check your compasses. The first clue is waiting for you at the start line.
Go!
Orienteering Control Card Orienteering Control Card
Official Challenge Scorecard
Final Challenge
Navigator 1
Navigator 2
Start Time
Finish Time
"Instructions: Use your map and compass to find the control points in any order. Each point has a unique letter code. Record the code in the matching box below. Accuracy and teamwork are your priorities!"
POINT 1
?
POINT 2
?
POINT 3
?
POINT 4
?
POINT 5
?
POINT 6
?
POINT 7
?
POINT 8
?
POINT 9
?
POINT 10
?
Mission Reflection
What was the most challenging point to find? Why?
How did you and your partner work together?
Instructor Initials
Challenge Setup Guide Teacher Resource
Challenge Setup Guide
Planning the Great Schoolyard Quest
Course Objective
The challenge is designed to test student accuracy in map reading, compass bearings, and pace counting. It is not a race; it is a test of precision.
Materials Needed
• 10 "Control Points" (Orange/White cards)
• 10 Clue Sheets (Bearings/Distances)
• Clipboards for each pair
• Whistle / Stopwatch
Step-by-Step Setup
1
Create the Master Map
Take a satellite image or drawing of the school. Mark 10 locations (controls). Ensure they are identifiable features (e.g., "The oak tree," "The corner of the gym").
2
Hang the Controls
Laminate 10 small orange/white cards. Write a unique letter (A-J) on each. Hang them at the 10 locations. Keep them visible but requiring a little "searching."
3
Write the Clues
Example Clue: "From the Flagpole, walk 120 paces at 210° to find Control #4."
Master Answer Key Template
P1
P2
P3
P4
P5
P6
P7
P8
P9
P10
Field Safety
Set clear boundaries. Students should always be within eye-line or earshot of the main base area. Use a whistle blast to signal the end of the challenge.