Slow Motion Slides Slow Motion Mastery
Visual Tracking with Balloons
Physical Education • Grade 1
The Big Challenge
"Can you keep your balloon in the air without letting it touch the ground?"
Watch it!
Tap it!
Time it!
How to Track
Glue Your Eyes
Don't look at your hands. Look only at the balloon!
Predict the Path
Where is it going next? Move your body there early.
Slow & Gentle
Balloons move slow. We should move with them!
Track the Path
Balloon Safety
Bubble Space
Stay in your own hoop or circle. Don't bump into friends!
Gentle Taps
Use your finger tips or palms. No hitting or squeezing!
Watch Out
If a balloon pops, tell a teacher right away. Don't touch the pieces!
Have Fun
Keep your eyes up and your hands ready!
Today's Missions
1
Keep it up with TWO hands
2
Tap it with only ONE hand (try your other hand too!)
3
Use different parts: head, shoulders, or knees!
4
Walk across the "River" while keeping it up
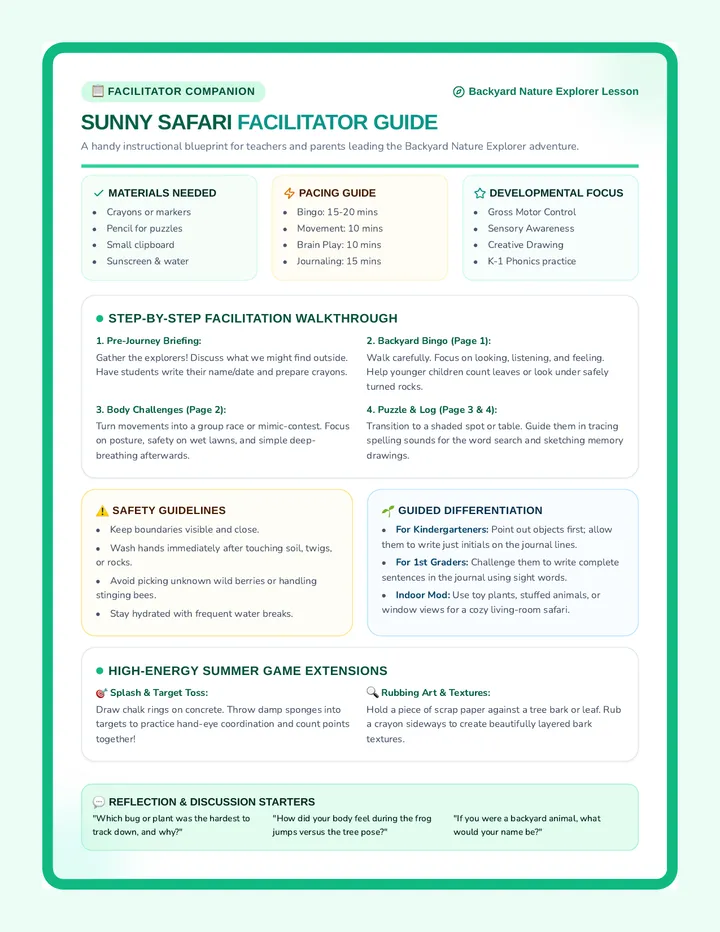
Slow Motion Teacher Guide Slow Motion Mastery
Teacher Instruction Guide
Lesson 1: Visual Tracking
Learning Objectives
Identify the importance of "eyes on the object" during movement.
Track a slow-moving object (balloon) through space.
Time a hand movement to make gentle contact with the object.
Maintain personal space while performing dynamic movements.
Equipment Needed
Balloons: 1 per student (plus extras)
Markers: Cones or Hula Hoops for personal space
Music: Upbeat, mid-tempo for tracking
Slide Deck: "Slow Motion Mastery"
Quick Cues
Visual
"Sticky Eyes"
Contact
"Butterfly Taps"
Body
"Ready Stance"
Activity Progression
5 Mins
1
Warm-Up: Follow the Finger
Students stand in their personal space. Teacher moves a finger (or a wand) in various patterns. Students must track it with their eyes ONLY (no head movement if possible).
10 Mins
2
The Float Challenge
Each student has one balloon. Challenge them to keep it up using only their palms. Encourage them to stay inside their "bubble" (hoop or spot marker).
Check for Understanding: Why do we look at the balloon and not our hands? (Answer: Because the balloon is the thing moving!)
10 Mins
3
Body Part Bingo
Teacher calls out body parts (e.g., "Left hand!", "Right elbow!", "Head!"). Students must use that part for the next tap to keep the balloon up.
10 Mins
4
The River Crossing
Students must move from one side of the gym to the other while keeping their balloon in the air. If it touches the floor, they must freeze for 3 seconds before continuing.
Challenge
Add a second balloon or require students to use non-dominant hands only. Try keeping it up while sitting on the floor.
Support
Use larger balloons (they move slower) or have students work in pairs to keep one balloon up together.
Slow Motion Student Log Balloon Tracker Log
Slow Motion Mastery • Lesson 1
Name
Date
Today's Tracking Missions
I used TWO HANDS to keep the balloon up.
I tapped the balloon with my LEFT HAND .
I tapped the balloon with my RIGHT HAND .
I used a DIFFERENT BODY PART (like a knee or elbow).
Draw Your Favorite Trick
What was the coolest way you kept the balloon in the air?
How did you do?
😅
Hard
🙂
Good
😎
Easy!
Catching Connection Slides The Catching Connection
Beanbag Tossing & Catching Skills
Physical Education • Grade 1
Can You Do It?
"How many times can you toss and catch your beanbag without dropping it?"
1... 2... 3...
Reaction!
The Secret Sauce
Eye Glue
Watch the beanbag from the moment it leaves your hand until it lands!
Cup Hands
Make your hands like a bowl or a cup. Don't "clap" the beanbag!
SOFT LANDING
"Listen for... NOTHING! Soft catches are quiet."
The Progression Path
Level 1
Low Toss + 2 Hands
Toss to eye level. Catch with both hands like a bowl.
Level 2
Add a Clap
Toss, clap your hands once, then catch!
Level 3
One Hand Mastery
Toss with your right, catch with your right. Then swap!
Level 4
The Criss-Cross
Toss with one hand, catch with the OTHER hand.
Pro Catching Tips
The Elevator
Your hands should move like an elevator. Go up to meet the bag and bring it down gently to absorb the catch.
Steady Feet
Keep your feet like anchors! Balanced and shoulder-width apart so you don't tip over when you reach.
Catching Connection Teacher Guide The Catching Connection
Teacher Instruction Guide
Lesson 2: Toss & Catch
Learning Objectives
Demonstrate correct "cup hands" catching technique.
Adjust body and hand position based on object trajectory.
Perform self-toss and catch using both dominant and non-dominant hands.
Execute a timed movement (clap) between tossing and catching.
Equipment Needed
Beanbags: 1 per student (various colors)
Markers: Floor spots or tape for stance
Checklists: Skills Tracker (1 per student)
Music: Rhythmic, steady beat
Key Vocabulary
Proprioception
Knowing where your body parts are without looking.
Absorb
Bringing the hands down with the catch to soften the impact.
Bilateral
Using both sides of the body together.
Instructional Progression
Focus
STANCE
The Balanced Catching Base
Start with feet shoulder-width apart, knees slightly bent (the "Athletic Ready Stance"). Practice moving hands up and down like an elevator without the beanbag first.
Phase 1
TWO-HAND
Two-Hand Bowl Catch
Toss the beanbag to eye-level. Students catch it using two hands, forming a "bowl." Emphasize keeping eyes on the beanbag until it hits the hands.
Common Error: "Clapping" or snatching at the bag.
Correction: Remind them to let the bag fall into the hands.
Phase 2
ONE-HAND
Dominant vs. Non-Dominant
Students toss with their preferred hand and catch with the same hand. Then, switch to the other hand. Finally, toss with one and catch with the other (Hand-to-Hand Transfer).
Phase 3
TRICKS
The Reaction Add-On
Toss + Clap once + Catch. Toss + Touch shoulders + Catch. Toss + Turn around + Catch (advanced). This builds reaction time and spatial awareness.
What to Look For (Assessment)
Eyes track object
Knees slightly bent
Hands absorb catch
Cup hands (no clapping)
Catching Connection Skills Tracker Skill Climber
Toss & Catch Progression Log
Student
Date
How high can you climb?
Level 1
The Simple Toss
Toss the bag and catch it with 2 hands. Do this 5 times in a row!
Level 2
The One-Hander
Toss with one hand and catch with the same hand. Try it with your other hand too!
Right Hand
Left Hand
Level 3
The Clap Challenge
Toss the bag, clap your hands once, and catch it. Can you do it 3 times?
The Trickiest Part
Which level was the hardest for you today?
Level 1
Level 2
Level 3
My Super Goal
Next time, I want to be able to catch the beanbag while...
Bullseye Basics Slides Bullseye Basics
The Art of the Underhand Throw
Physical Education • Grade 1
The Mission
"Can you adjust your throw to land the beanbag exactly inside the hoop?"
Aiming isn't just luck—it's Science!
3 Steps to a Bullseye
01
Tick-Tock
Swing your arm back like a clock pendulum. Straight arm!
02
Step & Point
Step with your opposite foot. Point your toes at the target!
03
The Release
Let go when your hand points at the target. Shake hands with the target!
Distance Control
LITTLE POWER
Short swing for targets that are close.
BIG POWER
Longer swing for targets that are far away.
Match your swing to the distance!
Station Rotation
STATION 1
Bucket Drop
Soft tosses into buckets.
STATION 2
Hoop Island
Landing in hula hoops.
STATION 3
Wall Ball
Hit the tape on the wall.
STATION 4
Tower Tumble
Knock over the cups!
Bullseye Basics Teacher Guide Bullseye Basics
Teacher Instruction Guide
Lesson 3: Aiming & Throwing
Learning Objectives
Demonstrate the underhand throwing pattern (Tick-Tock, Step, Release).
Apply force modulation (grading movement) based on distance.
Accurately aim at stationary targets of varying sizes.
Follow safety procedures for multi-station rotations.
Cues
"Tick-Tock, Step, Rock!"
Skill Focus
Spatial Awareness & Force
Gym Layout
Stations: Set up 4 distinct zones around the gym perimeter.
Safety Zones: Use tape to mark "Throwing Lines" and "Retrieval Zones."
Rotation: 5 minutes per station with a 1-minute transition.
Target Station Guide
1. The Bucket Drop
CLOSE TARGET
Focus on "soft release" to prevent beanbags from bouncing out of buckets or crates.
Setup
3 buckets at 5ft distance.
2. Hoop Island
MEDIUM TARGET
Aim for the center of hula hoops. Challenge: Give more points for landing in the "bullseye" (smaller hoop inside larger).
Setup
3 hoops at 8ft distance.
3. Wall Ball Targets
VERTICAL TARGET
Hit specific tape marks or posters on the wall. Focus on the height of the release.
Setup
Tape squares at varying heights.
4. Pyramid Power
PRECISION TARGET
Knocking over foam blocks or plastic cups. Requires more force than the Bucket Drop.
Setup
Foam blocks stacked on tables/benches.
Formative Assessment Checks
Arm Path
Is the arm swinging back straight and following through forward?
The Step
Is the student stepping with the OPPOSITE foot of the throwing hand?
Release Timing
Does the bag go way up (late release) or straight down (early release)?
Bullseye Basics Scorecard Target Scorecard
Bullseye Basics • Lesson 3
Ranger
Date
Visit each station! Give yourself a Star for every hit. Can you fill your card?
1 Bucket Drop
2 Hoop Island
3 Wall Targets
4 Cup Tumble
Target Talk
I used a SMALL SWING for targets that were close.
I used a BIG SWING for targets that were far away.
My favorite station was # _______
Floating Feathers Slides Floating Feathers
Introduction to Scarf Juggling
Physical Education • Grade 1
Juggling Magic
"Let's learn the first steps of juggling using scarves that float like feathers!"
Watch the Top
Catch the Tail
The Secret "X" Pattern
Cross the Line
Your right hand tosses to your left side. Your left hand tosses to your right side!
Claw Catch
Catch the scarf from the top like a bird's claw!
X
Toss Point
Step-by-Step Magic
1
One Scarf: The Rainbow
Toss from one hand, over your head, and catch with the other.
2
One Scarf: Hand to Hand
Toss across your body. Hand A to Hand B. Catch high!
3
Two Scarves: Toss-Toss-Catch-Catch
"Toss, Toss, Catch, Catch." This is the real rhythm!
Find Your Flow
Juggling is like dancing with your hands. Keep your body relaxed, your eyes up, and follow the rhythm of the float.
Toss
Float
Catch
Floating Feathers Teacher Guide Floating Feathers
Teacher Instruction Guide
Lesson 4: Scarf Juggling
Learning Objectives
Identify the "midline" of the body and demonstrate crossing it.
Execute a high "claw" catch on a descending lightweight object.
Maintain a consistent tossing height (above head level).
Perform a "Toss-Toss, Catch-Catch" rhythmic sequence with two objects.
Pedagogical Note
Scarf juggling is ideal for 1st grade because the objects move slowly, reducing anxiety and allowing time for visual tracking and processing. It is as much a cognitive task as a physical one!
Equipment
Juggling Scarves
2 per student (different colors are best)
Metronome/Rhythm Track
60-80 BPM for steady tossing
Instructional Steps
Focus
GRIP
The "Pinch & Poke" Grip
Show students how to hold the scarf in the center with a pinch. When tossing, "poke" the sky. This ensures the scarf opens up and floats better.
Focus
X-TOSS
The Rainbow Arc (One Scarf)
Students toss one scarf from their dominant hand, across the body (midline), and catch with the non-dominant hand. The scarf should reach eye-level or higher.
Cue: "Toss across, catch high!"
Focus
RHYTHM
Toss-Toss, Catch-Catch (Two Scarves)
The foundation of the 3-scarf cascade. Hold one in each hand. Toss A (across), then Toss B (across). Catch A, then Catch B. It should sound like a steady 1-2-3-4 beat.
R: Toss
L: Toss
L: Catch
R: Catch
Troubleshooting the Flow
Problem: Tossed too forward
Encourage students to "stand against a wall" or imagine they are in a telephone booth. Tossing should be vertical/lateral, not forward.
Problem: "Panic" Catching
If students are reaching low or slapping the scarf, remind them to "Wait for the float." Scarves take a long time to fall!
Juggling Journey Journal Juggling Journey
Reflections from Lesson 4
Magician
Date
The Juggler's Checklist
The Rainbow Scarf
I can toss one scarf across my body and catch it.
The Claw Catch
I caught the scarf from the top like a bird's claw.
The 1-2-3-4 Rhythm
I can say "Toss, Toss, Catch, Catch" while I juggle.
How did it feel?
When the scarves were floating in the air, how did your body feel? Circle the words that match:
CALM FAST FOCUSED HAPPY DIZZY
Self Portrait
Draw yourself juggling your favorite colors!
Juggler's Secret
Why are scarves easier to juggle than balls?
____________________________________________________________________
Pyramid Power Slides Pyramid Power
The Art of Speed Stacking
Physical Education • Grade 1
Speed vs. Precision
"How fast can you build a pyramid and take it down without it falling over?"
Speed
Precision
Both Hands!
Teamwork for Your Brain
No Lazy Hands!
Both hands must work together. One hand picks up, the other hand places!
Slide, Don't Slam
Gently slide the cups into place. If you slam them, they will bounce!
Bilateral!
The 3-3-3 Routine
1
Up-Stack
Build 3 little pyramids of 3 cups each.
2
Down-Stack
Collapse them back into stacks of 3.
3
Reset
Ready for the next round! Hands off the table.
Pro Stacking Tips
Light Touch
Hold the cups lightly at the top. Don't squeeze!
The Rhythm
Right-Left-Right... Left-Right-Left...
Pyramid Power Teacher Guide Pyramid Power
Teacher Instruction Guide
Lesson 5: Cup Stacking
Learning Objectives
Demonstrate bilateral integration by using both hands simultaneously.
Perform the 3-3-3 stacking sequence with accuracy and increasing speed.
Practice "precision placement" to maintain structural stability.
Engage in healthy competition and self-timing challenges.
Teacher Tip
Speed stacking is a fantastic way to develop bilateral coordination. Monitor students to ensure they are not using one dominant hand for everything. The non-dominant hand must lead or support at all times!
Equipment
Stacking Cups
Sets of 9 or 12 per student
Timers/Stopwatches
1 per pair of students
Flat Surfaces
Tables, desks, or gym floor mats
Instructional Steps
Focus
GRIP
"The Claw & Slide"
Students should hold the cup lightly at the top rim. Practice "up-stacking" a single 3-cup pyramid: Right hand sets the first base cup, Left hand sets the second, Right hand sets the top. Avoid "over-gripping."
Focus
3-3-3
The 3-3-3 Cycle
Build 3 pyramids of 3 cups from left to right. Then, return to the start and down-stack each one. Speed is the goal, but "fumbles" cost time!
CUE: "Lead with your dominant hand, follow with the other!"
Game
TIMER
The Beat the Clock Challenge
In pairs, one student stacks while the other times. They record their best of 3 tries. Emphasize that "slow is smooth, and smooth is fast."
Correction Strategies
Toppling Pyramids
Check for "heavy hands." Ensure cups are aligned perfectly in the center of the base cups.
One-Handed Stacking
Have the "lazy hand" hold a small ball or beanbag to force its engagement (or simply pause the student and demonstrate bilateral flow).
Transition Speed
Encourage students to keep their hands close to the table surface rather than reaching high between stacks.
Pyramid Power Record Sheet Stacker Stats
Speed Stacking Record • Lesson 5
Pro Stacker
Season
The Golden Rule
"If a cup falls, you must fix it before you move to the next stack!"
The Timing Trick
"Hands on the table to start... Hands on the table to stop!"
Speed Trials (3-3-3 Stack)
Attempt My Time (Seconds) Fumbles? TRIAL 1 Oops! TRIAL 2
Oops! |
| BEST TIME! | |
Oops! |
Precision Power Reflection
What part was easier today? Building the pyramids (Up-Stack) or collapsing them (Down-Stack)?
Up-Stack
Down-Stack
Unit Complete
Hand-Eye Master!