Float Serve Slides Float Serve
Physics
Advanced Serving Mechanics • 11th Grade PE
Pro Training Series
The Knuckleball Effect
Unpredictability through physics.
In baseball, a knuckleball is thrown with almost no spin.
Air interacts with the seams, creating erratic, unpredictable movement. The ball "dances."
"The pitcher doesn't know where it's going, the catcher doesn't know, and the batter definitely doesn't know."
Goal: Zero Spin
Maximum turbulence. Maximum frustration for the receiver.
The Contact Point
Flat palm, solid strike.
1. Rigid Hand
Keep the hand stiff and flat. No "cupping" the ball. Think of your palm as a solid wooden board.
2. Center Strike
Aim for the direct center of the ball. Any offset will create spin (top-spin or side-spin).
3. Short Impact
The "pop." Contact duration must be extremely short to prevent energy transfer into rotation.
The Freeze
Eliminating the arc.
Avoid: The high, sweeping follow-through common in top-spin serves.
Execute: The "Stab and Stop." After contact, freeze your hand in place as if you're high-fiving a wall.
The sudden stop prevents the wrist from snapping, which is the primary source of top-spin.
Visualizing the Force
Power Load Contact Freeze
The force is applied in a singular, explosive burst, then immediately cut off.
Strategic Use
When and why to float.
Targeting Deep
A deep float serve forces receivers to move backward while tracking an erratic ball—the hardest move in passing.
Short Drop
Suddenly cutting force can make the ball drop into the 10ft line (Zone 3), disrupting the setter's transition.
Physics is on your side.
The faster the serve, the more air turbulence acts on the ball. Speed + Zero Spin = Chaos.
Float Serve Analysis Activity Float Serve Analysis
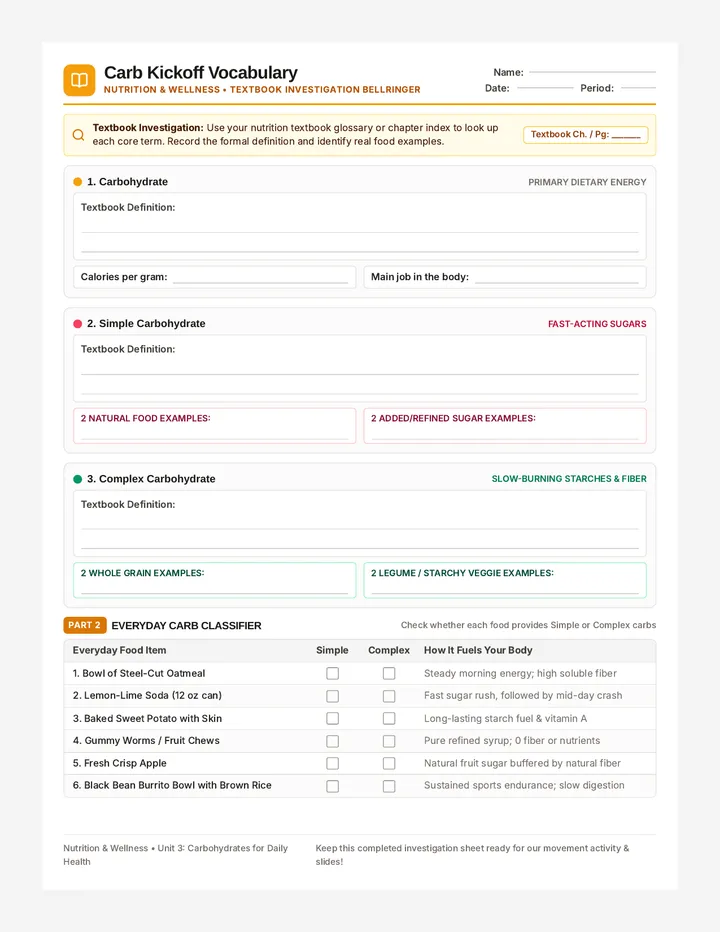
Biomechanics & Peer Observation • Pro Training Series
Athlete:
Partner:
1. Physics Simulation
Task: Visualize the Trajectory
Sketch the predicted flight path of a Top-Spin serve vs. a Float serve. Note the point where air resistance (turbulence) takes over.
Net Position
Analysis Prompt
Describe why the float serve "dances" in the air compared to the predictable arc of a top-spin serve. Mention spin and air resistance .
2. Peer Biomechanics Rubric
Observe your partner perform 5 serves. Mark a check (✓) for successful execution and a dash (—) for areas needing focus.
Technical Element Serve 1 Serve 2 Serve 3 Serve 4 Serve 5 Rigid Hand (Flat Palm) High Contact Point (Full Extension) The "Pop" (Short Contact) The Freeze (Minimal Follow-Through)
3. Peer Coaching Advice
The Glow (What went well)
The Grow (Technical correction)
Pro Tip: Look for the ball seams. If you can read the brand name mid-air, you've achieved a perfect float!
Platform Mastery Slides Mastering
the Platform
Stability & Angle Adjustment • Lesson 2
Defensive Excellence
Silent Passer Challenge
True control is quiet.
The Goal: Complete 10 perfect passes to target in a row.
No slapping sounds on contact.
No extra steps after setup.
Perfect "frozen" finish.
10/10
Execution Required
The Perfect Surface
Eliminating the variables.
1. Thumbs & Wrists
Thumbs must be parallel and pointing toward the floor. This "locks" the wrists and creates a flat hitting area.
2. Elbows Locked
Hyperextend your elbows. Any bend in the arms creates an uneven bounce and absorbs too much energy.
3. Shoulder Shrug
Push your shoulders toward your ears. This removes the "hole" in the center and provides more reach.
Angle is Everything
Tilt, don't swing.
The Simple Rule:
Angle of Incidence = Angle of Reflection
To pass a ball to your left, drop your left shoulder and raise your right. The platform becomes a ramp.
CRITICAL: Do not swing your arms upward. Let the angle and your legs do the work.
Target
Shoulder Tilt = Direction
Absorb vs. Attack
Handling different serve velocities.
Hard-Driven
Relax the platform slightly at contact. Move "with" the ball. Your goal is to kill the speed so it stays on your side.
Soft / Short
Drive through the ball with your legs. Use a rigid platform to push the ball to the target area.
"Your legs provide the power; your arms provide the accuracy."
Platform Response Log Platform Response Log
Mastery & Angle Adjustment • Session 2.2
Athlete Name:
Observation Date:
1. Silent Passer Challenge
Pass 10 consecutive balls to the setter target. If the ball slaps your arms (loudly) or your platform breaks before the "freeze" is complete, reset to zero.
1
2
3
4
5
6
7
8
9
10
Number of Resets:
Primary Reason for Error:
2. Angle Adjustment Matrix
Pass to Zone 4
Shoulder Position:
Pass to Zone 3
Shoulder Position:
Pass to Zone 2
Shoulder Position:
3. Technical Reflection
When receiving a high-velocity float serve, how did you adjust your platform tension to prevent the ball from flying out of bounds?
What is the most significant biomechanical difference between passing a ball directly in front of you versus passing laterally?
Coaching Key: "If your thumbs are up, the pass is up. Keep them down and pointed to the target."
Tactical Zones Slides Tactical
Serving
Strategic Serve Zones • Lesson 3
Court Geography & Seams
Court Geography
Identifying your targets.
4
3
2
5
6
1
Opponent's Side (Top View)
Zone 1 & 5: The deep corners. Hardest for receivers to judge "in or out."
Zone 6: The middle deep. Often the seam between two passers.
Zone 2, 3, 4: Short serves. Forces middle hitters to pass and disrupts their approach.
Attacking the Seams
Where communication breaks down.
What is a Seam?
The physical space between two receiving players. Neither player clearly "owns" this space, leading to hesitation.
The 50/50 Rule
A ball served exactly in the middle of two players forces them to make a split-second decision. If both go for it, they collide; if neither goes, the ball drops.
Chaos Factor
Serving the seam doesn't just score points; it builds frustration and breaks team trust on the other side of the net.
Strategic Disruption
More than just an "Ace".
1. Target the Setter
Serve the setter when they are in the back row. Forces them to move further to reach the net for the second contact.
2. Target the Hitter
Make the primary attacker pass the ball. It is much harder to transition into a full-speed attack after receiving a serve.
3. Target the Weakest
Find the player struggling with their platform or movement and put pressure on them consistently.
BATTLESHIP MODE
Objective: Eliminate the opponent's "fleet" by hitting designated zones in sequence.
The Rules:
• Serve from behind the line.
• Call your zone before serving.
• Hit the zone = Sink a ship.
• Miss the zone = Splash/Miss.
Target Accuracy Required
Battleship Mission Log Serving Battleship
Mission Briefing • Tactical Accuracy Challenge
Fleet Command:
Primary Objective
Systematically eliminate the opponent's defensive fleet by serving with 100% accuracy into designated tactical zones. Precision is the difference between a "Hit" and a "Splash."
Tactical Map (Opponent Side)
Zone 4
Zone 3
Zone 2
Zone 5
Zone 6
Zone 1
Note: Zones 1, 5, and 6 are back-row targets.
Fleet Status (The Ships)
Destroyer (Zone 1 & 5)
Submarine (Seam 1/6 & 5/6)
Aircraft Carrier (Zone 6)
Engagement Log
Attempt Target Zone Result (Hit/Splash) Correction for Next Shot #1 #2 #3 #4 #5
Post-Mission Analysis
1. Which zone was the most difficult to "hit" and why? (Consider distance vs. net height)
2. How did you adjust your biomechanics (toss height or contact speed) to target Zone 3 vs. Zone 6?
Mission Status: Complete
Formation Mastery Slides Formation
Mastery
Serve Receive Systems • Lesson 4
Team Coordination & Communication
W
The "W" Formation
Foundational 5-person receive.
LF
S
RF
LB
MB
RB
5 Passers • High Coverage
Best For: Beginner to intermediate teams or handling very unpredictable float serves.
Pros: Covers the most floor space; short distance for each player.
Cons: Many seams; crowded transition for attackers.
Perimeter System
High-performance 3-person receive.
P1
P2
P3
Elite Standard • Optimized Offense
The Concept: Only 3 players (usually OH1, OH2, and Libero) receive the serve.
Pros: Fewer seams = clearer communication; attackers (M, OP) are free to focus solely on transition.
Cons: Passers must cover massive territory (Zone 1 to Zone 5).
Seam Protocol
Deciding who takes the 50/50 ball.
The "Left is Right" Rule
Typically, the player to the left (looking at the net) has priority on the seam. This keeps the passing platform clear for a cross-court angle.
Deep vs. Short
The player moving forward usually takes precedence over the player moving backward. Moving forward is biomechanically more stable.
Call it Early.
Call it Loud.
"Mine!" or "Me!" must be shouted before the ball crosses the net.
Video Breakdown
Formation breakdown analysis.
Case Study: The "I Thought You Had It" Error
Watch the following clip of a collegiate serve receive. Identify the specific seam that was attacked and which player failed the communication protocol.
Waiting for Instructor Clip...
Seam Strategy Worksheet Seam Strategy Guide
Communication & Protocol • Lesson 4.2
Unit: Formation Mastery
NAME:
1. Visualizing the Seams
Below are three common serve-receive formations. **Using a red pen/marker, draw vertical lines representing the "Seams" between players.** Then, label which player (Left, Middle, or Right) should prioritize the ball based on the "Left is Right" protocol.
W-Formation
Primary Owner of Seam A:
Box Formation
Primary Owner of Center Seam:
Perimeter (Elite)
Number of High-Risk Seams:
2. Conflict Resolution Scenario
The Scenario:
A short float serve is falling directly between the Left Front (moving backward) and the Left Back (moving forward). Both players have called "Mine!" at the same time.
Who should take the ball?
Which biomechanical rule justifies this?
Explain how this communication error could have been avoided during the ball's flight:
3. Communication Checklist
Non-Verbal Signals:
Early platform formation (pointing at ball)
Shoulder tilt toward target
Eye contact with seam partner
Verbal Signals:
"Mine!" (Single syllable, loud)
"You!" (Directing partner early)
"Short/Deep" (Information for team)
Remember: Silence on the court leads to aces for the opponent. Be the loudest communicator in the gym.
High Stakes Duel Slides High Stakes
Duel
Pressure Performance • Final Session
Execution Under Stress
1-on-1 Battle
Server vs. Passer. No teammates. No safety net.
The Server: Must serve to a designated zone (1-6) to score. A missed serve is -1 point.
The Passer: Must pass the ball into a "perfect" 3-foot target area. An "Ace" against you is -2 points.
Winning Condition
FIRST TO 7
Standard Match Play
Sudden Death
One play. One winner. Zero margin for error.
Game Point
You are serving for the match. If you miss, you lose the match instantly. Do you play it safe or go for the seam?
The "Frozen" Rule
If the passer doesn't hold their "freeze" for 2 full seconds after the pass, the server gets the point regardless of where the ball goes.
Silence is Loss
If a passer fails to call the ball "loud and early" in a group duel, they automatically forfeit the point.
The Mental Game
Physiology of pressure.
Biological Response:
Under stress, your muscles tighten and your vision narrows. This is bad for a float serve and worse for passing.
The Reset:
Take a deliberate "Box Breath" before every whistle. Focus on your center of gravity , not the score.
Clutch Performance
"Pressure is a privilege. It means something is at stake."
BATTLE STATIONS
Grab your Performance Log. Find your rival. The duel begins now.
Round 1:
Float Serve vs. 3-Person Receive
Round 2:
Seam Attack vs. Angle Adjustment
Duel Performance Log Duel Performance Log
Competitive Pressure Final • Session 5.2
ATHLETE:
1. Duel Scorecard (First to 7)
Match 1: Rival: _________
My Score
0
VS
Their Score
0
Tally points as they are earned.
Match 2: Rival: _________
My Score
0
VS
Their Score
0
Tally points as they are earned.
2. Pressure Point Checklist
Self-assess your mechanics during "Sudden Death" or match-point scenarios.
Metric Match 1 Match 2 Box Breath completed before service whistle? Y / N Y / N Held "Freeze" follow-through for 2+ seconds? Y / N Y / N Called the ball "Loud and Early" on every pass? Y / N Y / N Platform remained rigid on high-velocity serves? Y / N Y / N
3. Mental Resilience Log
When you were down in points, what physical cue did you focus on to regain technical control?
Describe the difference in your float serve accuracy between the first match and the high-pressure final match. Why did it change?
Unit Competency Achieved
Advanced Serving & Reception Mechanics
Final Instructor Signature