Animal Strength Slides Animal Strength
Gymnastics Level 1: Building Shoulders
Today's Mission
"We are visiting the Jungle Gym today! But there's a catch... you have to move exactly like the animals do."
Why? Because animal walks make our shoulders strong enough to stand on our hands!
The Bear Walk
Hands and feet flat on the floor
Bottoms up in the air!
Move opposite hand and foot
Keep your arms STRAIGHT like pillars!
Keep your belly HIGH like a table!
The Crab Walk
Sit down, then push up with hands
Fingers point toward your toes
Walk backwards or forwards
The Inchworm
1
Start in a pike position (hands and feet down)
2
Walk hands out until you are in a plank
3
Walk feet up to your hands (don't bend knees!)
This is the ULTIMATE shoulder builder!
Safety First!
Space
Stay in your "personal bubble." No bumping into friends!
Wrists
If your wrists feel tired, give them a "shake out" and a "gentle stretch."
Shoulder Strength Teacher Guide Animal Strength
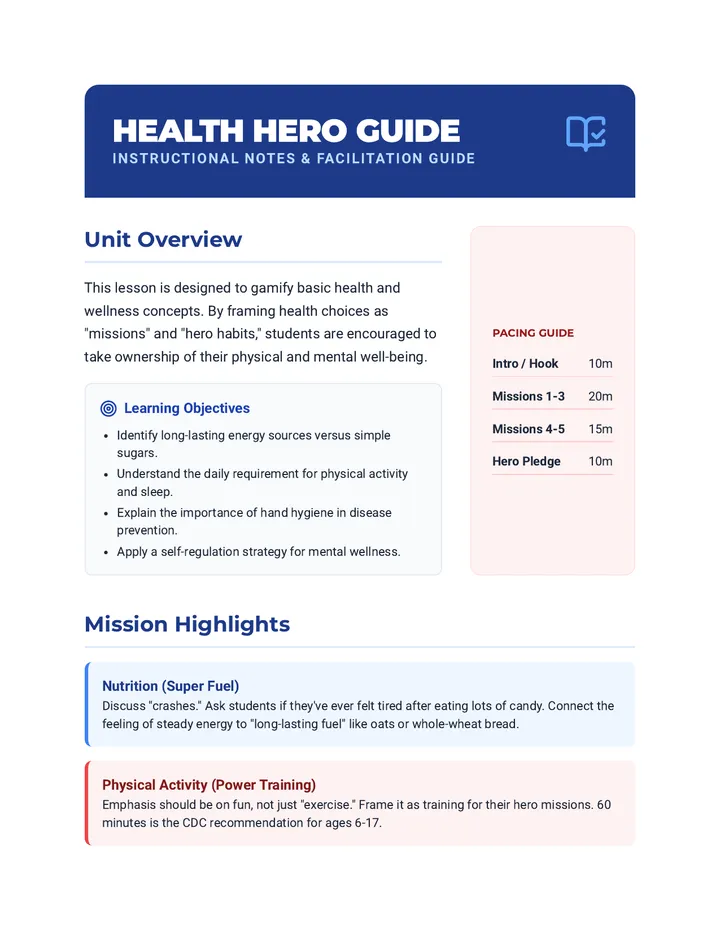
Teacher Facilitation Guide
LESSON 1 OF 5
Instructional Focus
This lesson focuses on developing shoulder girdle stability and wrist flexibility . These are the foundational physical requirements for all inverted movements. By mimicking animal gaits, students engage in dynamic weight-bearing that strengthens the upper body without the high-impact stress of jumping.
Upper Body Strength Weight Transfer Coordination
Setup
Clear floor space (mats pref.)
Cones for lane marking
Animal Tracker Worksheets
Pencil for each student
Movement Cues & Coaching
The Bear Walk Primary: Stability
Coaching Cues
"Strong arms like tree trunks."
"Keep your eyes on your hands."
"High hips, straight knees."
Common Errors
Bent elbows (collapsing), looking backwards instead of at hands (loss of alignment).
The Crab Walk Primary: Core + Shoulders
Coaching Cues
"Make your body flat like a table."
"Push the floor away with your palms."
"Fingers point toward your heels."
Common Errors
Saggy bottoms (hips dropping), fingers pointing backwards (strains wrists).
The Inchworm Primary: Hamstrings + Load
Coaching Cues
"Tiny steps with your hands."
"Keep your legs straight as you walk in."
"Hold the plank for a count of 3."
Common Errors
Walking hands too far (arched back), bending knees during the 'closing' phase.
Lesson Pacing
5 MIN
Warm-Up
Wrist circles and arm swings
10 MIN
Demo + Try
Model each walk, kids mimic
20 MIN
Zoo Circuit
3 laps of each walk across gym
10 MIN
Reflection
Log tracker and cool down
Animal Walk Tracker Zoo Tracker
Gymnastics Weight Transfer Lab
Name:
Date:
Mission: Animal Strength
Can you complete all the animal walks across the gym? Check the boxes after each round. Remember to keep your arms strong and push the floor away!
Bear Walk
LAP 1
LAP 2
LAP 3
Tip: Keep your bottom high!
Crab Walk
LAP 1
LAP 2
LAP 3
Tip: Tummy like a table!
Inchworm
LAP 1
LAP 2
LAP 3
Tip: Don't bend your knees!
How do your shoulders feel?
Strong Like a Bear!
A Little Tired
I Need a Rest
Draw your favorite animal walk here:
Kick High Slides Donkey Kicks
Gymnastics Level 2: Getting Hips High
The Mission
Can you get your HIPS over your SHOULDERS?
It feels a little like flying... while staying on the ground!
Rule #1: Glued Hands
Your hands are GLUED to the mat.
1
Palms flat, fingers spread wide.
2
Arms locked out STRAIGHT like pillars.
3
They never leave the floor during the kick!
How to Mule Kick
1. Crouch
Hands on the floor, knees bent like a frog.
2. Hop
Push through your feet to lift your bottom high!
3. Land
Land softly on your feet. No loud stomps!
Level Up!
Small Hops
Focus on a soft landing and straight arms. Just get your feet 2 inches off the ground.
Big Sky Kicks
Try to see the sky between your knees as your hips go up. Keep those elbows locked!
The Soft Landing
Quiet Feet = Safe Body
If we hear a "THUD," your hips were moving too fast. Control your landing like a ninja!
Safe Landing Teacher Guide Donkey Kicks
Teacher Facilitation Guide
LESSON 2 OF 5
Instructional Focus
This lesson introduces dynamic inversion . The donkey kick (or mule kick) teaches students to trust their hands while their feet are airborne. The primary technical goal is stacking hips over shoulders , which is the cornerstone of handstands and cartwheels.
Inversion Tolerance Hip Elevation Arm Support
Safety Rules
No "buckling" elbows (Stay stiff)
Eyes look between hands
Soft "ninja" landings only
Stay on the mats
Skill Progression Steps
1
The Frog Hop
Start in a deep squat. Place hands in front. Jump feet up and forward to land beside hands. Focus on the weight shift from feet to hands.
Cue: "Hand-Hand-Feet-Feet"
2
Static Hand Glue
Glue hands to one spot. Hop feet up but land them in the same spot they started. This prevents 'traveling' and focuses on vertical height .
Cue: "Kick the Clouds"
3
The Mule Kick
From hand glue, kick heels toward the ceiling. Aim for a momentary 'freeze' at the top where hips are over the shoulders.
Cue: "Bottoms to the Sky"
4
Straddle Kick
Kick legs up but spread them wide like a 'V'. This helps with balance and lowers the center of gravity for more control.
Cue: "Big V Kicks"
Troubleshooting
ISSUE
Bent Arms: Student is afraid of the floor.
Fix: Have them practice holding a "High Plank" for 20 seconds to feel the "locked out" shoulder position.
ISSUE
Falling Forward: Hips are going too far past shoulders.
Fix: Encourage smaller hops. Use a cone behind them—they shouldn't touch the cone with their feet.
Hip Height Tracker Worksheet Hip Tracker
Gymnastics Inversion Lab
Name:
Date:
The Challenge
Every time you kick, try to get your bottom a little bit higher! Use the levels below to track your progress today.
Coach's Reminder:
"Keep your eyes on your thumbs!"
Level 1: Frog Hop
My feet leave the ground just a tiny bit.
Level 2: Half Way
My bottom is even with my shoulders.
Level 3: Sky High
My hips are all the way over my shoulders!
Draw Your Kick
Draw yourself doing a Level 1 Hop:
Draw yourself doing a Level 3 Kick:
Safety Check!
Circle the sound your feet made when you landed today:
THUD! Tap Silence (Ninja)
Skill Earned: Mule Master
Side Travel Slides Side Travel
Gymnastics Level 3: Moving Sideways
The Big Question
"Can you jump over this log sideways using your hands as feet?"
This is the secret to doing a cartwheel!
The Cartwheel Rhythm
ONE
Hand
TWO
Hand
THREE
Foot
FOUR
Foot
1 - 2 - 3 - 4
Side Bunny Hops
A
Hands reach across the line first.
B
Jump your feet over to join them!
C
Keep your knees together.
"Zip your legs together like a zipper!"
Getting Higher
Small Bunny
Keep your feet low. Focus on the 1-2-3-4 rhythm of your hands and feet.
Big Kangaroo
Try to get your hips high in the air as you jump over. Imagine your legs making an "L" shape!
Hand Placement
Don't Cross Your Arms!
Make sure your hands land side by side, not one over the other. This keeps your shoulders safe and strong.
Rhythm Master Teacher Guide Rhythm Master
Teacher Facilitation Guide
LESSON 3 OF 5
The Rhythm of Rotary Skills
Lateral movement requires a specific 4-count rhythm: Hand-Hand-Foot-Foot . This lesson transitions students from vertical weight bearing (Lesson 1 & 2) to rotary movement . By jumping sideways over a line, students learn to transfer weight through a side-to-side plane, which is the foundational action of a cartwheel.
Lateral Transfer Rhythm Patterning Cartwheel Prep
Mat Setup
Use tape or a floor line
Long benches for advanced
Space stations 6ft apart
Directional arrows on mats
Skill progression
Phase 1: Lateral Bunny Hops Goal: Lateral Confidence
Movement
Hands reach over the line, then both feet hop over together. Start with hands and feet close to the line.
Cueing
"Hands lead the way!" and "Zip your legs."
Phase 2: Rhythmic Side Travel Goal: 1-2-3-4 Timing
Movement
Emphasize separate hand placements (Hand 1, Hand 2) followed by separate foot landings (Foot 1, Foot 2).
The Beat
"Clap-Clap-Stomp-Stomp"
Phase 3: High Hips Side Hop Goal: Inversion Integration
Movement
Jump higher so hips pass briefly over the line of the shoulders. Legs should start to extend toward a straddle.
Warning
Ensure hands are flat and shoulder-width apart. No crossing wrists!
Troubleshooting
Crossing Hands
Students cross their midline, causing a tumble.
Fix: Put stickers on the mat for where each hand should go.
Scissoring Legs
Legs flying wildly.
Fix: Have them hold a small sponge between their knees to keep them zipped.
Side Hop Sheet Side Hopper
Gymnastics Rhythm Lab
Name:
Date:
The Secret Code
Every cartwheel follows a 1-2-3-4 rhythm. Can you number the boxes in the right order?
Foot
Hand
Foot
Hand
Line Crossings
10
Hops
20
Hops
30
Hops
MAX
Goal
Draw the line on the mat and show where your hands and feet go:
Triangle Power Slides Triangle Power
Gymnastics Level 4: The Tripod
Strongest Shape
"Triangles are the strongest shape in the world. Engineers use them for bridges and skyscrapers."
Gymnastics Secret:
We can build a triangle using our head and our hands!
HEAD
HAND
HAND
Building the Tripod
Step 1
Hands go flat on the mat, shoulder-width apart.
Step 2
Place the top of your head in front to make a triangle point.
Step 3
Rest your knees on your elbows. Balance!
Protect Your Neck
YES!
Top of Head
Your head should be flat on top, like a table. Keep your eyes looking at the mat.
NO!
Forehead or Back
Never balance on your forehead or the back of your head. This will make you tip over!
The "Flat Triangle" Trap
Too Flat
If your head is in a straight line with your hands, you have no balance!
Big Triangle
Wide base = Rock solid stability.
Can You Hold It?
5
Seconds
10
Seconds
"Quiet mind, steady hands, strong triangle!"
Steady Base Teacher Guide Steady Base
Teacher Facilitation Guide
LESSON 4 OF 5
The Geometry of Balance
The Tripod is the first static inversion students learn. Unlike previous lessons which were dynamic (moving), this lesson focuses on finding a center of gravity . The triangular base (two hands, one head) provides the maximum surface area for balance. Safety is paramount here, particularly regarding cervical spine alignment .
Static Inversion Base of Support Neck Safety
Safety Checklist
Top of head only (crown)
Tuck chin slightly (long neck)
Stay in "crouch" position
Spotting: Hands on hips
Station Setup
The Triangle Mat
Tape an equilateral triangle on the mat. Head goes on the point, hands go on the base corners.
The Wall Assist
Place head 6 inches from the wall for students who tip forward easily.
Pacing
Warm-Up (5m) Neck & Wrist Rolls
Triangle Intro (10m) Diagramming & Modeling
The Tripod (20m) Partner Practice
Reflection (10m) Base of Support Sheet
Coaching & Spotting
Spotting Technique
Spotters should stand beside the gymnast, not in front. Place hands on the gymnast's hips to guide them upward and prevent tipping. Encourage the gymnast to "feel" the weight distribute evenly between their three points.
Key Verbal Cues
"Build your bridge base first."
"Look at the floor, not your feet."
"Squeeze your elbows toward each other."
"Breathe into your triangle."
Balance Point Worksheet Balance Point
Gymnastics Geometry Lab
Name:
Date:
The Triangle Test
Look at the shapes below. Only ONE of them is a strong Tripod base. Circle the winner!
Flat Line
Big Triangle
Skinny line
How steady was your base?
Steady Scale
Wobbly
Tipping
Solid
Rockstar
Draw your Tripod here!
(Show your head and hands in a triangle)
Complete this sentence:
When I put my head of my hands, my triangle got and I felt more .
Spider Walk Slides Spider Walkers
Gymnastics Level 5: Handstand Mastery
Final Challenge
"Can you walk up the wall like Spiderman?"
Vertical Alignment
Shoulder Endurance
How to Wall Walk
1
Plank
Hands on floor, feet against the wall.
2
Climb
Walk feet up while hands stay glued.
3
Adjust
Walk hands in toward the wall.
4
Hold
Squeeze your belly. Make a pencil shape!
The Pencil Shape
In gymnastics, we call this the Hollow Body.
Tuck your ribs in.
Squeeze your bottom tight.
Point your toes to the sky.
TOP BOTTOM
No Bananas!
Avoid the Arched Back
If your belly sticks out, your back will hurt. Squeeze your core to stay straight like a board, not curved like a banana!
Handstand Levels
Level 1
Feet low on wall. Strong plank.
Level 2
Hips over shoulders. High feet.
Level 3
Nose to wall. Perfectly vertical!
Great power comes with great practice!
Wall Master Teacher Guide Wall Master
Teacher Facilitation Guide
LESSON 5 OF 5
Vertical Endurance
The Wall Walk is the ultimate progression toward a free-standing handstand. It combines vertical alignment , core stabilization , and shoulder endurance . The goal is the 'Hollow Body' position, which protects the spine and creates a straight line of force through the arms and shoulders.
Vertical Alignment Hollow Body Shoulder Stability
Critical Safety
Eyes on wall, not floor
Walk DOWN, don't jump down
Spotting: Hand on stomach
Max 10-second holds
Mastery Progression
Level 1: The L-Stand
Student walks feet up until body is in an "L" shape (hips over shoulders, feet horizontal). This builds the initial confidence of being vertical.
Focus: Shoulder Stacking
Level 2: The Half Climb
Student walks feet higher than the L-shape but does not walk hands in. This increases the load on the shoulders significantly.
Focus: Core Tension
Level 3: Chest to Wall
The ultimate goal. Students walk hands toward the wall until their chest or nose touches. Body must be perfectly straight.
Focus: Vertical Line
The Dismount (Safety)
Teach students to walk their hands forward FIRST, then lower their feet slowly. Never allow "falling" out of the handstand.
Rule: Ninja Feet Only
Correcting the "Banana Back"
Visual Cue
"Imagine your belly button is a magnet being pulled toward your spine."
Physical Check
Gently tap the student's lower back. If it's curved, tell them to "tuck your tailbone like a scared puppy."
Sequence Completion
Vertical Skill Certificate Gymnastics Academy
Vertical Mastery
Wall Walker Certificate
This certificate is proudly awarded to:
Master Gymnast Name
Skill 1
Shoulder Strength
Skill 2
Hip Alignment
Skill 3
Spiderman Walk
The Academy Reflection
What was the hardest part about being upside down? Draw or write your answer below before taking your certificate home!
Certified by Coach: