Stencil Logic Slides UNIT 01: STENCIL LOGIC
BEYOND THE
MESSY MESH
From Industrial Origins to Pop Art Icons: Understanding the Power of the Multiplied Image.
What's the Connection?
Andy Warhol: Marilyn (1962)
High Art: Sold for Millions
Street Art: Poster on a Wall
Guerrilla Art: Temporary & Free
"Once you 'got' Pop, you could never see a sign the same way again." — Andy Warhol
Origins of Serigraphy
Song Dynasty
Earliest known forms of stenciling on fabrics in China (960–1279 AD).
The Industrial Age
Screen printing was a trade secret used for wallpaper and military labels.
Why was it a secret?
Faster than hand-painting
Cheaper than detailed engraving
Allowed for vibrant, thick ink layers on any surface (wood, metal, fabric)
The Stencil Logic
1
Islands
Shapes that are completely surrounded by negative space. If you cut the outline, the island falls out!
2
Bridges
The connecting strips of material that hold the 'islands' in place. Without bridges, your design collapses.
Stencil Typography Example
Stencil Logic Worksheet Islands & Bridges
Mastering the Logic of the Stencil
Name:
Date:
Part 1: The Anatomy of a Stencil
ISLANDS
An island is a part of your design that is completely cut out from the rest of the material. In screen printing, if an island isn't connected to the "mainland" of your stencil, it will simply fall out, leaving a giant hole in your print.
BRIDGES
Bridges are the small "connecting strips" that you leave intentionally to hold your islands in place. A good designer knows how to hide bridges within the artwork or make them a feature of the style.
Part 2: Identify the Islands
Circle the parts of the designs below that would "fall out" (islands) if you cut along the black lines without adding bridges.
B
Example A
Example B
Example C
Part 3: Add the Bridges
Redesign the following icon so that it can be cut as a single-piece stencil. Use white out or draw "bridge lines" to show where you would leave paper to hold the inner shapes.
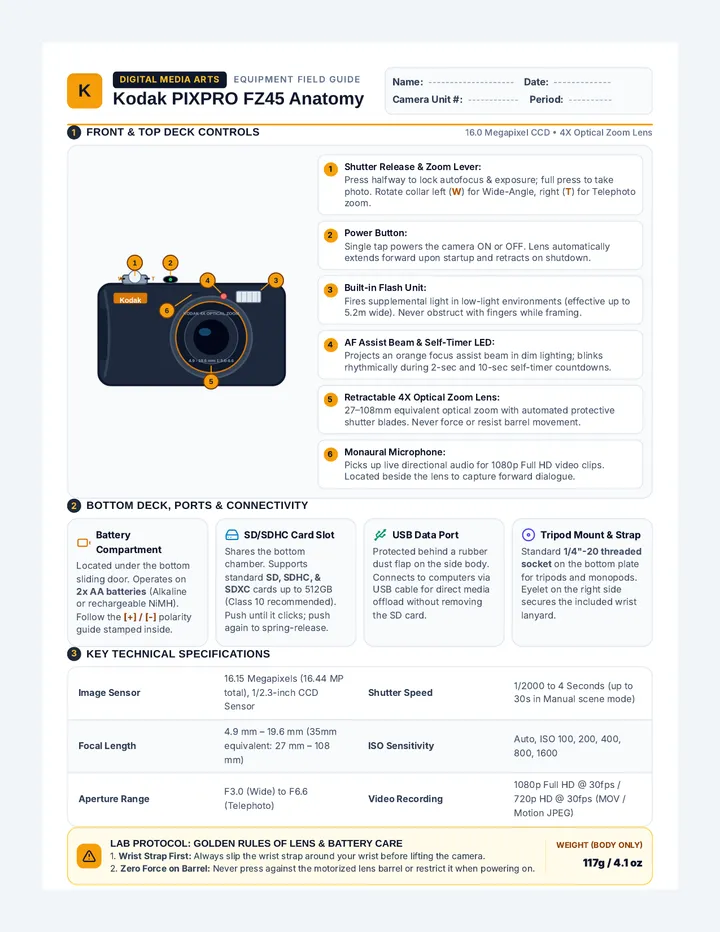
Original: Impossible Stencil
Notice the lens and the flash—they are islands!
Your Solution: Ready to Cut
Pro-Tip: Most "Stencil Fonts" (like the ones on military crates) use built-in bridges to make sure letters like A, B, D, O, P, Q, and R don't lose their center islands.
Stencil Logic Teacher Guide Teacher Facilitation Guide
Lesson 1: Stencil Logic & Pop Art History
45-60 MIN
Learning Objectives
Analyze the transition of serigraphy from industry to high art.
Identify structural "islands" in graphic designs.
Demonstrate "bridge" placement to maintain stencil structural integrity.
Materials Needed
• Lesson 1 Slide Deck
• Stencil Logic Worksheet
• Examples of Warhol prints
• Scissors & Black Paper (Demo)
1. The Hook (5-10 min)
Display a high-quality reproduction of Warhol’s Marilyn and a contemporary street art poster. Ask students:
Key Point: Both use the "stencil" as a tool for mass reproduction. Warhol used it to comment on consumer culture; street artists use it for speed and accessibility.
2. Industrial Secret Case Study (15 min)
Use the slide deck to discuss the "trade secret" era. Explain how the "Silk" in Silk-Screening was once restricted to guild members. Transition to the Pop Art era (1960s) and how artists "lowered" high art by using industrial tools.
3. The Stencil Logic Demo (10 min)
Perform a "live fail" demonstration. Cut a large letter 'O' out of black paper. Show the class the outer part, then let the center circle (the island) fall to the floor.
The Challenge: "How do I keep this circle hanging in the middle of space without using glue or magic?"
4. Guided Practice (20 min)
Distribute the Stencil Logic Worksheet . Circulate as students work on the camera challenge. Look for students who make the bridges too thin—remind them that bridges must be strong enough to withstand the pressure of a squeegee later!
Common Misconceptions
"Bridges ruin the look."
Remind students that in stencil art, the bridges ARE part of the look. They provide a gritty, industrial aesthetic that defines the medium.
"Can I just tape it?"
In screen printing, we can't just tape islands to the screen easily because the ink will leak. The stencil must be a single, structurally sound piece of paper or film.
Precision Cuts Slides Unit 02: The Cut
SURGICAL
PRECISION
Mastering the Blade and Preparing the Barrier.
The "Pin-Hole" Disaster
In screen printing, ink is a liquid searching for a way out.
If your stencil has even a tiny pin-hole or a gap in the tape, the ink will find it. One tiny leak can ruin a stack of 50 posters.
Today's Goal:
Zero Leaks. Perfect Borders.
Leak Detection
Blade Protocol
The "Lazy Hand" Rule
Always keep your non-cutting hand BEHIND the direction of the blade. Never pull the knife toward your fingers.
Sharp = Safe
A dull blade requires more pressure, which leads to slips. If it snags, snap it off and get a fresh edge.
The 4-Point Check
Mat board underneath?
Blade retracted when not in use?
Cut away from the body?
Discard old blades in the SHARPS container?
Prepping the Mesh
1
Degreasing
Oils from your fingers prevent stencils (and ink) from sticking. Scrub with mesh degreaser first.
2
Masking
Use screen tape to block the "wells"—the gap between the frame and the mesh where ink loves to hide.
3
Mounting
Align your paper stencil on the substrate, then lower the screen and 'tack' it into place.
Blade Safety Poster STUDIO
SAFETY
Protocol 02
DANGER
Handle With Respect
01
FOLLOW THE BLADE
Keep your "helping hand" (the one holding the paper) at least 4 inches away from the path of the knife. Never cut toward yourself.
02
THE SHARPS BIN
Broken or dull blades NEVER go in the regular trash. Place them immediately in the designated yellow plastic "Sharps" container.
03
NO WALKING BLADES
Retract the blade before you stand up. If the knife does not retract, keep the cap on. Never walk across the studio with an exposed blade.
A sharp blade is a safe blade. A dull blade is a disaster.
Screen Prep Checklist Technical Checklist
Screen Preparation & Stencil Mounting
STATION:
MESH COUNT:
1. The Sink Run
Degrease the Mesh
Scrub both sides with Mesh Prep solution to remove finger oils.
Pressure Rinse
Rinse thoroughly. No soap bubbles should remain in the corners.
Total Dry
Screen must be 100% dry. Water blocks ink just as well as your stencil does.
2. The Cut
Island Verification
Double check that all islands have at least two bridges.
Precision Trim
Ensure edges are sharp. Jagged cuts lead to "bleeding" prints.
Backing Removal
If using masking film, remove the paper backing only when ready to mount.
3. Mounting & The "Zero Leak" Seal
Center & Align
Place the stencil on your test paper. Lower the screen. Ensure it's centered in the mesh area.
Block-Out Tape
Tape all four edges of the screen where the mesh meets the frame. Use 2-inch screen tape.
Pin-Hole Inspection
Hold the screen up to a light. If you see light where there shouldn't be ink, add a piece of tape.
Final Tack
Use a small amount of spray adhesive or tape tabs to secure the stencil to the underside of the mesh.
Stuck? If your stencil won't stay attached to the mesh, check if the screen is still damp or if you have too much spray adhesive (which can clog the mesh).
Squeegee Mechanics Slides Unit 03: The Pull
FLOOD
& PULL
Mastering the Physics of the Squeegee.
The Golden Angle
45 Degrees
This is the ideal angle for the squeegee blade. It creates enough "shear" to force ink through the mesh without "plowing" it underneath the stencil.
Too Vertical (90°)
Scrapes the ink off; thin, patchy print.
Too Flat (10°)
Pushes too much ink; blurry edges.
45°
The Flood & Pull
1
THE FLOOD
Lifting the screen slightly, use light pressure to coat the stencil with a layer of ink. This prevents ink from drying in the mesh between prints.
Screen UP
2
THE PULL
Lower the screen onto the paper. Apply firm, even pressure and pull towards your body. You should hear a "zip" sound as the mesh snaps off the paper.
Screen DOWN
The "Core" of Printing
Stance
Feet shoulder-width apart. Lean your body weight over the squeegee.
Grip
Thumbs on top, fingers wrapping the front. Squeeze with the whole hand, not just fingers.
Speed
Consistent speed from top to bottom. No stopping mid-print!
Print with your Shoulders,
not your Wrists.
If your wrists are sore, you're doing it wrong. Use your body weight to push the ink.
Squeegee Mechanics Lab Sheet Squeegee Drill Sheet
Mastery Training: Angle, Pressure, & Rhythm
PRINTER:
CRITIC:
The Dry Run Challenge
Printing is 50% chemistry and 50% choreography. Today, we practice the choreography. Partner up. One person performs the "Dry Pull" (no ink), and the other critiques the mechanics using the rubric below.
Mechanics Assessment
Mechanic Drill 1 Drill 2 Drill 3 Final Score 45° Squeegee Angle
Is the blade consistently tilted?
| ☐ | ☐ | ☐ | / 5 |
|
Two-Handed Pressure
Is pressure even on both sides?
| ☐ | ☐ | ☐ | / 5 |
|
Shoulder Lean
Body weight over the squeegee?
| ☐ | ☐ | ☐ | / 5 |
|
The "Flood" Motion
Screen lifted, light coating stroke?
| ☐ | ☐ | ☐ | / 5 |
Peer Feedback & Troubleshooting
What was the hardest part of the motion?
One adjustment the printer should make:
"The Zip Sound" — When you pull the squeegee correctly, the mesh should 'snap' off the paper immediately after the blade passes. This is called the 'Off-Contact' snap. If you don't hear it, you aren't using enough pressure!
Registration Mastery Slides Unit 04: The Alignment
HIT THE
MARK
Mastering Multi-Color Registration and Color Separation.
The "Cereal Box" Error
Have you ever seen a comic book or a box where the colors don't line up?
This is a Registration Error. In mass production, alignment is everything. If you're off by 1mm, the whole image looks "vibrated" or broken.
"Trapping" is the solution: making the bottom color slightly larger so the top outline covers the gap.
Layering Logic
LAYER 1
Lightest colors first (Yellow, Sky Blue, White). These act as the "base".
LAYER 2
Mid-tones or specific spot colors (Red, Green, Orange).
LAYER 3
Darkest outlines (Black, Navy). These "hide" the edges of the previous layers.
The Acetate Guide
1
Print your "Key Layer" (the outline) onto a clear sheet of acetate taped to the bed.
2
Slide your paper under the acetate until it lines up perfectly with the ghost image.
3
Tape "registration blocks" (cardboard scraps) against the corners of the paper to lock the position.
Paper Alignment
The stencil stays fixed to the screen. The registration guides move the paper to the stencil.
Two-Color Design Organizer Layer Logic
2-Color Separation Planning Sheet
Designer:
Strategy
Most 2-color designs consist of a Base Fill (Shape) and a Key Layer (Outline/Detail). Use this sheet to sketch how your image will be broken down into two separate stencils.
1
Layer 1: The Base
Sketch Solid Shapes Here
Ink Color:
2
Layer 2: The Key
Sketch Outlines/Details Here
Ink Color:
The Trapping Check
Is your base slightly larger?
To avoid white gaps between colors, your Base Fill should overlap with your Key Layer by about 1-2mm. This is called "Trapping."
Trapping Diagram
Registration Method:
Acetate Pin Bars Eye-Ball
Final Composite Preview (Sketch how they look combined) Production Day Slides Unit 05: The Edition
PRESS
START
Executing the Run and Protecting the Mesh.
The 5-Minute Warning
Ink never sleeps. Once it hits the screen, the countdown begins.
If you stop printing for more than 5 minutes without "flooding" the screen, the ink will dry inside the mesh. This is called Clogging.
The Golden Rule:
If you're not pulling, you're flooding. If you're not flooding, you're washing.
05:00
Remaining Time to Dry
Studio Rhythm
1. Prep
Ink bucket open. Squeegee ready. Stack of 10 papers aligned. Scraps for testing.
2. Print
Flood. Pull. Lift. Check the print. Move it to the rack immediately.
3. Monitor
Is the ink getting low? Is the stencil lifting? Adjust pressure if needed.
4. Wash
Run to the sink the moment the last print is finished. No exceptions.
Mesh is Money
A professional screen costs $50-$100. If you let ink dry in it, it becomes a piece of wood with a window.
Scrape excess ink back into the tub.
Remove tape from the frame.
Scrub until you can see clearly through the mesh.
THE GHOST IMAGE
If you see a faint stain of your design after washing, use "Haze Remover" to save the mesh for the next student.
Production Run Tracker Production Tracker
Live Run Log & Clean-Up Protocol
Project ID
Date
The Edition Log
Track every pull. An "Edition" is a set of identical prints. Use the notes to identify why a print failed (e.g., "bleeding", "misalignment", "starved ink").
# Pass/Fail Quality Notes Dried? 1 ☐ 2 ☐ 3 ☐ 4 ☐ 5 ☐ 6 ☐ 7 ☐ 8 ☐
Final Tally:
GOOD: ____ WASTE: ____ Yield: ____ %
End-Of-Shift Cleanup
Critical
Ink Scrape: Use the plastic spatula to put all remaining wet ink back in the bucket. Seal the lid tight.
Tape Stripping: Peel all screen tape and paper stencils off the mesh. Discard in the trash.
The Scrub: At the sink, use a sponge and mesh wash. Scrub until no pigment remains in the weave.
Station Wipe: Wipe down the press bed and squeegee handle with a damp cloth. No sticky spots!
Teacher Signature Required Before Dismissal
Final Project Rubric Edition Grade
Screen Printing Final Project Rubric
9th
Criteria Level 4 (Exemplary) Level 2 (Developing) Score Stencil Logic & Execution Complex design with successful "islands and bridges." No visible "collapse" in stencil. Sharp, clean edges. Islands falling out; bridges too thin or missing. Jagged cuts indicate dull blade or rushed work. / 25 Registration Alignment Multi-color layers align perfectly with less than 1mm gap. Effective use of "trapping" to hide seams. Major shifts (3mm+) between colors. White paper gaps showing between shapes. / 25 Ink Quality & Coverage Consistent, opaque color fields. No "ghosting" or "bleeding." Hearing the "snap" was evident. Patchy ink; starved areas where mesh was clogged. Blurry edges from too much pressure or flat angle. / 25 Studio Professionalism Zero ink leaks on press bed. Immediate, thorough screen cleanup. Full edition of 5+ prints logged. Ink left on squeegee handles or frames. Screen required aggressive scrubbing due to drying. / 25
Final Grade / 100
Master Printer Feedback
© Ink & Iron Studio • Printmaking Unit • Grade 9 Assessment