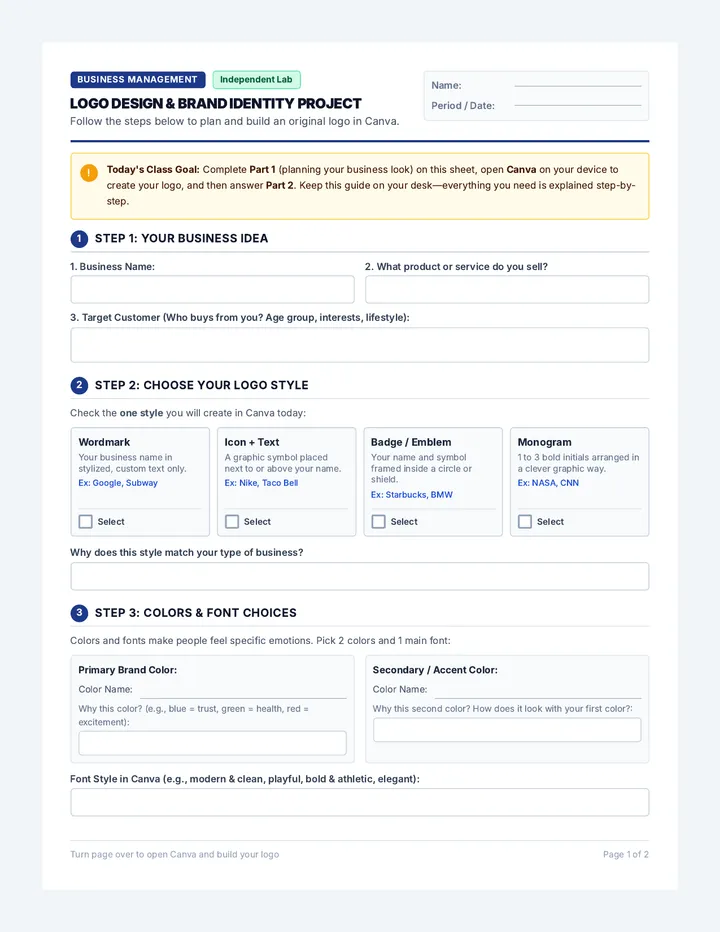
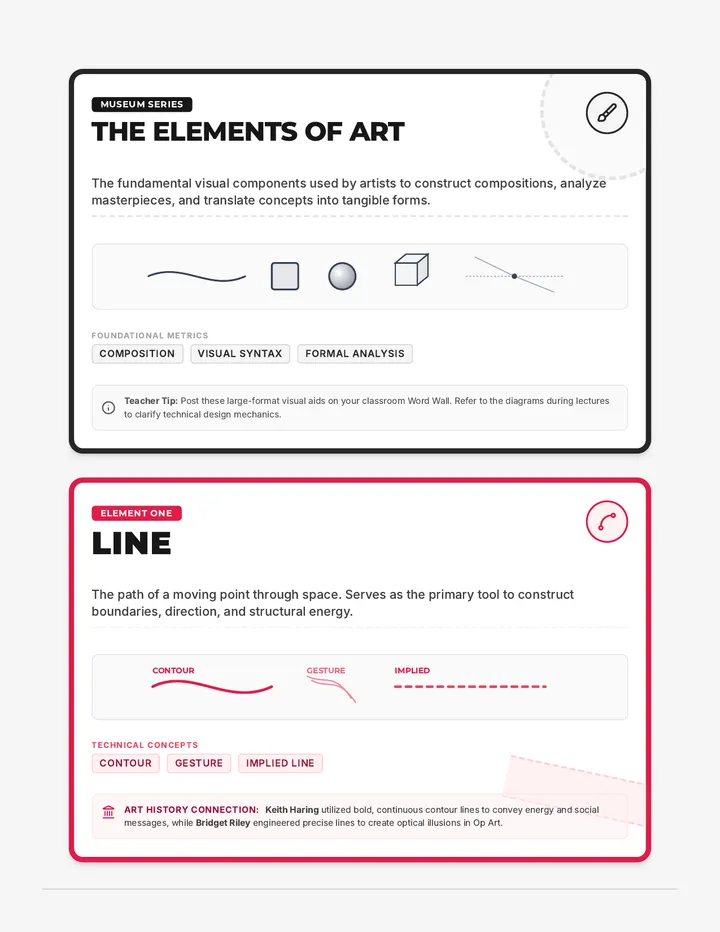
Exposure Investigator Worksheet Exposure Investigator
Lesson 1: Triangle Tactics • Photography I
Student Records
Name:
Date:
Activity 1: The "Bad Photo" Gallery
Visit the images posted around the room. For each photo, identify what went wrong with the exposure and suggest a "Light Hunter" fix.
Photo #1: The Ghost Runner
Observation: Subject is blurry, but the background is sharp.
Diagnosis:
Suggested Adjustment:
Photo #2: The White-Out
Observation: Image is almost entirely white; detail is lost in the sky.
Diagnosis:
Suggested Adjustment:
Photo #3: The Grainy Night
Observation: The image looks "speckled" or rough (digital noise).
Diagnosis:
Suggested Adjustment:
Photo #4: Into the Shadows
Observation: Everything is too dark; you can barely see the subject.
Diagnosis:
Suggested Adjustment:
Activity 2: Defining the Three Pillars
Aperture "The Eye"
How it works:
Visual Side-Effect:
Shutter Speed "The Blink"
How it works:
Visual Side-Effect:
ISO "The Sensor"
How it works:
Visual Side-Effect:
The Law of Reciprocity
"Exposure is like a bucket of water. To fill it perfectly, you can open the tap wide (Aperture) for a short time (Shutter), or open it slightly for a long time."
SCENARIO A: A Sunny Beach
There is TOO MUCH light.
What adjustments should you make?
Aperture: Smaller / Larger Hole
Shutter Speed: Faster / Slower Blink
ISO: High / Low Sensitivity
SCENARIO B: A Dark Concert
There is NOT ENOUGH light.
What adjustments should you make?
Aperture: Smaller / Larger Hole
Shutter Speed: Faster / Slower Blink
ISO: High / Low Sensitivity
Activity 3: The Camera Settings Hunt
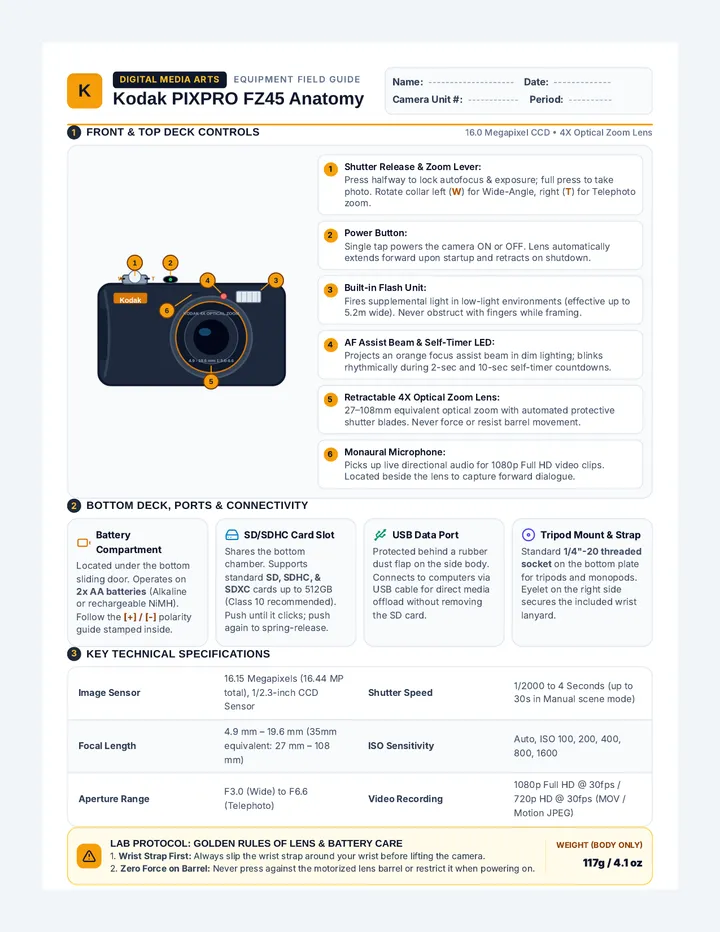
Pick up your camera. Switch it to MANUAL mode (M). Find these three numbers on your display and record their current values.
Aperture (f-stop)
f / ____
Shutter Speed
1 / ____
ISO
____
Reflection Question:
If you were to take a photo right now with these settings, based on the light in this room, do you think it would be overexposed, underexposed, or correct? Why?
Triangle Tactics Presentation Photography I
Triangle Tactics
Mastering the three pillars of exposure to hunt light and capture reality.
What is Exposure?
Definition
The amount of light reaching a photographic film or electronic image sensor.
Too Much Light
Overexposed
Too Little Light
Underexposed
"Exposure is the chemical reaction of light meeting the sensor."
The Three Pillars
APERTURE
The size of the hole in the lens. Controls the VOLUME of light.
Measured in f-stops
SHUTTER SPEED
How long the sensor is exposed. Controls the TIME of light entry.
Measured in Seconds
ISO
The sensitivity of the sensor. Controls the RESPONSE to light.
Measured in Values
The Balancing Act
One Change Affects Everything
If you let in less light with one, you must compensate with another.
Find your Controls
Before we go into the field, you must find these settings on your device. Every camera is different, but they all share common icons.
LAB TIME
Grab your camera and follow along with the Exposure Investigator worksheet.
Triangle Tactics Teacher Guide Teacher Resource Lesson 1 of 5
Triangle Tactics: Facilitation Guide
Demystifying Exposure and the Three Pillars
Objective
By the end of this lesson, students will be able to define the three pillars of the Exposure Triangle (Aperture, Shutter Speed, ISO), describe their primary visual side-effects, and locate manual controls on their specific camera models.
The "Why"
Students often struggle with "information overload" when first switching to manual mode. This lesson uses visual diagnosis to build a "Light Hunter" mindset—viewing every image as a balance of technical choices rather than just a lucky shot.
Key Vocabulary
Exposure:
The total light reaching the sensor.
Overexposed:
Image is too bright; loss of detail.
Underexposed:
Image is too dark; heavy shadows.
Reciprocity:
The inverse relationship between settings.
Preparation
Post 4 "Bad Exposure" photos around the room for the Gallery Walk.
Ensure all cameras are charged and have SD cards.
Print "Exposure Investigator" worksheets (2 per student).
Materials
DSLR/Mirrorless Cameras Printed Gallery Photos Student Worksheet
Instructional Sequence
10m Hook
Gallery Walk Diagnosis
Students rotate through 4 stations. Do not give them technical terms yet. Ask them to describe what they see in "human" terms (e.g., "blurry," "white-out").
Prompt: "If you were the editor, what one instruction would you give the photographer to fix this?"
20m Instruction
The Three Pillars (Slide Deck)
Use the "Triangle Tactics" presentation. Focus on the analogies: Aperture as an Eye, Shutter as a Blink, ISO as the sensor's Volume knob.
Analogy Alert: For ISO, compare it to a radio. Turning it up lets you hear the faint music (light), but also increases the static (digital noise/grain).
25m Application
Camera Setting Hunt
Walk the room as students attempt to switch to Manual (M) and find the f-stop, shutter speed (1/xxx), and ISO values. This is often where students realize they have different camera brands (Nikon vs. Canon vs. Sony).
Differentiation: For students with smartphone cameras, direct them to use a "Pro" mode or third-party manual app.
05m Debrief
The Seesaw Check
Quick-fire check: "If I speed up my shutter to freeze motion, what must I do with Aperture or ISO to keep the same exposure?" (Wait for: "Make it brighter / let in more light").
Speed Seekers Presentation Lesson 2
Speed Seekers
Mastering time and motion through the shutter's blink.
The Hook: 1/1000th vs 1/15th
Frozen in Time
Every drop of water, every hair, stopped perfectly.
1/1000 sec
A Blur of Motion
Light streaks, movement turned into texture.
1/15 sec
What is Shutter Speed?
"The duration of time the camera's shutter remains open, allowing light to strike the sensor."
Technical
It controls the QUANTITY of light over time.
Creative
It controls how MOTION is recorded.
Handheld Rule
Avoid going slower than 1/60 without a tripod!
The Shutter Speed Scale
1/4000
Freeze
1/500
Action
1/60
Portrait
1/15
Intentional Blur
1" (1 Sec)
Long Exposure
Fast Shutter
Less Light In
Slow Shutter
More Light In
Motion Blur Lab
You are about to test the limits of time. Grab your cameras and the "Motion Blur Lab" worksheet.
Mission: Capture the Invisible
Motion Blur Lab Worksheet Light Hunters Lab
Motion Blur Lab
Lesson 2: Speed Seekers • Capturing Time
Name:
Partner:
The Mission
Your goal is to photograph a fast-moving object (a spinning wheel, a falling ball, or your partner jumping) using three distinct shutter speeds. Observe how the light and the sharpness of the image change as you manipulate time.
Constant Variable (Keep same):
Aperture & ISO
Independent Variable (Change):
Shutter Speed
Trial Shutter Speed Visual Result (Blur/Sharp) Exposure Result (Dark/Bright) #1: The Freeze 1/1000 #2: The Standard 1/125 #3: The Motion 1/15
Sketch Trial #1 (Freeze):
Sketch Trial #3 (Motion):
Data Analysis
1. Look at your Trial #1 (1/1000). Compared to the other trials, how was the brightness of the photo? Why do you think this happened based on what you know about the shutter?
2. Look at your Trial #3 (1/15). Describe the "texture" of the motion. If your hand moved while taking this shot, how did that affect the background?
Challenge: The Balancing Act
If your 1/1000 shot was too dark, but you NEEDED to freeze that motion, what could you do to the other parts of the Exposure Triangle to fix the brightness?
A
Option 1: Aperture
B
Option 2: ISO
Flash Check
Circle the correct answer:
To freeze a hummingbirds wings, I need a...
FAST SHUTTER SLOW SHUTTER
A slow shutter speed lets in...
MORE LIGHT LESS LIGHT
Speed Seekers Teacher Guide Teacher Resource Lesson 2 of 5
Speed Seekers: Facilitation Guide
Capturing Time and Motion
Objective
Students will manipulate shutter speed to achieve two distinct artistic effects: "Freezing" fast motion and creating "Intentional Motion Blur." They will also observe the reciprocal effect of shutter speed on overall exposure.
The "Why"
Shutter speed is the most intuitive part of the triangle for students because they can *see* it in action. This lesson moves them from accidental blur to intentional creative control.
Key Shutter Benchmarks
1/1000: Sports / Freezing Water
1/250: Everyday Action
1/60: The Handheld Limit
1/15: Motion Streaks
1" +: Long Exposure (Tripod!)
Materials Needed
DSLR/Mirrorless Cameras
Moving Objects (Fan, Ball, Fidget Spinner)
Motion Blur Lab Worksheets
Tripods (Optional but helpful)
Pacing
0-5m Hook
5-20m Instruction
20-50m Lab Work
50-60m Analysis
1 The Hook: The Disappearing Fan
Set a box fan to high speed. Have students attempt to photograph the blades. They will likely get a blur. Challenge them: "Who can get a photo where I can count the blades?"
"Look at the screen. Why is the photo getting darker as you make the blades stay still?" This sets up the need for the Exposure Triangle conversation.
2 Core Instruction (Slides)
Explain Shutter Priority Mode (Tv or S) vs Manual Mode (M) . For this lab, students should stay in Manual to see the exposure effect.
Emphasize the denominator : A bigger number (1/1000) is a smaller slice of time.
Discuss Camera Shake : Students often confuse "motion blur" (the subject moving) with "camera shake" (the photographer moving).
3 Lab Facilitation Tips
Troubleshooting #1: Too Dark
If students are shooting at 1/1000 in a standard classroom, their images will be black. Direct them to open their Aperture (lowest f-number) or move closer to a window.
Troubleshooting #2: Too Bright
At 1/15, images might "white out." Tell them to "make the eye smaller" (higher f-number) or lower their ISO.
Check for Understanding
"If you want to take a photo of a waterfall and make the water look like smooth silk, would you use 1/4000 or 1/2 second?"
Depth Detectives Presentation Lesson 3
Depth Detectives
Mastering the Aperture and the magic of Depth of Field.
The Professional "Look"
Shallow Focus
The subject pops; the world disappears.
f / 1.8
Deep Focus
Everything from here to the horizon is sharp.
f / 22
Aperture
The Eye of the Lens
Aperture refers to the opening inside your lens. It is made of blades that open and close like the pupil of your eye.
The Inverse Rule
SMALL NUMBER = BIG HOLE
Example: f/2 is huge. f/22 is tiny.
f / 1.4 f / 16
More Light Less Light
Depth of Field (DOF)
f / 2.8
Wide Open
Shallow DOF
"Blurry background. Good for people."
f / 16
Stopped Down
Deep DOF
"Everything is sharp. Good for mountains."
Aperture Alley Challenge
You are headed to the "Alley" (hallway). Your mission: Use a large aperture to make your partner pop from a cluttered background.
Gear Up
Grab Worksheet
Aperture Alley Worksheet Light Hunters Field Guide
Aperture Alley
Lesson 3: Depth Detectives • Isolating the Subject
Name:
Subject:
The Mission
Head to the designated "Alley" (a hallway or area with depth). You will take two photos of the same subject. Your goal is to see how the aperture changes the Depth of Field (what stays in focus) and how you must adjust the Shutter Speed to compensate for the light.
Part 1: The Portrait Pop (Shallow Focus)
Settings: Lowest possible f-stop
Instructions: Get close to your subject. Ensure there is a lot of distance behind them. Open your aperture wide (lowest f-number like f/2.8 or f/4).
Record Final Settings:
Aperture:f / ____
Shutter:1 / ____
ISO:____
Visual Sketch of Result
(Show subject sharp, background blurry)
Part 2: The Hallway Detail (Deep Focus)
Settings: f/16 or higher
Instructions: Stay in the same spot. Increase your f-stop to f/16 or f/22. Look at your meter! You will likely need to slow down your shutter speed.
Record Final Settings:
Aperture:f / ____
Shutter:1 / ____
ISO:____
Visual Sketch of Result
(Show subject and background both sharp)
The Reciprocity Analysis
Compare your data from Part 1 and Part 2. When you changed the aperture to f/16 (Deep Focus), what did you have to do to the Shutter Speed to keep the light meter balanced at zero?
Observation:
Why does this make sense technically?
Aperture Scenarios
For each scenario, circle the best f-stop choice.
A macro shot of a single flower petal where you want the background to be a creamy blur.
f/2.8 f/11
A wide landscape photo of the Grand Canyon where everything should be sharp.
f/1.8 f/16
A group photo of 10 people standing in three different rows (front, middle, back).
f/2.0 f/8.0
Final Conclusion
Complete the sentence:
As the f-number gets higher , the opening in the lens gets ______________________, and the amount of distance in focus gets ______________________.
Depth Detectives Teacher Guide Teacher Resource Lesson 3 of 5
Depth Detectives: Facilitation Guide
Mastering Aperture and Subject Isolation
Objective
By the end of this lesson, students will be able to explain the inverse relationship between f-stop numbers and aperture size, and demonstrate how to use a wide aperture to create a shallow depth of field (Bokeh effect).
The "Why"
Aperture is the "creative heart" of photography. It allows students to move away from flat, "snapshot" style photos to artistic compositions that guide the viewer's eye. Understanding f-stops is often the biggest technical hurdle in this unit.
Aperture Cheat Sheet
Low f-number (f/1.8, f/2.8)
• Large opening (Big hole)
• More light enters
• Shallow Depth of Field
High f-number (f/11, f/16)
• Small opening (Pin hole)
• Less light enters
• Deep Depth of Field
Setup
Identify a "Hallway" or long space for the activity.
Prepare objects if partners aren't available (e.g., chess pieces, toy cars).
Note: Kit lenses (18-55mm) often stop at f/3.5-5.6. Emphasize that "wide open" means the lowest their specific lens can go.
Direct Instruction (20m)
Use the presentation to explain the mechanics. Focus on the f-stop fraction logic: 1/2 is bigger than 1/16. This helps students remember why f/2 is larger than f/16.
Demonstration Tip: The Hand Aperture
Have students make a tiny circle with their thumb and index finger. Ask them to look through it at something far away. Then open the circle wide. Ask which one lets more light into their eye.
The "Alley" Activity Facilitation
Part 1
Subject Isolation: Ensure students are close to their subject (3-5 feet) and the background is far away (20+ feet). If they stand too far from the subject, the background won't blur effectively.
Part 2
Reciprocity Check: This is where it clicks. When they go to f/16, the screen will turn black. Students must realize they need a much slower shutter speed to compensate for the tiny hole. Check for handheld shake (blurred backgrounds) in Part 2.
Differentiation: Pro Challenges
For advanced students, introduce the concept of Focal Length . Challenge them to zoom in all the way (e.g., 55mm) and see how it increases the background blur compared to shooting wide (18mm).
Grain Gain Presentation Lesson 4
Grain Gain
Understanding ISO sensitivity and the cost of light.
Can you see in the dark?
Sometimes, you can't open your Aperture any wider. Sometimes, you can't slow your Shutter Speed anymore without blurring the image.
"What happens when you have run out of time and space?"
Enter ISO: The Sensor's Volume Knob.
The Night Vision Mission
Photographing objects inside a dark box using digital sensitivity.
ISO Sensitivity
The Definition
ISO measures your sensor's sensitivity to light. It is an artificial amplification of the light hitting the camera.
"Like turning up the volume on a radio to hear a faint song."
100 Low ISO
Clean, sharp, no grain. Best for sunny days.
800 Mid ISO
Cloudy days or indoor rooms with good light.
6400+ High ISO
Dark environments. Allows faster shutter speeds, but adds "Noise."
The Cost of Sensitivity: Digital Noise
ISO 100
Sharp & Clean
ISO 12800
Noisy / Grainy
"Digital Noise happens when you push the sensor beyond its native limits."
The Dark Box Lab
You will attempt to capture an object inside the "Dark Box." You'll need to crank your ISO to see what's hidden inside, but watch out for the grain!
Step 1
Capture a "Black" photo at ISO 100.
Step 2
Double your ISO until you "see" the object.
ISO Noise Worksheet Light Hunters Investigation
ISO Noise Test
Lesson 4: Grain Gain • Sensitivity vs Quality
Name:
Camera Model:
The Dark Box Challenge
Your teacher has placed a mystery object inside a dark box. You cannot use a flash. You cannot use a long exposure (shutter must stay at 1/60). You must use ISO to find the object.
Fixed: Shutter @ 1/60
Fixed: Aperture @ Wide Open
Variable: ISO
Trial ISO Setting Visibility (Can you see it?) Noise Level (1-10) Trial 1 100 Trial 2 800 Trial 3 3200 Trial 4 Max ISO
Zoom Investigation
Look at your Max ISO photo on your camera screen and zoom in all the way. Describe the "Noise" you see in the dark areas of the photo.
Sketch the "Noise" pattern below:
Synthesis
Based on your experiment, what is the "highest clean ISO" your specific camera can handle before the noise becomes too distracting? (This is your camera's limit!)
ISO: ________
Light Hunting Decisions
You are a professional photographer. Choose the best ISO for these situations and explain WHY.
Scenario A: You are shooting a landscape at mid-day on a bright beach. You are using a tripod.
ISO 100 ISO 1600
Reasoning:
Scenario B: You are shooting a fast-paced basketball game in a dimly lit high school gym. You need a fast shutter (1/500).
ISO 100 ISO 3200
Reasoning:
The Golden Rule of ISO
"Always use the ______________ ISO possible for the lighting situation to ensure the ______________ image quality."
Dark Box Challenge Guide Teacher Resource Lesson 4 of 5
Dark Box Challenge Guide
Managing Sensitivity and Noise
The Mission
Students often think ISO is "free light." This challenge proves that light always has a cost. By photographing hidden objects in a dark box, students discover the technical limits of their equipment and the visual consequences of digital amplification.
Key Takeaway
ISO is the last resort. We only use it when we have physically run out of Aperture and Shutter Speed options for a handheld shot.
Dark Box Setup
The Box: A cardboard box with a 4-inch hole cut in one side for the camera lens. Tape all other seams to prevent light leaks.The Object: A colorful or detailed object (e.g., a Lego figure, a textured ball) placed in the back corner of the box.The Variable: Students MUST keep Shutter at 1/60 (to simulate handheld) and Aperture at their widest (to show they've run out of space).
Introduction (15m)
Present the Grain Gain slides. Use the Radio Volume analogy. Remind students: ISO doesn't "change" the light, it just "amplifies" the signal already there.
Investigation (30m)
Groups of 3-4 rotate through the Dark Box stations. Students record settings and visual clarity on the ISO Noise Worksheet . Encourage them to zoom in on the LCD screen to see the "grain."
Synthesis (15m)
Ask students to share their "Max Clean ISO." This varies by camera—newer/pro sensors can handle 3200 easily; older kit sensors might fail at 800.
Watch for the "Cheat"
Students might try to slow their shutter speed to 1 second to see inside. Stop them! Explain that if this were a live sports event or a handheld street shot, 1 second would be a blurry mess. They MUST use ISO to solve this specific problem.
Noise vs. Grain
Technically, film has "grain" (chemical) and digital has "noise" (electronic). In 9th grade, they are often used interchangeably, but you can point out that noise usually looks like colored specks (magenta/green) in the shadows.
Differentiation: Low-Light Art
Challenge fast finishers to take a "Noir" portrait of a peer using only the light from a smartphone screen. They will have to balance a wide aperture and a moderately high ISO to capture the mood without too much noise.
Manual Masters Presentation Lesson 5
Manual Masters
Synthesis, mastery, and the final Light Hunter challenge.
The Triangle Recap
Aperture
Depth & Volume
Small # = Blurry Background Large # = Sharp Landscape
Shutter Speed
Time & Motion
Fast (1/1000) = Frozen Slow (1/15) = Blur
ISO
Sensitivity & Noise
Low (100) = Clean High (6400) = Grainy
The Holy Grail: The Zero
"The light meter is your guide. Your mission in Manual Mode is to adjust the three pillars until the indicator sits perfectly at zero."
-2
+2
Underexposed Correct Overexposed
Final Challenge Scenarios
Scenario 1: The Golden Hour
Soft sunset light. You want a sharp landscape with no grain.
Low ISO (100)
Small Aperture (f/11)
Slow Shutter (Need Tripod!)
Scenario 2: The Skate Park
Bright sun. Fast action. You want the skateboarder frozen and the background blurry.
Fast Shutter (1/2000)
Wide Aperture (f/2.8)
Low ISO (100)
Manual Masters Relay
The training is over. It's time to prove your mastery. Take your cameras and your challenge cards.
Capture. Control. Conquer.
Manual Masters Challenge Worksheet Light Hunters Certification
Manual Mastery Relay
Lesson 5: Manual Masters • Final Synthesis Challenge
Name:
Date:
The Rules of the Hunt
You are no longer an apprentice. For each challenge below, you must capture a photo that meets the specific Artistic Intent . Your exposure meter must be at ZERO , and you must record your technical decisions below.
Challenge #1
The Speed Demon
Capture a peer jumping or running. The subject must be perfectly frozen with no blur.
My Settings:
SS: 1/____
f / ____
ISO: ____
Teacher Initials: _______
Challenge #2
The Lone Star
Capture a portrait of a peer. The background must be completely blurry (Subject Isolation).
My Settings:
SS: 1/____
f / ____
ISO: ____
Teacher Initials: _______
Challenge #3
The Deep Dive
Capture a long view of the hallway or school. Everything must be sharp from front to back.
My Settings:
SS: 1/____
f / ____
ISO: ____
Teacher Initials: _______
Challenge #4
The Ghost Walk
Capture a peer walking. Use a slow shutter to turn them into a blurry streak while the background stays sharp.
My Settings:
SS: 1/____
f / ____
ISO: ____
Teacher Initials: _______
The Mastery Debrief
Choose your favorite image from today's challenge and explain the specific technical decisions you made to achieve your artistic intent.
Challenge Selection:
#1 #2 #3 #4
Explain your "Light Hunting" process for this specific shot:
Light Hunting Scenarios
1. You take a photo and it is too dark (Underexposed). You don't want to change your Depth of Field. What are your two remaining options?
2. You are using a very slow shutter speed (1/15) to capture motion blur, but your photo keeps turning completely white. What must you do to the Aperture to fix this?
Portfolio Check
Ensure all four images are uploaded to the class drive with your name and challenge number.
Manual Mode Mastery
Manual Masters Teacher Guide Teacher Resource Lesson 5 of 5
Manual Masters: Facilitation Guide
Final Synthesis and Assessment
The Synthesis Challenge
This final lesson is the "Boss Fight" of the unit. Students must move beyond isolated skills and prove they can juggle all three variables of the Exposure Triangle simultaneously. The goal is complete technical autonomy.
Grading Philosophy
Grade for intent . A photo doesn't have to be a masterpiece, but it must clearly demonstrate the requested effect (e.g., if it's the speed challenge, is the motion frozen?).
The Mastery Relay
Challenge Cards: Students rotate through 4 indoor/outdoor stations.Teacher Check: As a student completes a shot, they show you their LCD screen and their settings. If they hit the intent, initial their worksheet.Zeroing: Strictly enforce the "Zero" light meter rule. An underexposed photo is not a pass, even if the settings are theoretically correct.
Assessment Rubric
Criteria Level 4: Master Level 2: Developing Technical Exposure All challenge photos are perfectly exposed (histogram/meter at zero). No accidental clipping in highlights or shadows. Photos are consistently too dark or too light. Relies on "Post-Processing" excuses rather than manual balance. Creative Intent Shallow DOF is distinct (bokeh). Frozen motion shows zero blur. Deep DOF is sharp throughout. Motion blur is intentional. Effects are muddy or accidental (e.g., camera shake instead of intentional motion blur). Subject is not isolated. ISO Management Used the lowest ISO possible for the shutter/aperture combo. Noise is minimal and only used as a last resort. ISO is high even in bright light. Image quality is degraded due to excessive digital noise. Setting Logic Reflection reveals deep understanding of reciprocity (e.g., "I went to f/16 so I HAD to use a tripod at 1/15"). Reflection is vague or incorrect (e.g., "I just turned the dial until it looked good"). Cannot explain the relationship.
Lesson Flow
10m Review
40m Relay
10m Upload
Pro Tip: The Zero Check
During the relay, don't just check the photo. Check their shutter speed. If they are shooting at 1/15 handheld, they might think it's "correctly exposed" but it will be a blurry mess. Teach them to look for the "Blur" warning in their own eyes.