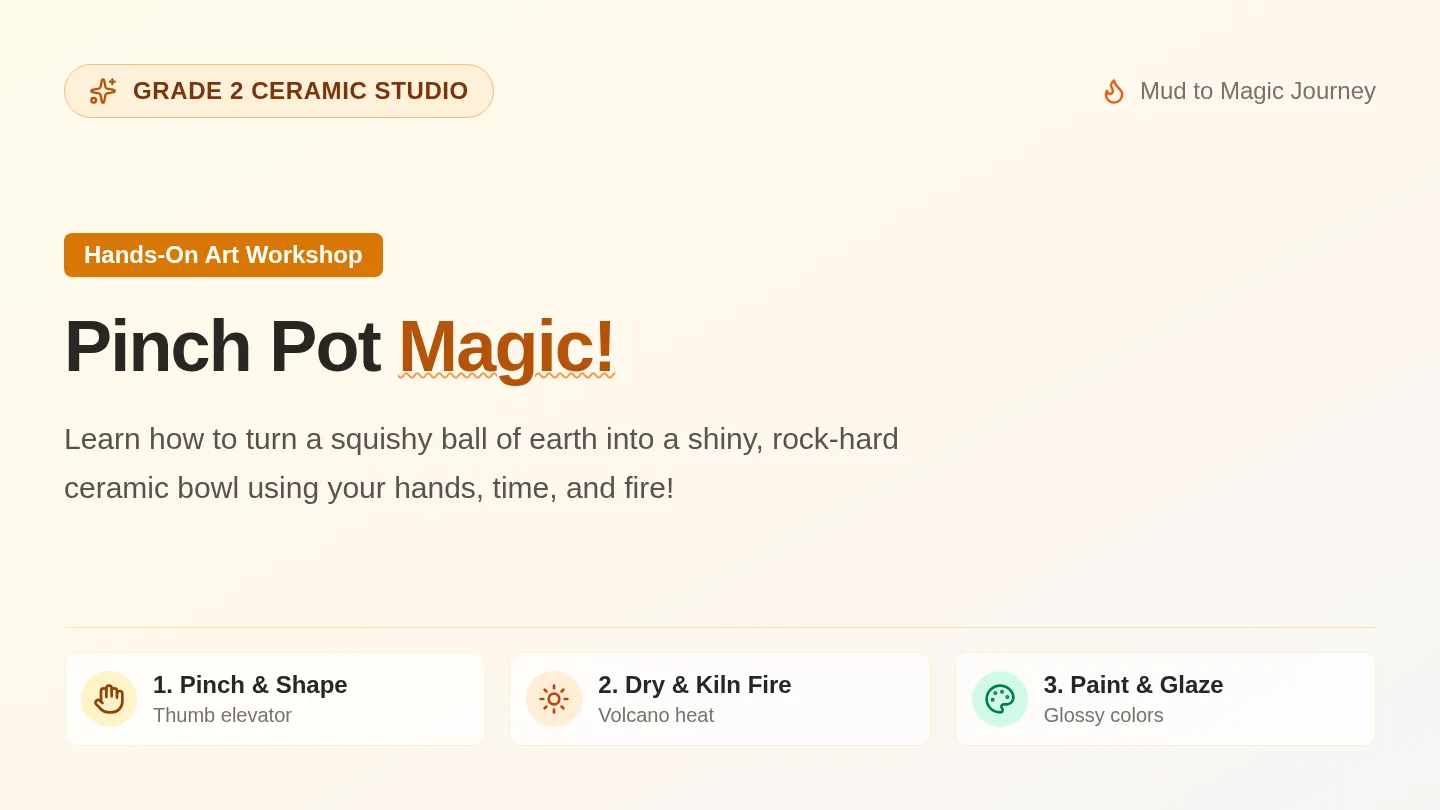
Pinch Pot Studio Slides Grade 2 Ceramic Studio
Mud to Magic Journey
Hands-On Art Workshop
Pinch Pot Magic!
Learn how to turn a squishy ball of earth into a shiny, rock-hard ceramic bowl using your hands, time, and fire!
1. Pinch & Shape
Thumb elevator
2. Dry & Kiln Fire
Volcano heat
3. Paint & Glaze
Glossy colors
Meet Our Material: Earth Clay
Part 1: The Wonder of Clay
Natural Mineral
Clay comes from the ground!
Clay is made of tiny mineral bits washed down rivers over thousands of years. It feels cool and damp because it holds water like a sponge.
🌱
Real clay is totally different from Play-Doh. It needs heat to freeze in place!
Clay Superpowers
The 3 Golden Rules
Keep your hands warm & gentle
Do not add too much water (mud soup!)
Clay stays on the placemat at all times
✨
If your clay starts to get dry cracks, smooth with one damp fingertip!
Artist Wisdom: Treat your clay with patience and gentle fingers!
The Secret: Cookie Thickness!
Secret to No Cracks
Too Thin!
Like a potato chip! The walls will flop down like melted ice cream and crack while drying.
Thickness: < 1/4 inch ❌
Just Right!
Like a thick sugar cookie or the width of your pinky finger! Strong, sturdy, and happy.
Thickness: Pinky Finger (~1/2") ⭐
Too Thick!
Like a whole potato! Moisture gets trapped deep inside and can make the pot burst in the kiln.
Thickness: > 3/4 inch ❌
💡 Pro Tip: Keep walls the same thickness from top to bottom so it dries evenly!
4 Steps to Your Pinch Pot
Hands-On Technique
1
Roll a Ball
Pat and roll your clay between two open palms into a smooth sphere with no cracks.
Round as an orange! 🍊
2
Thumb Elevator
Hold the sphere in one hand. Push your opposite thumb straight down the center!
Stop before the floor! 🛑
3
Pinch & Turn
Thumb inside, 4 fingers outside. Gentle baby crab pinches: pinch, turn, pinch, turn!
Start at bottom, walk up! 🦀
4
Tap & Smooth
Tap the bottom flat on your board so it stands upright. Smooth the top rim with your thumb!
Stable and sturdy! 🏺
Remember: Work in a circle like a clock! Never pinch too hard in one single spot.
The 4 Stages of Clay Magic
Science of Ceramics
Stage 1
Wet Clay
Soft, cool, moldable. We shape our pinch pots today while it is wet!
Can be recycled easily
Stage 2
Bone Dry
All water has evaporated. Light colored, chalky, and fragile like an eggshell!
Handle with two hands! 🥚
Stage 3
Bisque Fired
Baked in the kiln at 1,900°F! Hard as stone now. Water will never dissolve it again.
Ready for glaze painting! 🎨
Stage 4
Glaze Fired
Baked a 2nd time! Glaze melts into liquid glass and cools into a shiny, waterproof shield.
Finished masterpiece! 🏆
Patience is an artist's best tool: this process takes about 2 to 3 weeks!
What is the Kiln?
The Ceramic Oven
1,900° Fahrenheit!
A regular kitchen oven bakes cookies at 350°F. Our pottery kiln gets over five times hotter than that!
Permanent Transformation
The intense heat fuses clay particles together. It changes the chemical structure so it turns from soil into solid ceramic rock!
Studio Kiln Rules
Kiln Safety for 2nd Graders
Teacher Zone Only: Only the art teacher loads and operates the kiln.
Bone Dry Only: If clay has even a drop of trapped water, steam expands and the pot can pop!
Slow Cooling: The kiln takes 24 hours to cool down before opening!
🔥 Magic fact: Ancient humans made pinch pots over 20,000 years ago!
The kiln turns fragile dried earth into lasting ceramic treasures!
Glaze Day: Painting with Glass!
Session 2 Glaze Studio
3
Magic Rule of 3
Paint three even coats ! Wait for the shiny wet look to turn chalky dry before adding coat #2 and coat #3.
1 coat = streaky, 3 coats = rich color!
🚫
Dry Foot Rule
NEVER paint glaze on the very bottom of your pot! Leave a clean 1/4 inch border around the bottom foot.
Glaze melts & sticks to kiln shelves!
✨
The Great Reveal
Unfired glaze looks dusty and dull in the jar. Don't worry! In the kiln fire, it melts into bright, shiny, vibrant colors.
Trust the color chart label!
Glaze is non-toxic classroom underglaze. Always wash hands after painting!
Food-Safe Finish
Studio Clean-Up Champions!
Clay Care
1. Clay Bucket
Leftover scraps go into the clay reclaim bucket. Never wash clay chunks down the classroom sink drain!
2. 2-Bucket Sponge
Rinse your sponge in bucket #1, squeeze it dry, then wipe your mat clean. Dry mats don't get sticky!
3. Label Your Pot
Carve your initials and student number on the bottom with a stylus or wooden pencil before drying!
Ready to create? Let's warm up our clay hands and start pinching! 🏺✨
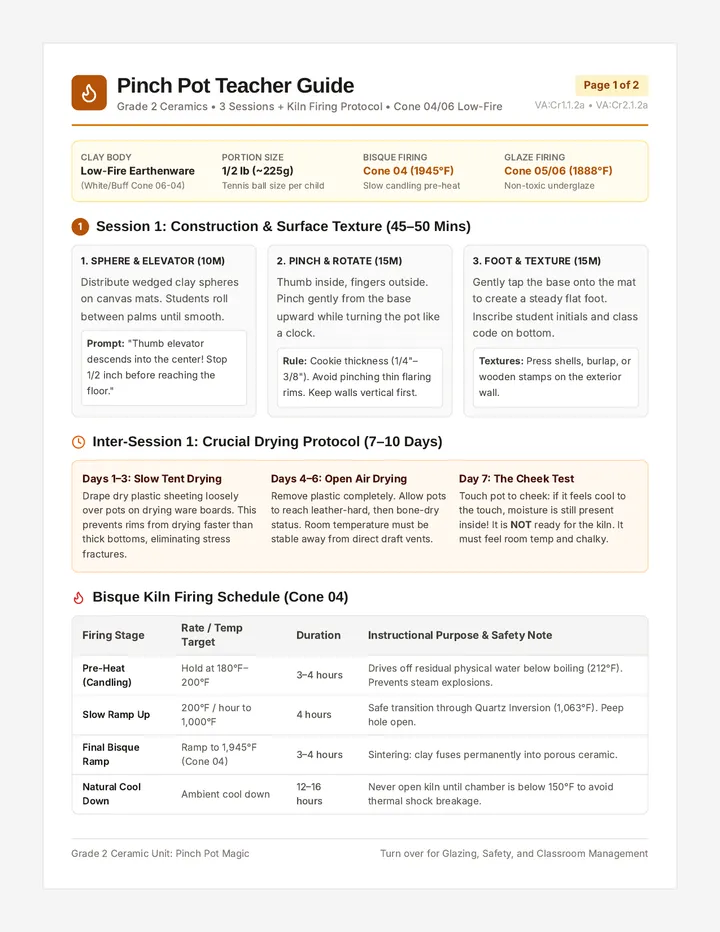
Pinch Pot Teacher Guide Pinch Pot Teacher Guide
Grade 2 Ceramics • 3 Sessions + Kiln Firing Protocol • Cone 04/06 Low-Fire
Page 1 of 2
VA:Cr1.1.2a • VA:Cr2.1.2a
Clay Body Low-Fire Earthenware (White/Buff Cone 06-04)
Portion Size 1/2 lb (~225g) Tennis ball size per child
Bisque Firing Cone 04 (1945°F) Slow candling pre-heat
Glaze Firing Cone 05/06 (1888°F) Non-toxic underglaze
1
Session 1: Construction & Surface Texture (45–50 Mins)
1. Sphere & Elevator (10m)
Distribute wedged clay spheres on canvas mats. Students roll between palms until smooth.
Prompt: "Thumb elevator descends into the center! Stop 1/2 inch before reaching the floor."
2. Pinch & Rotate (15m)
Thumb inside, fingers outside. Pinch gently from the base upward while turning the pot like a clock.
Rule: Cookie thickness (1/4"–3/8"). Avoid pinching thin flaring rims. Keep walls vertical first.
3. Foot & Texture (15m)
Gently tap the base onto the mat to create a steady flat foot. Inscribe student initials and class code on bottom.
Textures: Press shells, burlap, or wooden stamps on the exterior wall.
Inter-Session 1: Crucial Drying Protocol (7–10 Days)
Days 1–3: Slow Tent Drying
Drape dry plastic sheeting loosely over pots on drying ware boards. This prevents rims from drying faster than thick bottoms, eliminating stress fractures.
Days 4–6: Open Air Drying
Remove plastic completely. Allow pots to reach leather-hard, then bone-dry status. Room temperature must be stable away from direct draft vents.
Day 7: The Cheek Test
Touch pot to cheek: if it feels cool to the touch, moisture is still present inside! It is NOT ready for the kiln. It must feel room temp and chalky.
Bisque Kiln Firing Schedule (Cone 04)
Firing Stage
Rate / Temp Target
Duration
Instructional Purpose & Safety Note
Pre-Heat (Candling)
Hold at 180°F–200°F
3–4 hours
Drives off residual physical water below boiling (212°F). Prevents steam explosions.
Slow Ramp Up
200°F / hour to 1,000°F
4 hours
Safe transition through Quartz Inversion (1,063°F). Peep hole open.
Final Bisque Ramp
Ramp to 1,945°F (Cone 04)
3–4 hours
Sintering: clay fuses permanently into porous ceramic.
Natural Cool Down
Ambient cool down
12–16 hours
Never open kiln until chamber is below 150°F to avoid thermal shock breakage.
Grade 2 Ceramic Unit: Pinch Pot Magic Turn over for Glazing, Safety, and Classroom Management
Glaze Studio & Management
Glaze Application • Firing Cone 05/06 • Trouble-Shooting • Studio Cleanup
Page 2 of 2
Session 2 & Session 3
2
Session 2: Glaze Application Protocol (45 Mins)
1. Bisque Prep & Inspection
Inspect bisque pieces for sharp burrs. Rub sharp edges with a damp sanding sponge over a water basin.
Wipe whole pot with a damp sponge to remove kiln dust so glaze adheres cleanly.
2. The "Rule of 3" Underglaze
Use stroke-and-coat or commercial liquid underglazes. Demonstrate brushing in cross-hatch directions.
Teach students: coat 1 dries matte before coat 2. Three thin coats create vibrant, opaque ceramic saturation.
3. The Strict Dry Foot Rule
Leave the bottom base and lowest 1/4" edge completely glaze-free!
Teacher check: wipe bottom with wet sponge before loading into the glaze kiln. Prevent shelf fusing!
Glaze Kiln Firing Details (Cone 05 / 06)
Clear Glaze Topcoat: After underglaze dries, teacher dips pieces in low-fire clear glaze (Amaco HF-9 or Mayco Clear Cone 06).
Kiln Stacking: Glaze pieces CANNOT touch each other or kiln shelves. Maintain 1/2" clearance between pots. Apply kiln wash to all shelves.
Glaze Program: Fast ramp to Cone 06 (1828°F) or Cone 05 (1888°F) with a 10-minute hold for bubble healing. Cool slowly.
Troubleshooting Common Grade 2 Ceramic Challenges
Cracks along the top rim while pinching
Cause: Clay drying out from body heat / over-manipulation.Fix: Rub one damp finger along the rim. Do NOT dunk in water bowl (creates slip slurry that collapses walls).
Pot collapses into a flat pancake
Cause: Base pushed outward or walls thinned too quickly.Fix: Gently cup the exterior with both palms to compress clay inward. Allow to firm for 5 minutes before shaping upper rim.
Fears of "Air Bubble Explosions"
Reality: Air does not explode—steam from trapped moisture does. As long as pots are bone-dry and bottom < 1/2" thick, pots fire safely.
Clay clogging school plumbing
Plumbing Safeguard: Never let clay down classroom sinks! Use the 2-Bucket System: scrape into trash, sponge wash in bucket 1, rinse in bucket 2.
Grade 2 Studio Routine: 7-Minute Clean-Up Checklist
Pot Inspection: Child checks name/code stamp on bottom and places pot on the assigned class board.Clay Scraps: Collect trimmings into the central reclaim clay bin (seal tightly to prevent dry dust).Mat Sponge: Dampen personal sponge, wring thoroughly, and wipe placemat clean. Lay mats flat to air dry.Sponge Clean: Rinse sponge in the pre-wash rinse station (NOT direct sink drain).
Grade 2 Ceramic Unit: Pinch Pot Magic Ceramic Safety Standards • ASTM D-4236 Certified Materials
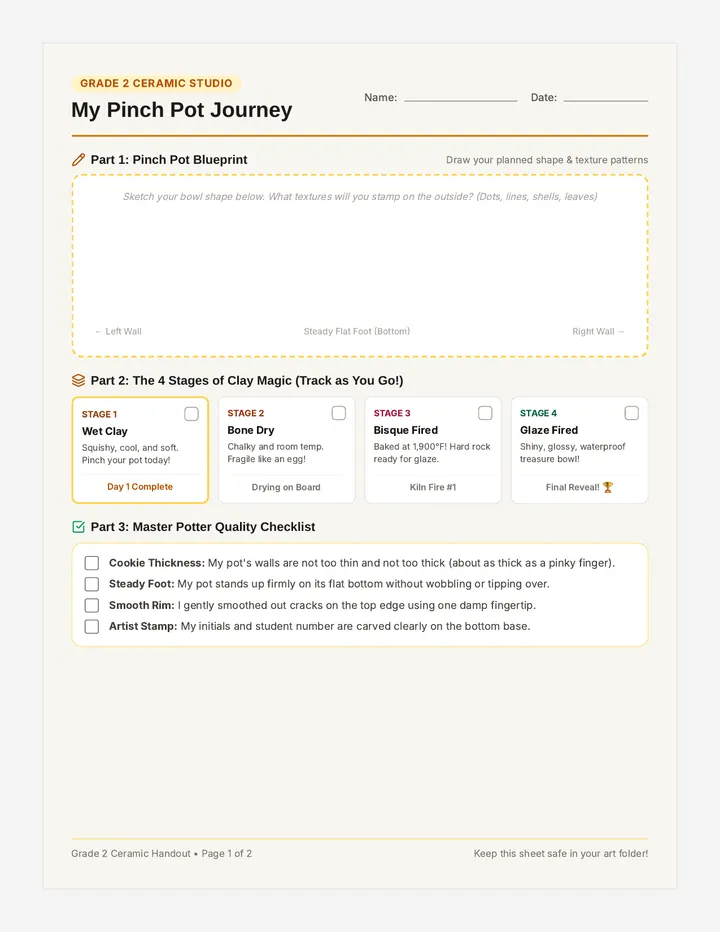
Clay Journey Student Handout Grade 2 Ceramic Studio
My Pinch Pot Journey
Name:
Date:
Part 1: Pinch Pot Blueprint
Draw your planned shape & texture patterns
Sketch your bowl shape below. What textures will you stamp on the outside? (Dots, lines, shells, leaves)
← Left Wall Steady Flat Foot (Bottom) Right Wall →
Part 2: The 4 Stages of Clay Magic (Track as You Go!)
Stage 1
Wet Clay
Squishy, cool, and soft. Pinch your pot today!
Day 1 Complete
Stage 2
Bone Dry
Chalky and room temp. Fragile like an egg!
Drying on Board
Stage 3
Bisque Fired
Baked at 1,900°F! Hard rock ready for glaze.
Kiln Fire #1
Stage 4
Glaze Fired
Shiny, glossy, waterproof treasure bowl!
Final Reveal! 🏆
Part 3: Master Potter Quality Checklist
Cookie Thickness: My pot's walls are not too thin and not too thick (about as thick as a pinky finger). Steady Foot: My pot stands up firmly on its flat bottom without wobbling or tipping over. Smooth Rim: I gently smoothed out cracks on the top edge using one damp fingertip. Artist Stamp: My initials and student number are carved clearly on the bottom base.
Grade 2 Ceramic Handout • Page 1 of 2 Keep this sheet safe in your art folder!
Session 2 & 3 Studio Work
Glaze Plan & Artist Statement
Page 2 of 2
Part 4: Glaze Color Plan (Remember: 3 Thin Coats!)
Inside Bowl Color
Color name:
Outside Wall Color
Color name:
The Bottom (Foot)
DRY FOOT RULE: Leave completely bare clay! No glaze on the bottom.
Clean with sponge ✓
Part 5: Ceramic Artist Statement (Complete After Firing)
1. The special title of my ceramic pinch pot is:
"_____________________________________________________________________"
2. What treasures or objects will your pot hold at home?
"It will safely hold ________________________________________________"
3. When I molded the wet earth clay with my hands, it felt:
Cool & squishy Heavy & firm Smooth & soft Sticky & muddy
4. One challenging part of making clay that I solved was:
"I solved it by ____________________________________________________"
★
Master Potter Seal
I practiced patience and care through all four stages of clay!
Potter's Signature:
Grade 2 Ceramic Handout • Page 2 of 2 National Core Arts Standards: VA:Cr3.1.2a & VA:Re7.1.2a