Fundamental techniques for drawing, painting, sculpture, and photography alongside modern digital design principles. Analyzes historical artistic movements while building skills in printmaking and graphic media.
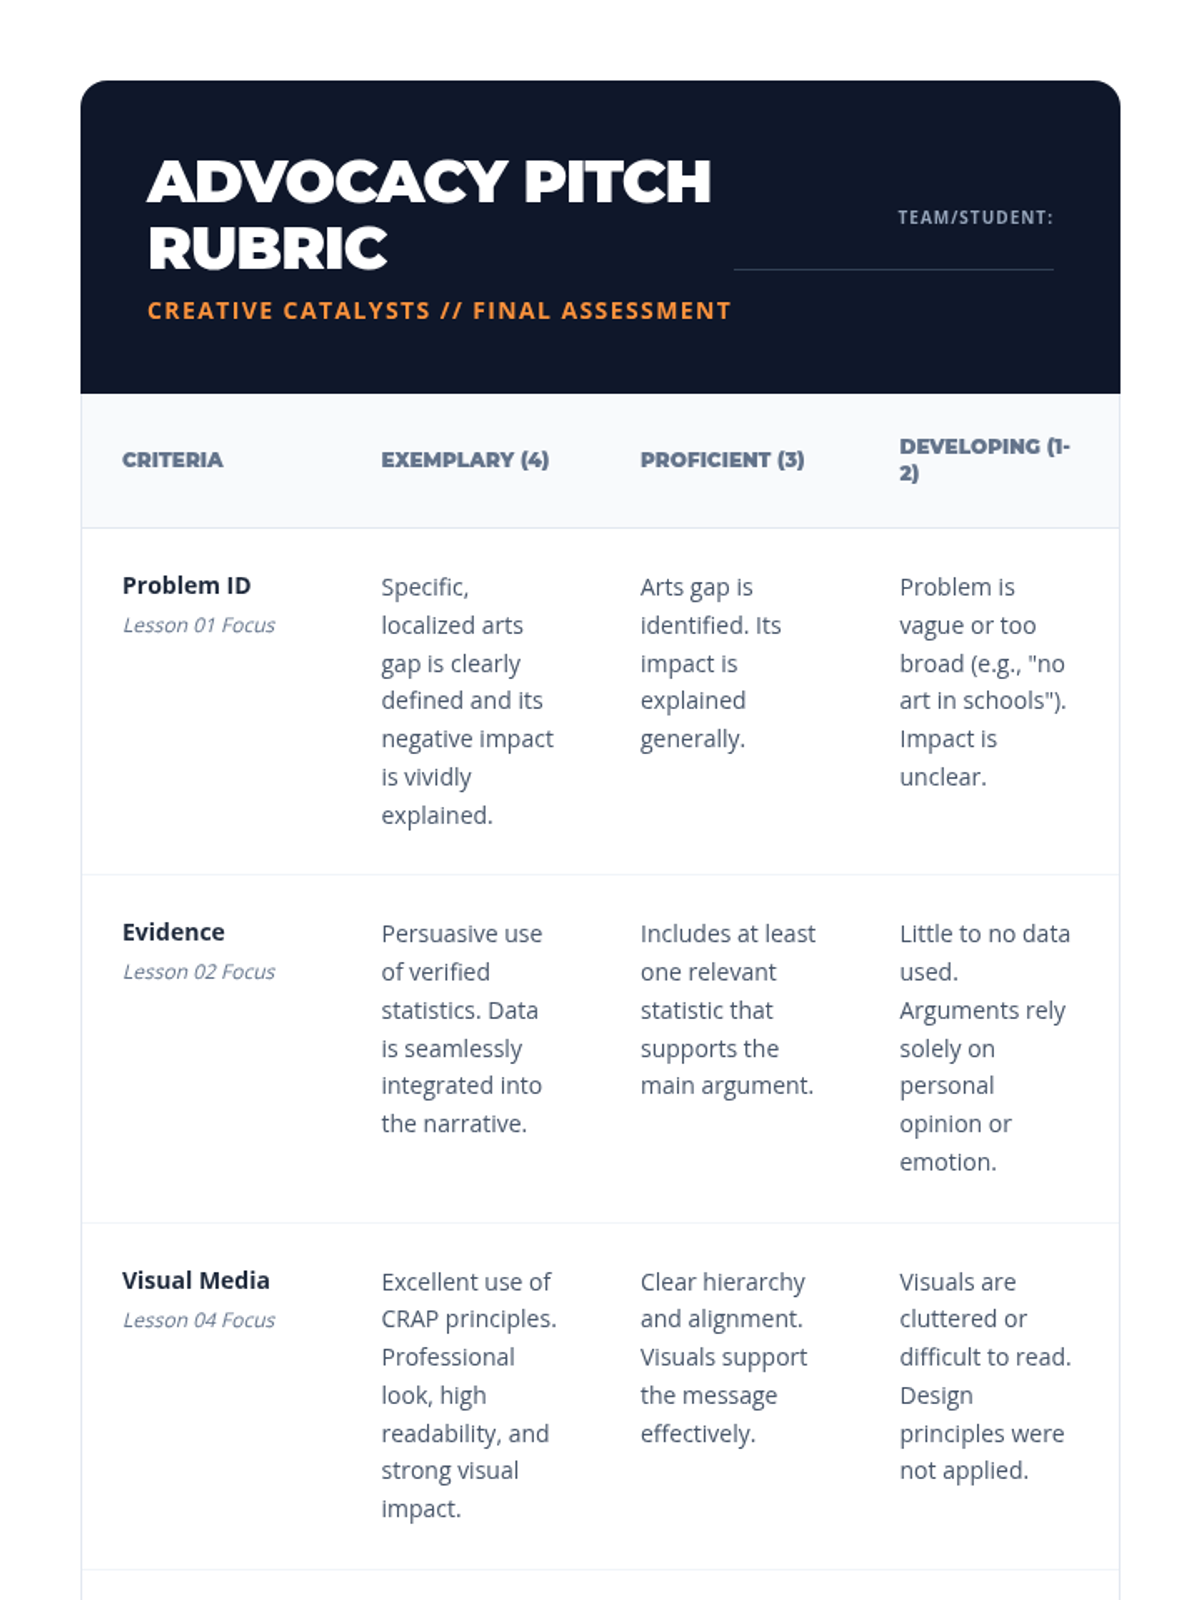
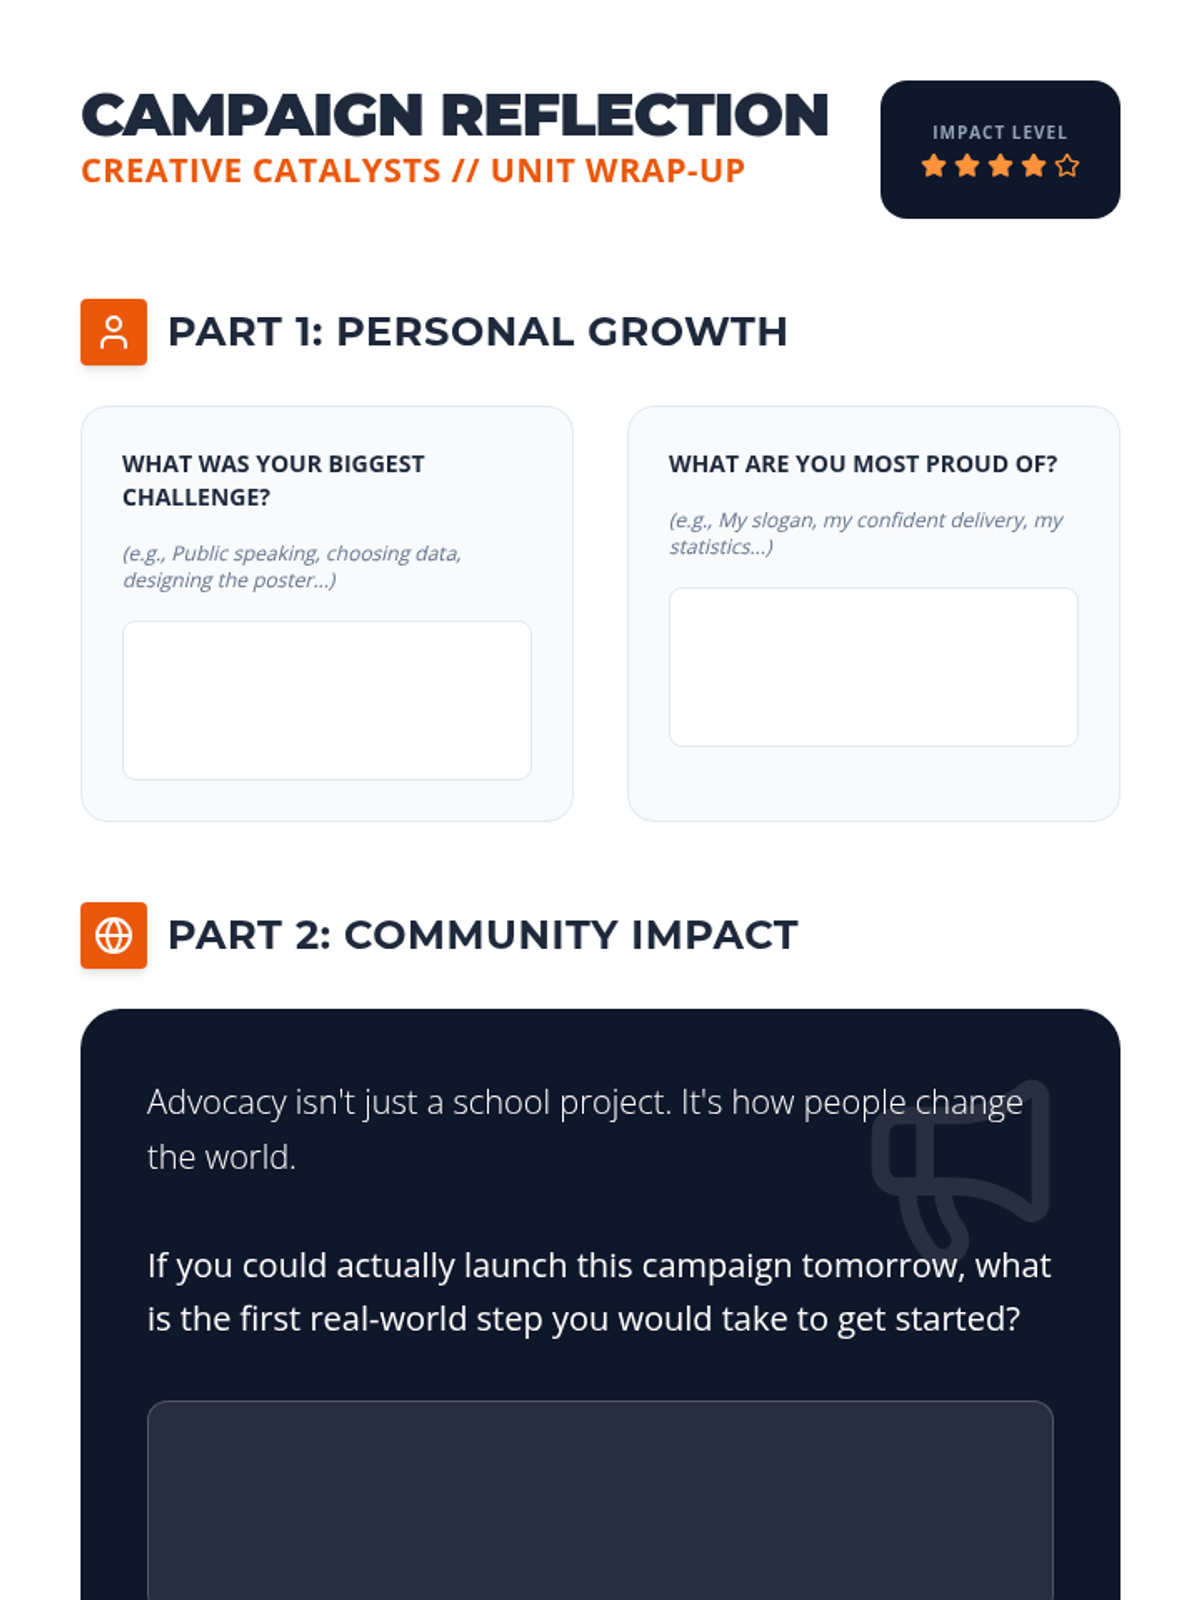
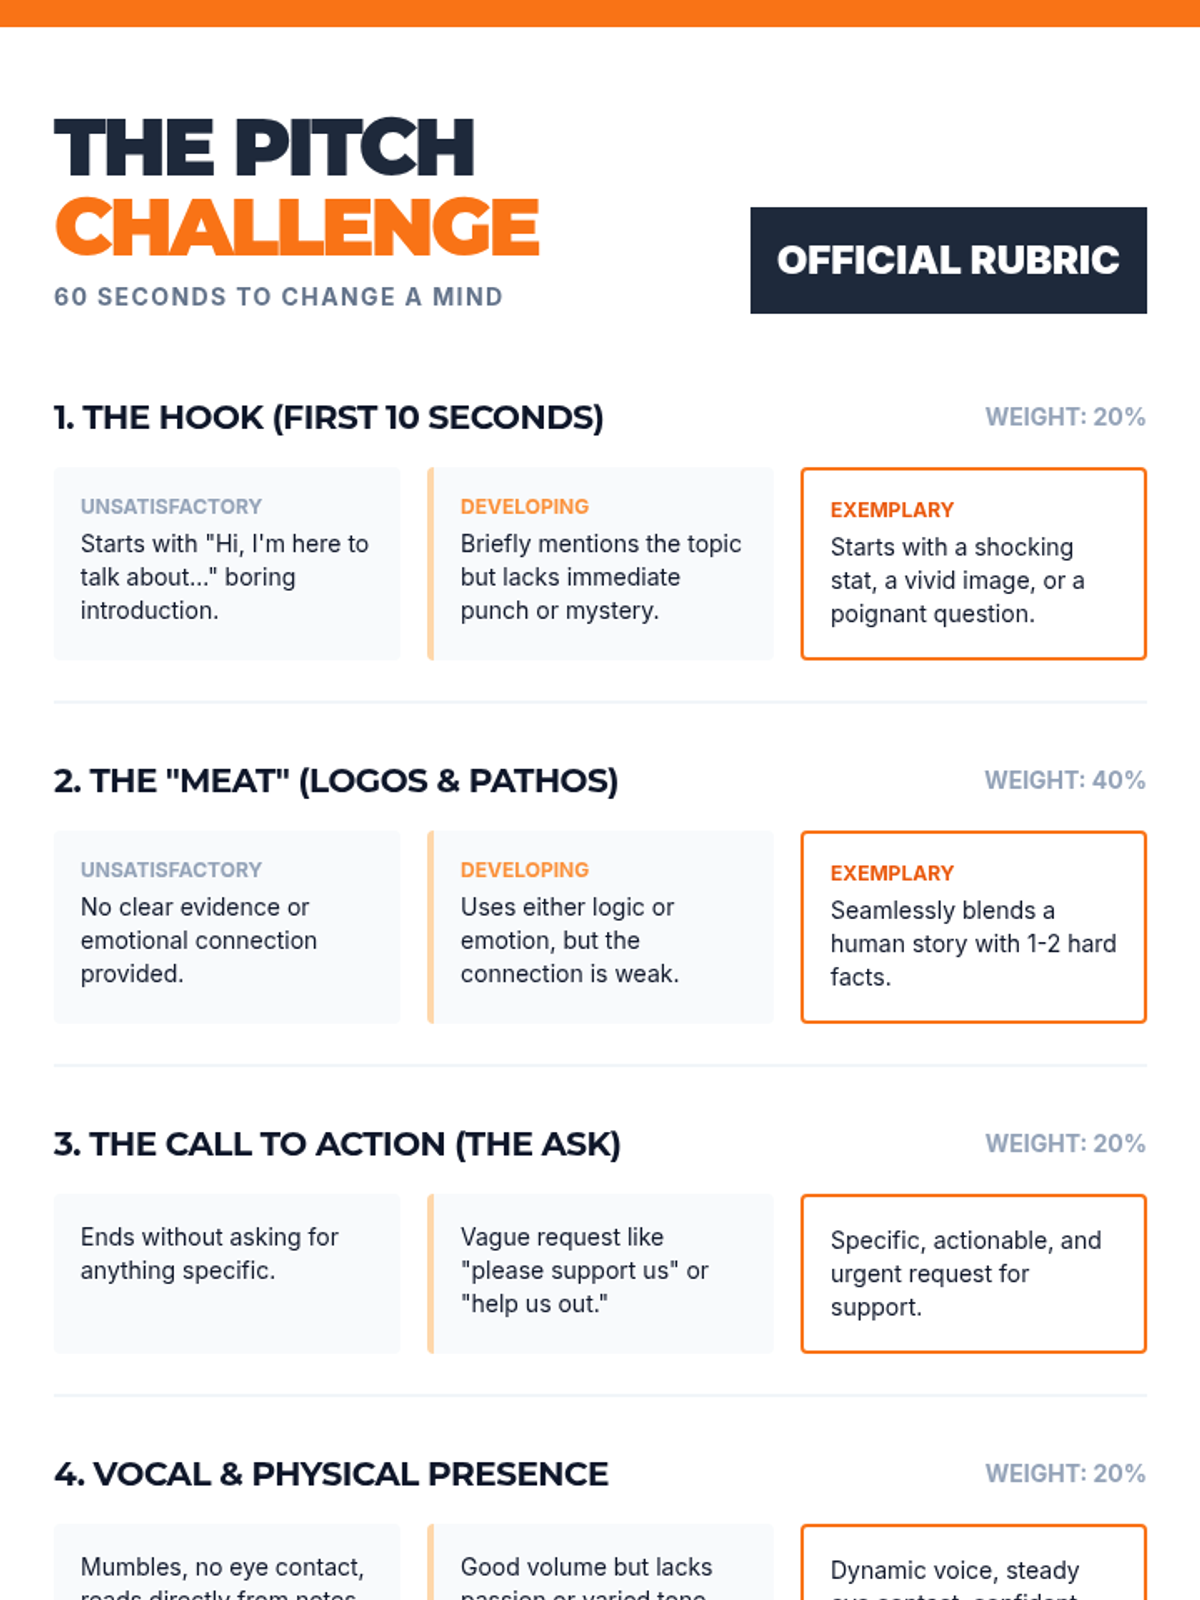
Students present their completed campaigns to a panel representing school administrators or local council members. They deliver a verbal pitch accompanied by their visual materials and answer questions regarding feasibility and impact.
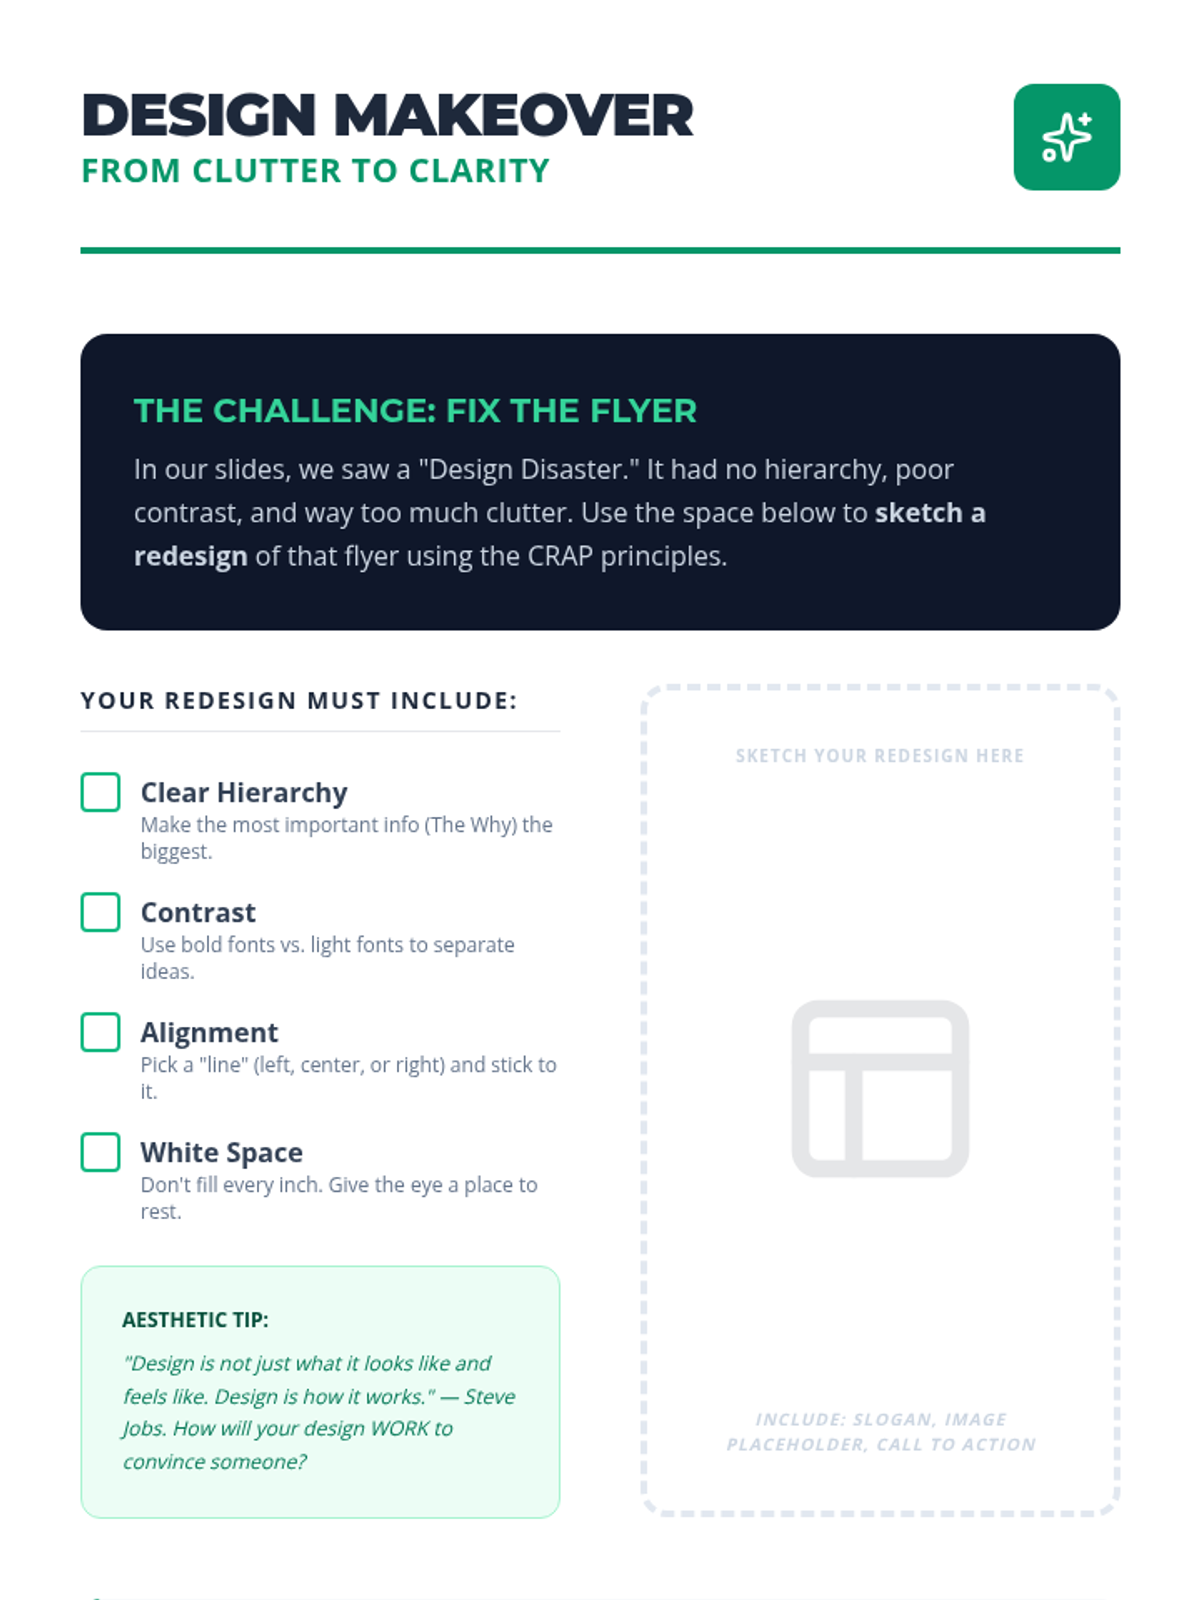
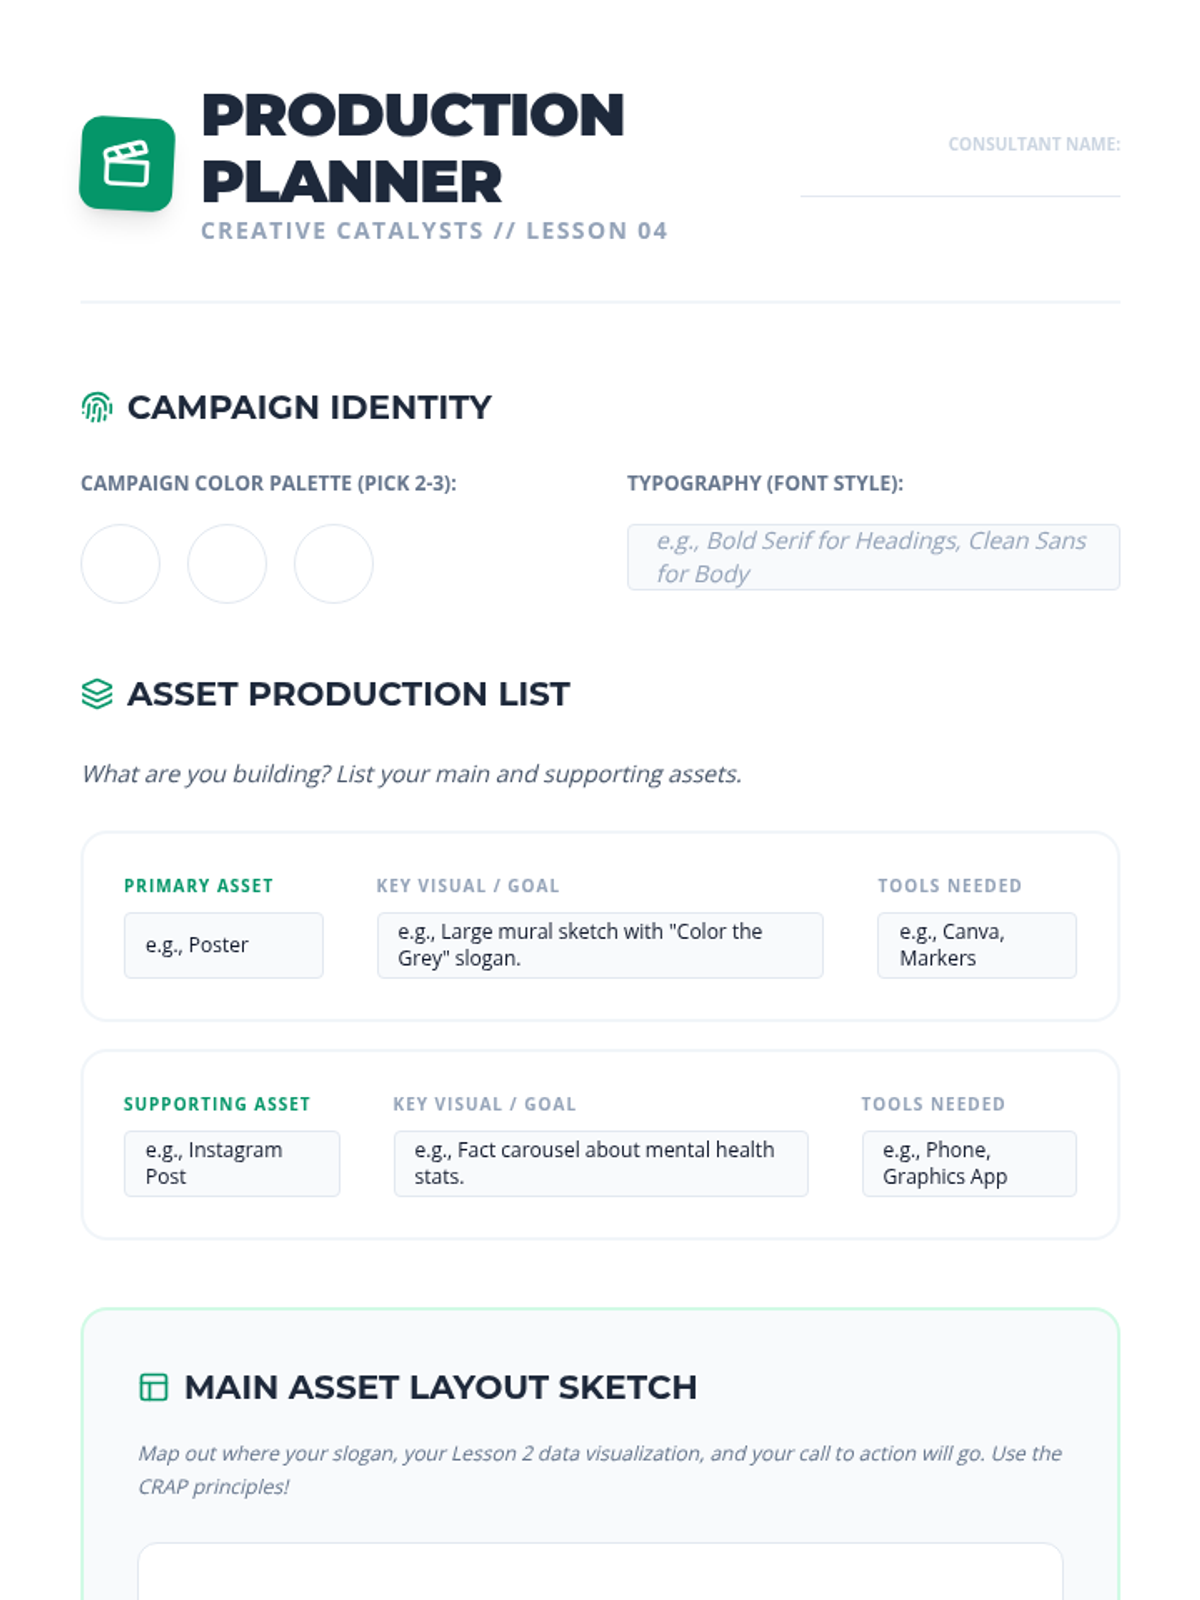
Students enter a production phase to create the physical or digital assets for their campaign. They apply principles of design hierarchy to ensure their message is visually accessible. The lesson emphasizes the intersection of aesthetics and communication.
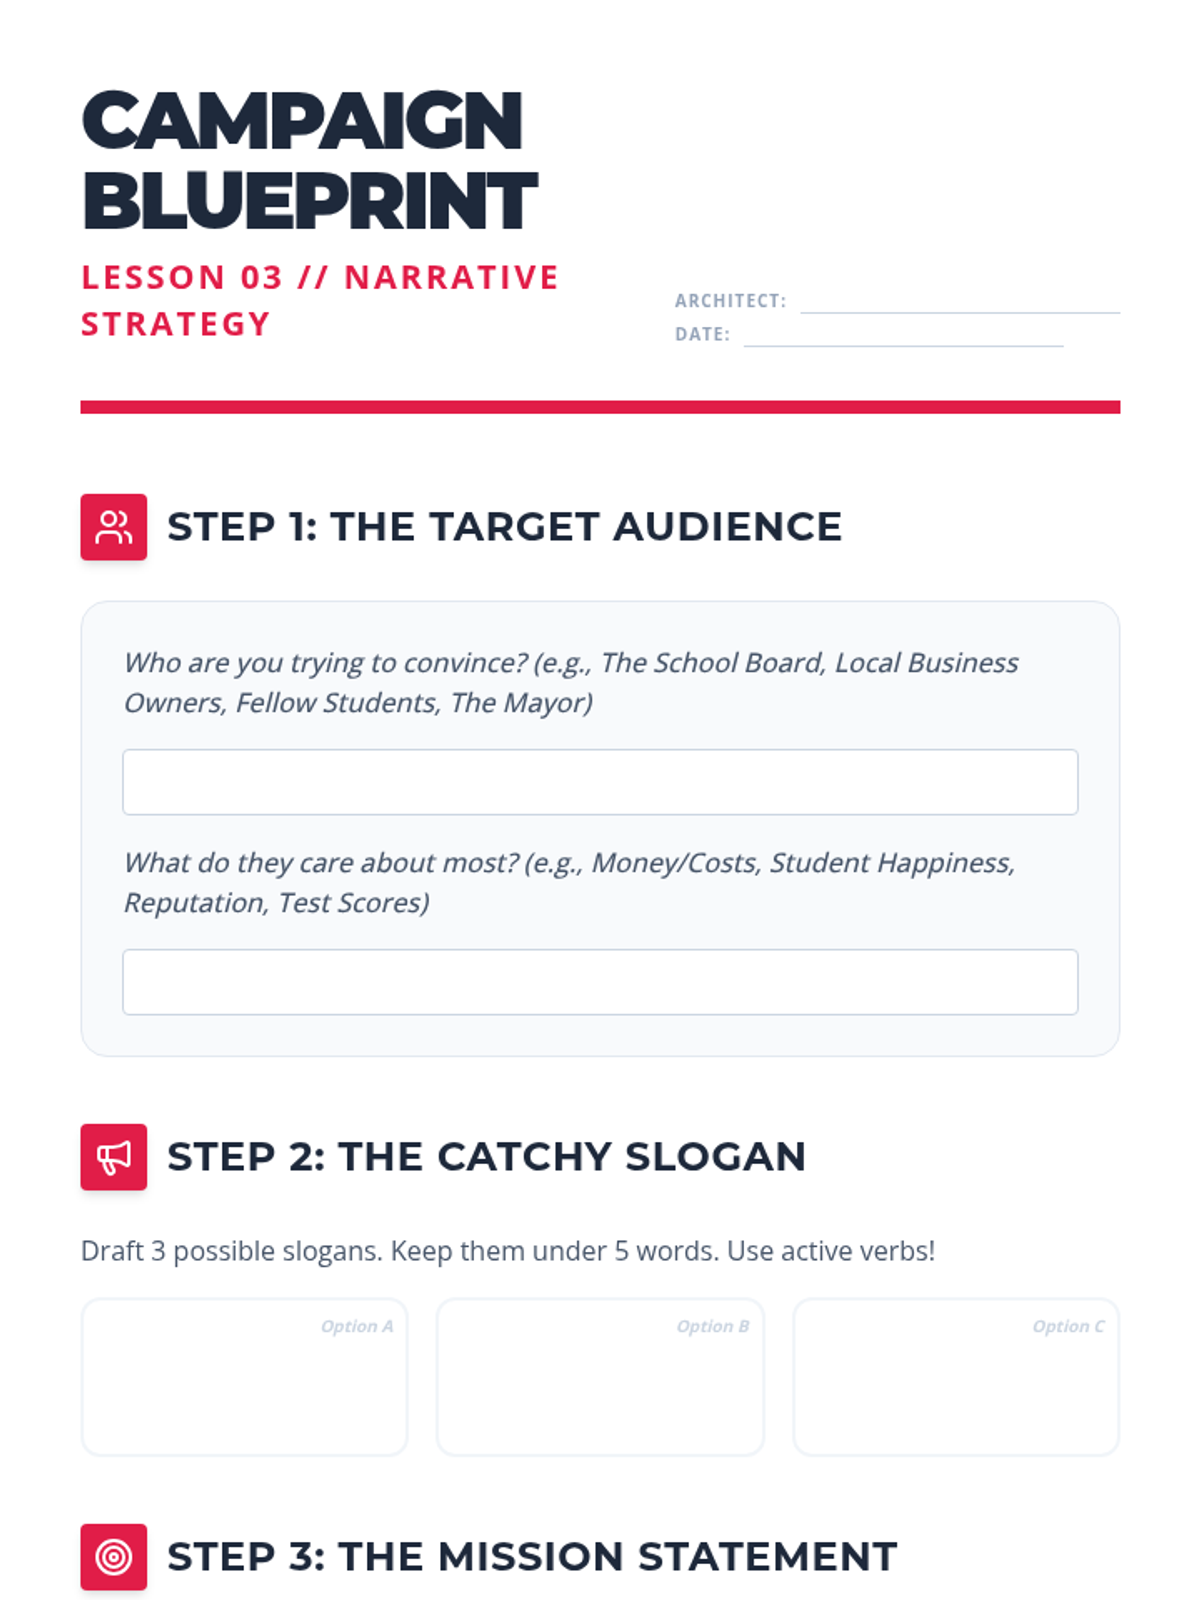
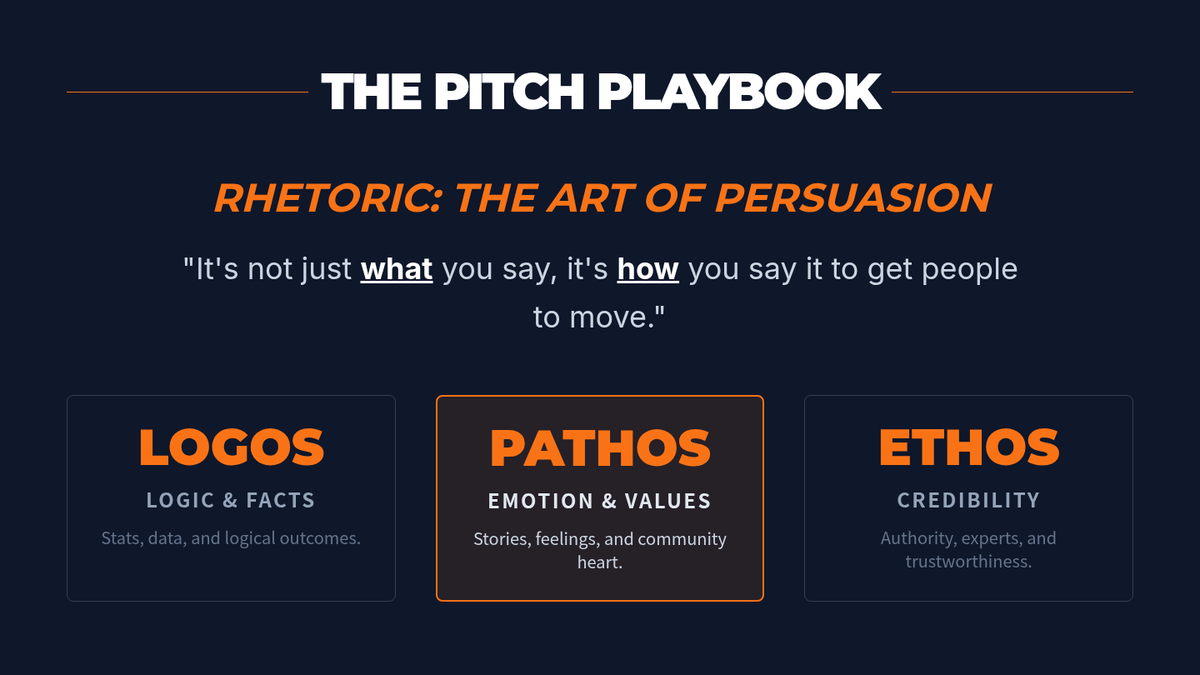
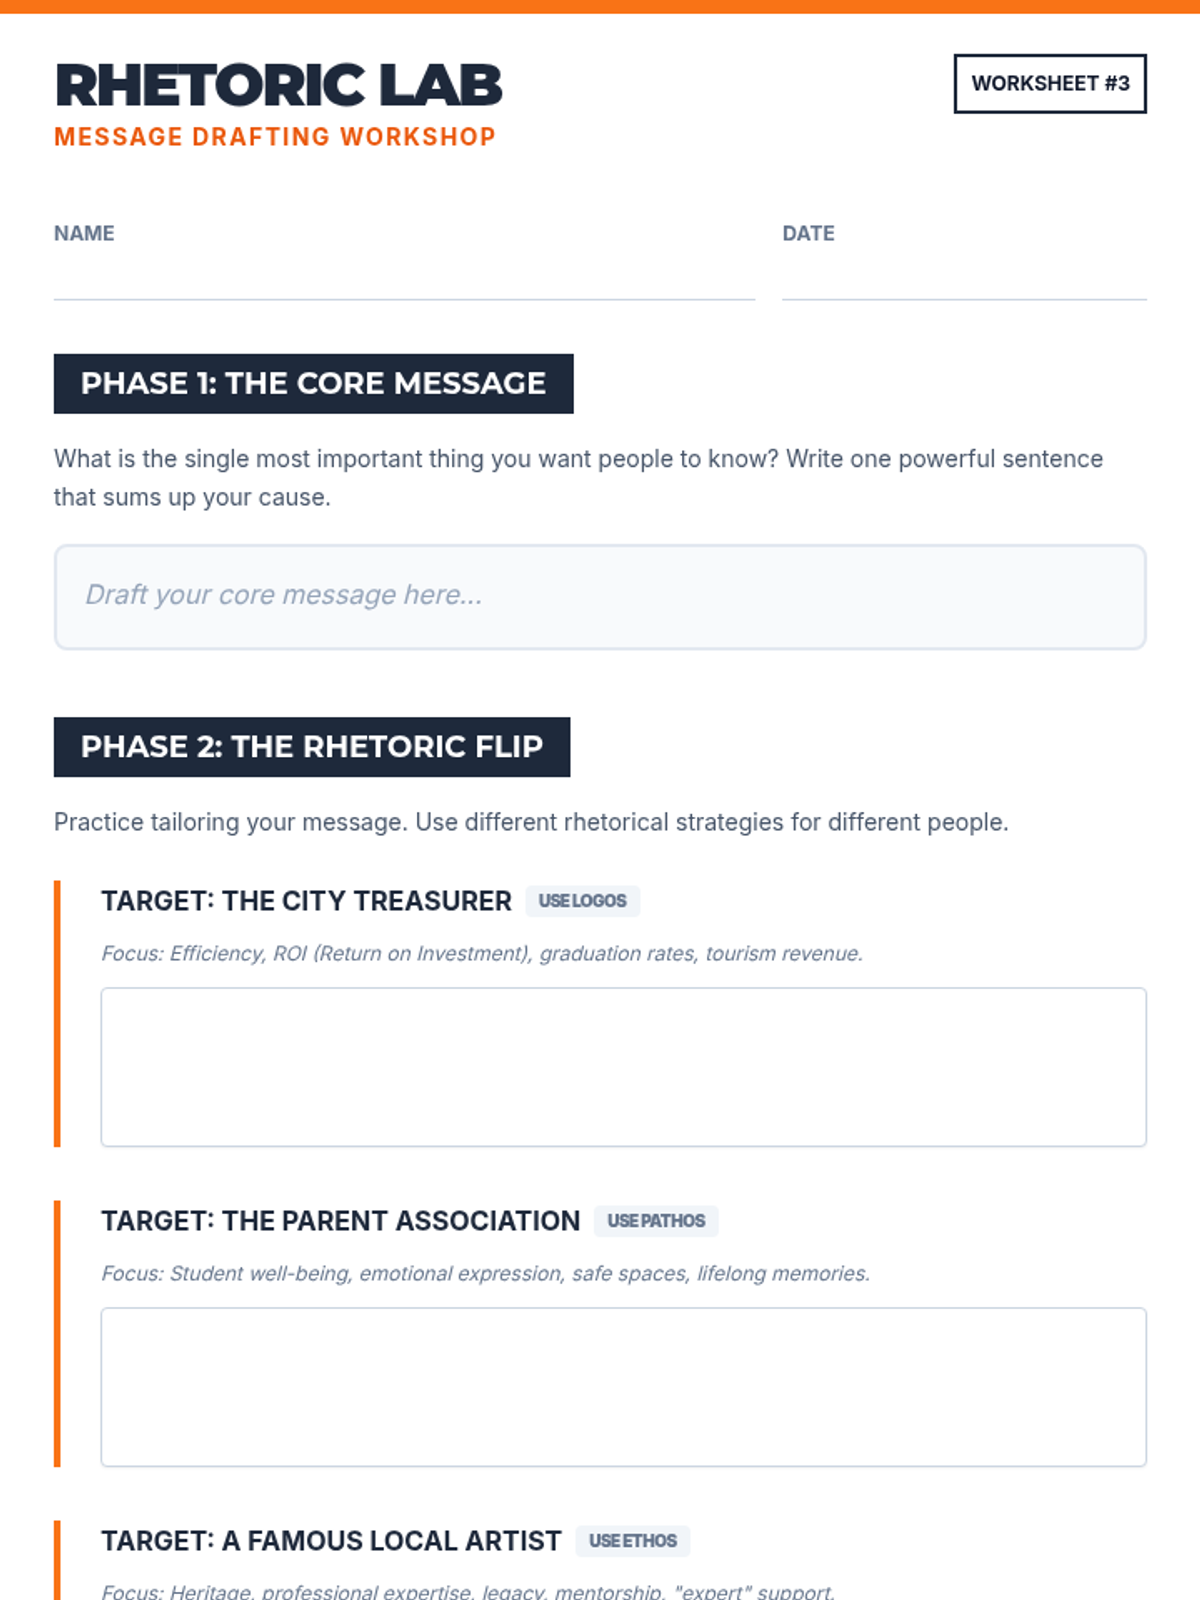
Focusing on rhetoric, students draft the core messaging for their campaign, including a slogan, a mission statement, and an 'elevator pitch.' They analyze successful advertising techniques to understand tone and audience targeting.
Students present their comprehensive campaigns to a mock panel and practice high-stakes elevator pitches.
Students design visual advocacy materials, focusing on branding and media literacy to capture public attention.
Students learn to blend emotional appeals and factual evidence to craft a compelling persuasive narrative for their arts cause.
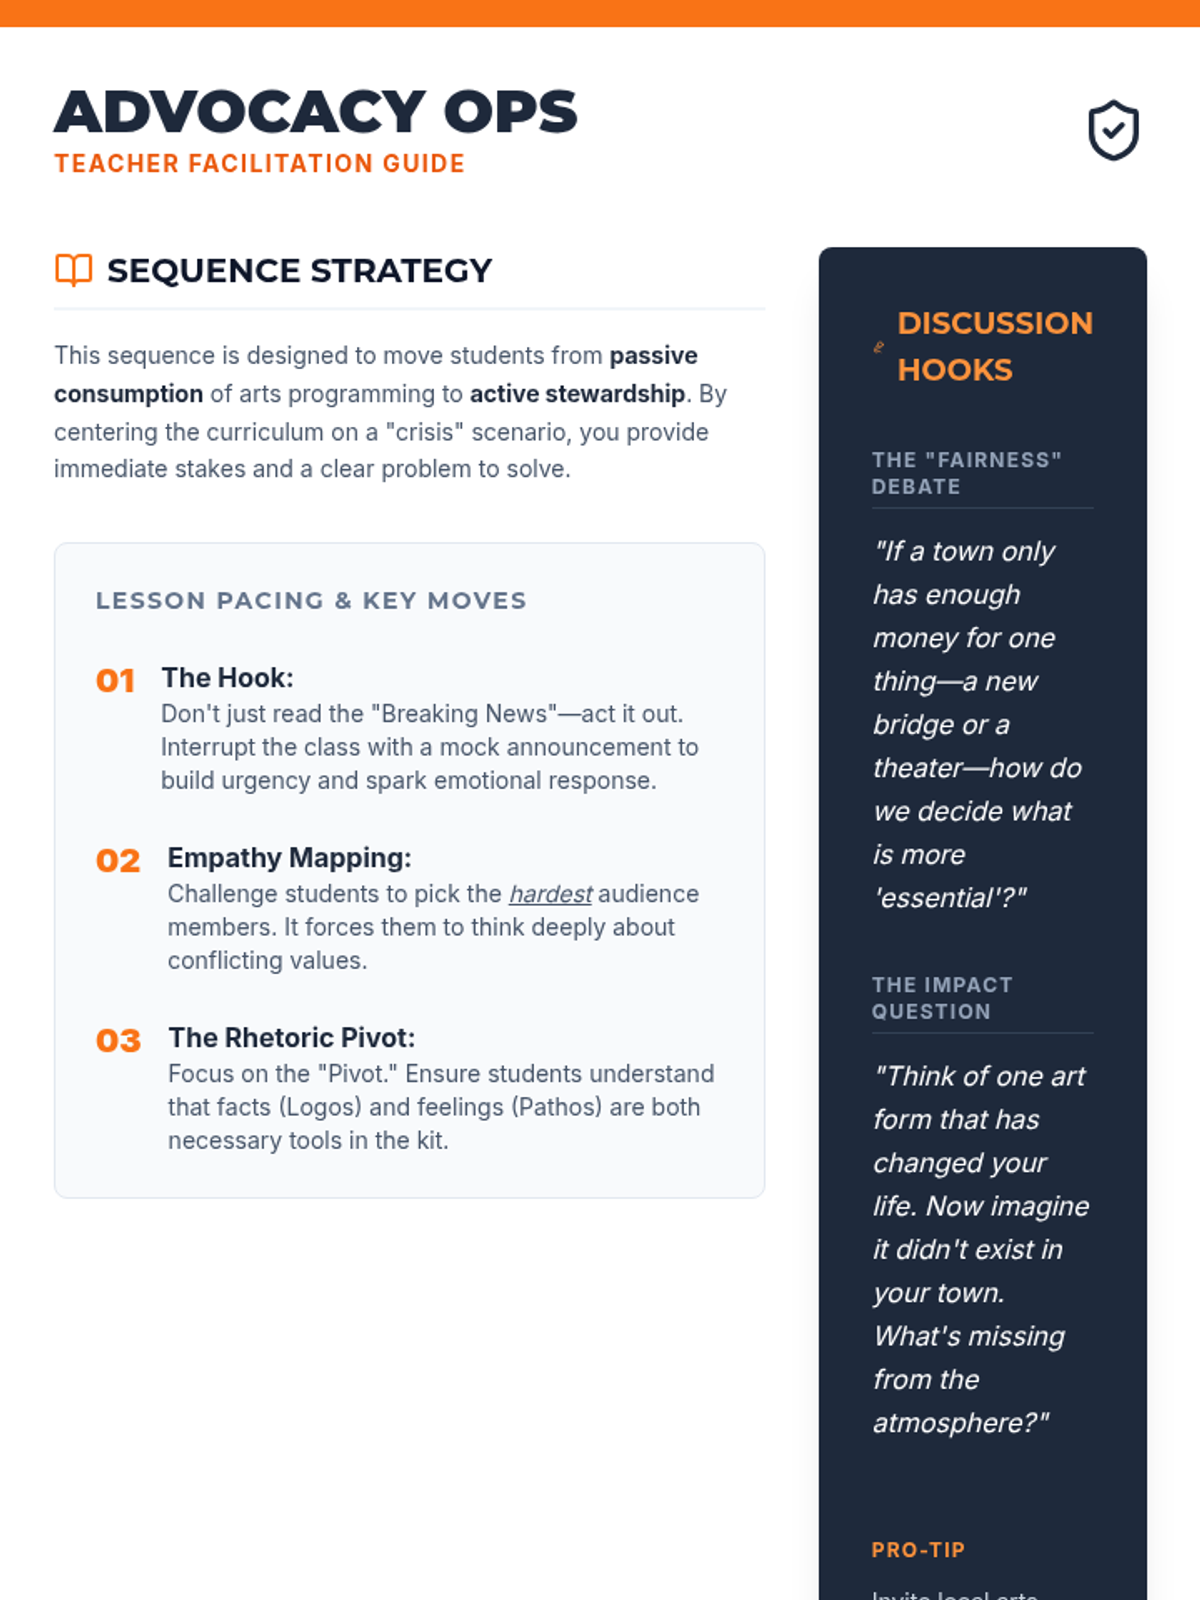
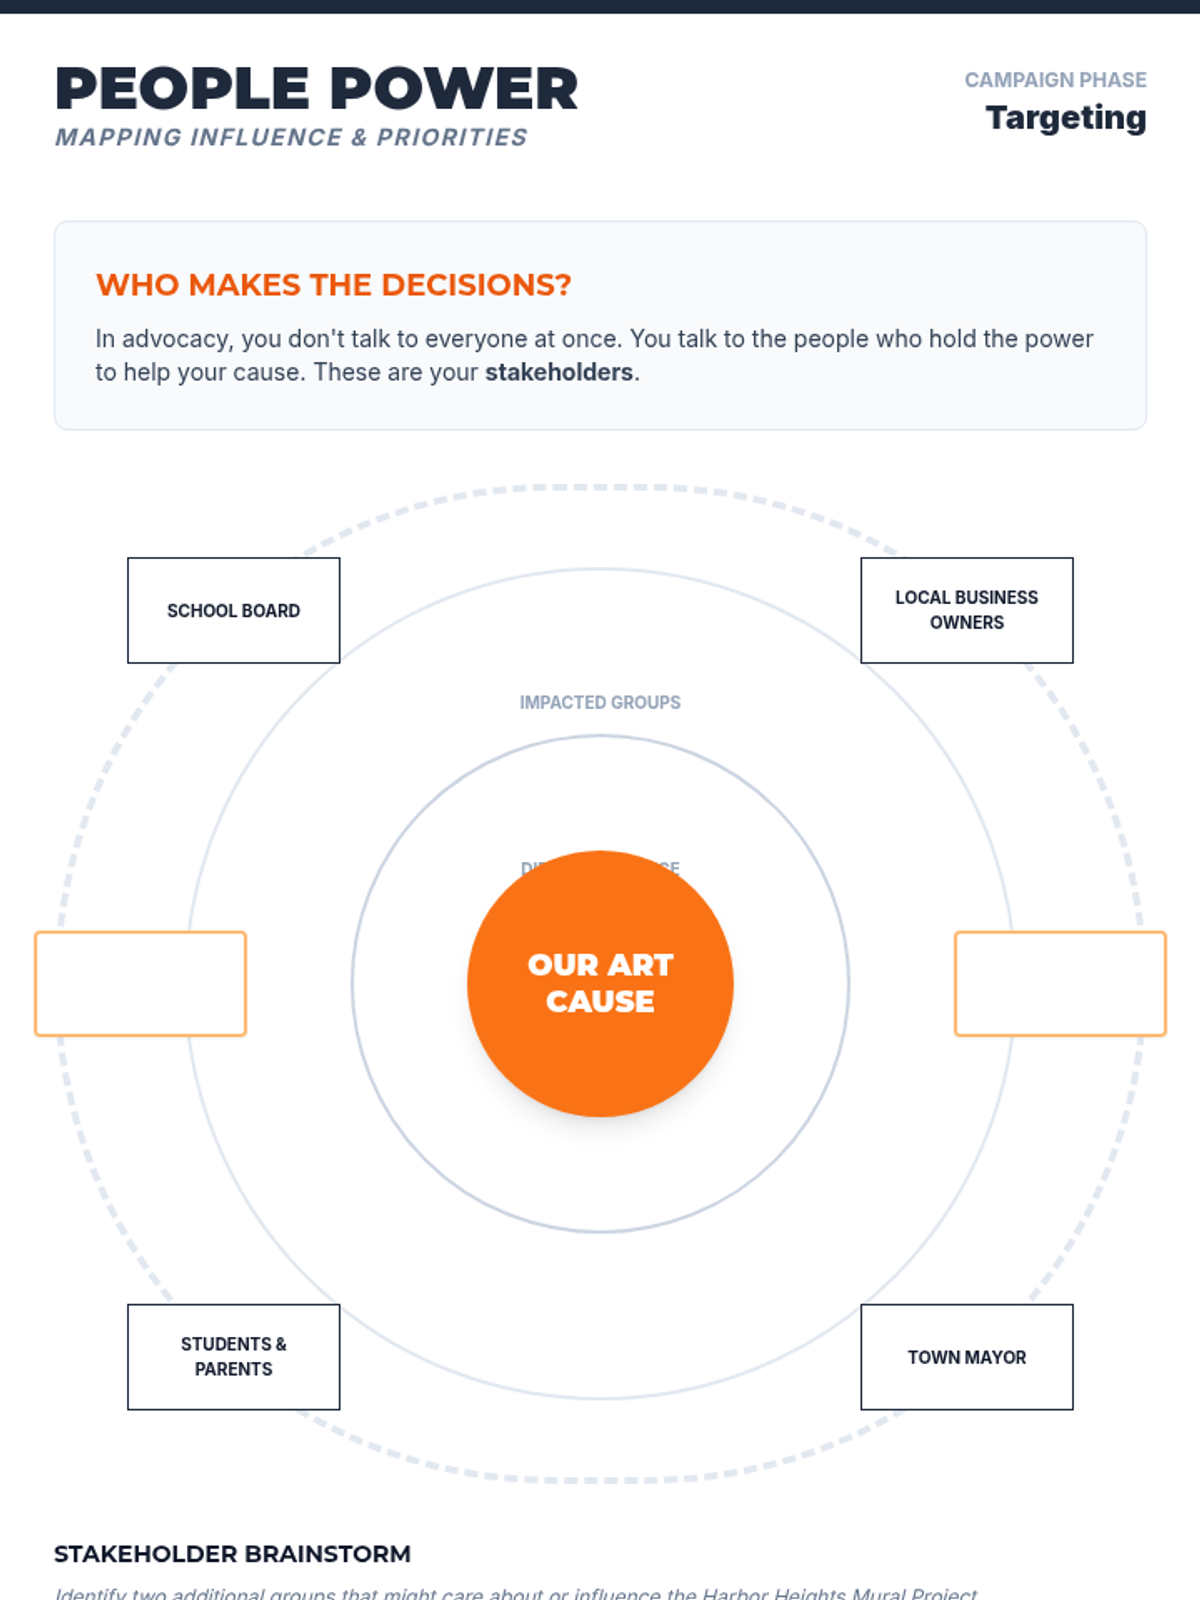
Learners map out stakeholders and use empathy mapping to understand the values and priorities of different audience groups.
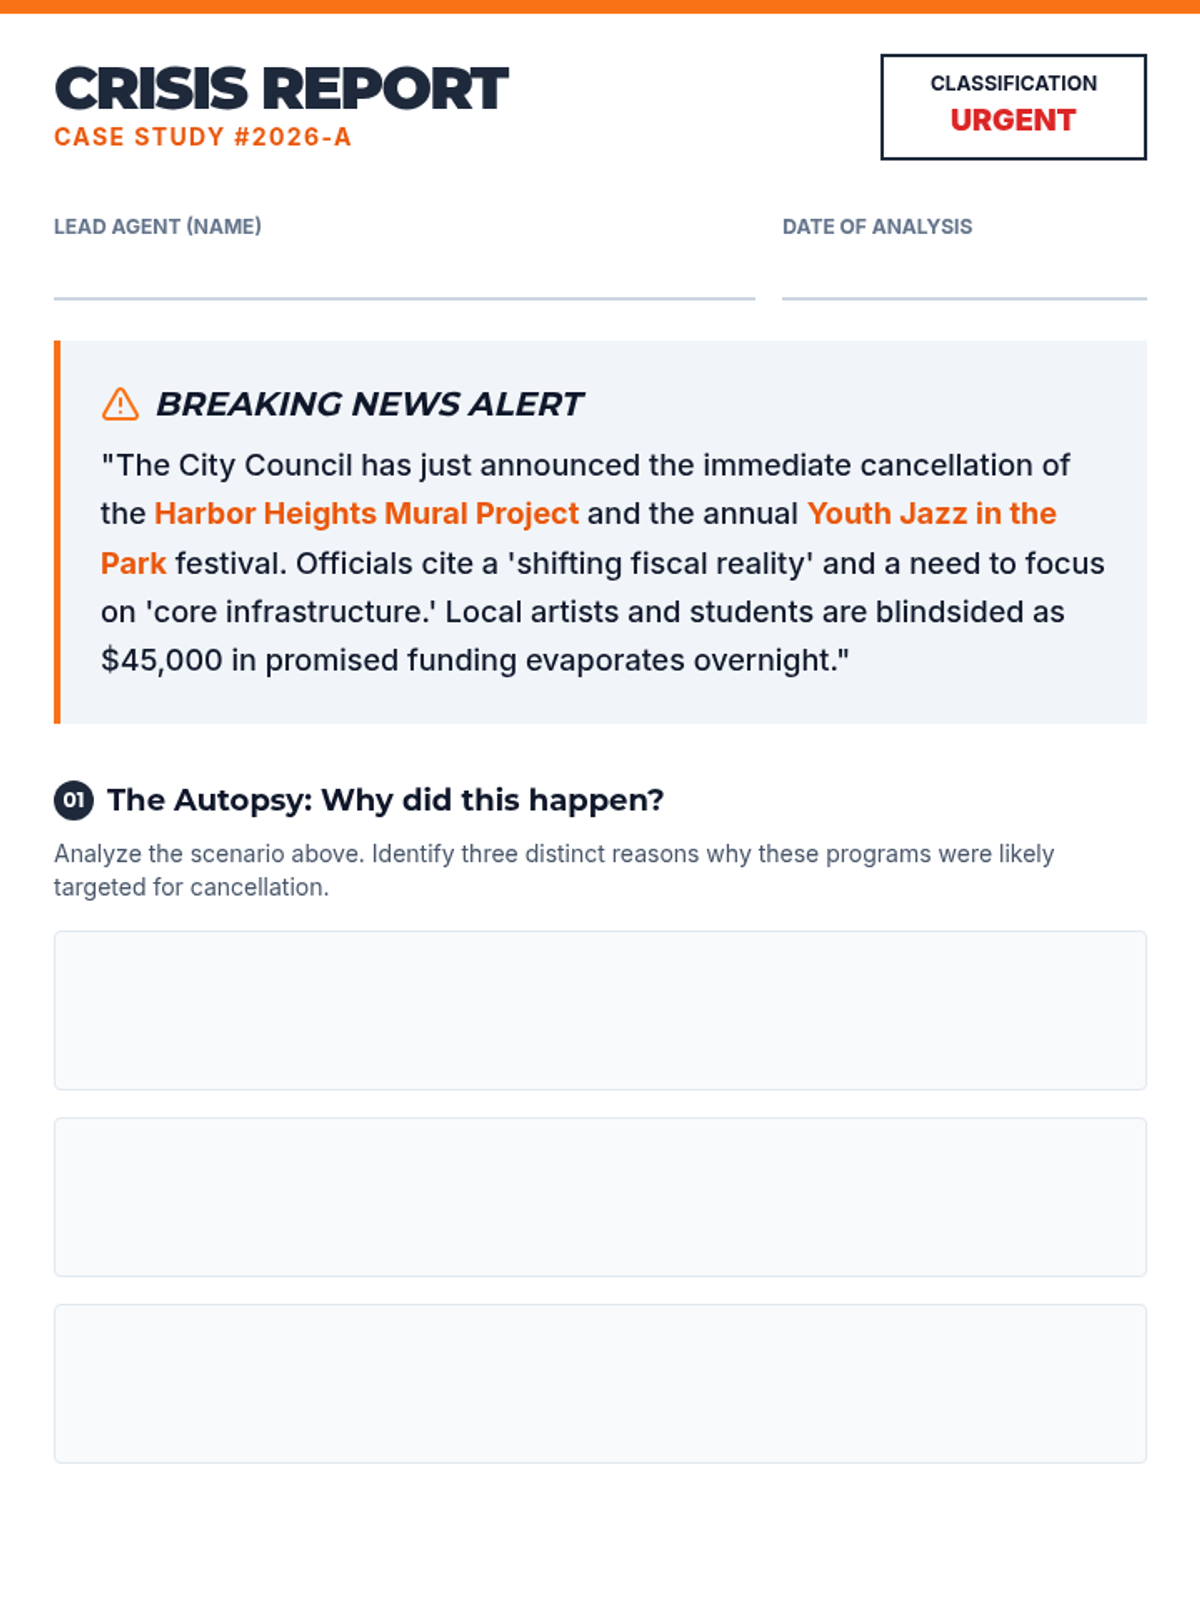
Students analyze hypothetical scenarios where arts programs face budget cuts or closure to identify root causes and specific advocacy needs.
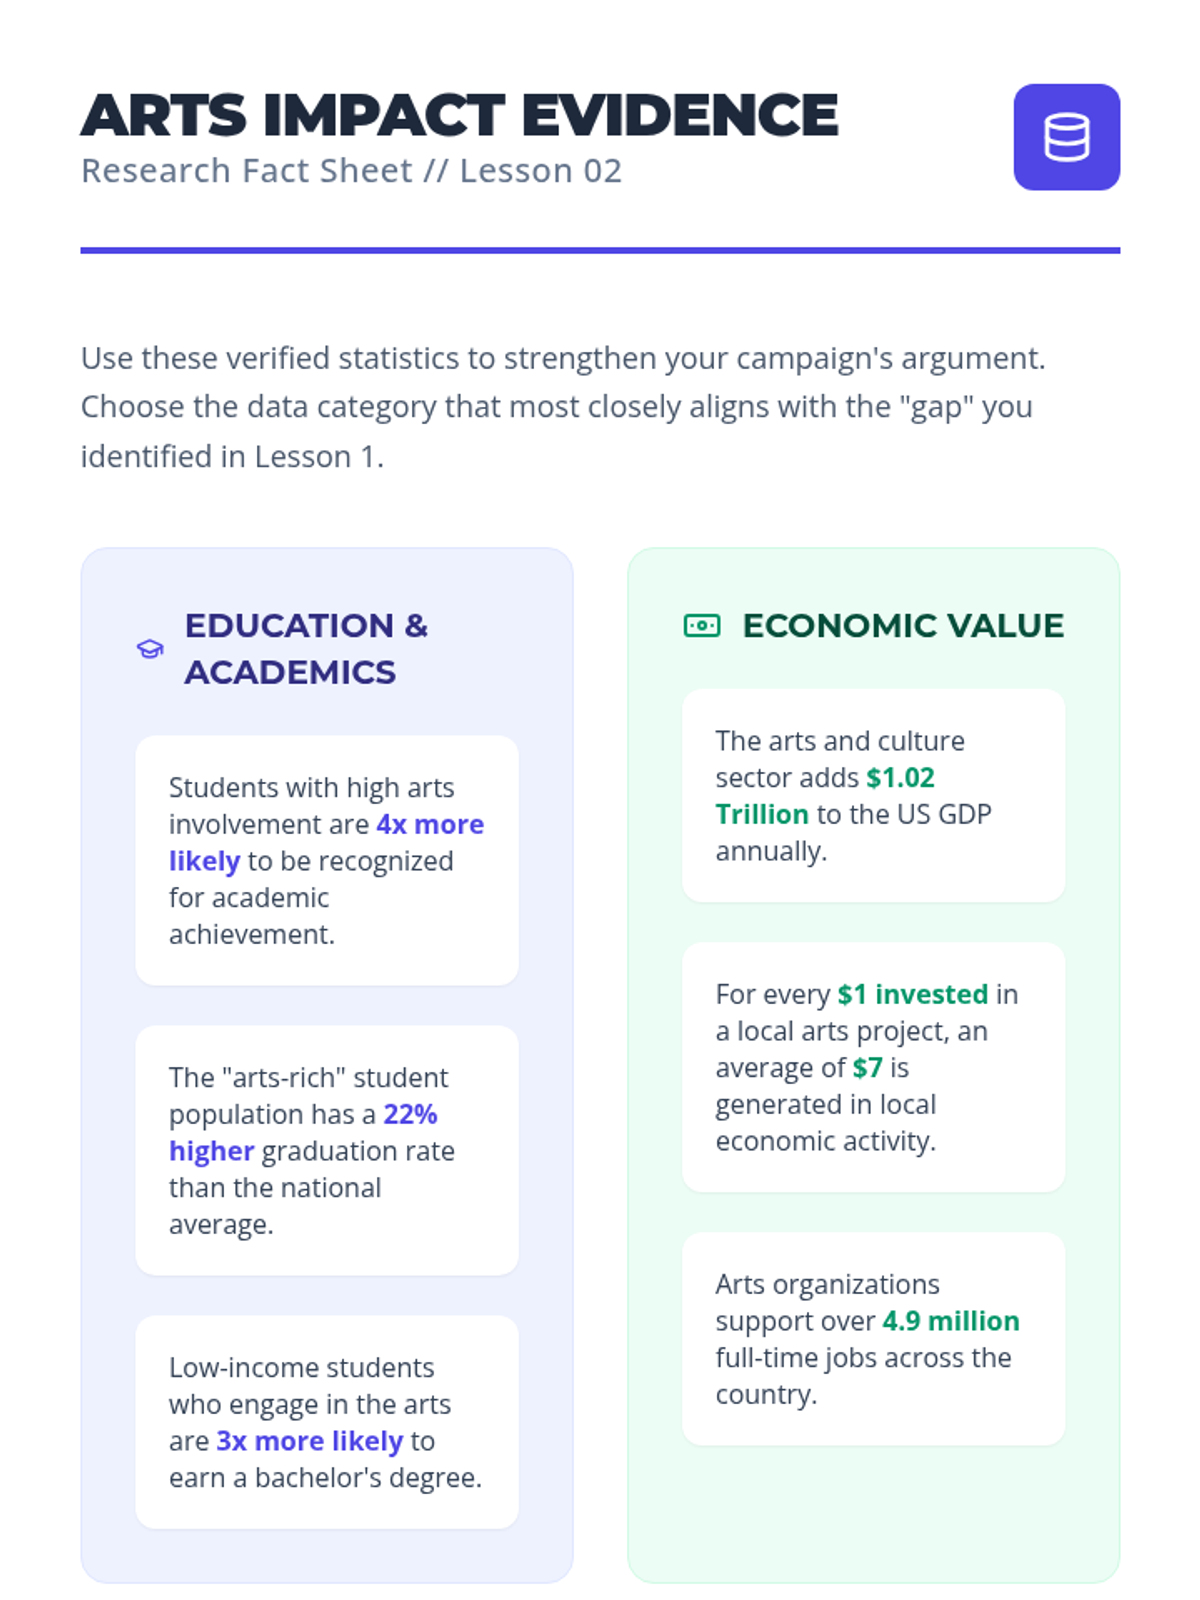
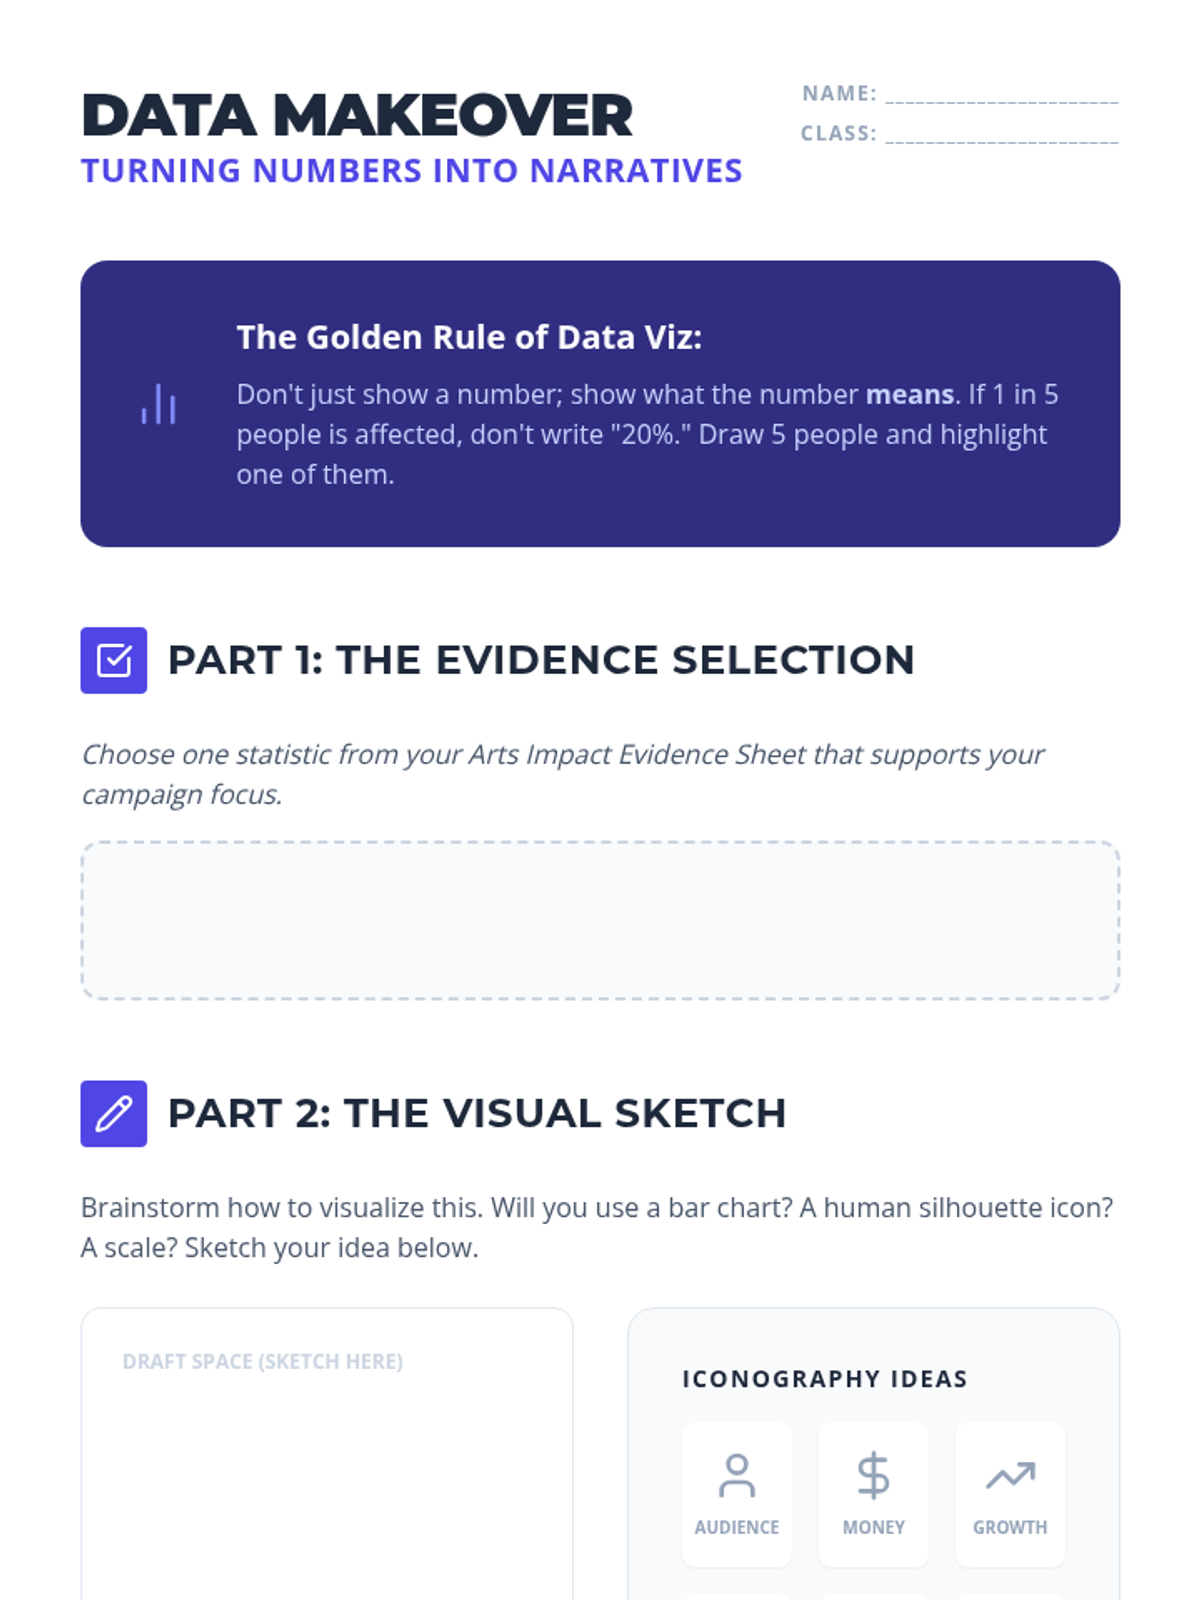
Students explore real-world advocacy case studies to understand how data supports arts funding. They select relevant statistics to bolster their specific campaign and practice translating dry data into compelling infographics.
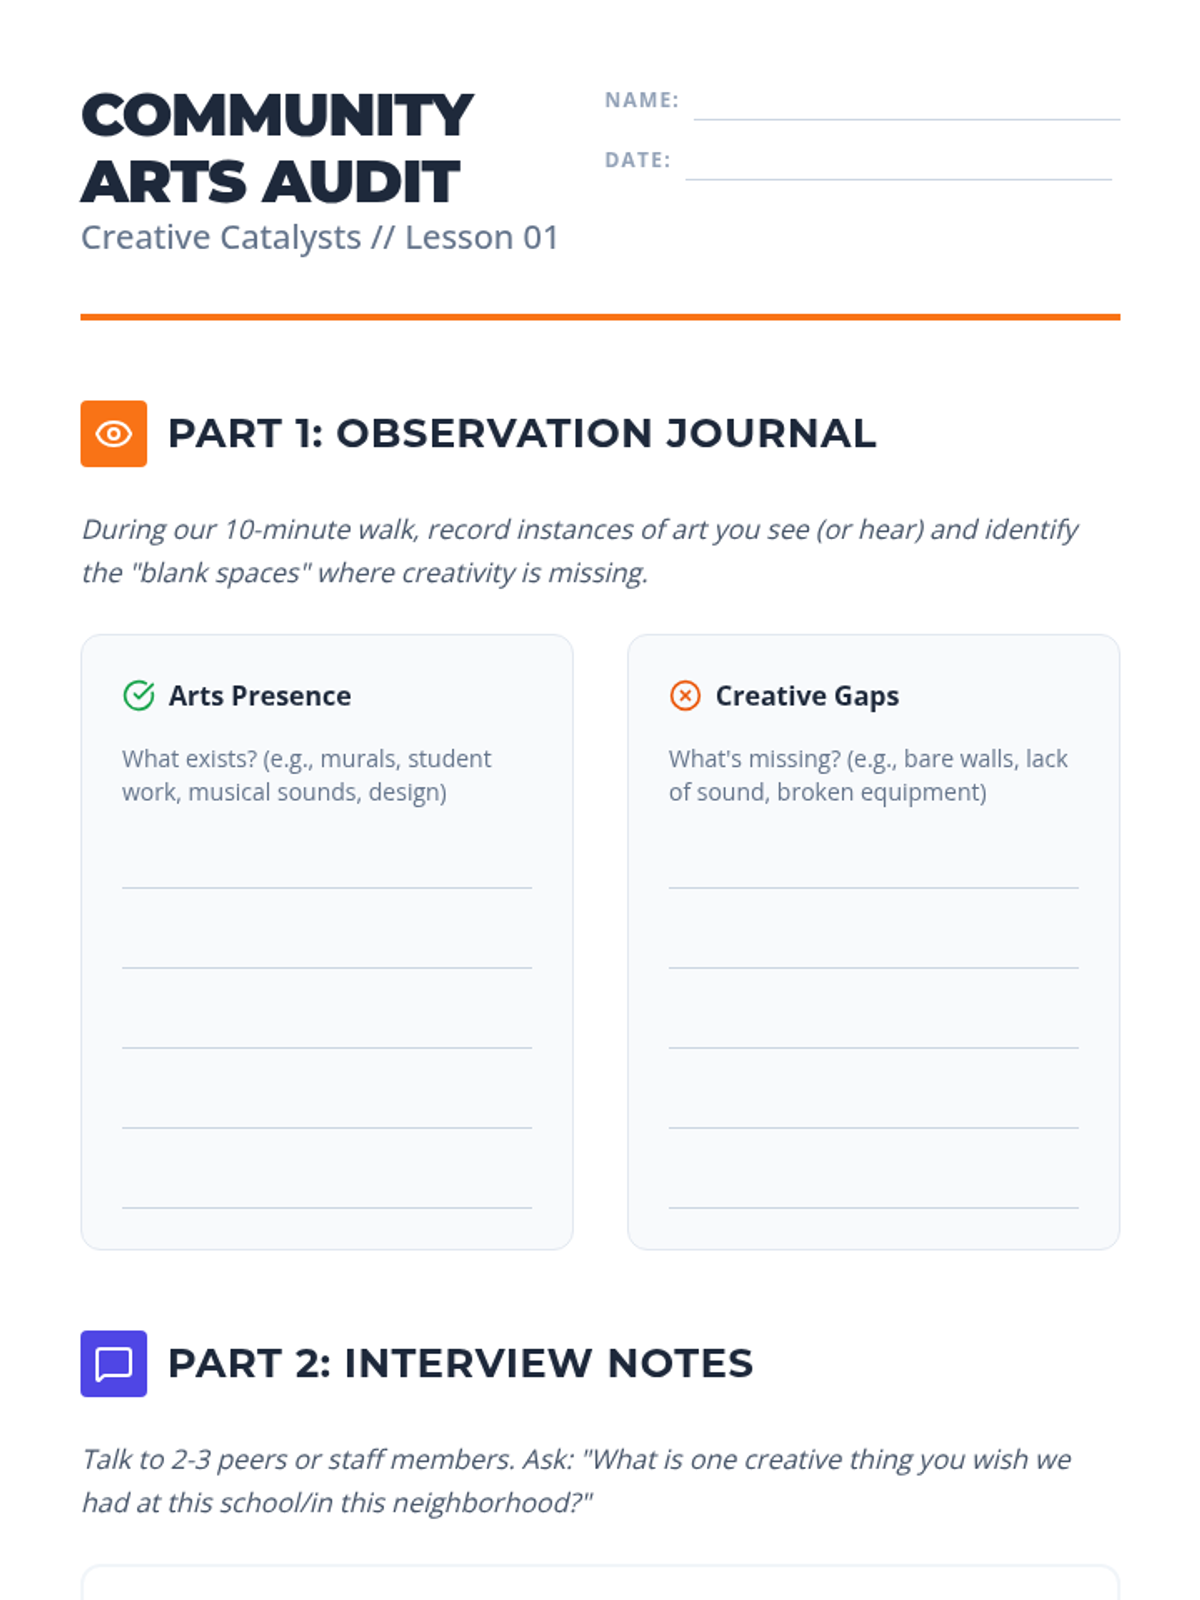
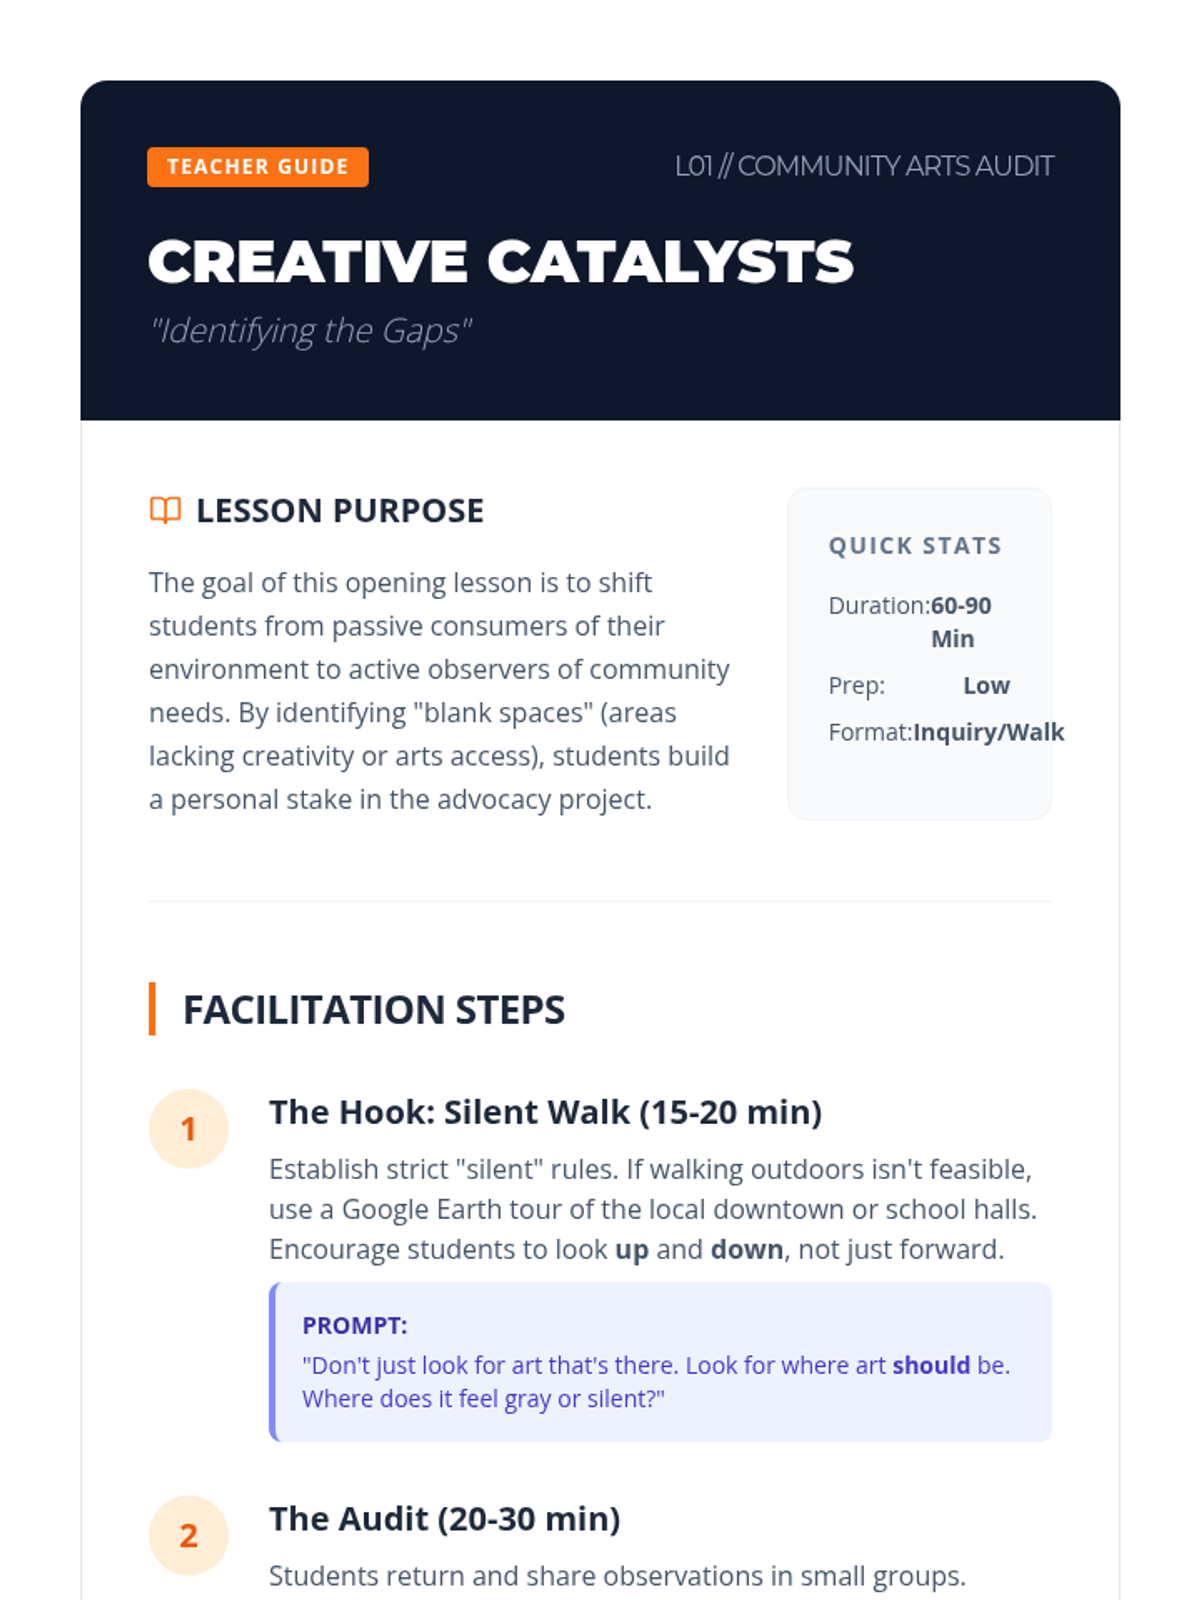
Students conduct an audit of their current school or neighborhood arts landscape to identify gaps in access or funding, eventually selecting one specific issue to advocate for.
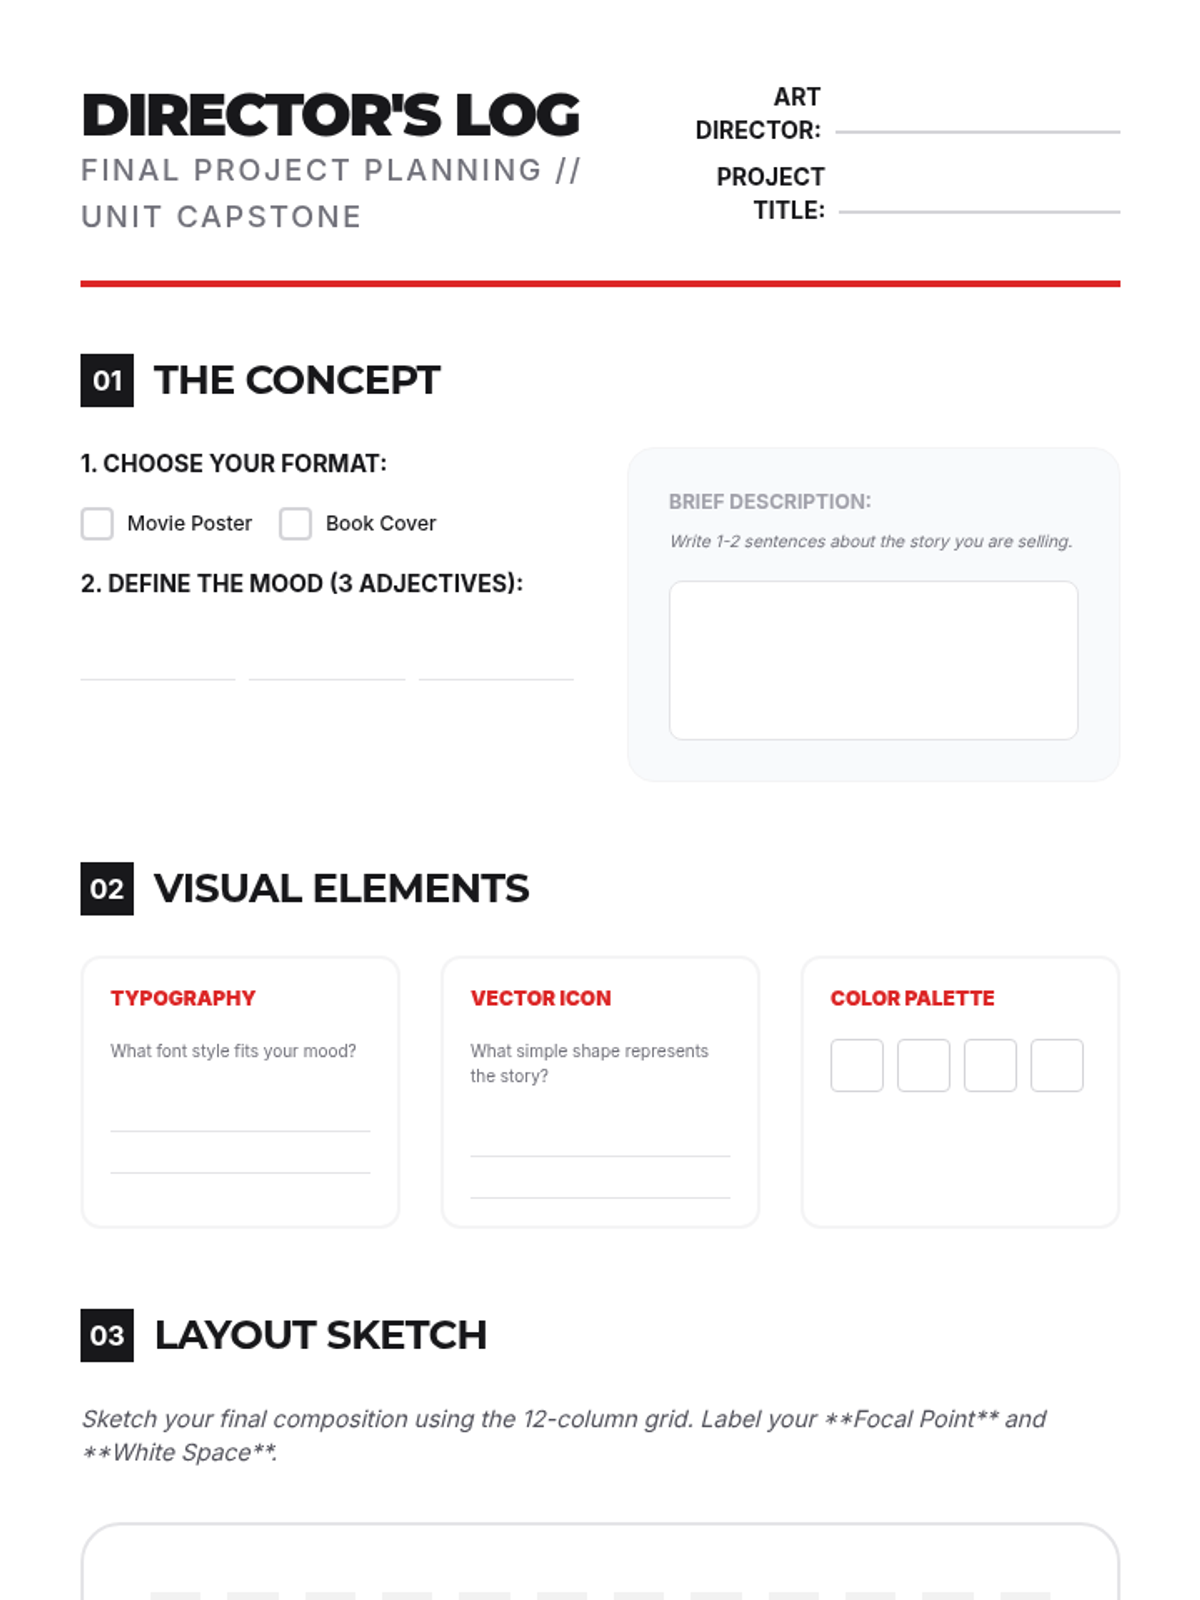
The culmination of the unit where students act as art directors to create a high-fidelity movie poster or book cover integrating all learned skills.
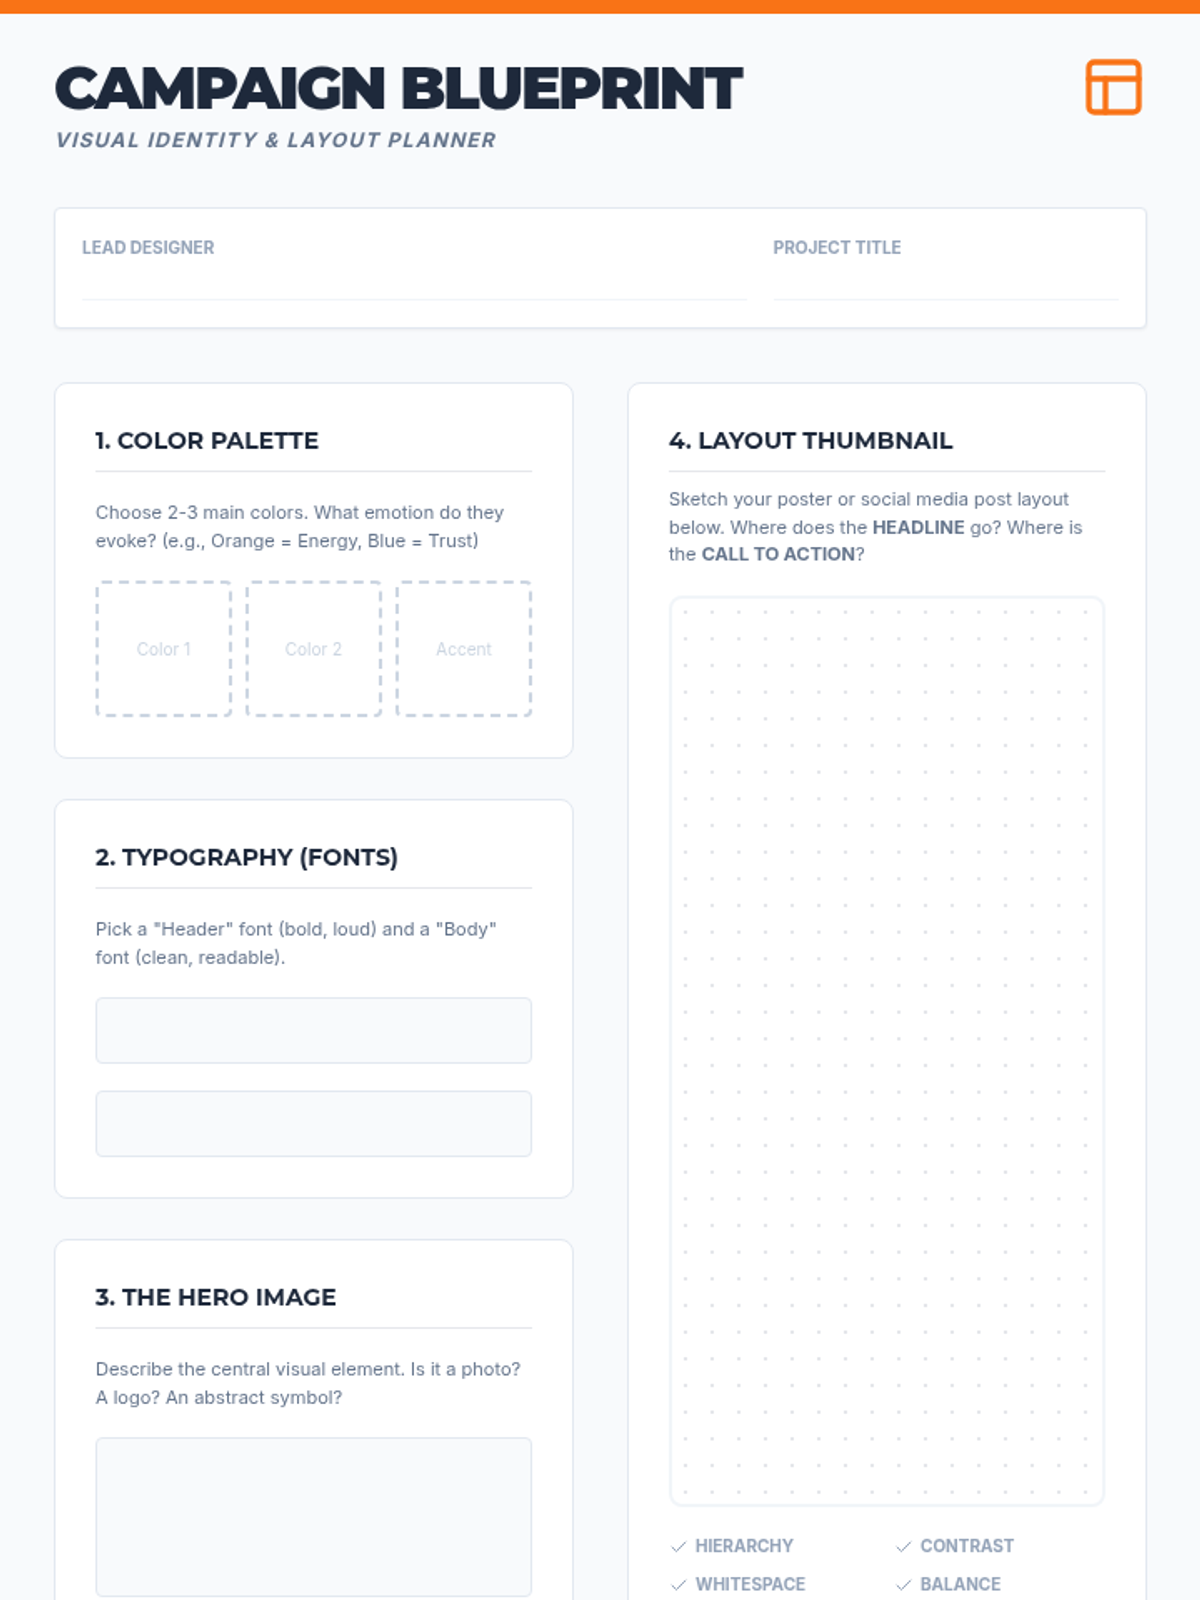
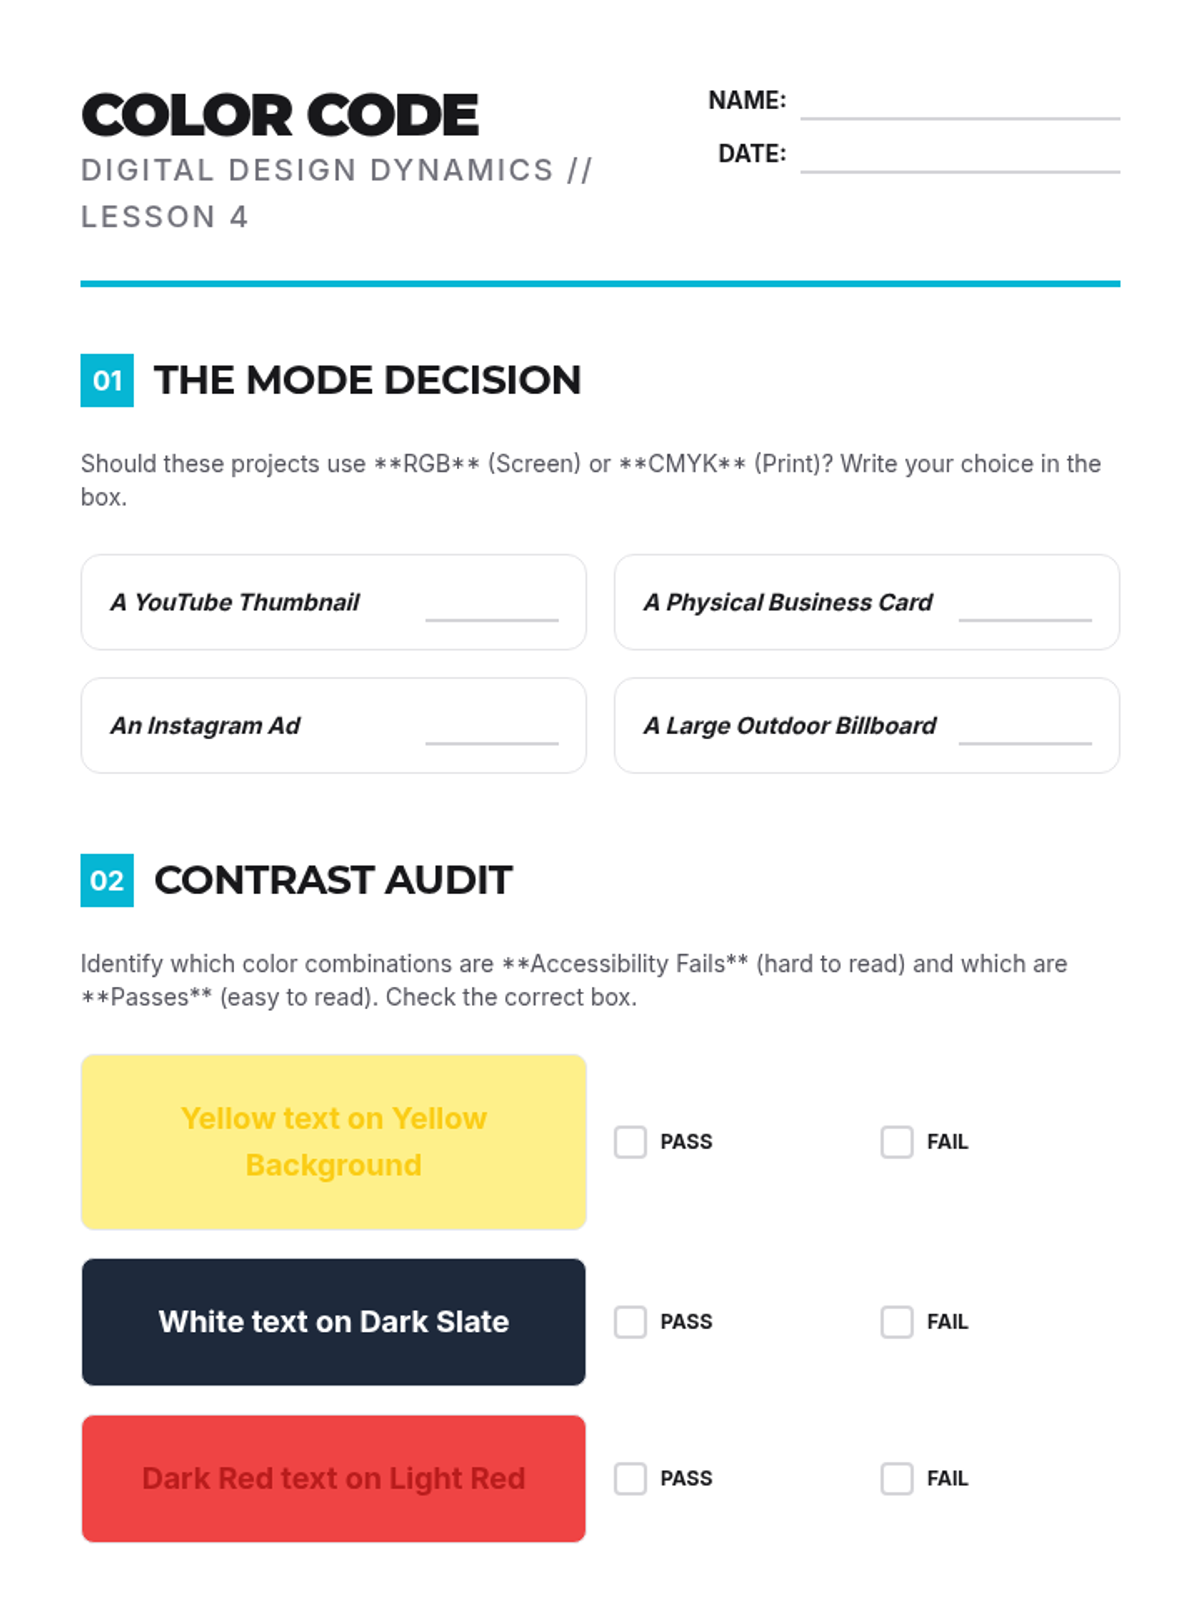
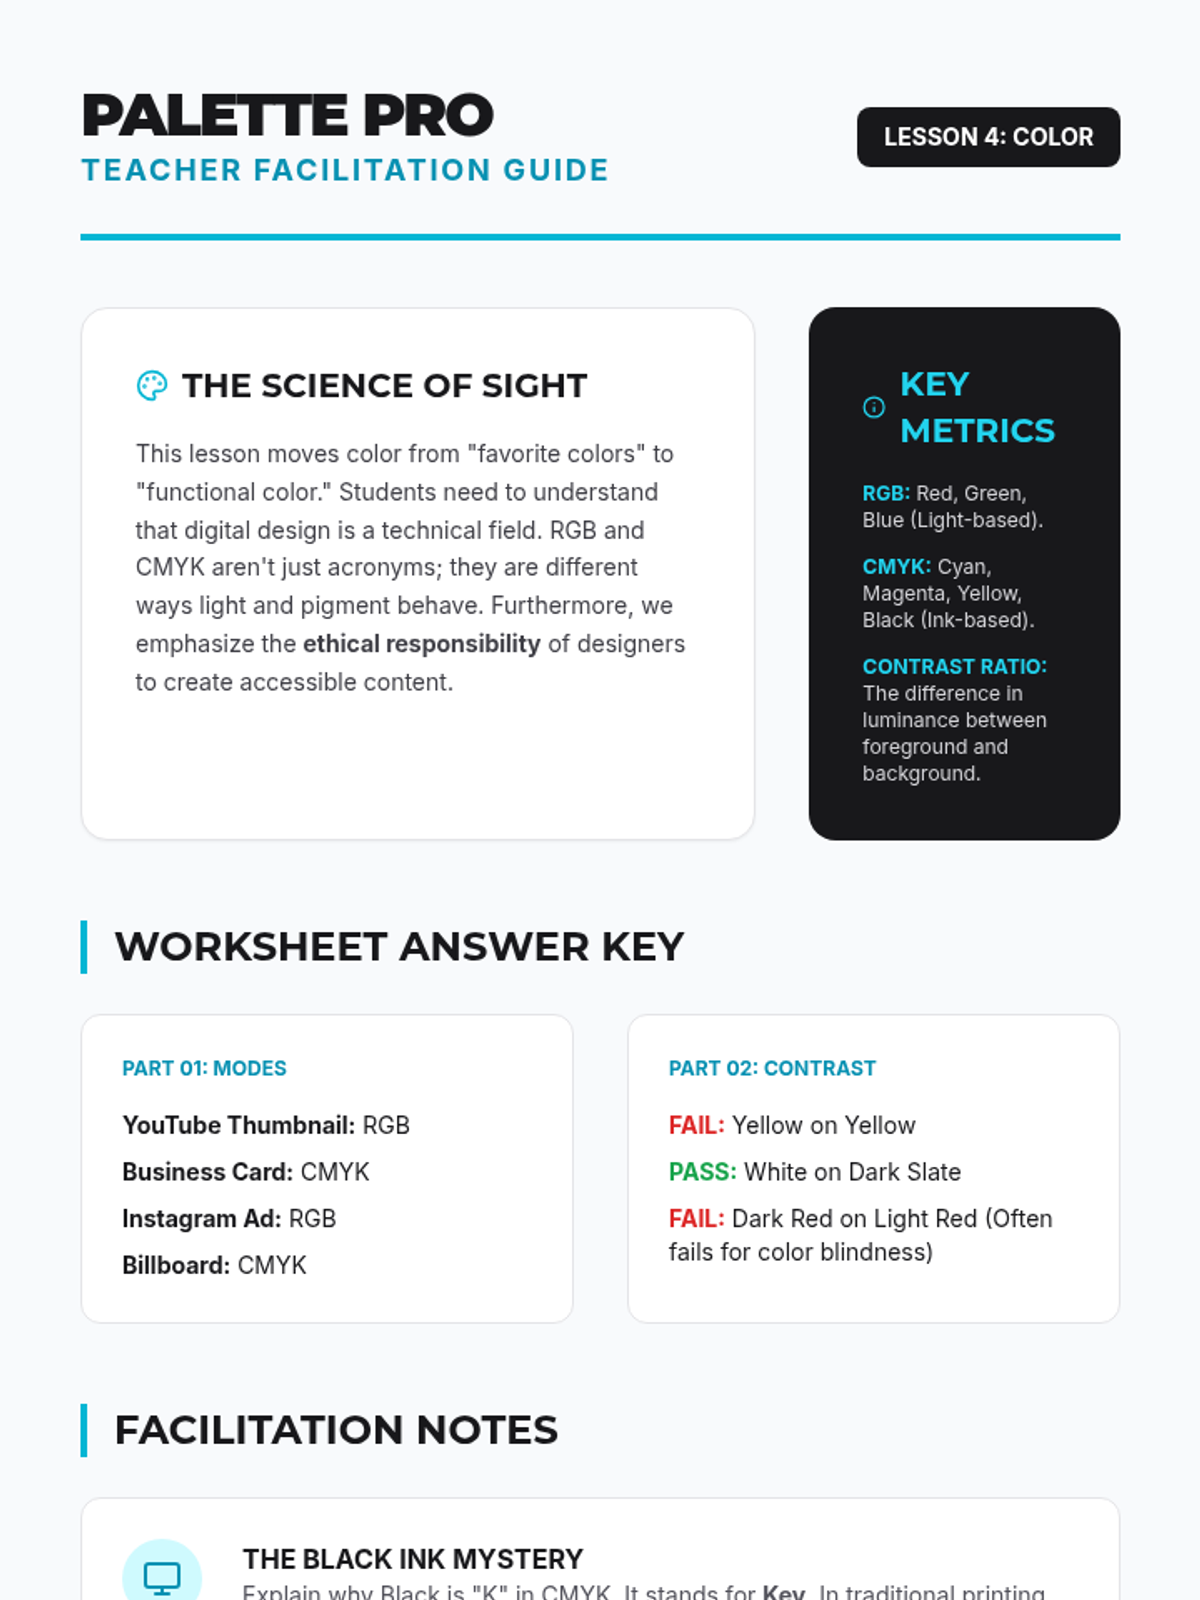
Investigating the science of digital color, students learn about RGB vs. CMYK and how to use contrast and palette selection for effective communication.
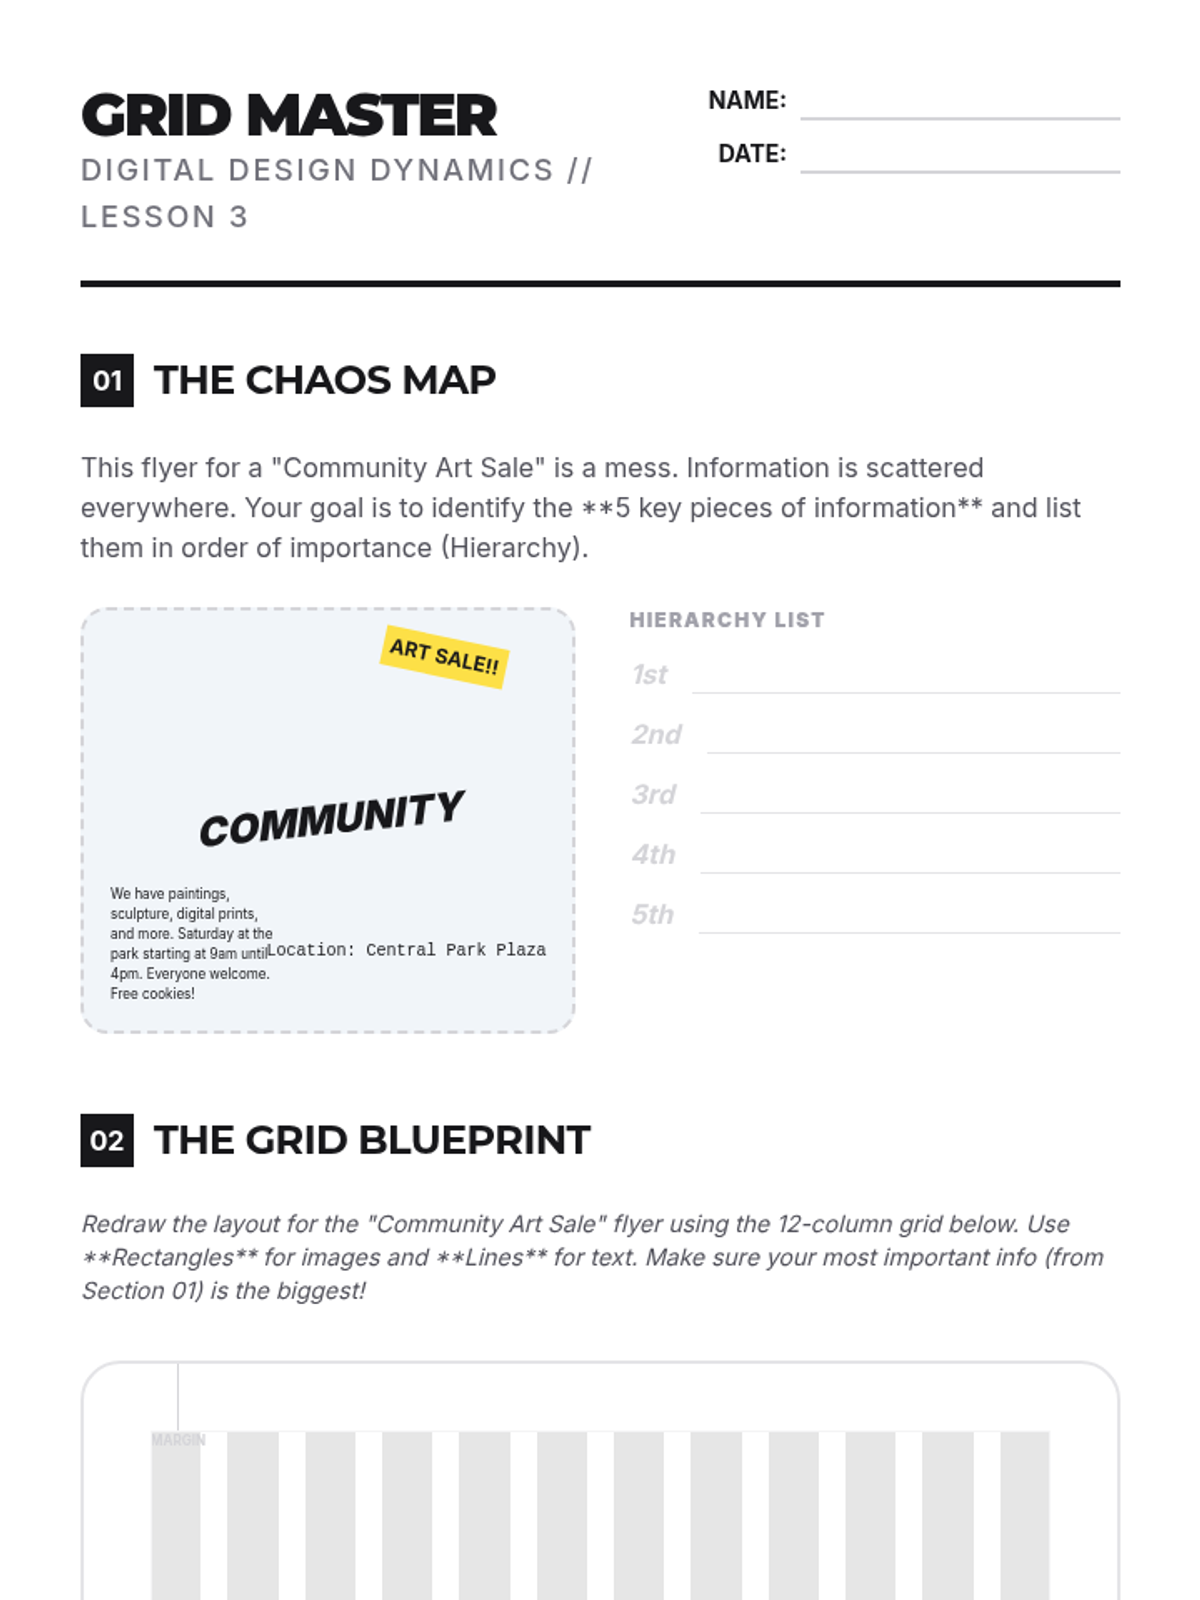
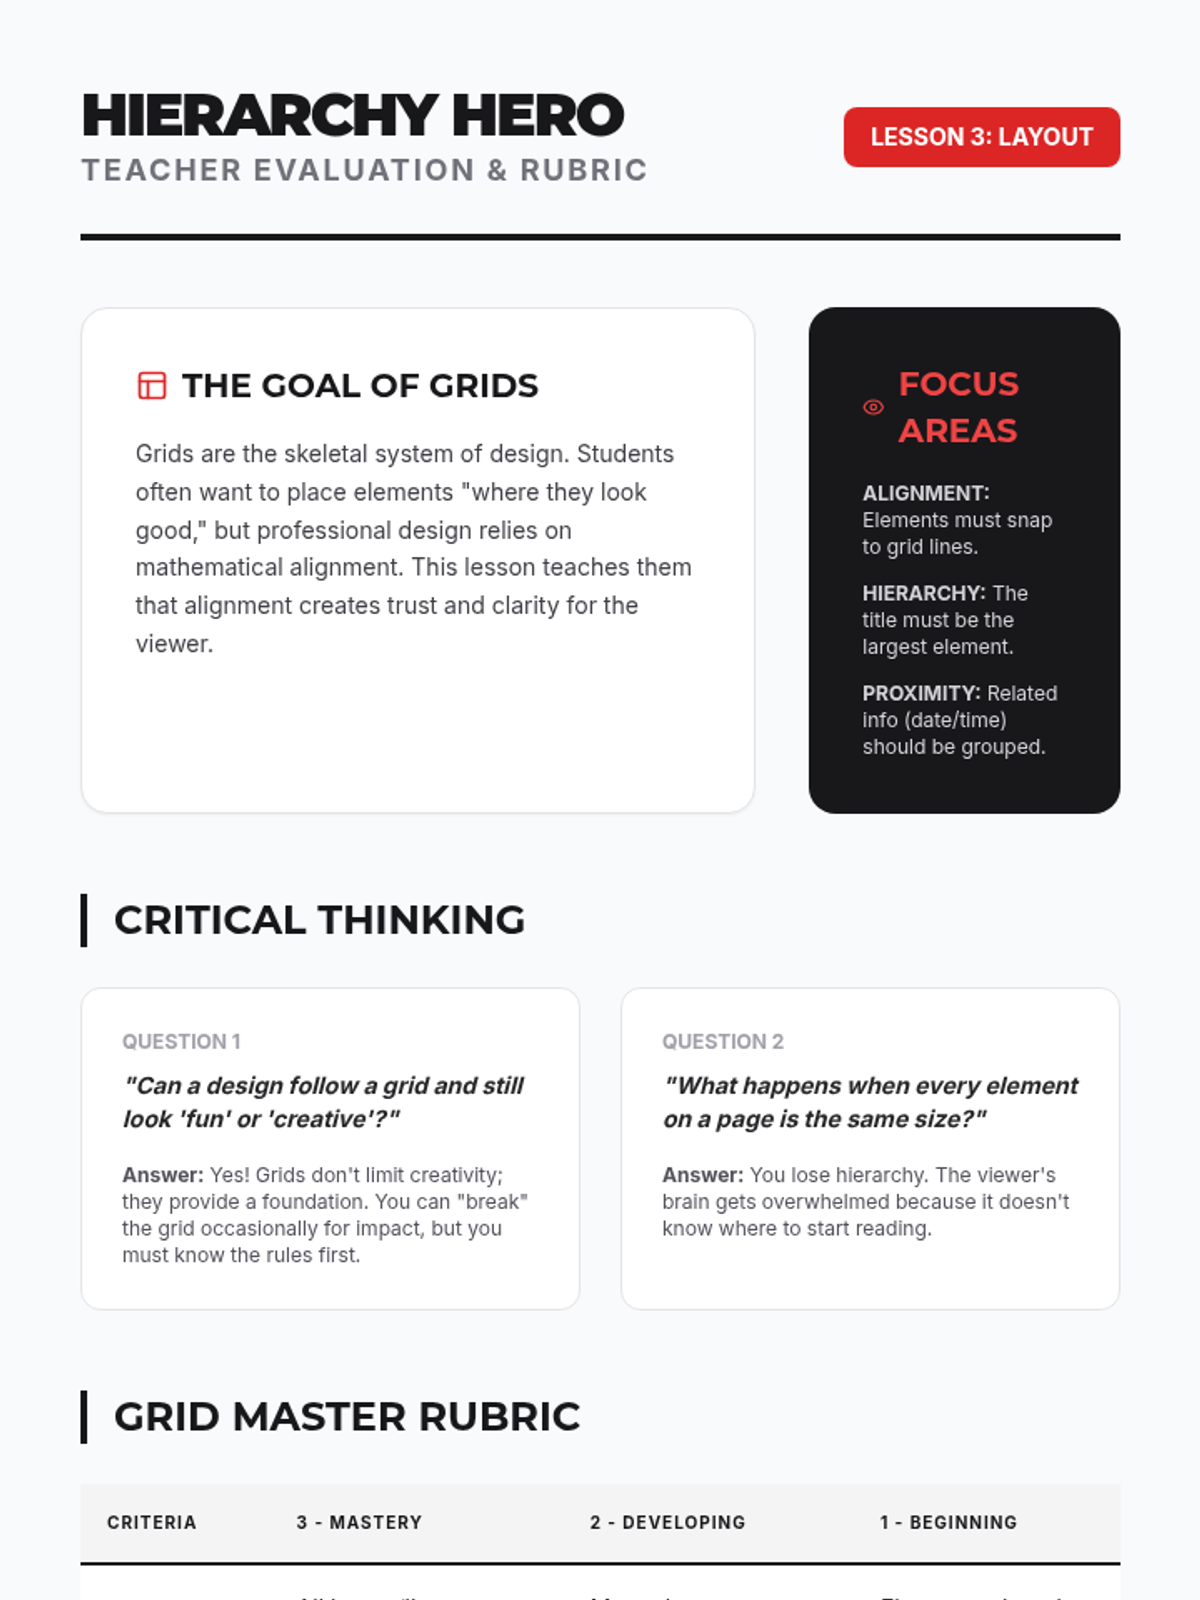
An exploration of organizational systems in design, teaching students how to use grids, white space, and hierarchy to guide a viewer's eye.
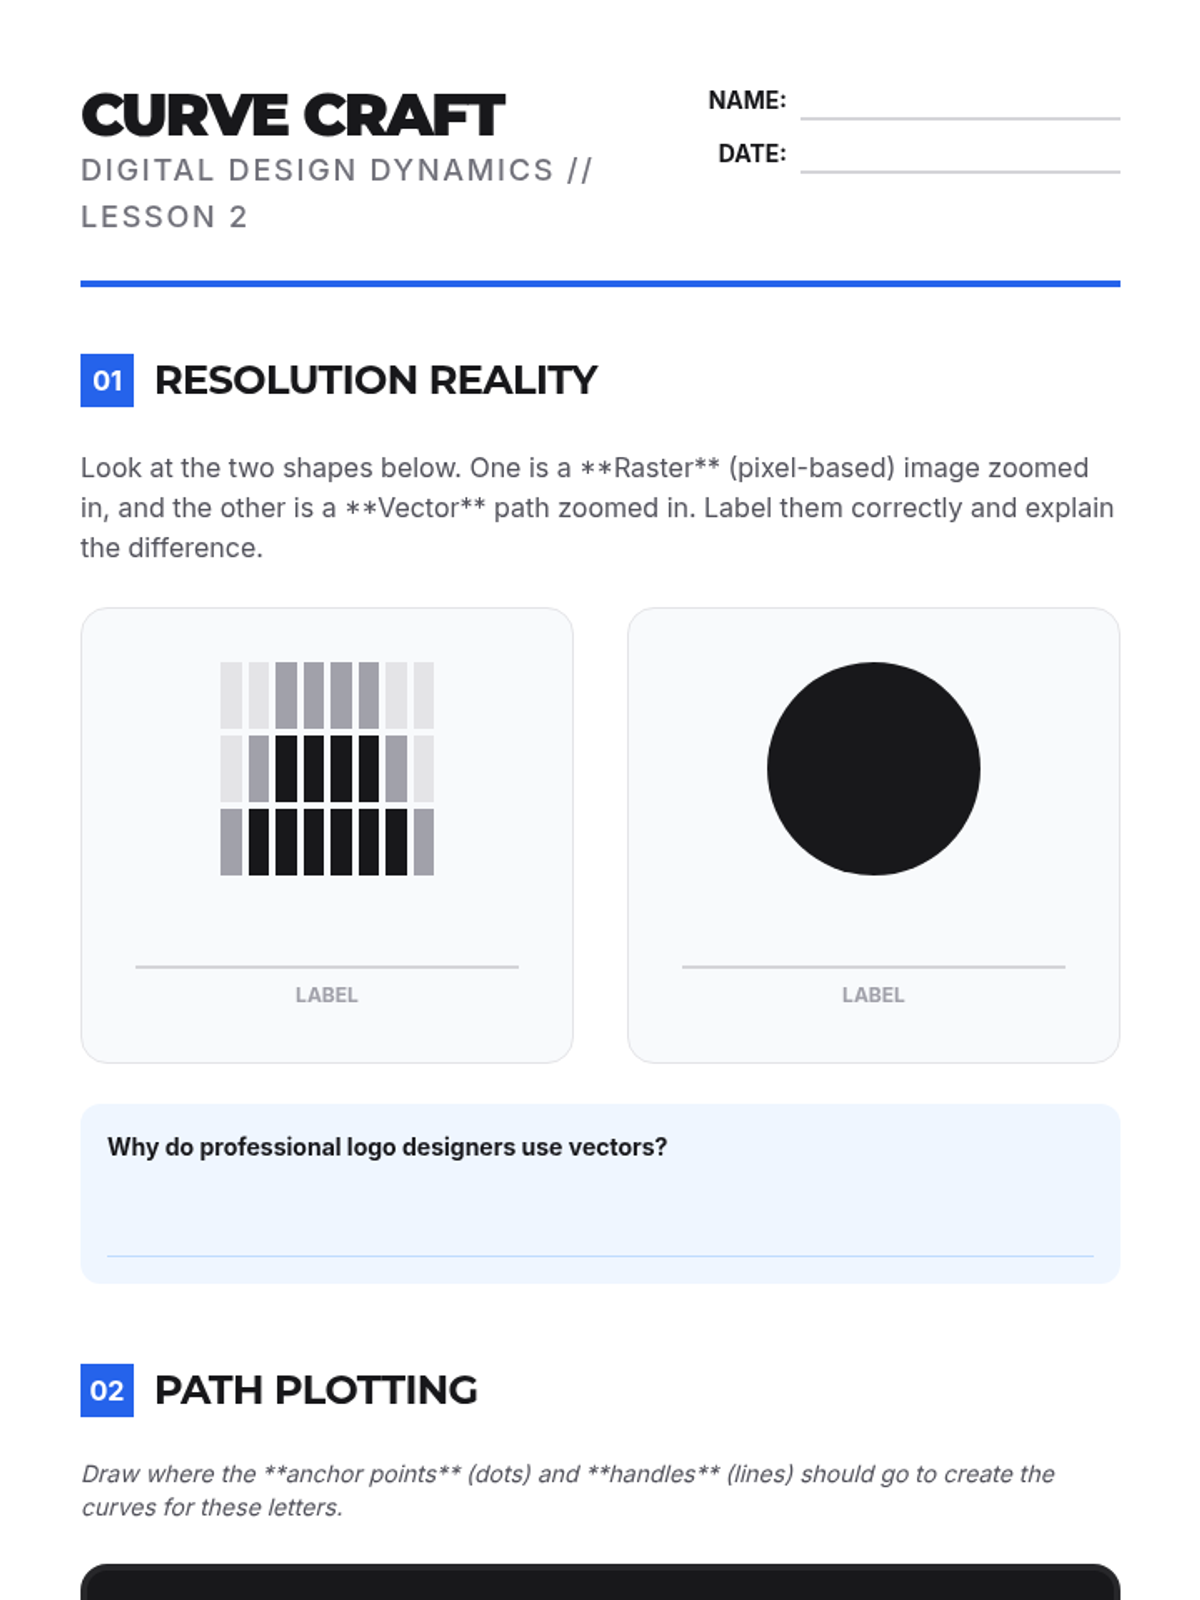
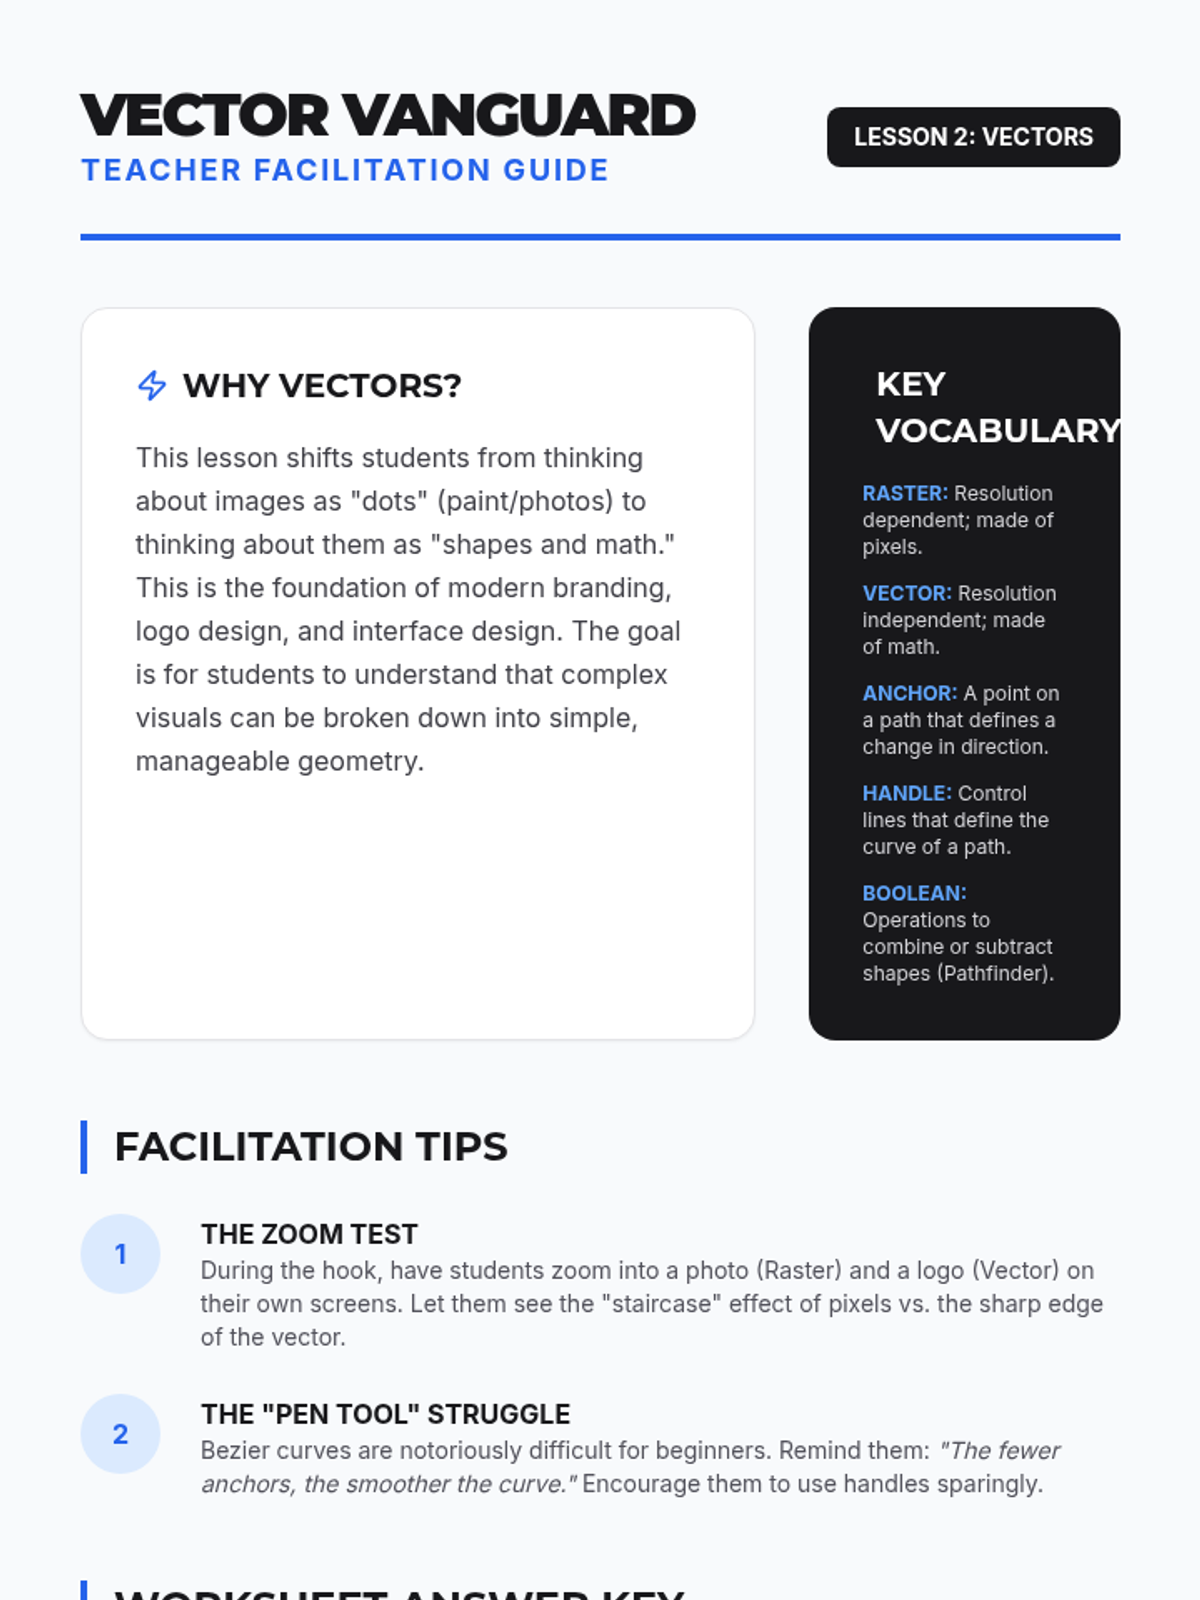
Students learn the fundamentals of vector graphics, focusing on scalability, anchor points, and building complex forms from simple geometric shapes.
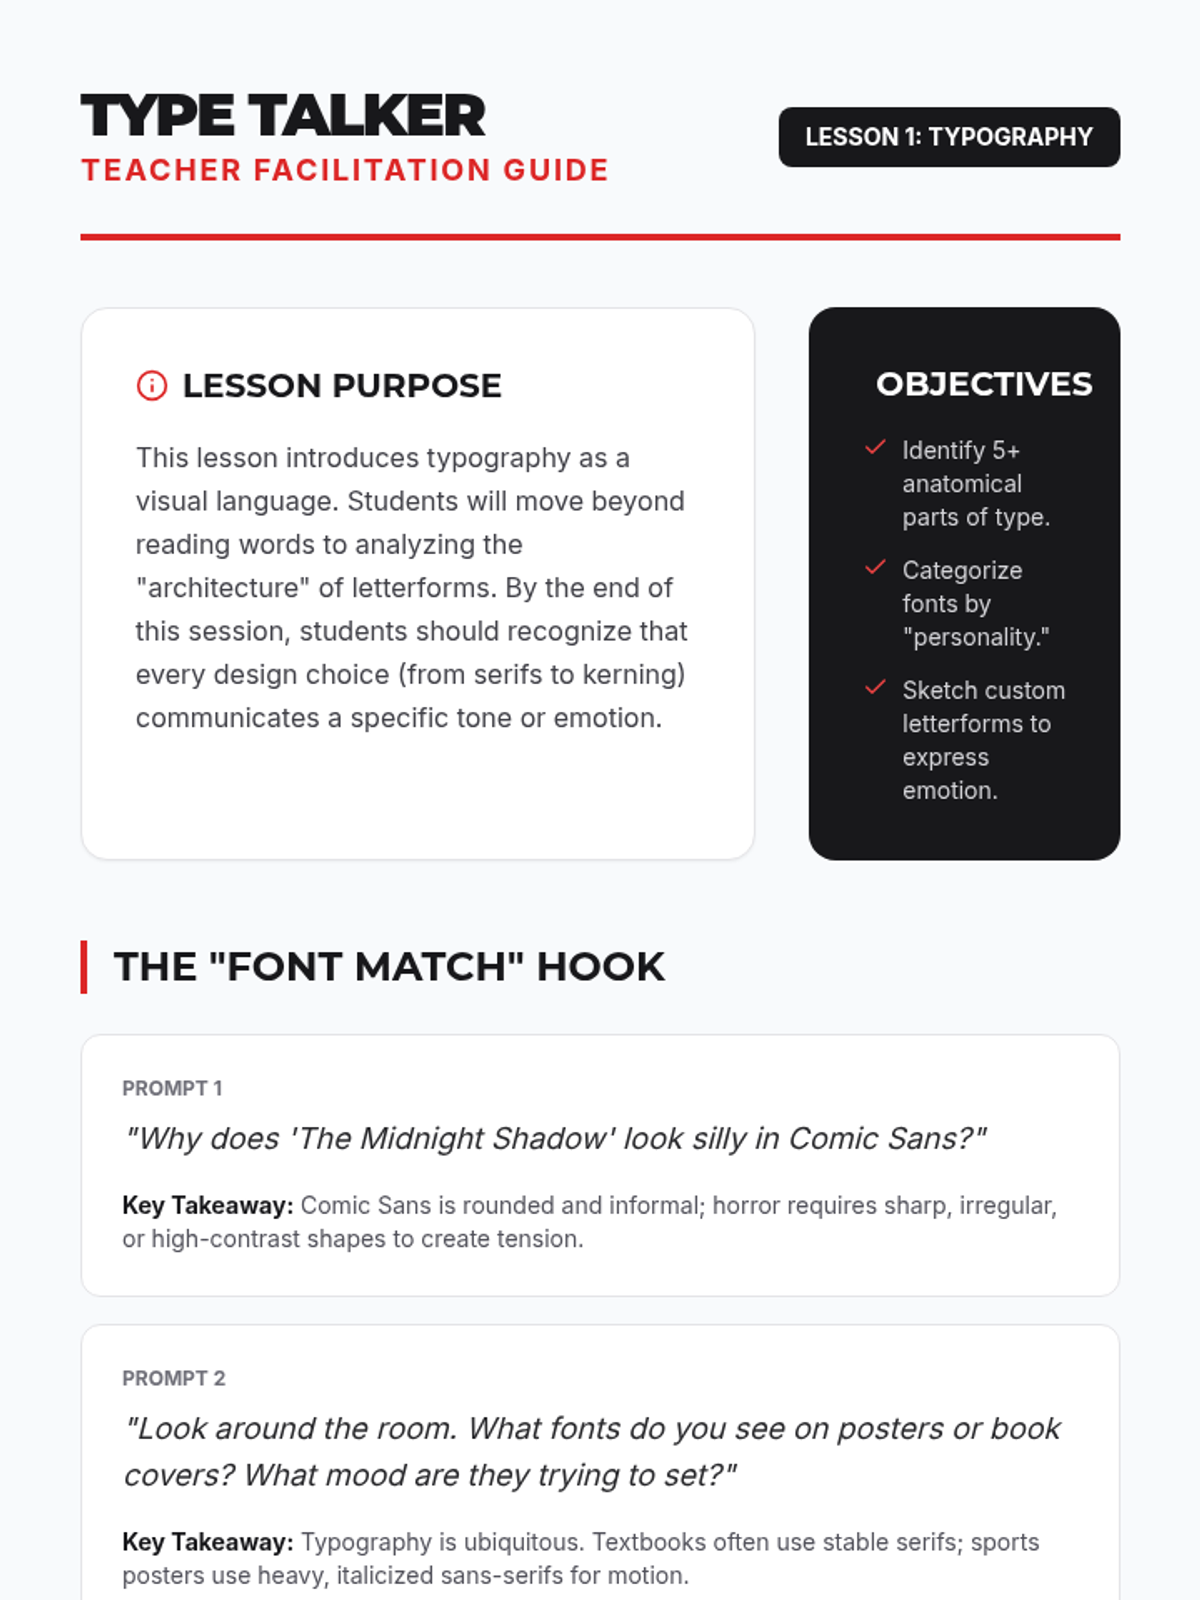
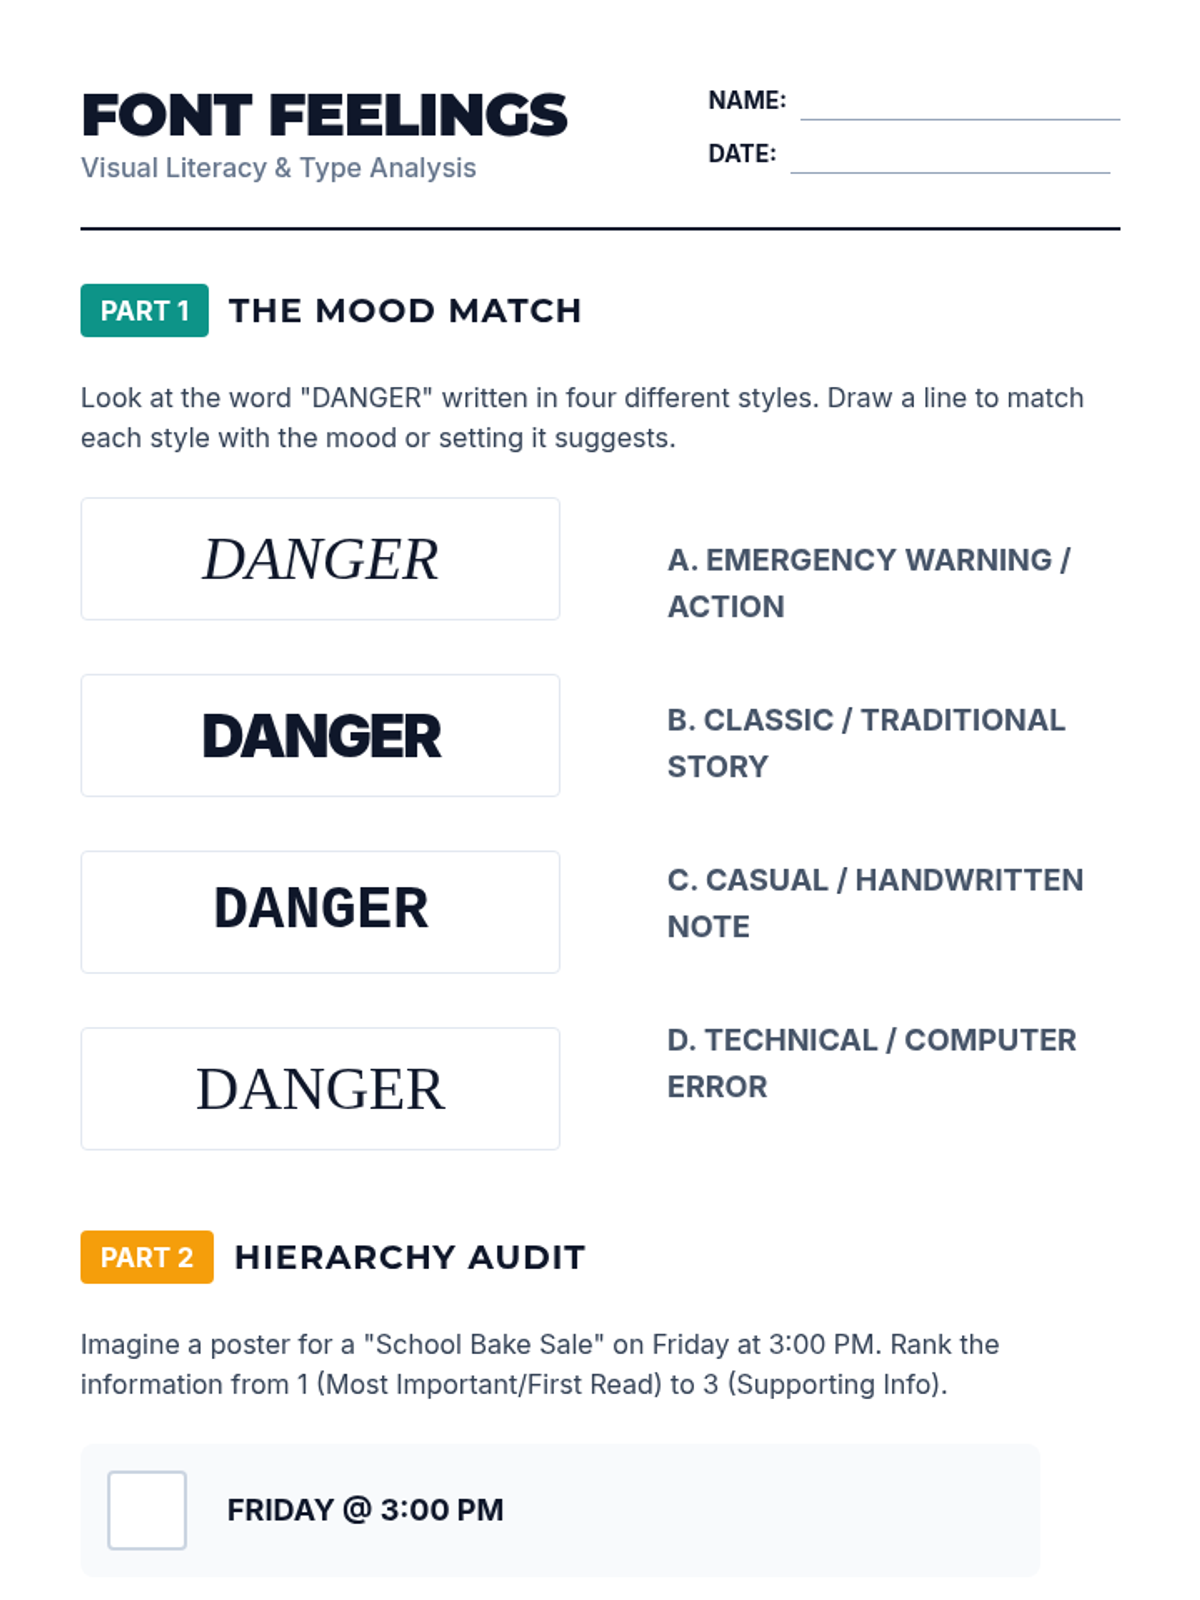
Students dissect typefaces, identifying anatomy and exploring how font choice communicates emotion and personality beyond the text itself.
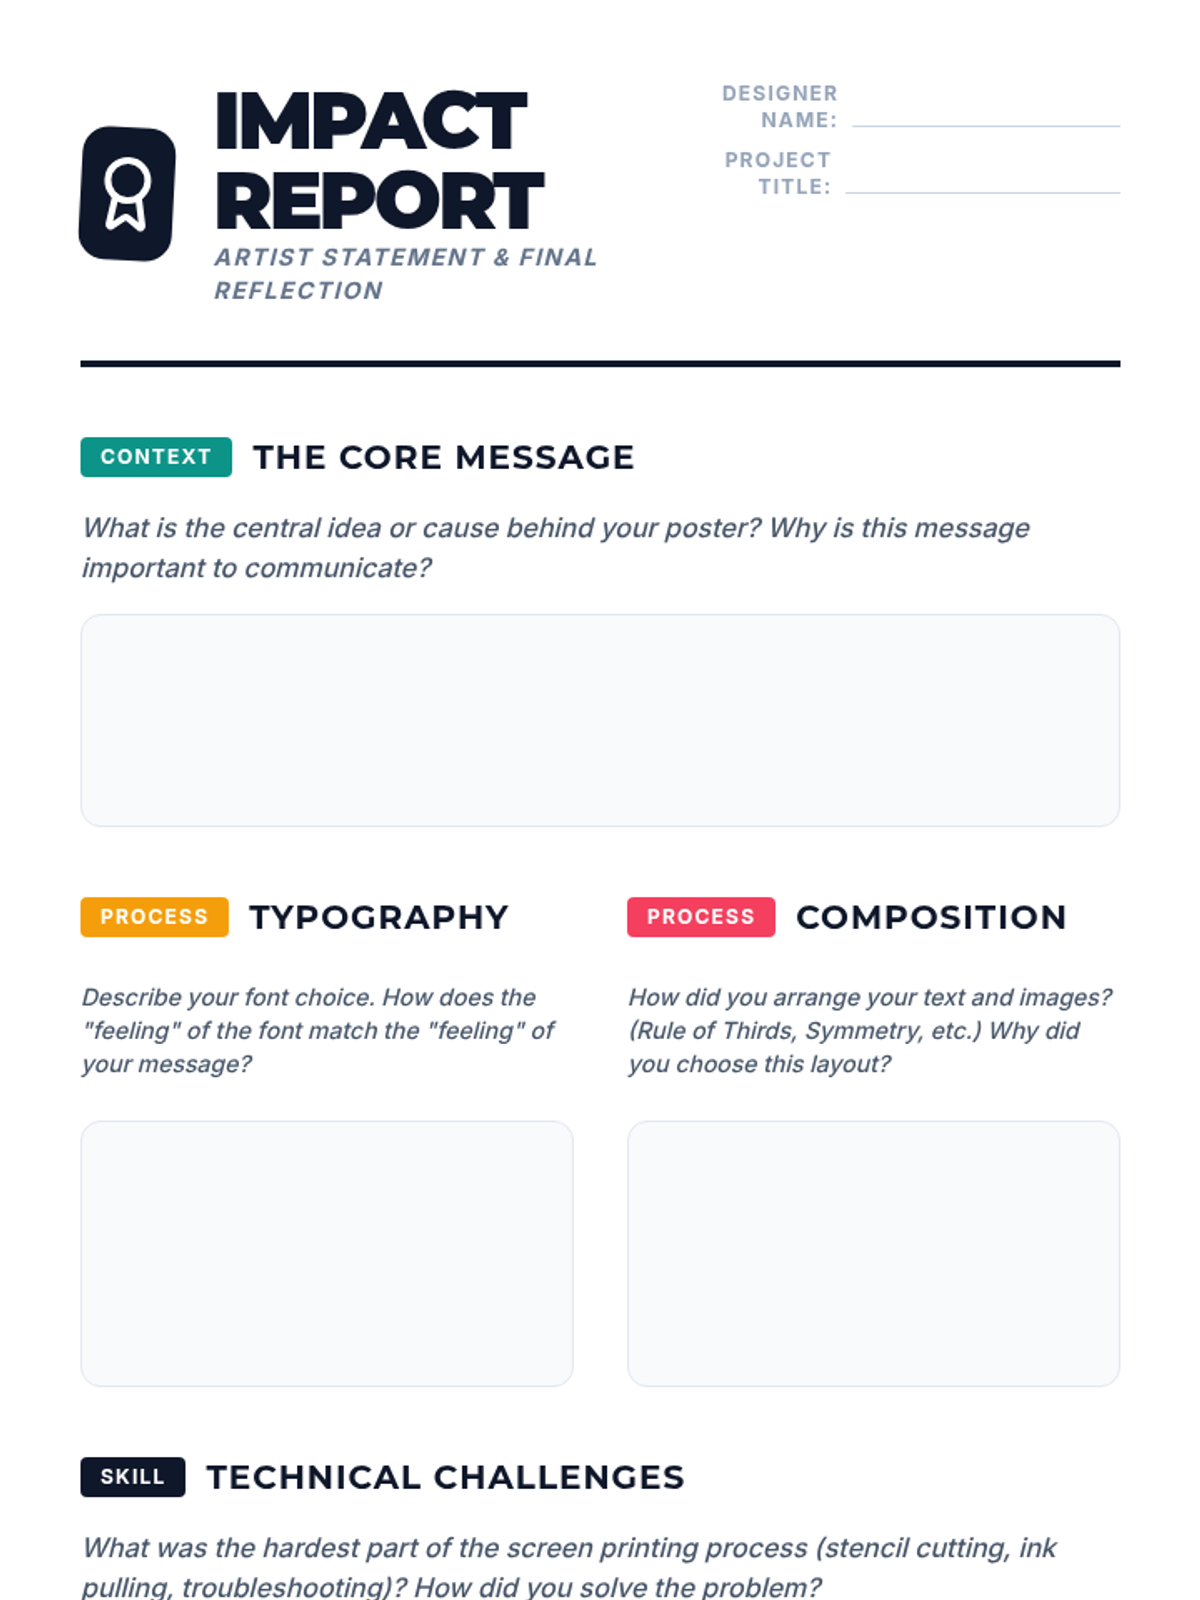
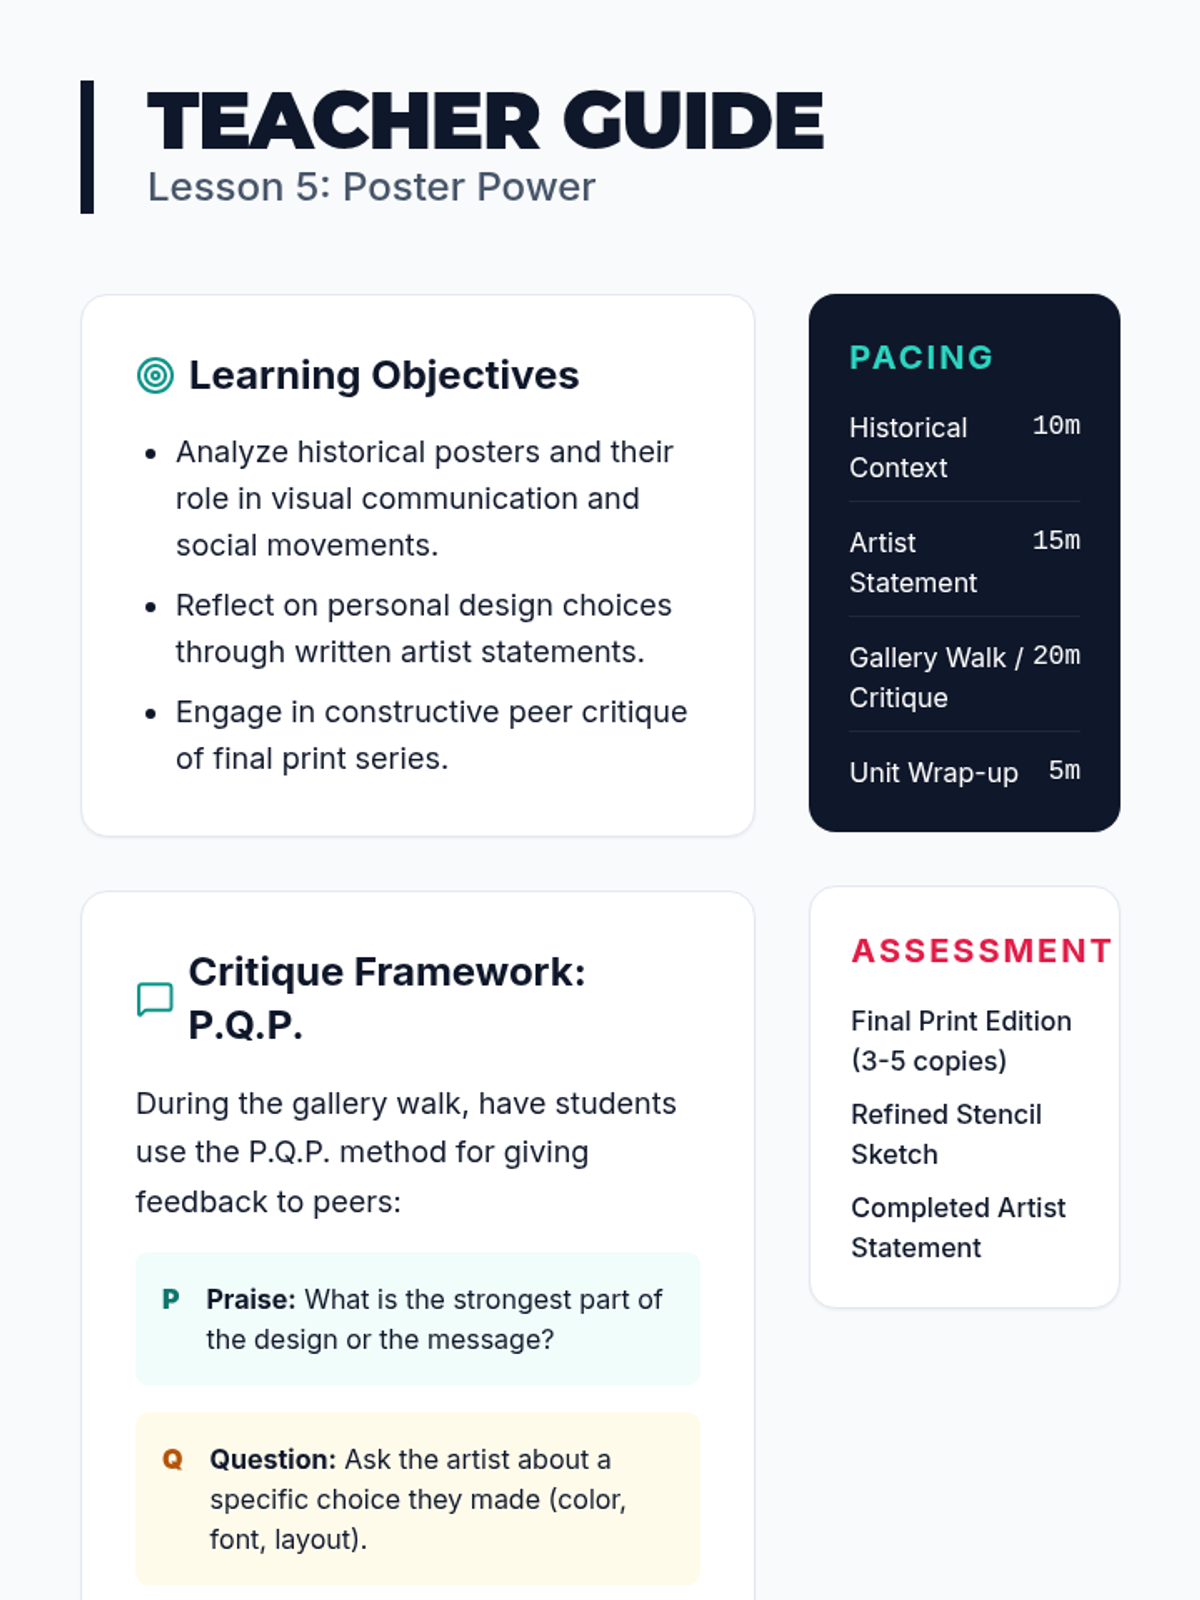
Students review their final prints and explore the historical role of posters in social movements. They conclude the sequence by writing an artist statement reflecting on their design choices.
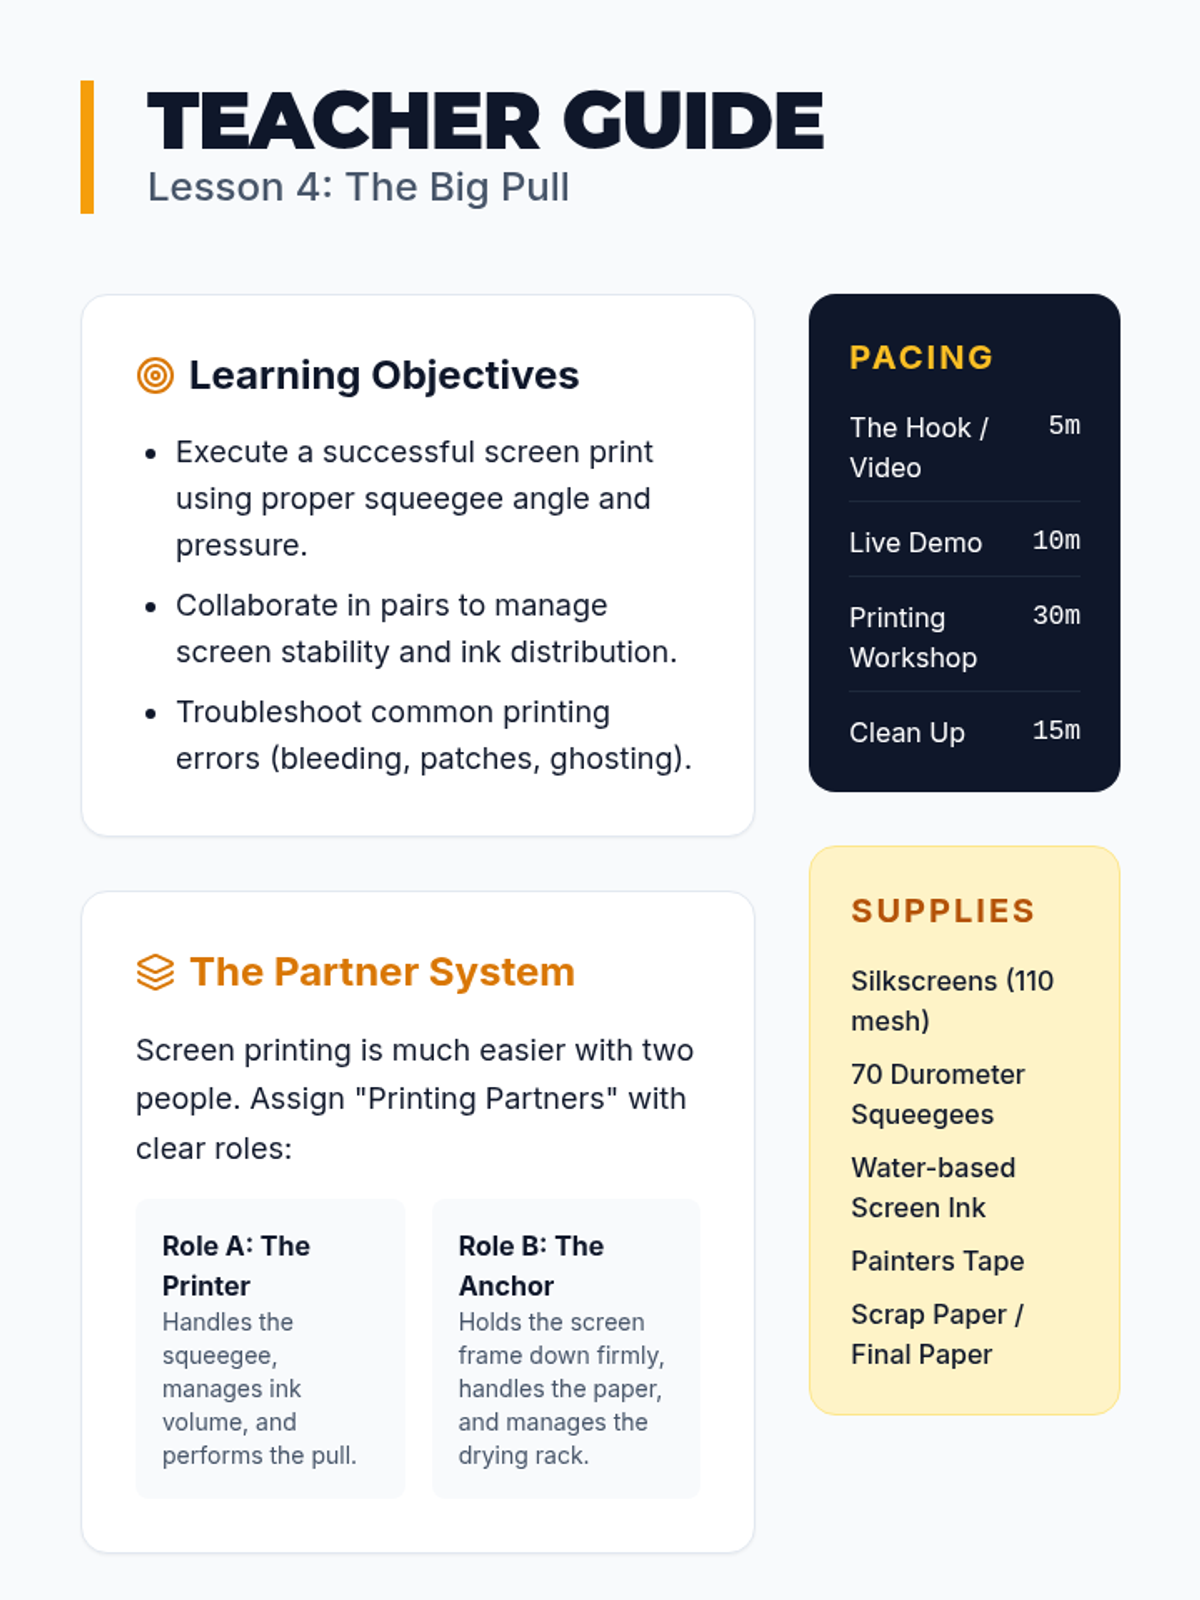
Working in pairs, students learn the physical mechanics of screen printing, including the squeegee pull, ink management, and troubleshooting common printing issues.
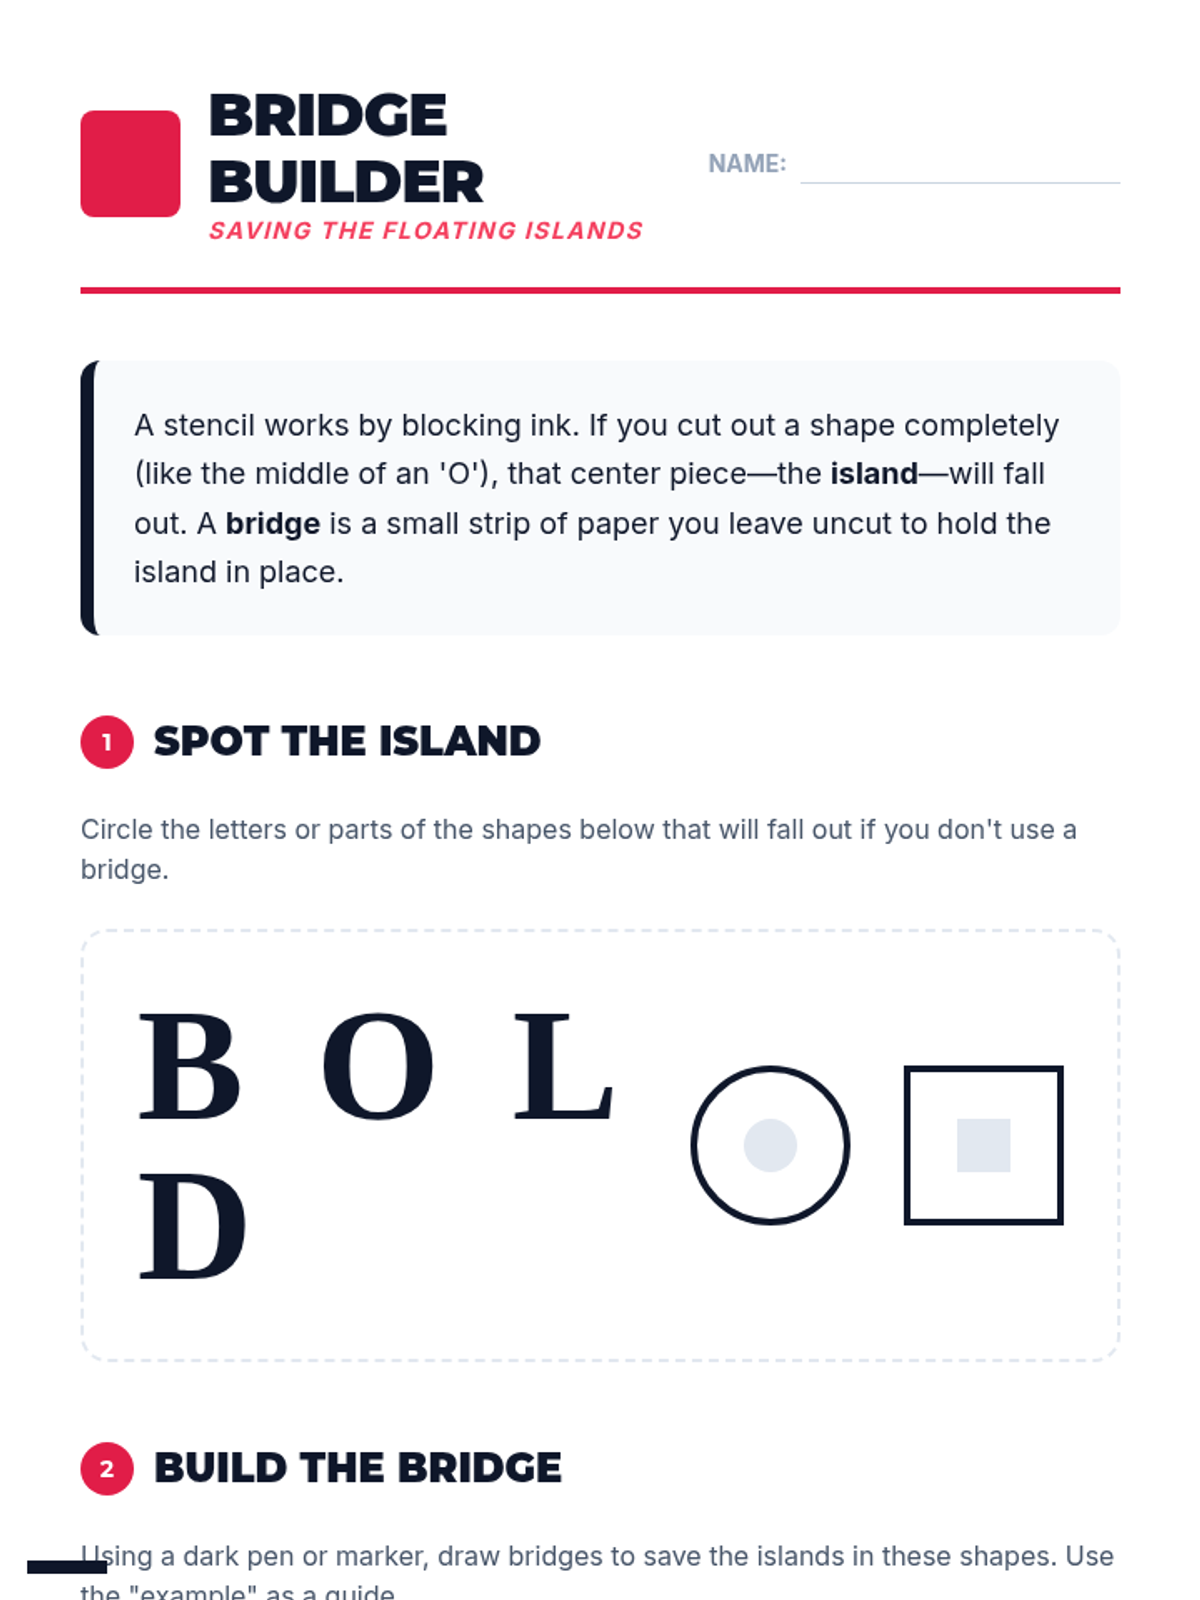
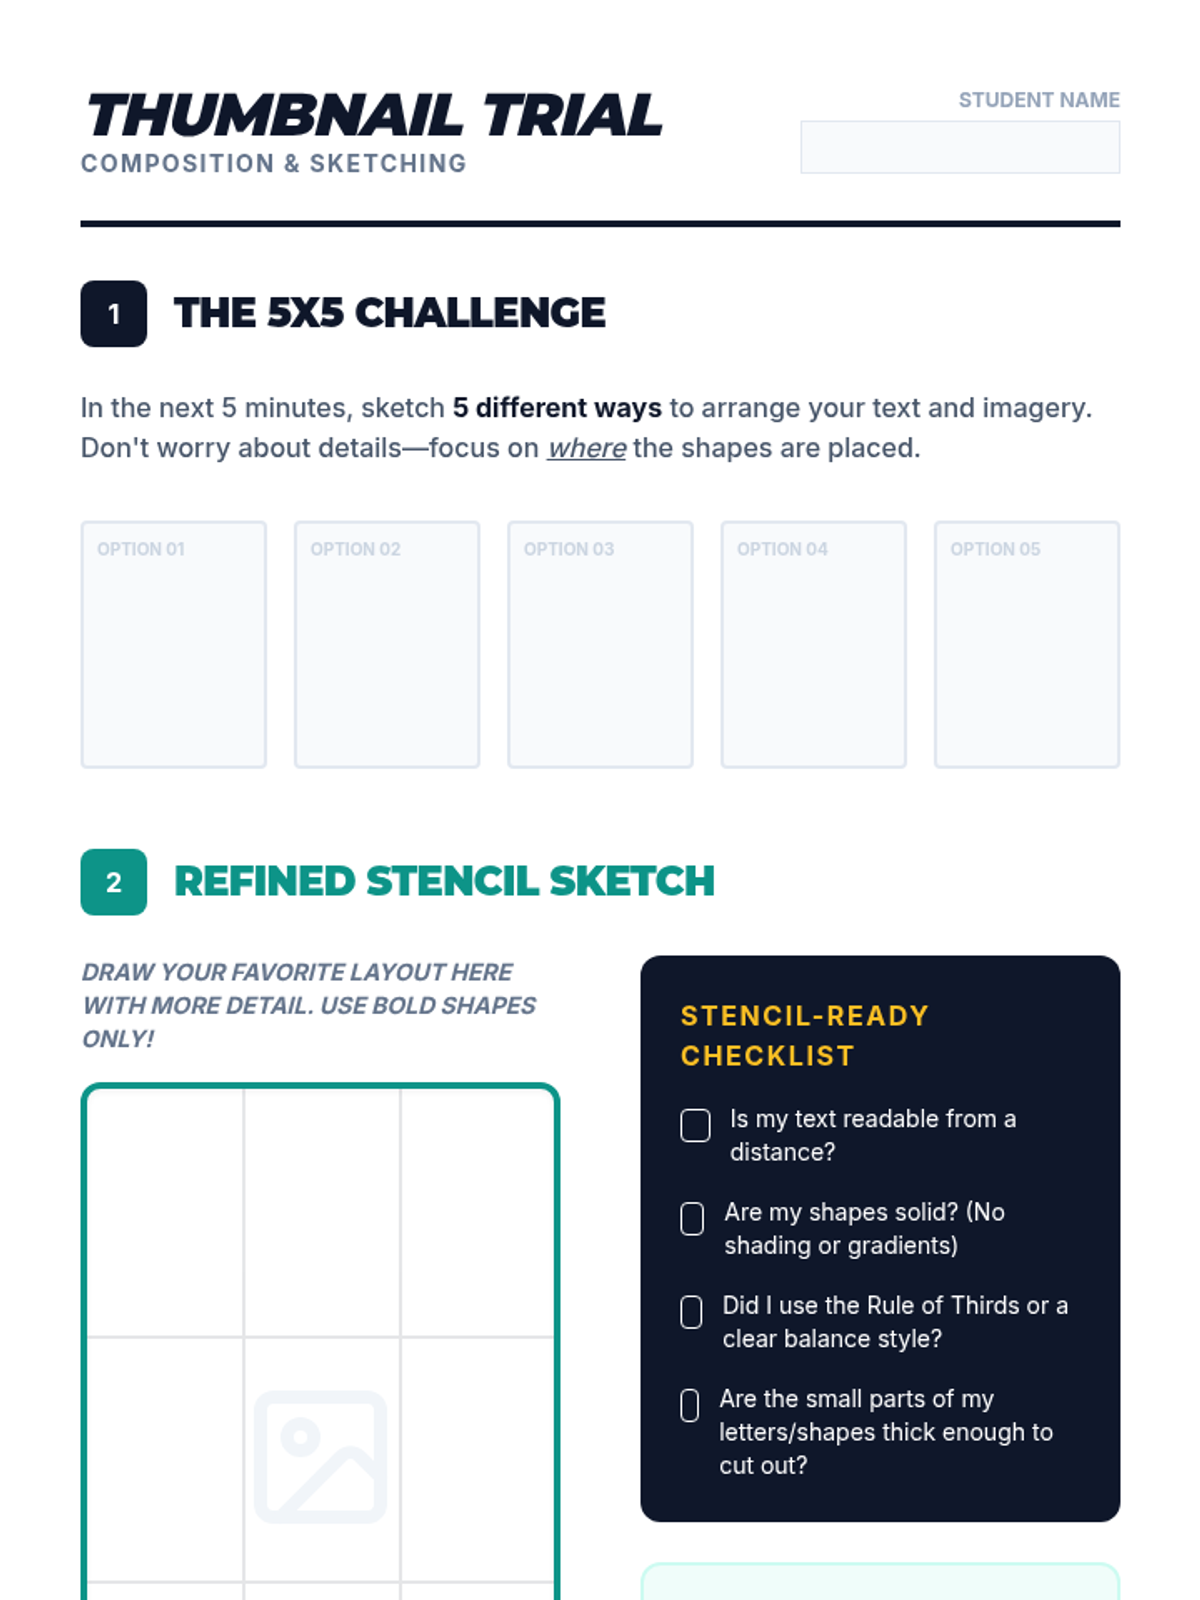
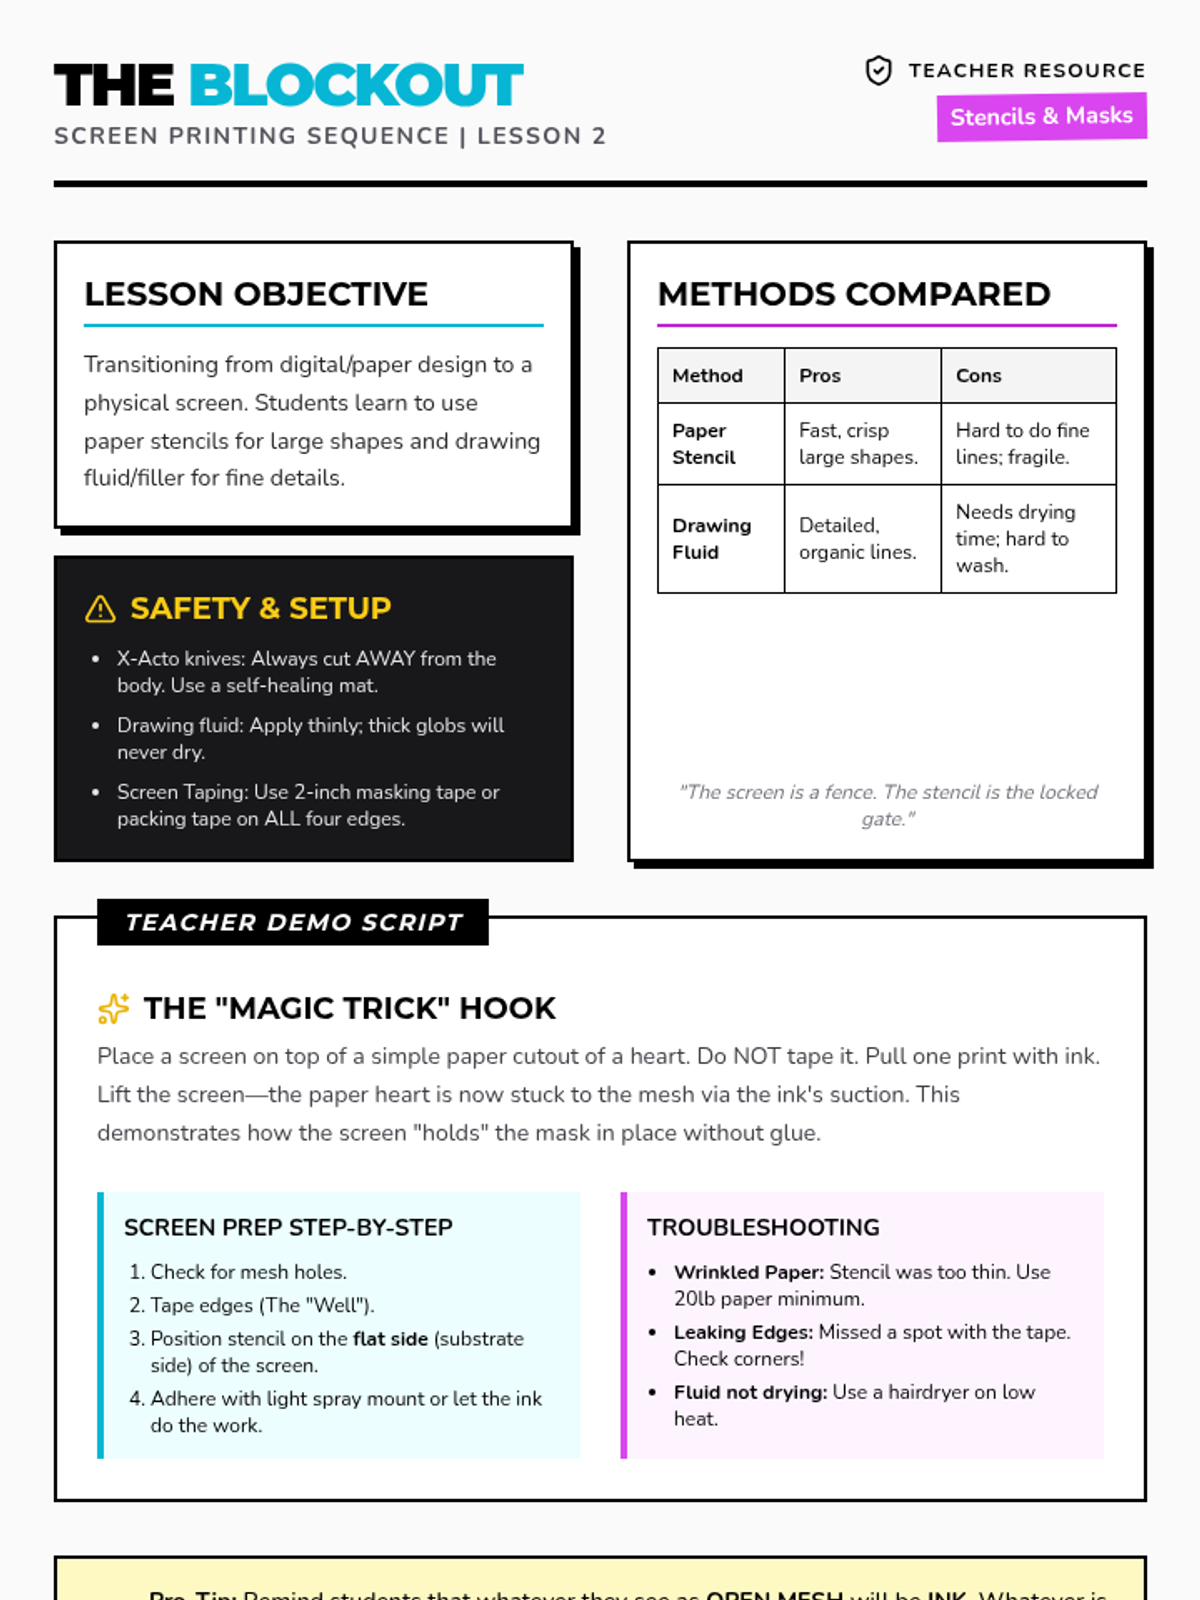
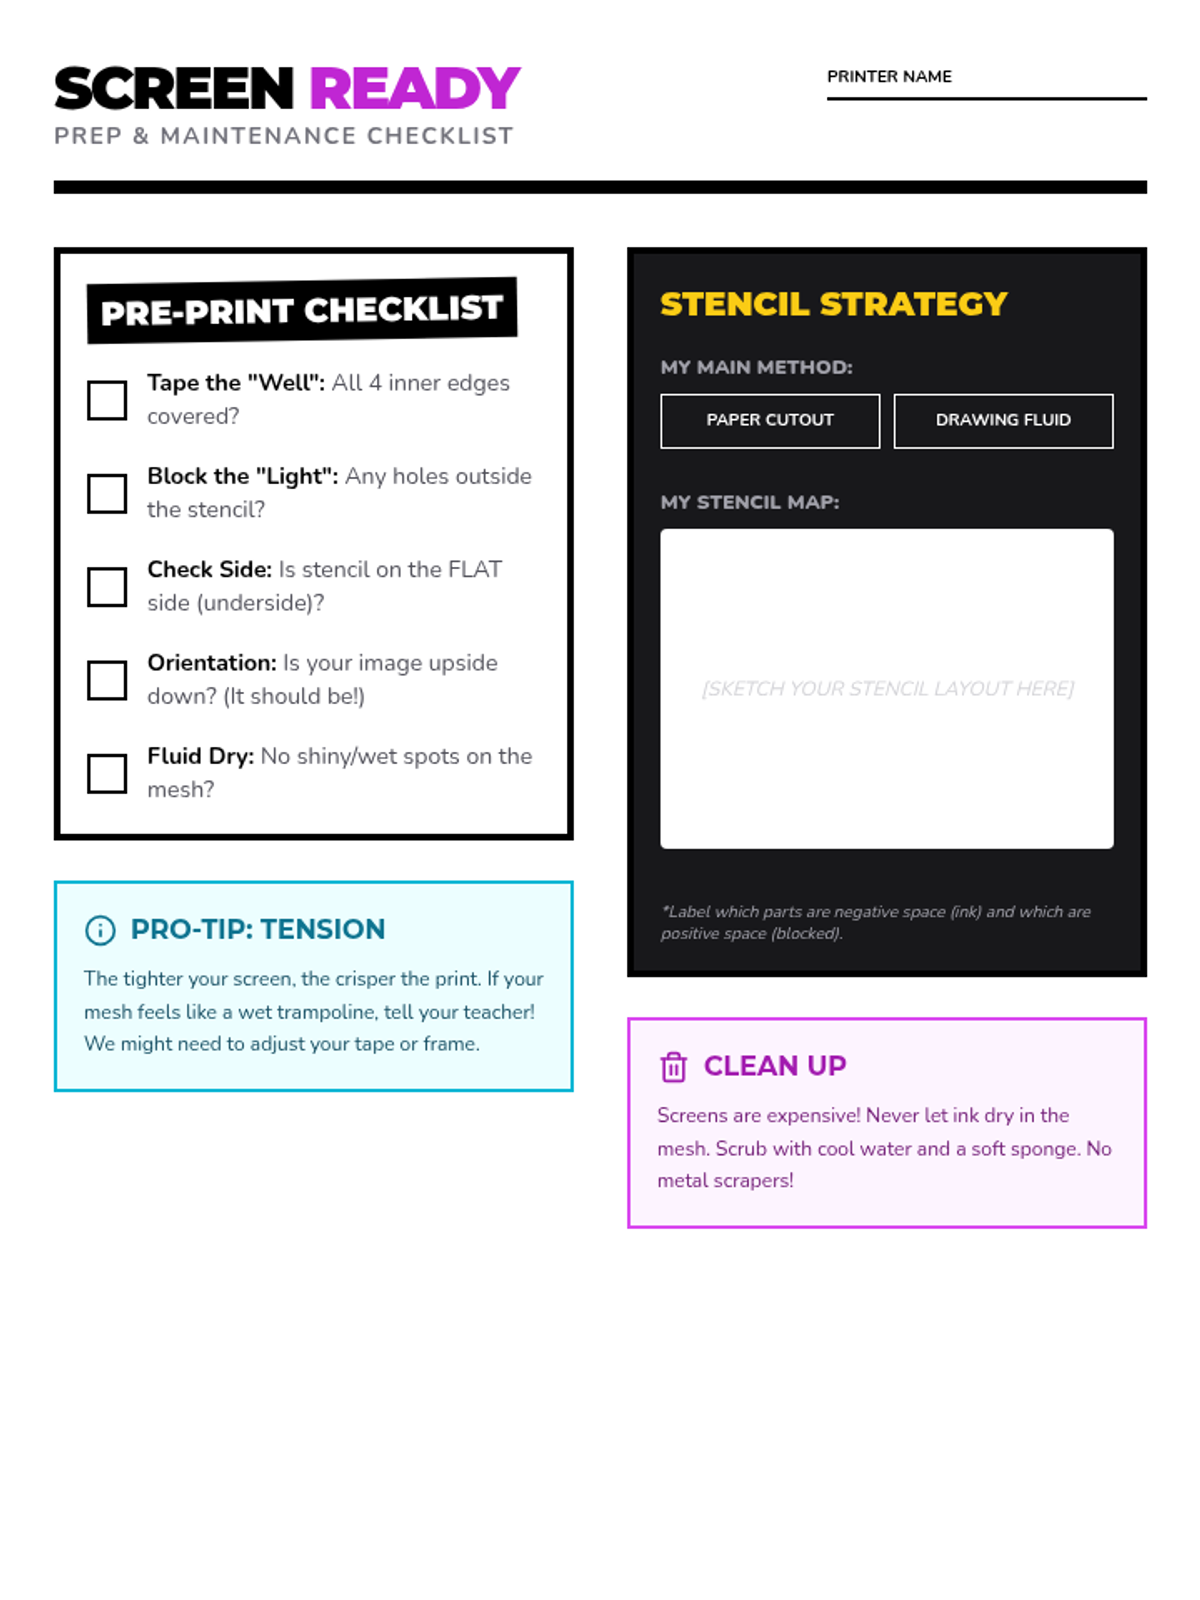
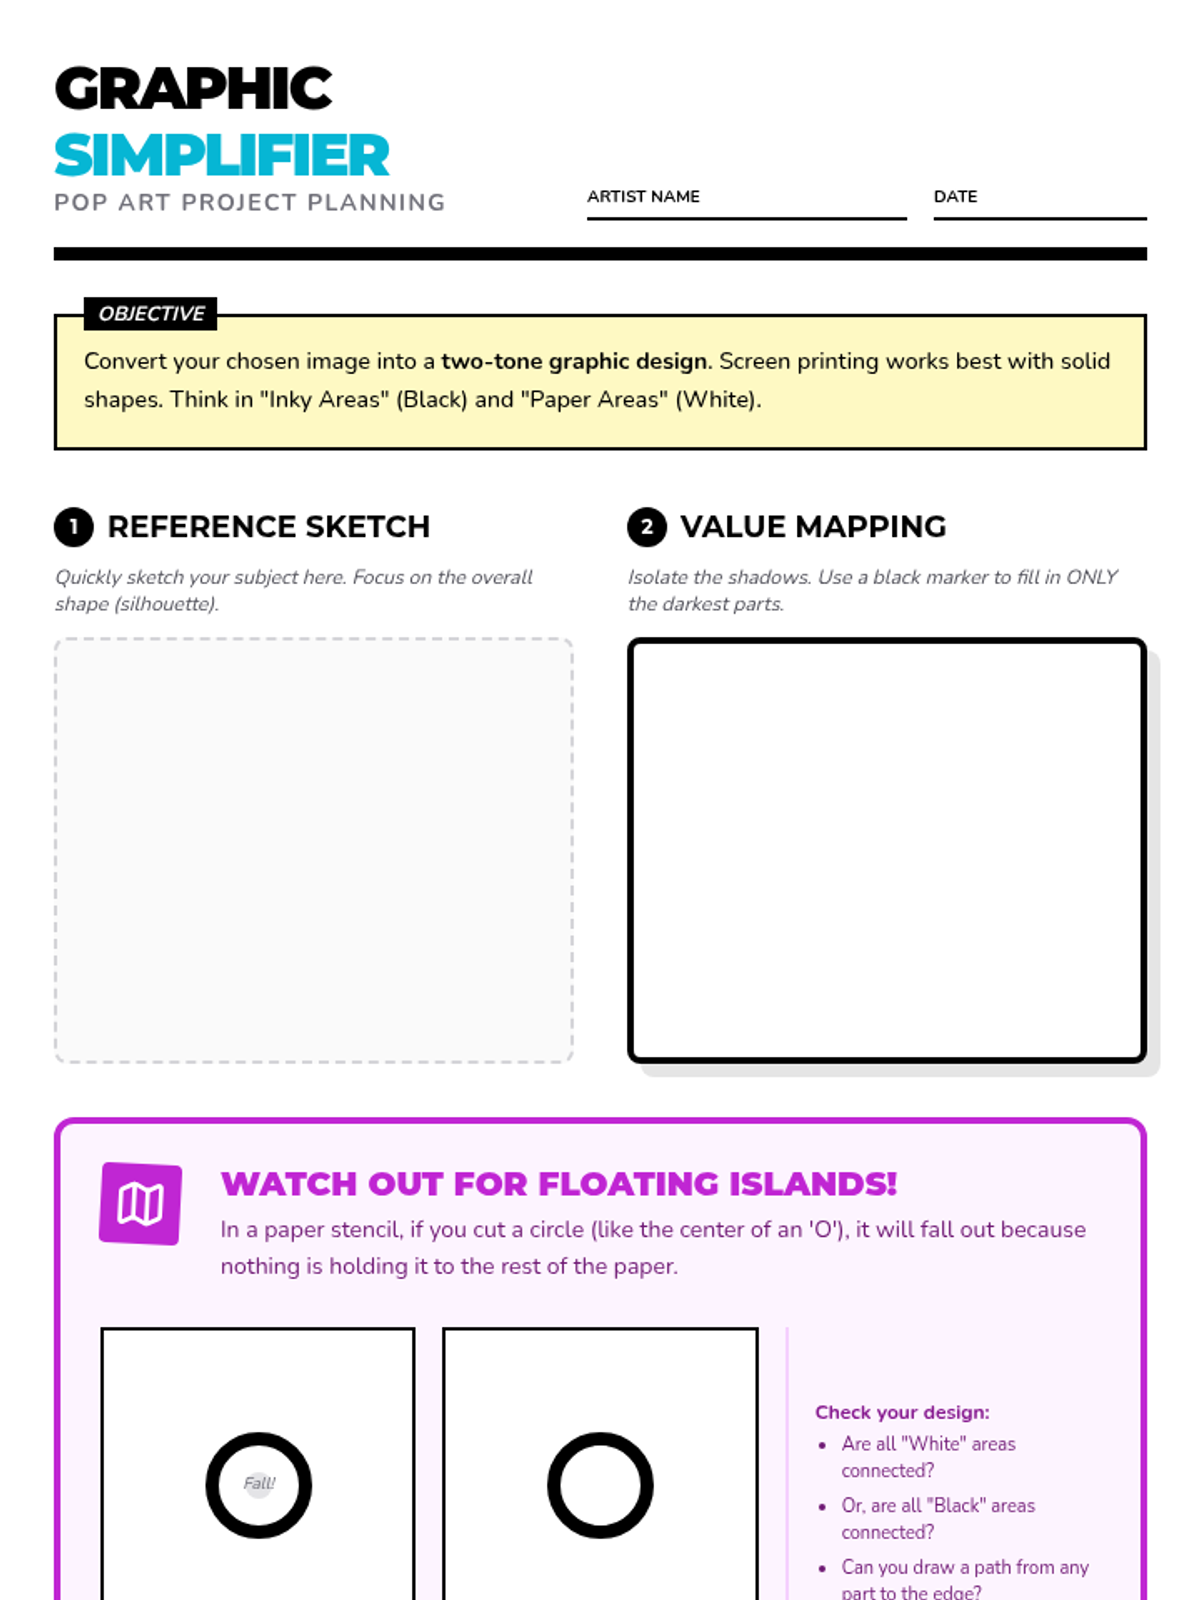
Students transfer their designs to stencil paper and learn the technical requirements of stenciling, specifically focusing on the 'island' problem and precision cutting techniques.
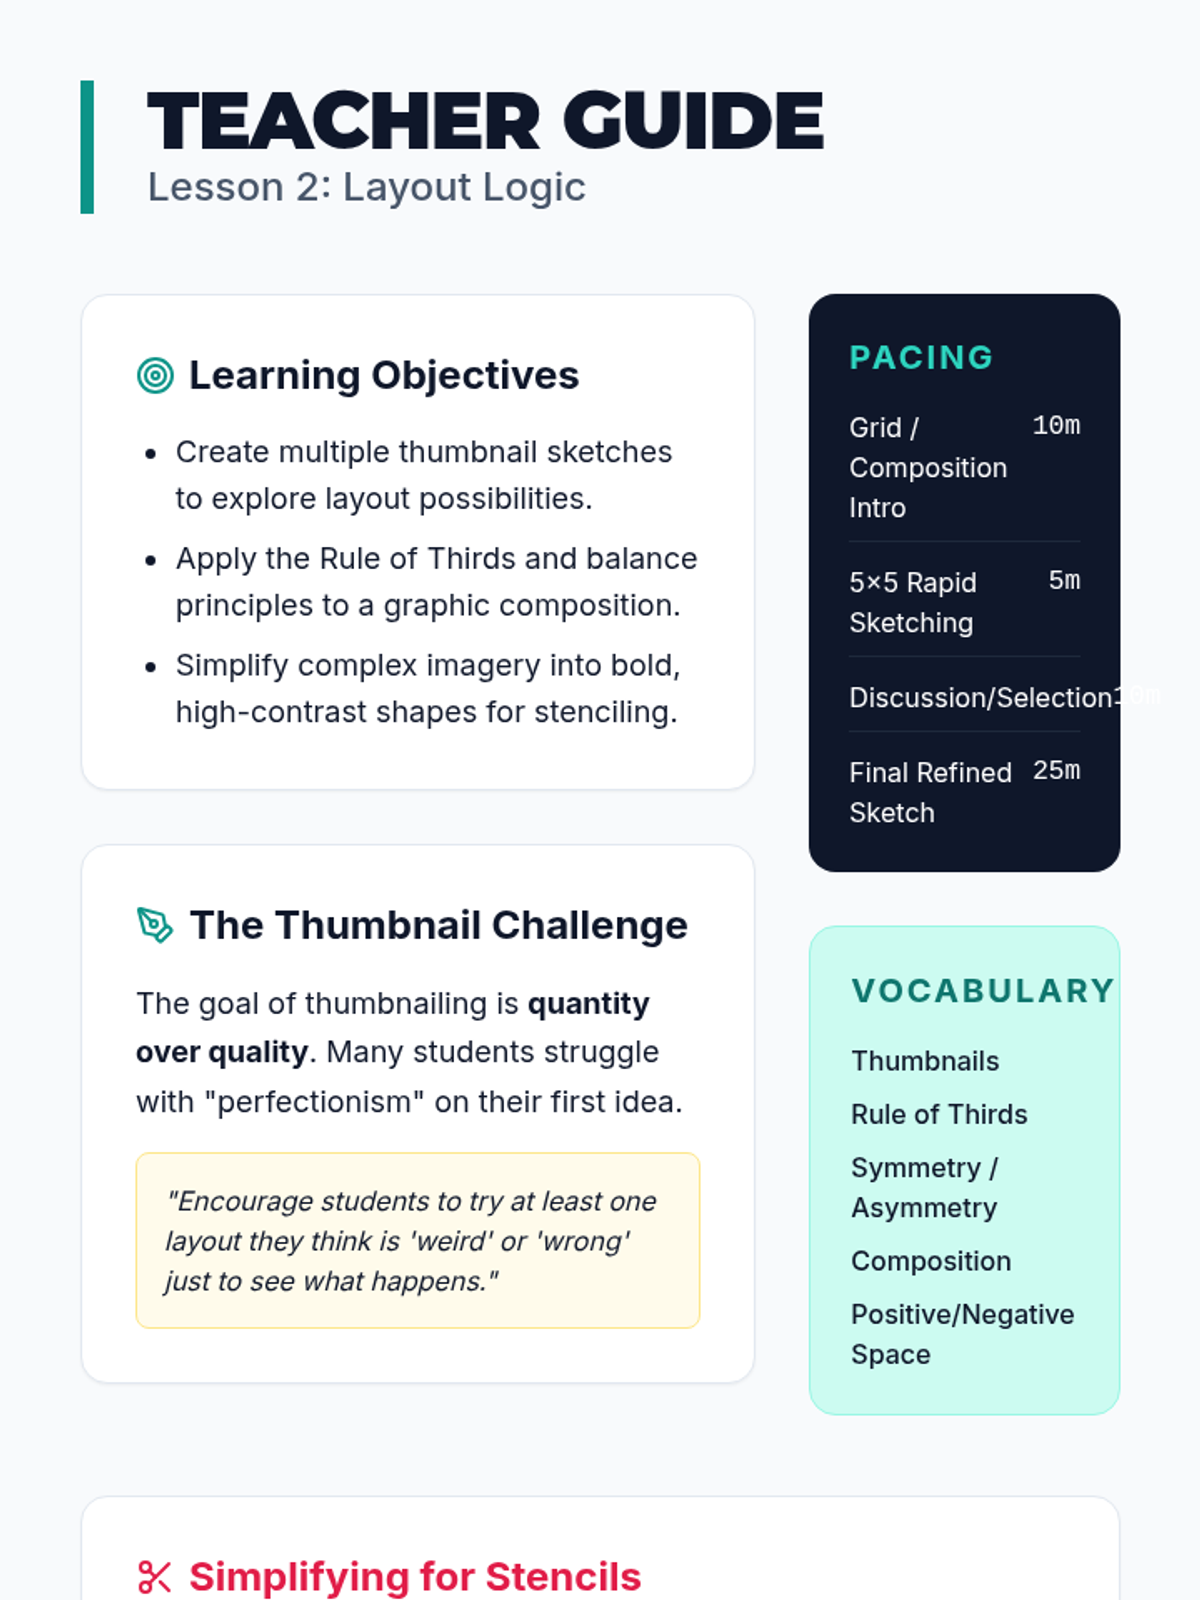
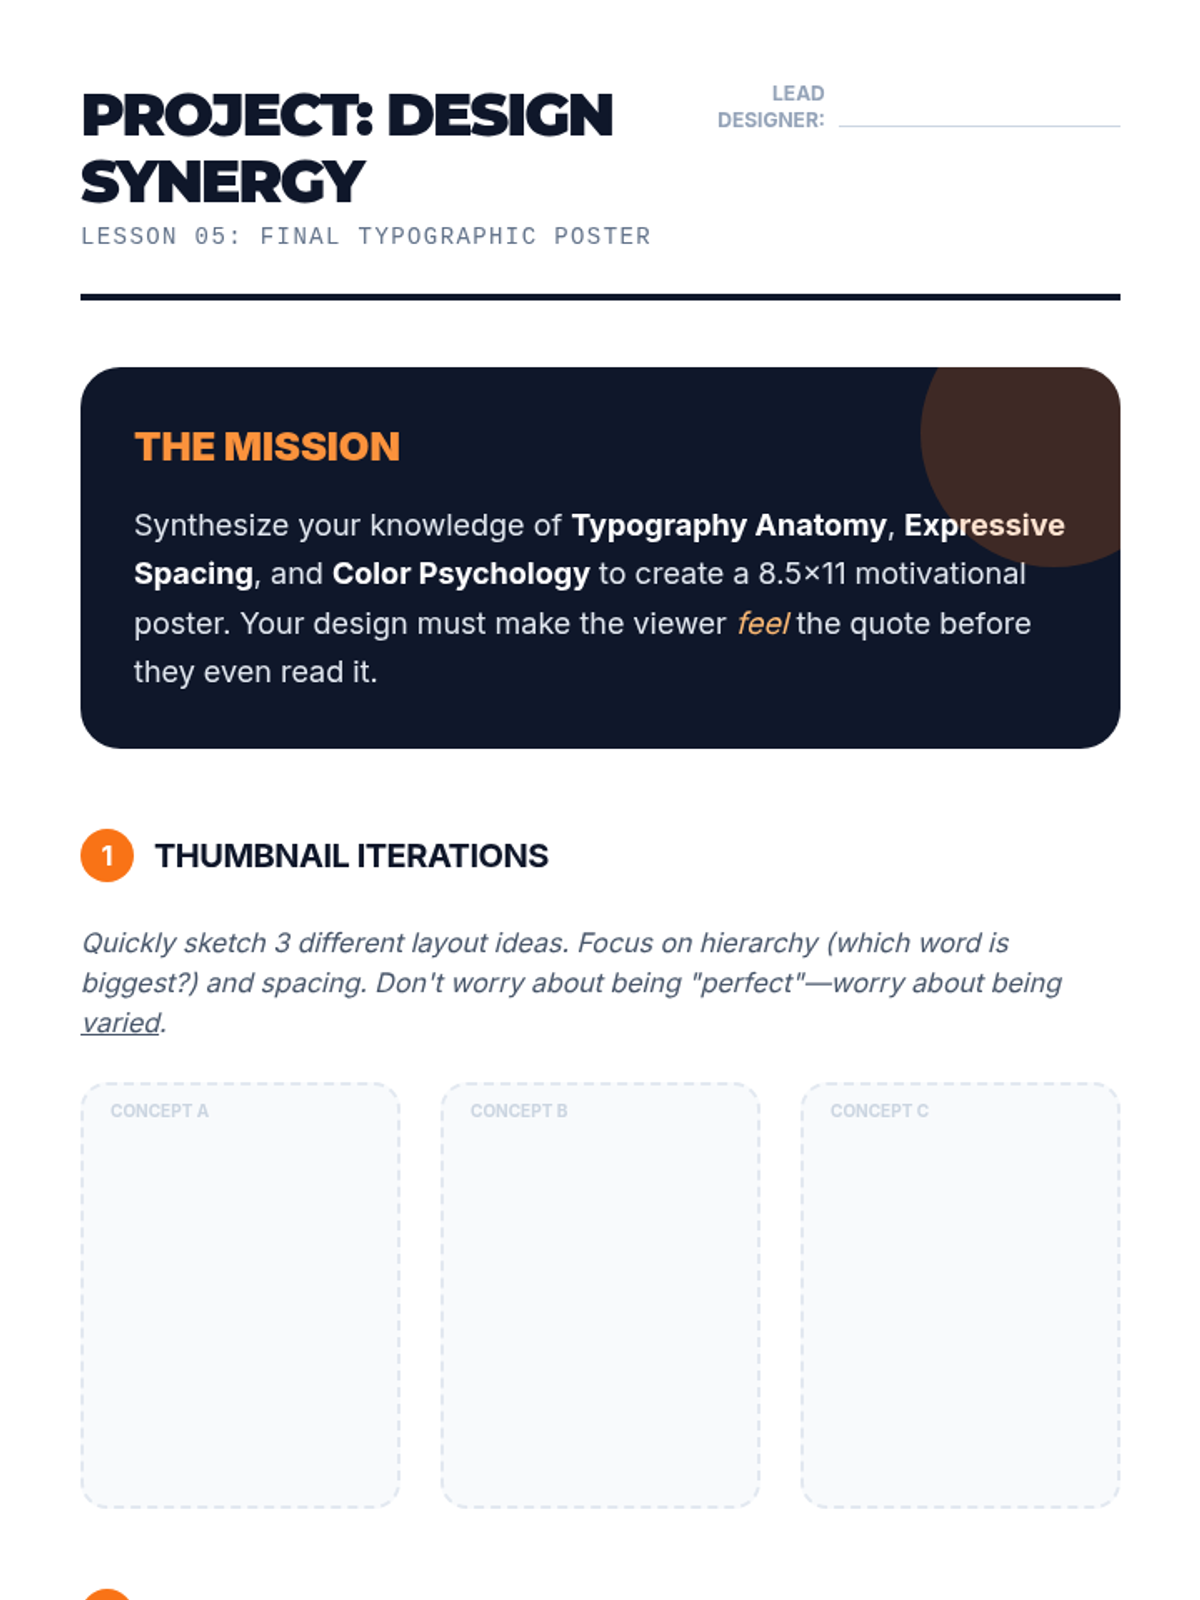
Students focus on composition by sketching multiple thumbnail layouts that integrate text and imagery. They refine their designs by simplifying them into shapes suitable for the stenciling process.
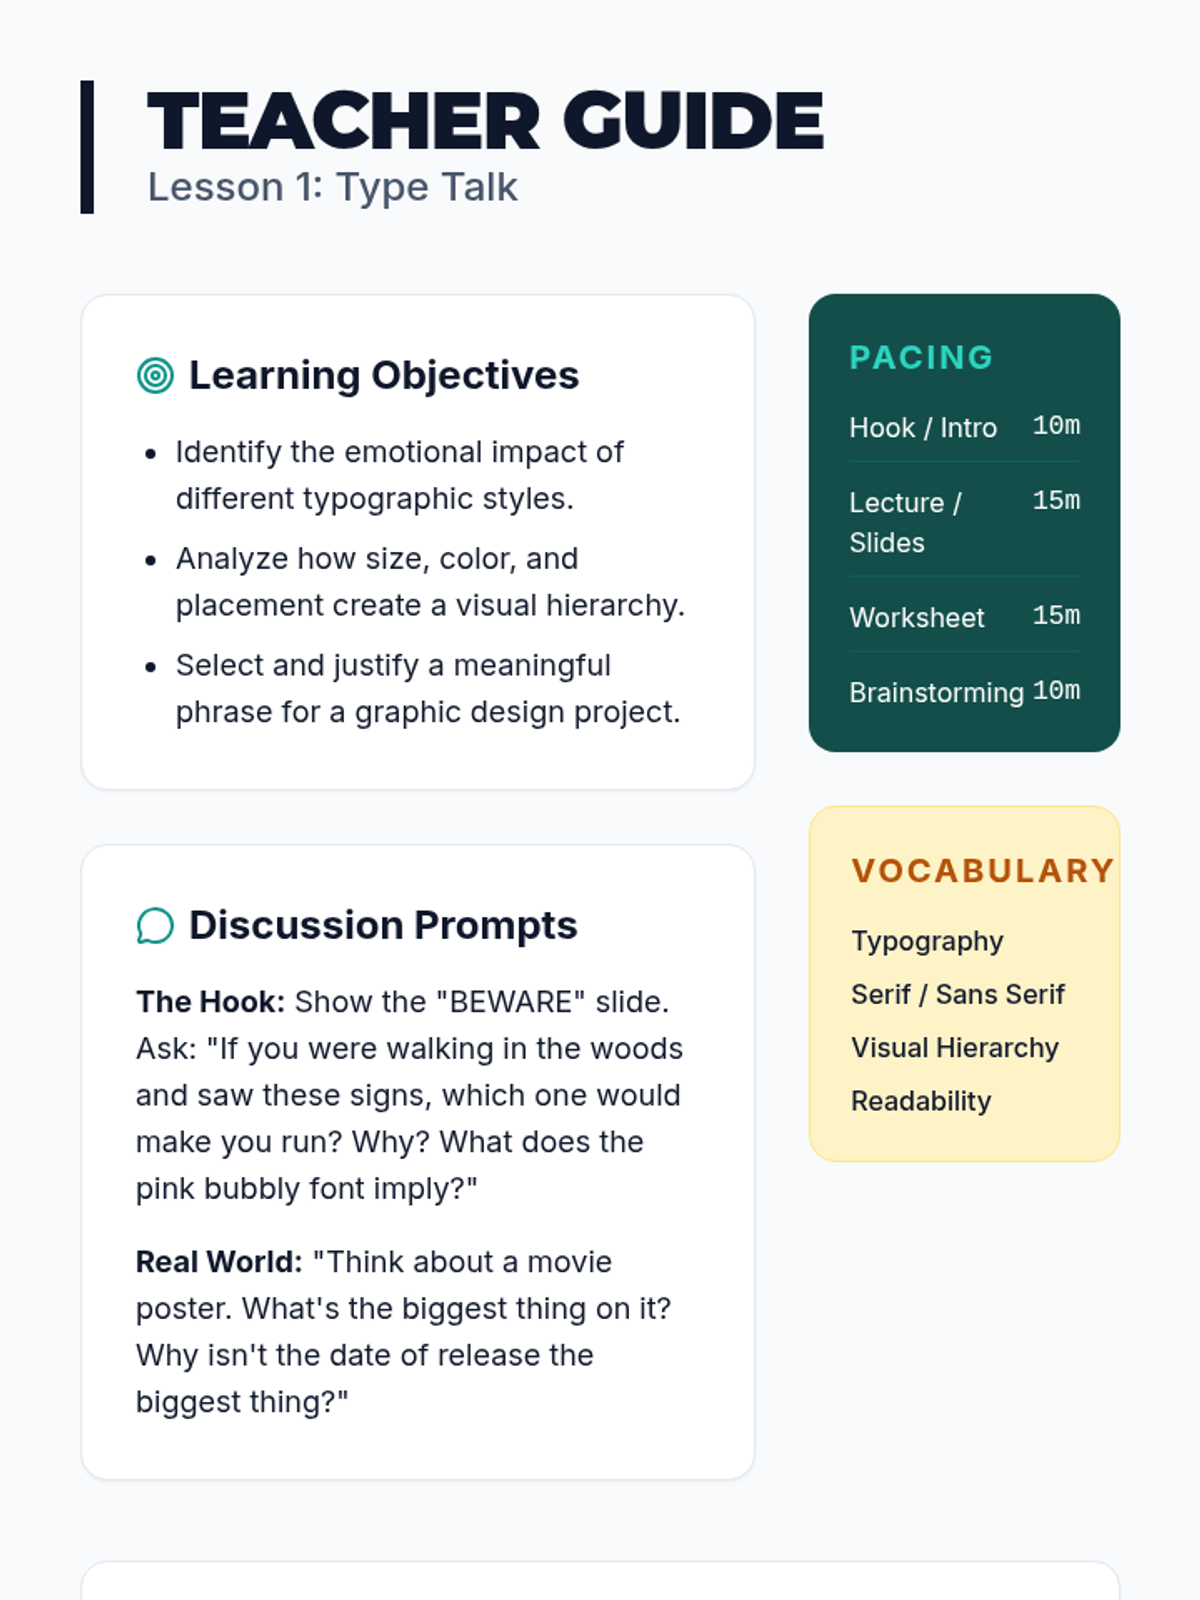
Students investigate how font choice and placement impact the meaning of a message by analyzing movie posters and advertisements. They learn to identify hierarchy of information and select a short phrase for their own project.
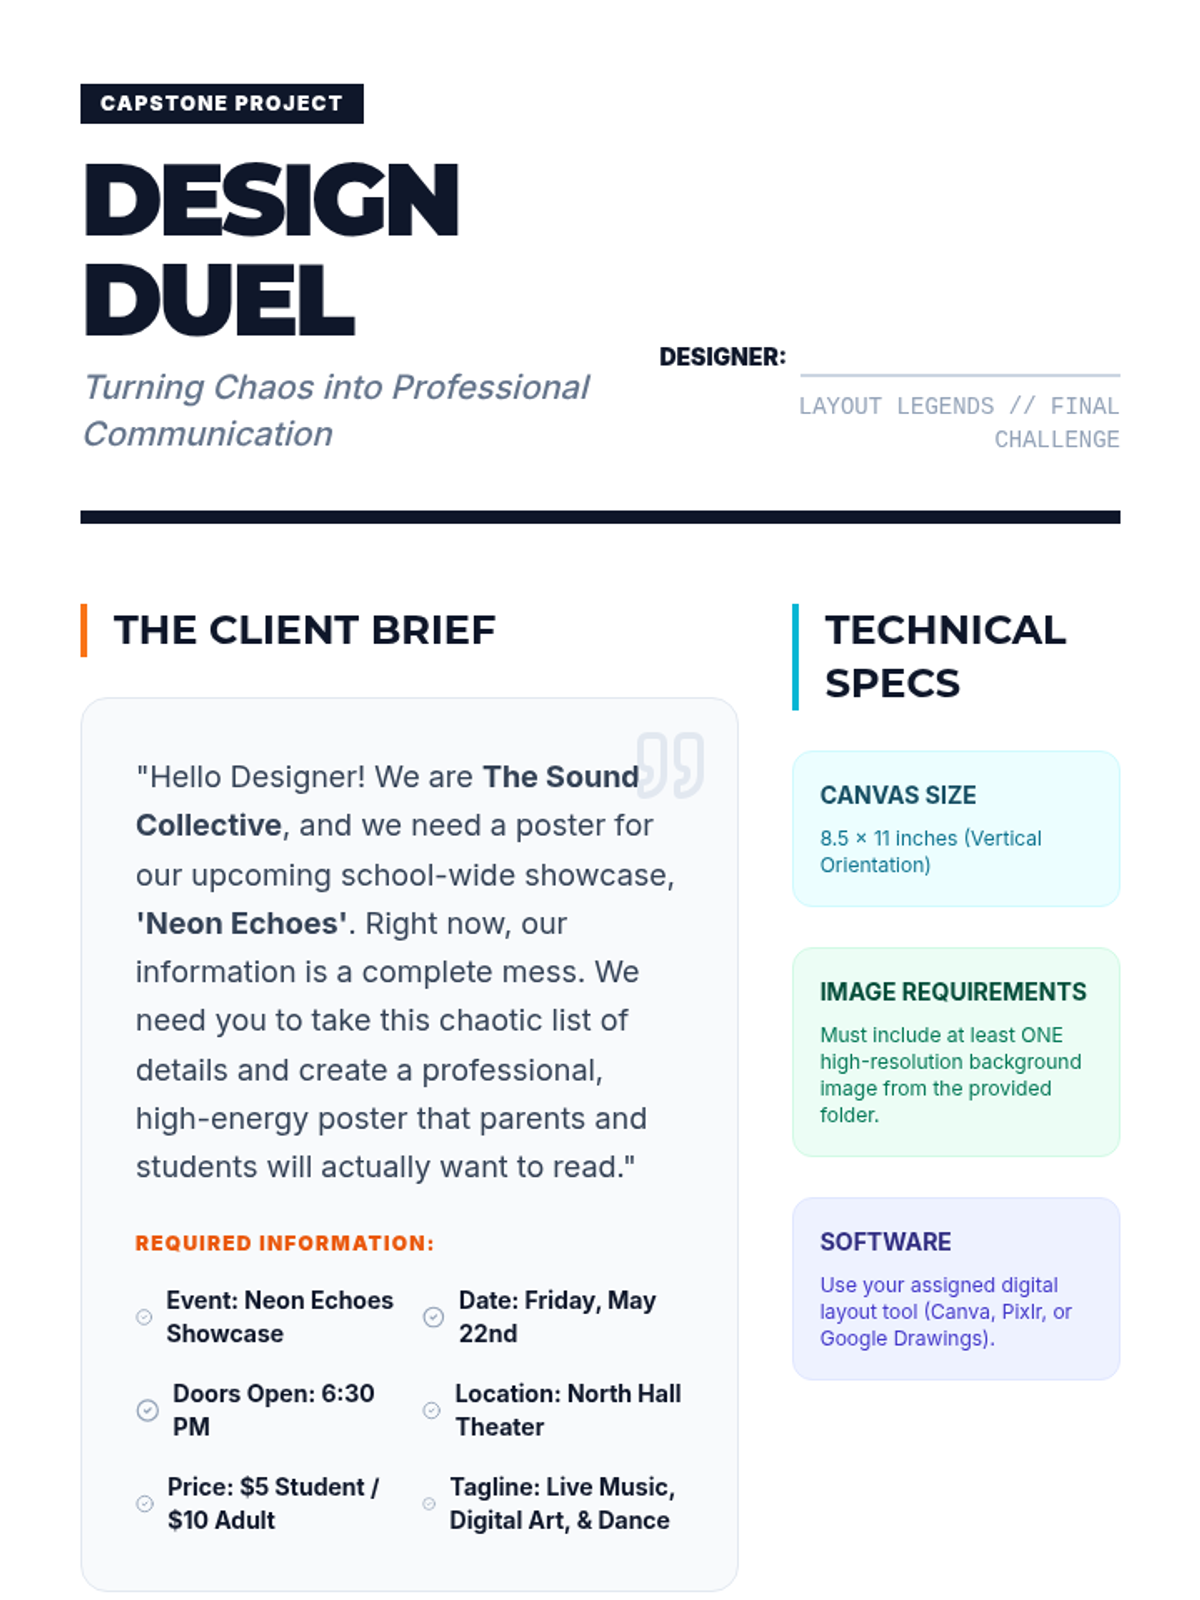
The capstone project where students apply all learned principles to fulfill a client brief and design a professional school event poster.
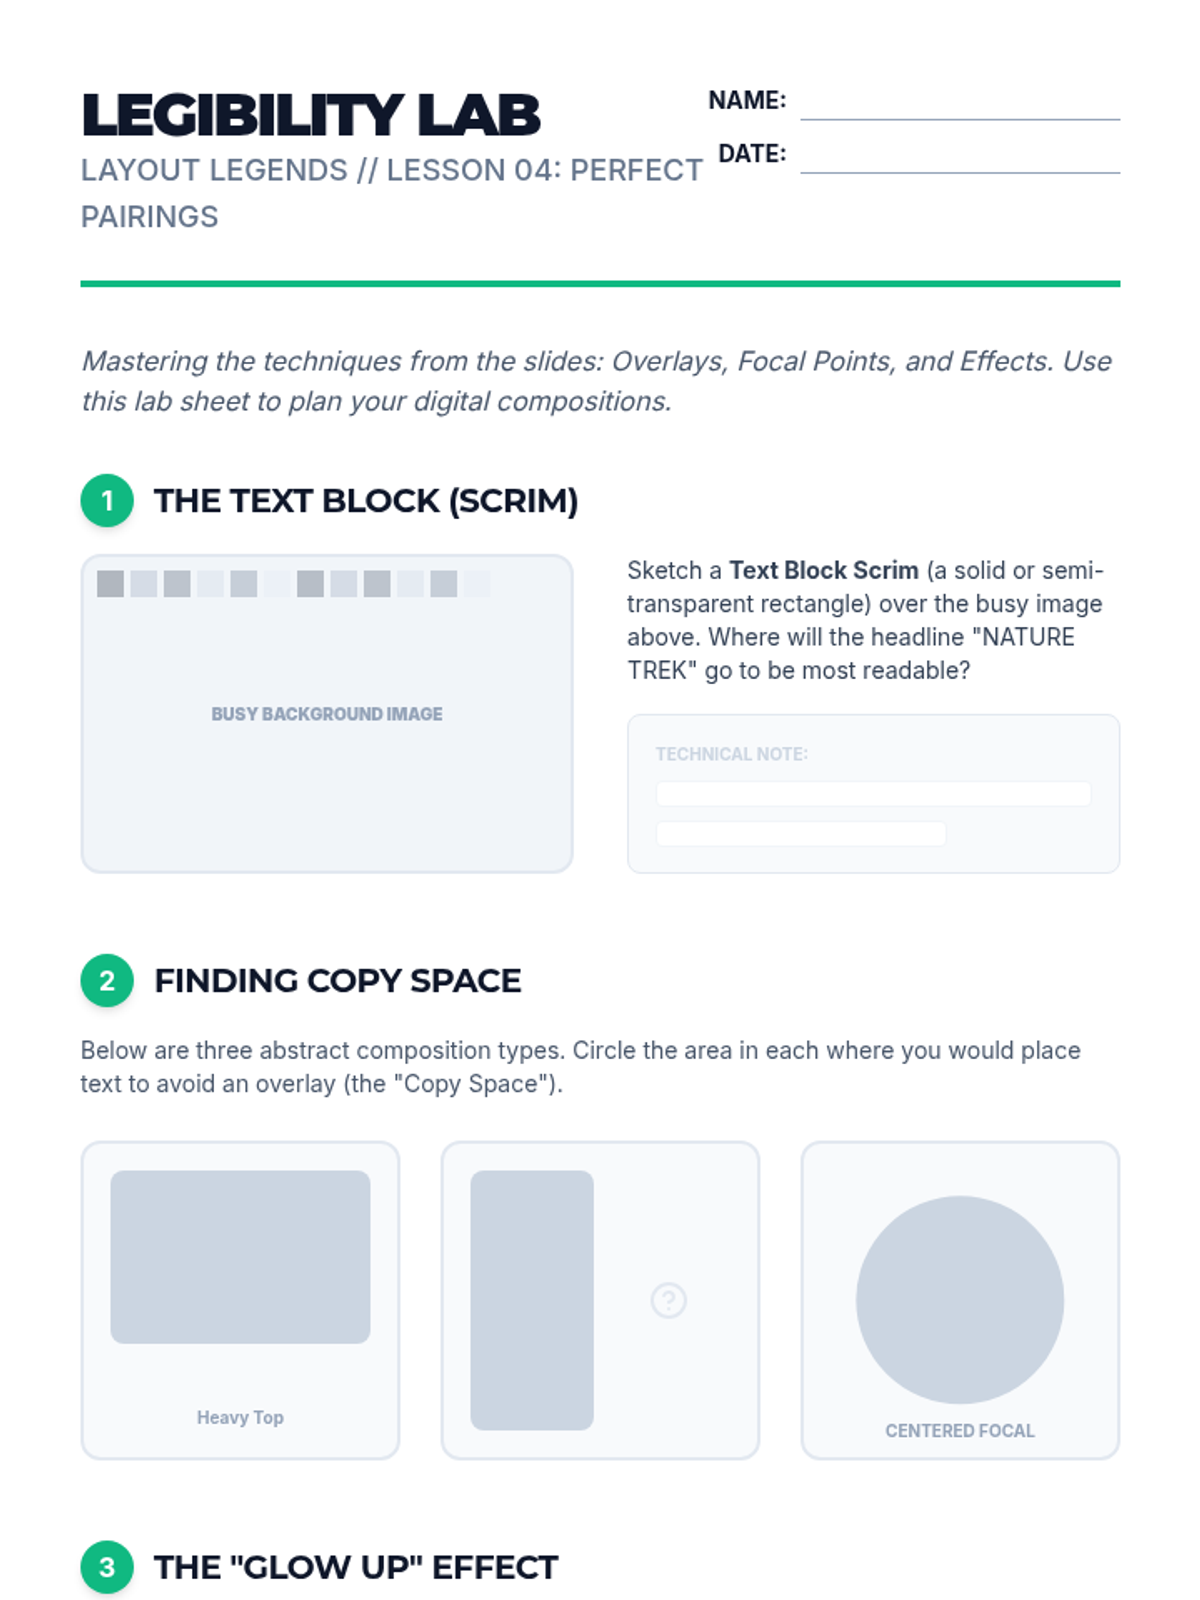
Focusing on the marriage of graphics and copy, students master techniques for placing legible text over complex background images.
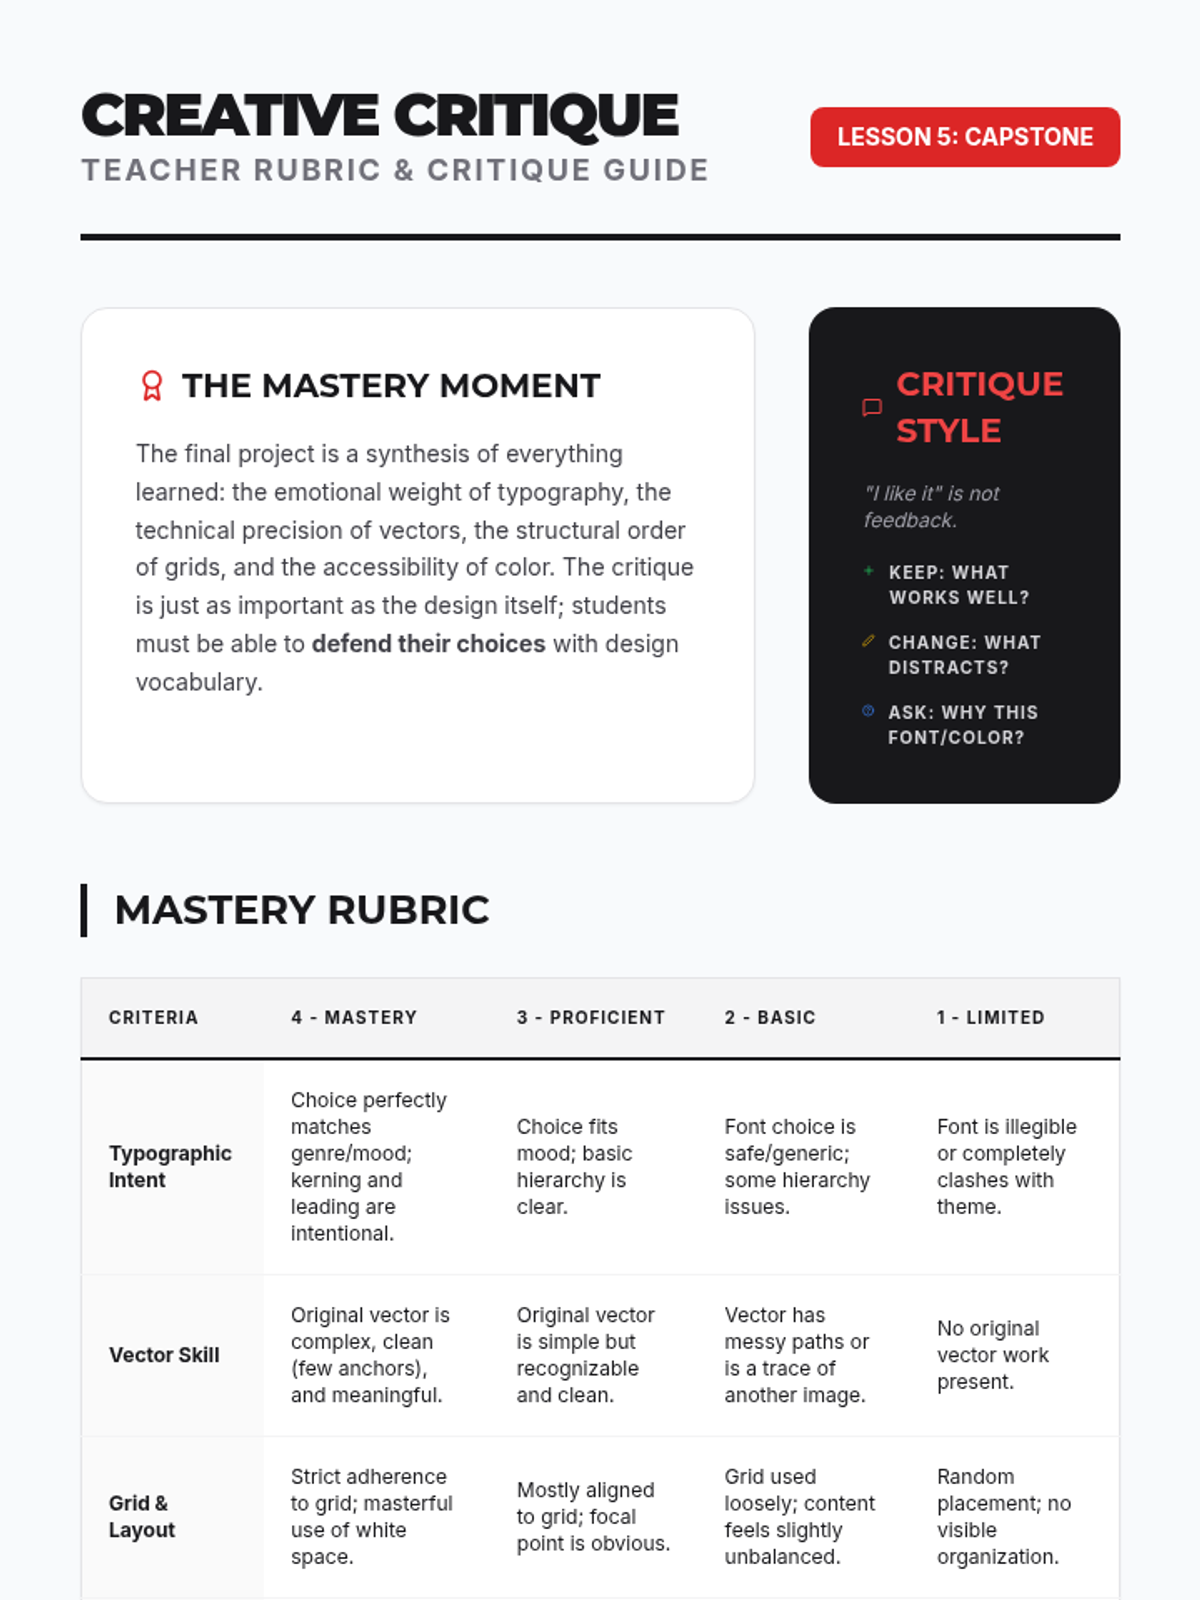
Students combine their typography and color skills to design a motivational quote poster. They must justify their design choices in a brief written reflection, explaining how the font personality and color psychology support the message.
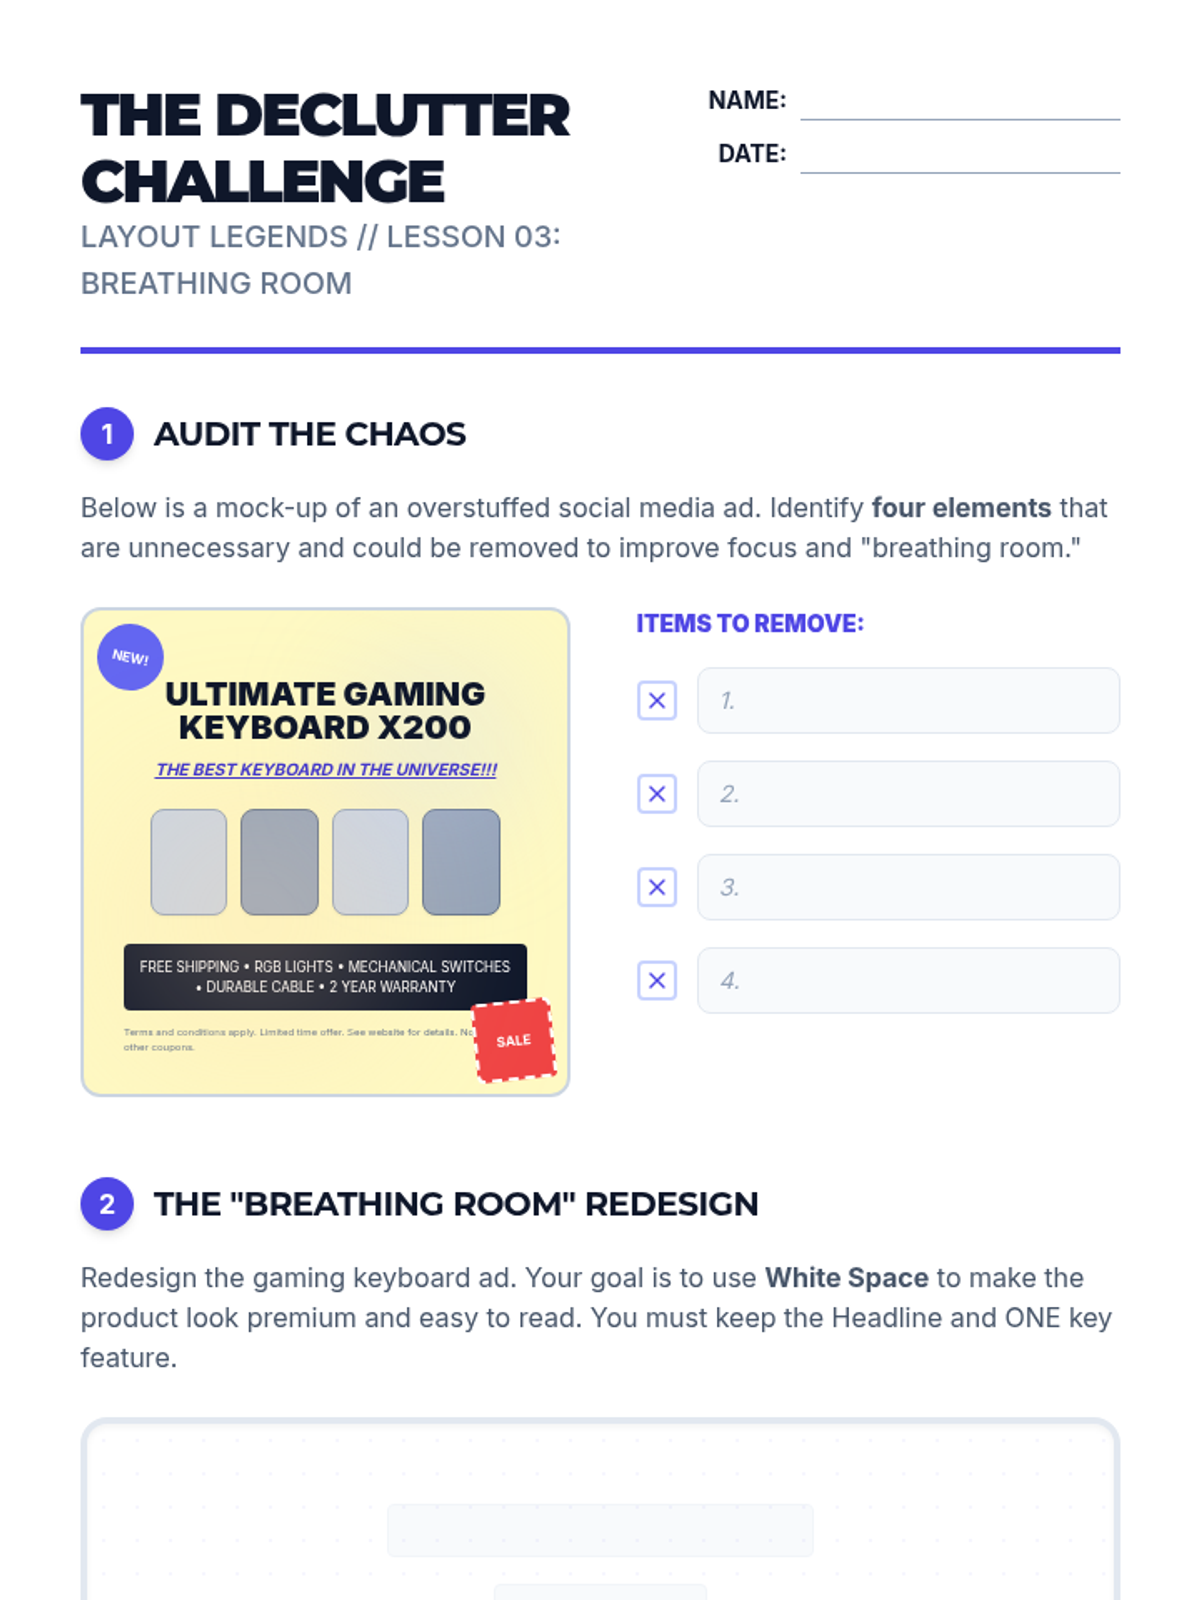
Students learn the power of negative space and the difference between symmetrical and asymmetrical balance to create "breathing room" in their designs.
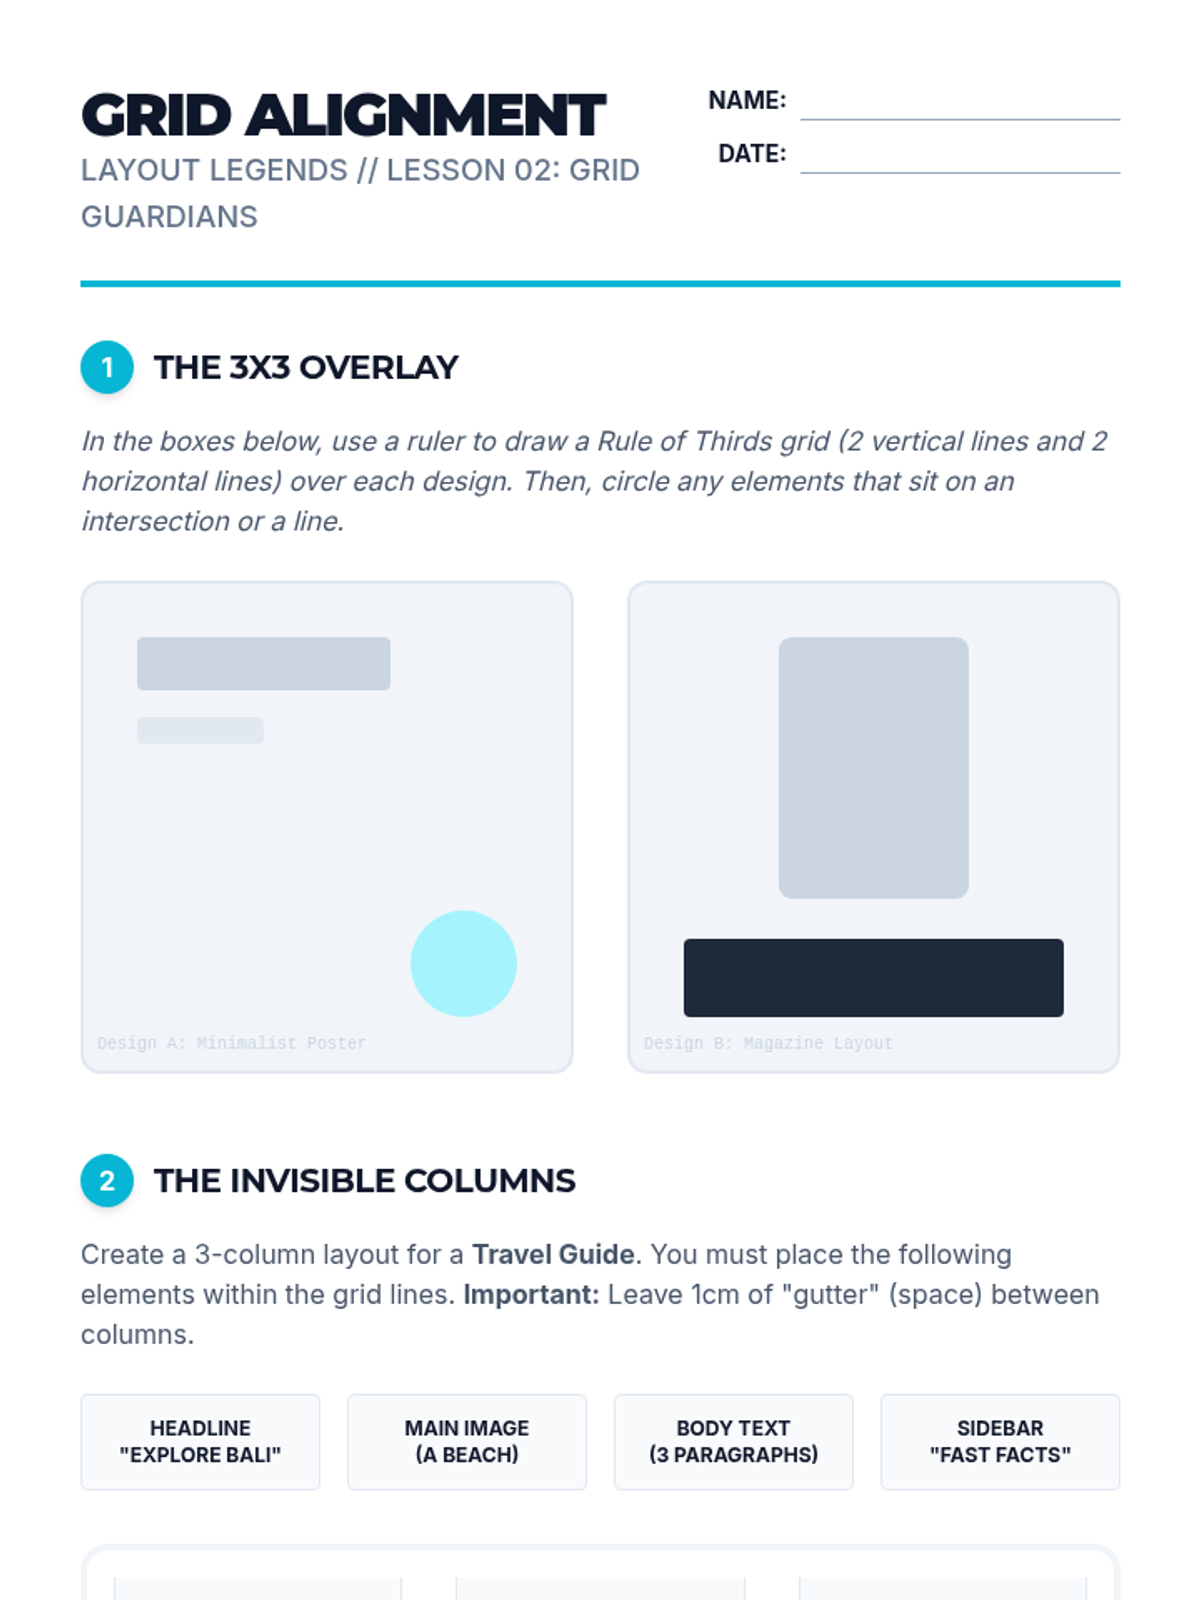
This lesson introduces the invisible structures of design, teaching students to use grids and the Rule of Thirds to create organized and professional layouts.
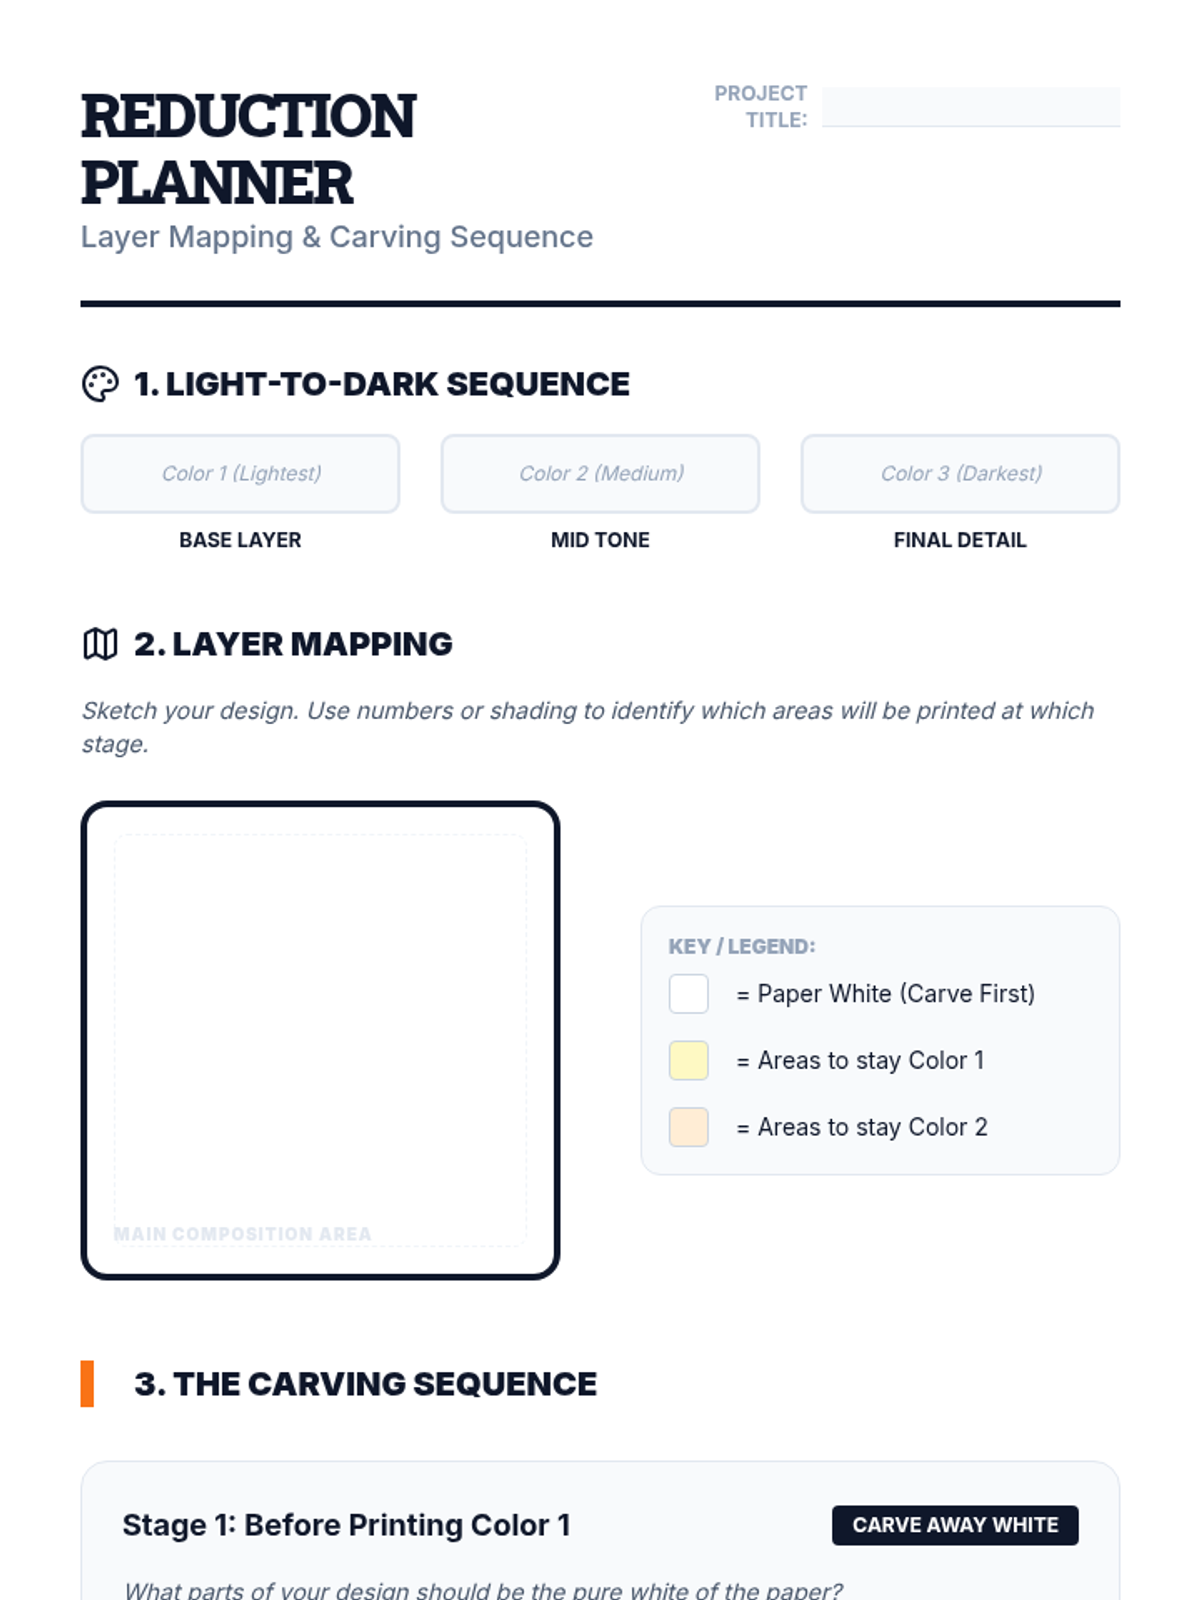
Students are introduced to the reduction printing method, where a single block is carved and printed multiple times to create a multi-colored image, requiring careful planning and 'destructive' carving.
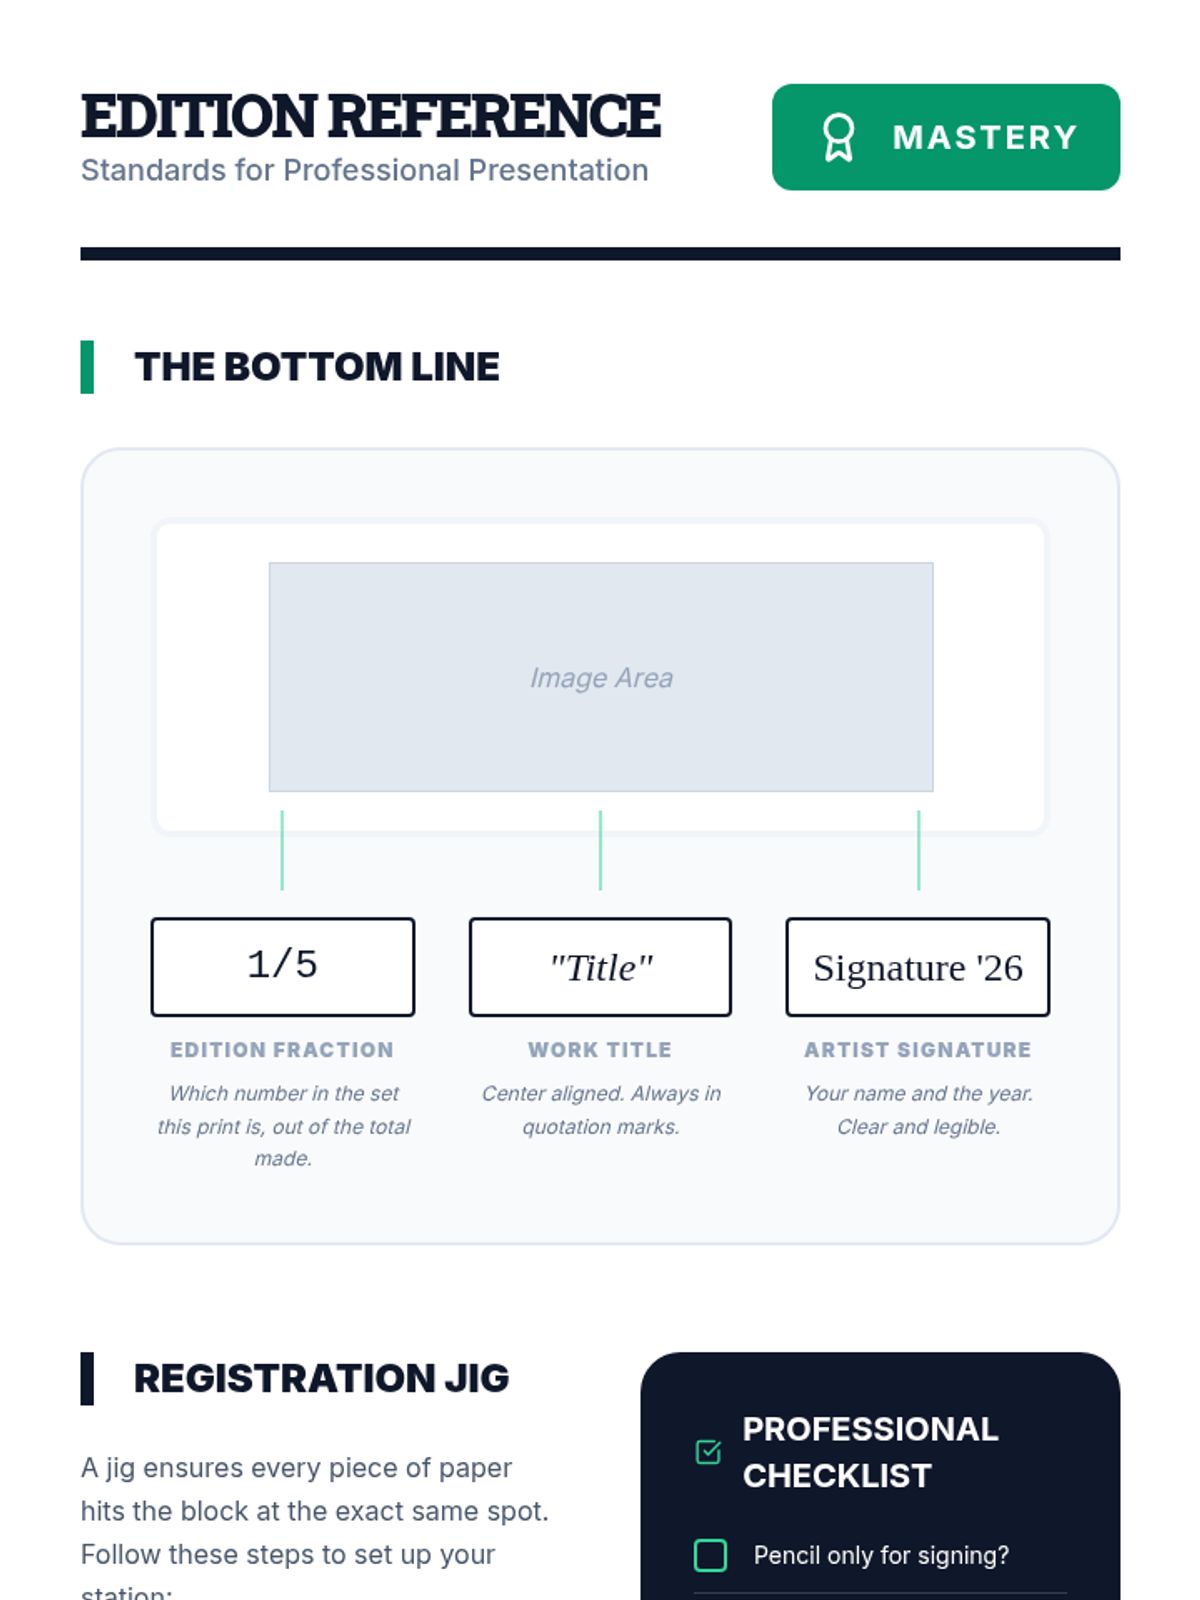
This lesson covers the professional standards of printmaking, including paper registration for consistent alignment and the formal conventions of signing and numbering an edition.
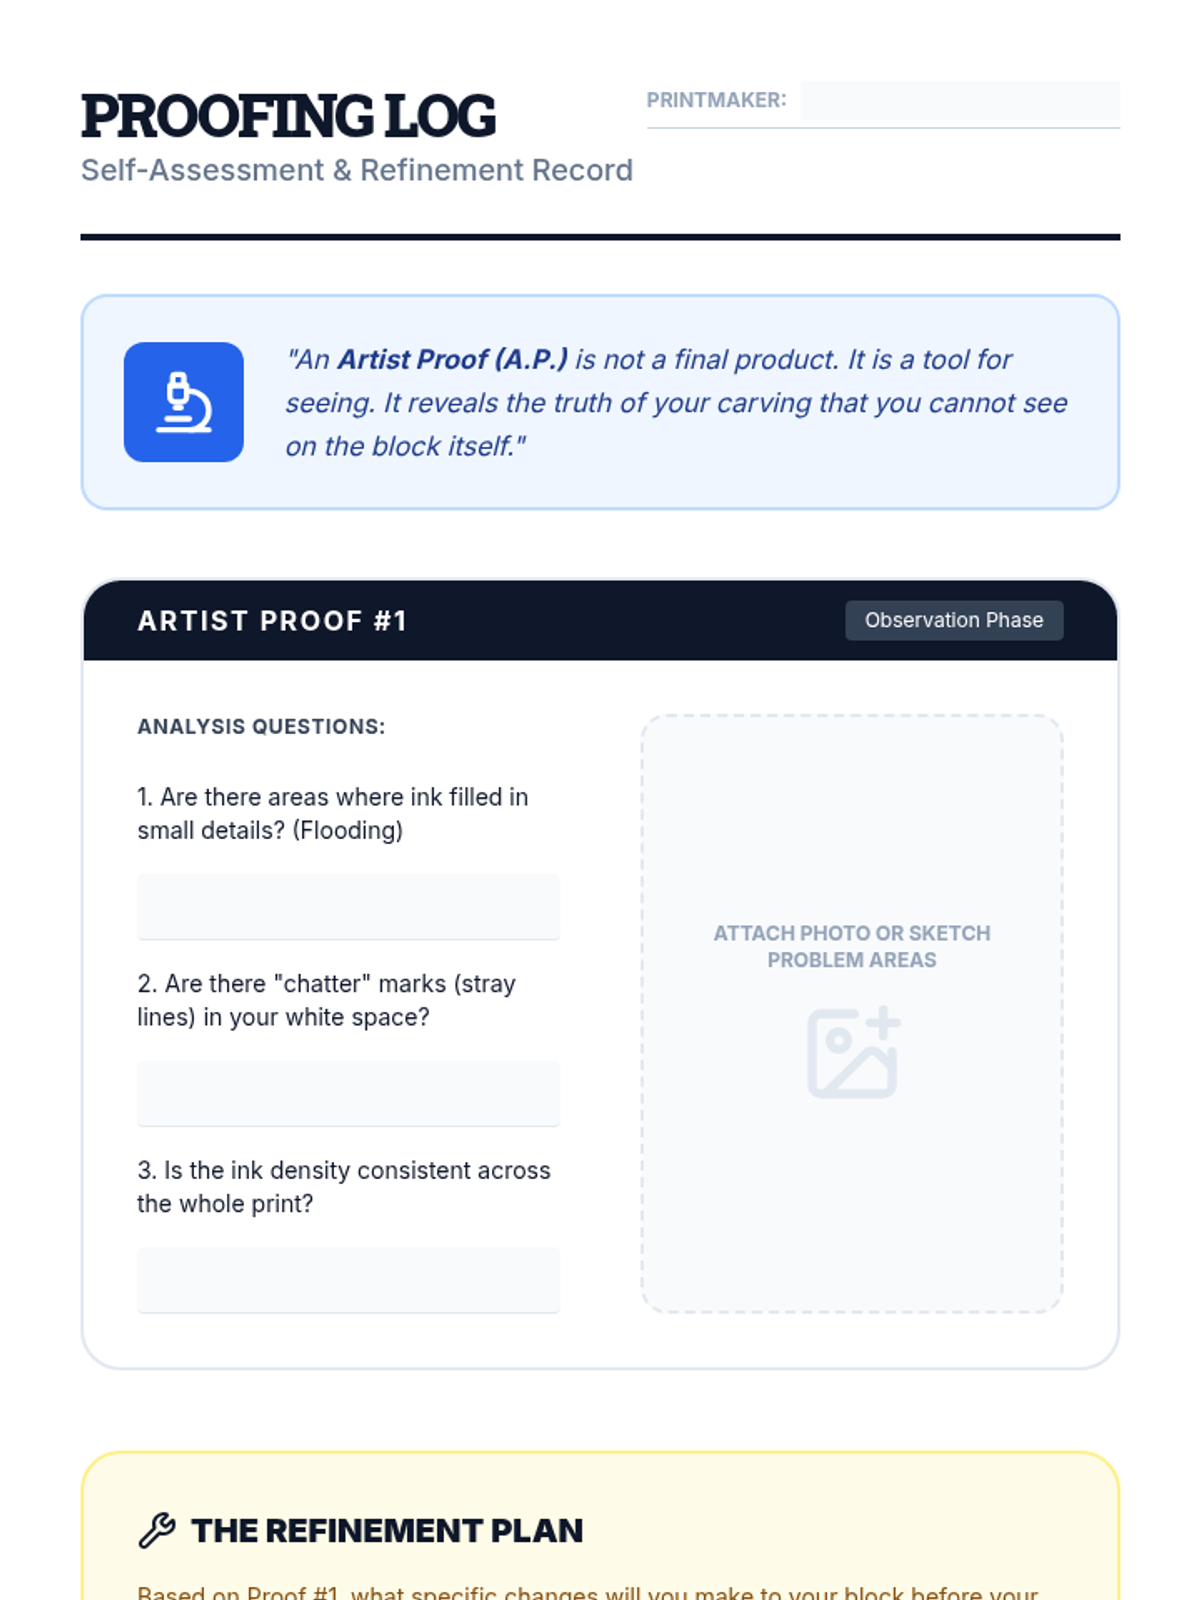
Students master the art of inking a block, identifying the correct ink consistency and pressure. They pull artist proofs to refine their carvings before final printing.
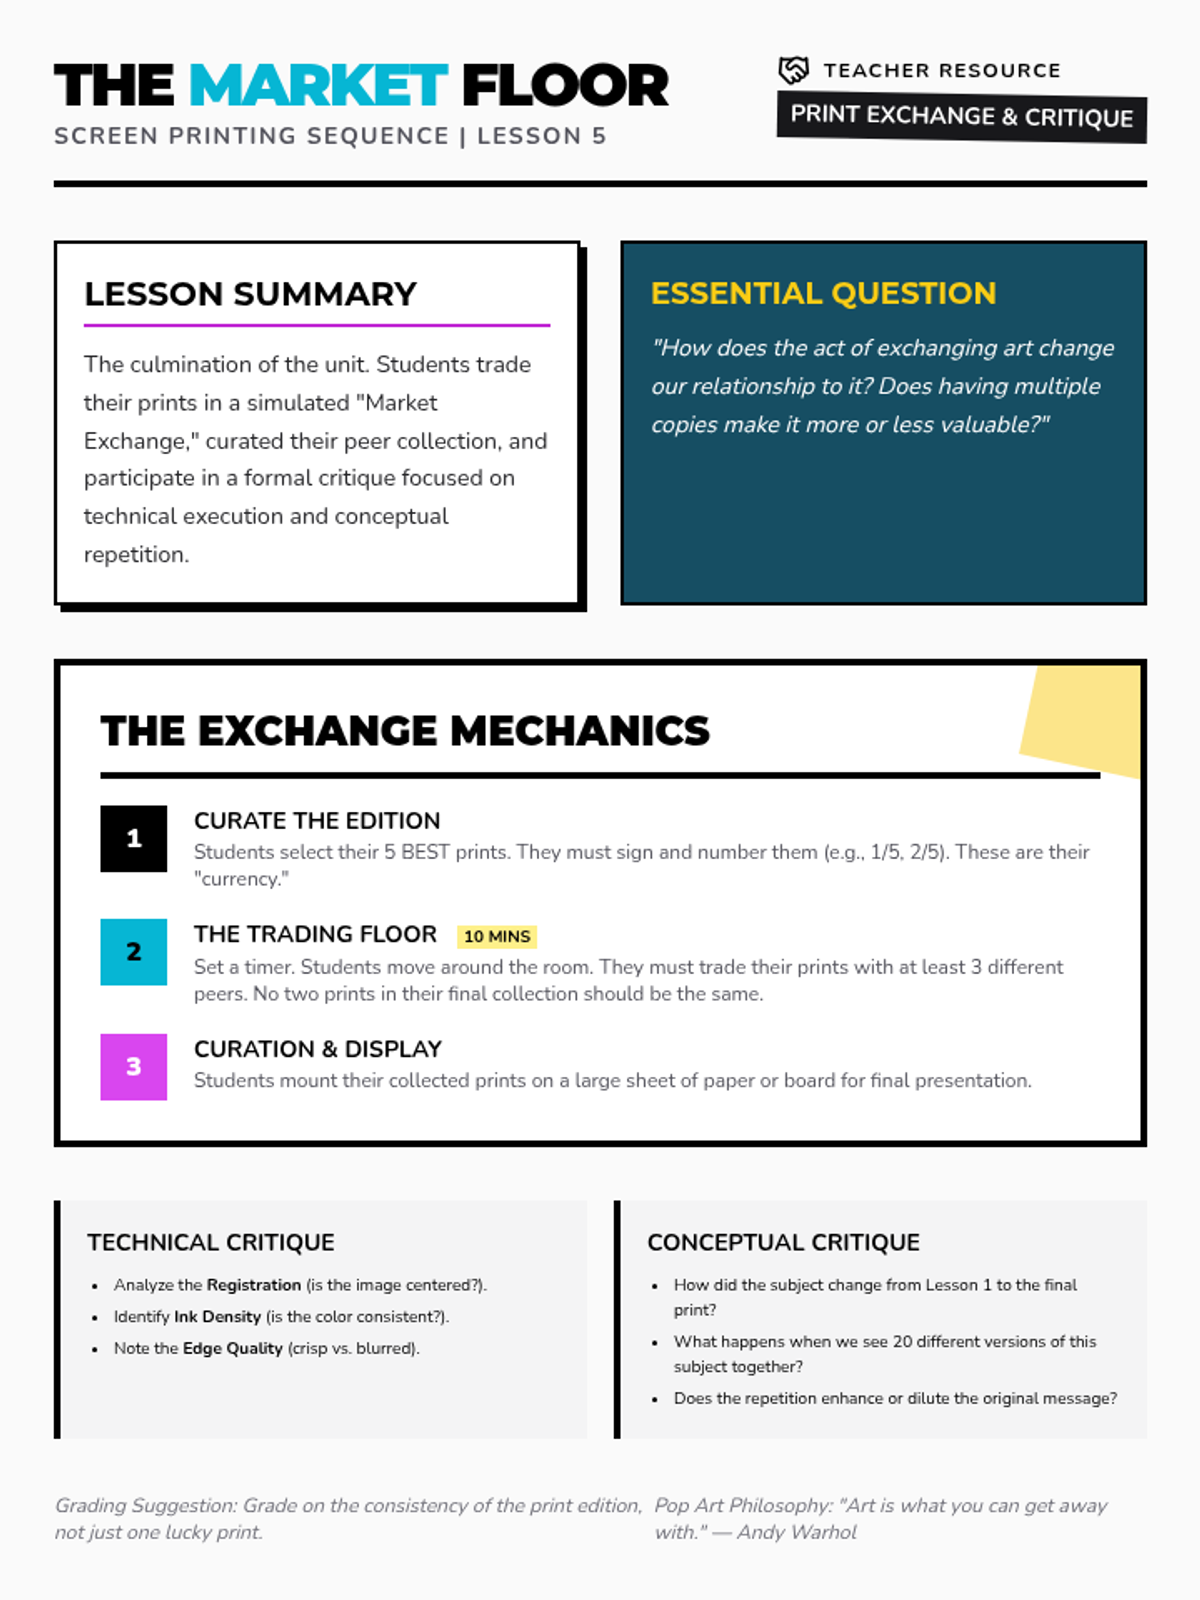
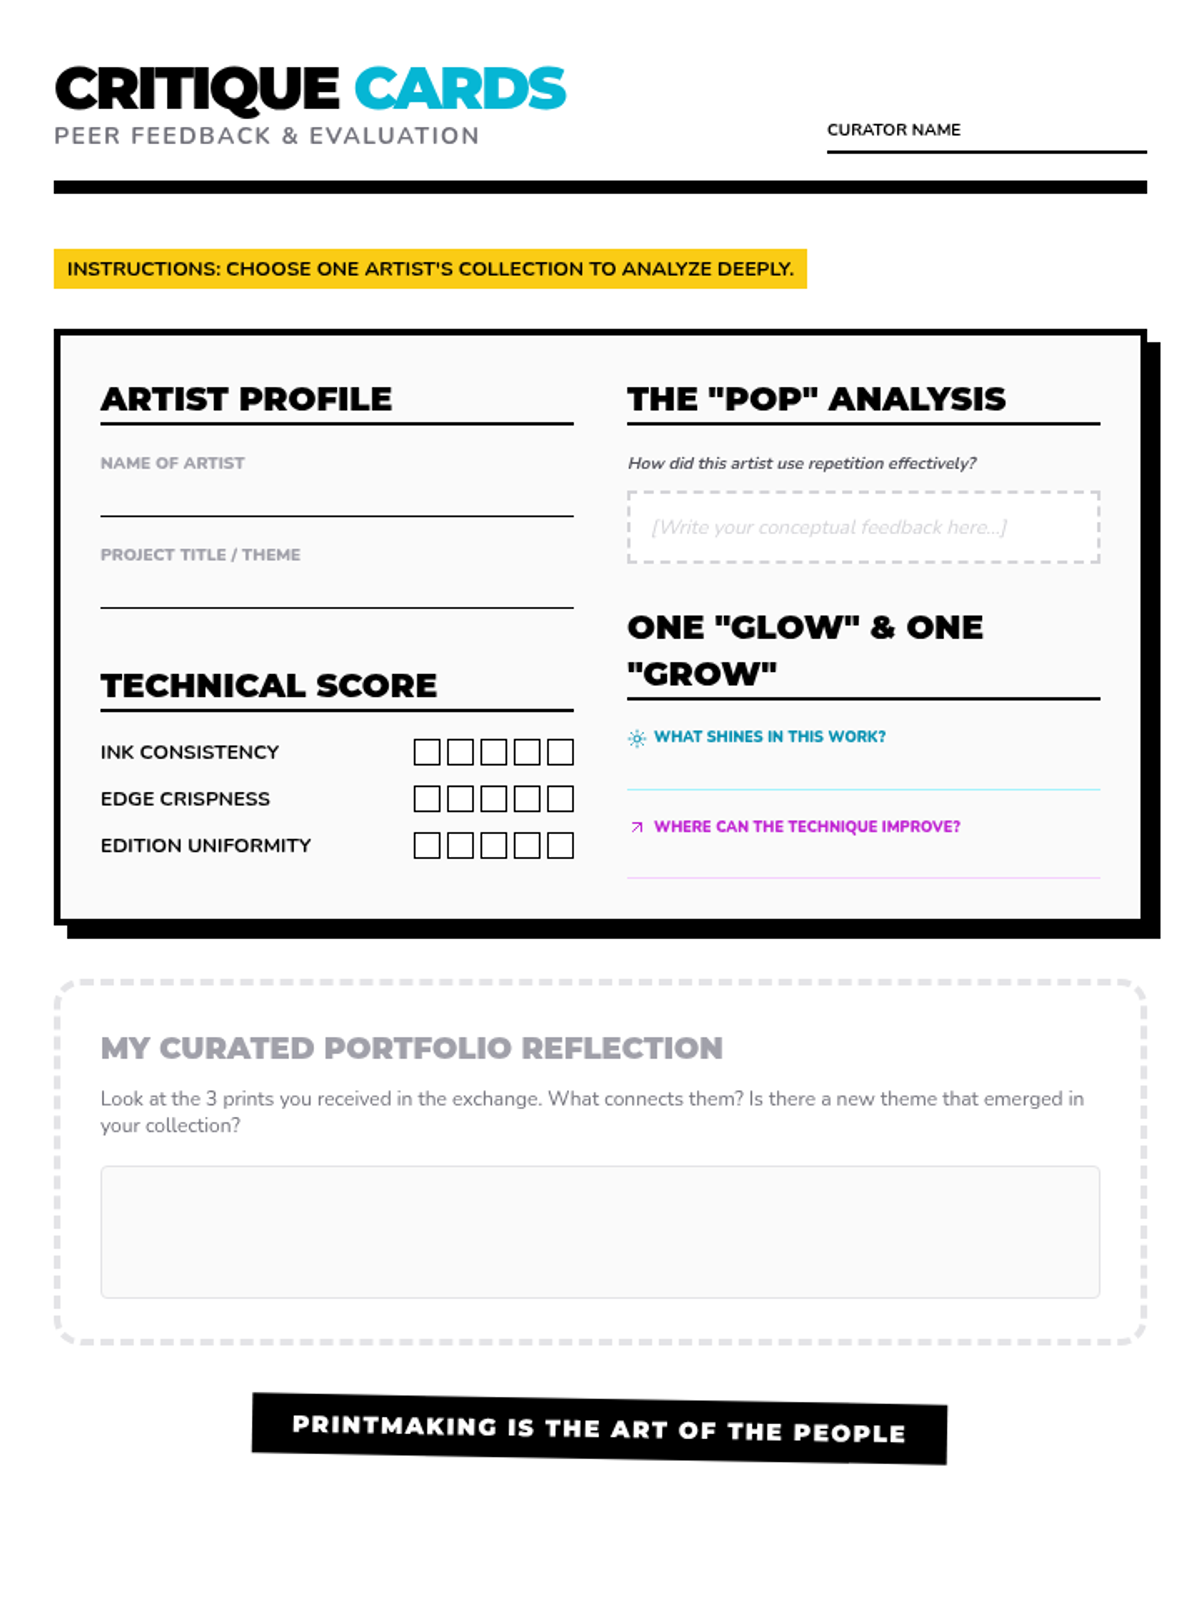
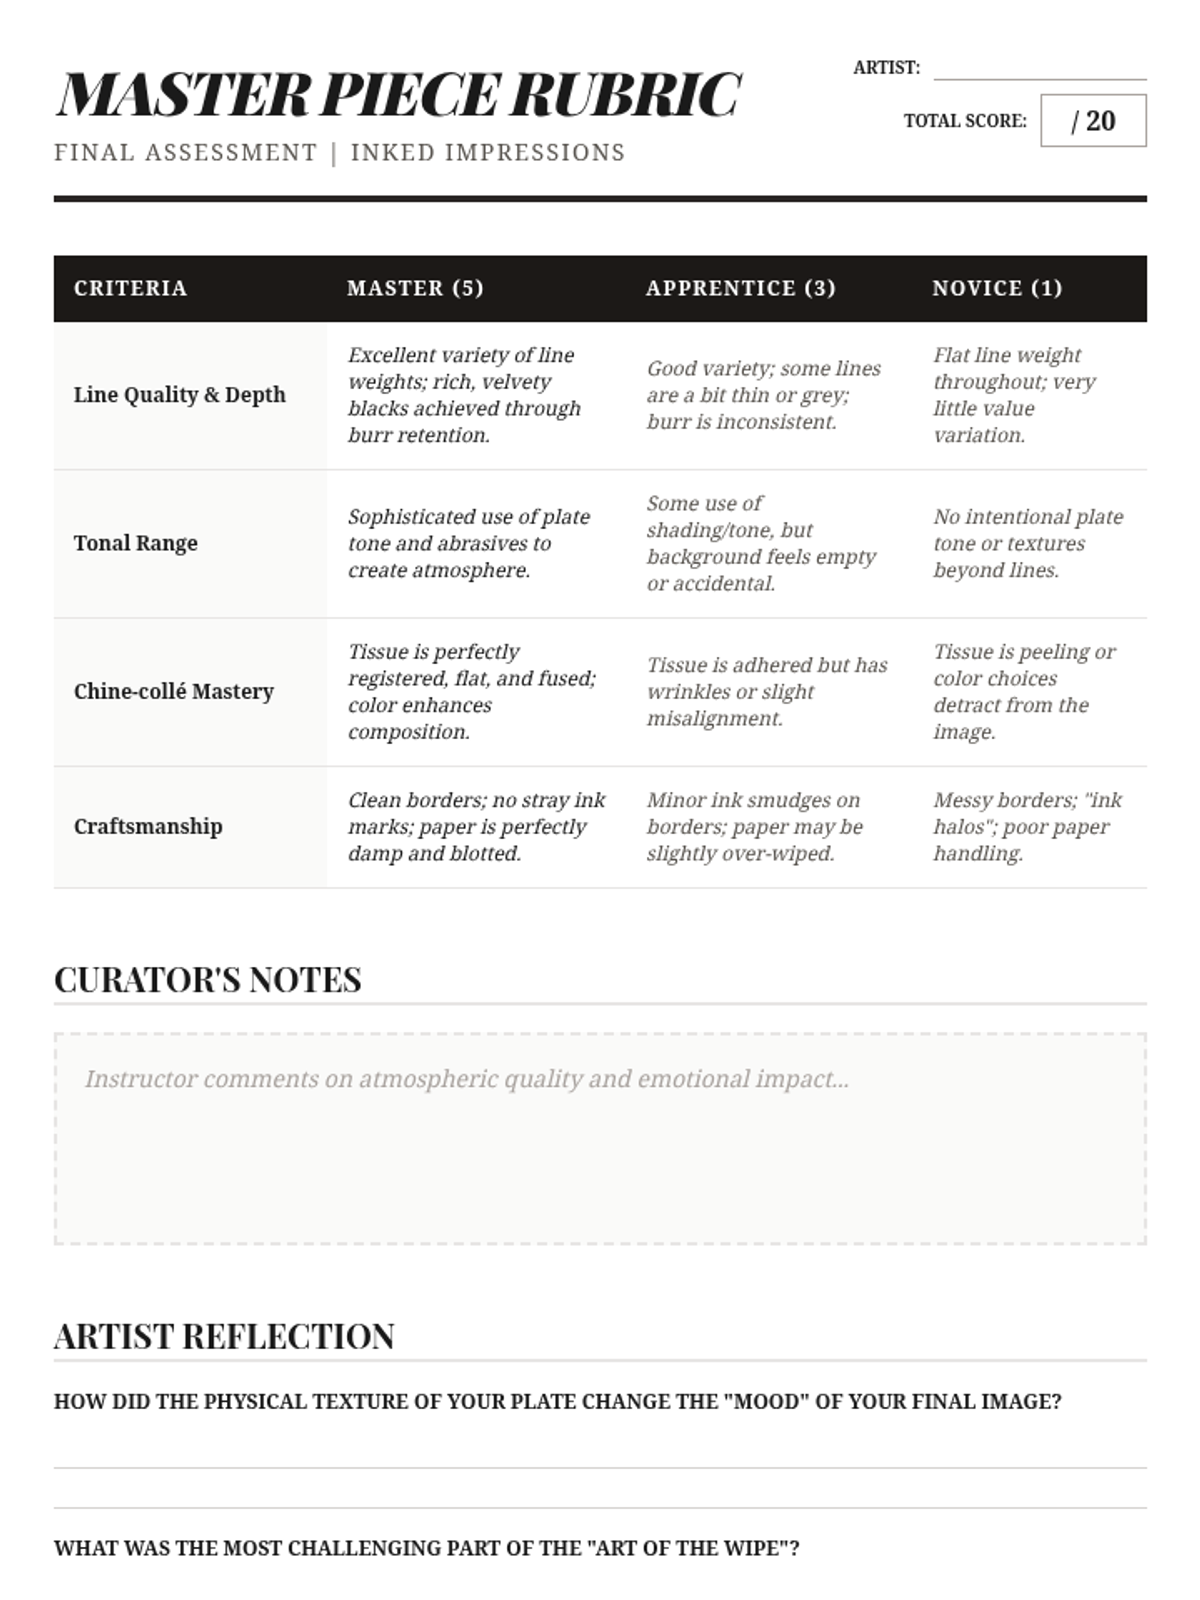
The culmination of the unit where students trade their prints, curate a portfolio, and engage in a formal critique of their technical and conceptual work.
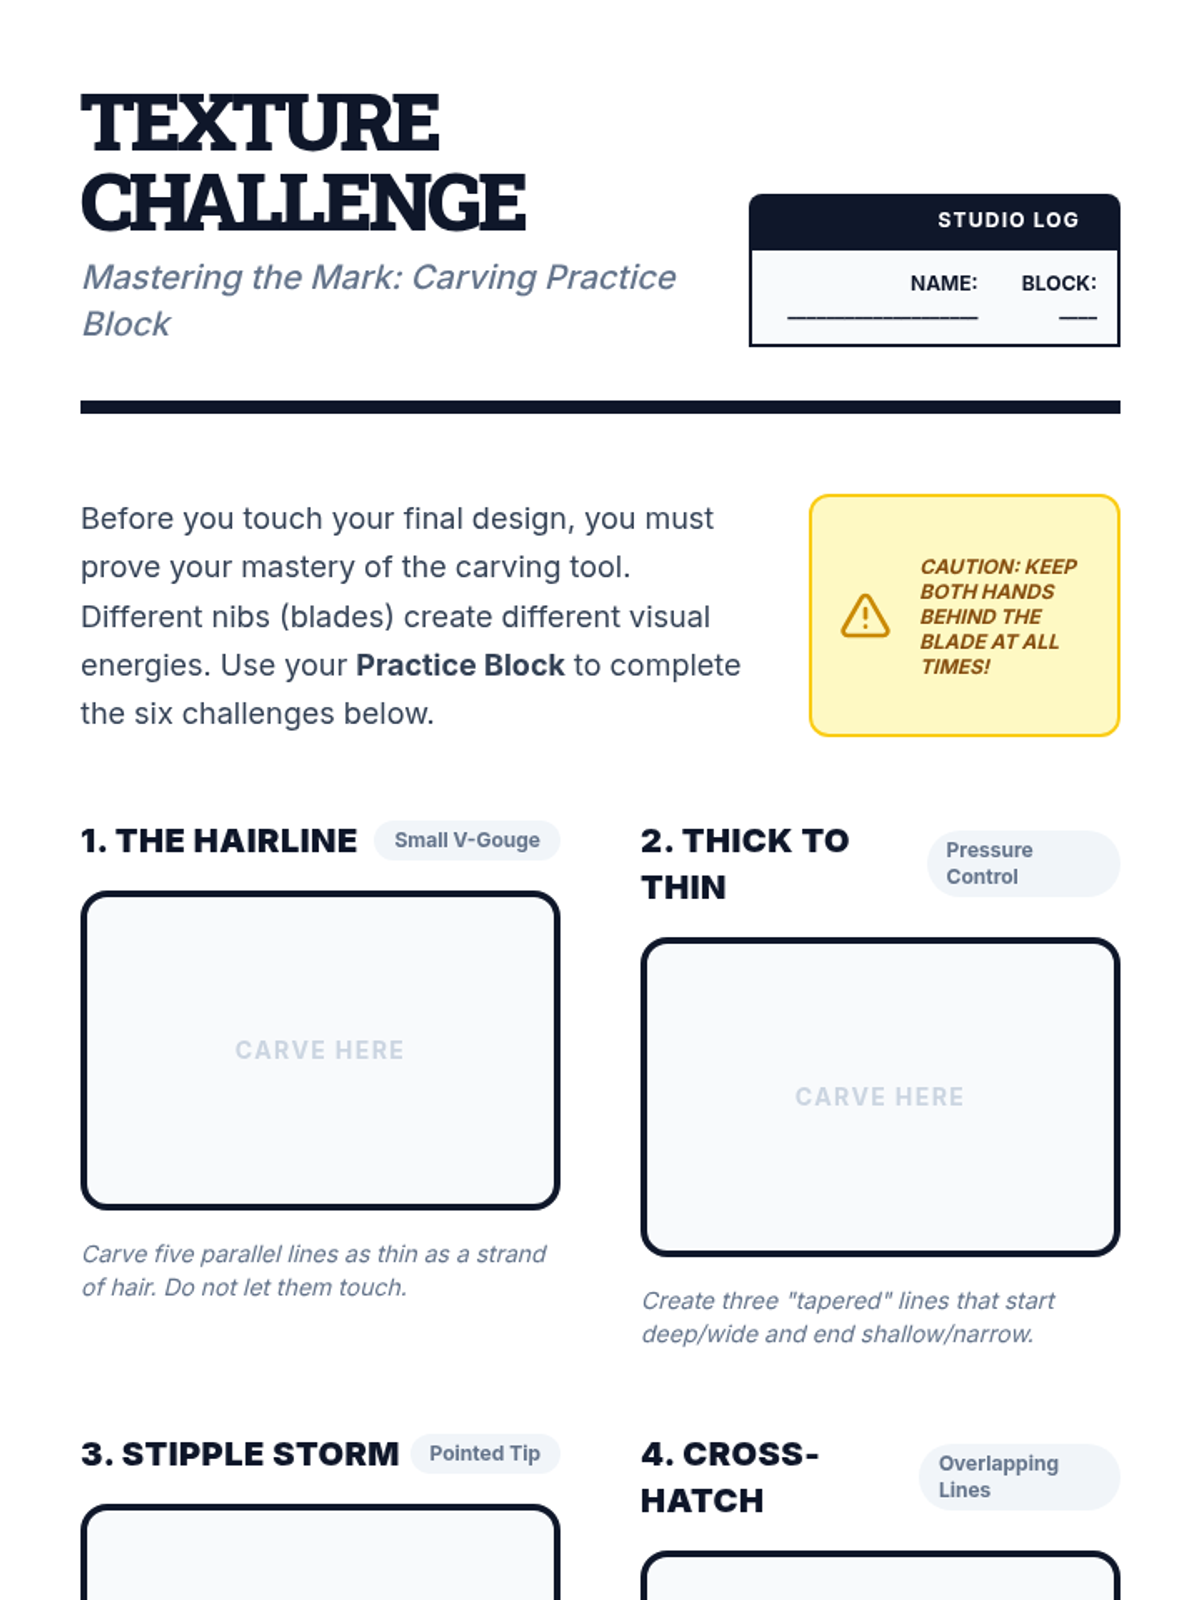
Focusing on tool safety and technical proficiency, students learn to use linoleum cutters and bench hooks. They practice various carving techniques to create diverse textures and line weights.
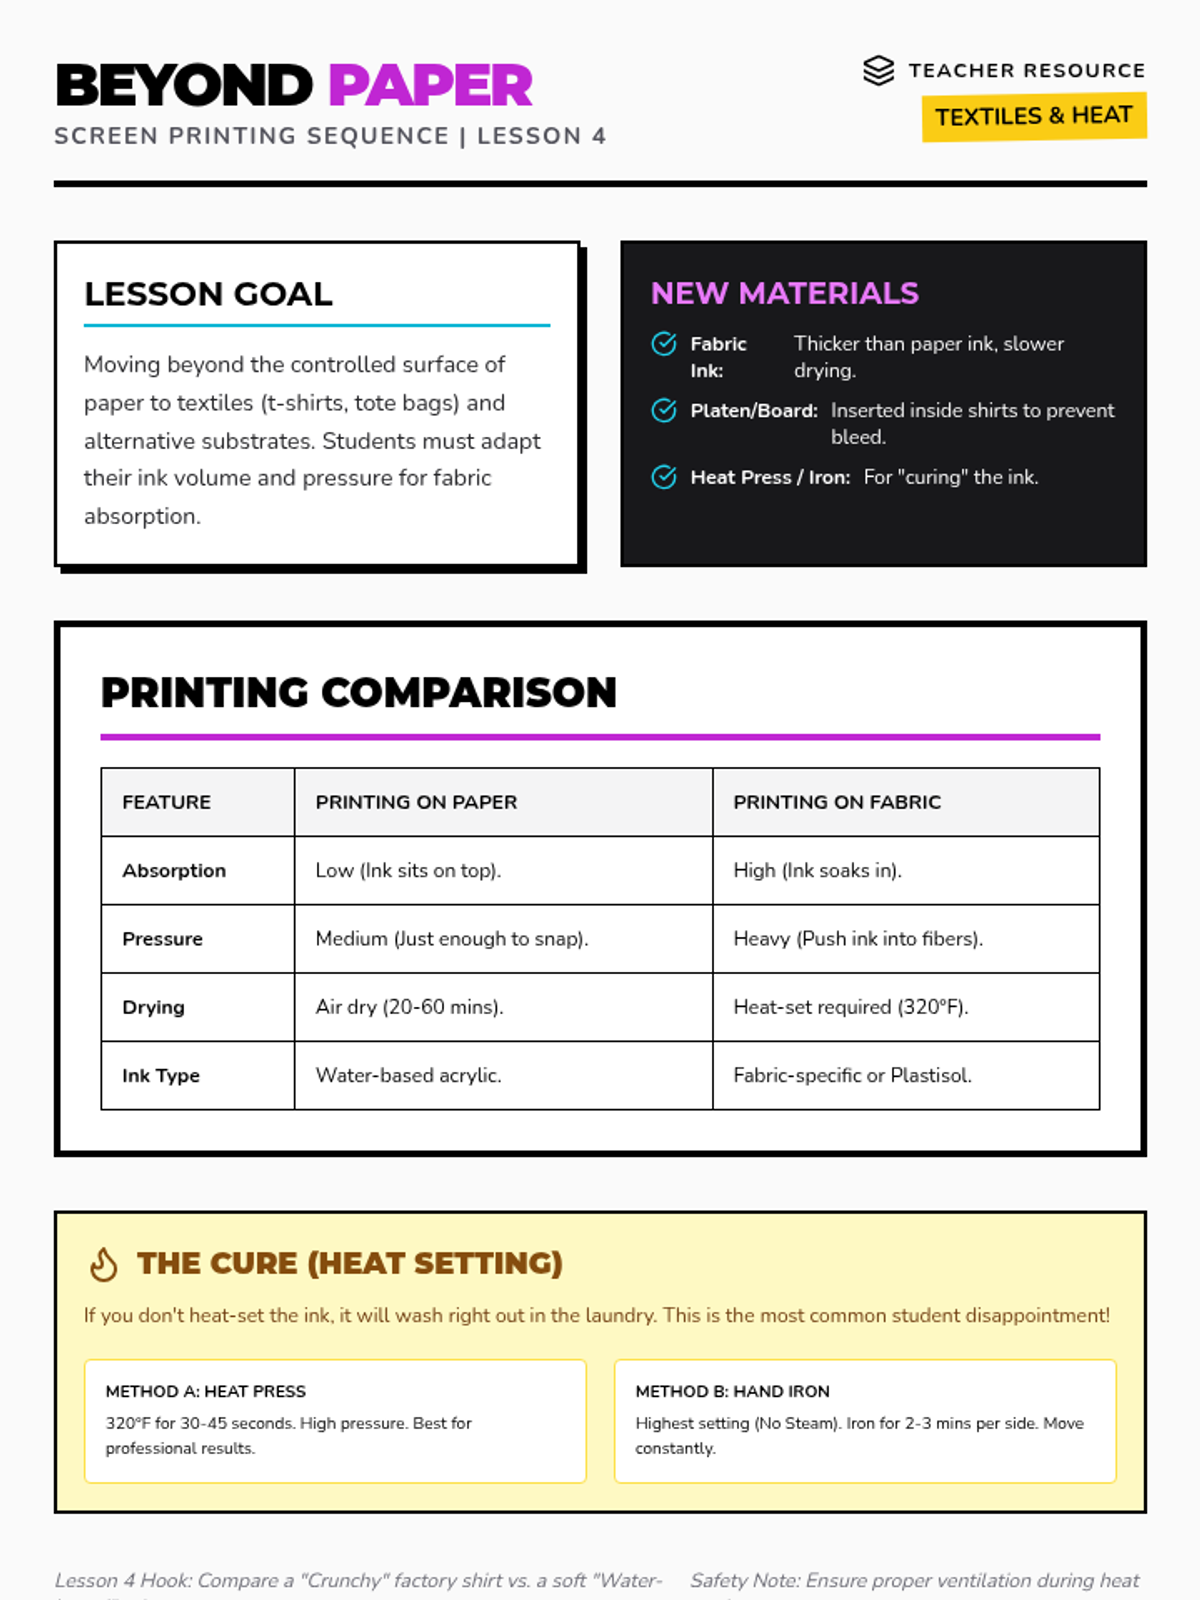
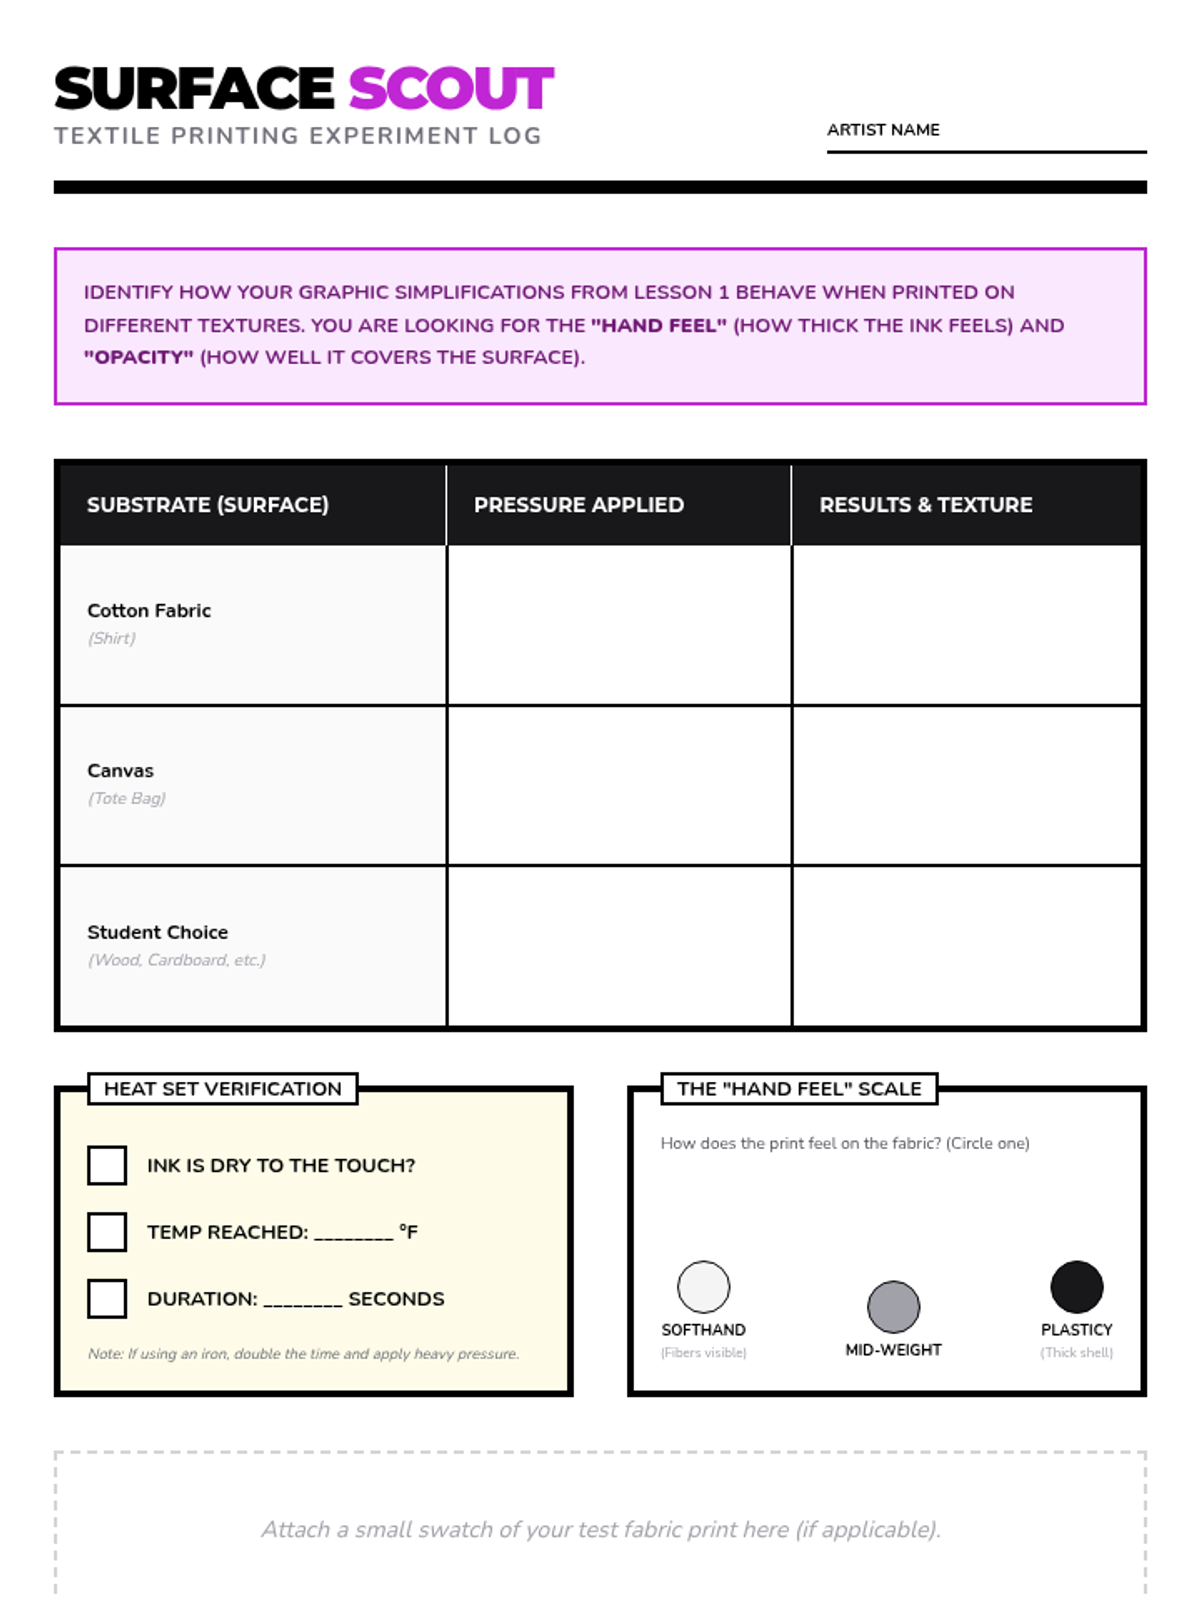
Exploring materiality by printing on textiles and other surfaces, requiring adjustments in ink management and heat setting.
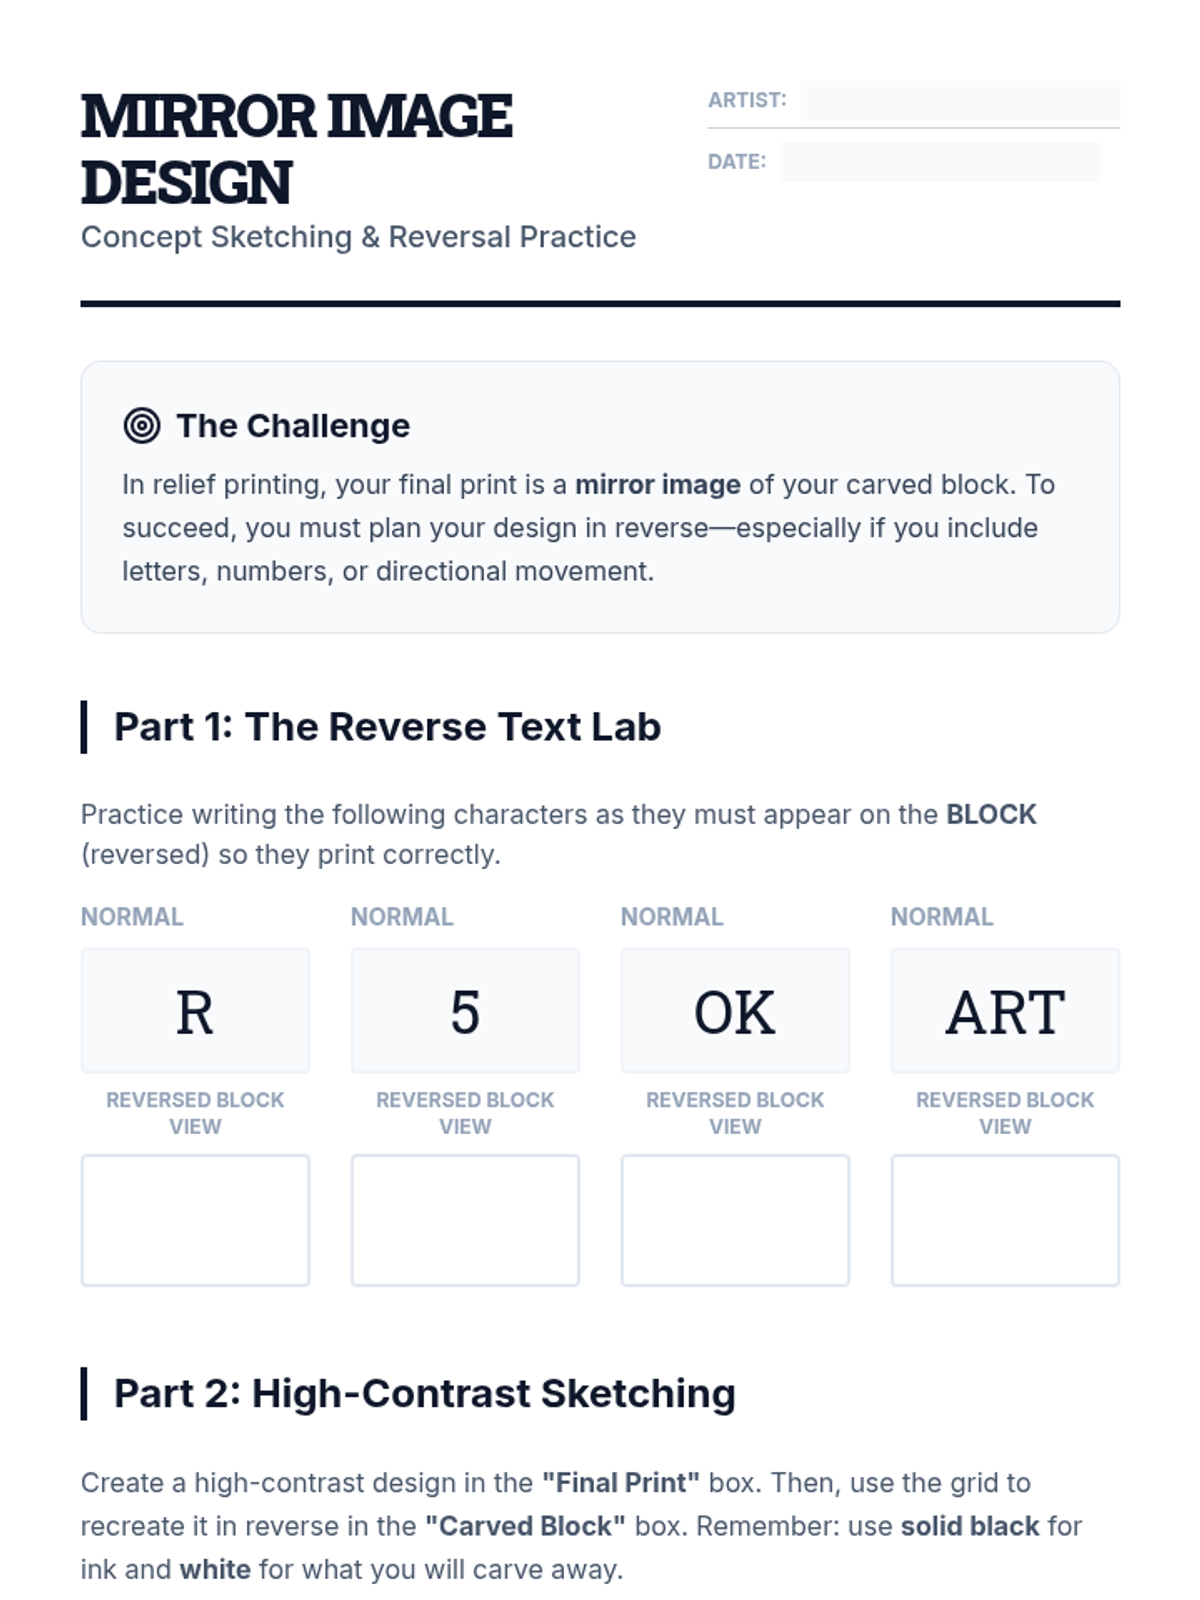
Students explore high-contrast design and the concept of image reversal in relief printing. They analyze historical woodblocks and develop designs that account for the mirrored nature of the medium.
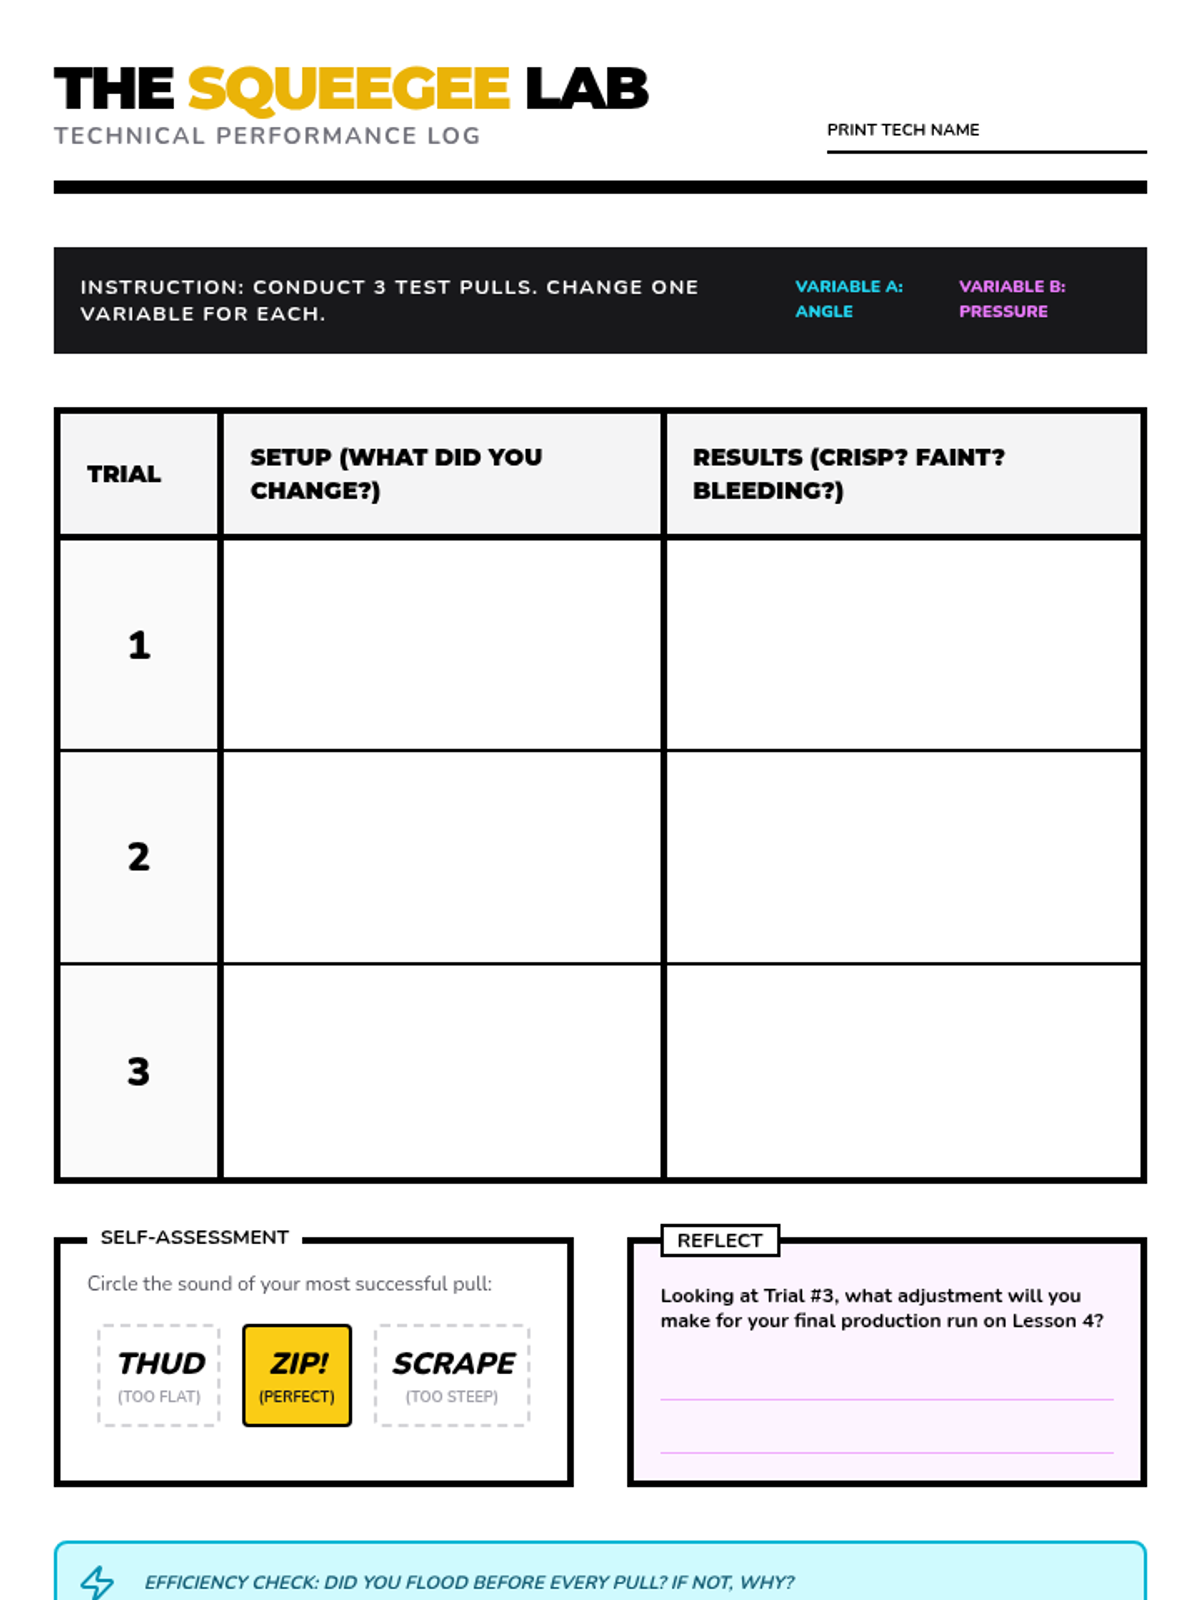
A technical workshop on the physics of the squeegee, focusing on angle, pressure, and the crucial 'flood stroke' technique.
Students transition from concept to stencil, learning to manage negative space and prepare screens using paper masks and drawing fluid.
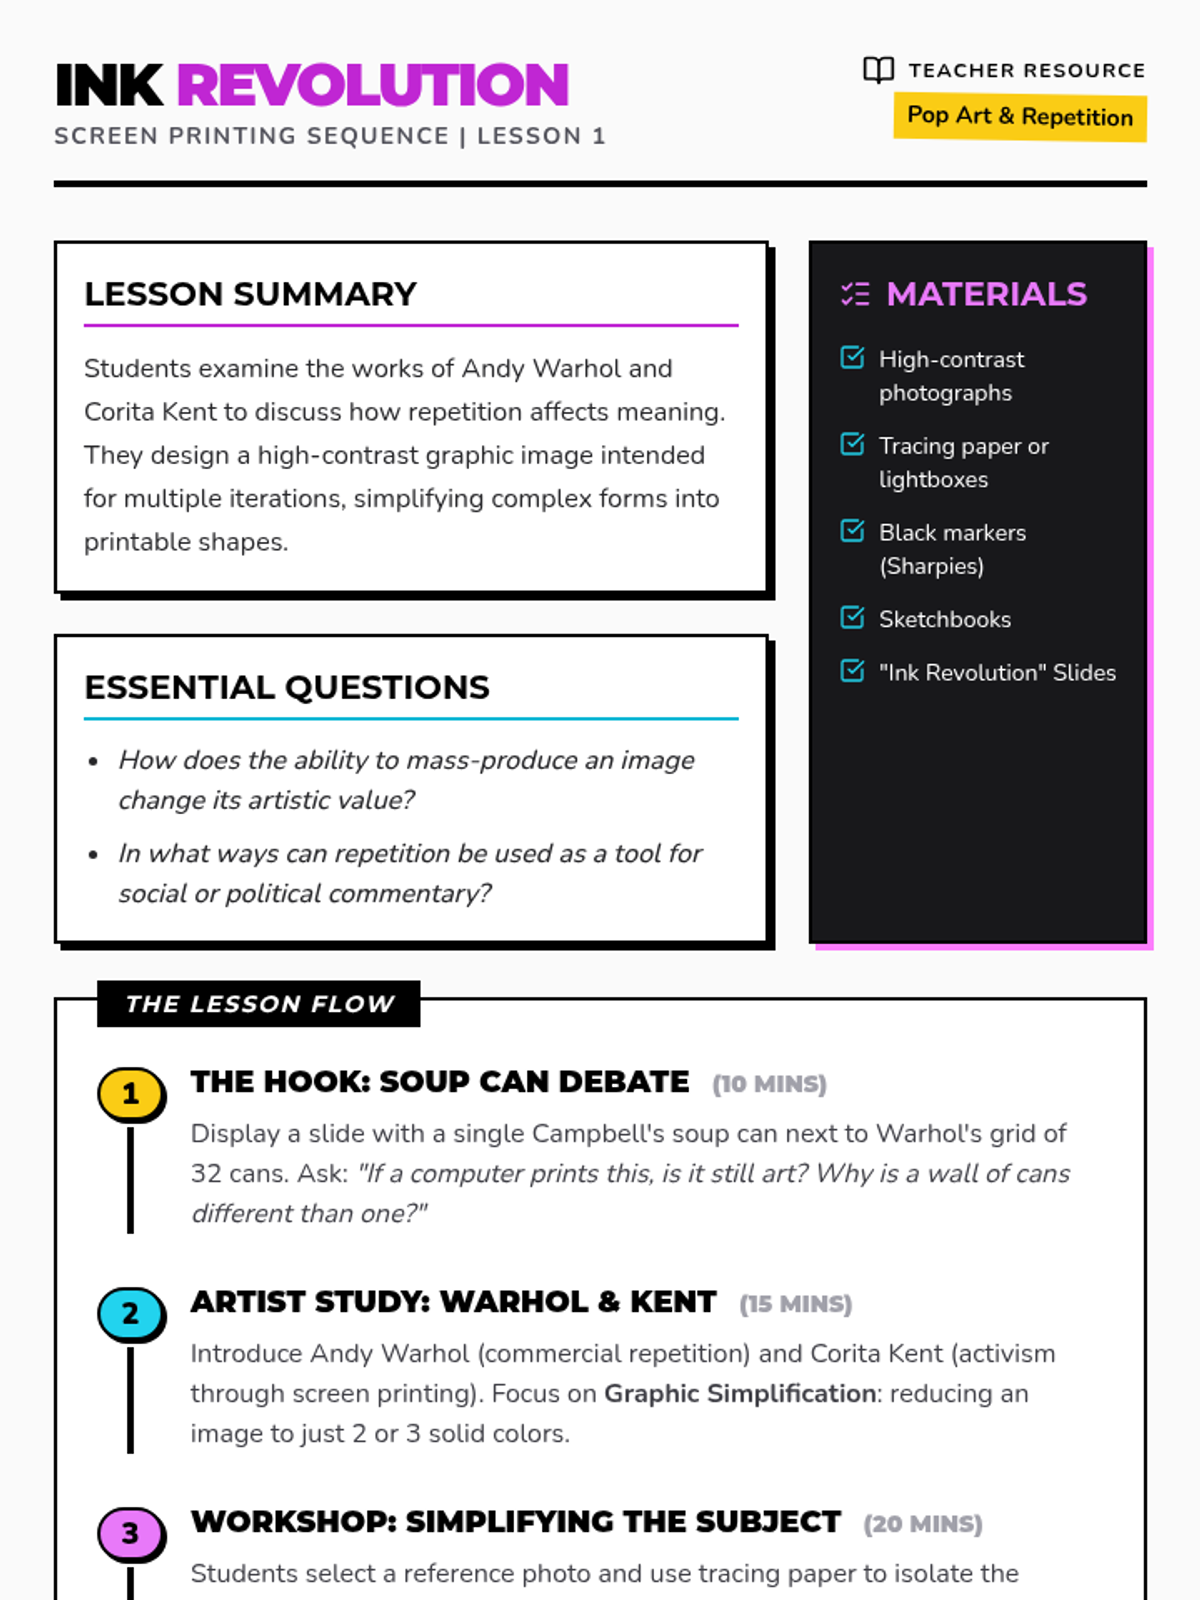
Students investigate the aesthetic and conceptual impact of repetition in art through the works of Warhol and Kent, then design their own high-contrast graphic image.
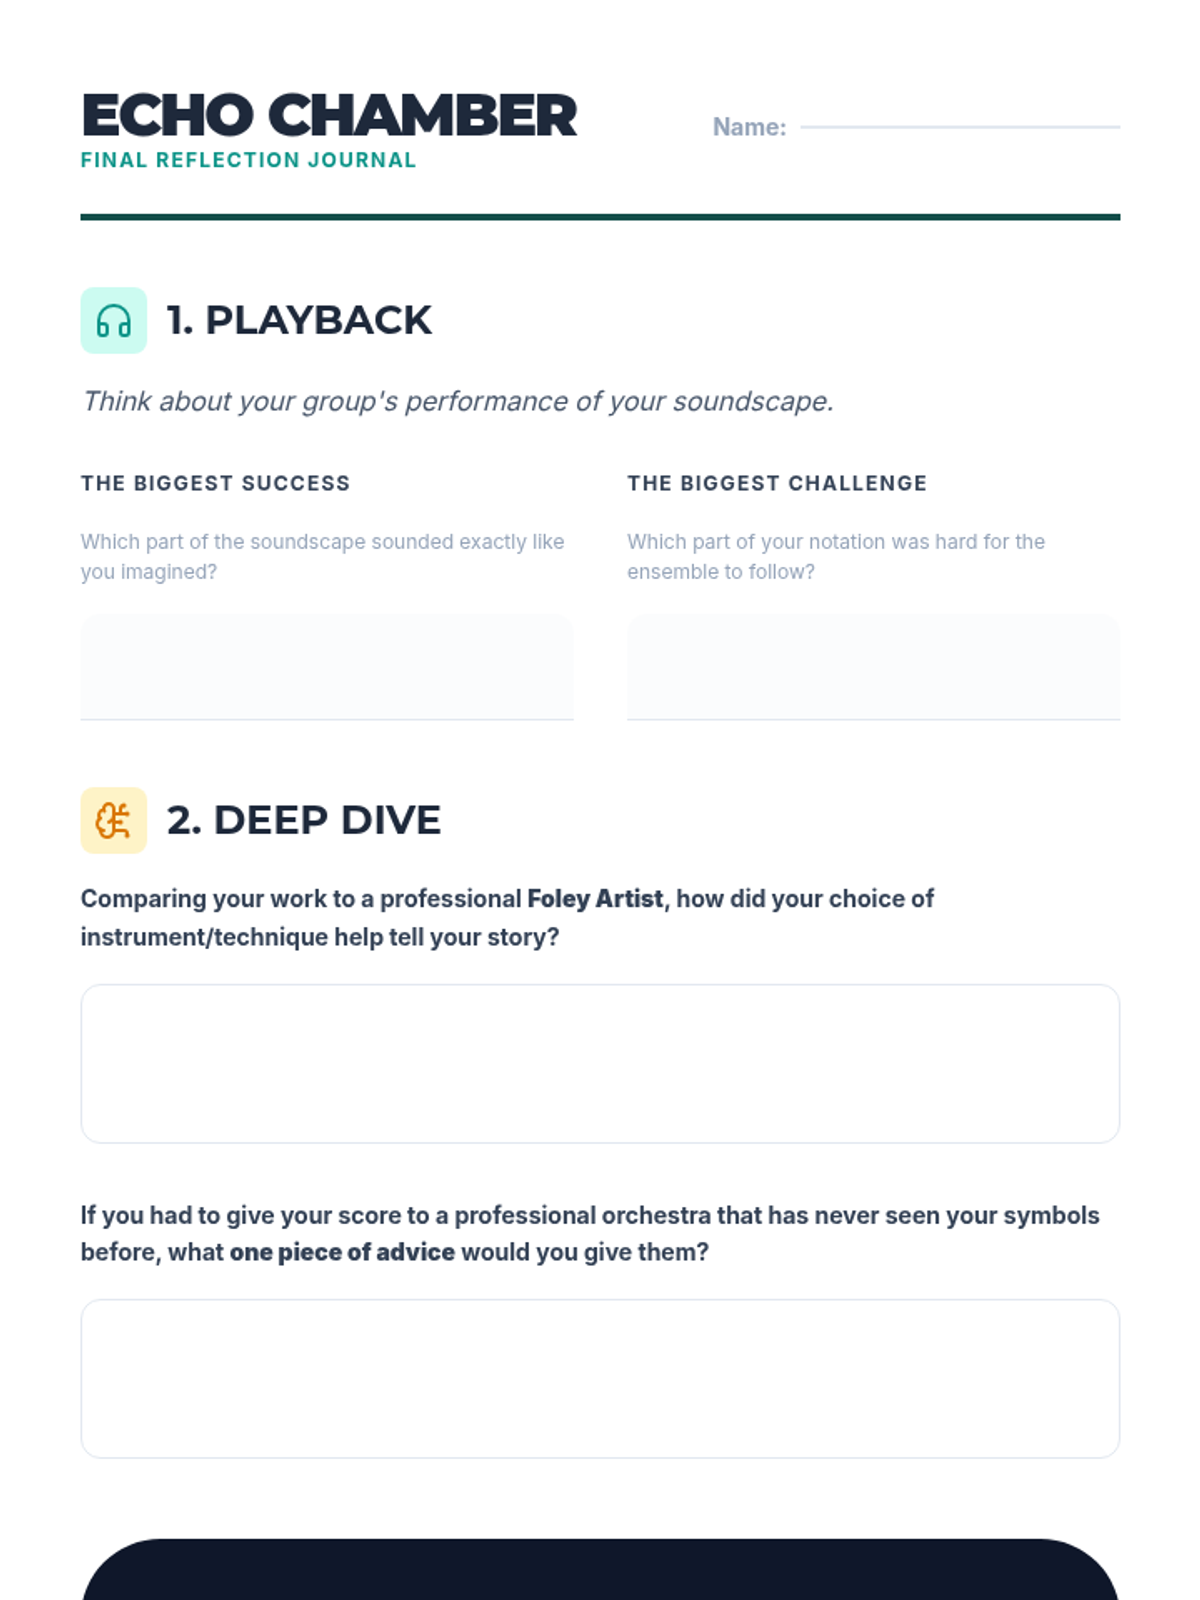
Students reflect on their compositions and performances, comparing their work to professional Foley artists.
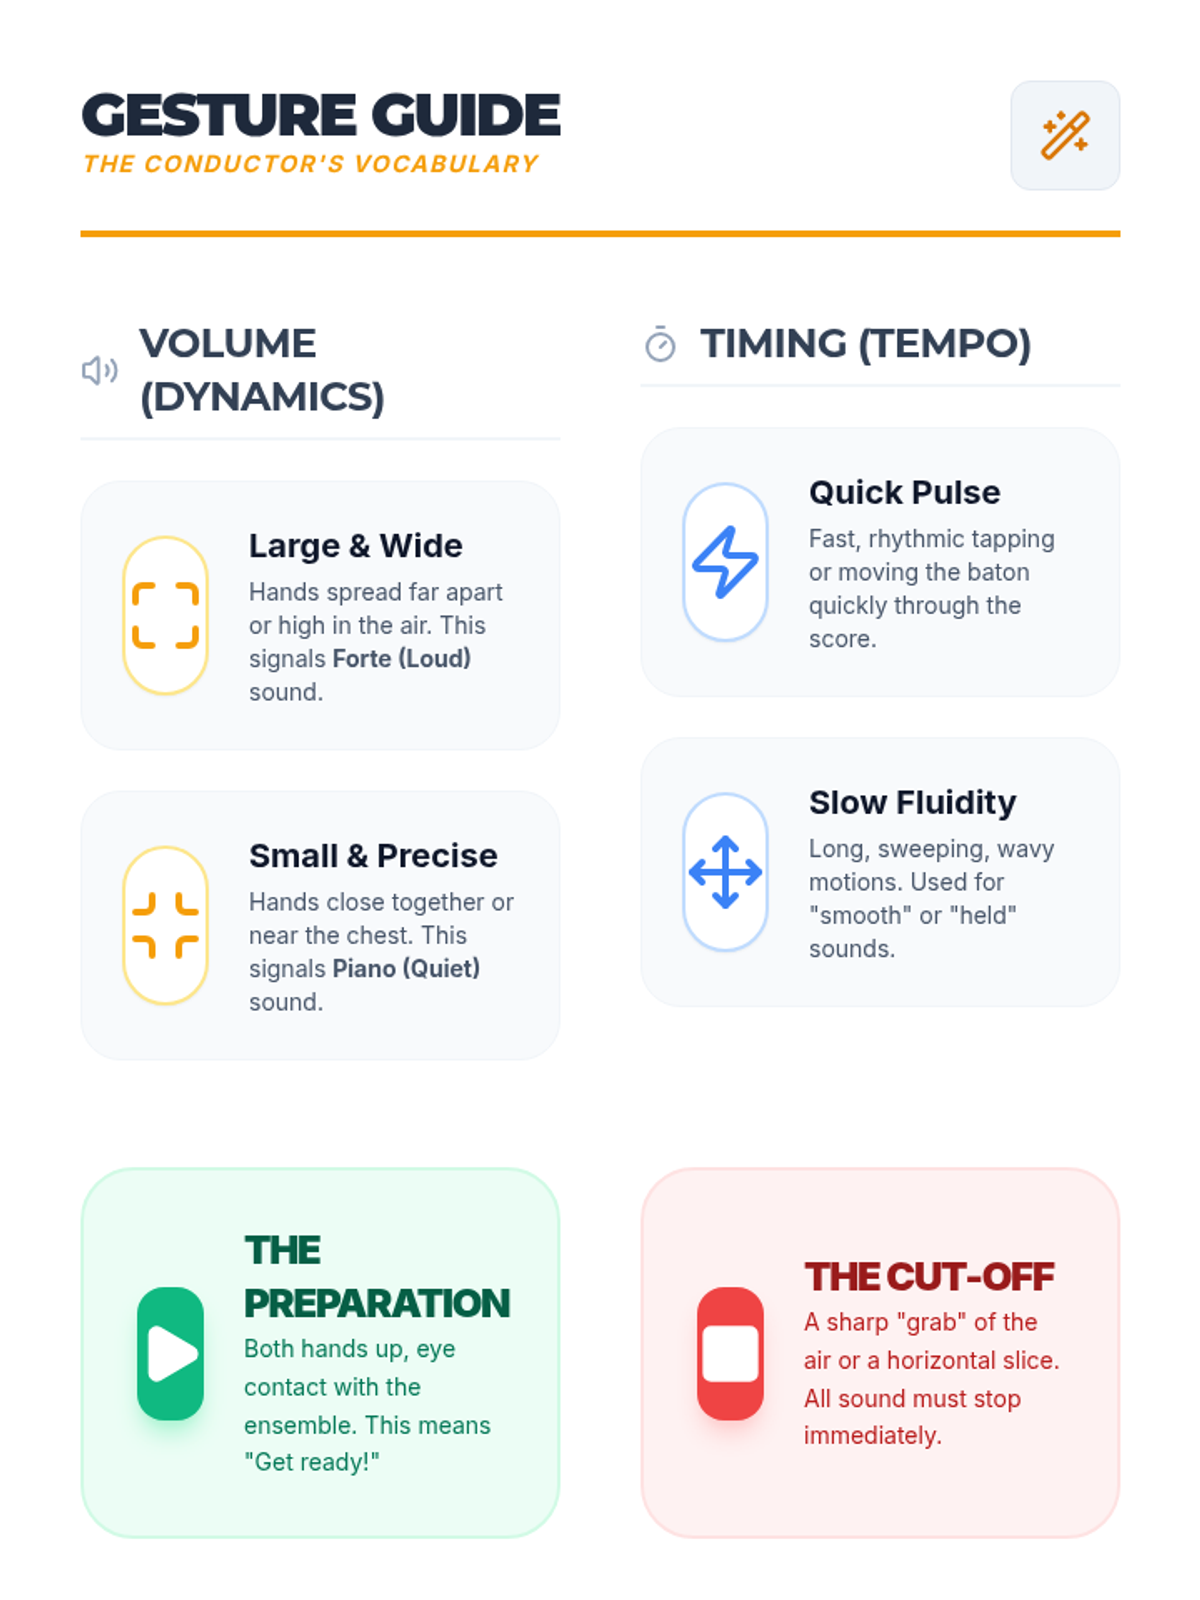
Young composers practice conducting their scores, using gestures to lead their peers through the visual music.
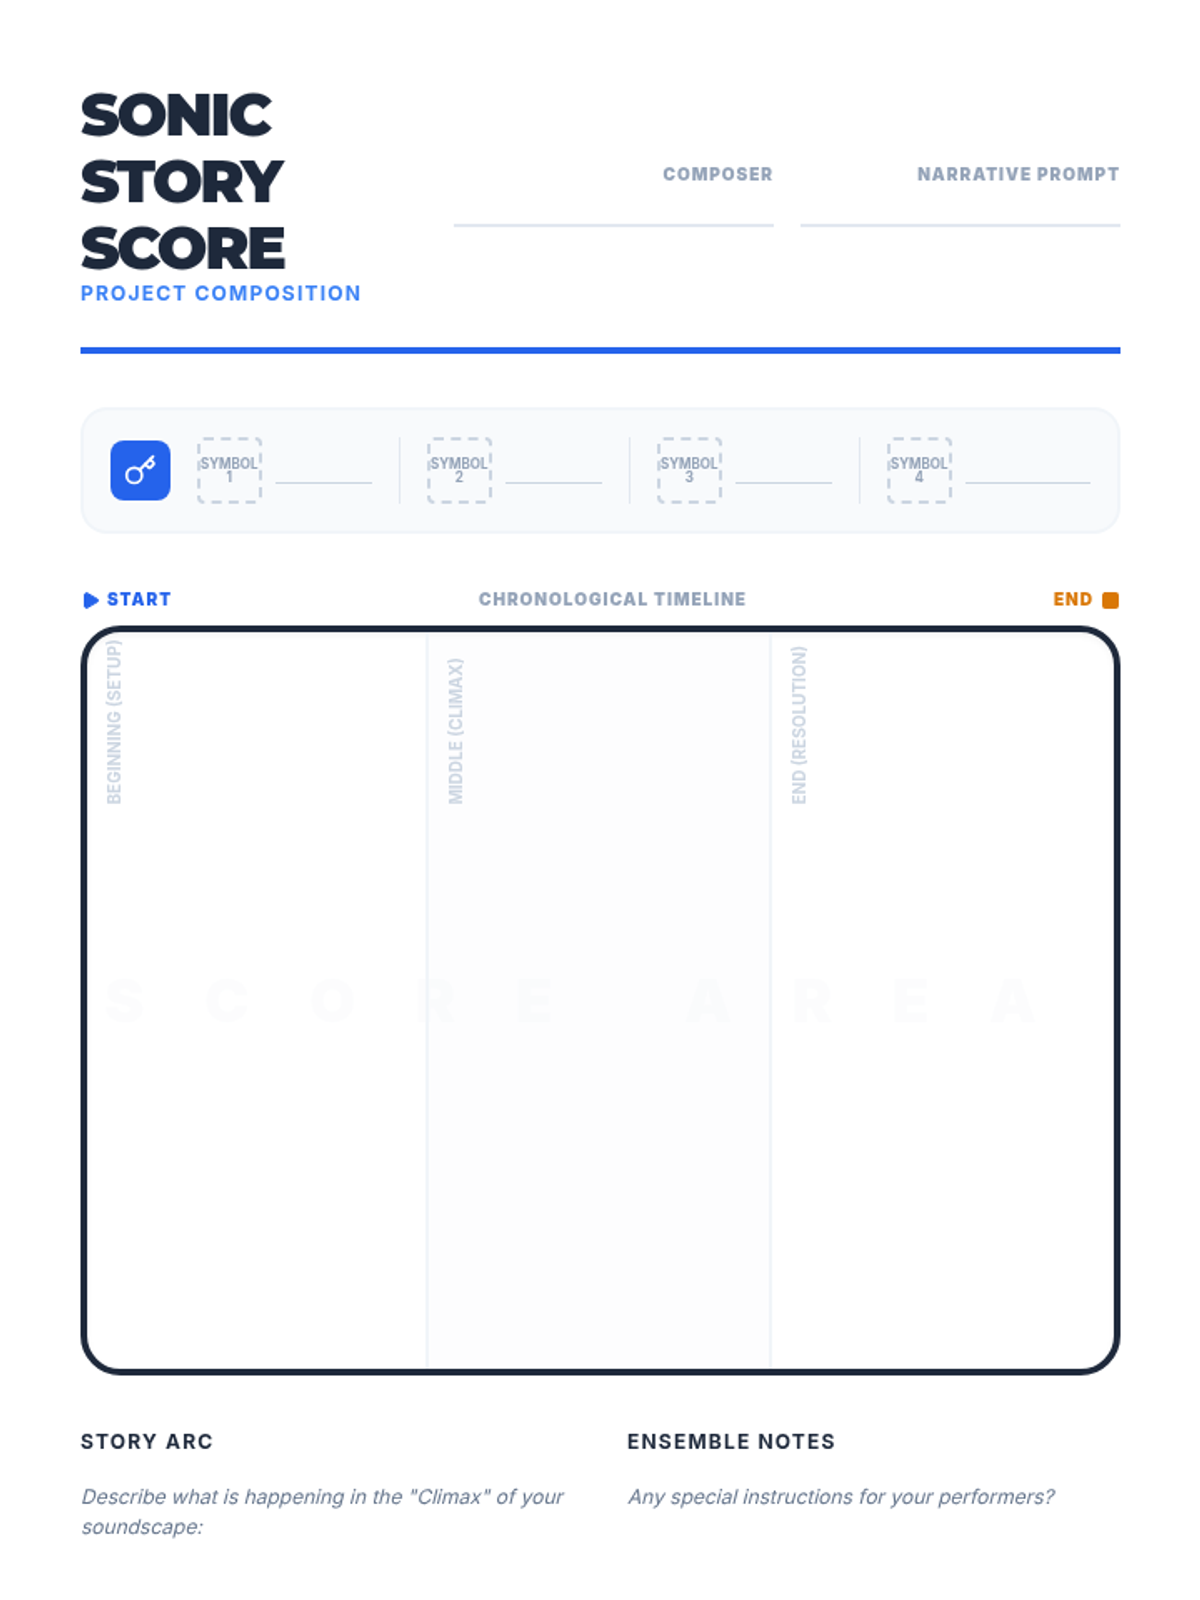
Students compose a narrative-driven graphic score that uses their symbols to tell a sonic story.
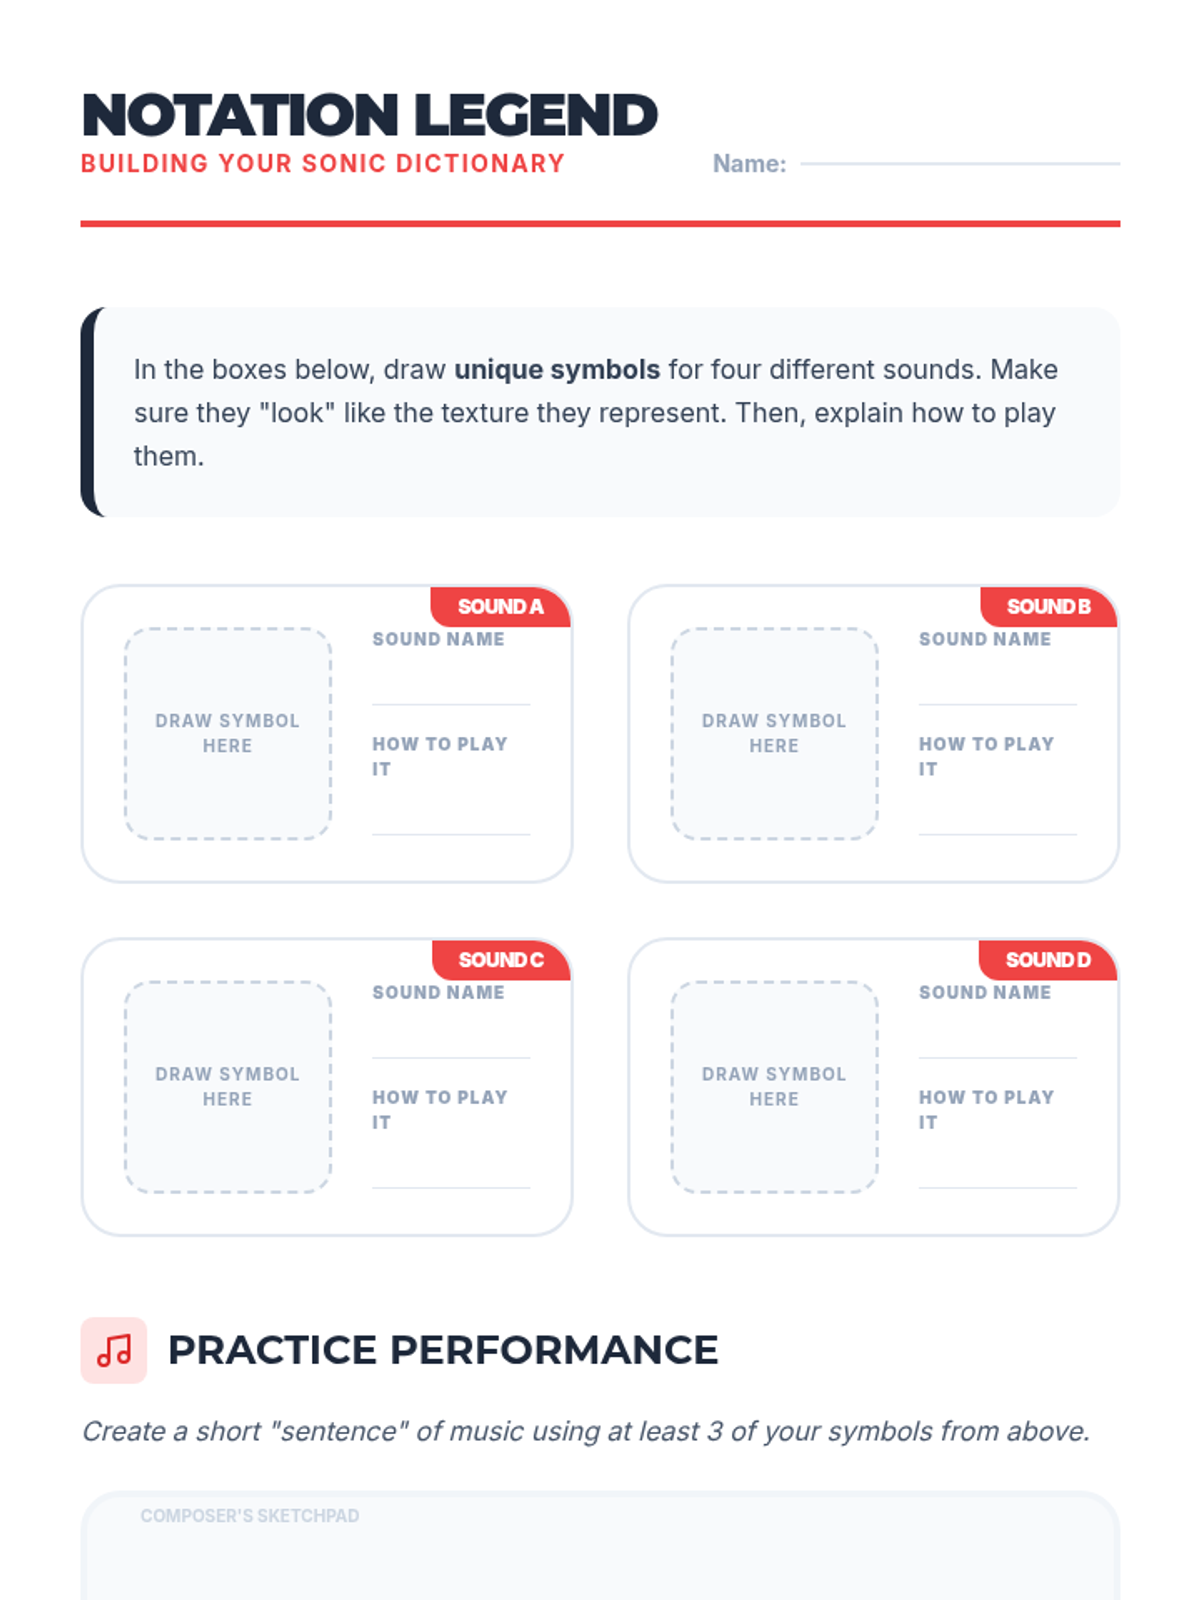
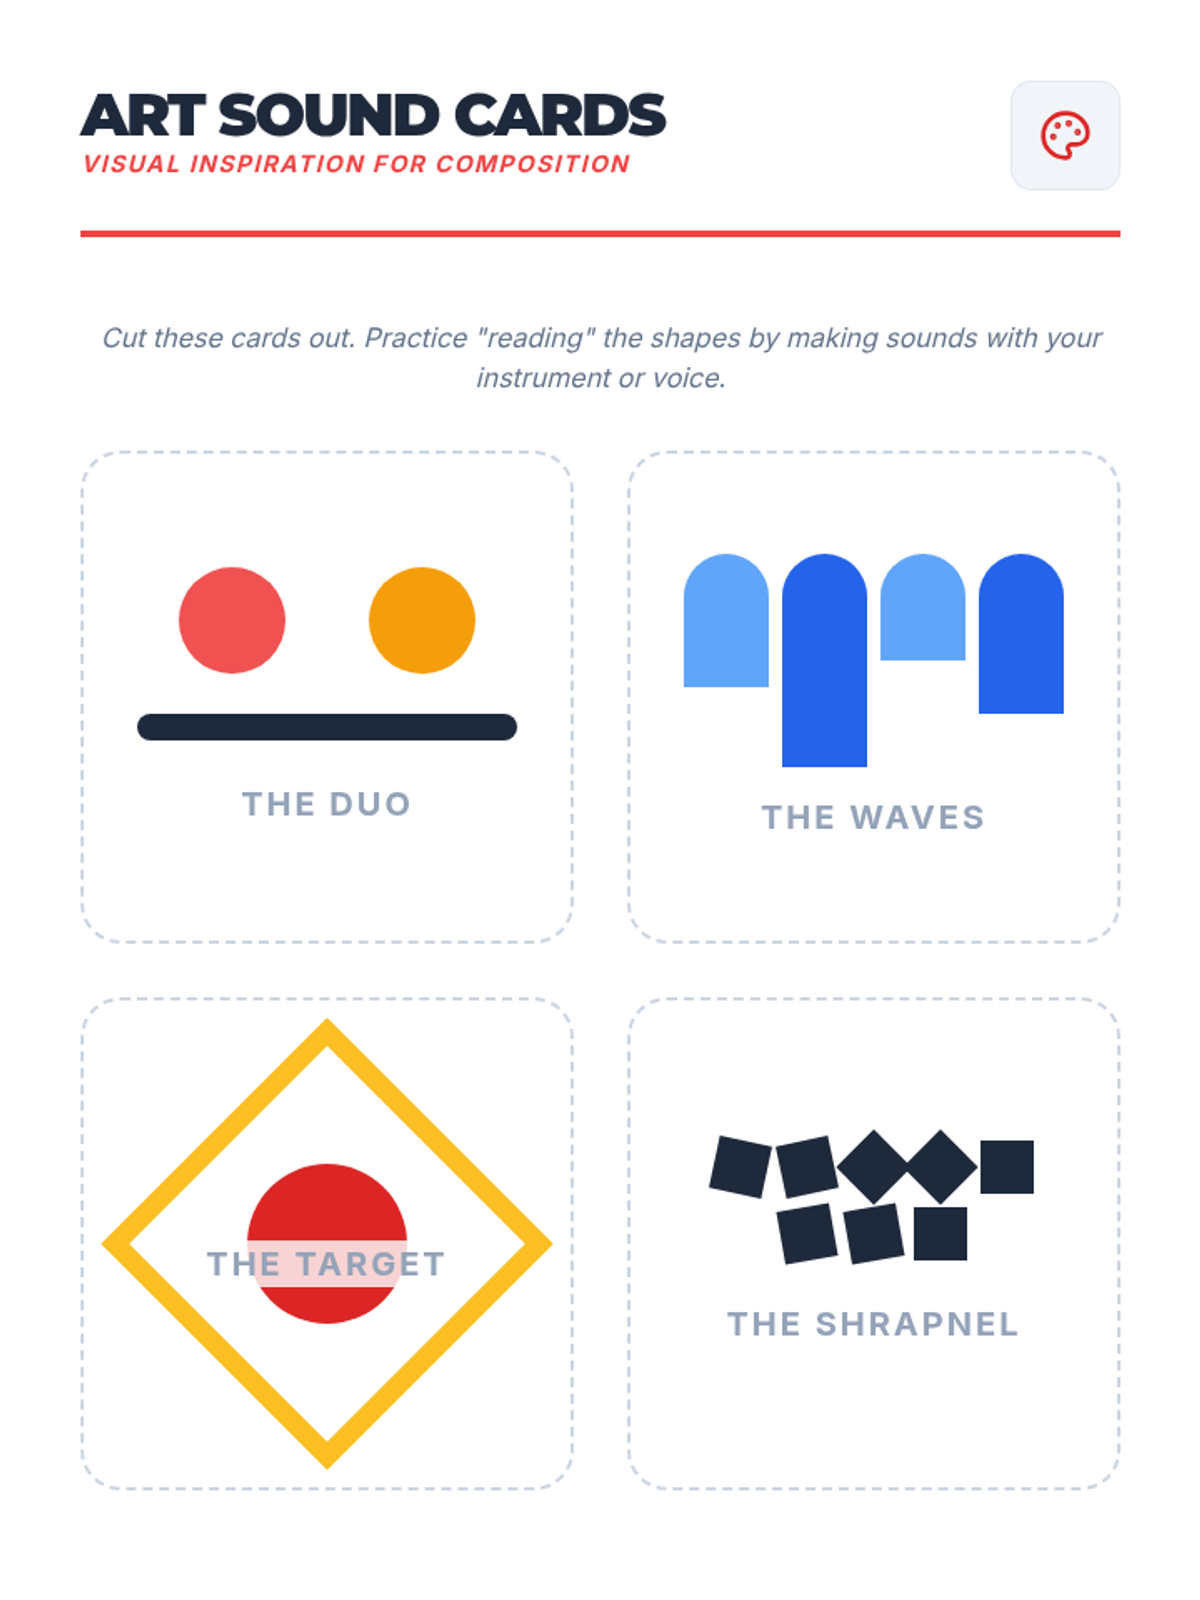
Learners translate sounds into visual symbols, creating a legend that maps shapes and colors to specific audio qualities.
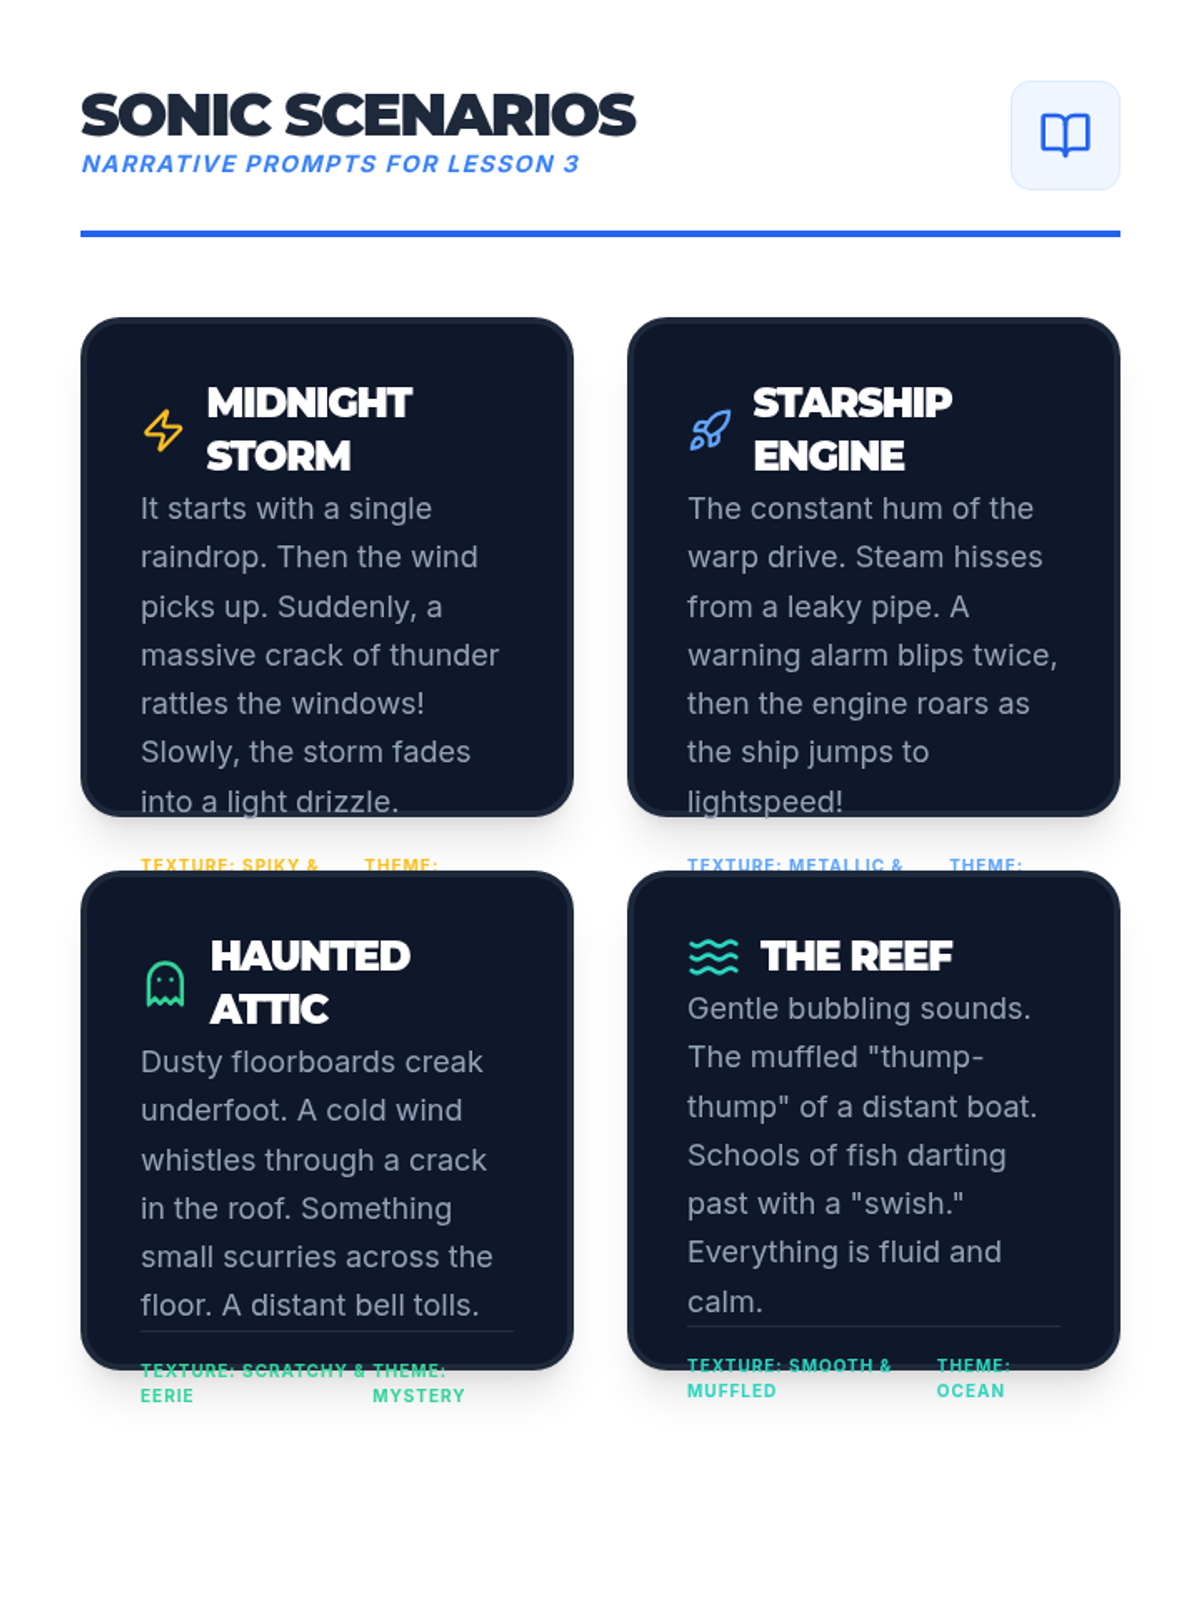
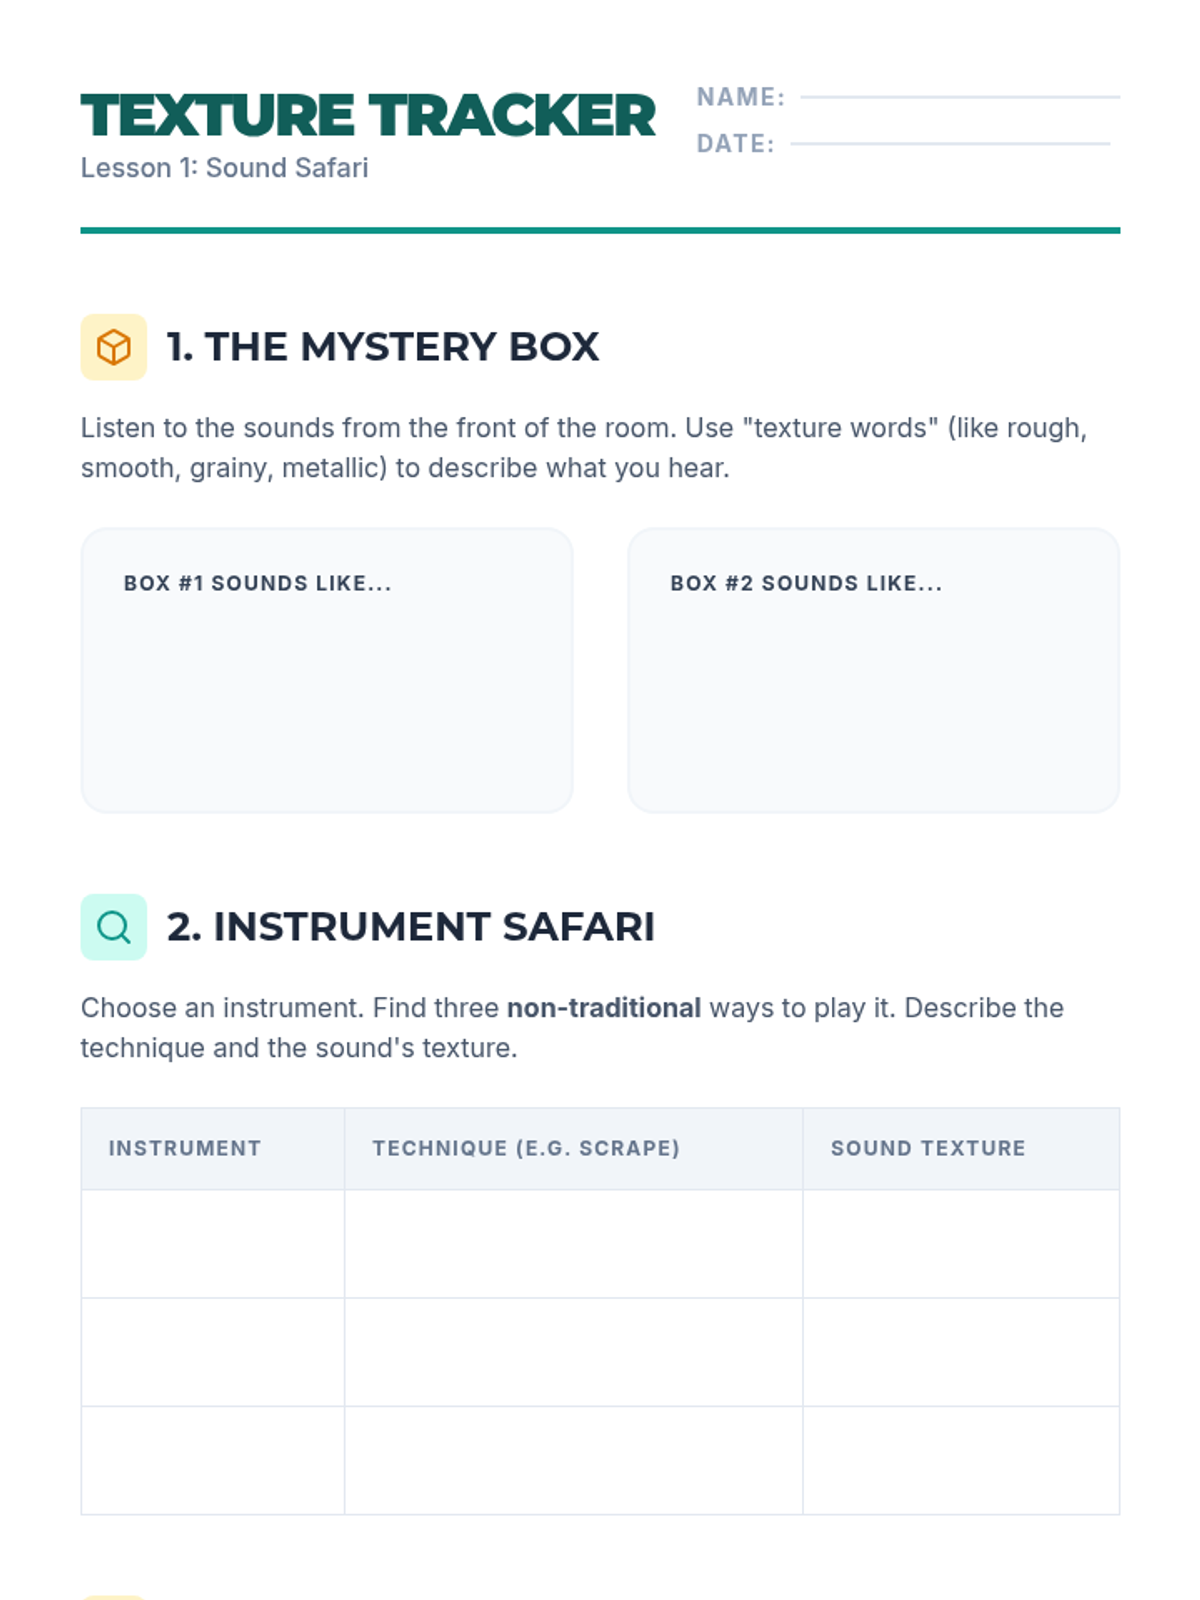
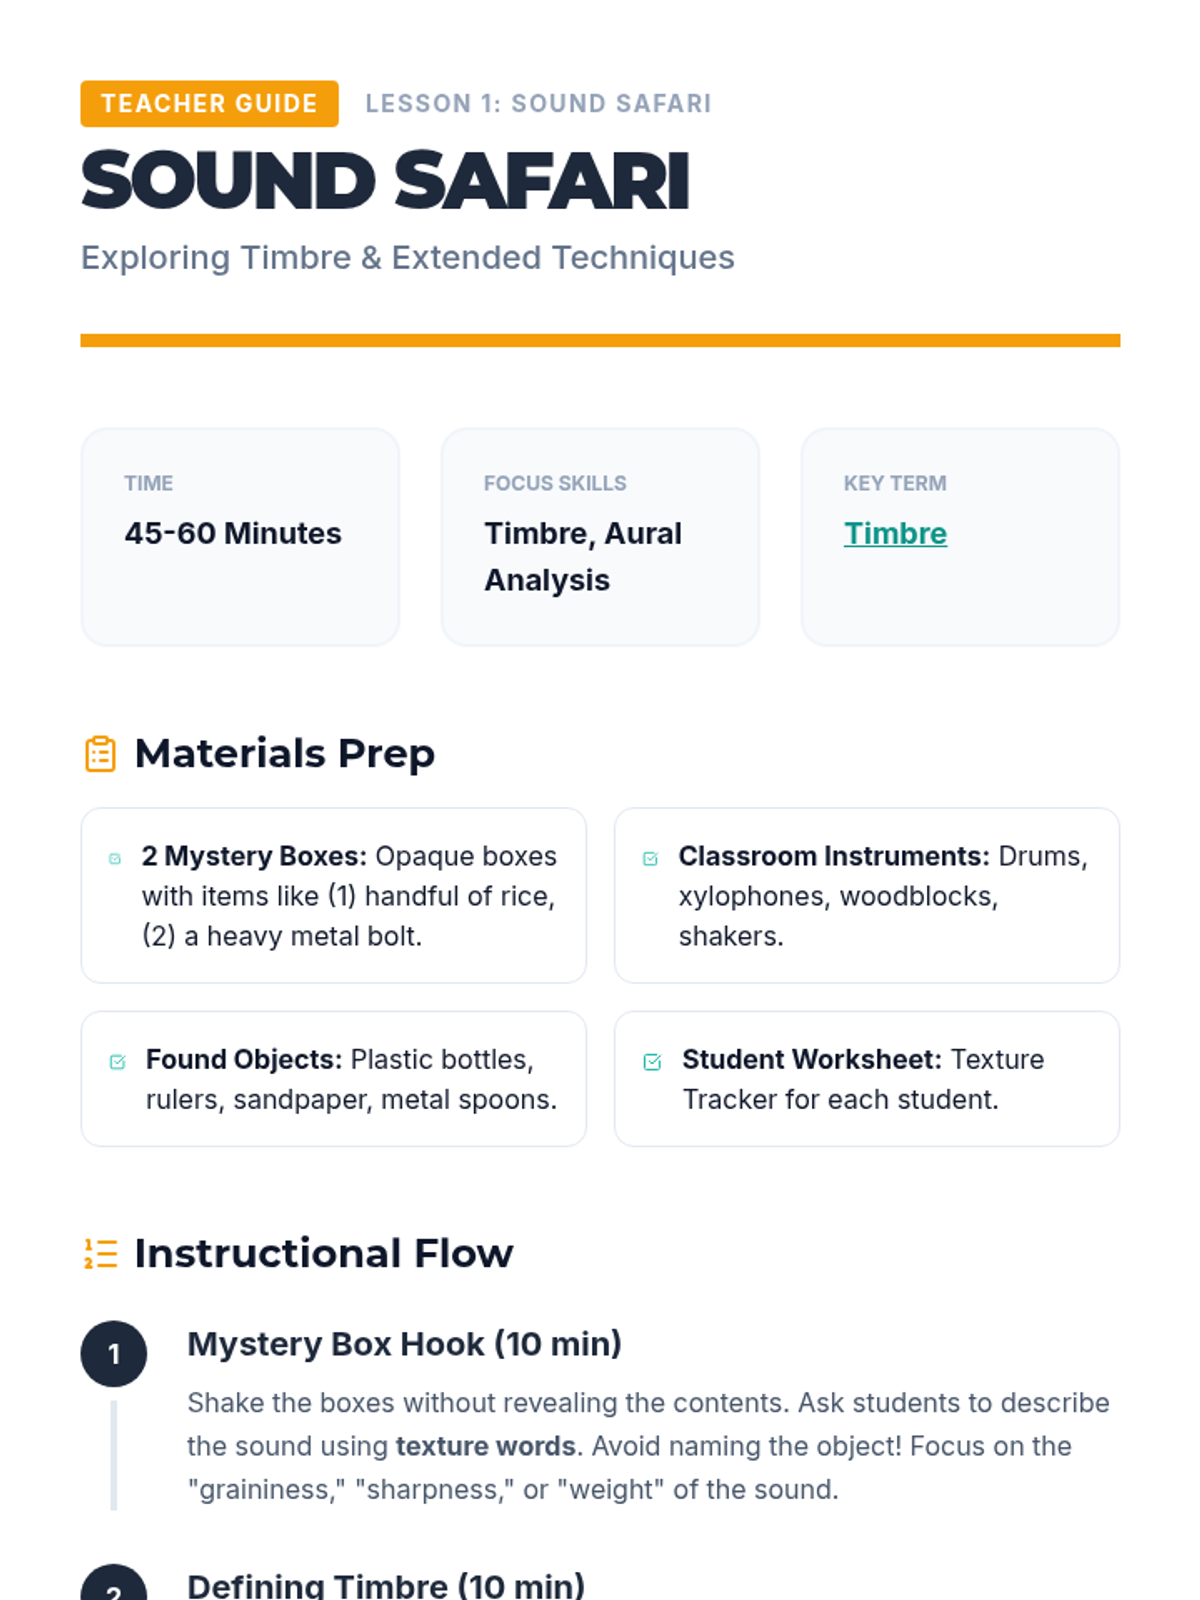
Students explore non-traditional sounds using classroom instruments and found objects, categorizing them by texture.
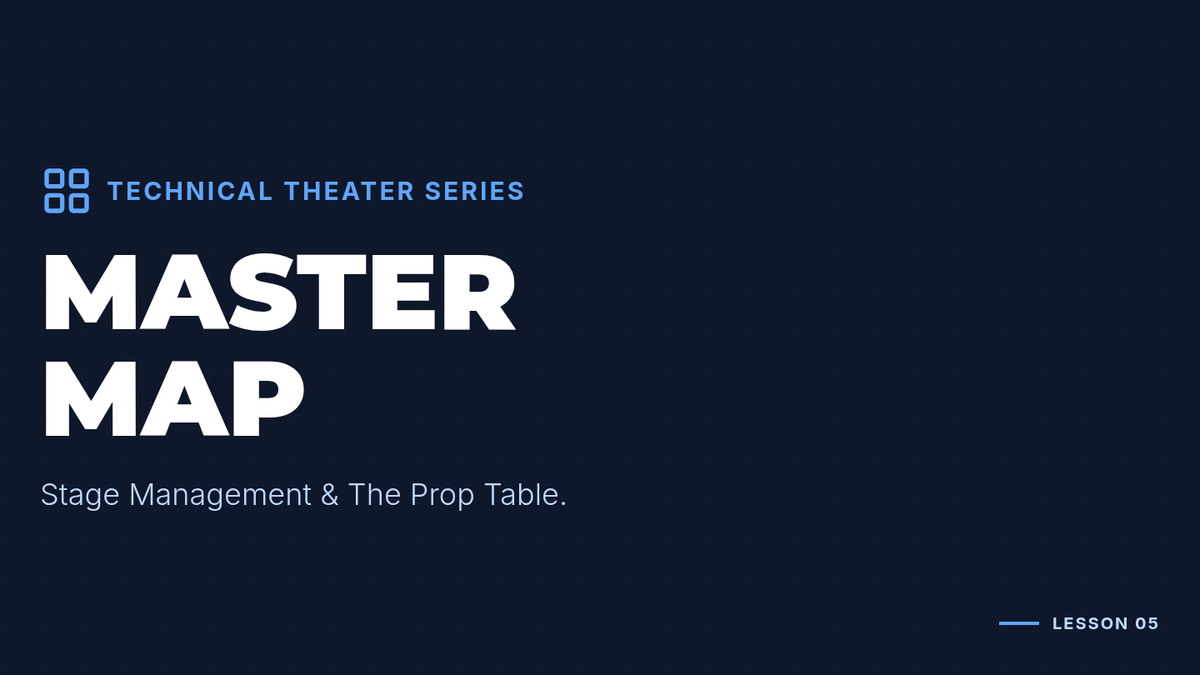
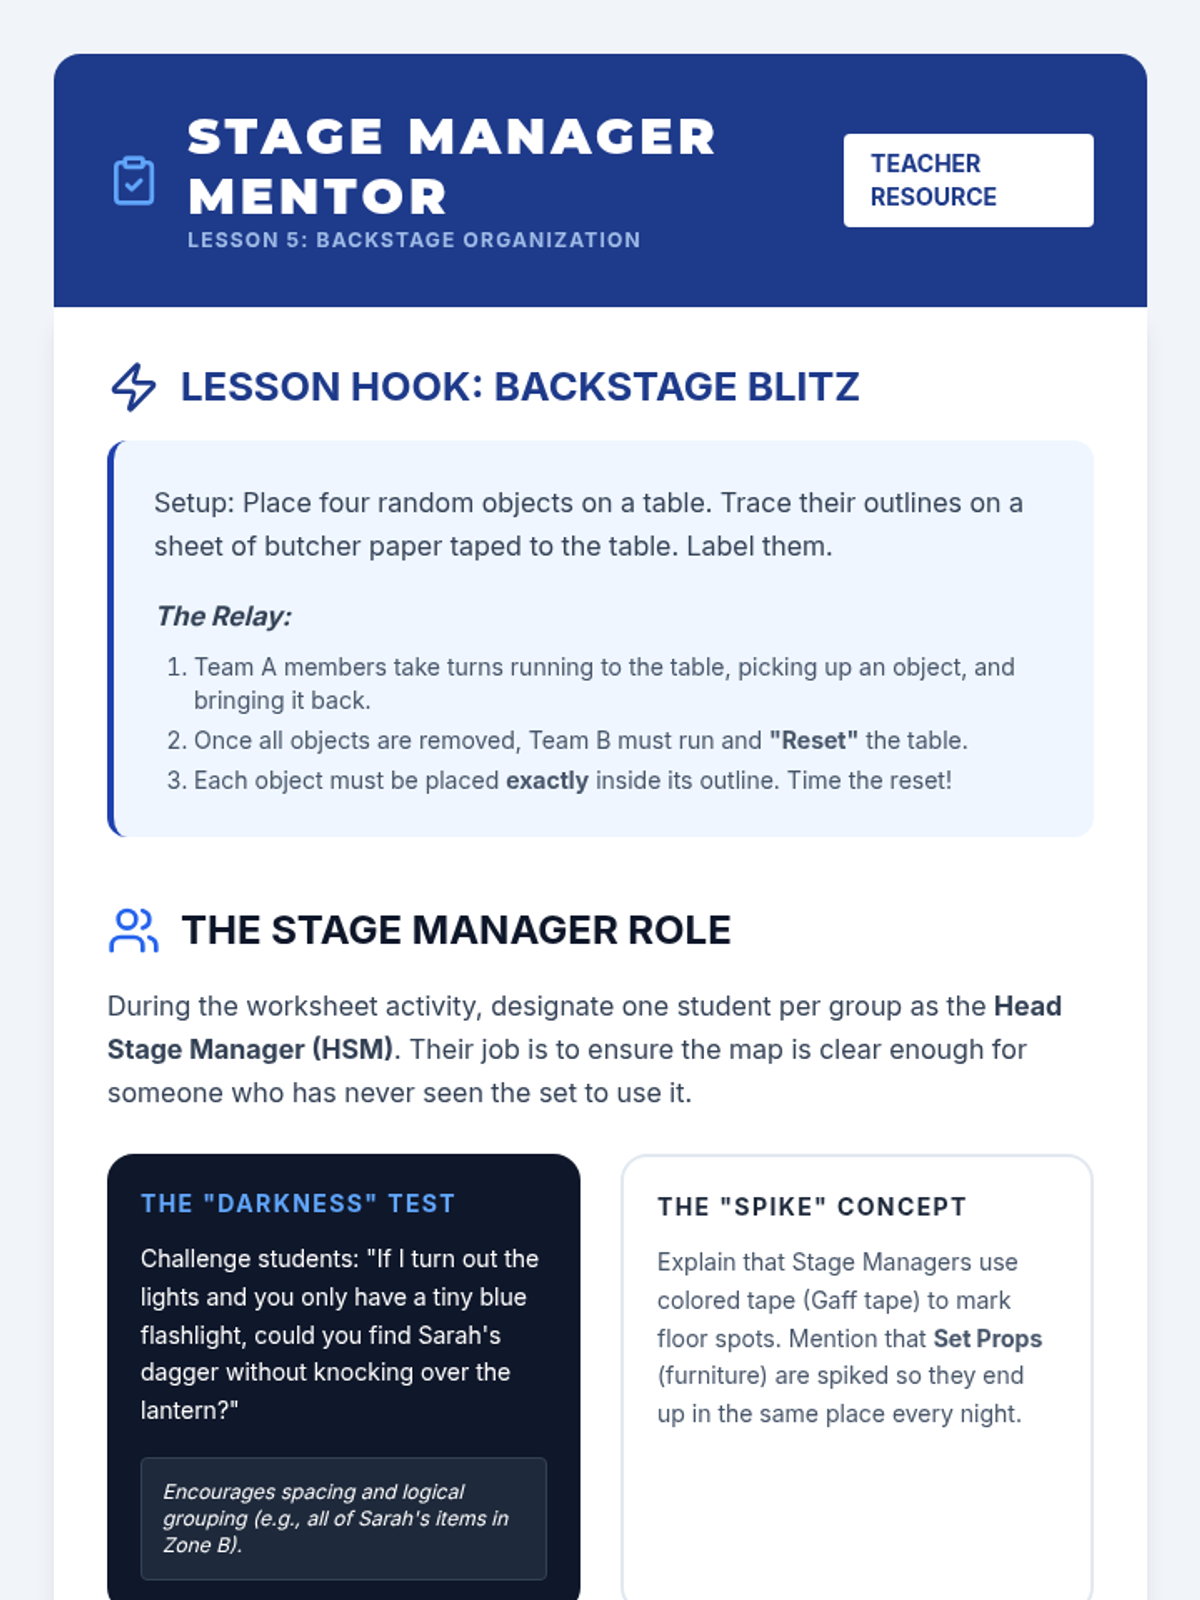
Students step into the role of Stage Managers to learn about organization. They create a 'prop table' map, outlining where items go ensuring actors can find them in the dark, and practice resetting a scene quickly.
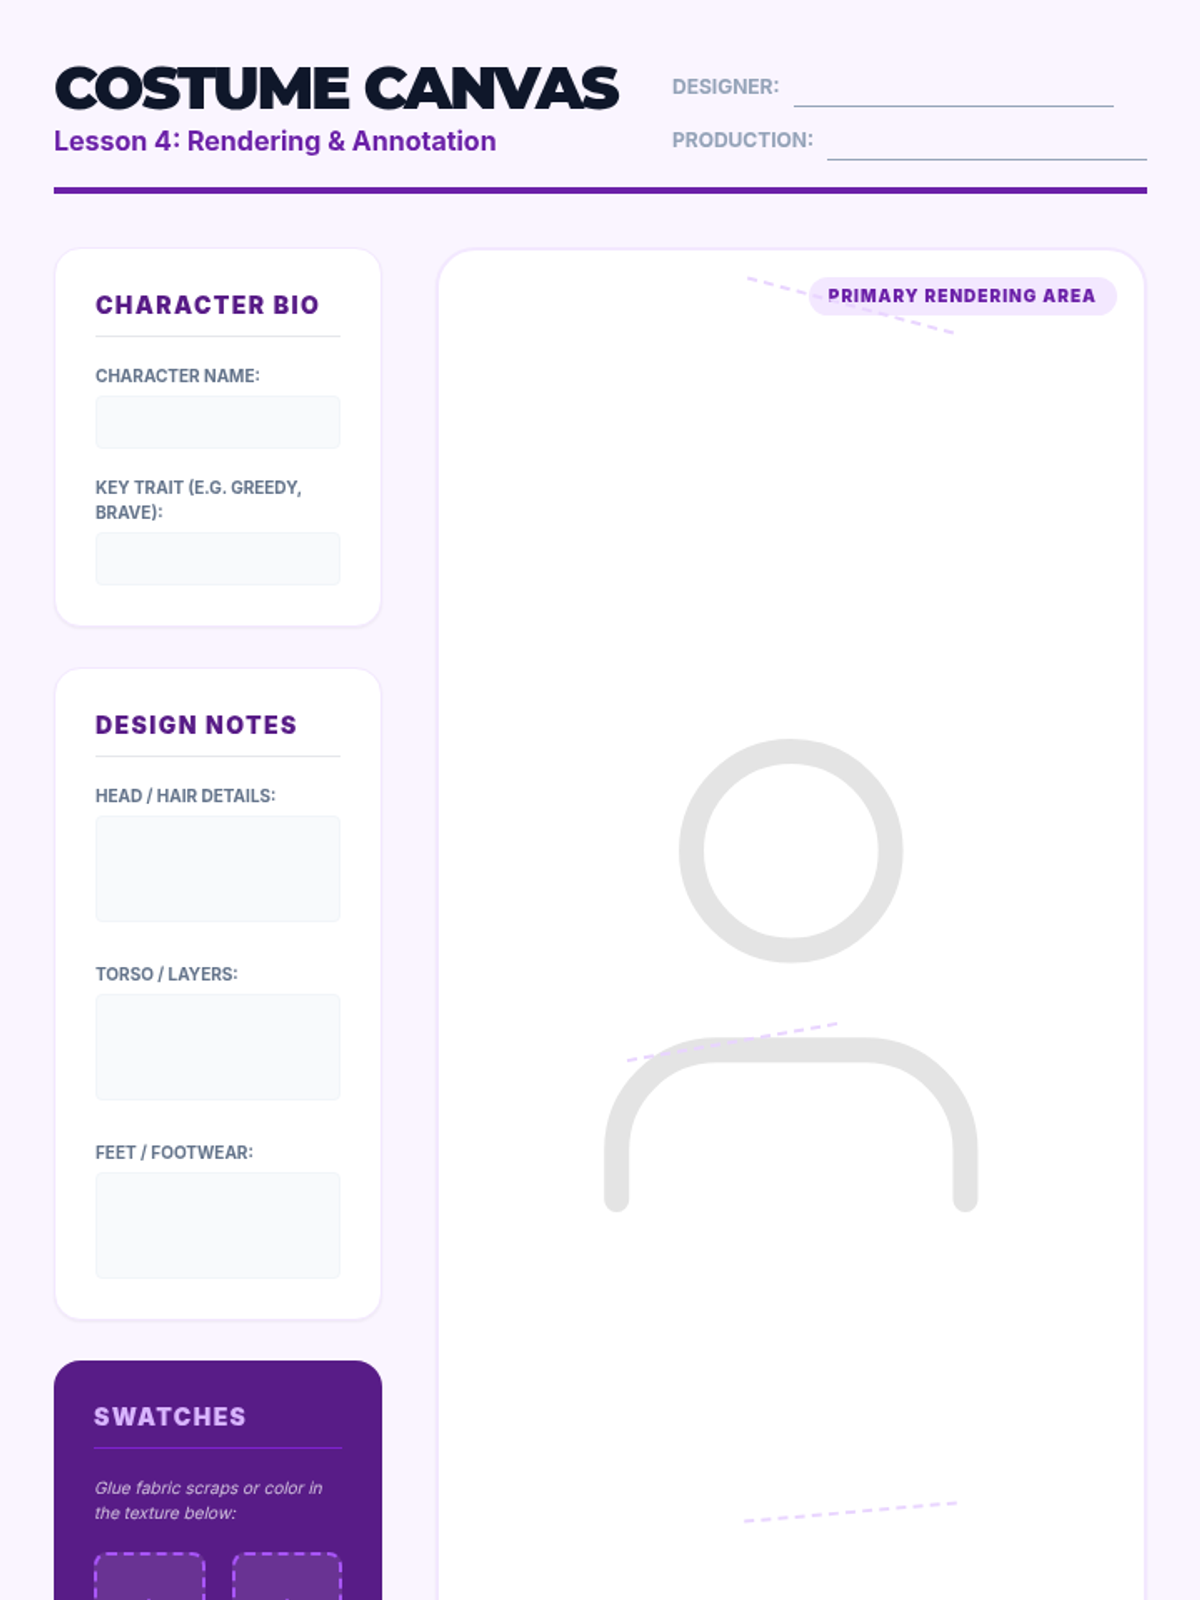
Students create a costume rendering for a specific character using drawing or collage techniques. They must annotate their design to explain how their choices relate to the character's age, job, and personality.
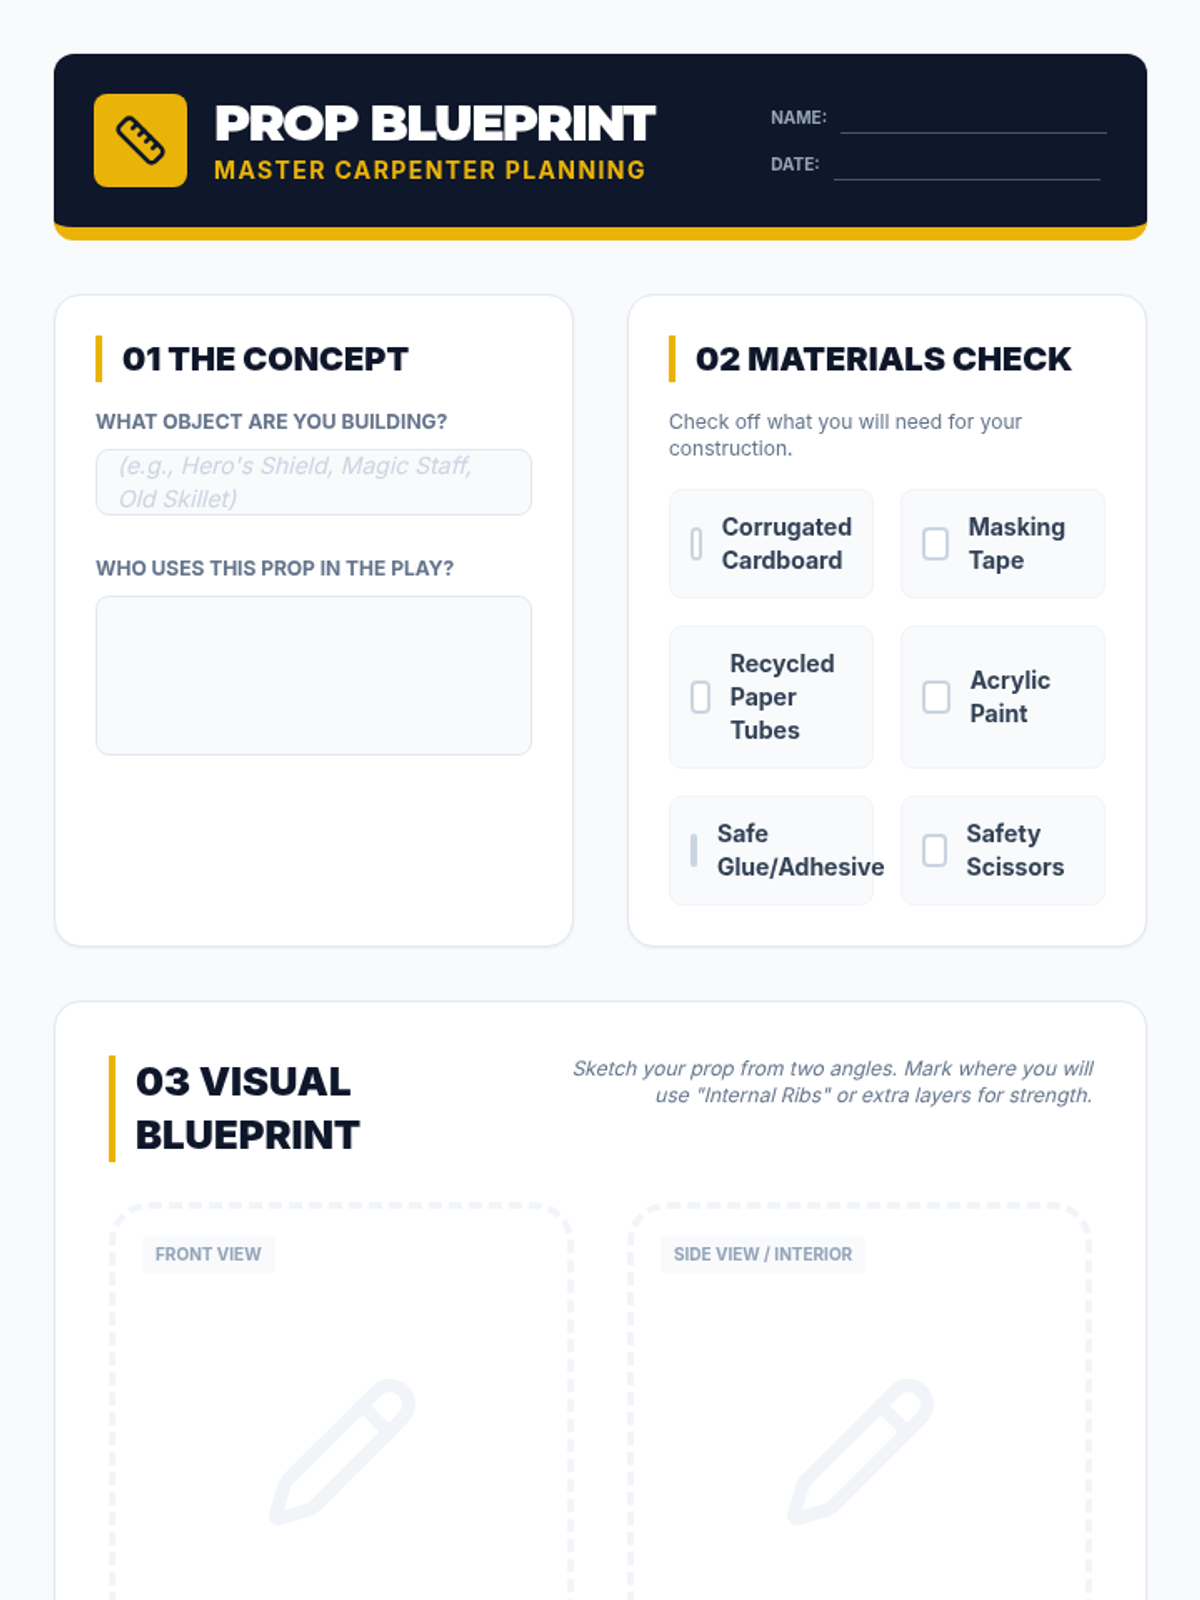
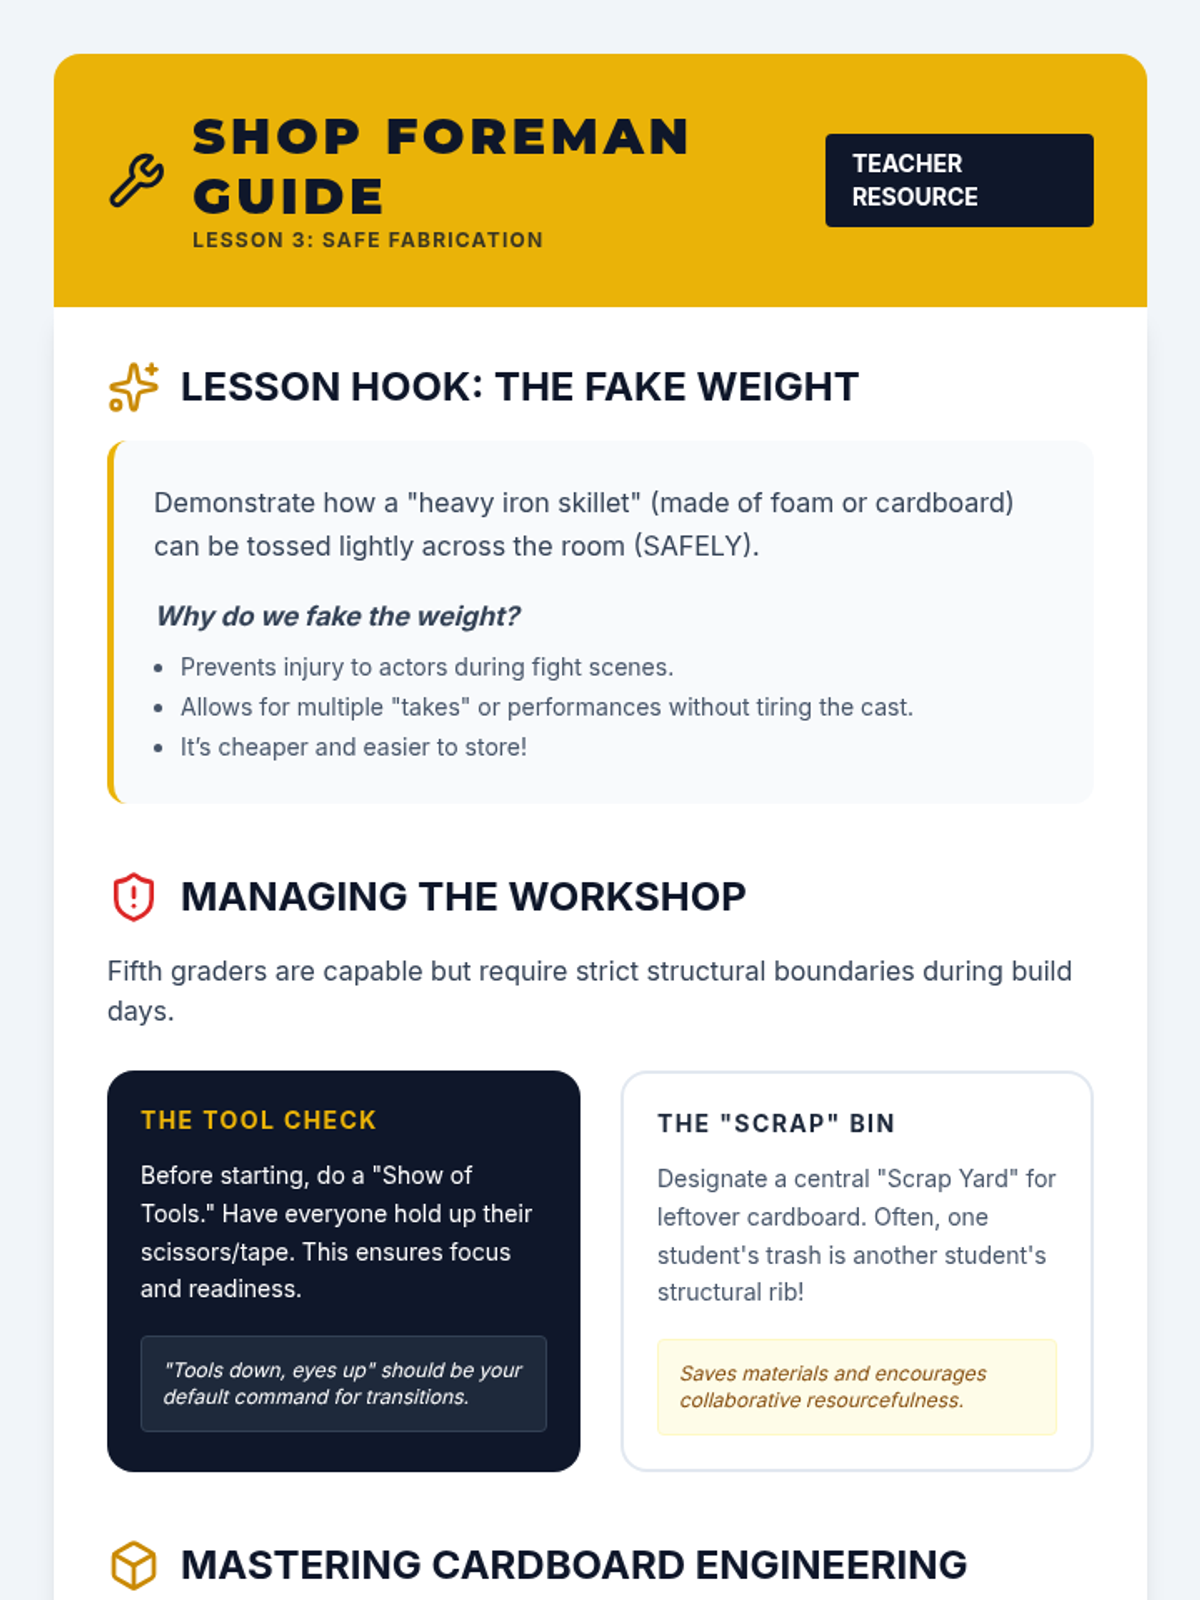
Focusing on safety and resourcefulness, students learn to build a specific hand prop using cardboard, tape, and safe adhesives. The lesson covers structural integrity and how to make lightweight objects look heavy or metallic.
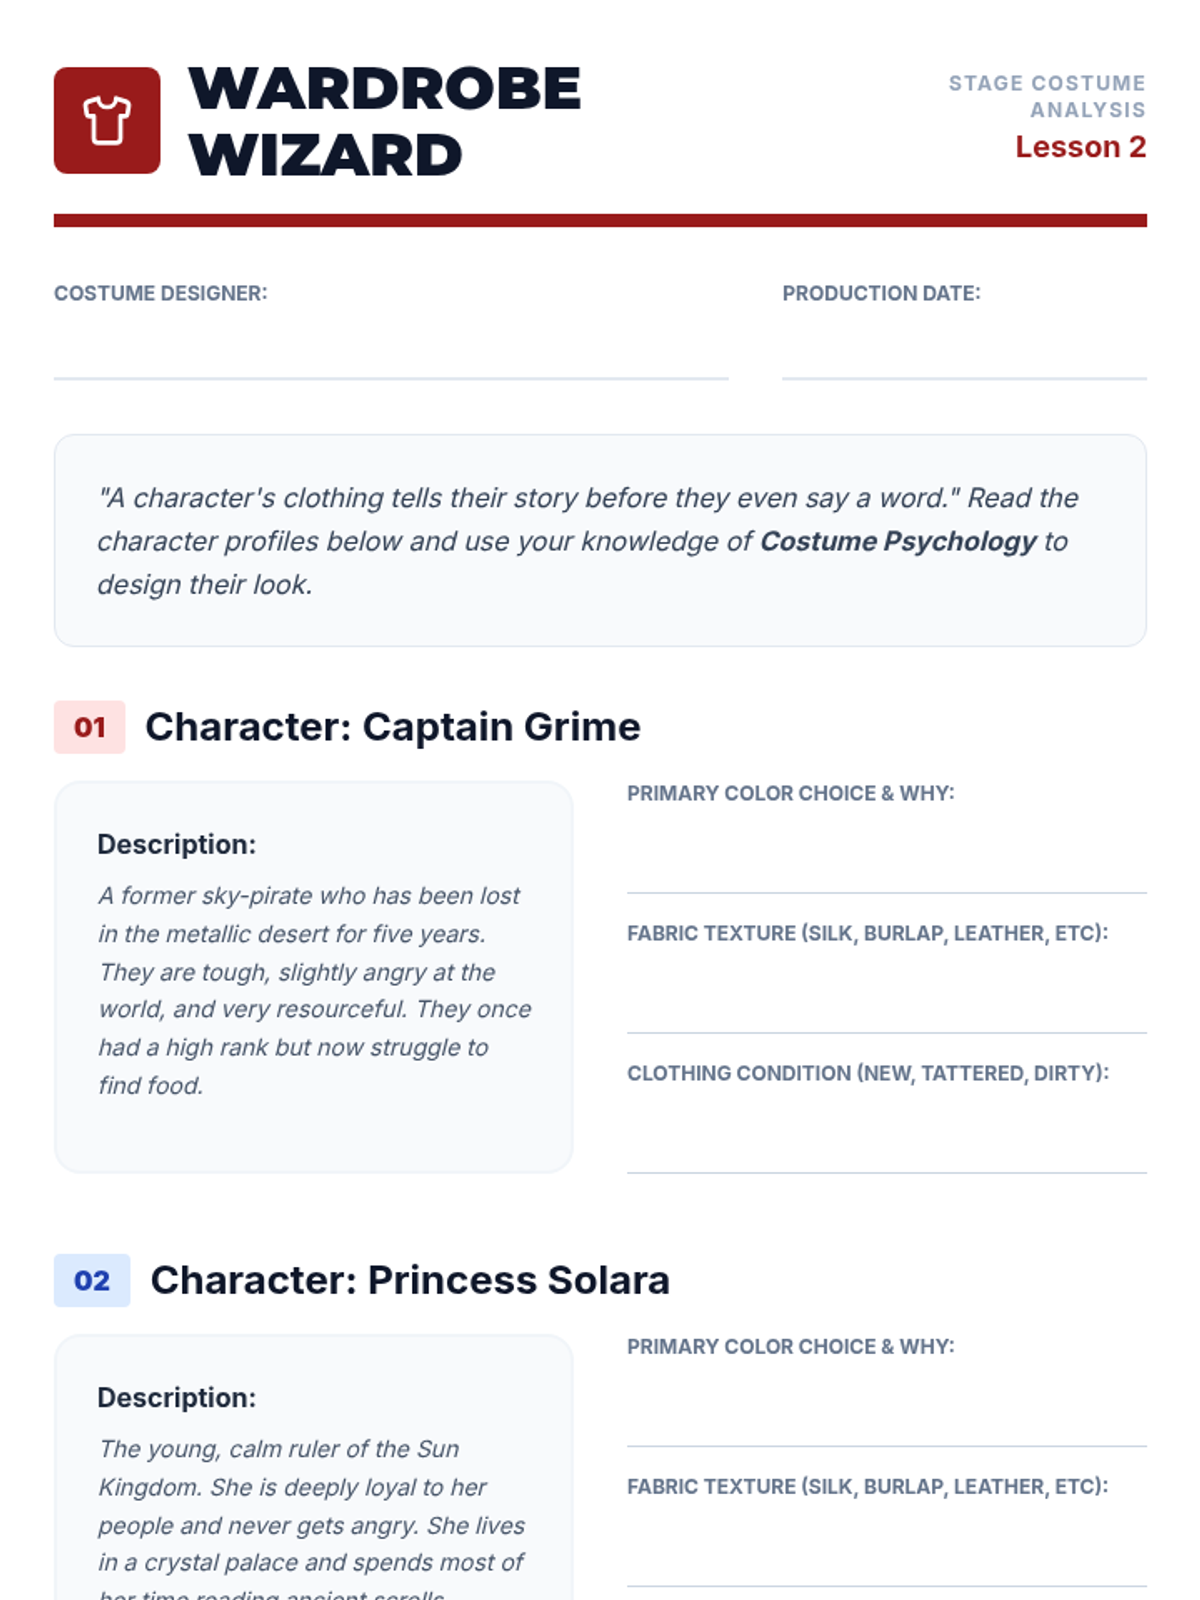
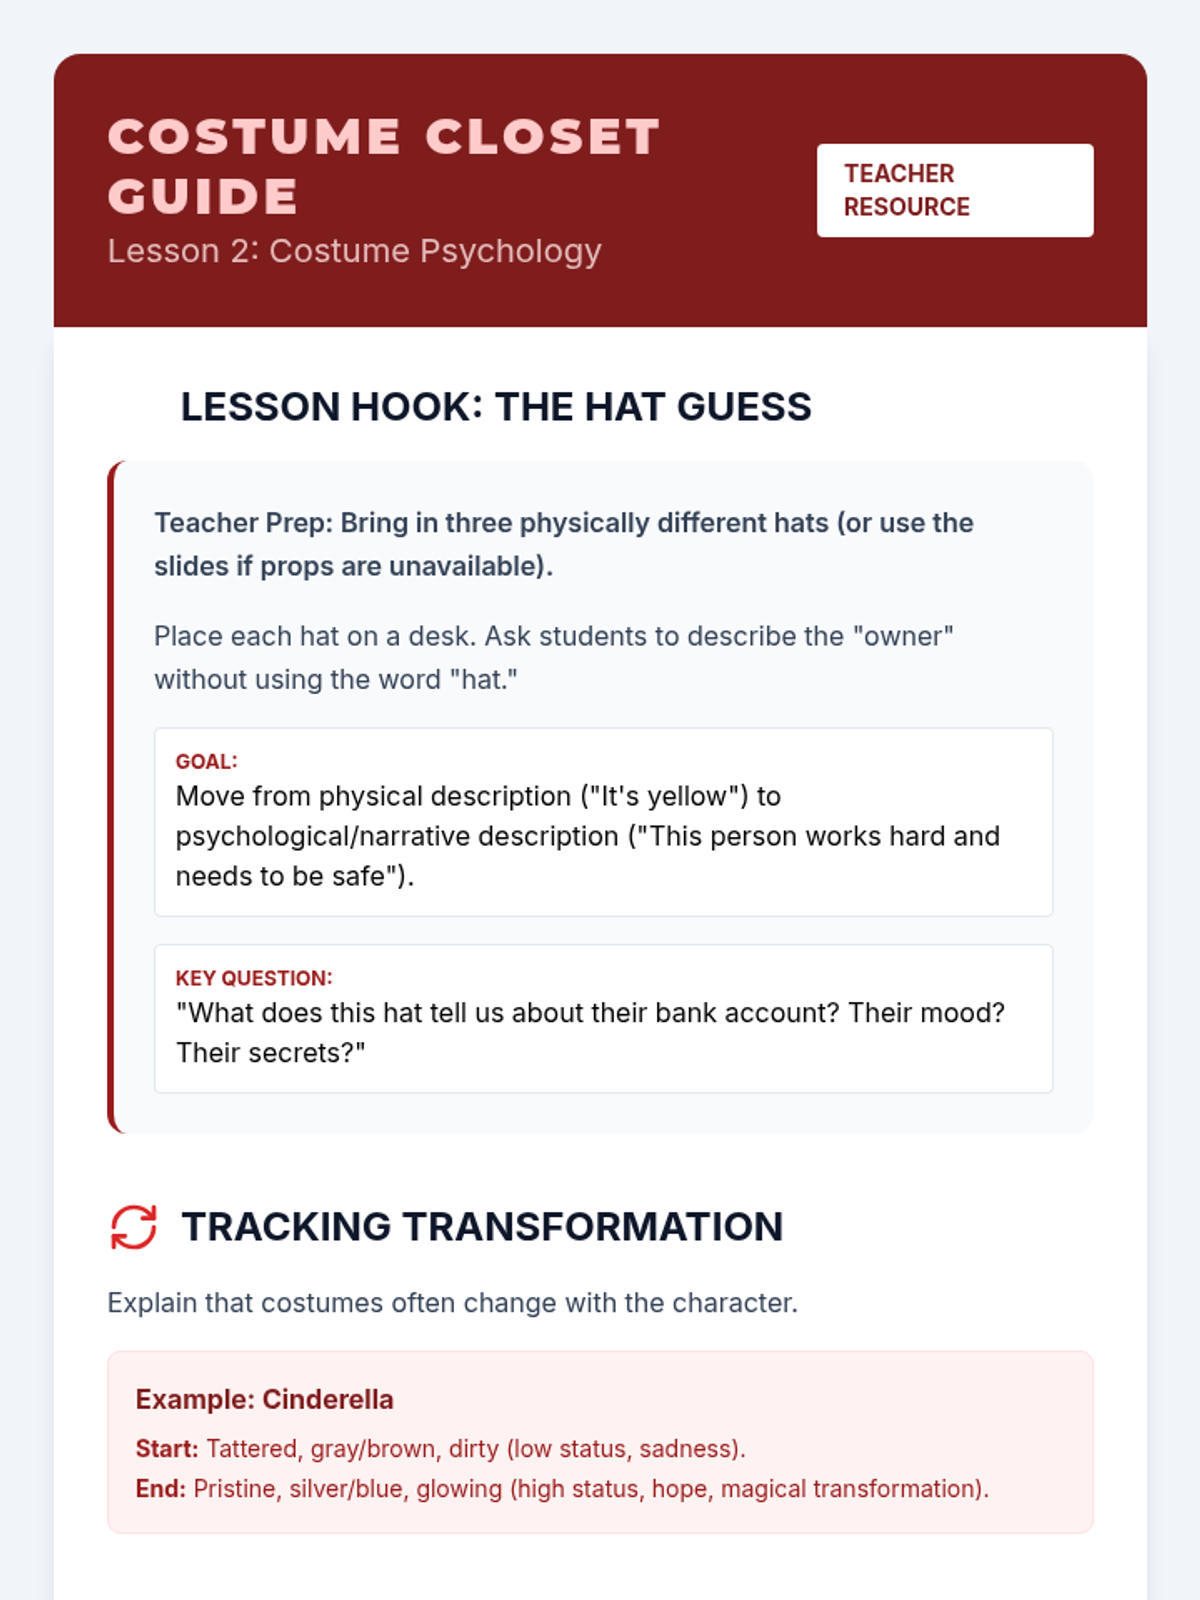
Students explore how color, condition, and fit of clothing communicate character traits. They analyze character descriptions and select fabric swatches or colors that represent the character's personality and status.
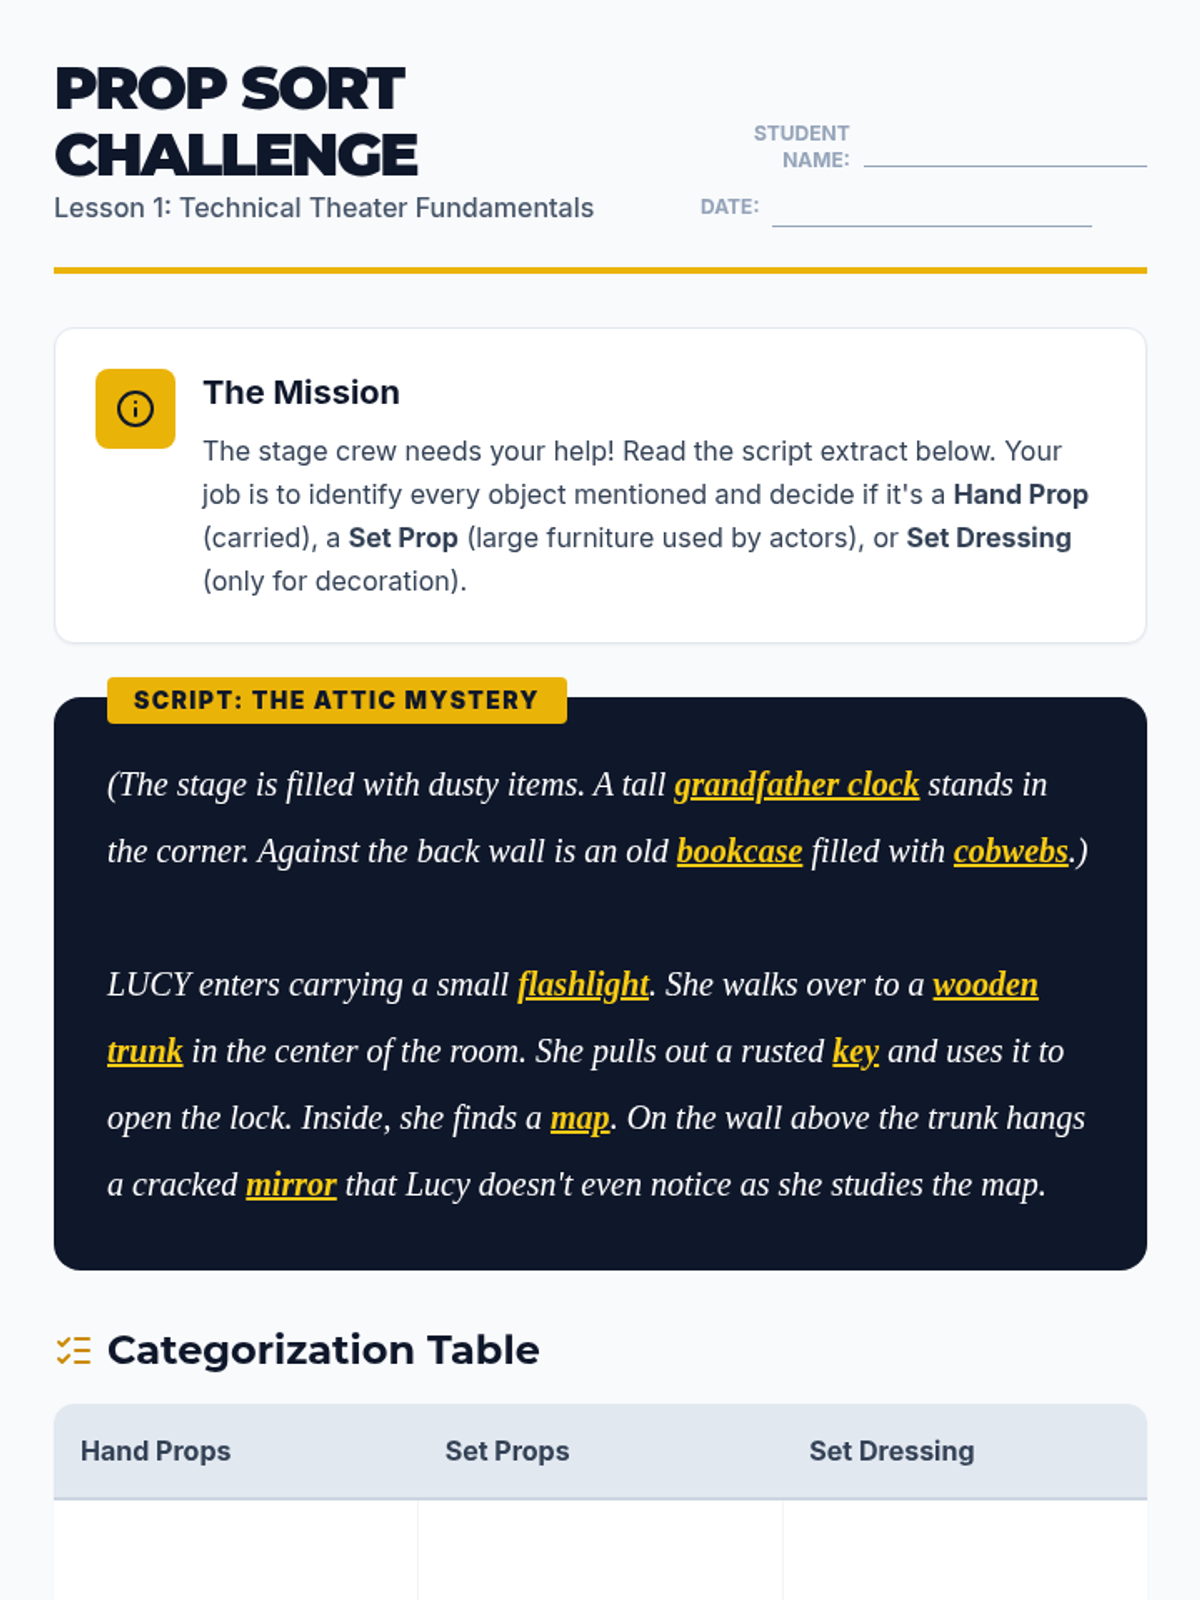
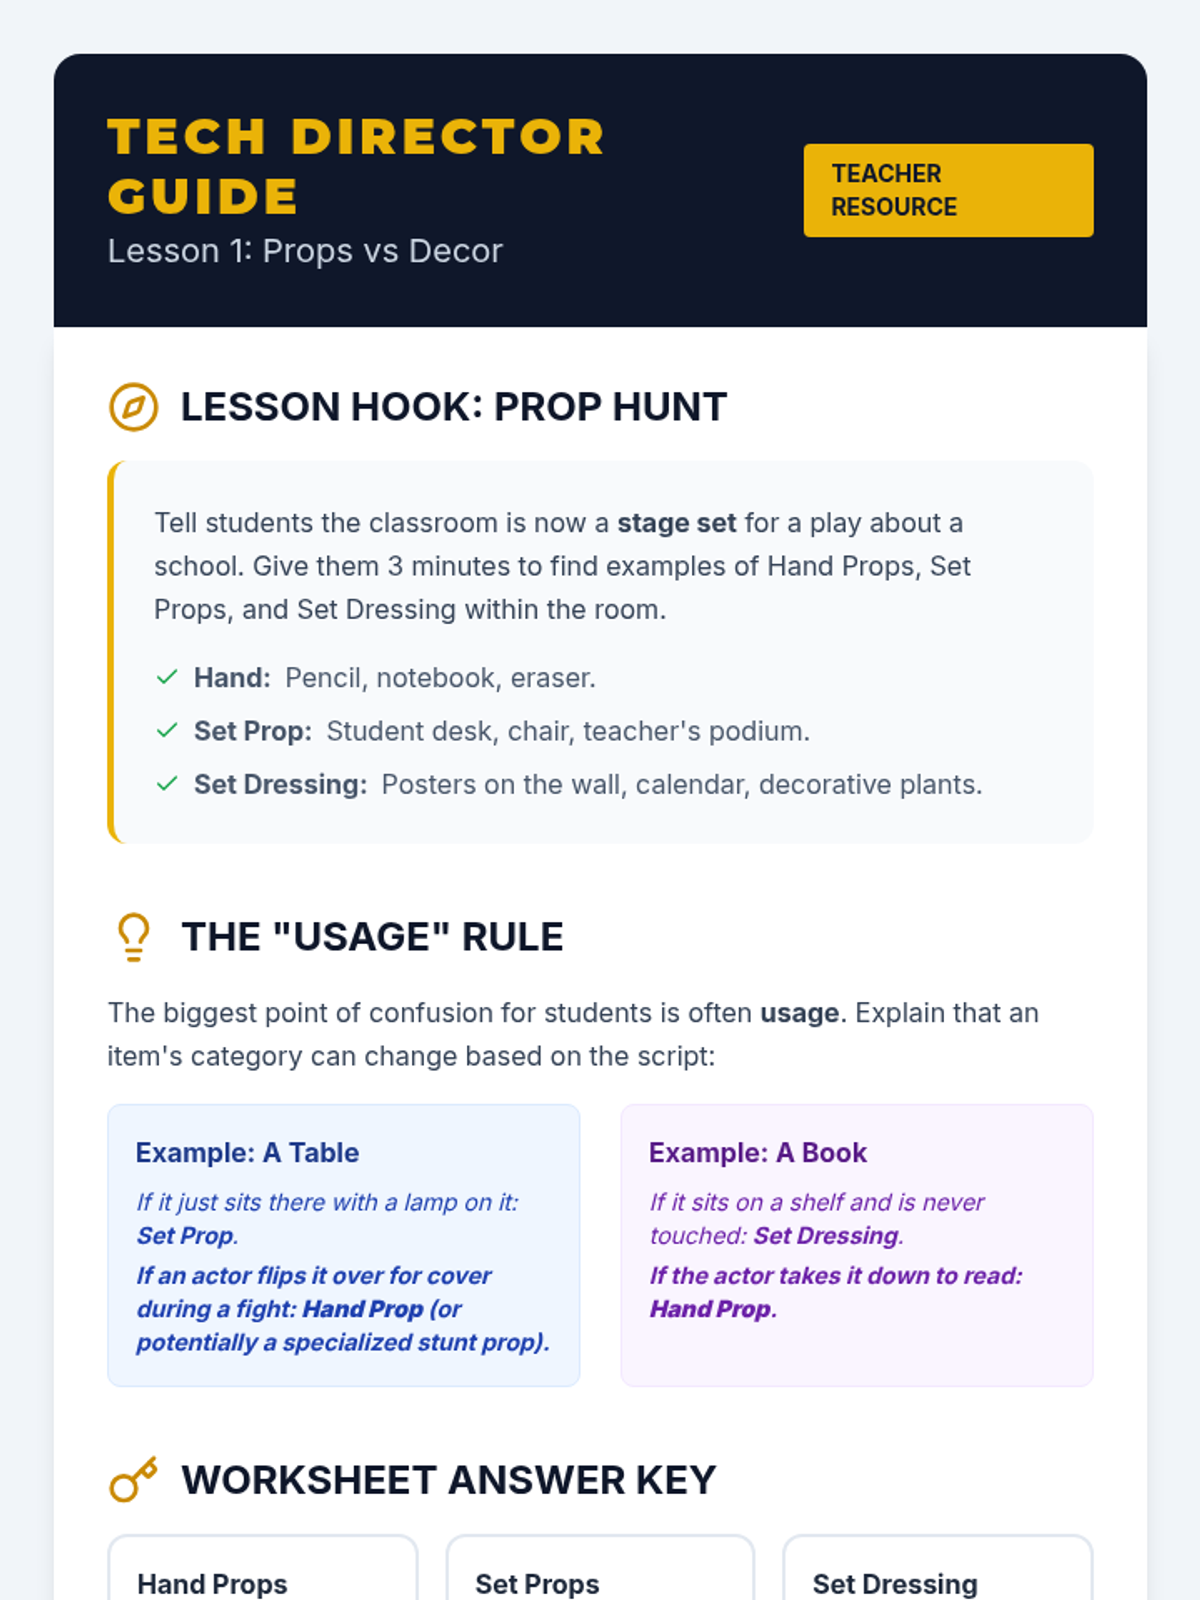
Students learn to categorize items as Hand Props, Set Props, or Set Dressing through sorting activities. They analyze a scene to determine which items are handled by actors versus which items just set the scene.
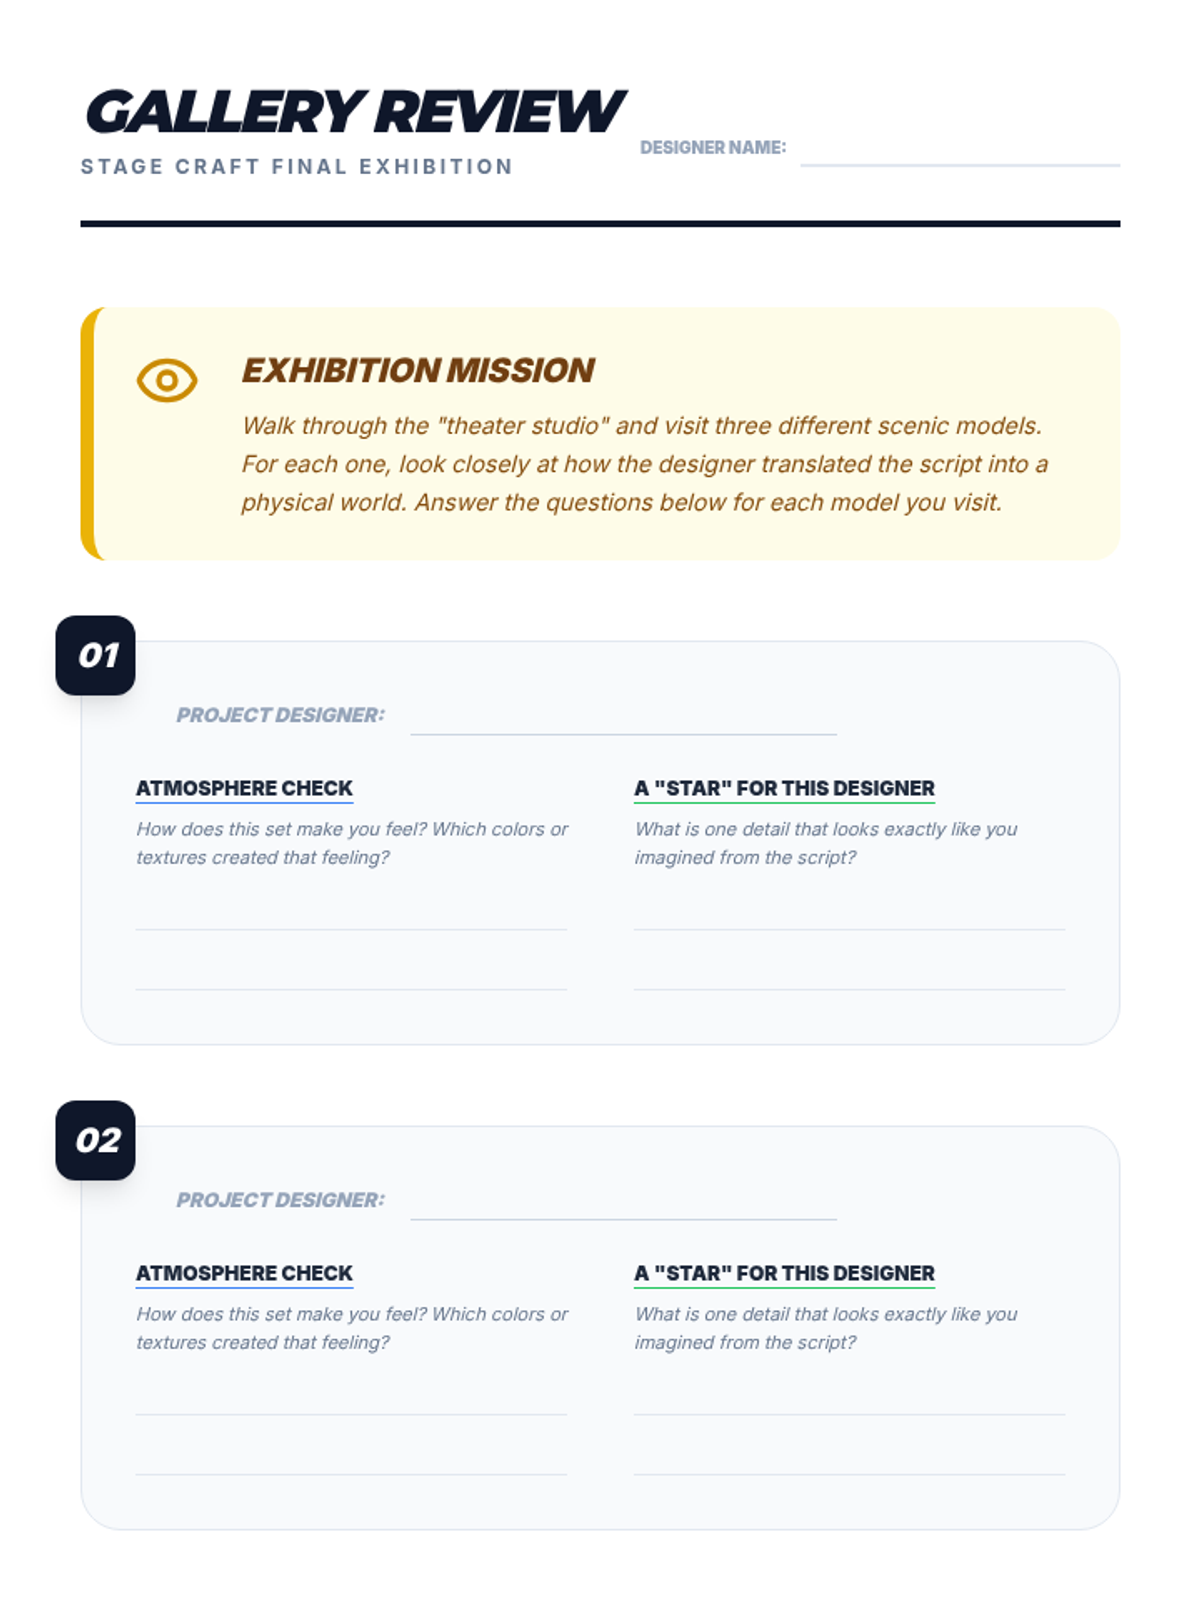
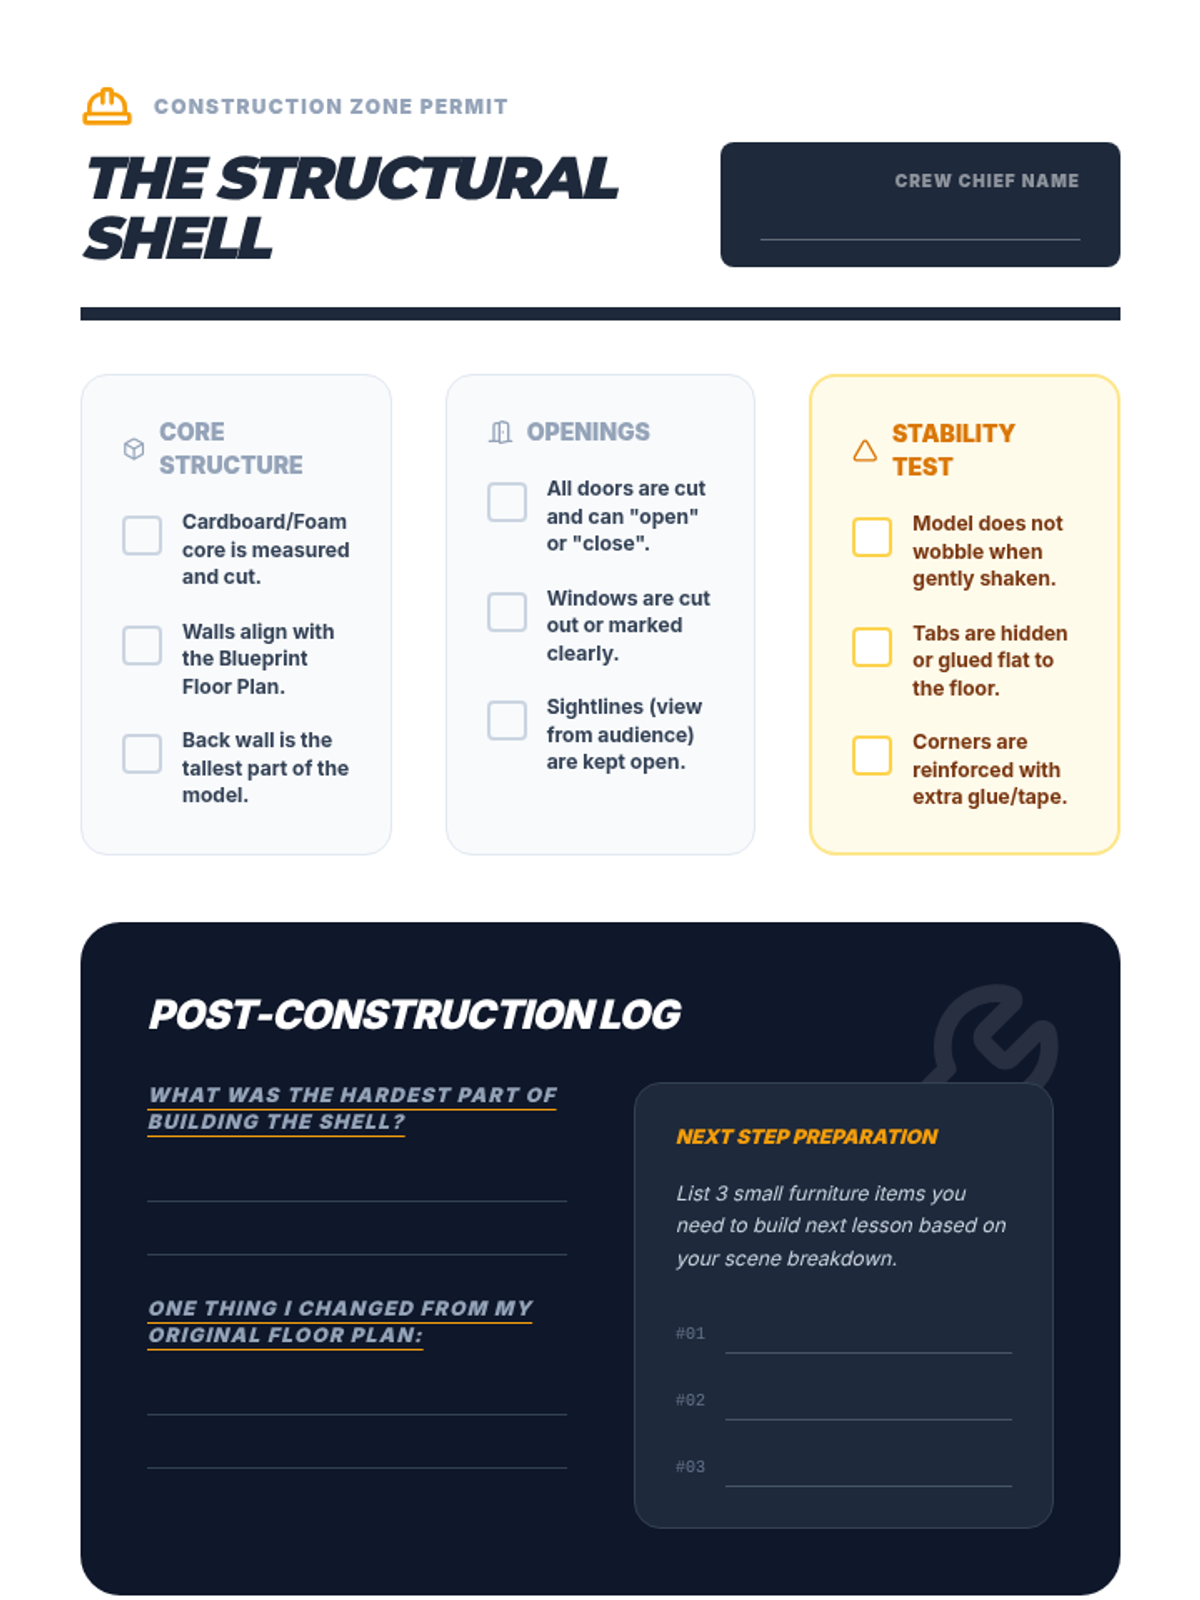
Students complete their models by adding furniture pieces, architectural details, and applying color or texture. The sequence concludes with a gallery walk where students critique how well the designs serve the script.
Students begin the hands-on construction of their scale model using cardstock, foam core, or shoeboxes. They build the perimeter walls and floor based on their earlier floor plans.
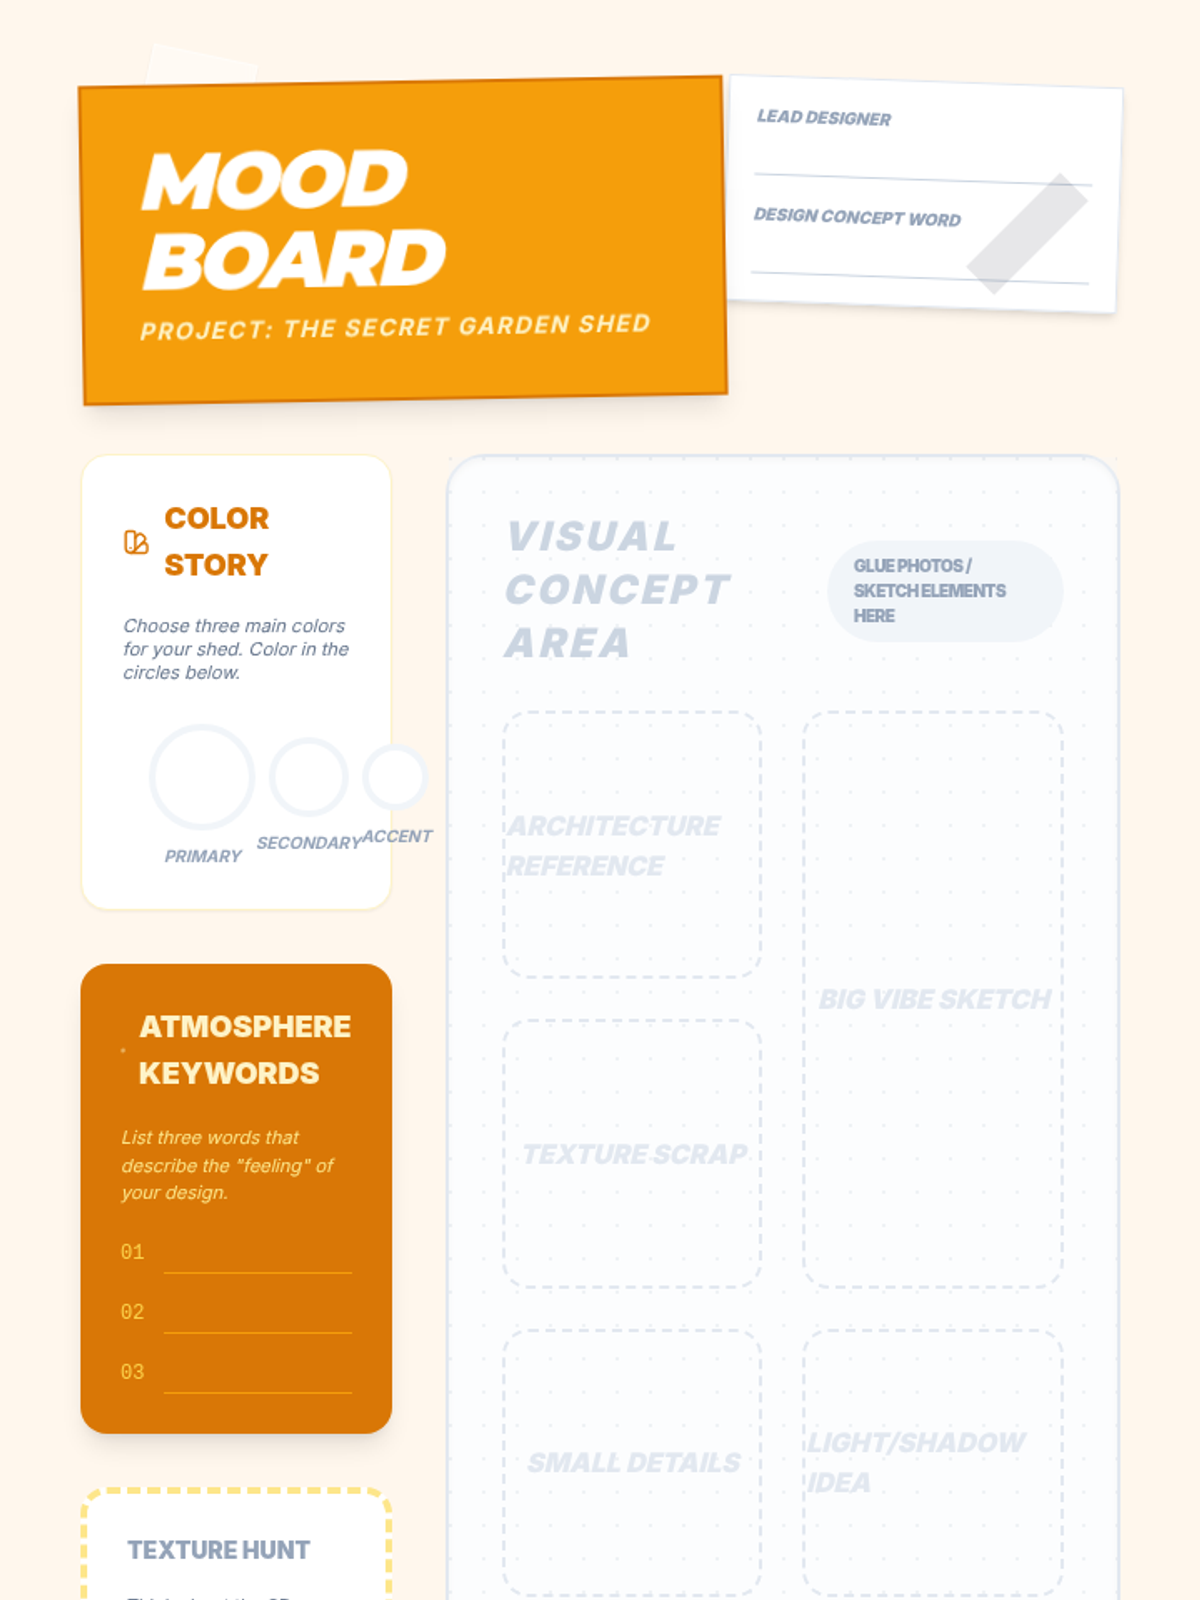
Focusing on the artistic atmosphere, students select color palettes, textures, and reference images that evoke the emotion of the scene. They compile these into a mood board that serves as the aesthetic guide for their final model.
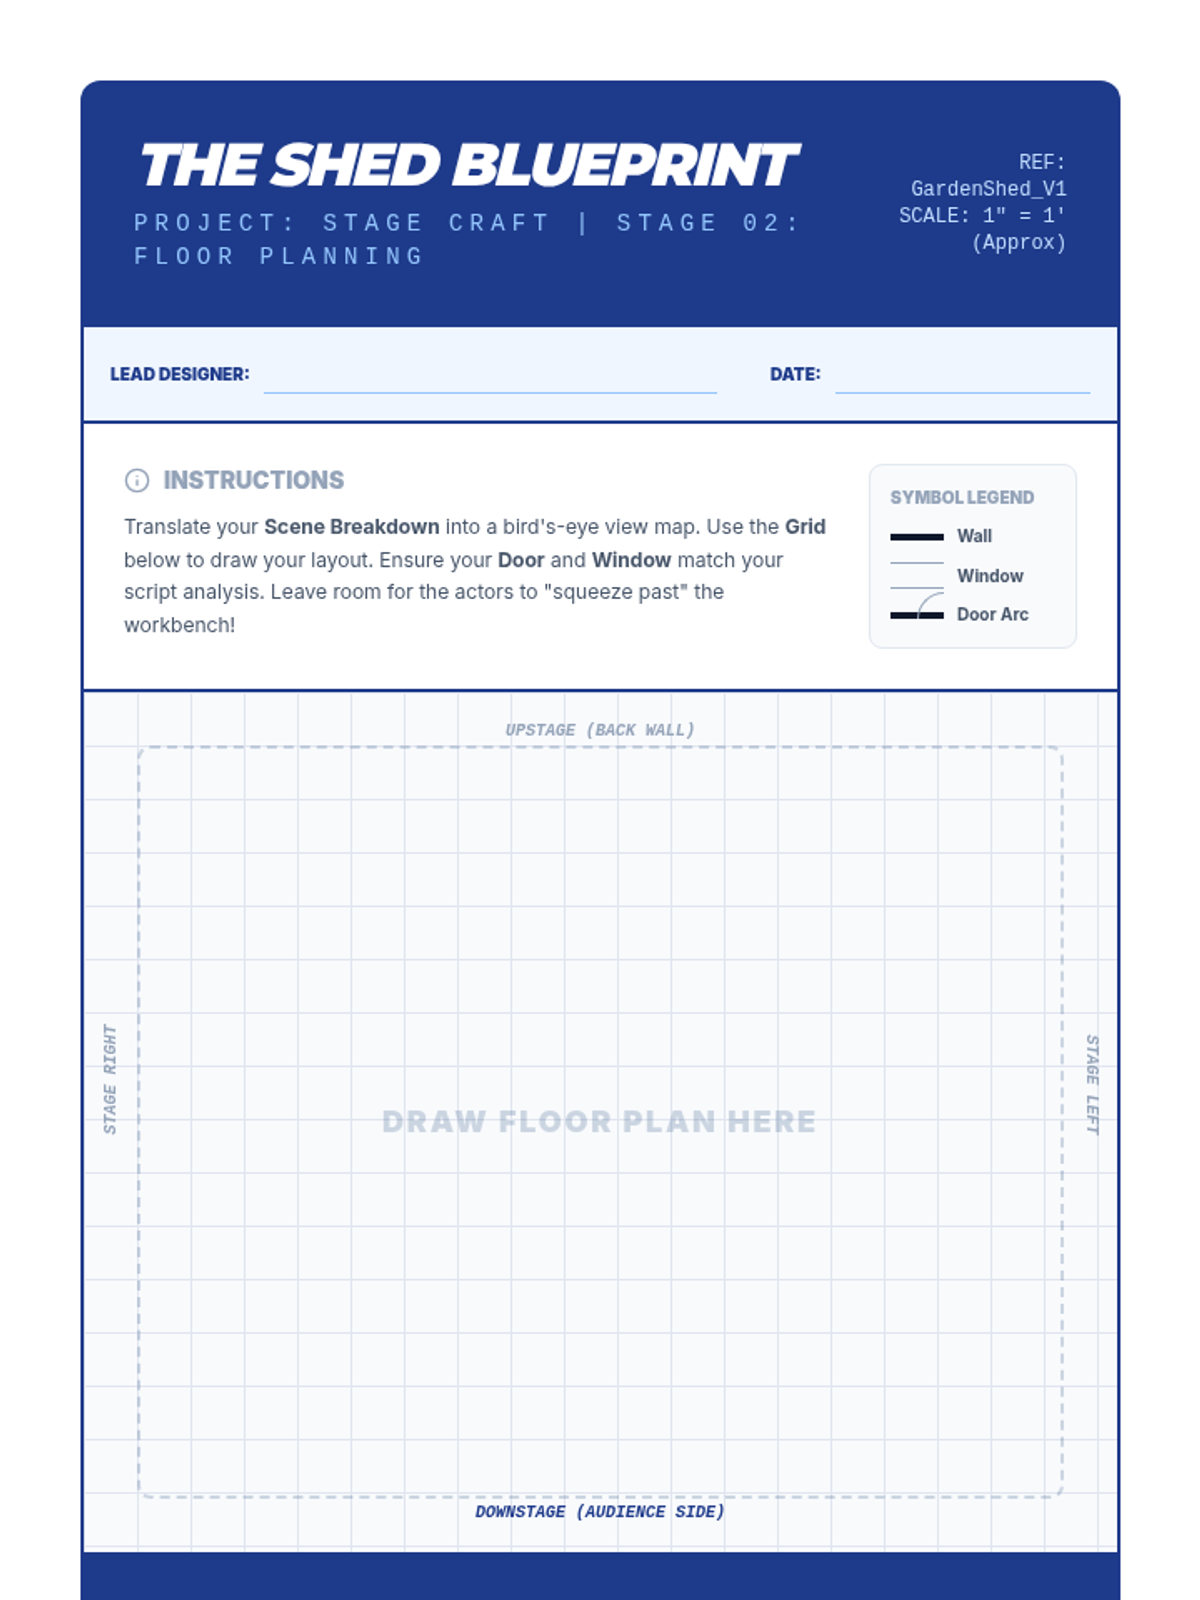
Students learn to translate their scene breakdown into a bird's-eye view floor plan, focusing on placement of furniture and walls to ensure actors have room to move and sightlines remain clear.
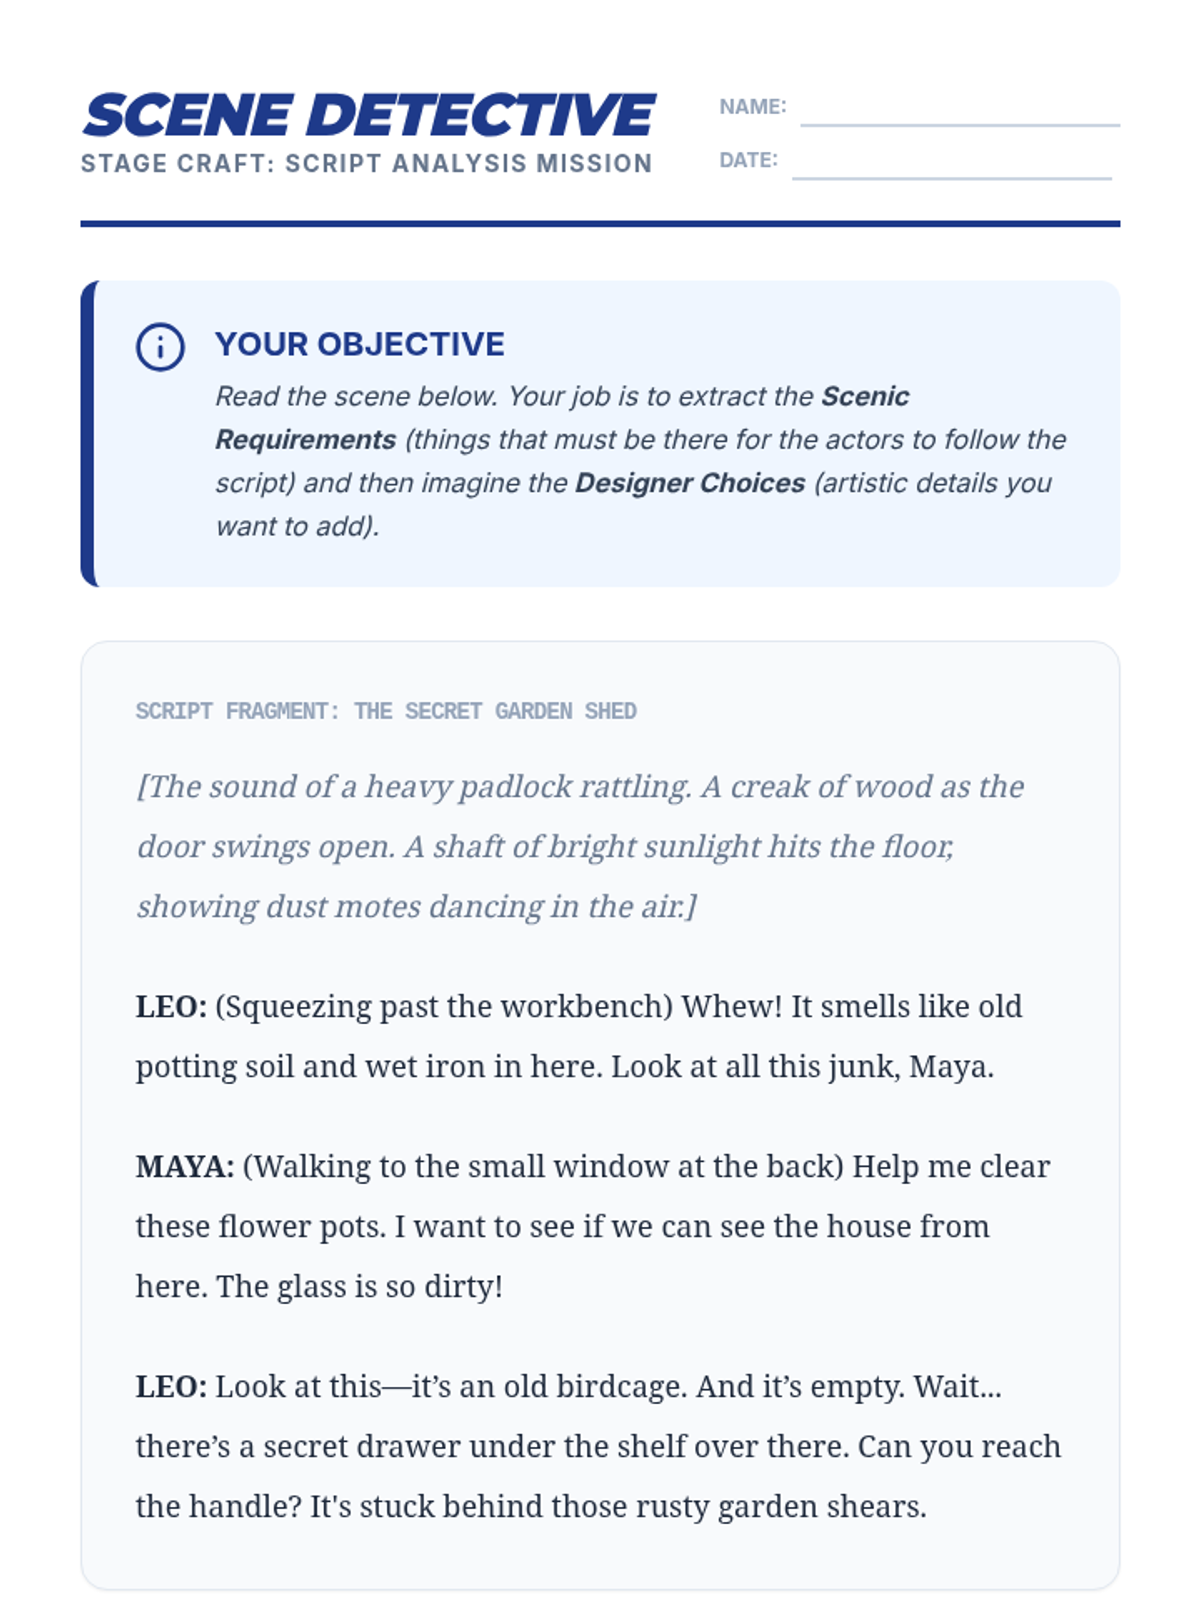
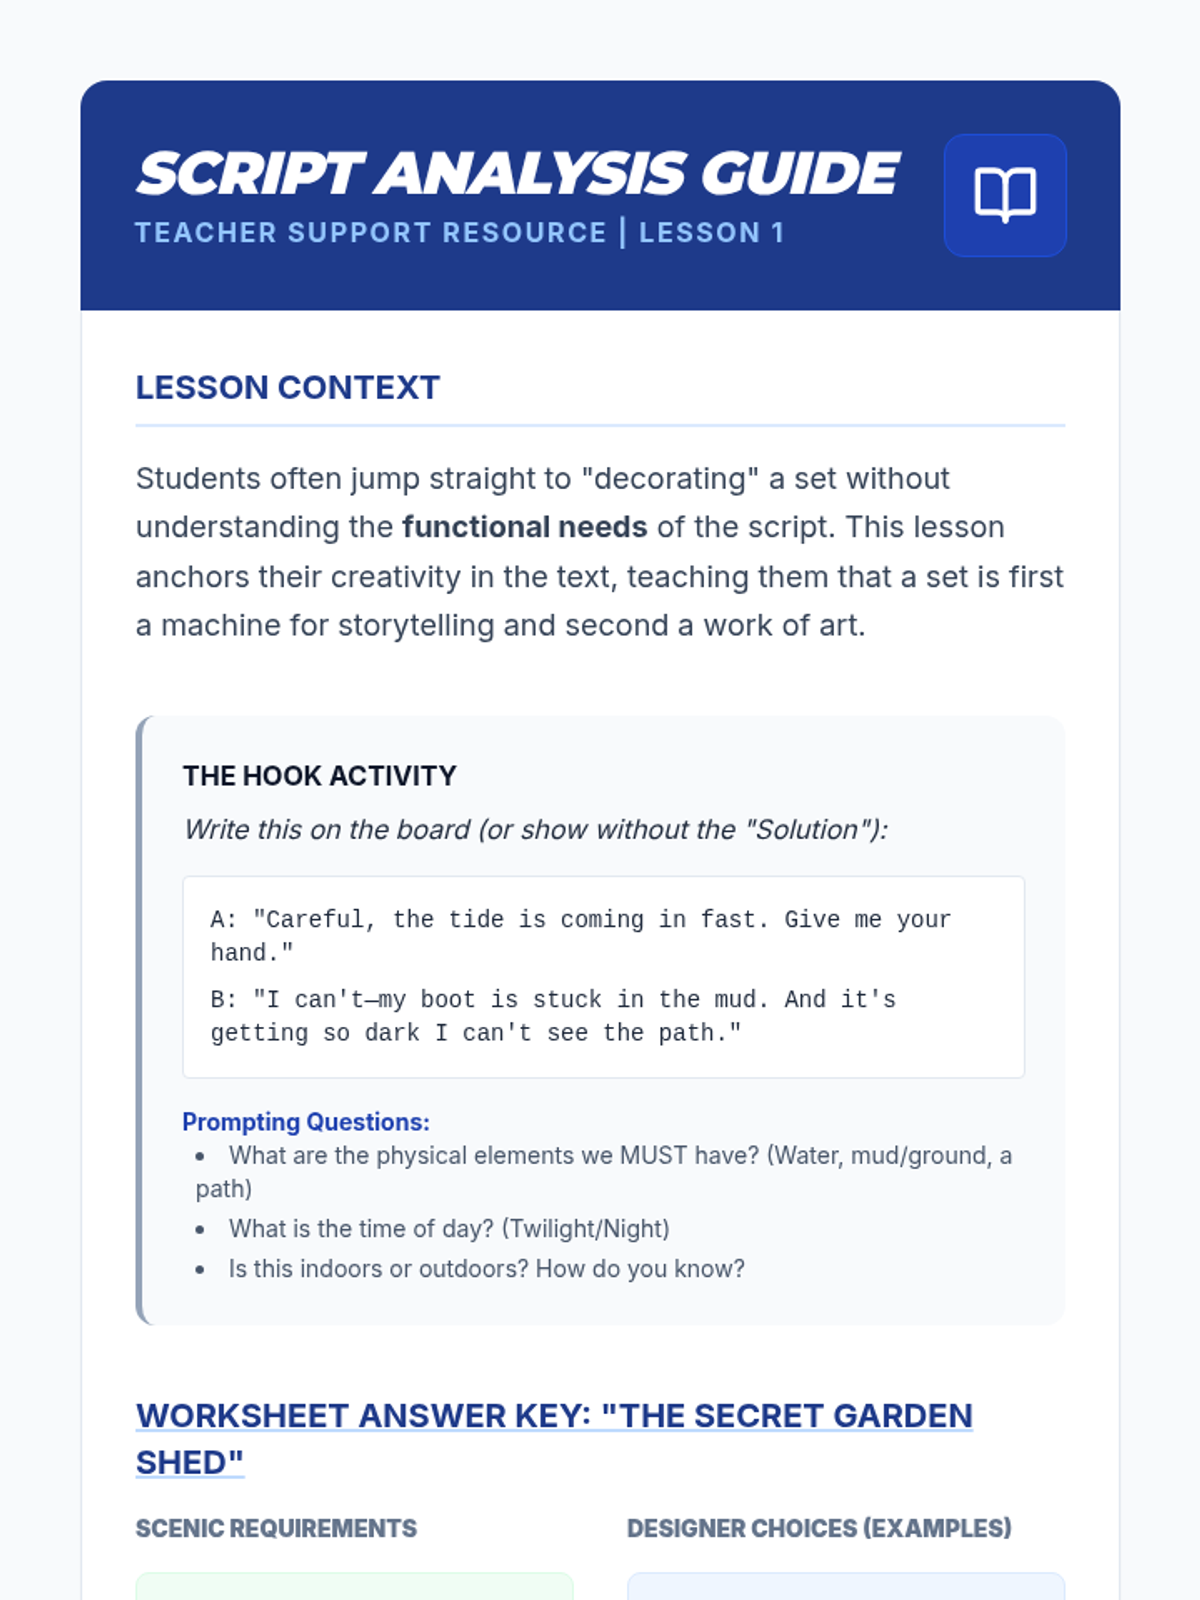
Students read a short scene to identify specific scenic needs, such as entrances, exits, furniture, and time period clues. They create a 'scene breakdown' list that categorizes these necessary elements versus artistic possibilities.
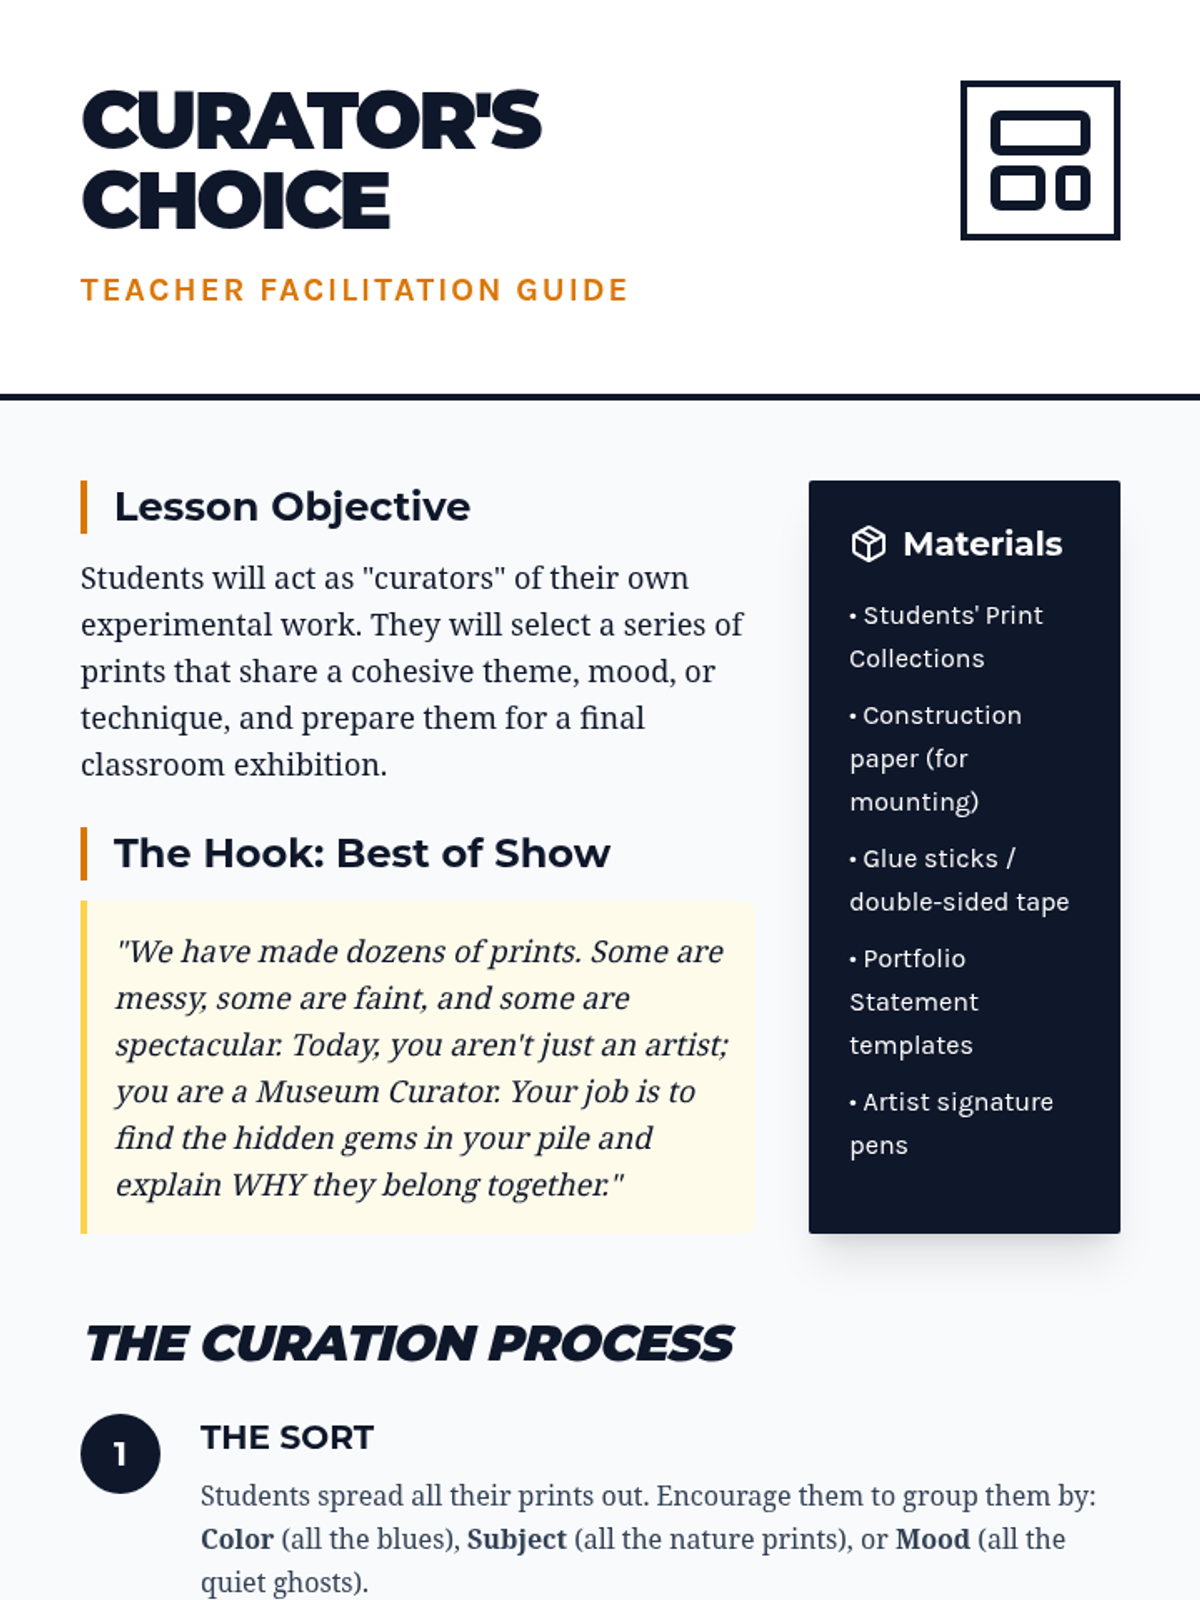
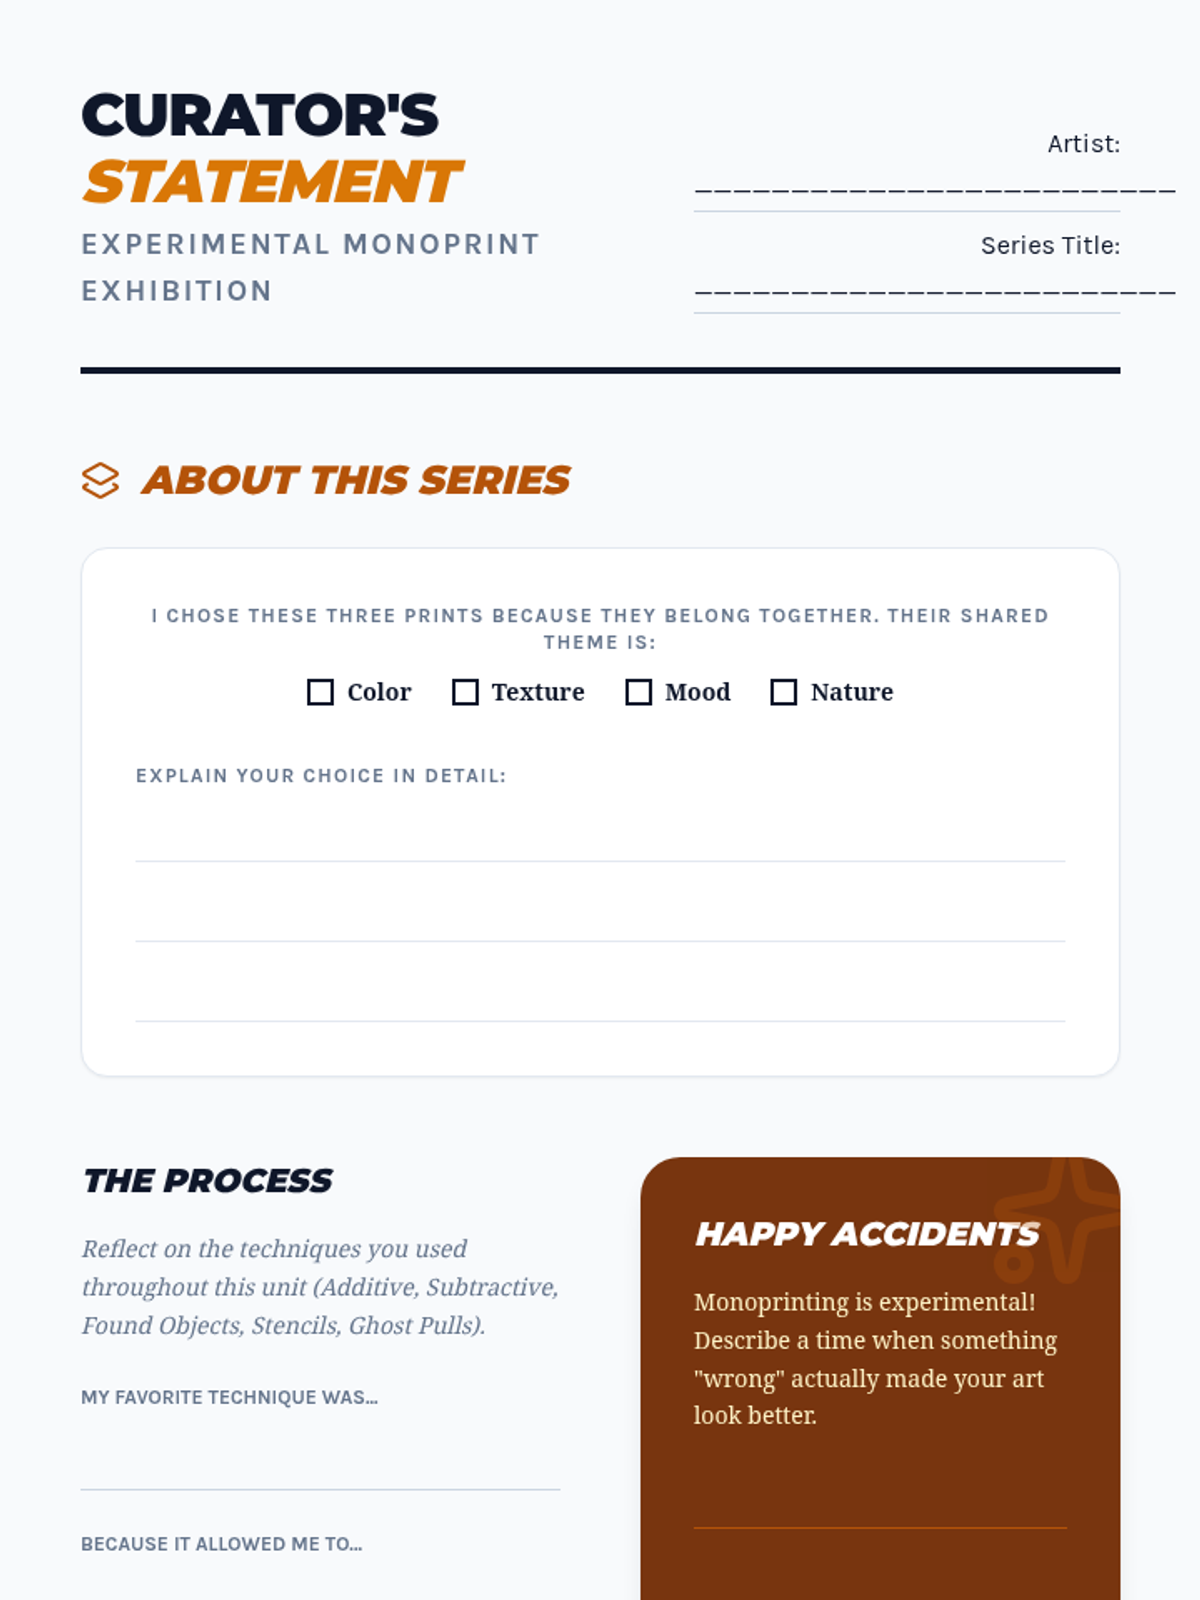
Students curate their experimental prints and select a cohesive series. They add finishing touches with drawing materials and write a brief curator's statement about their process.
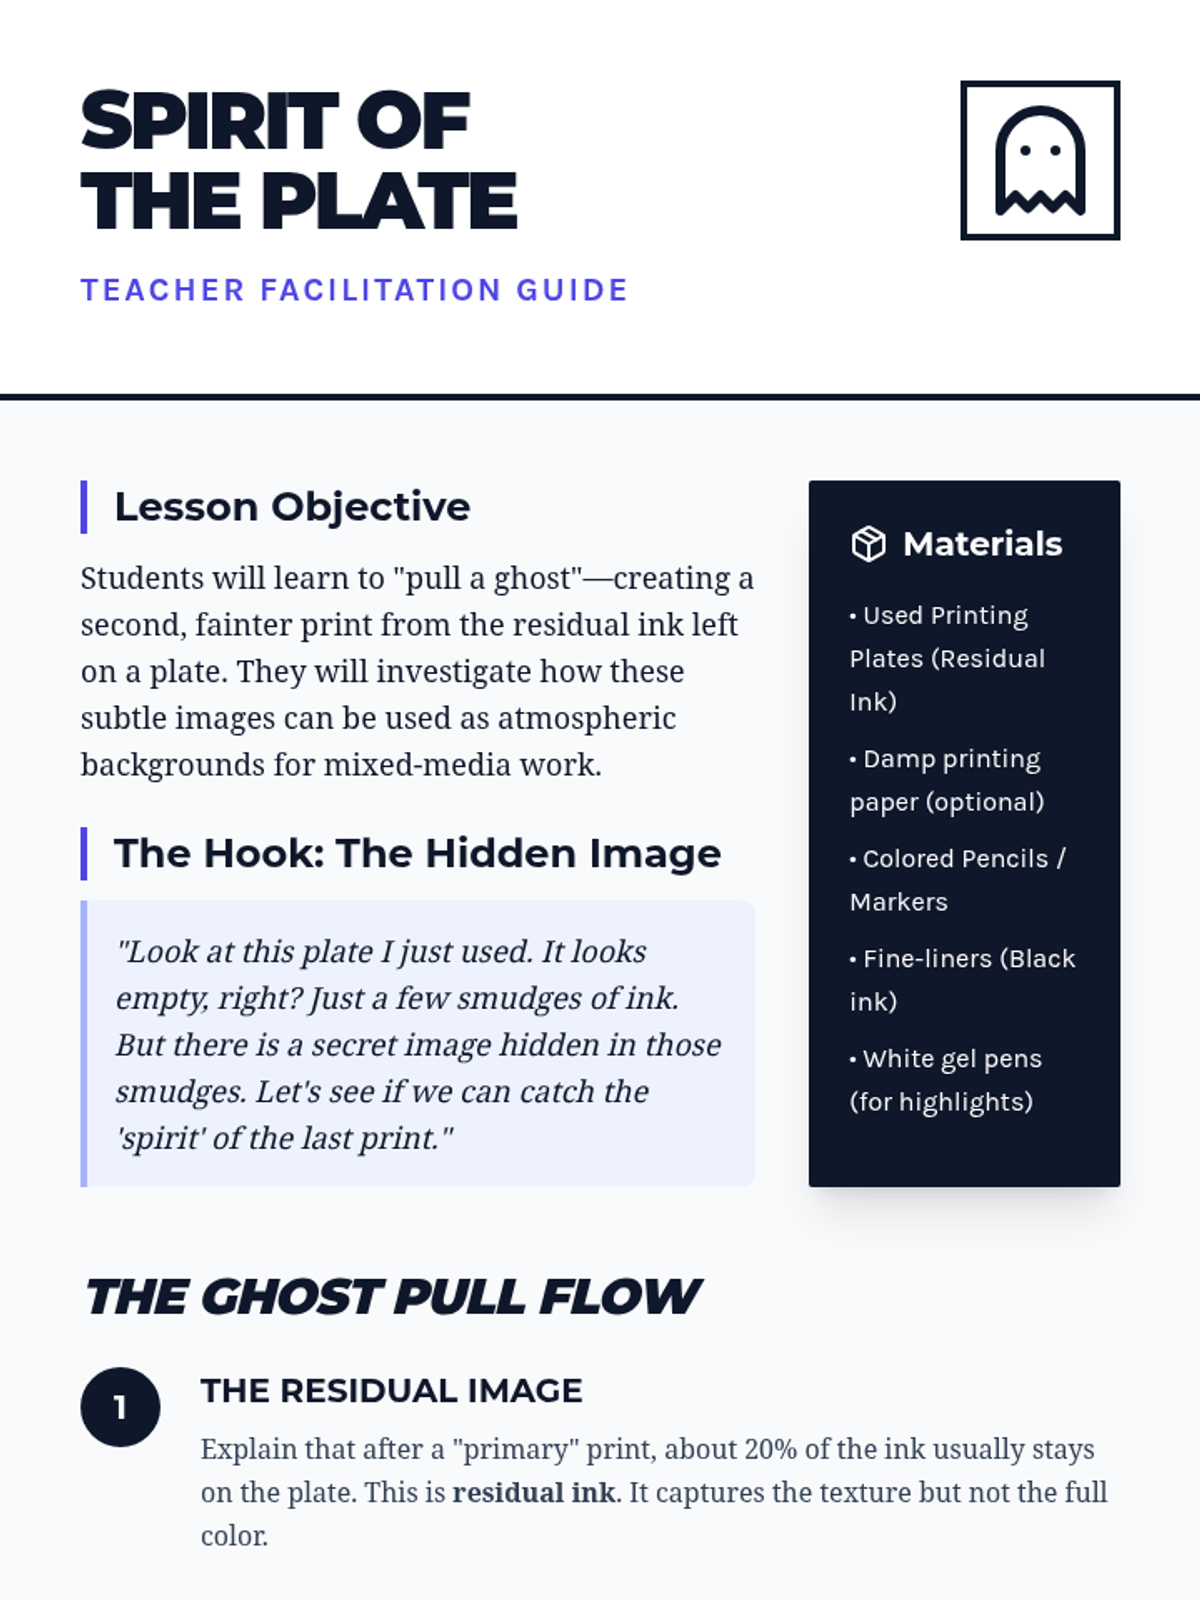
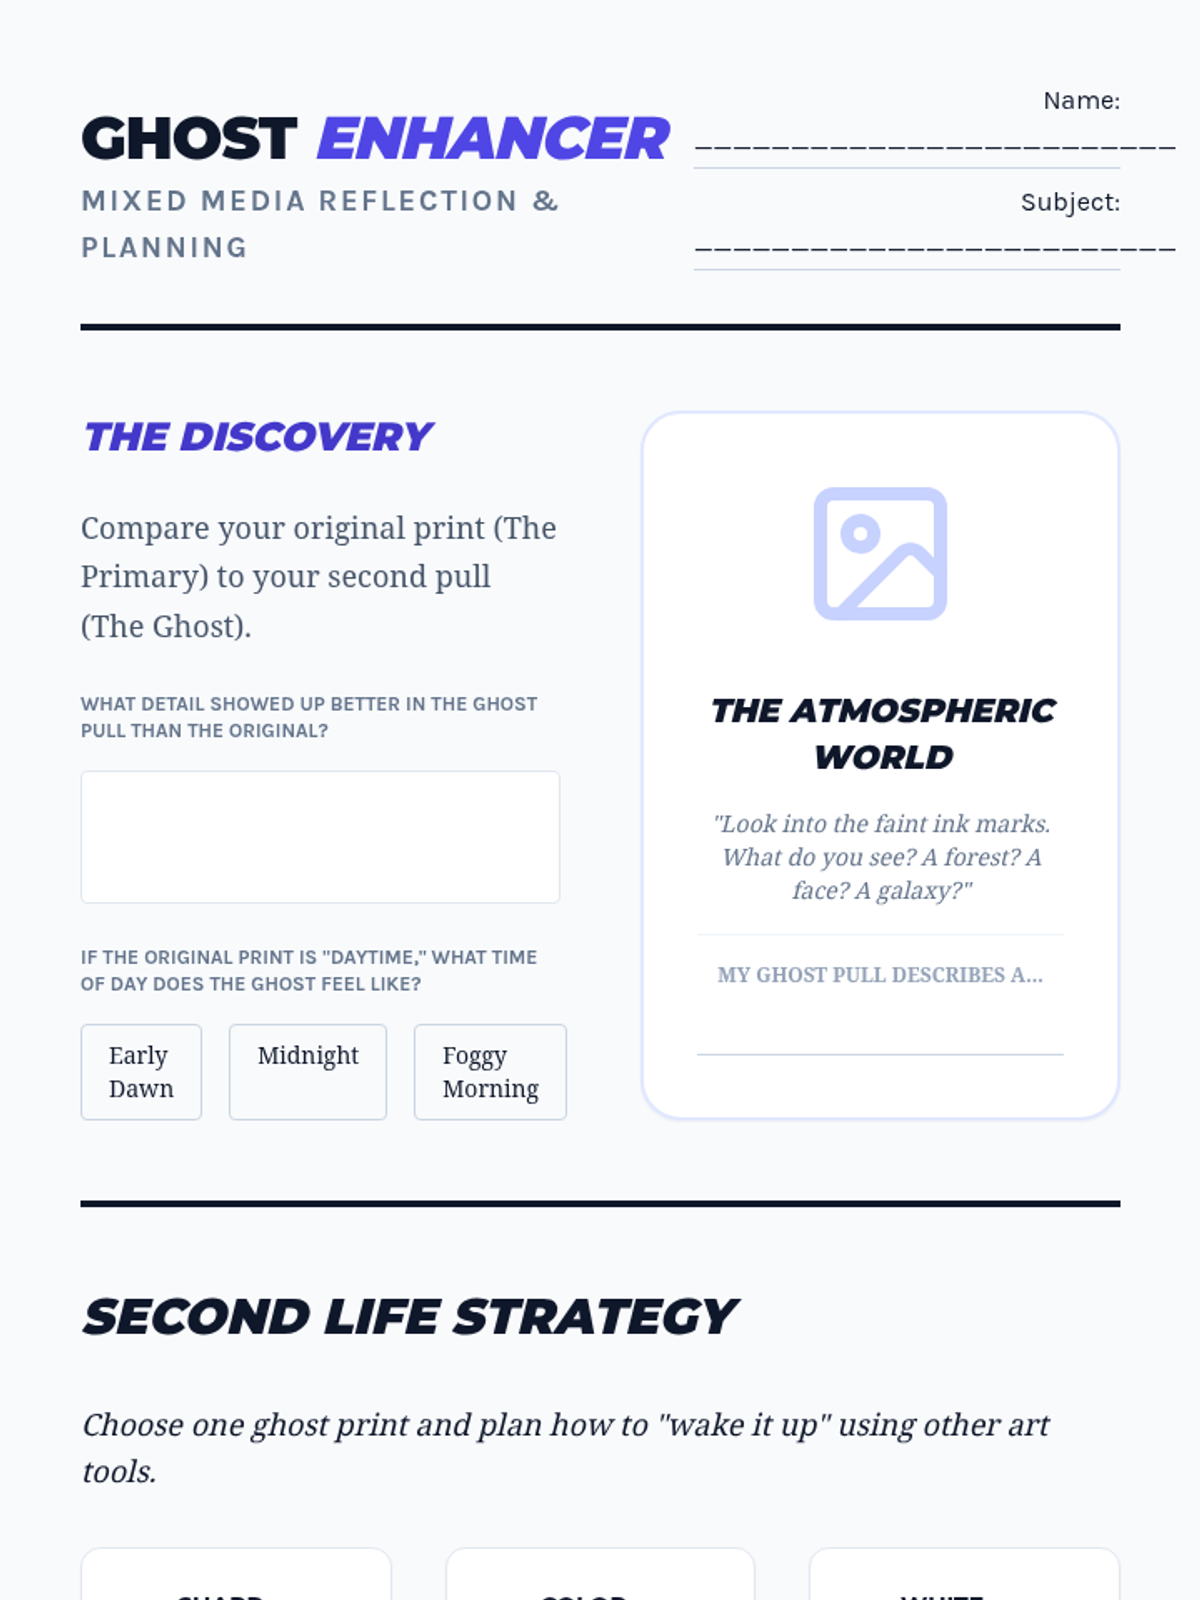
Students explore the concept of residual ink by pulling 'ghost prints'. They investigate how faint images can serve as backgrounds for further artistic development.
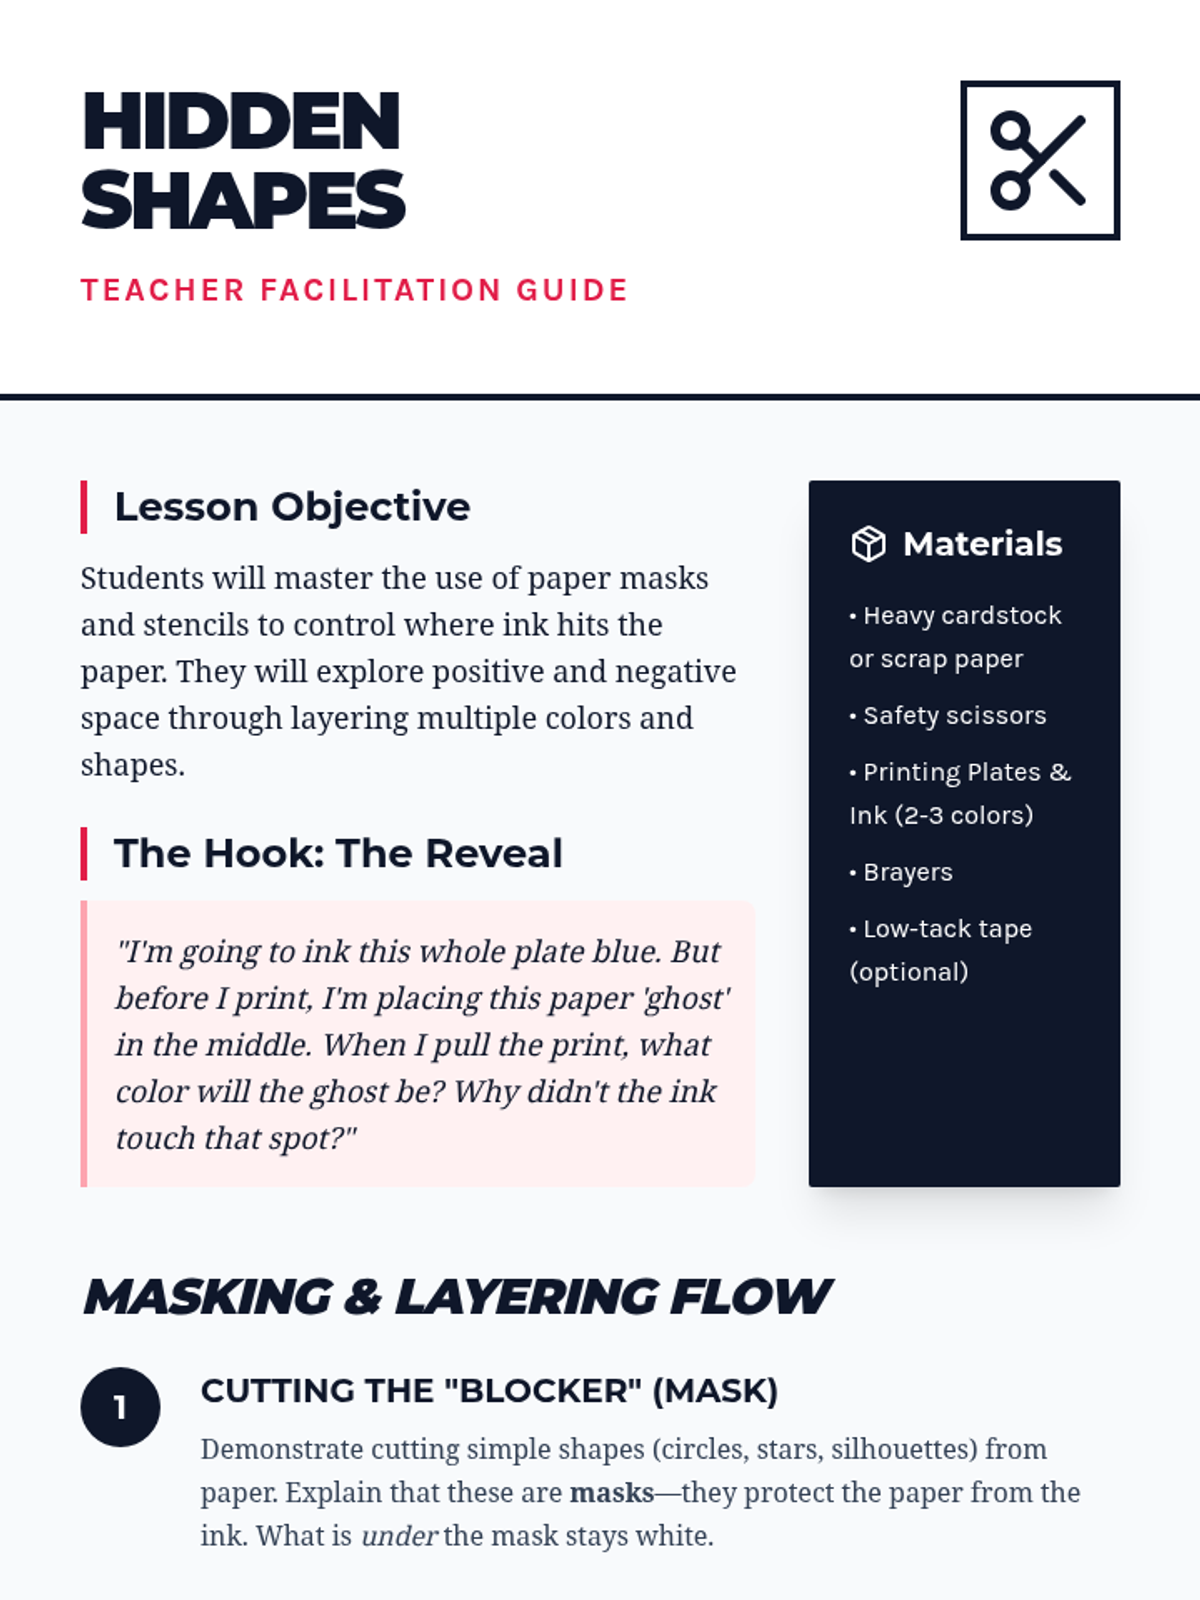
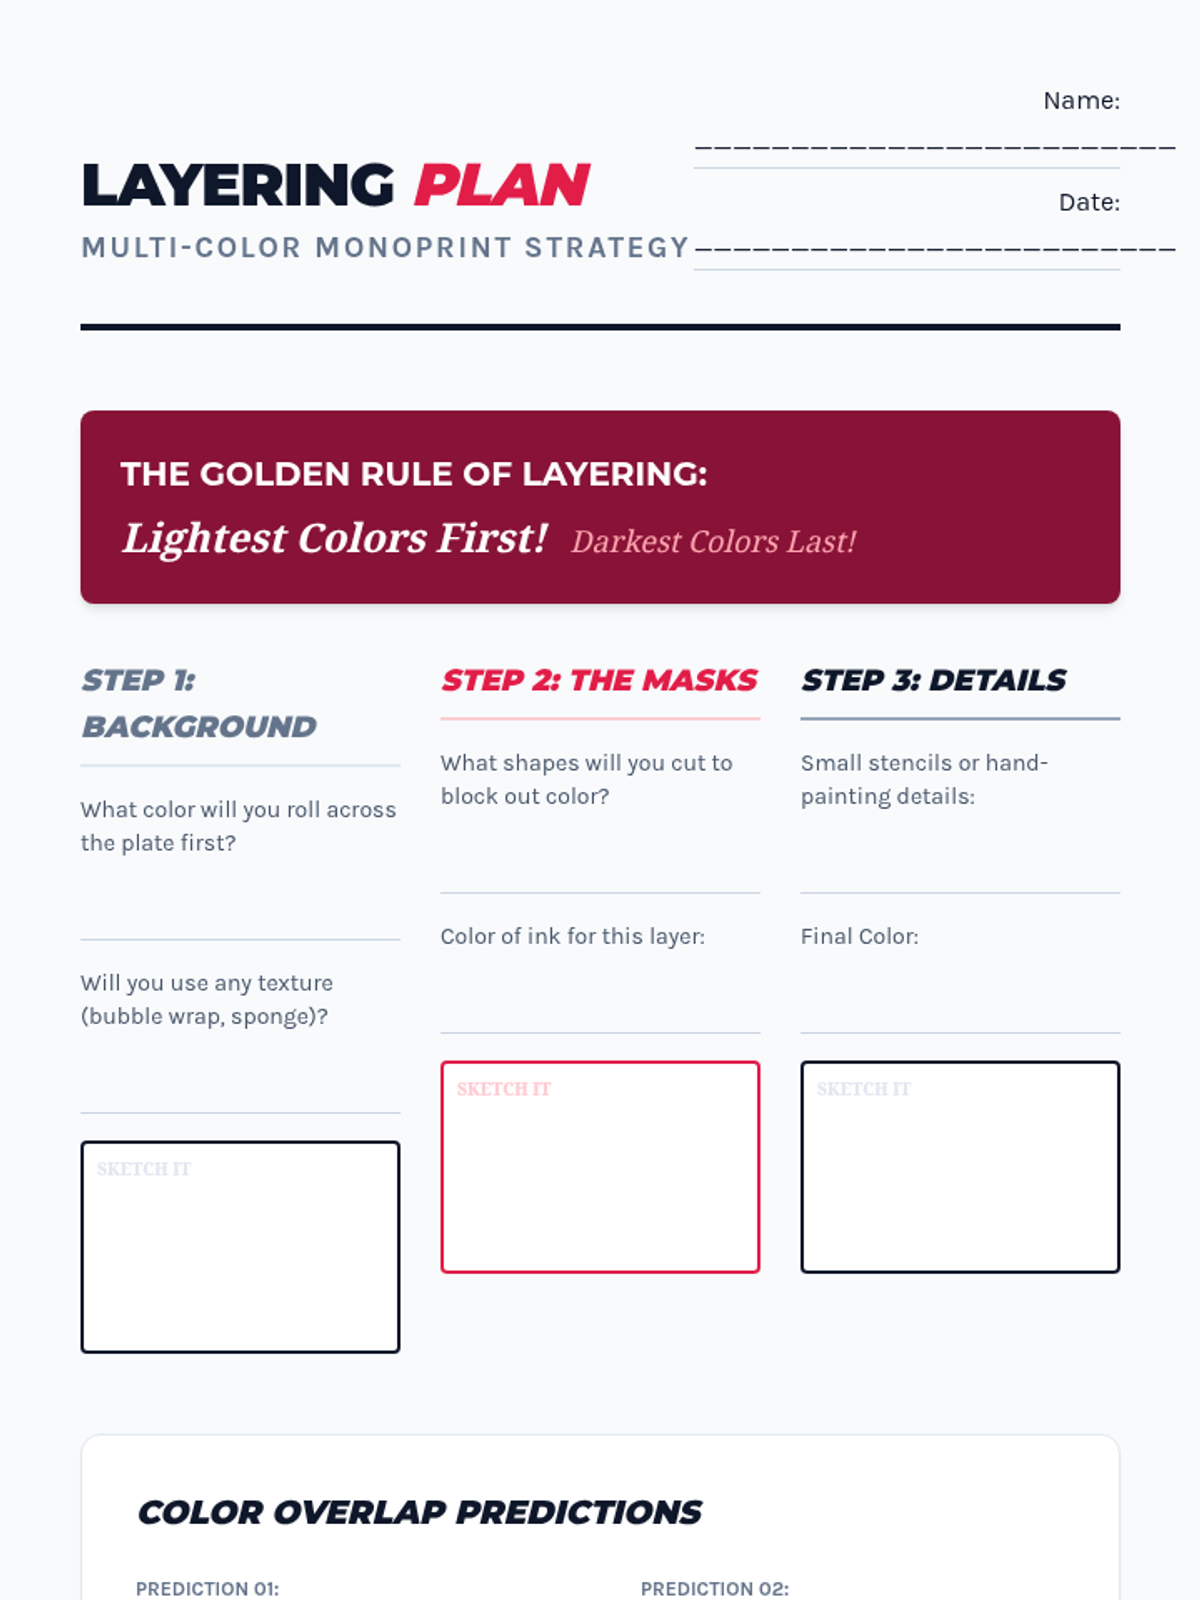
Students create paper masks to block areas of the plate, exploring positive and negative space. They learn to layer colors and preserve white space in their compositions.
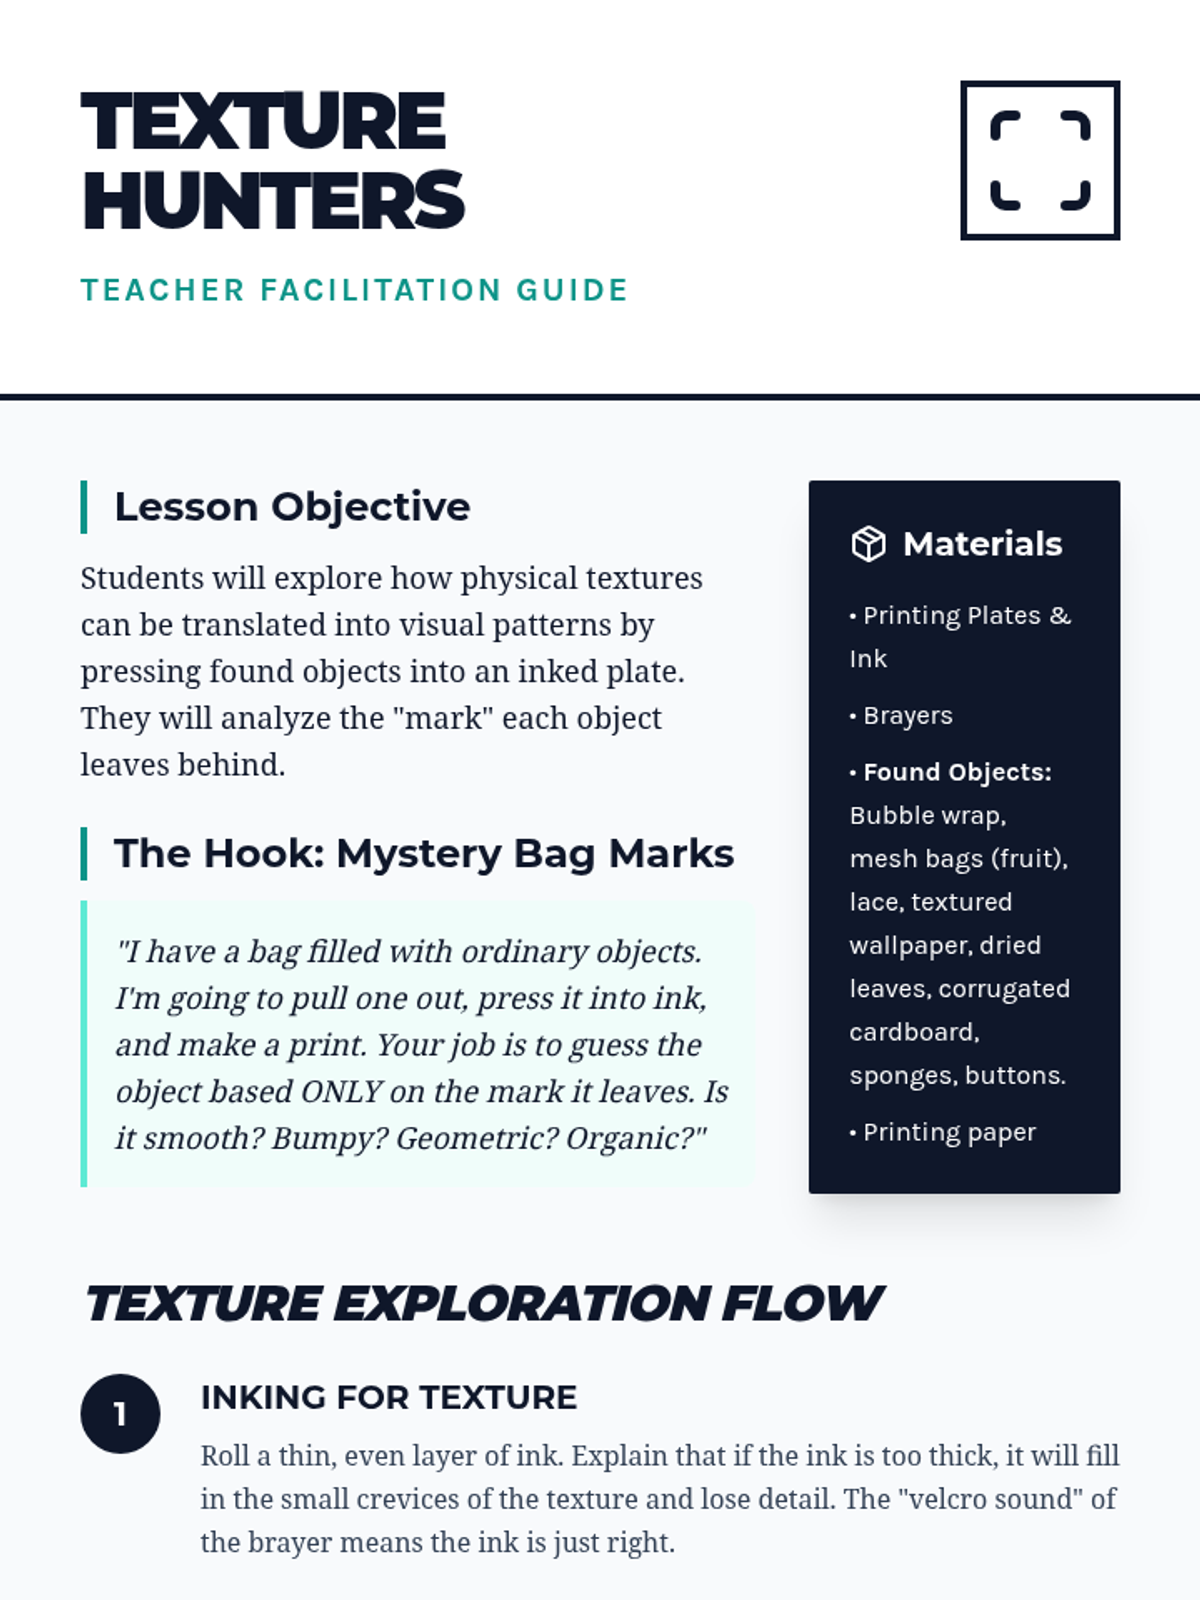
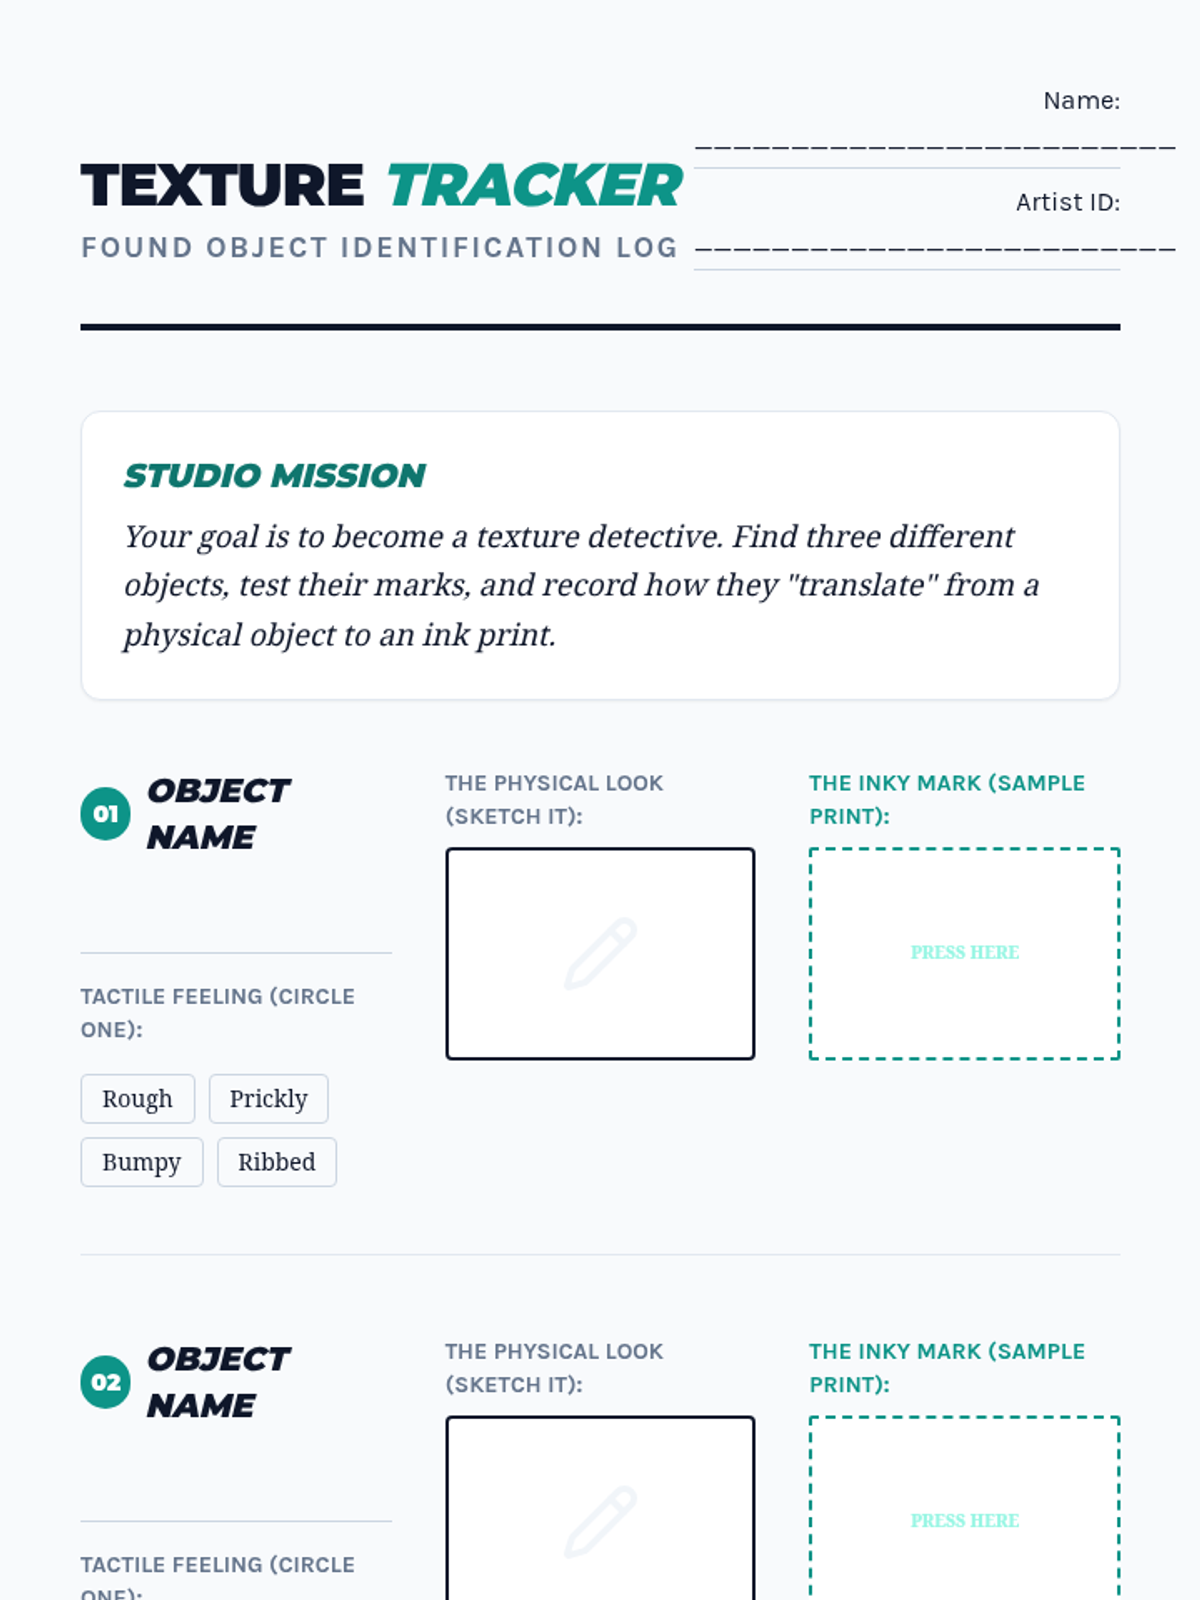
Students use textured materials like bubble wrap and lace to transfer patterns. They analyze how different materials leave distinct visual imprints on the printing plate.
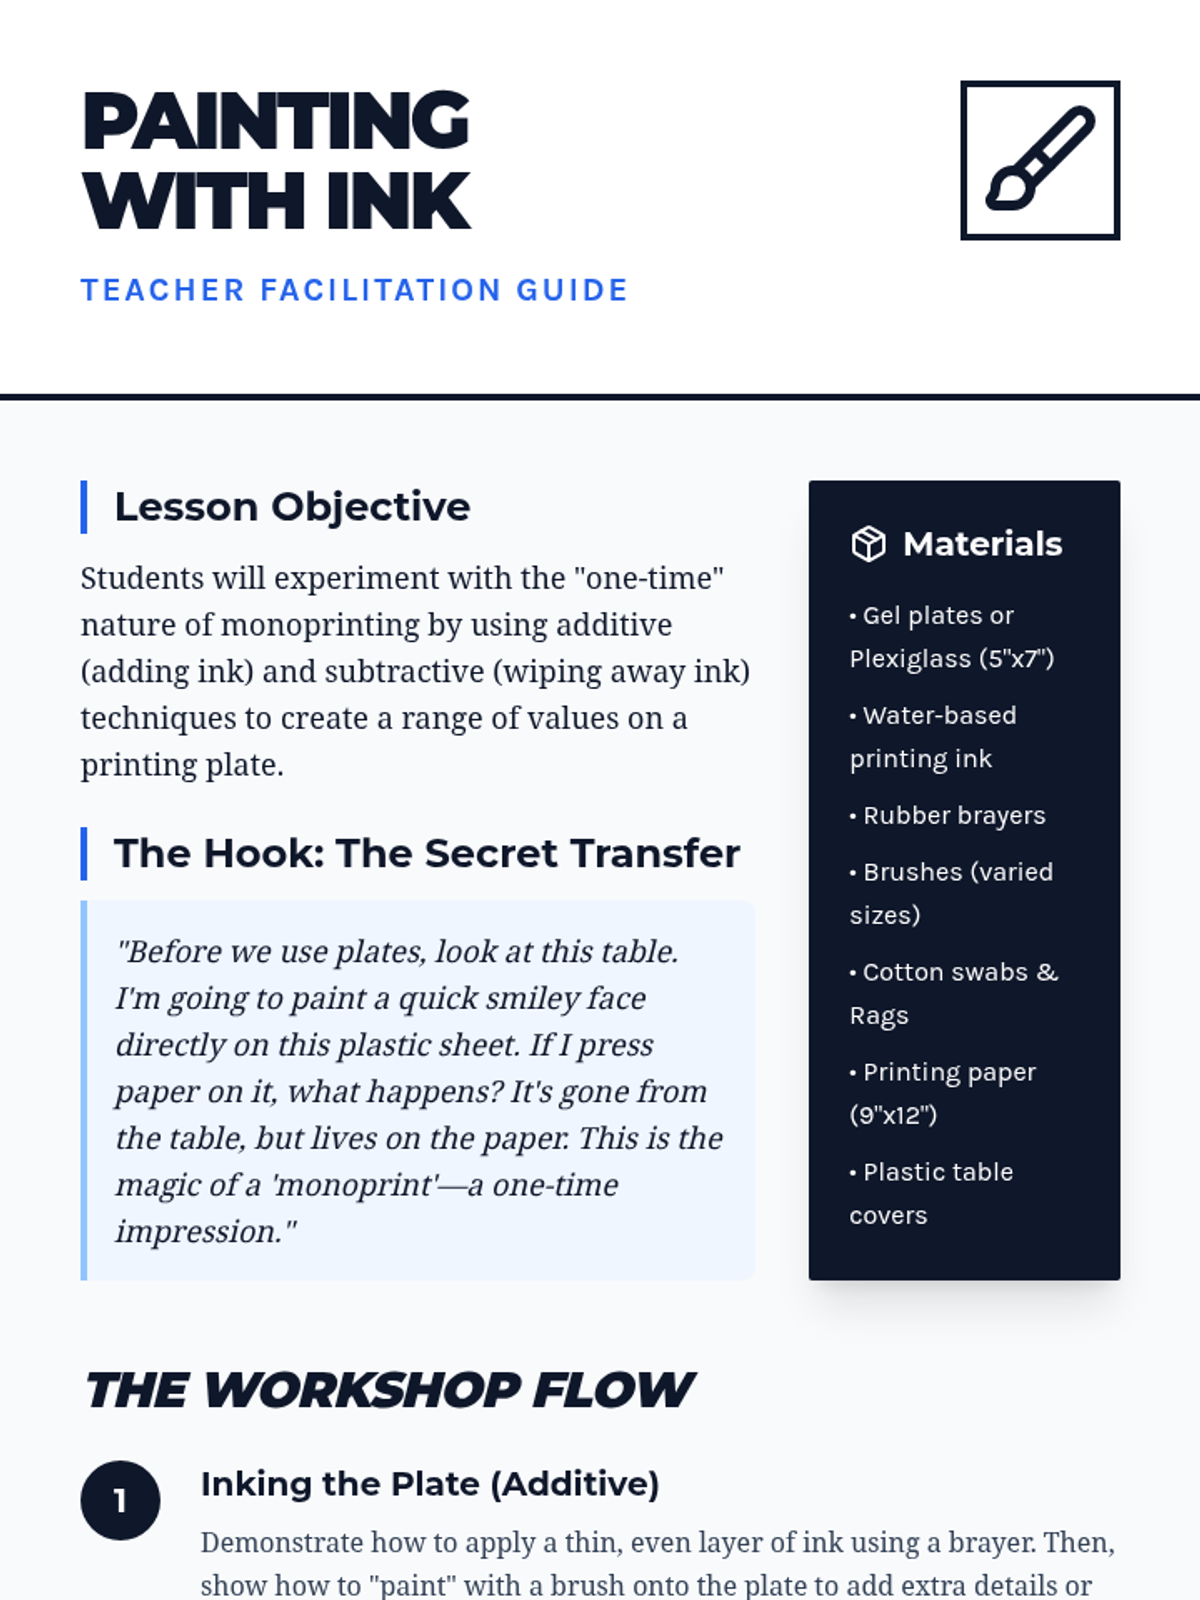
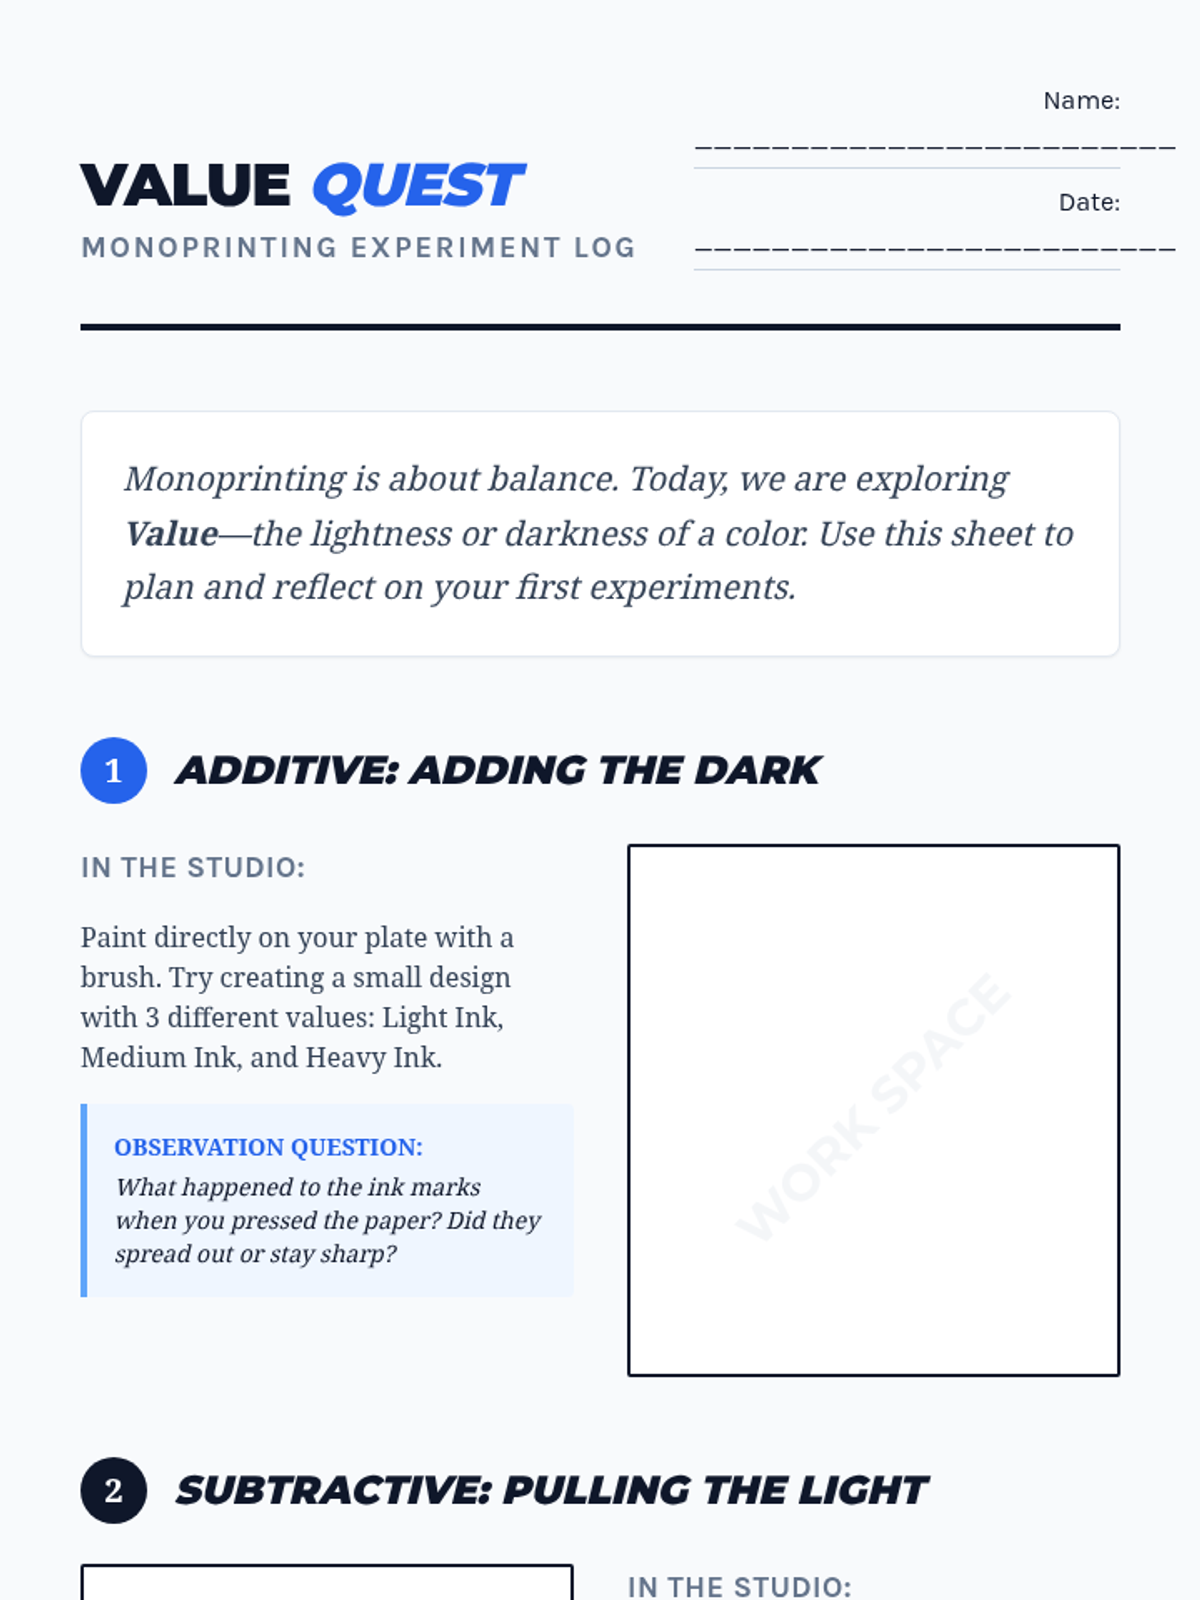
Students explore the printing plate as a surface for painting and wiping away ink. They learn additive and subtractive techniques to create light and dark values in a 'one-time' print.
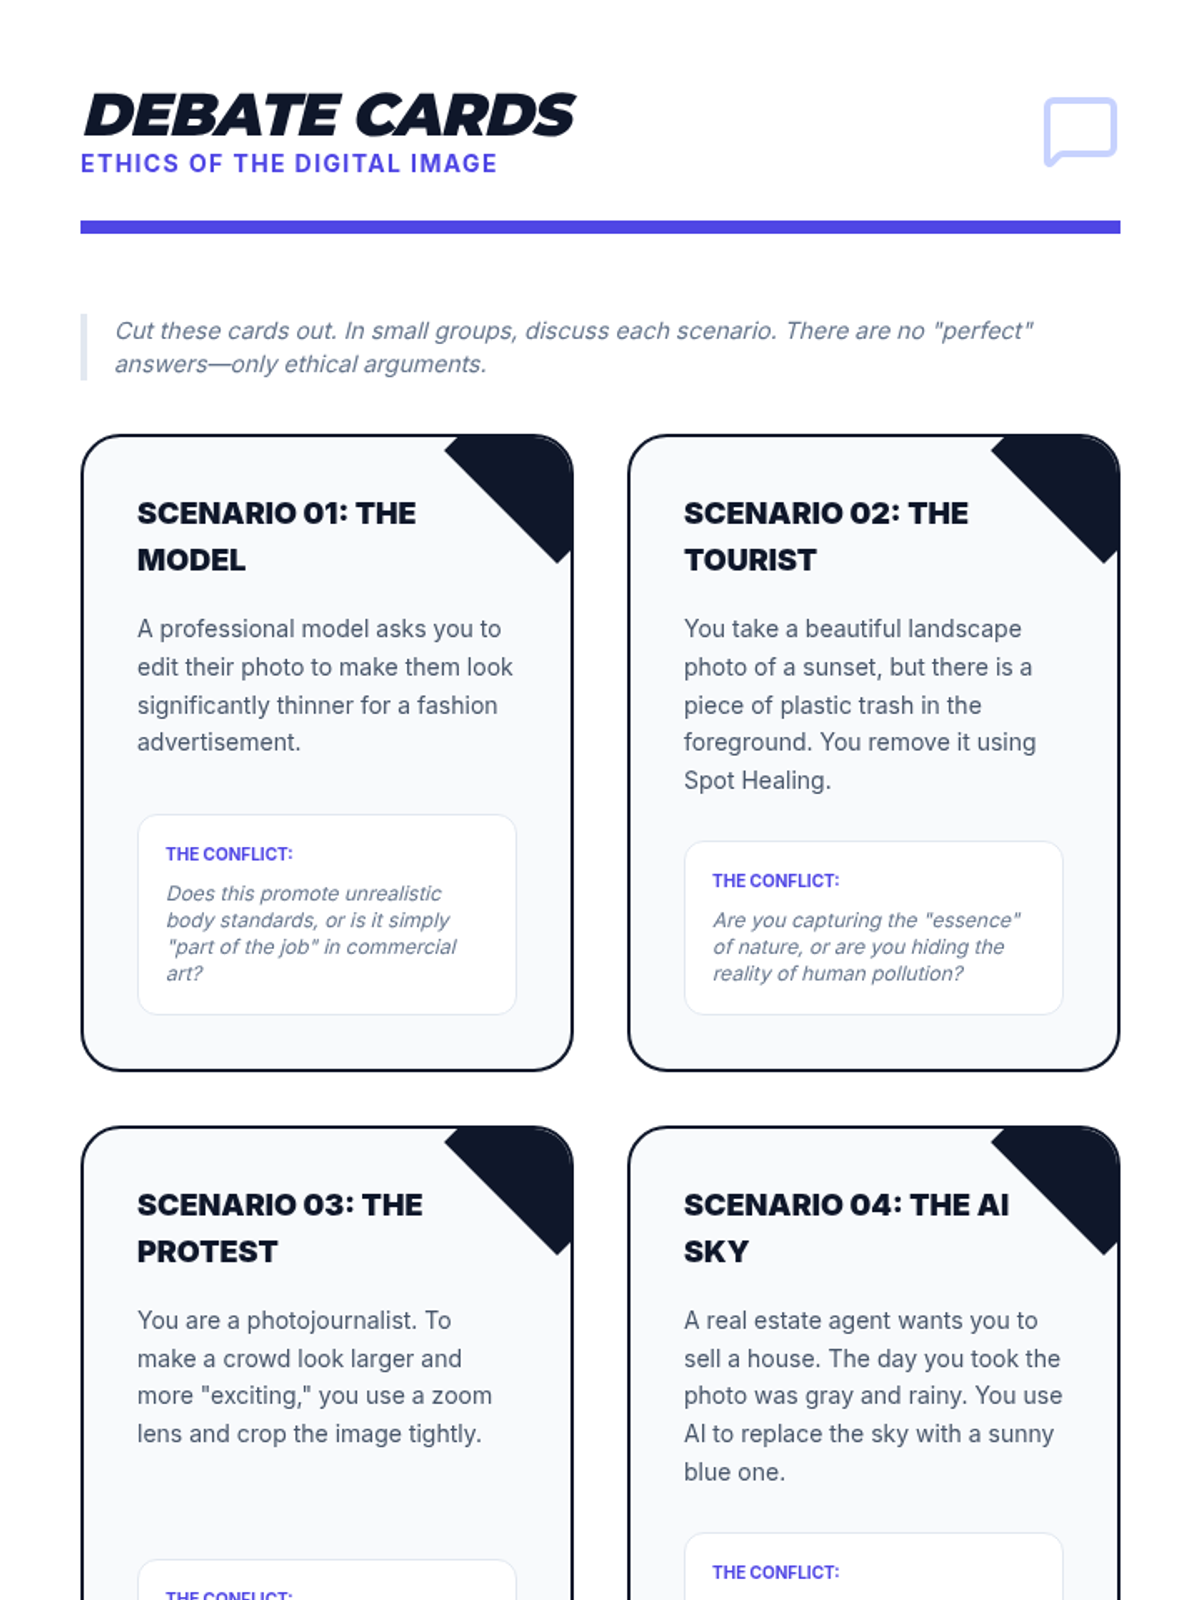
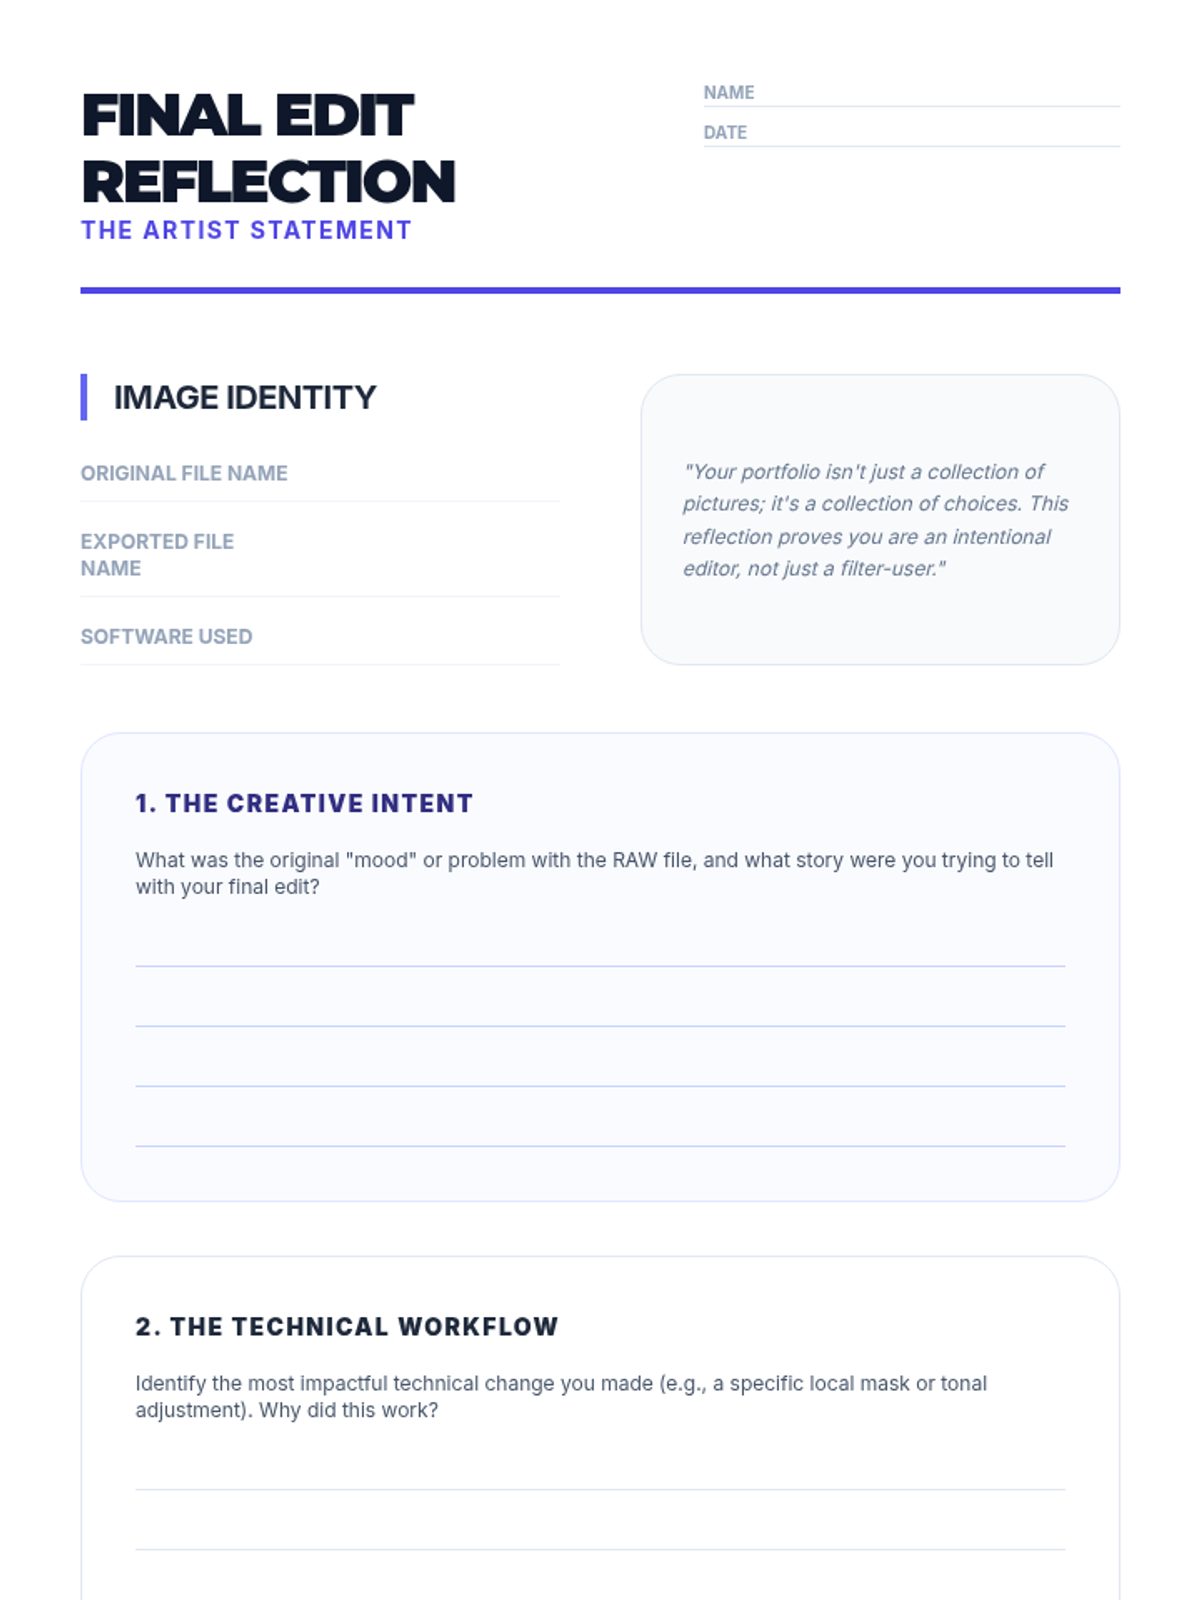
A critical examination of the ethical boundaries in photo manipulation. Students debate case studies of media controversy and AI-generated imagery, culminating in a portfolio reflection on their own editing choices.
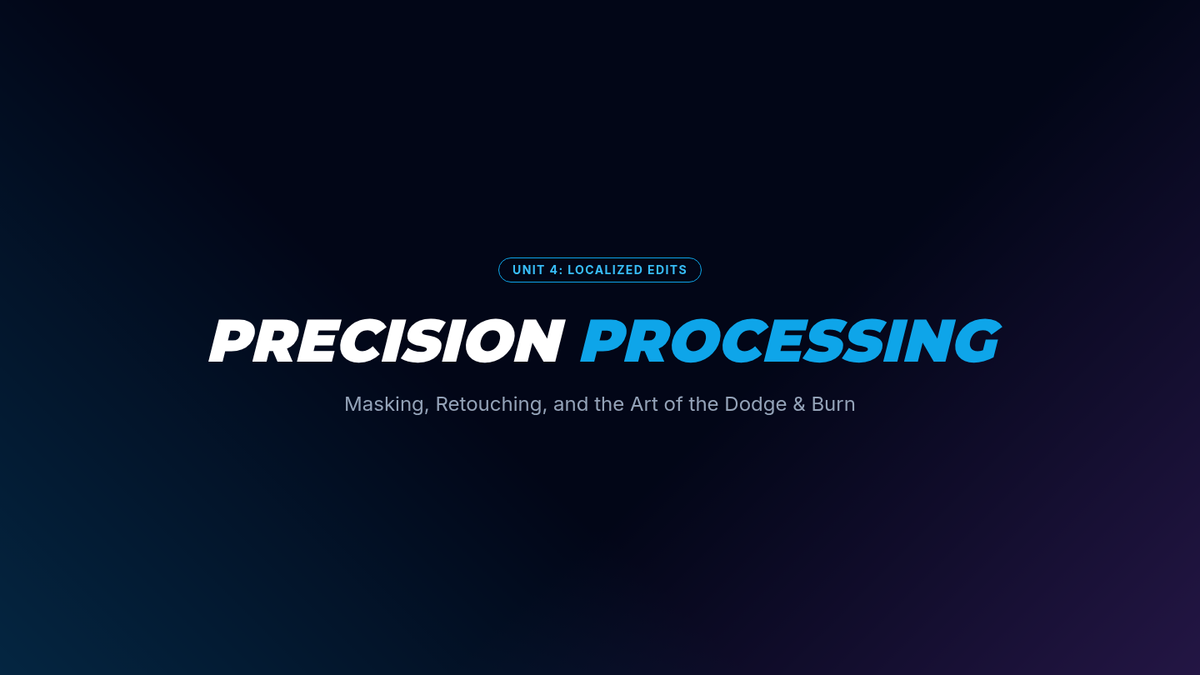
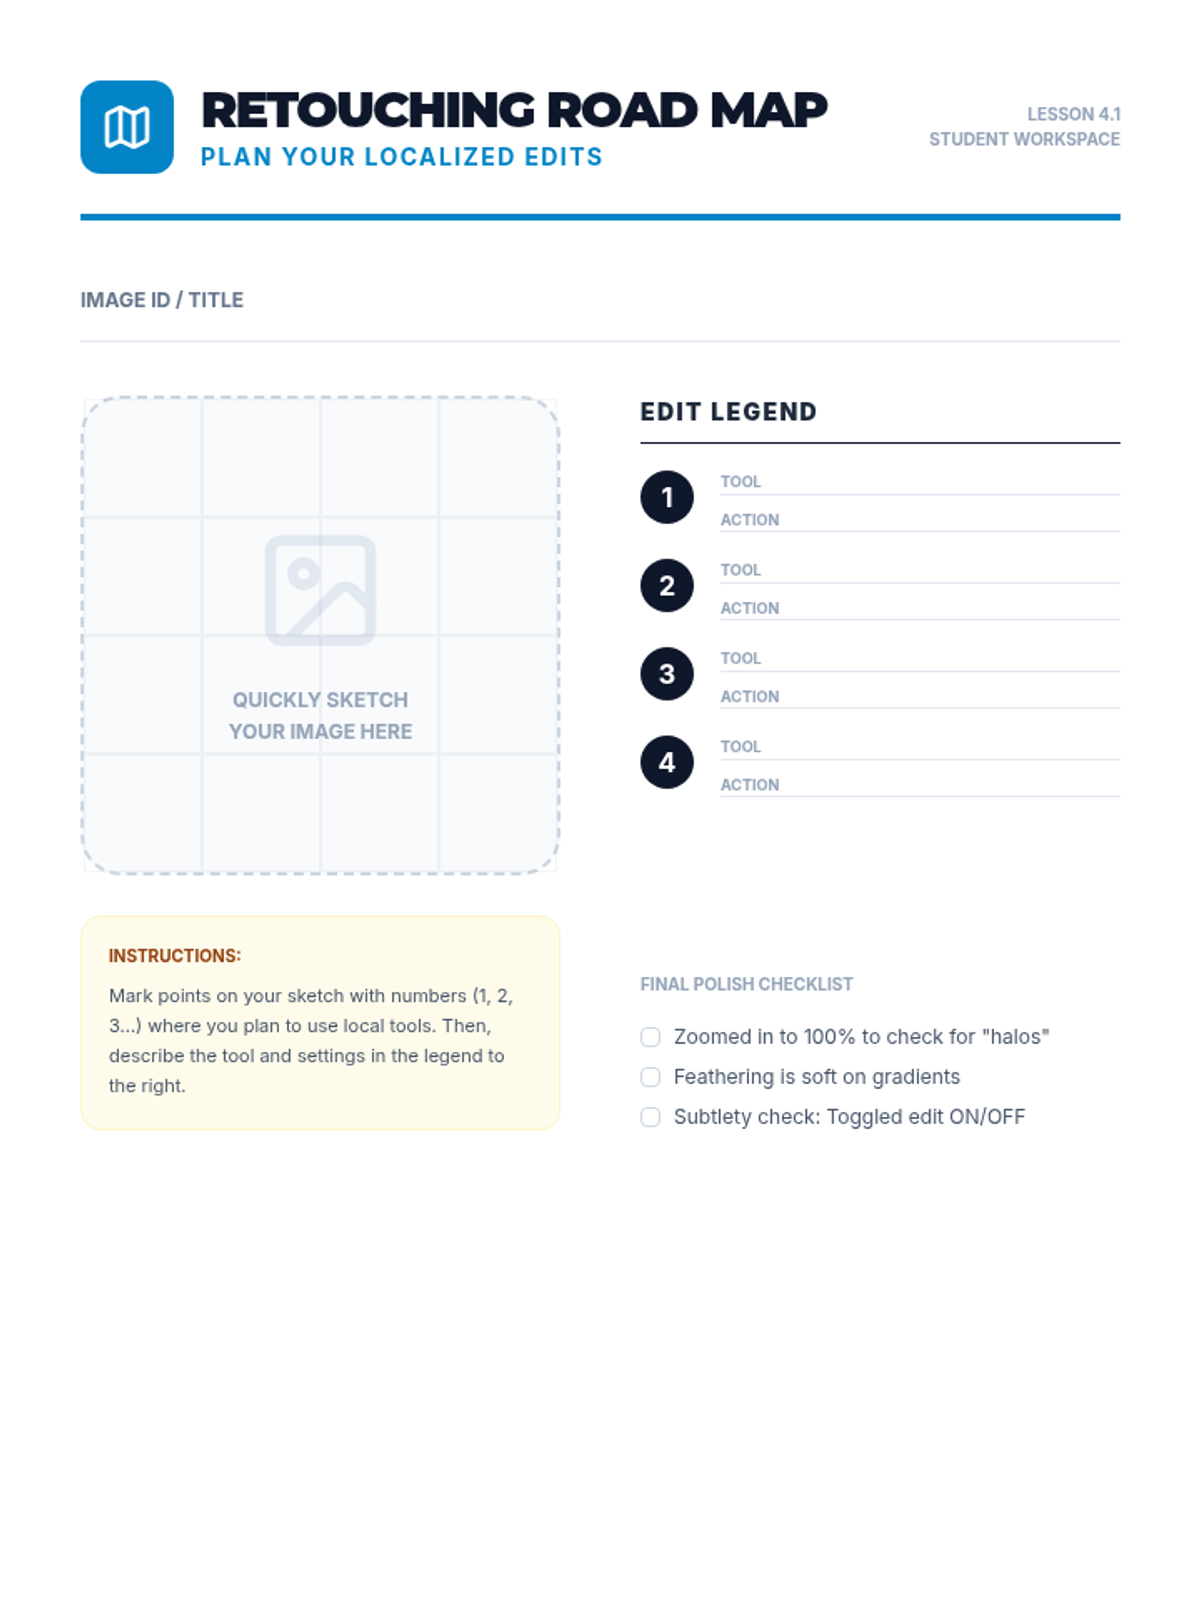
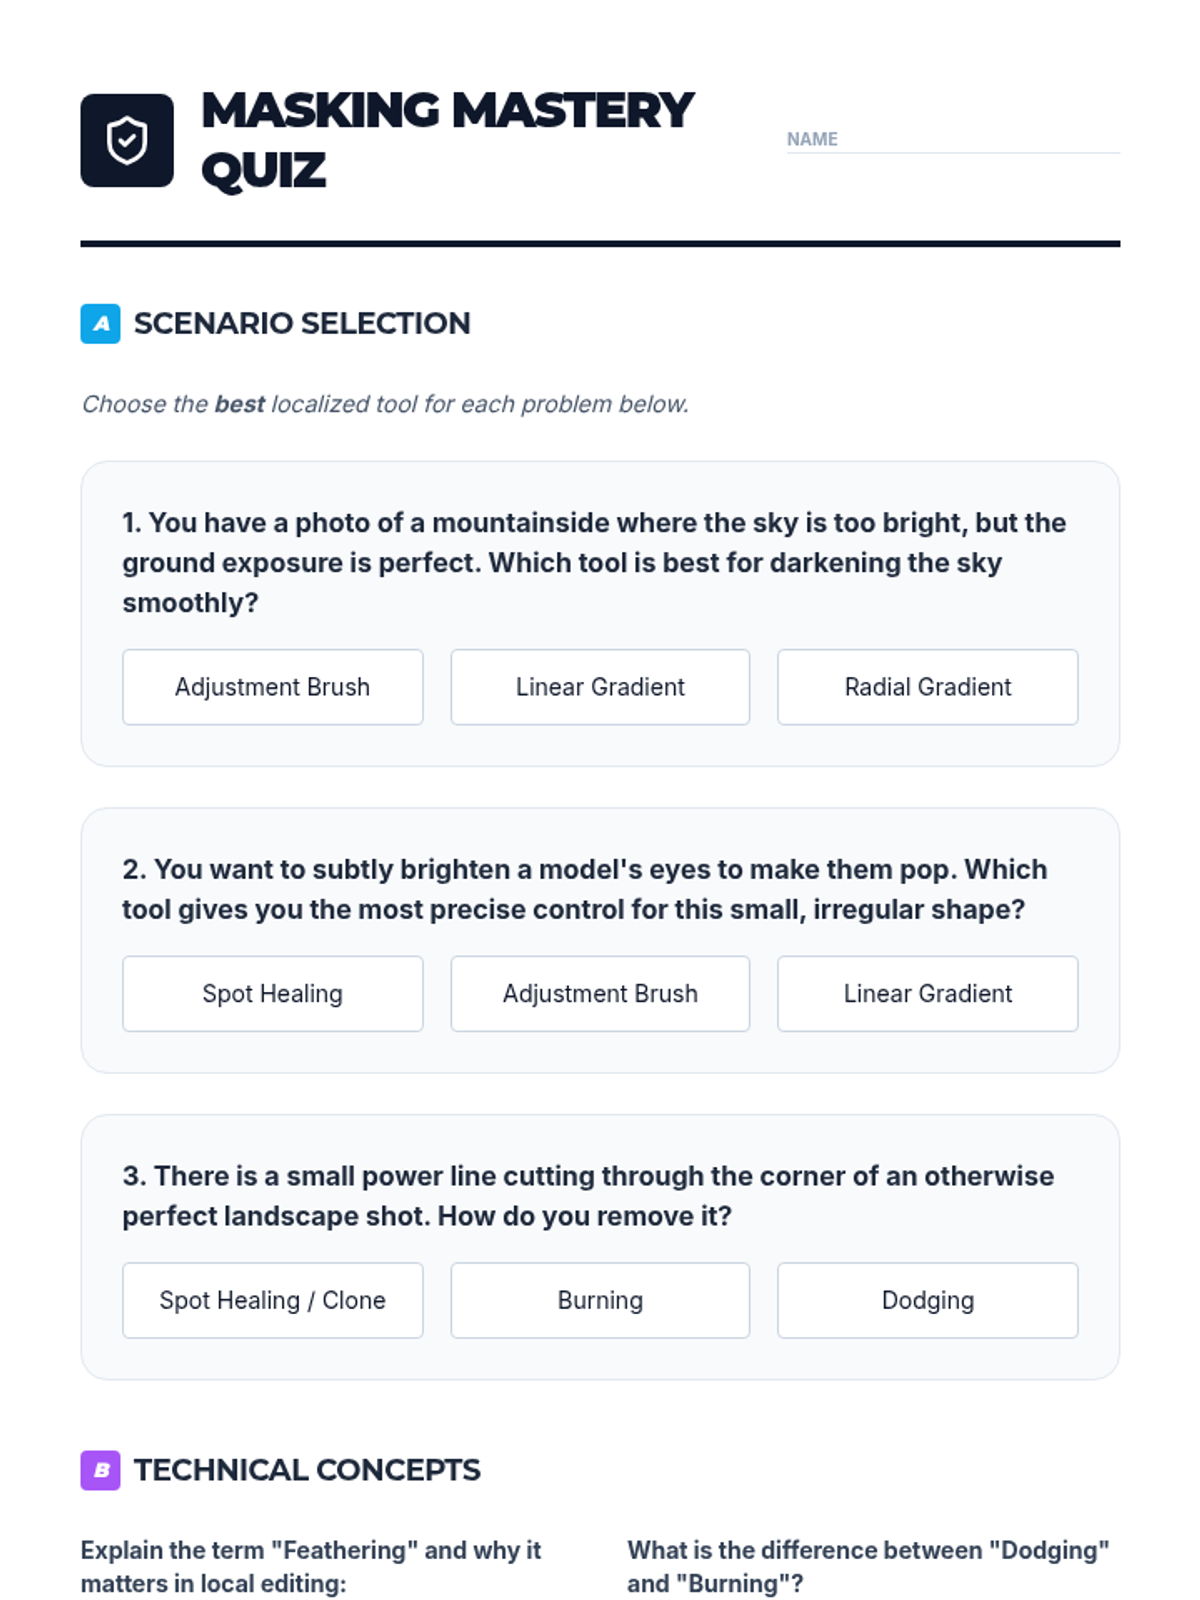
Students master localized editing tools including brushes, gradients, and spot removal. They learn the art of dodging and burning to guide the viewer's eye and remove minor distractions without compromising realism.
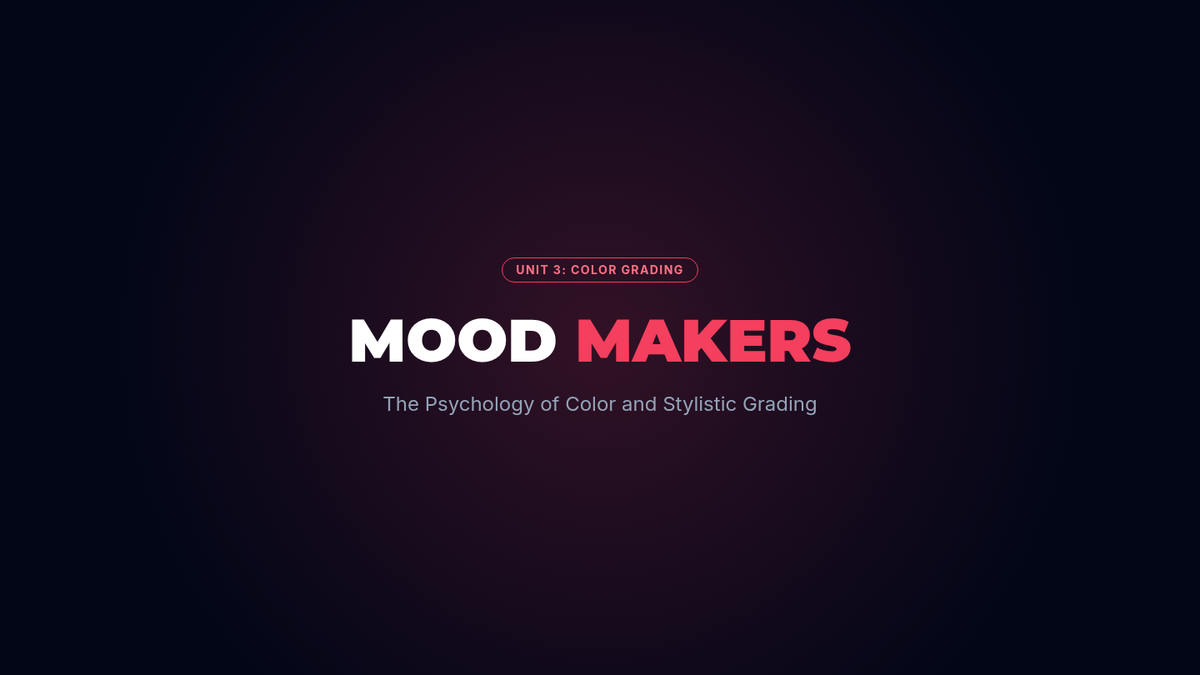
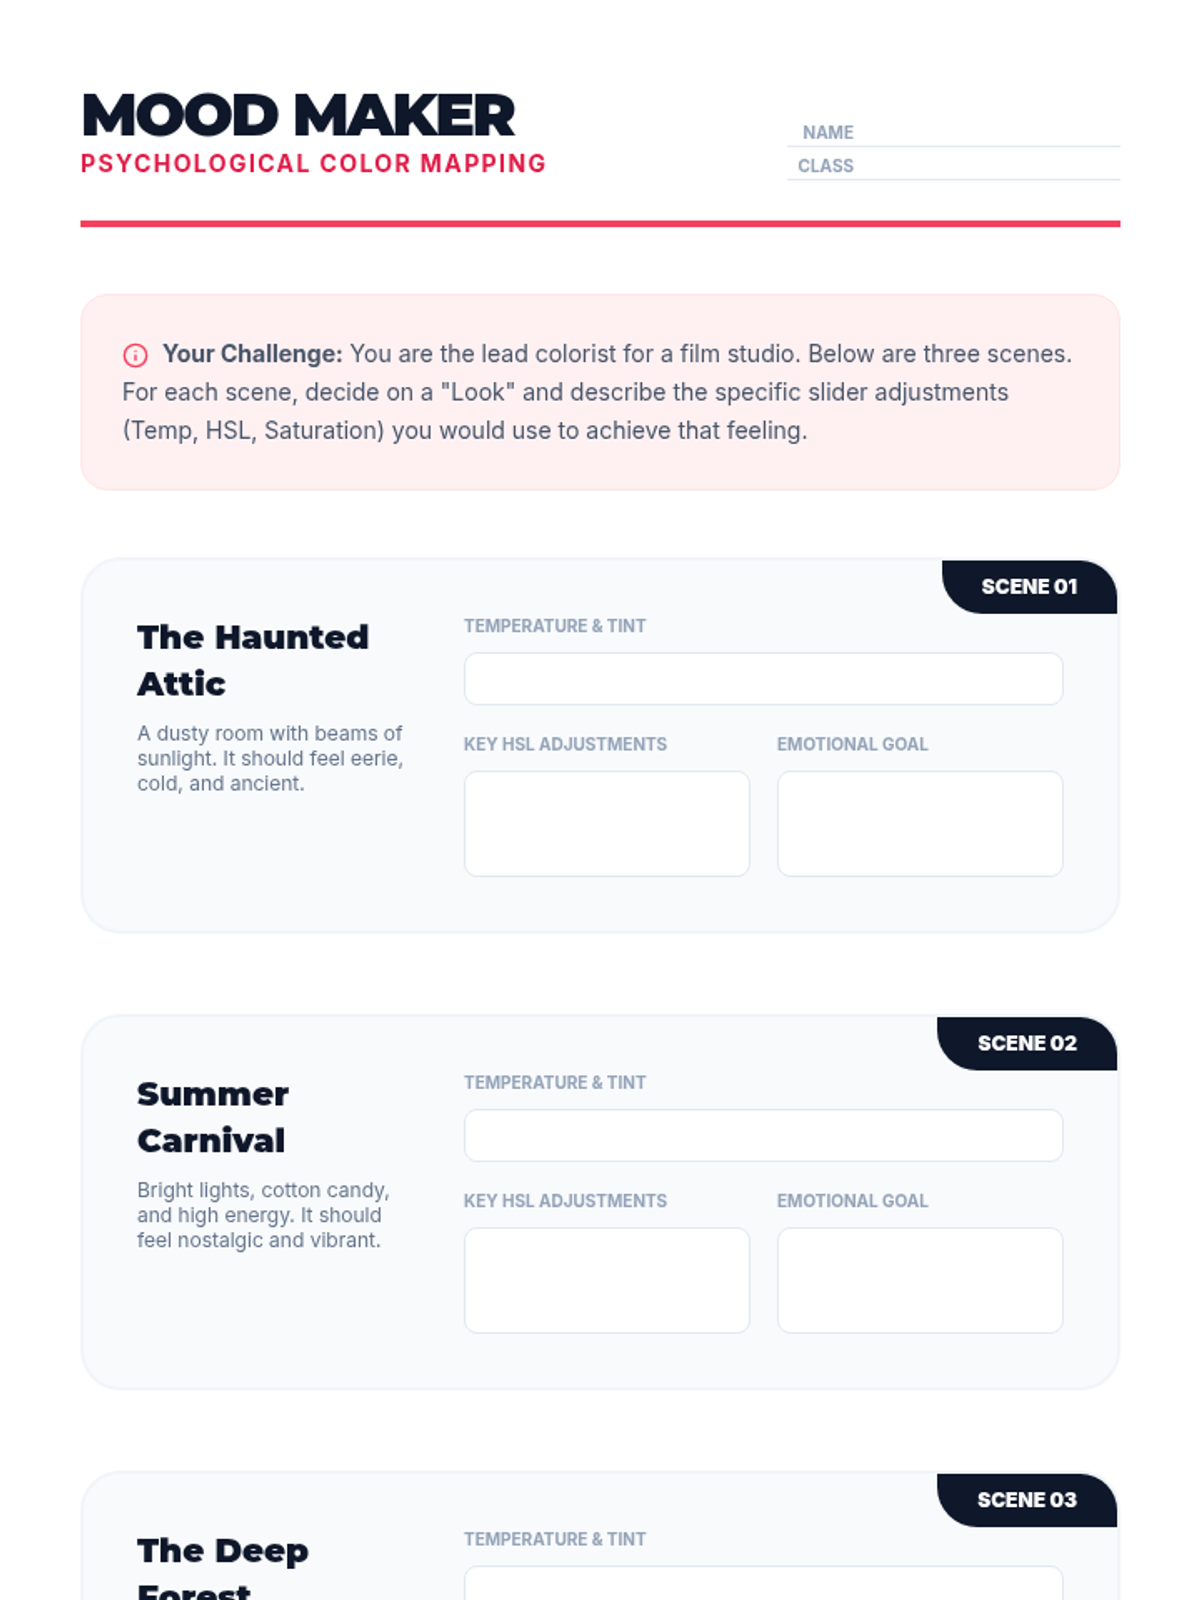
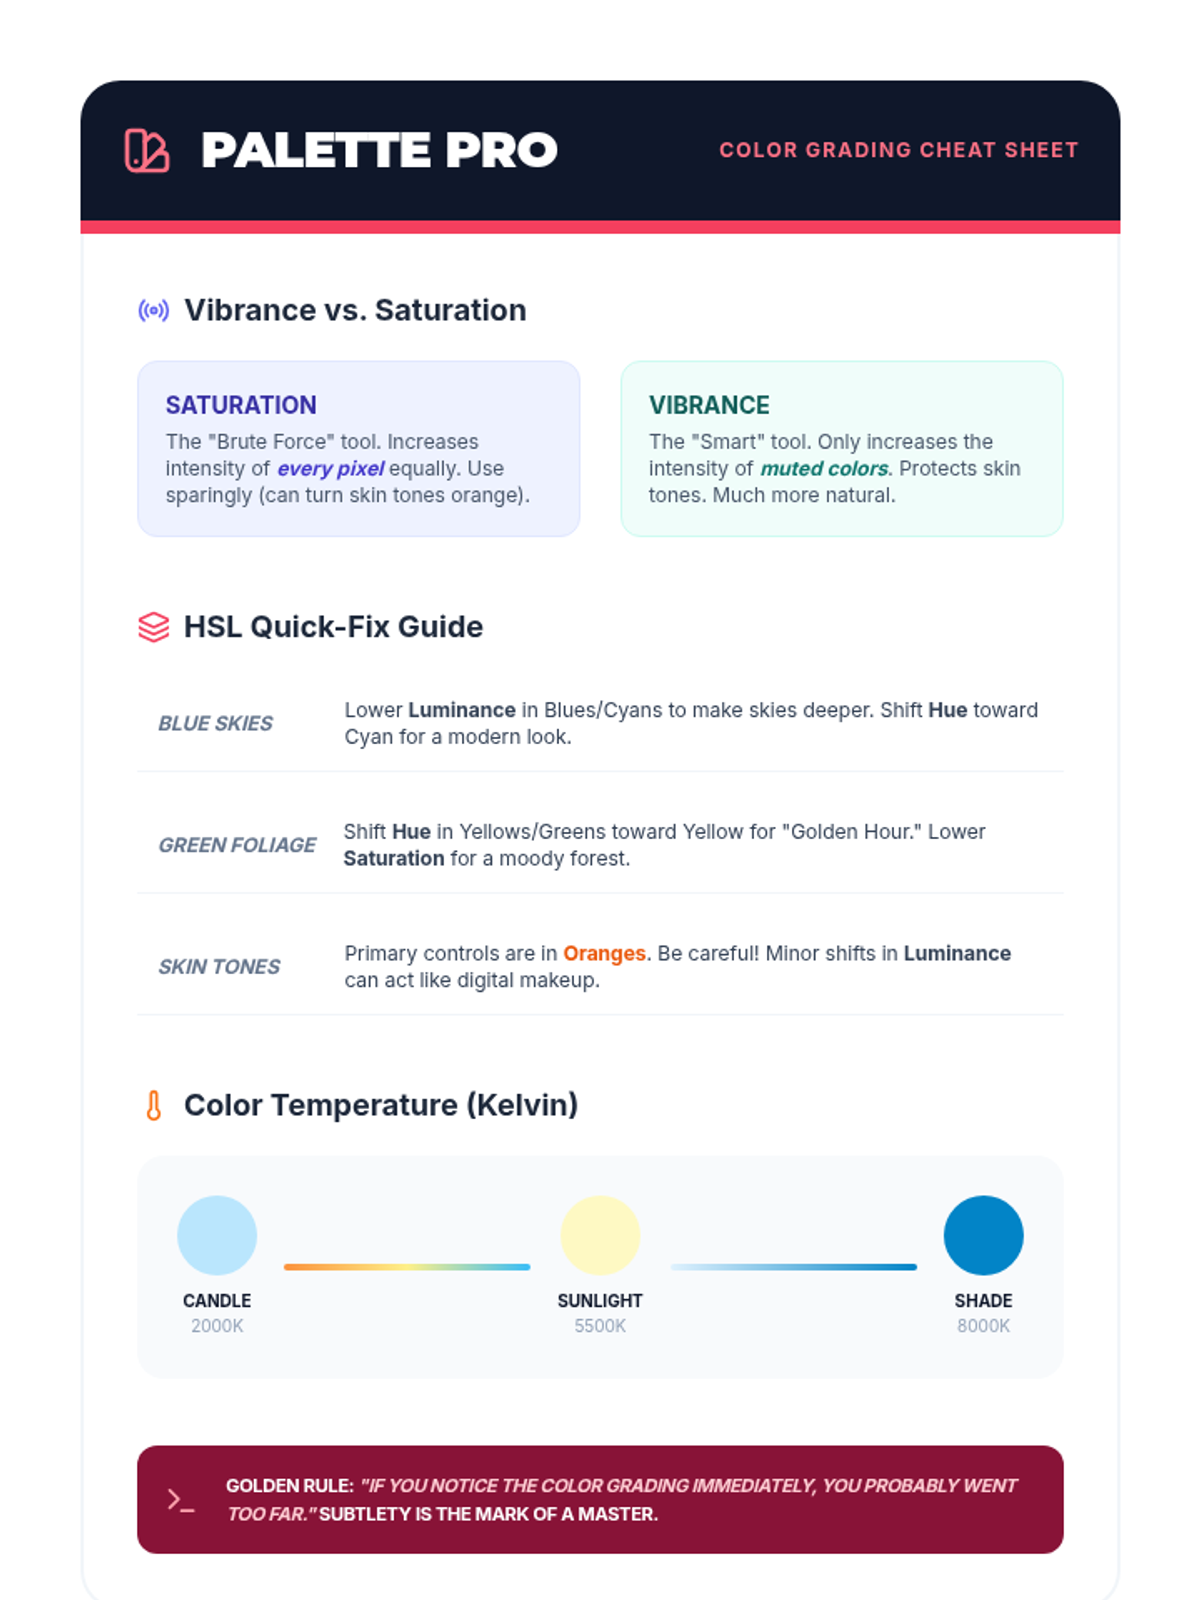
This lesson explores the psychological impact of color through white balance, HSL sliders, and stylistic grading. Students learn how to use color to evoke specific moods and create a cohesive aesthetic.
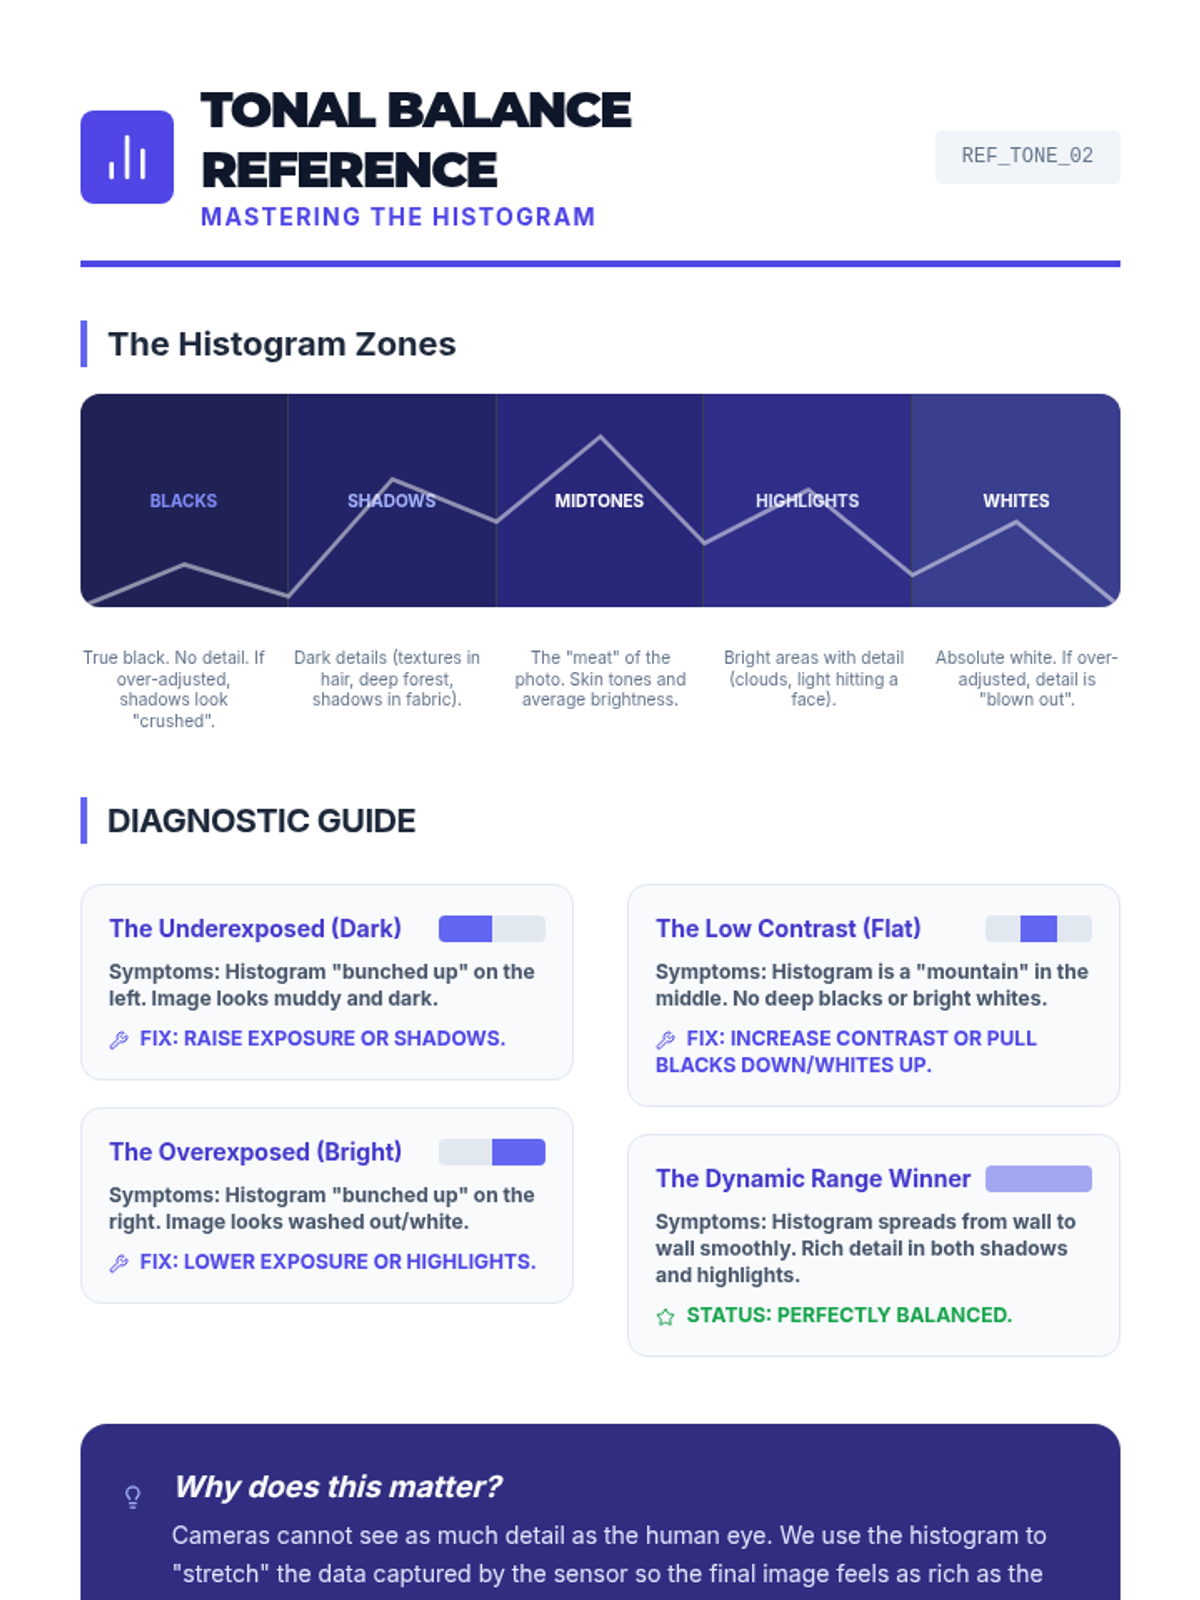
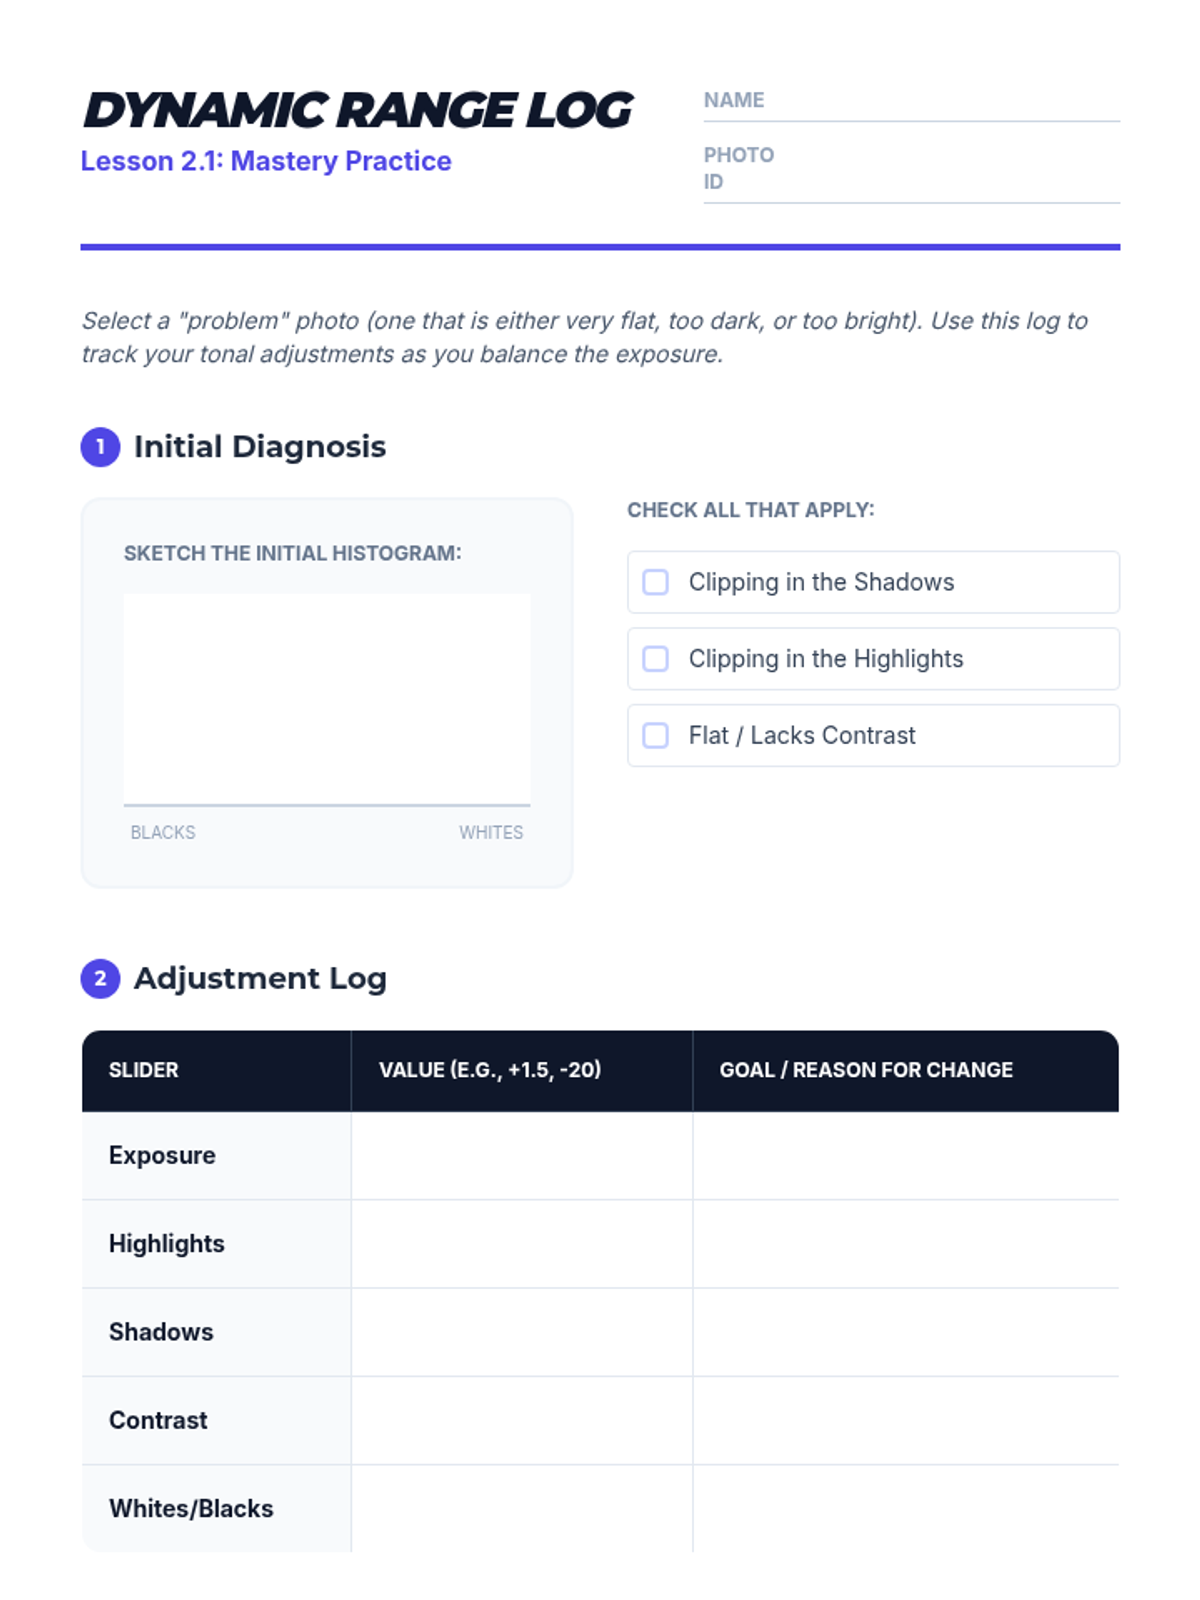
Learners demystify the histogram to evaluate exposure objectively and learn to use tonal sliders to maximize dynamic range. They practice recovering details in highlights and shadows to create balanced compositions.
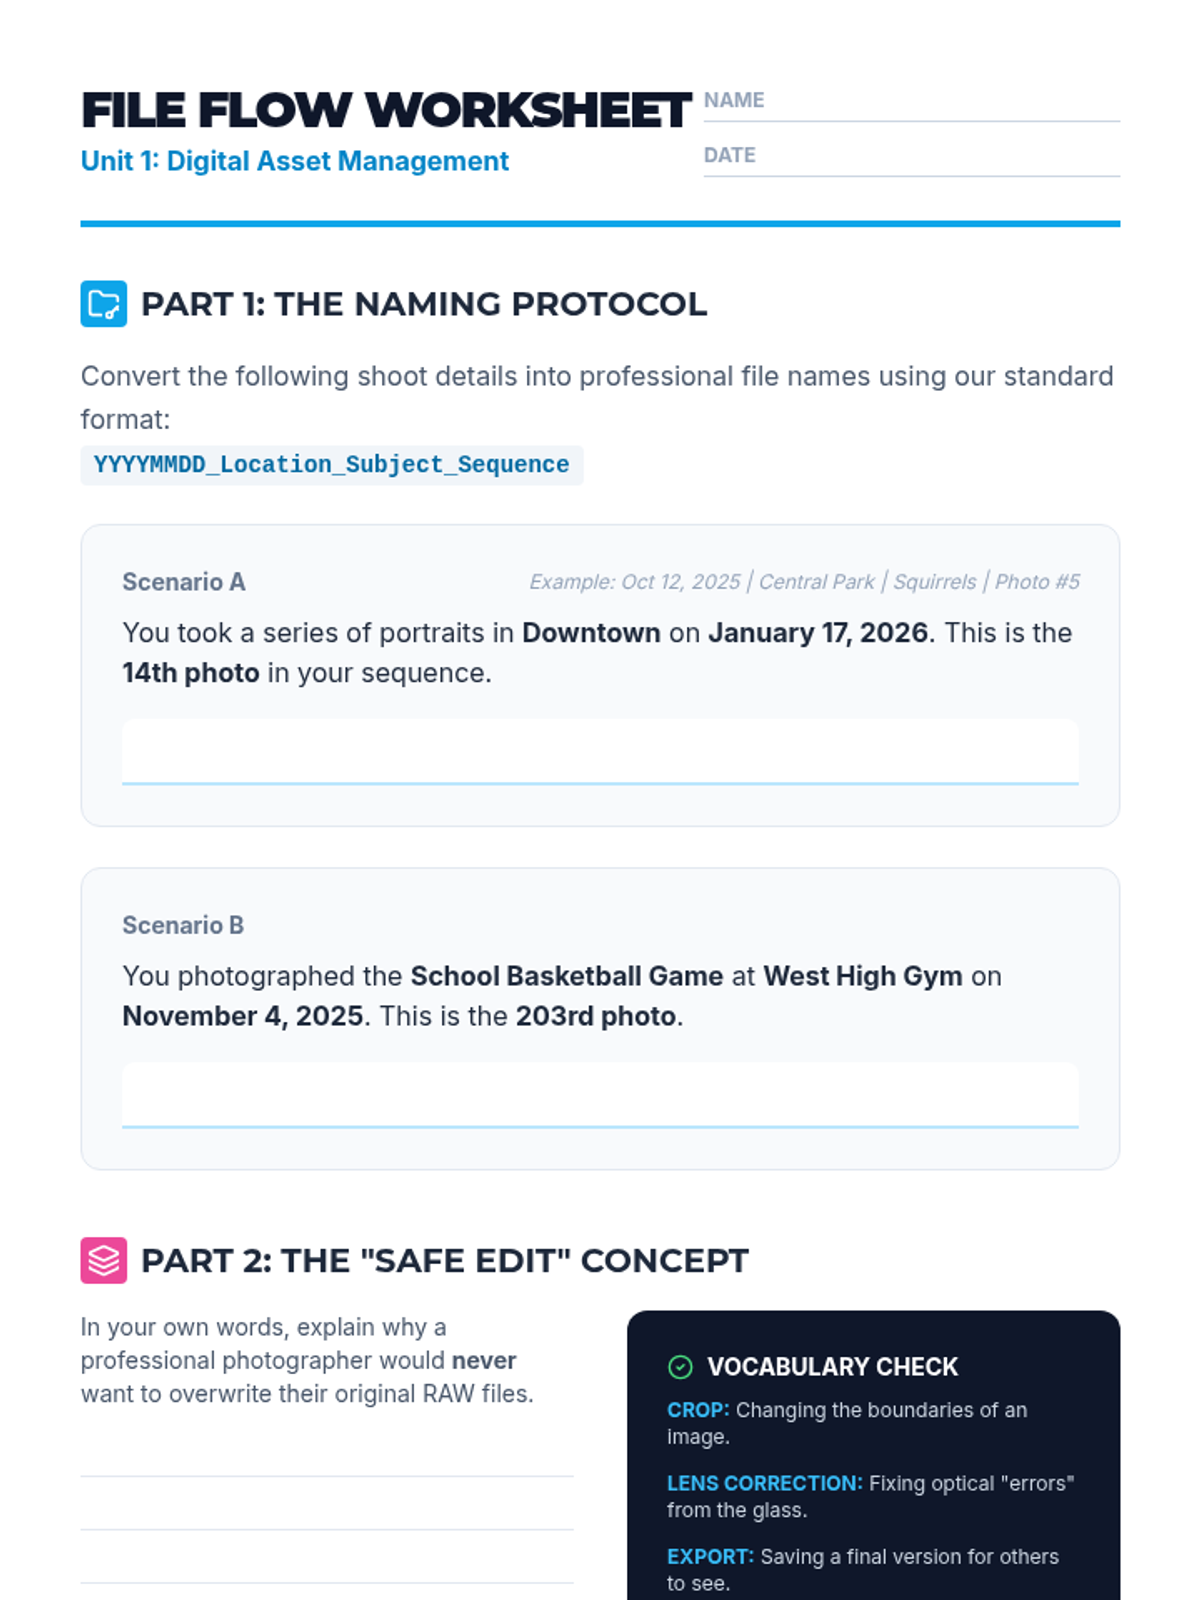
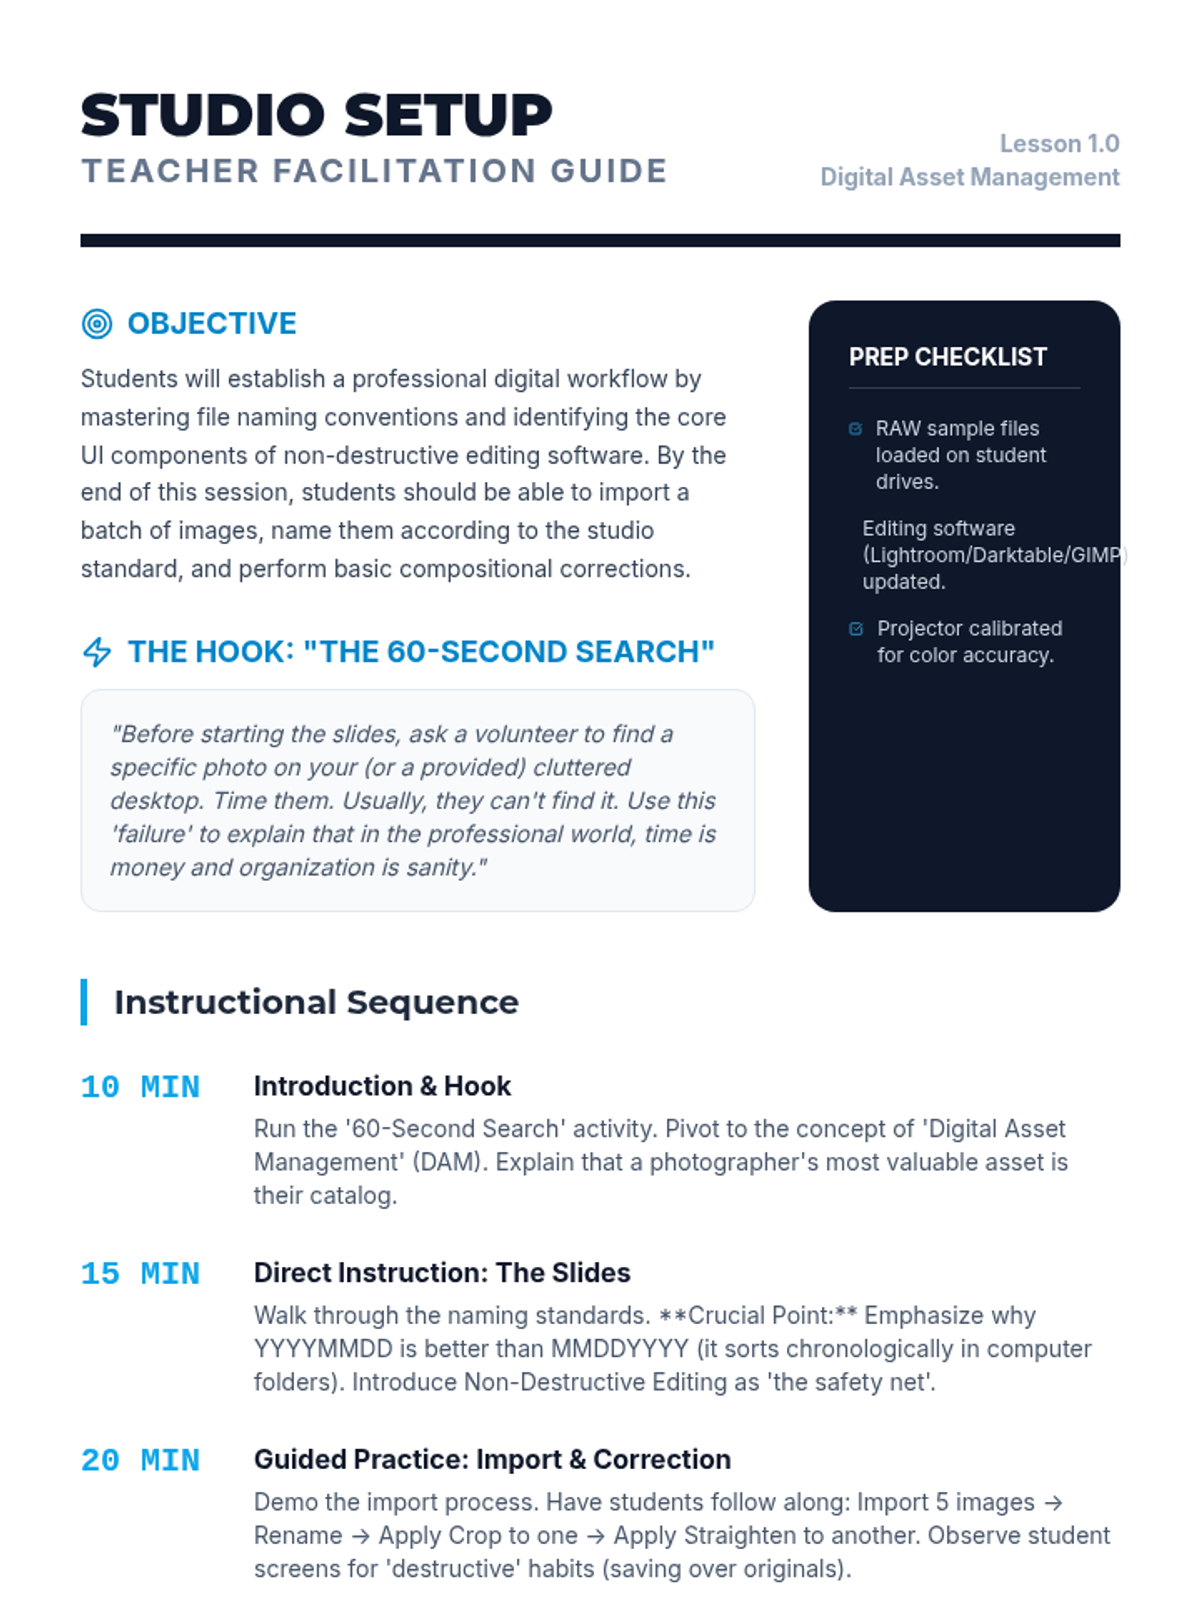
Students learn how to import, organize, and back up digital files while exploring the basics of non-destructive editing software. Fundamental corrections like cropping and straightening are introduced to establish a solid workflow foundation.
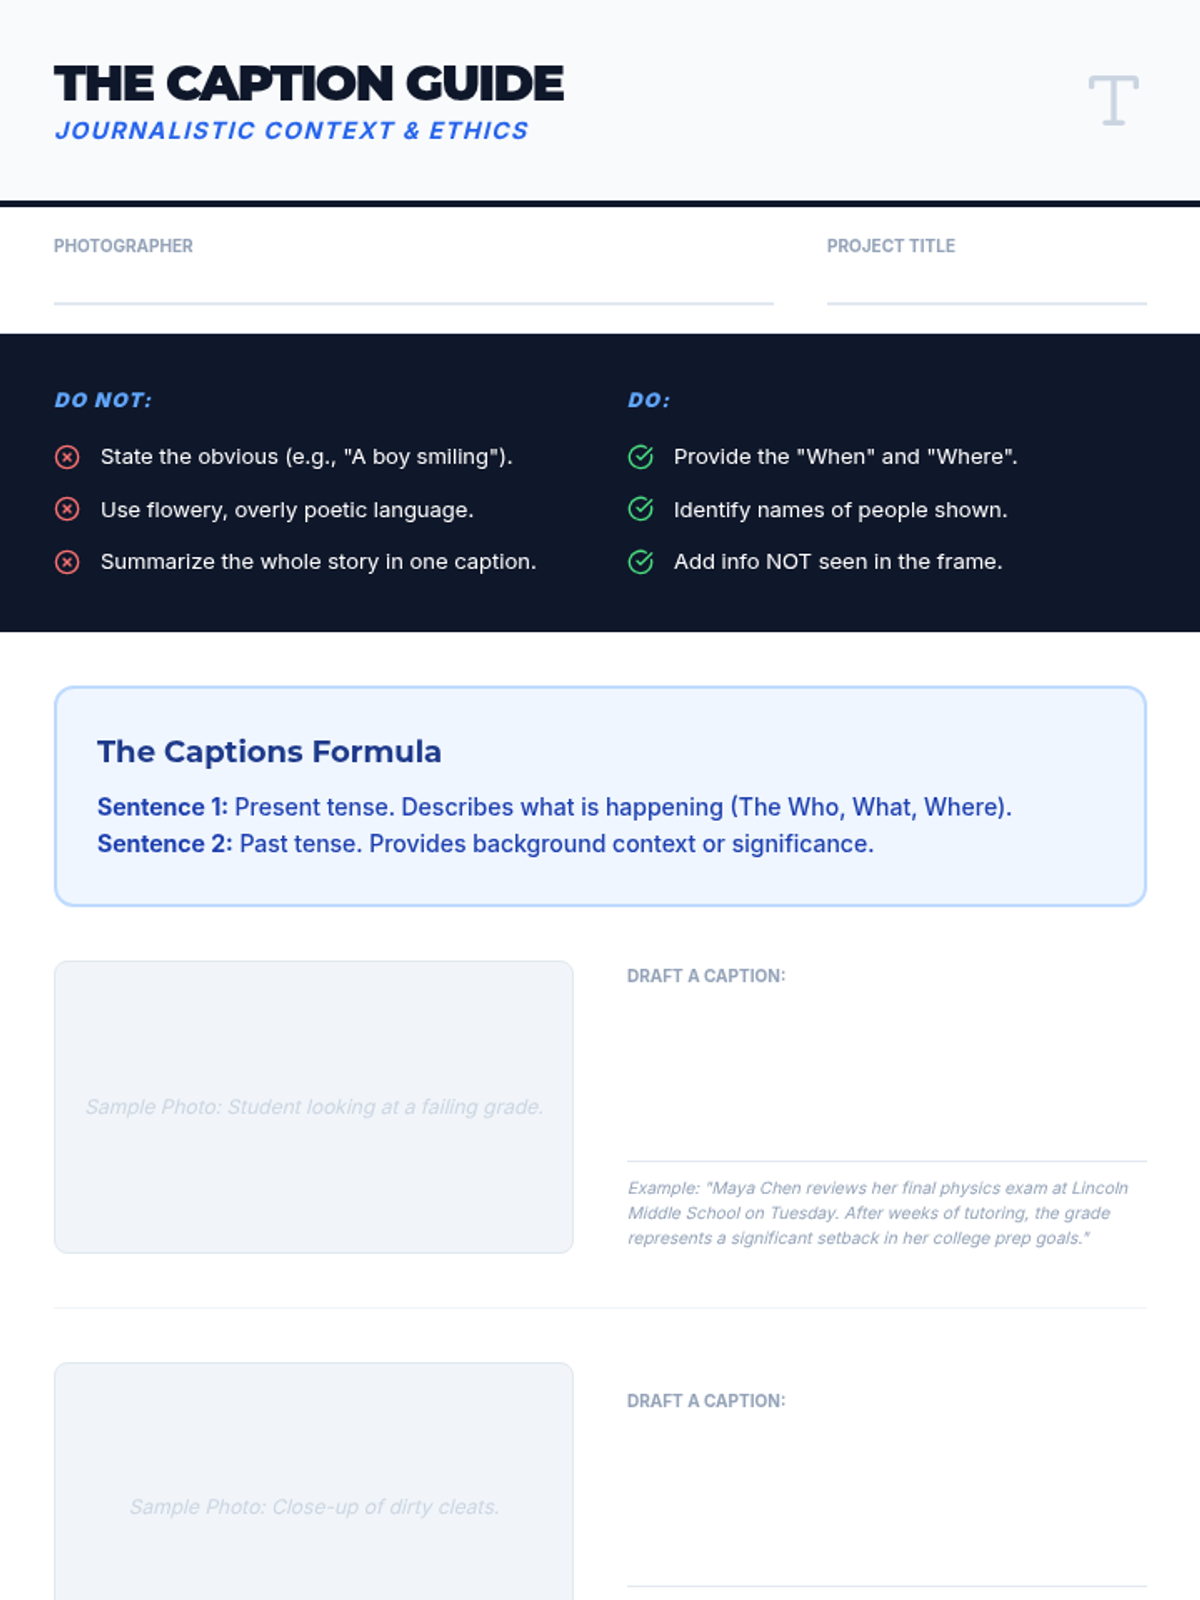
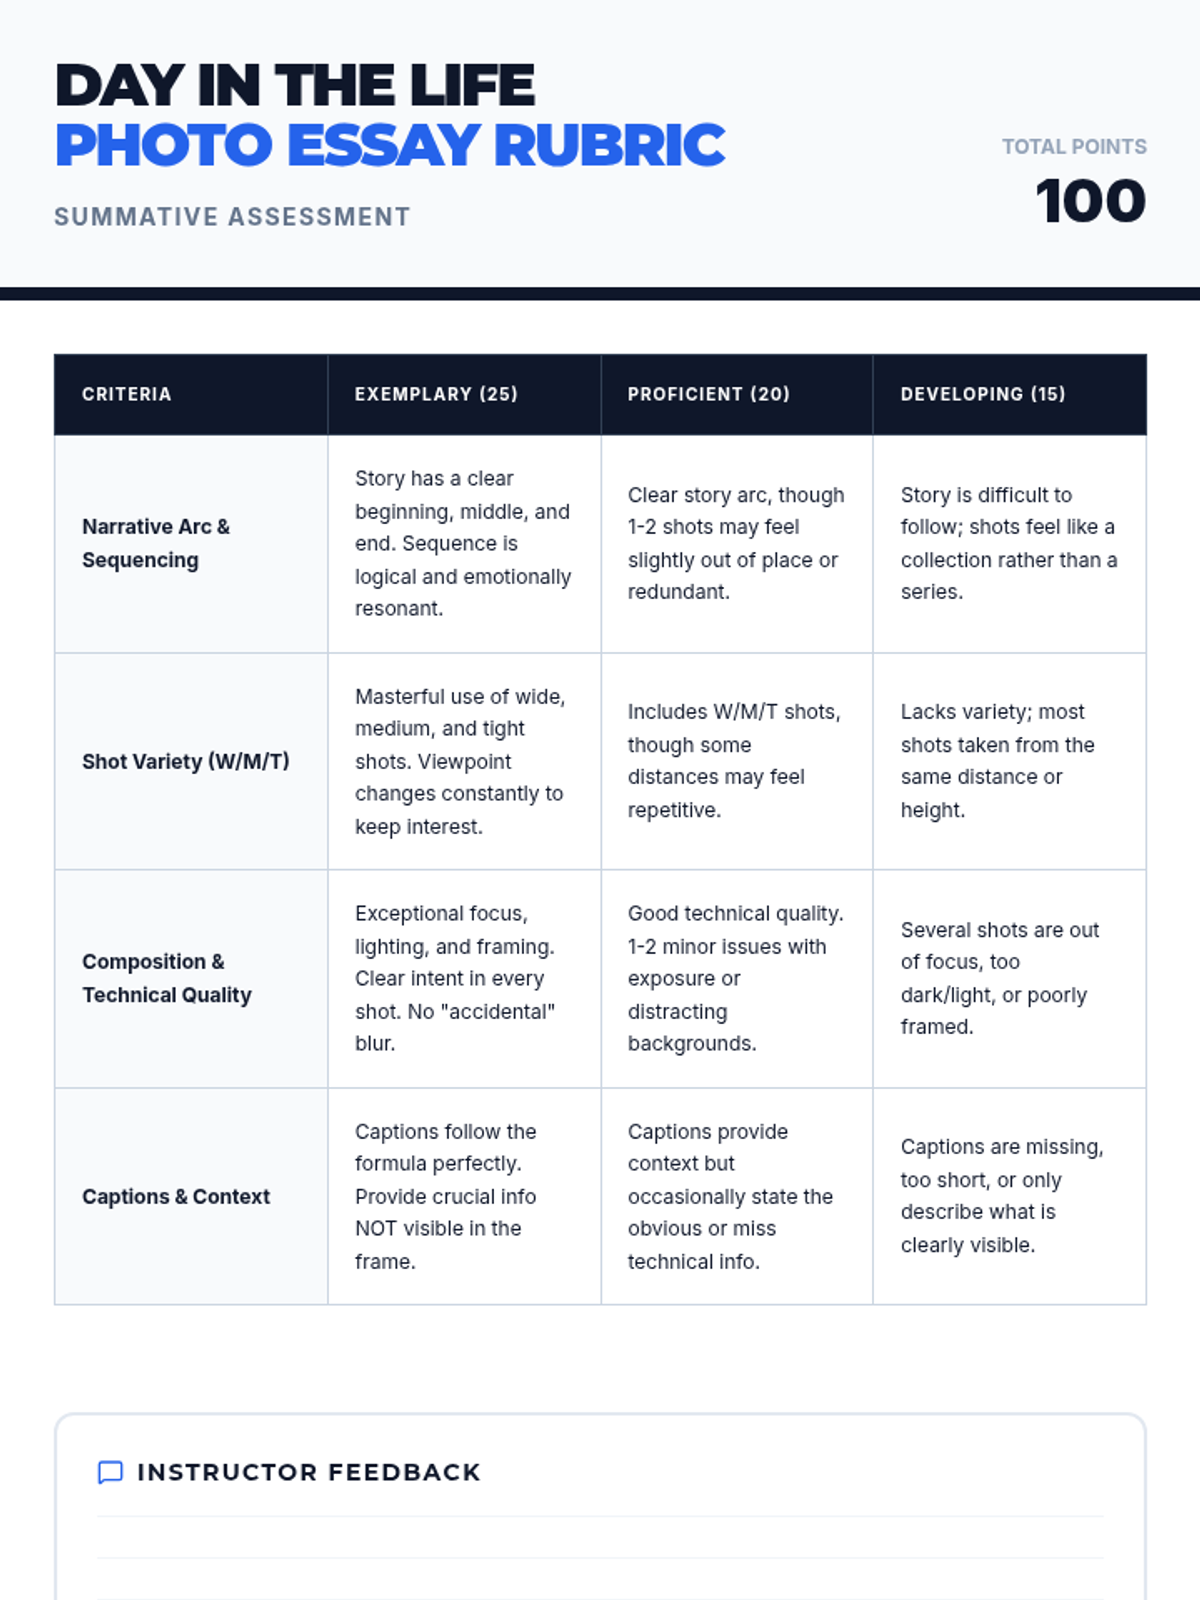
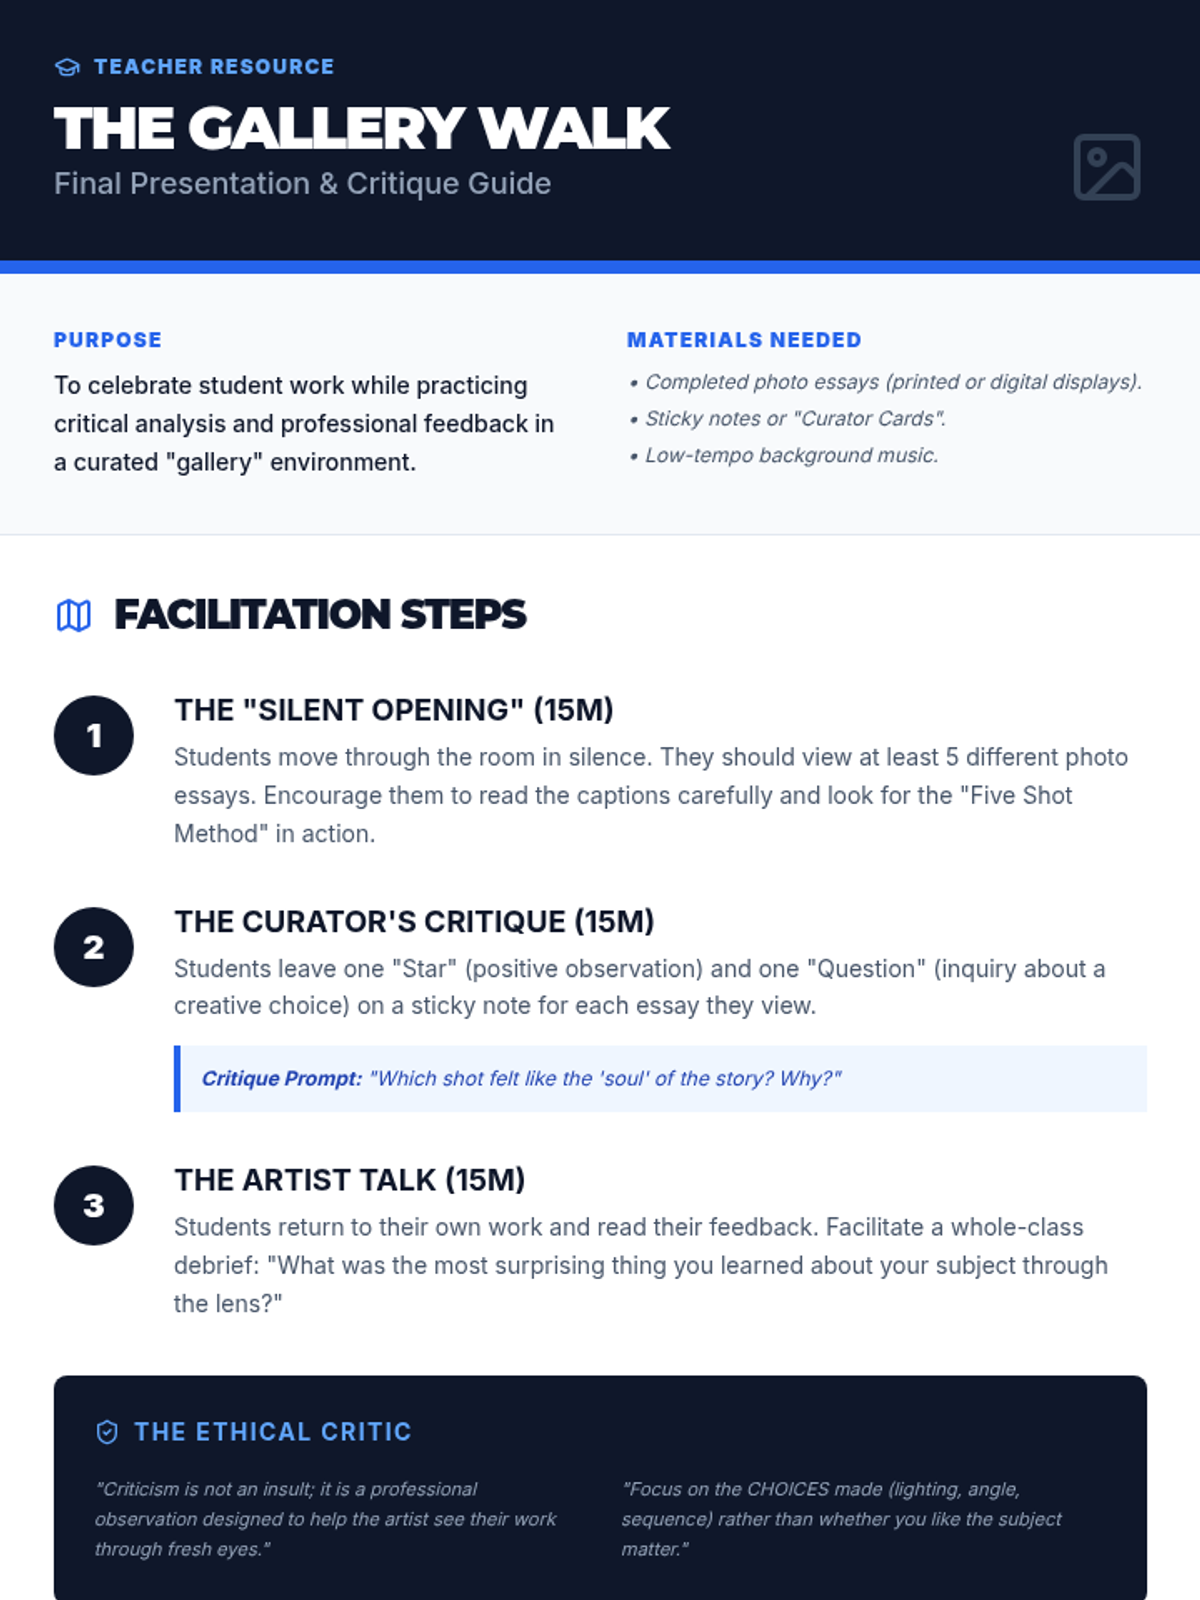
Adding the final layer of context through professional captions. Students explore the synergy between text and image before presenting their final photo essays.
The art of editing. Students learn to cull their photos, choosing only the images that advance the narrative while maintaining visual flow.
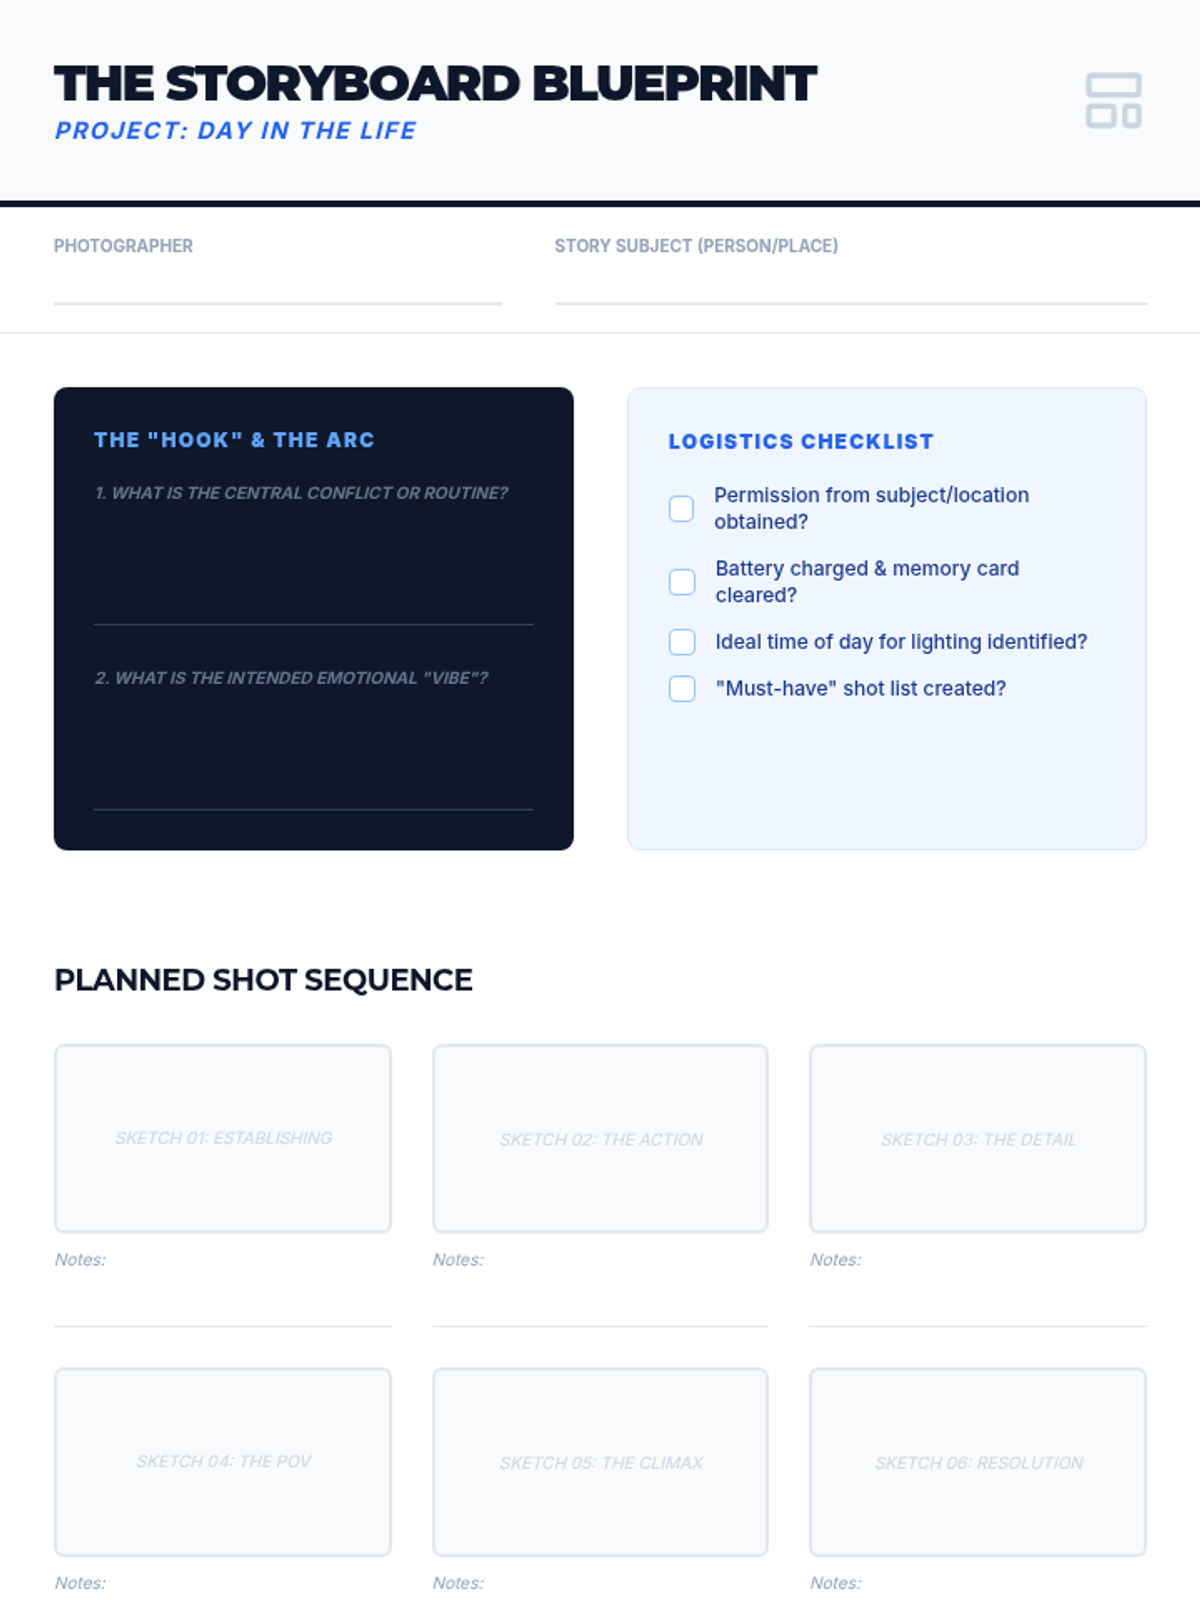
Students transition to the pre-production phase, learning to plan their shoots with storyboards and logistics checklists for their 'Day in the Life' project.
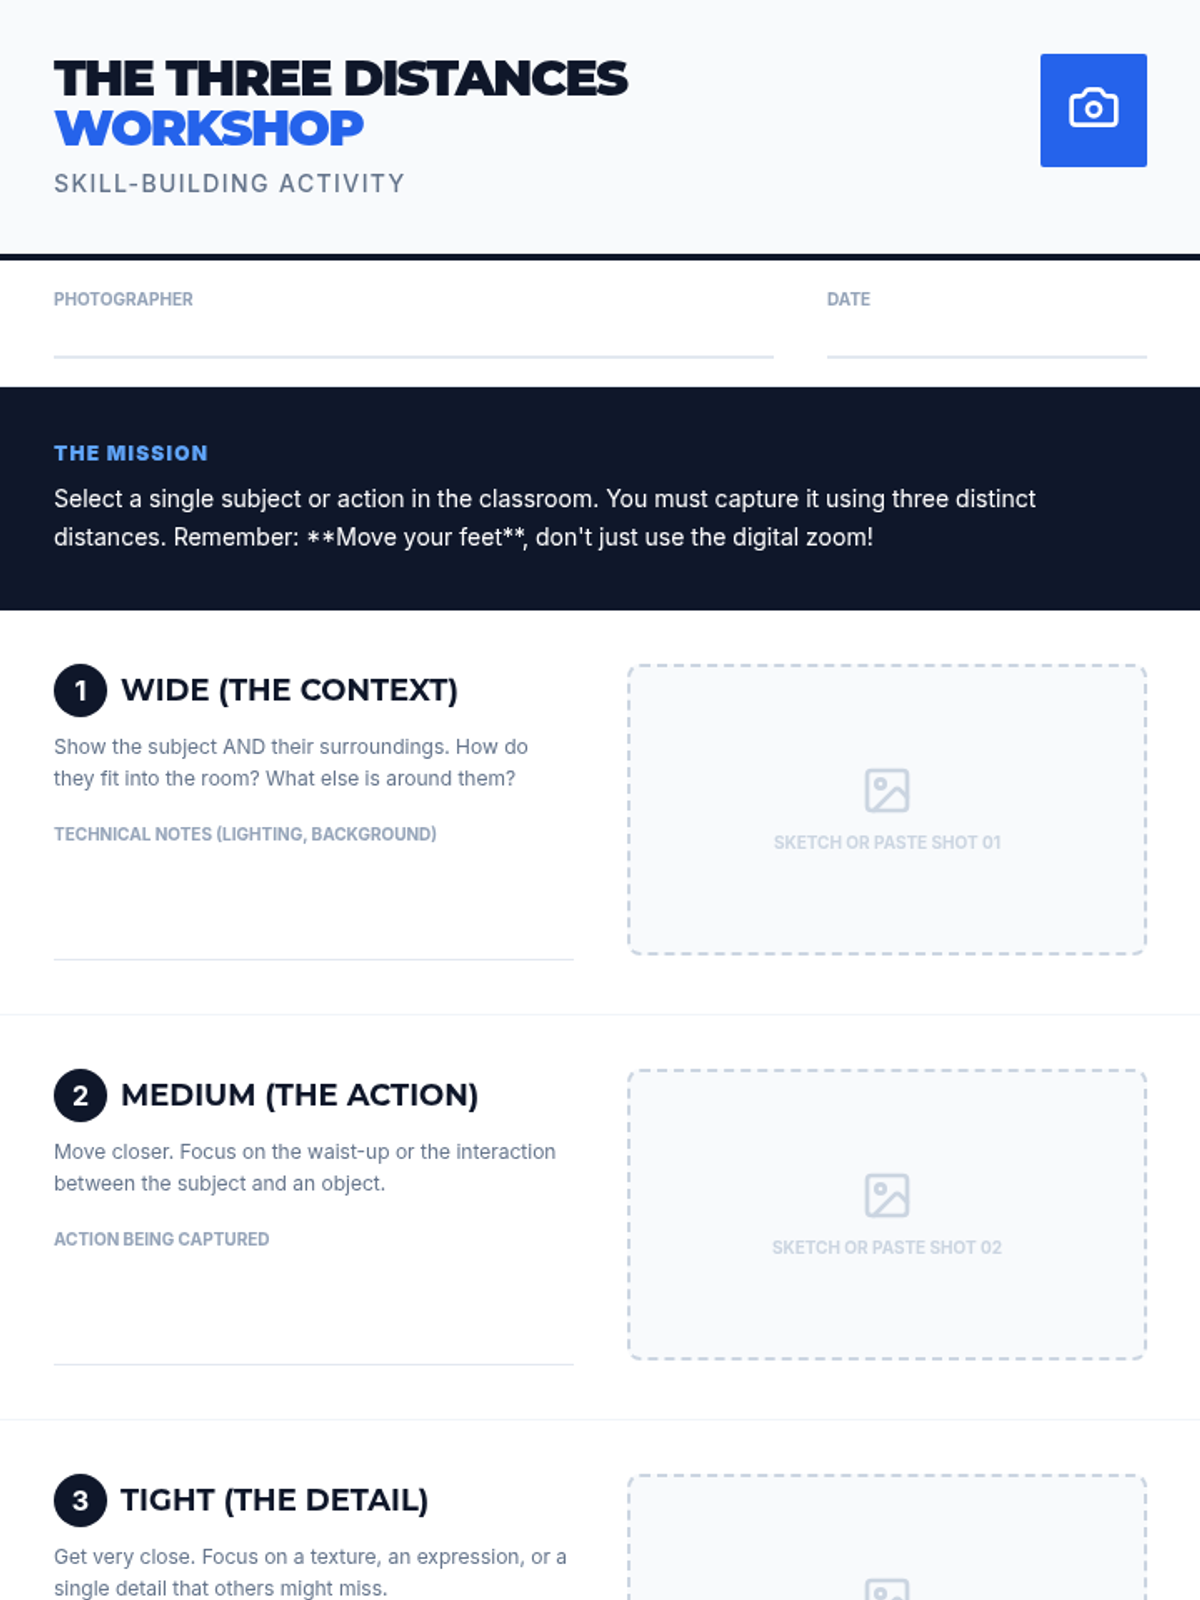
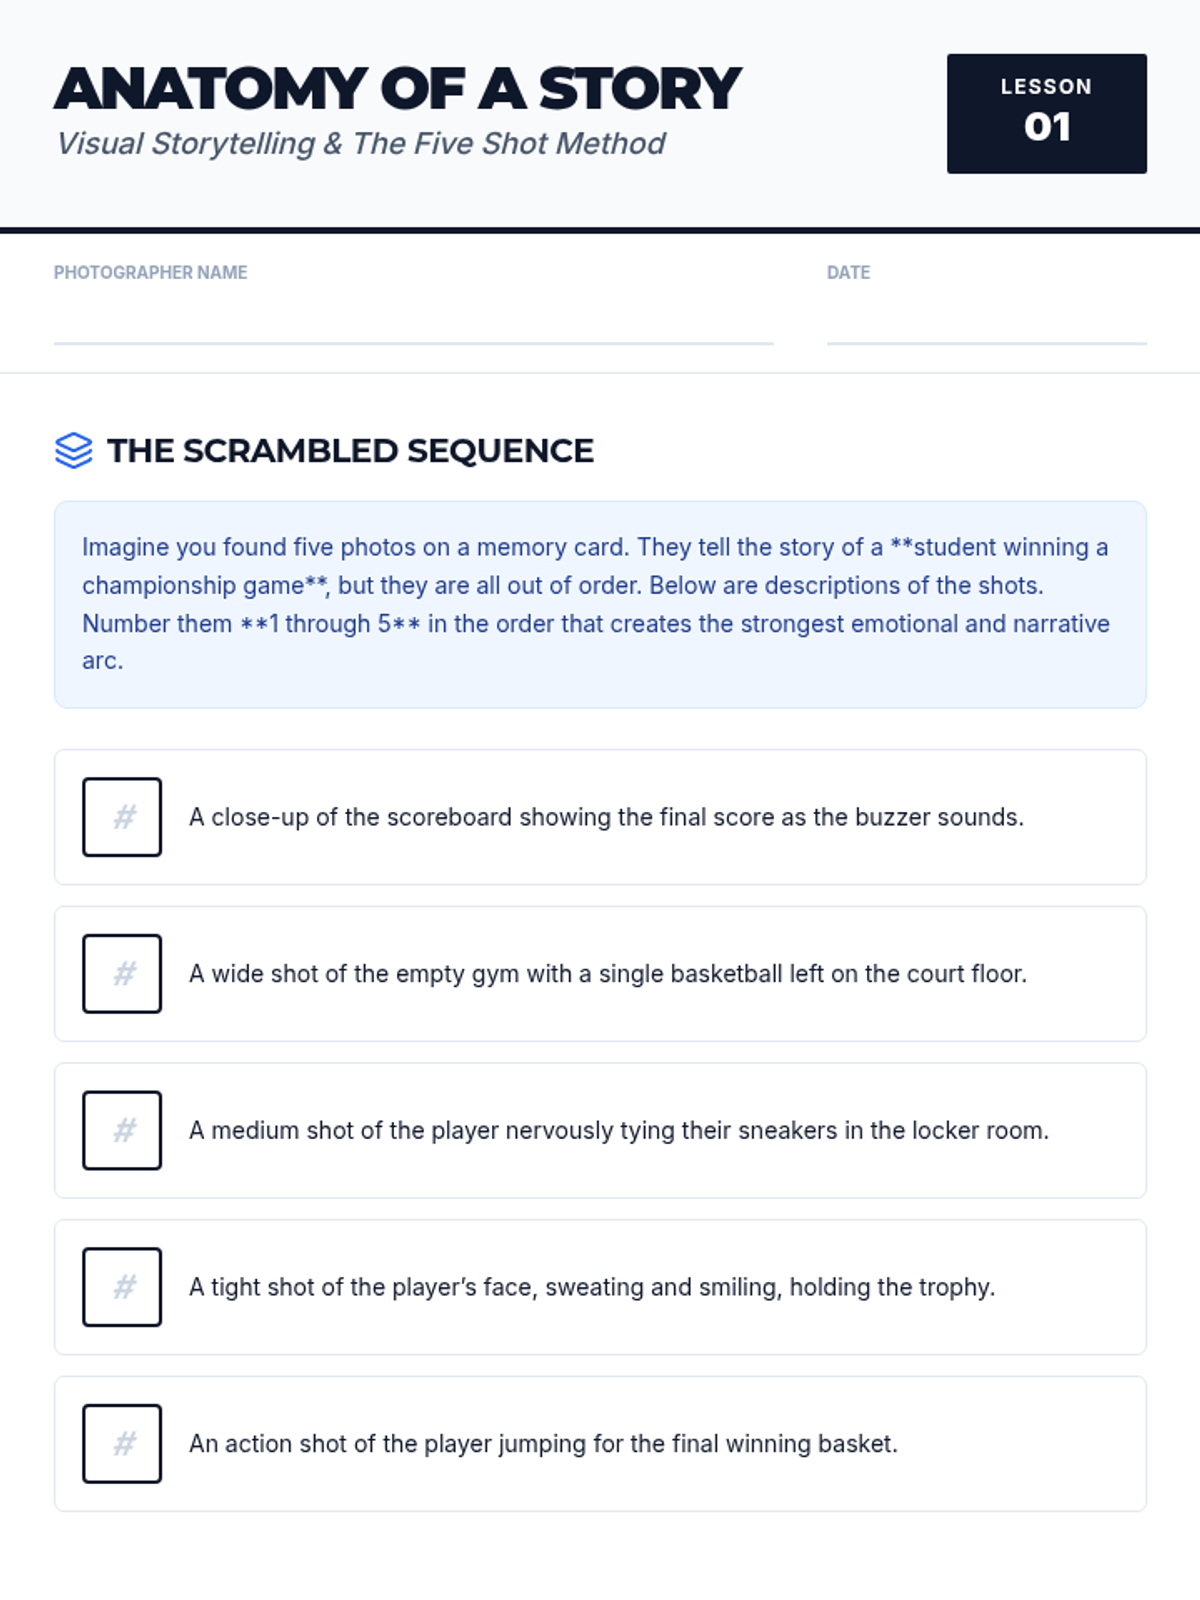
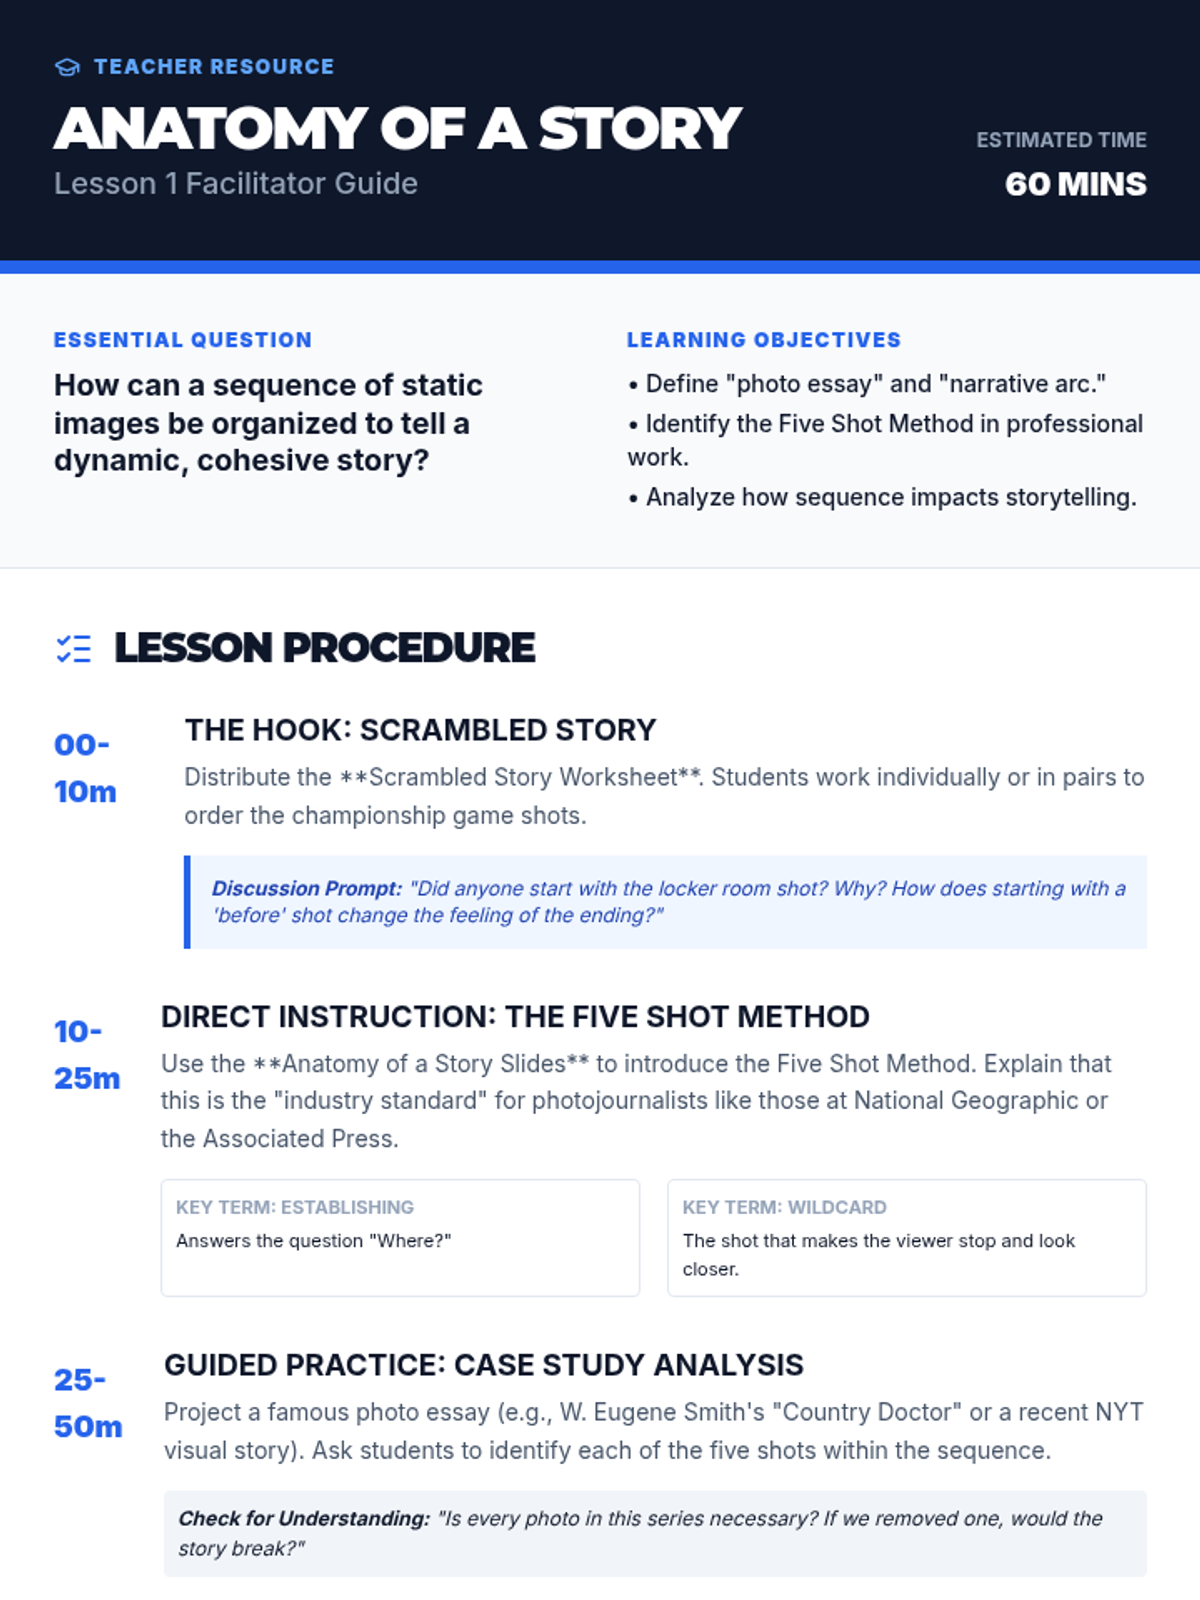
Focuses on the technical and creative use of distance and perspective. Students learn to use wide, medium, and tight shots to provide context, action, and emotion.
Students explore how multiple images work together to create a narrative arc. They learn the 'Five Shot Method' for ensuring diverse coverage of a subject.
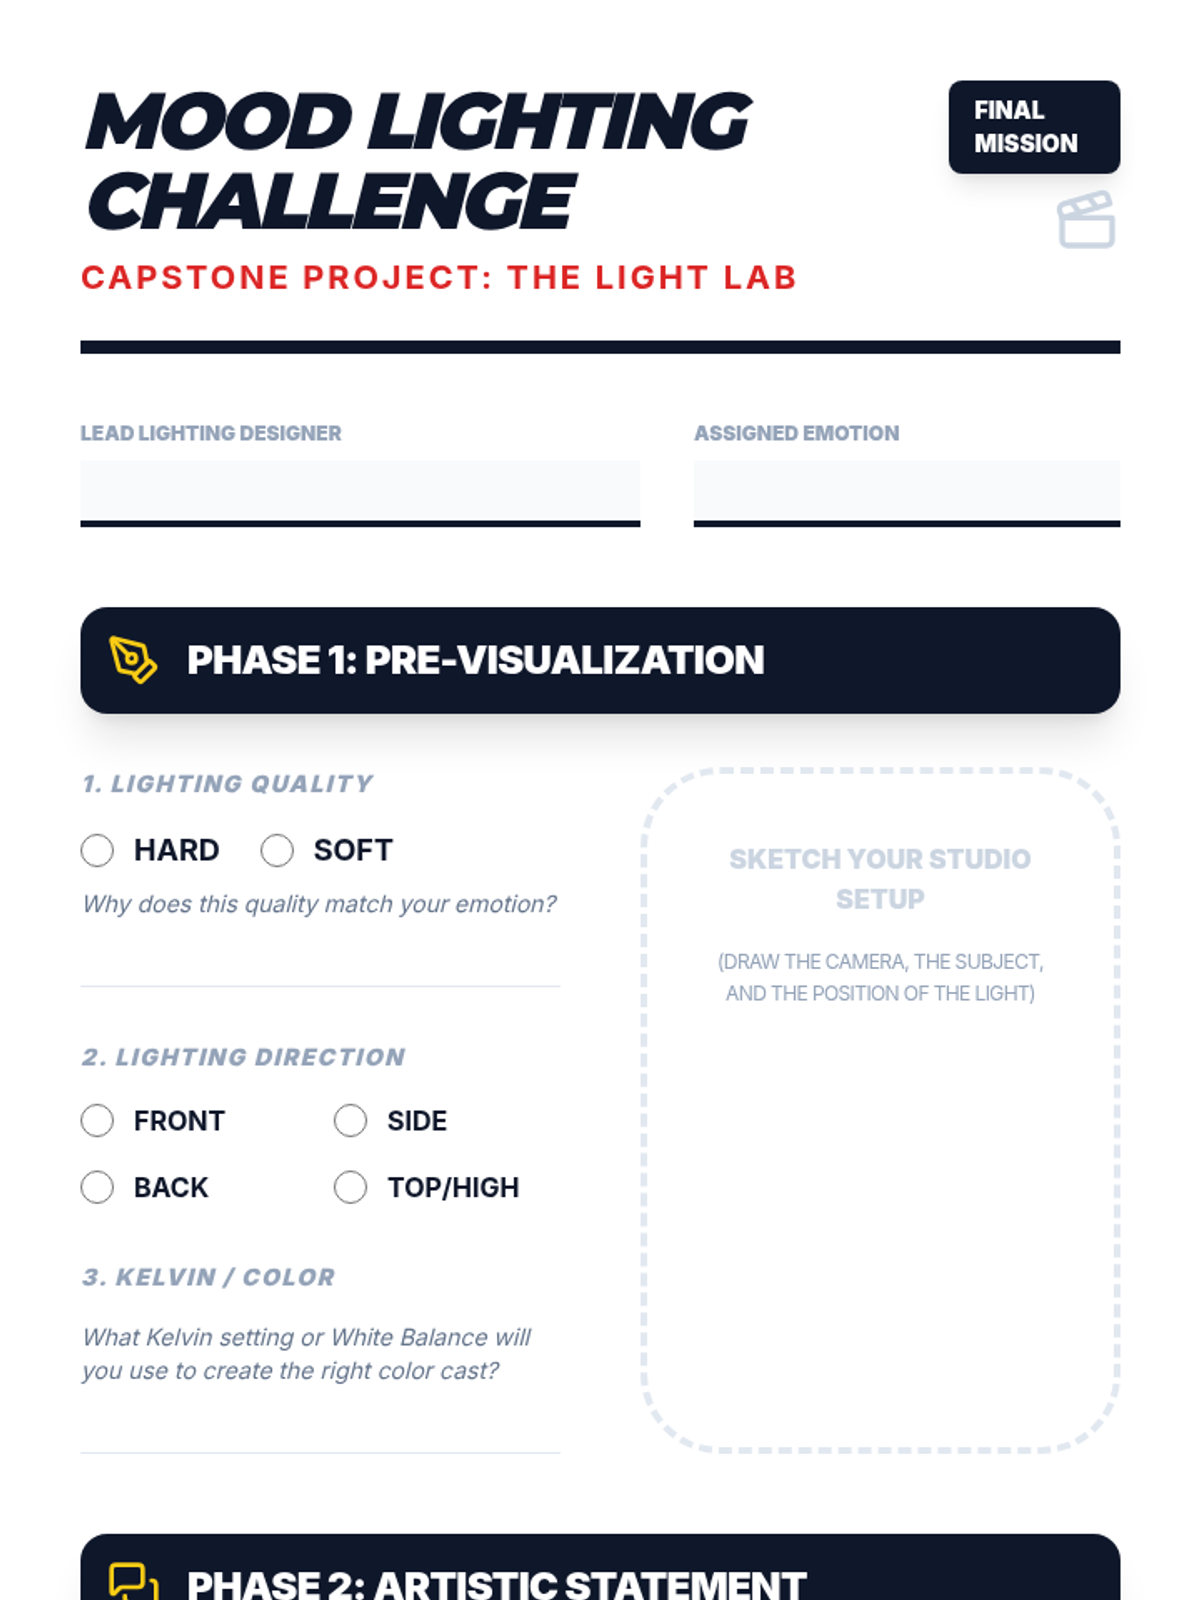
A cumulative project where students design lighting setups to convey specific emotions without relying on facial expressions.
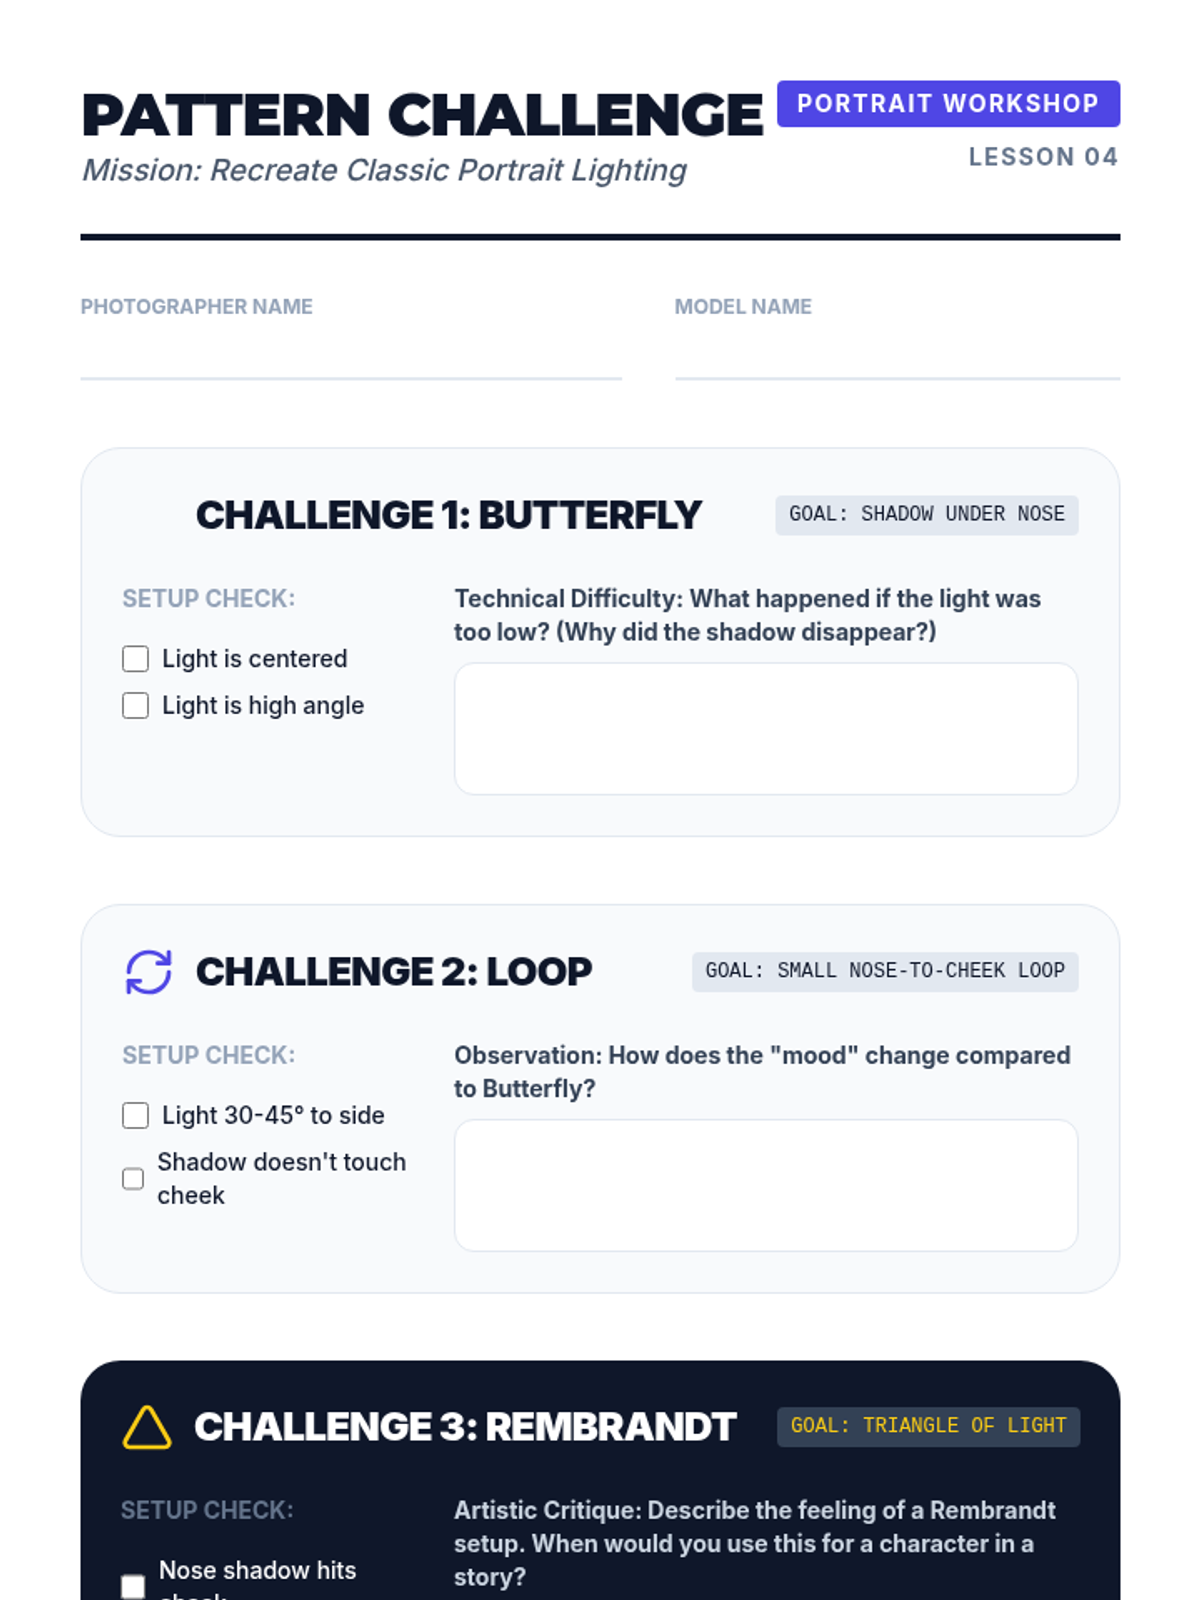
Introduction to classic studio lighting patterns (Rembrandt, Loop, Butterfly) using simple equipment to create professional portraits.
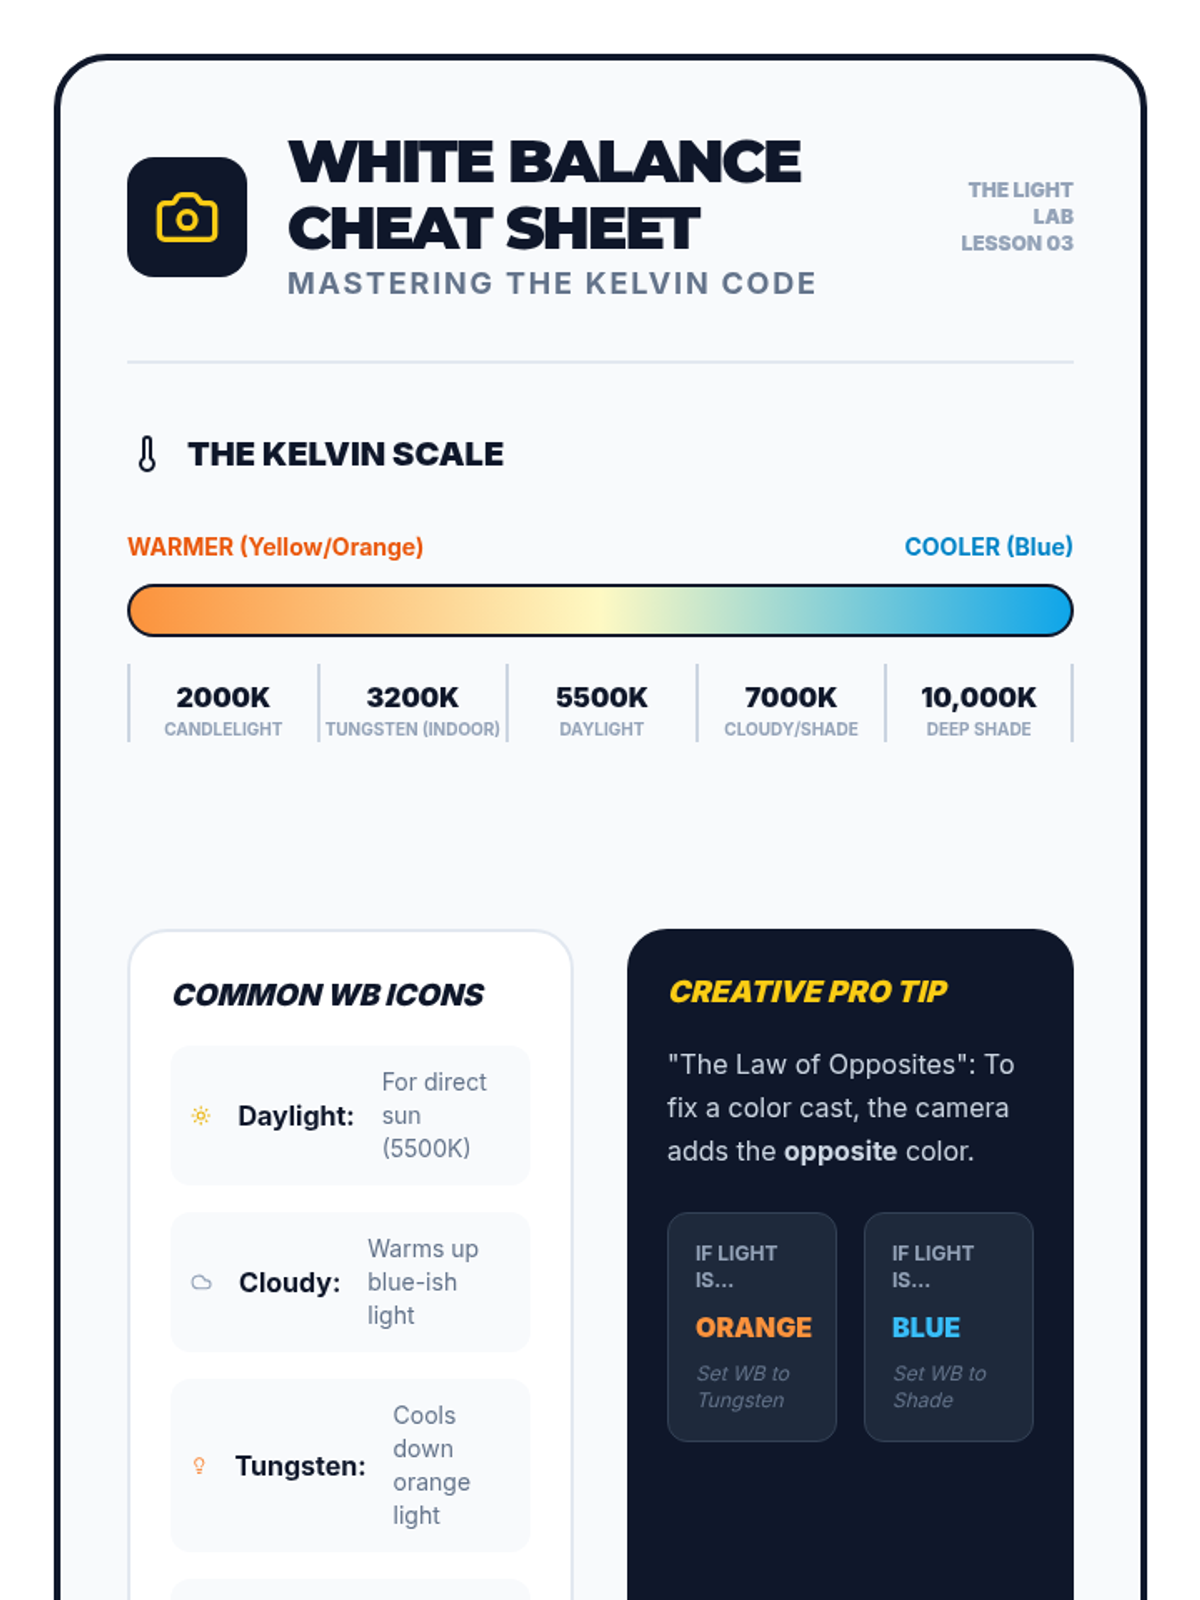
An exploration of the Kelvin scale and White Balance settings, teaching students how to manage color casts and use temperature for emotional impact.
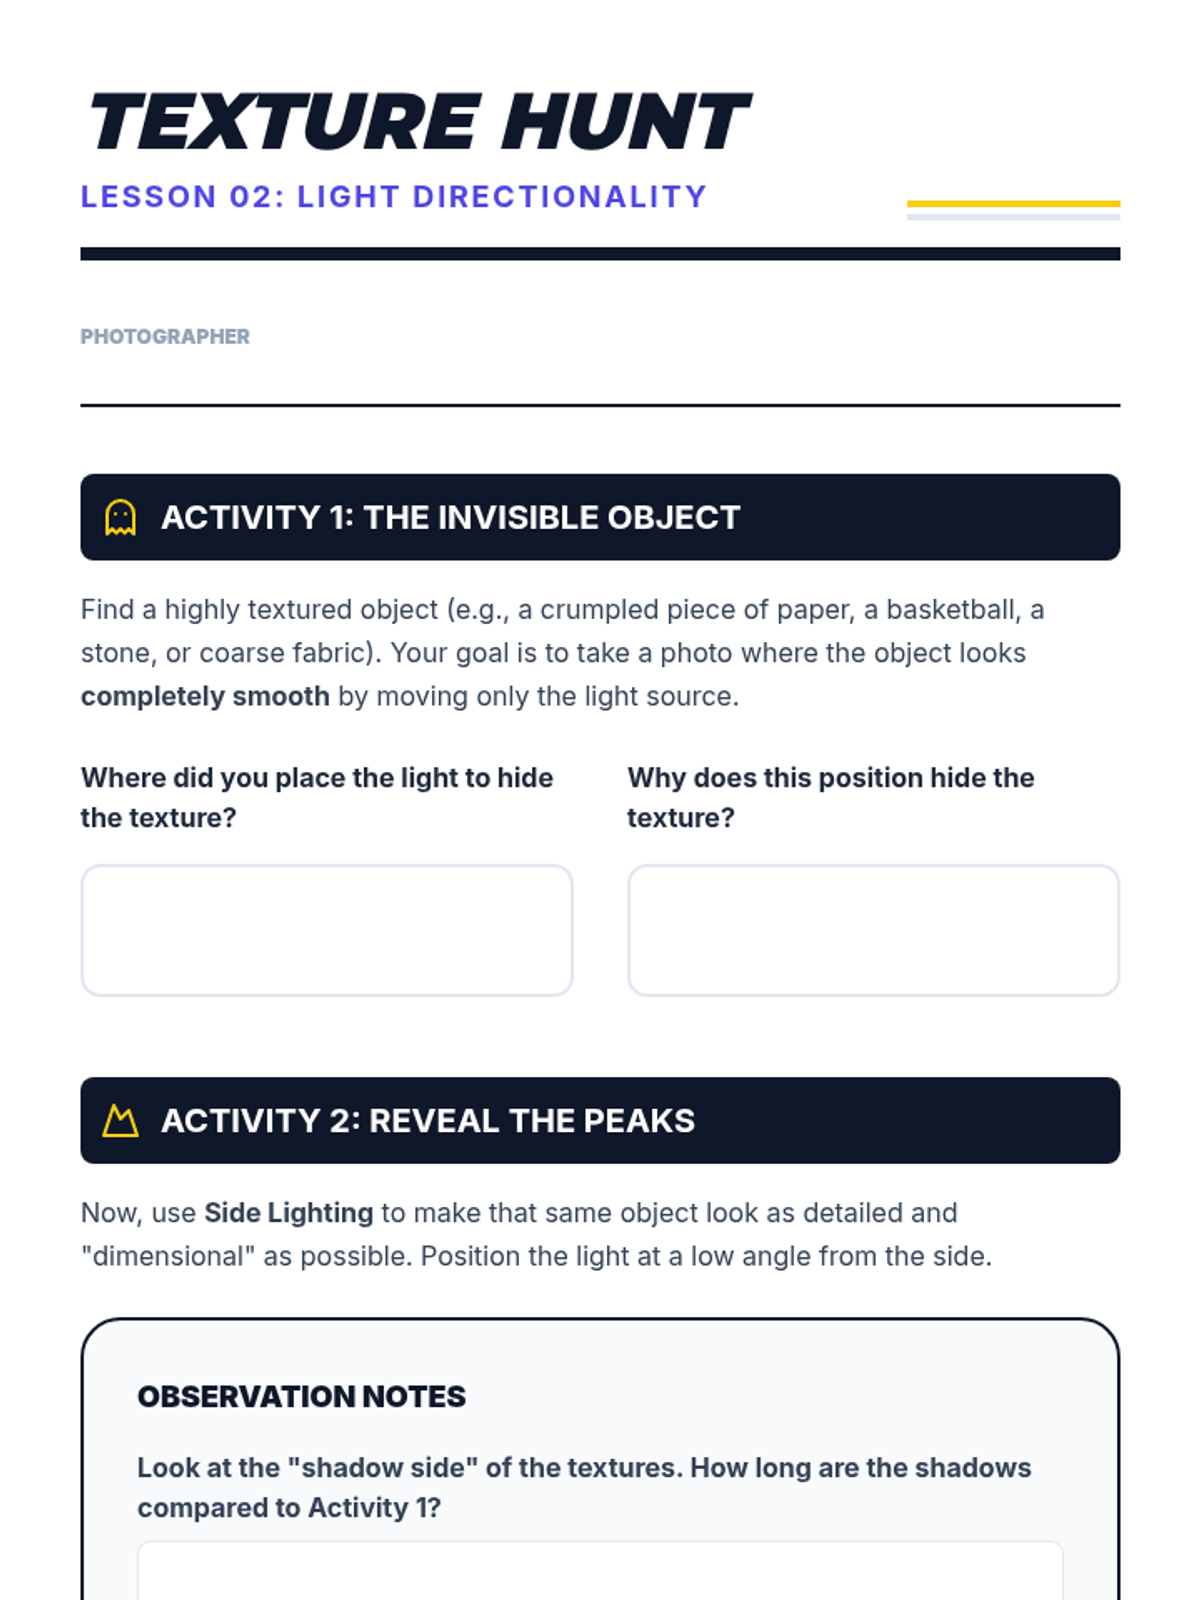
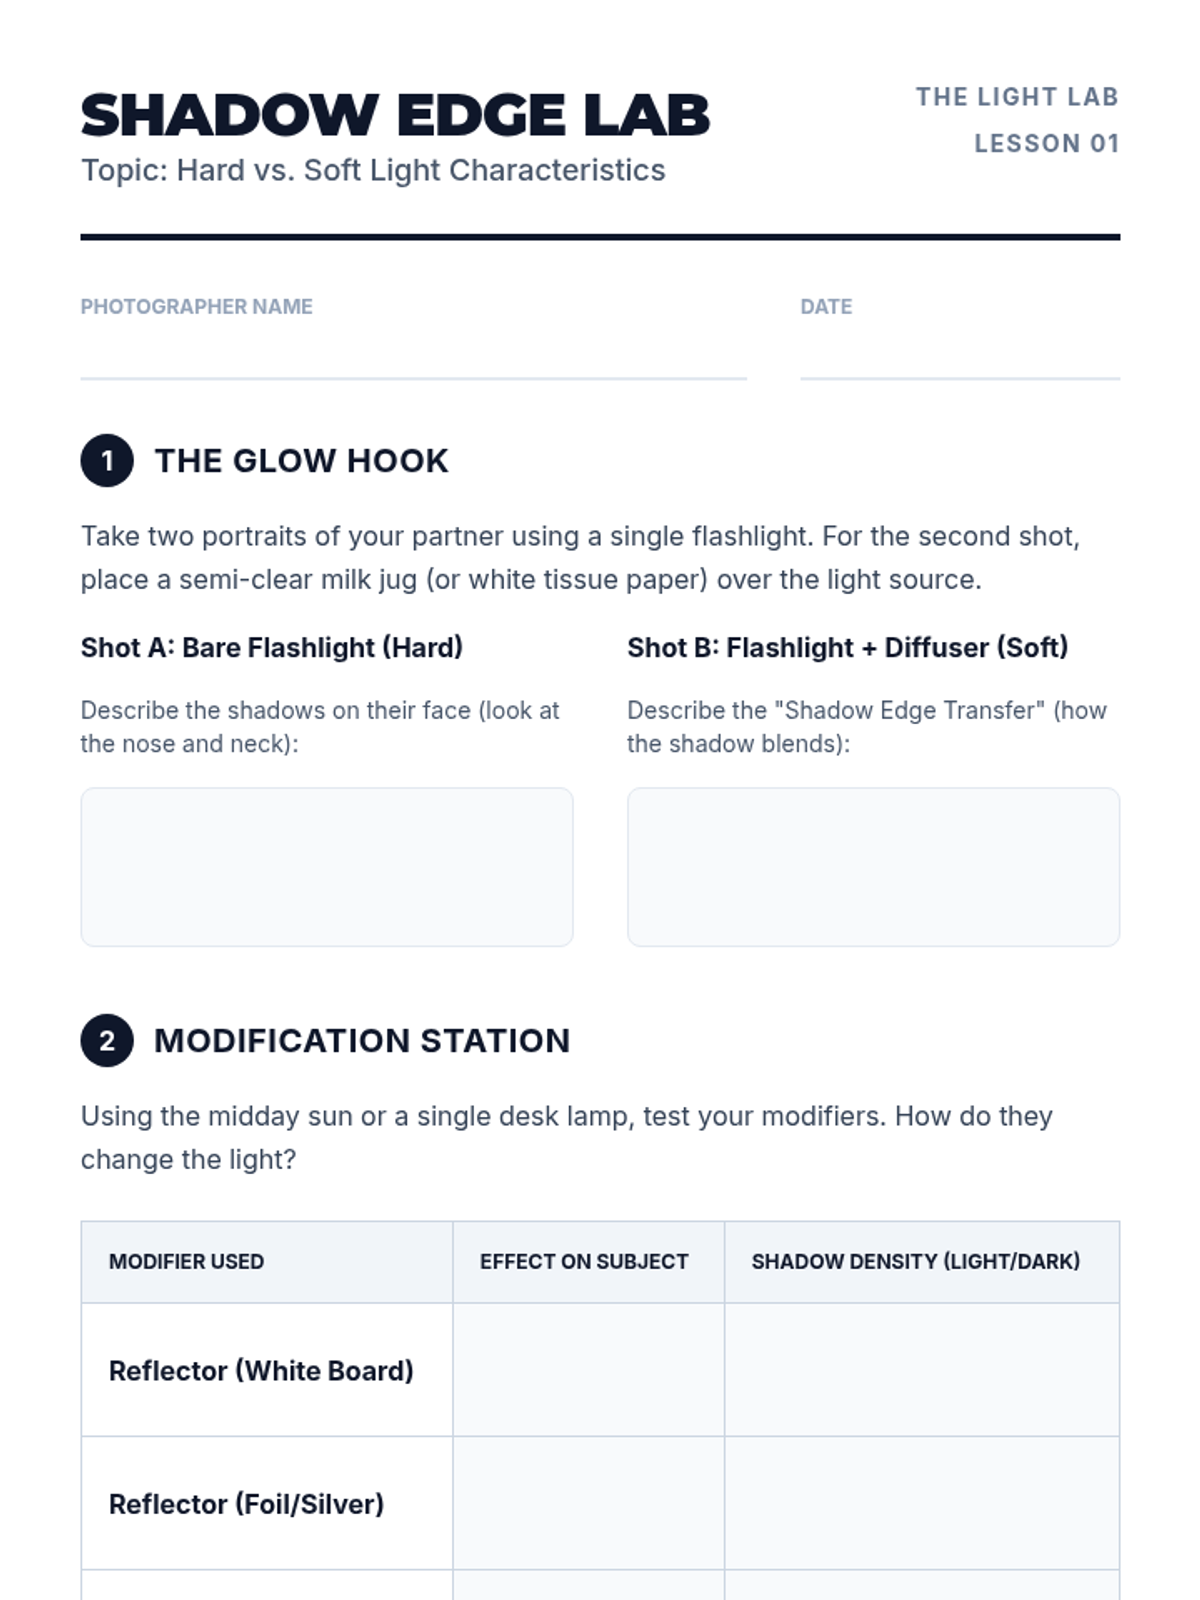
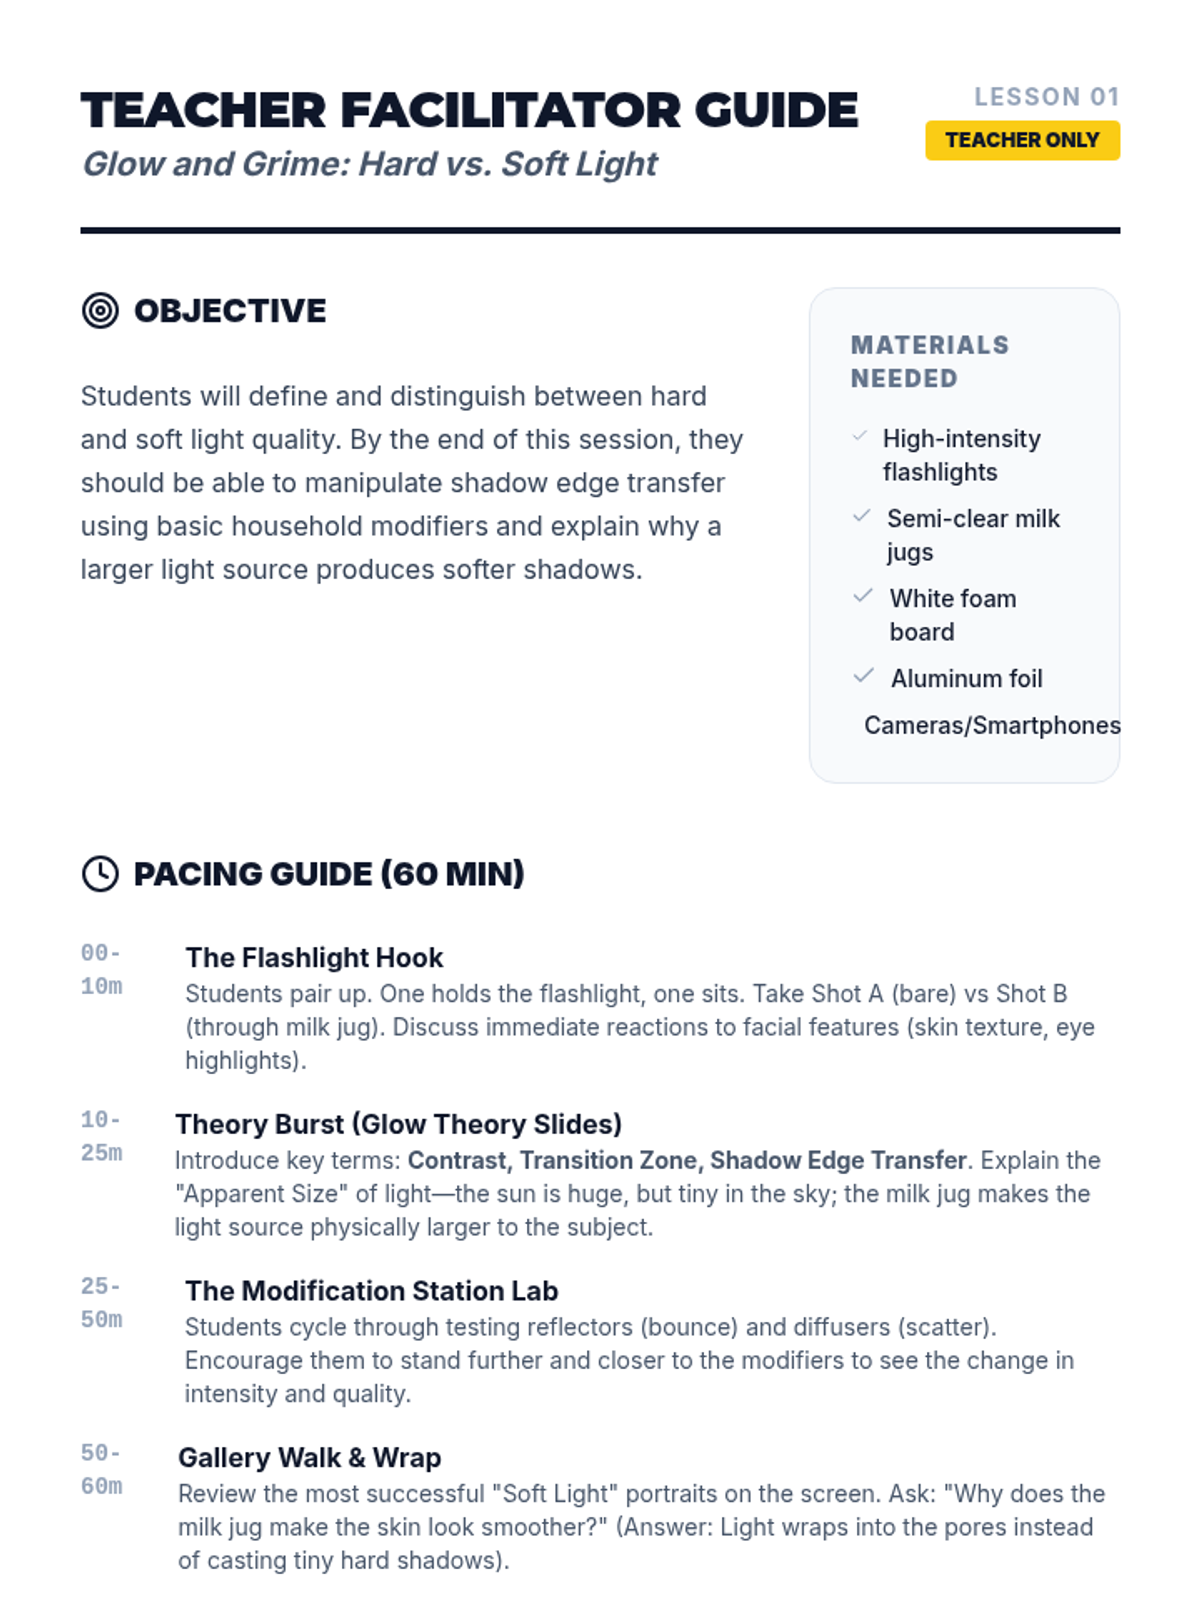
Focusing on light direction (front, side, back), students learn to emphasize texture and create silhouettes while understanding how lighting placement affects depth.
Students compare direct sunlight (hard) and overcast sky (soft) light, using modifiers like reflectors and diffusers to manipulate shadow edge transfer and contrast.
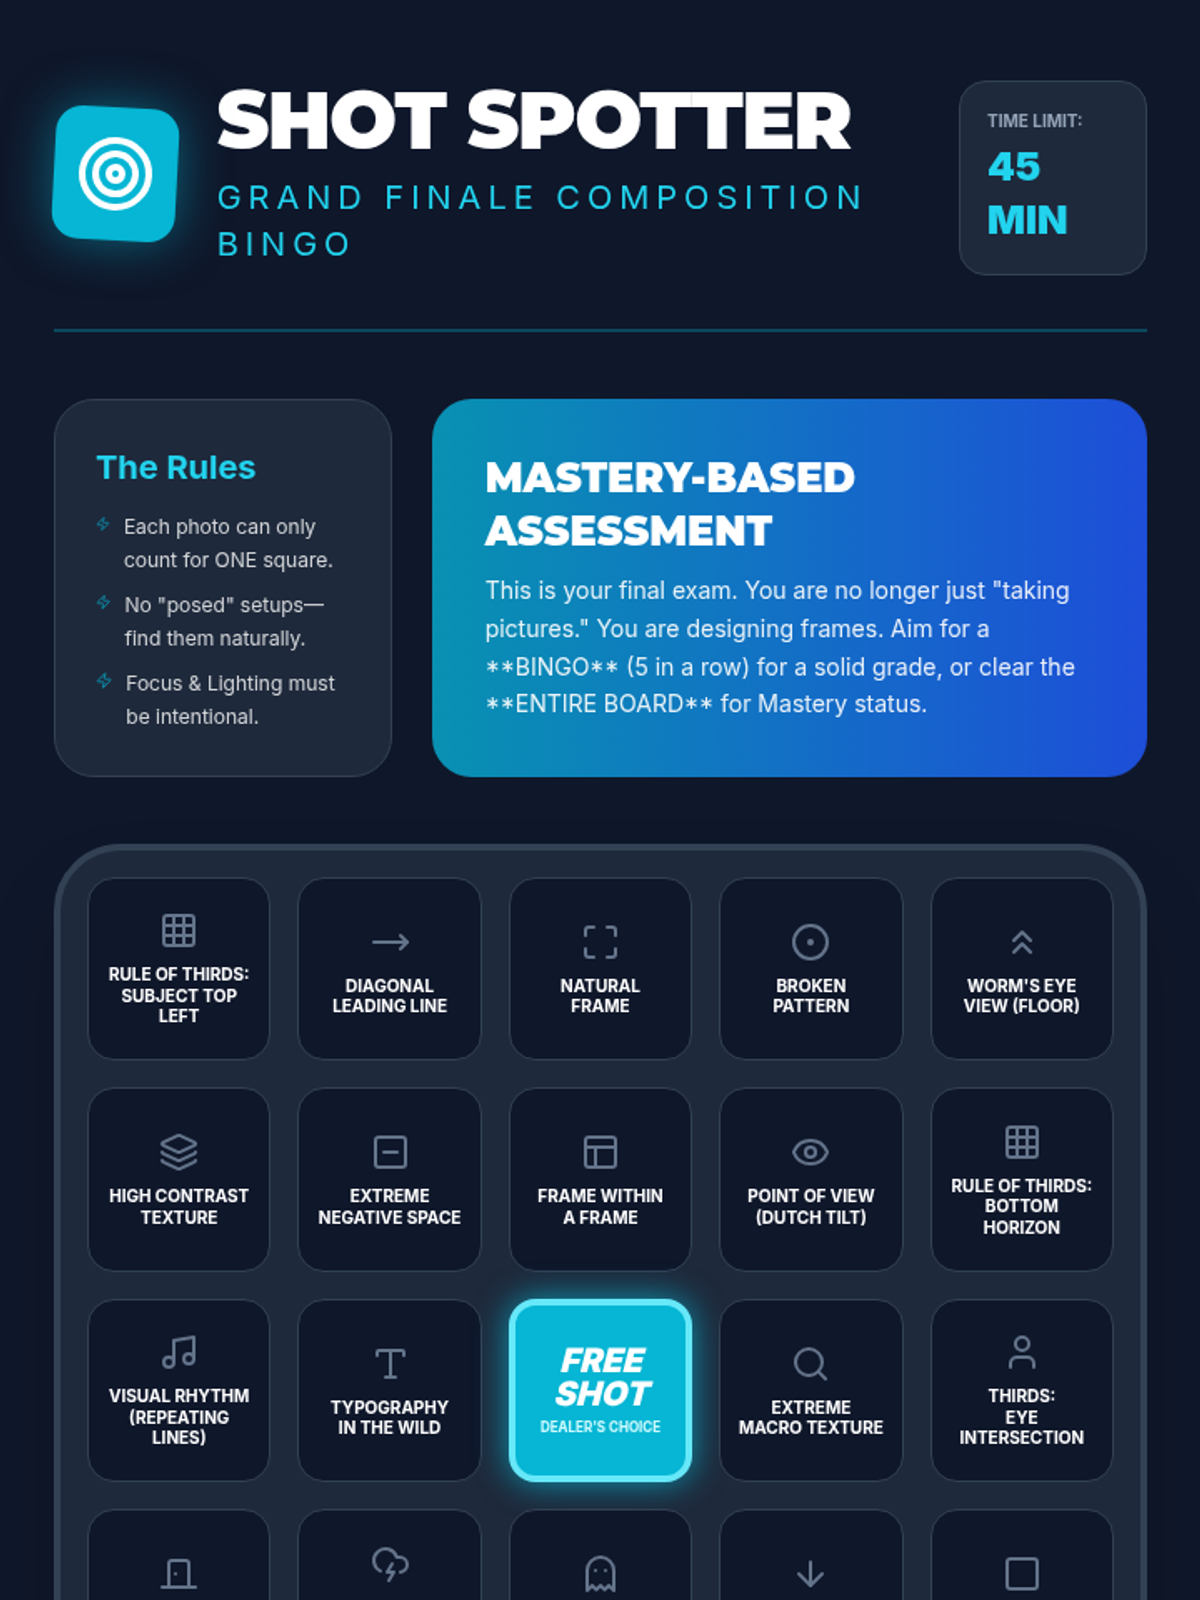
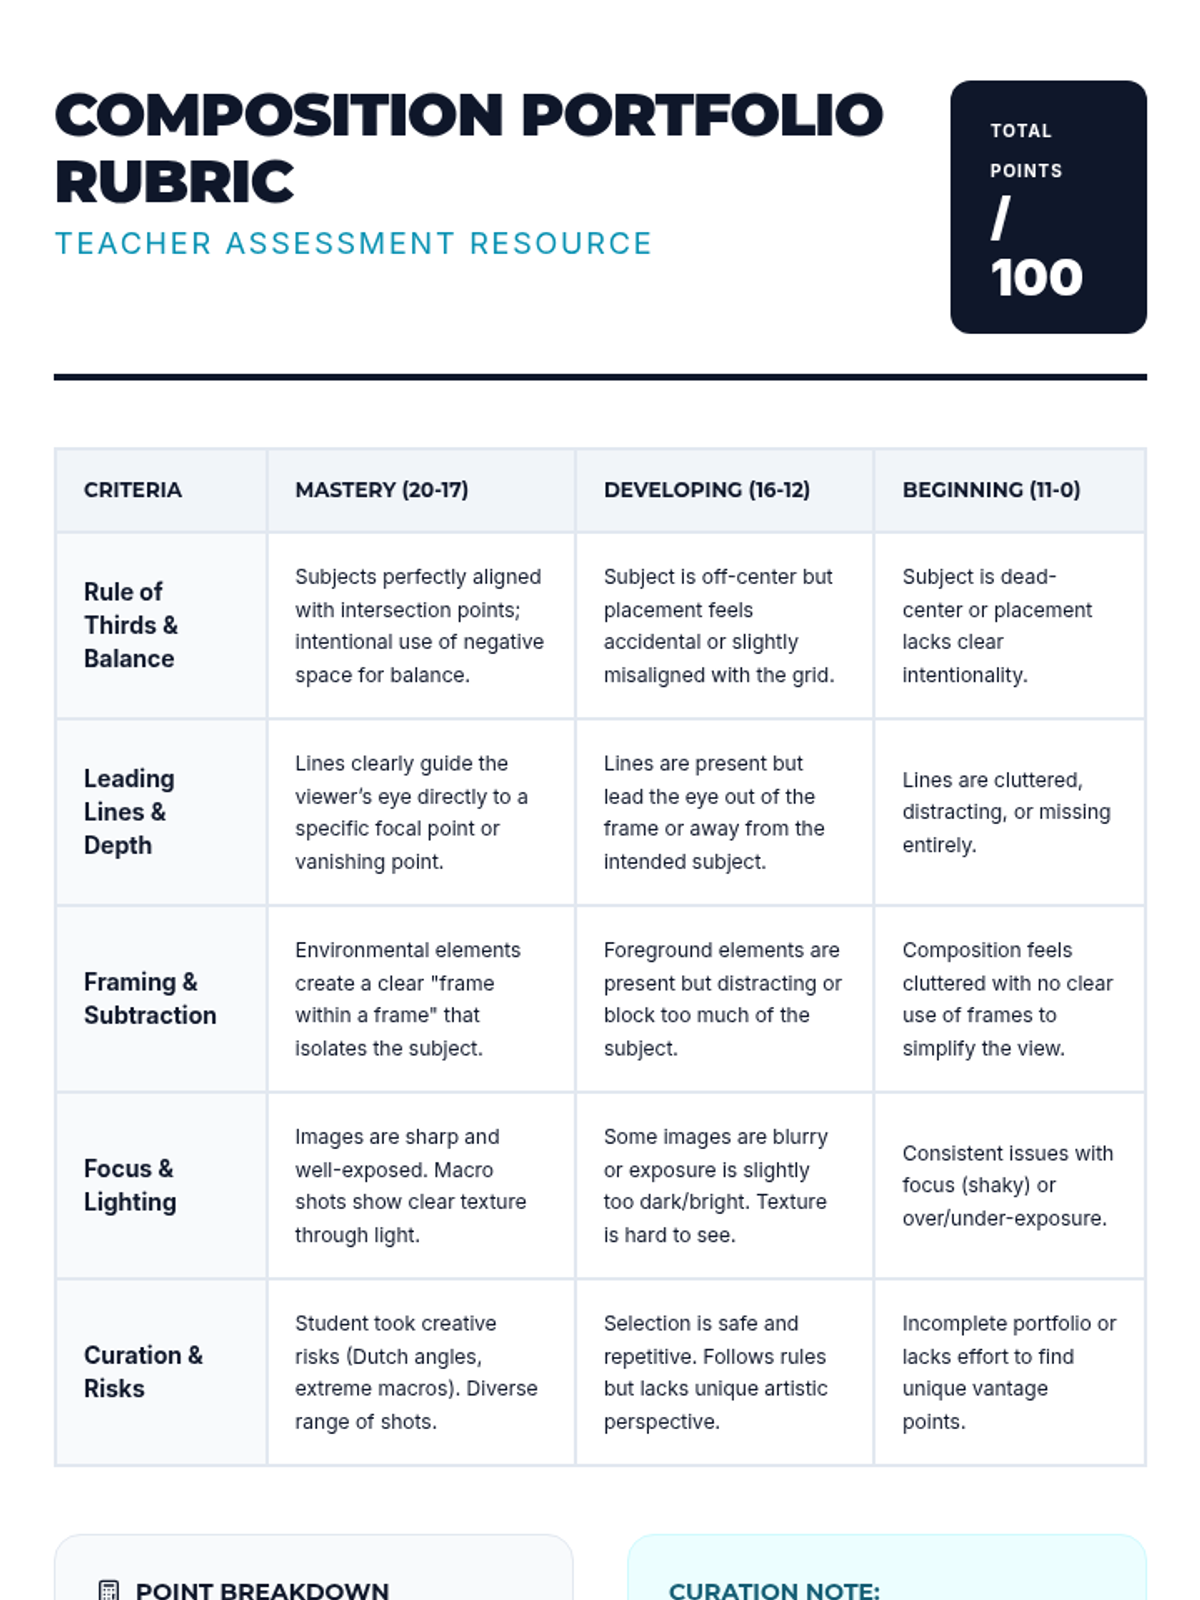
A gamified assessment where students race to capture high-quality images representing all the composition rules learned, submitting their work to a digital gallery for peer review.
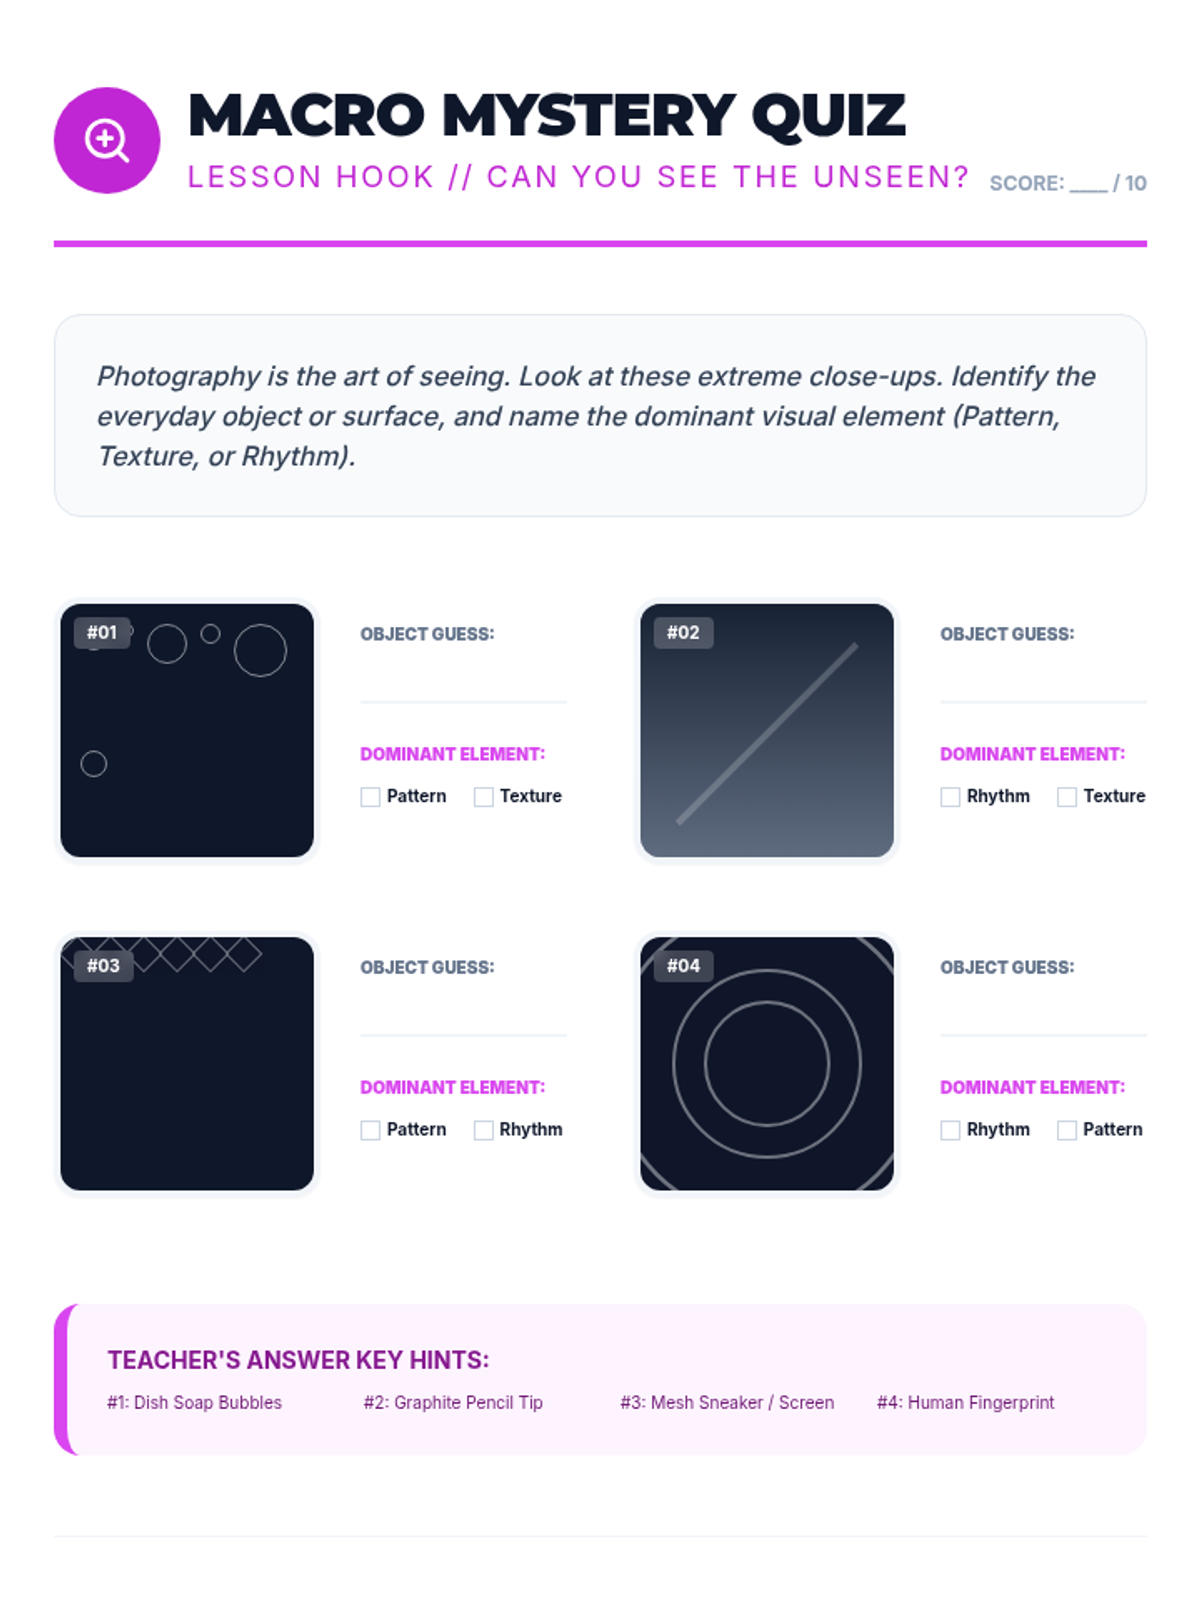
Learners focus on abstract qualities, zooming in to capture textures or repetitive patterns. They learn how breaking a pattern can create a strong focal point through macro-style photography.
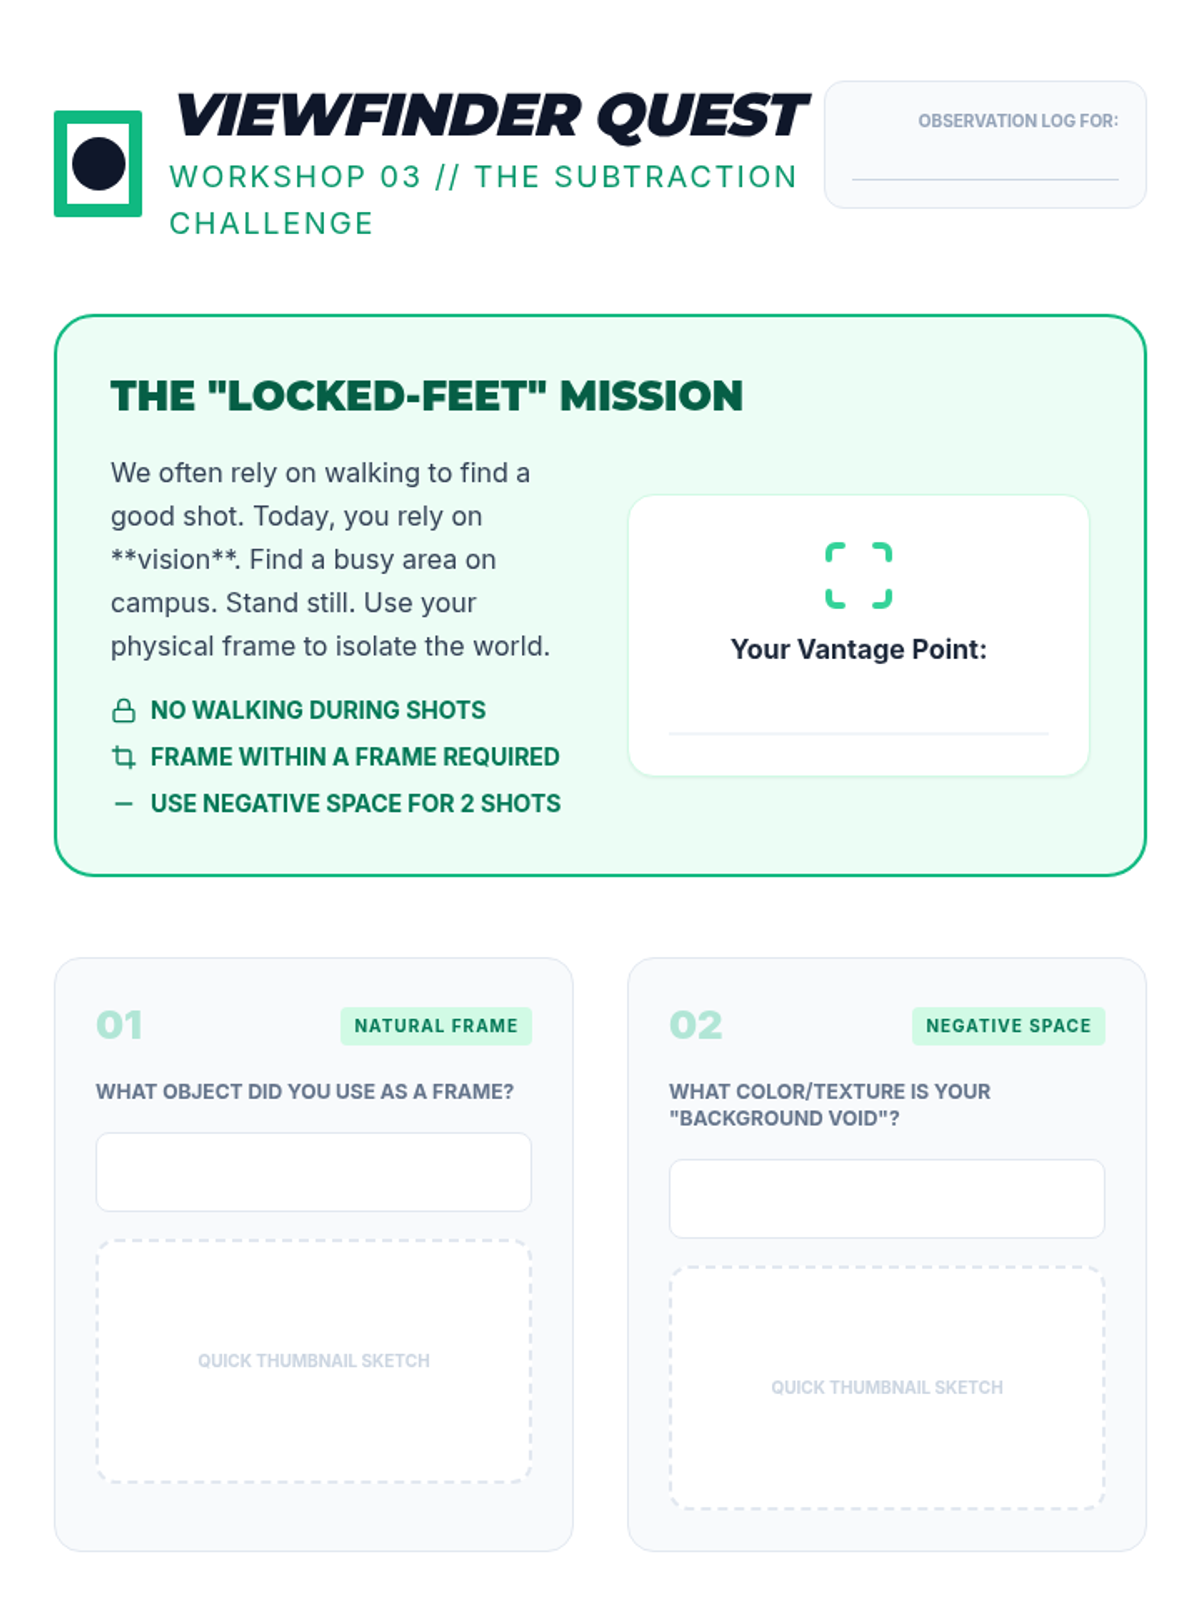
Students investigate how to use environmental elements to create a 'frame within a frame' and explore negative space to evoke minimalism. The focus is on subtraction—removing unnecessary clutter from the shot.
This lesson explores how lines guide the viewer's eye through a photograph toward the subject. Students experiment with shooting from high, low, and dutch angles to change perspective.
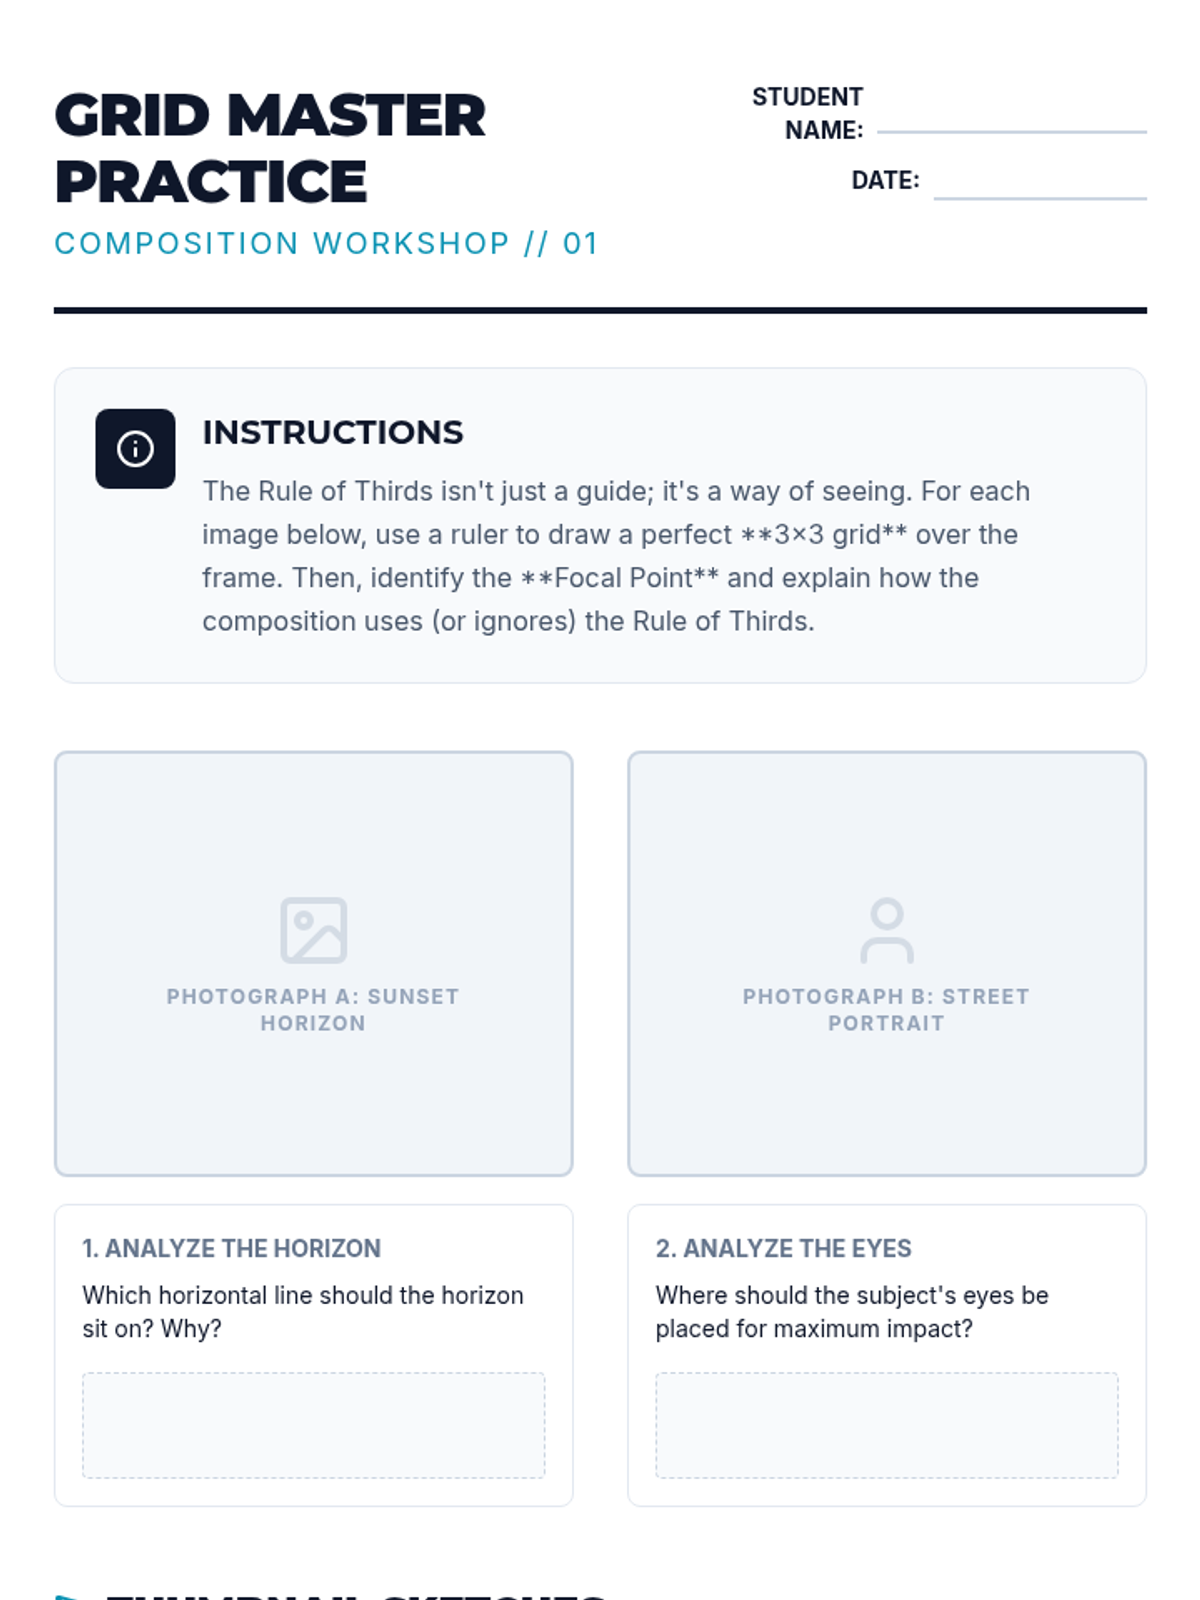
Students learn the foundational grid system of photography to avoid static center-placement. They analyze famous photographs to see the grid in action and practice aligning subjects at intersection points.
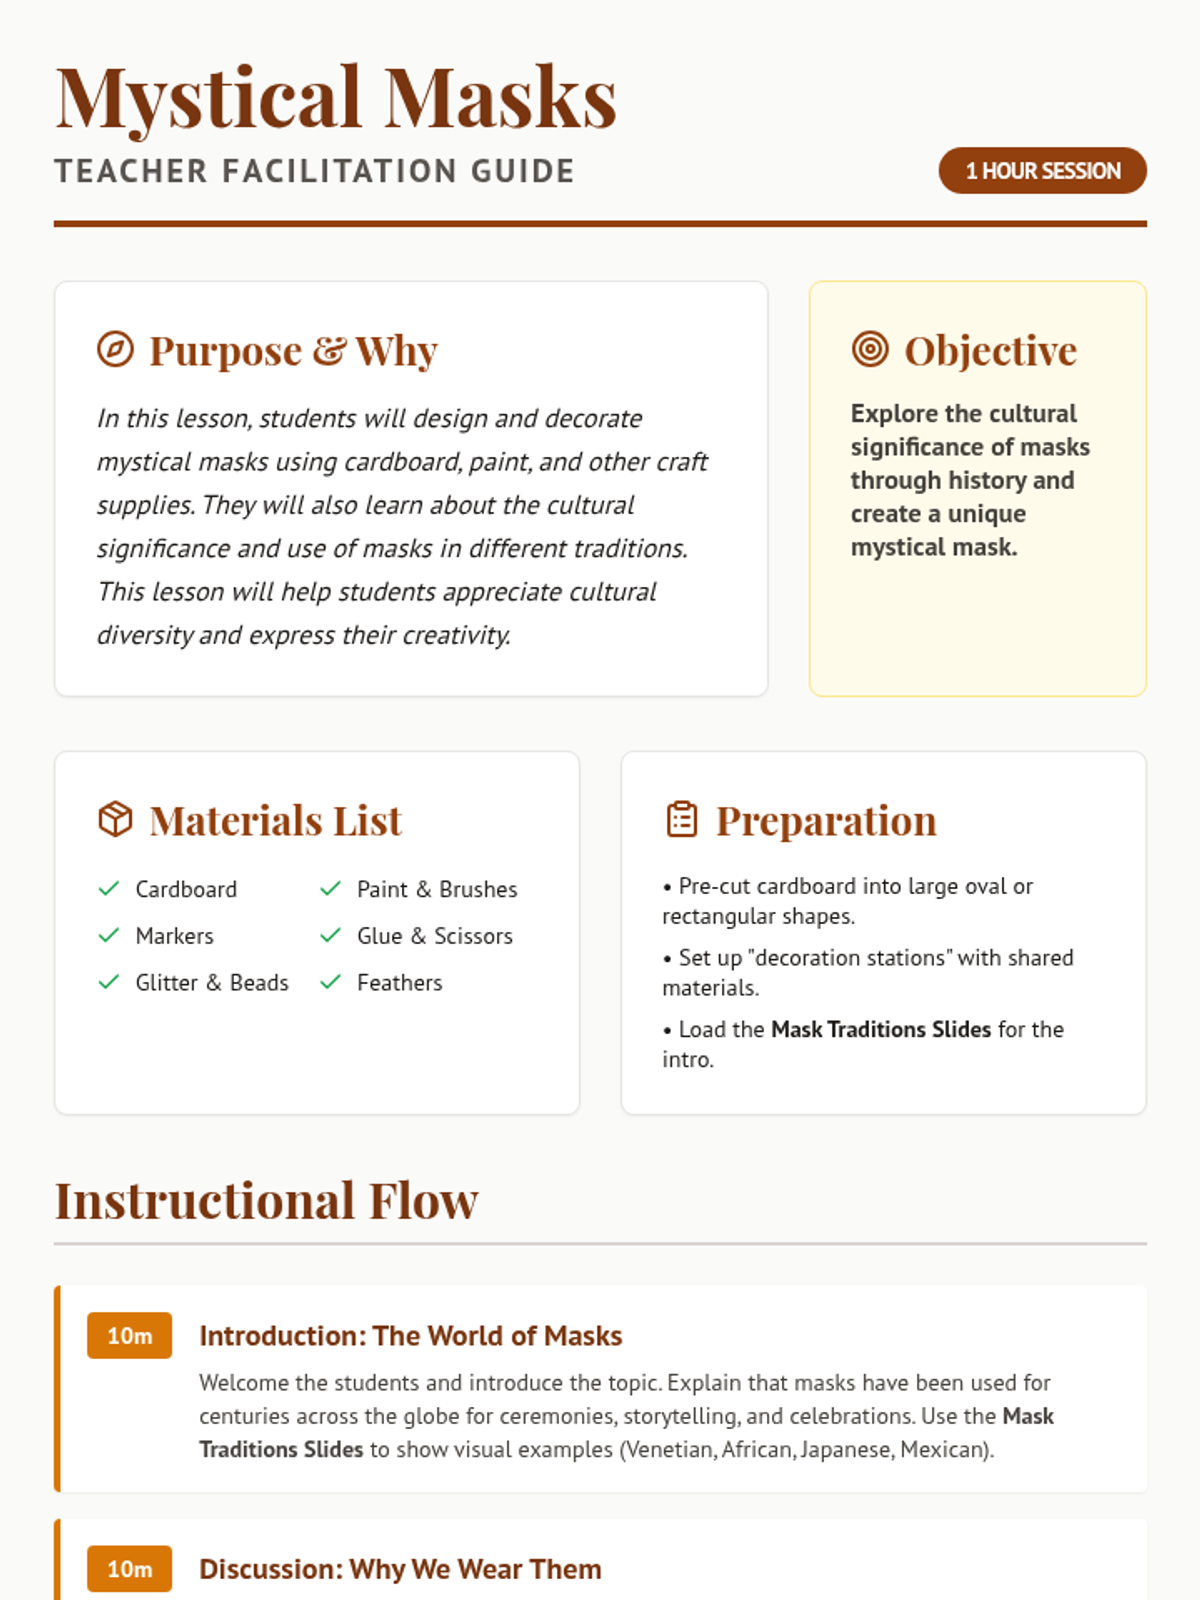
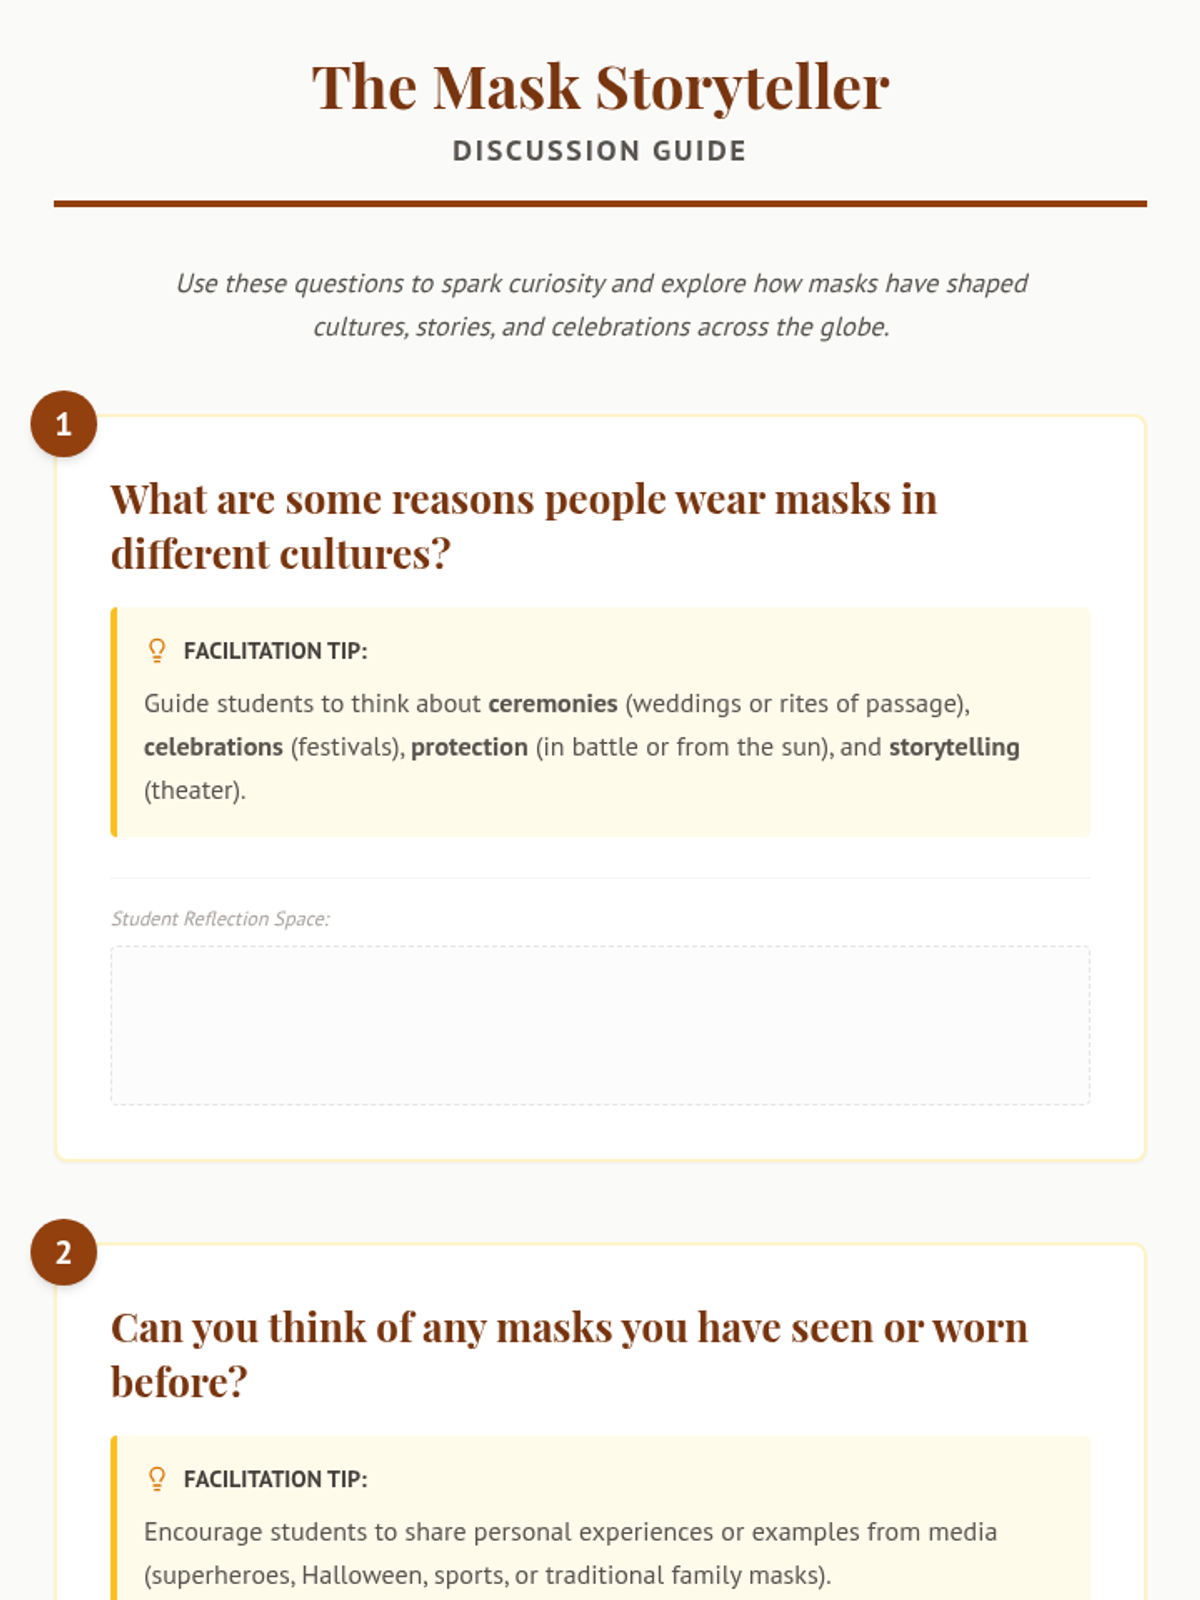
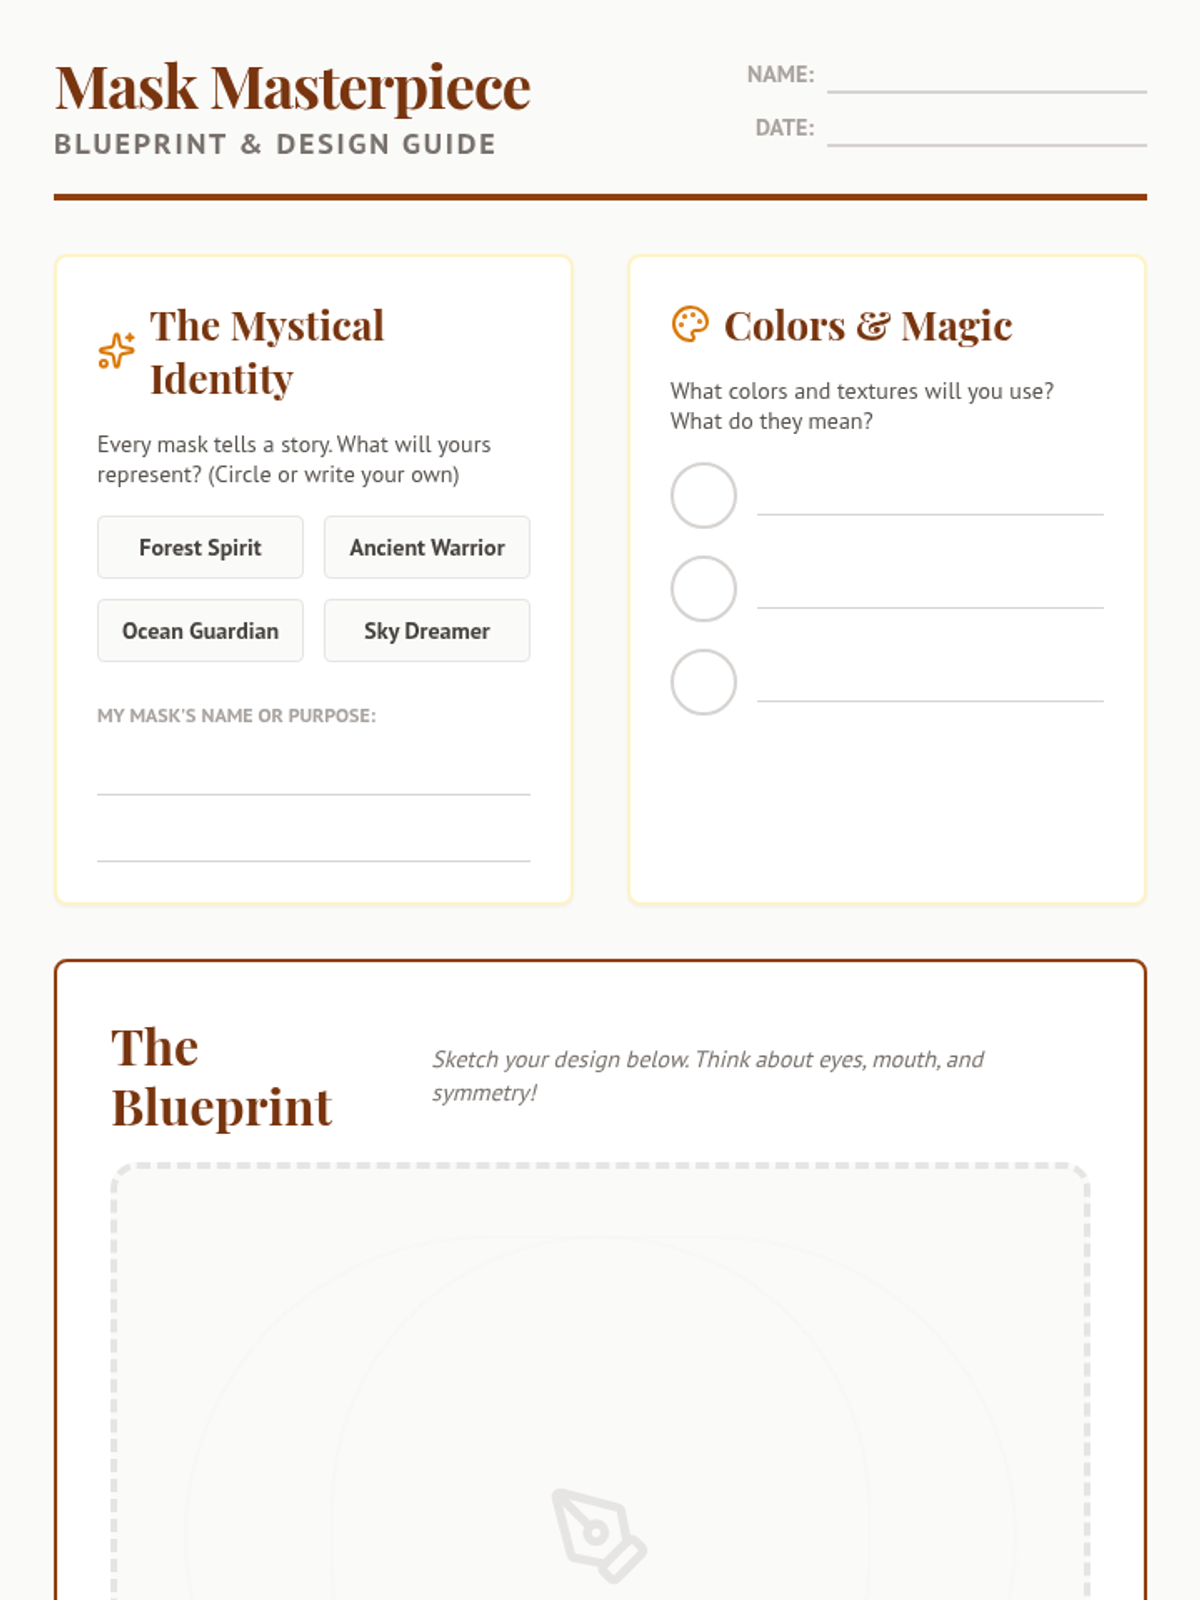
Students explore the cultural significance of masks from around the world and design their own mystical masks using cardboard and craft supplies.
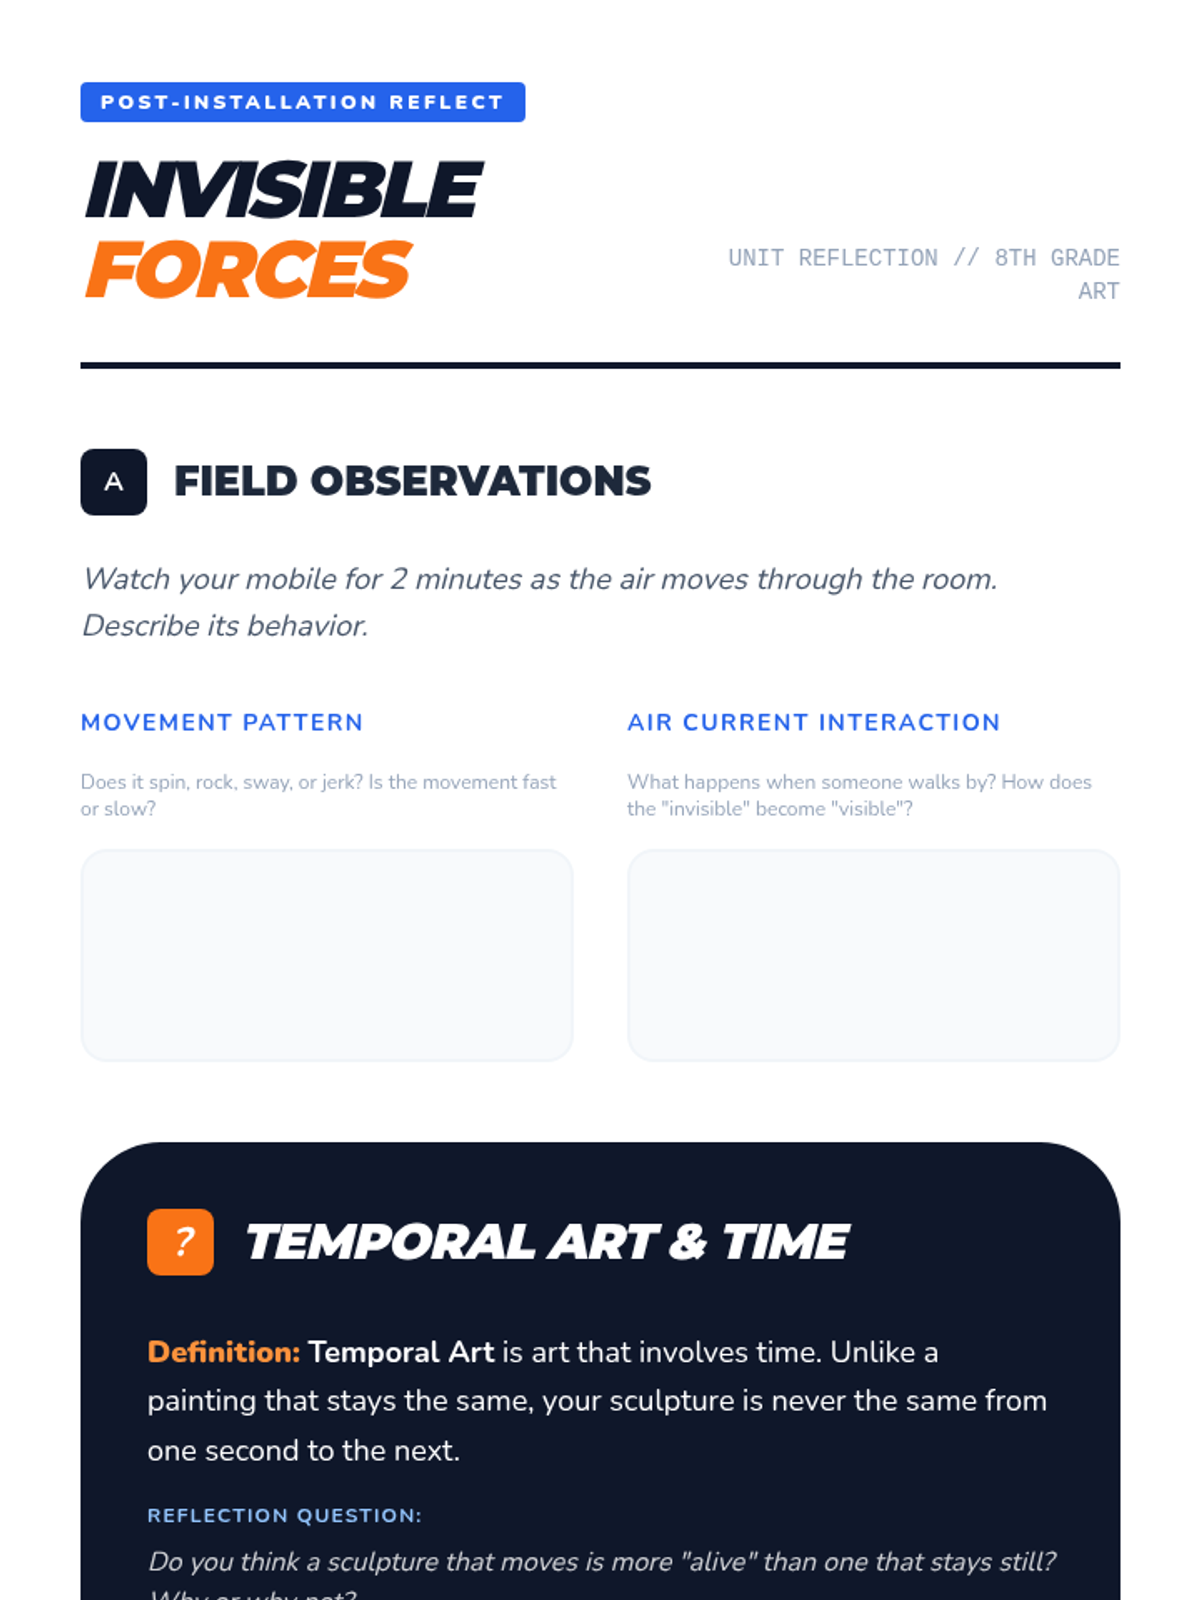
Students install their sculptures and observe how air currents interact with their work, reflecting on the concept of temporal art.
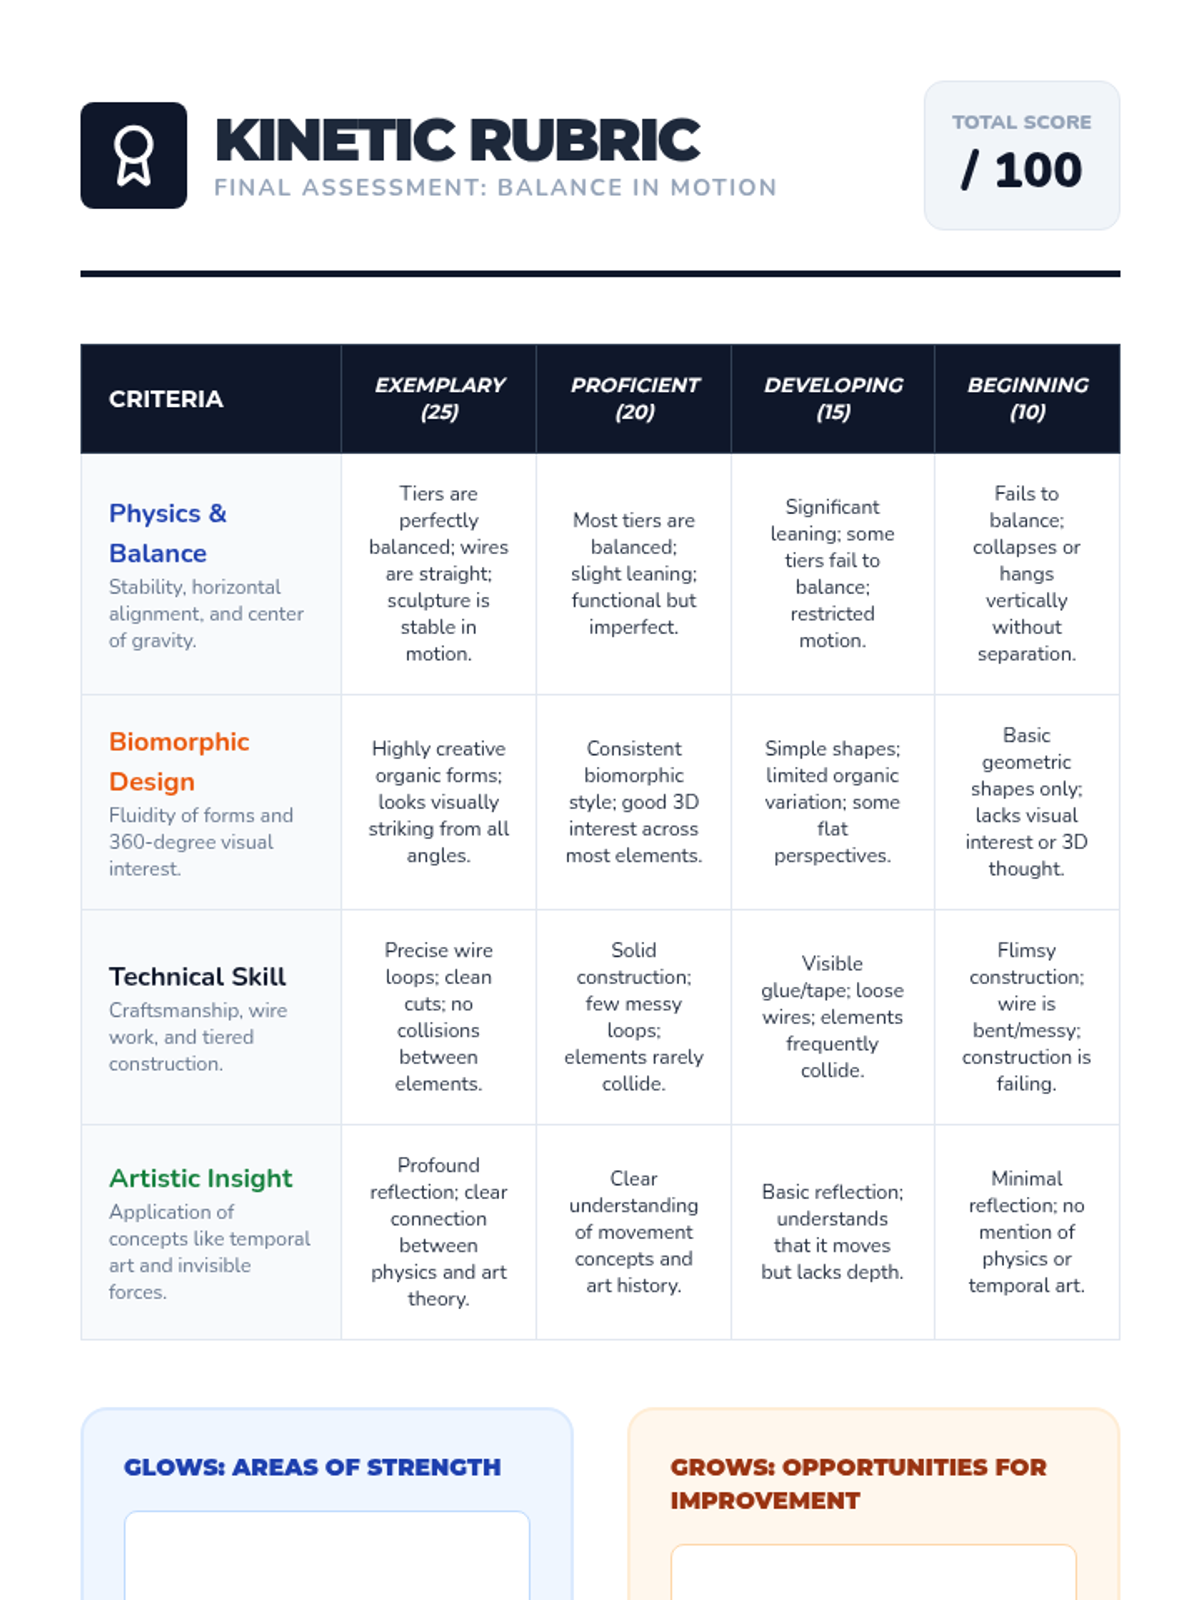
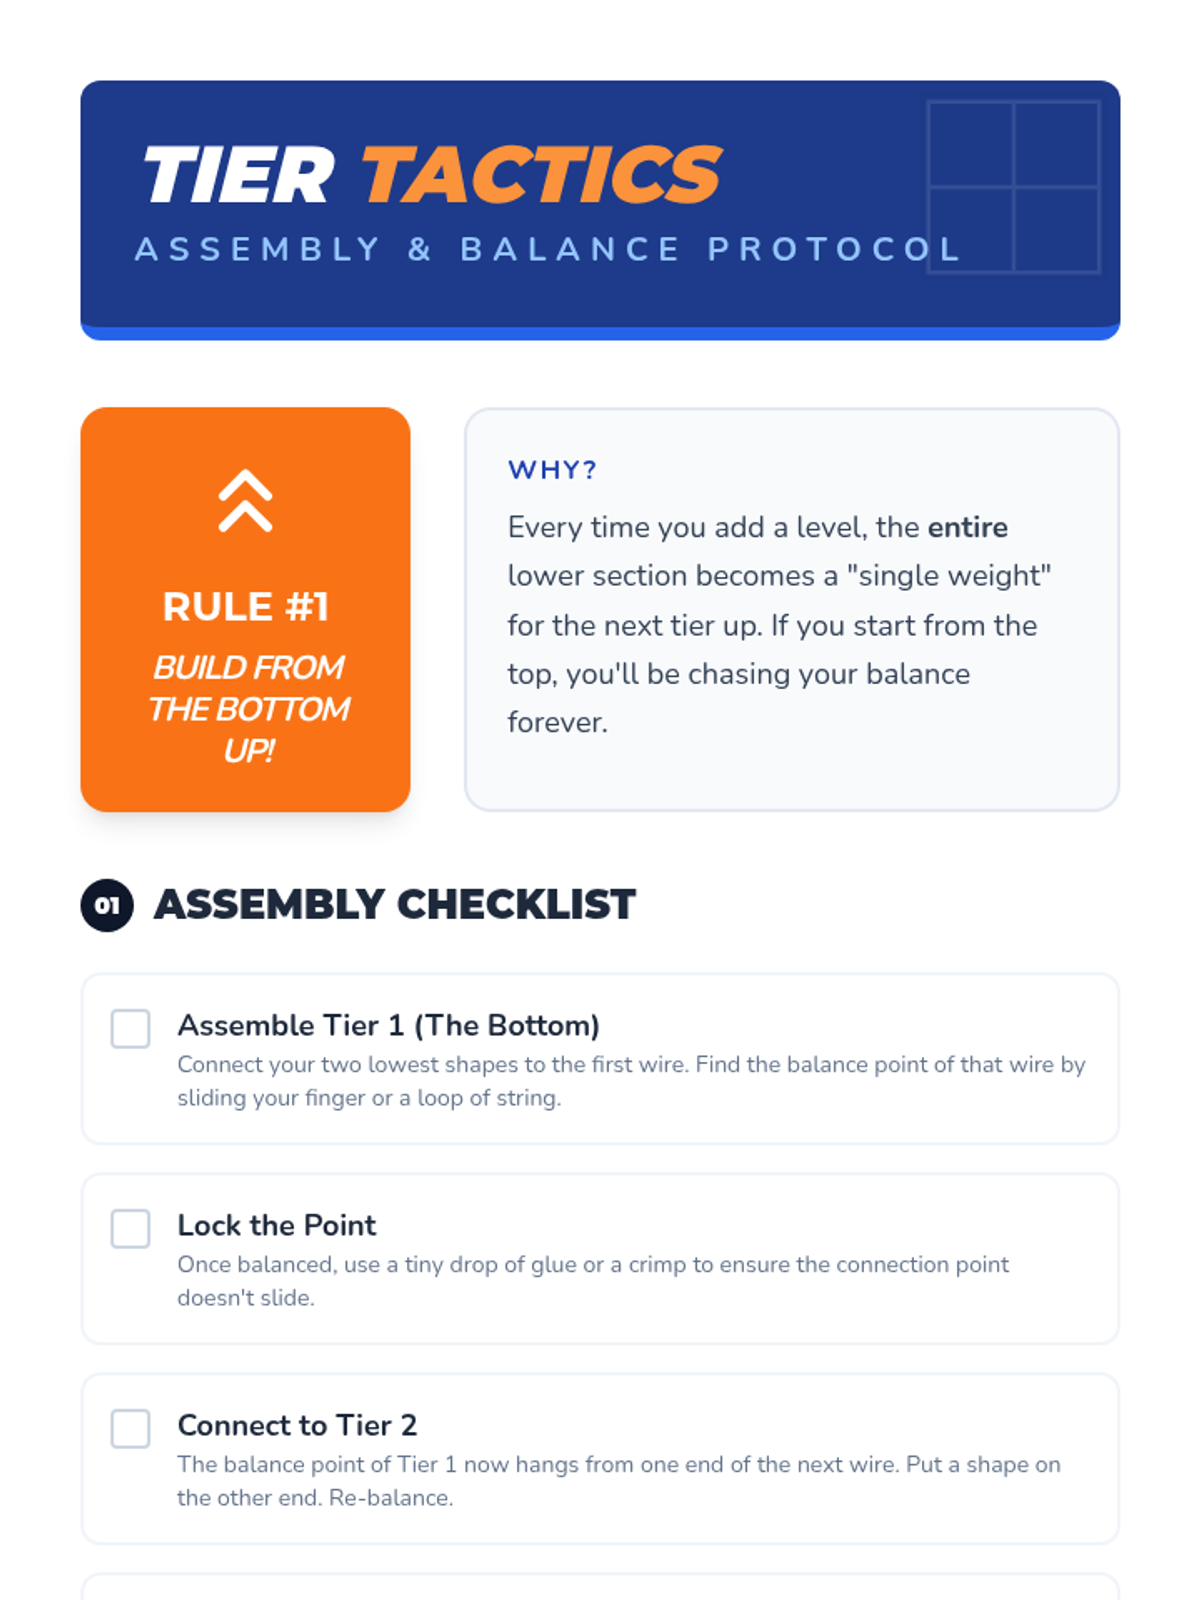
A workshop-style lesson focusing on the bottom-up assembly of multi-tiered mobiles and the iterative process of balancing.
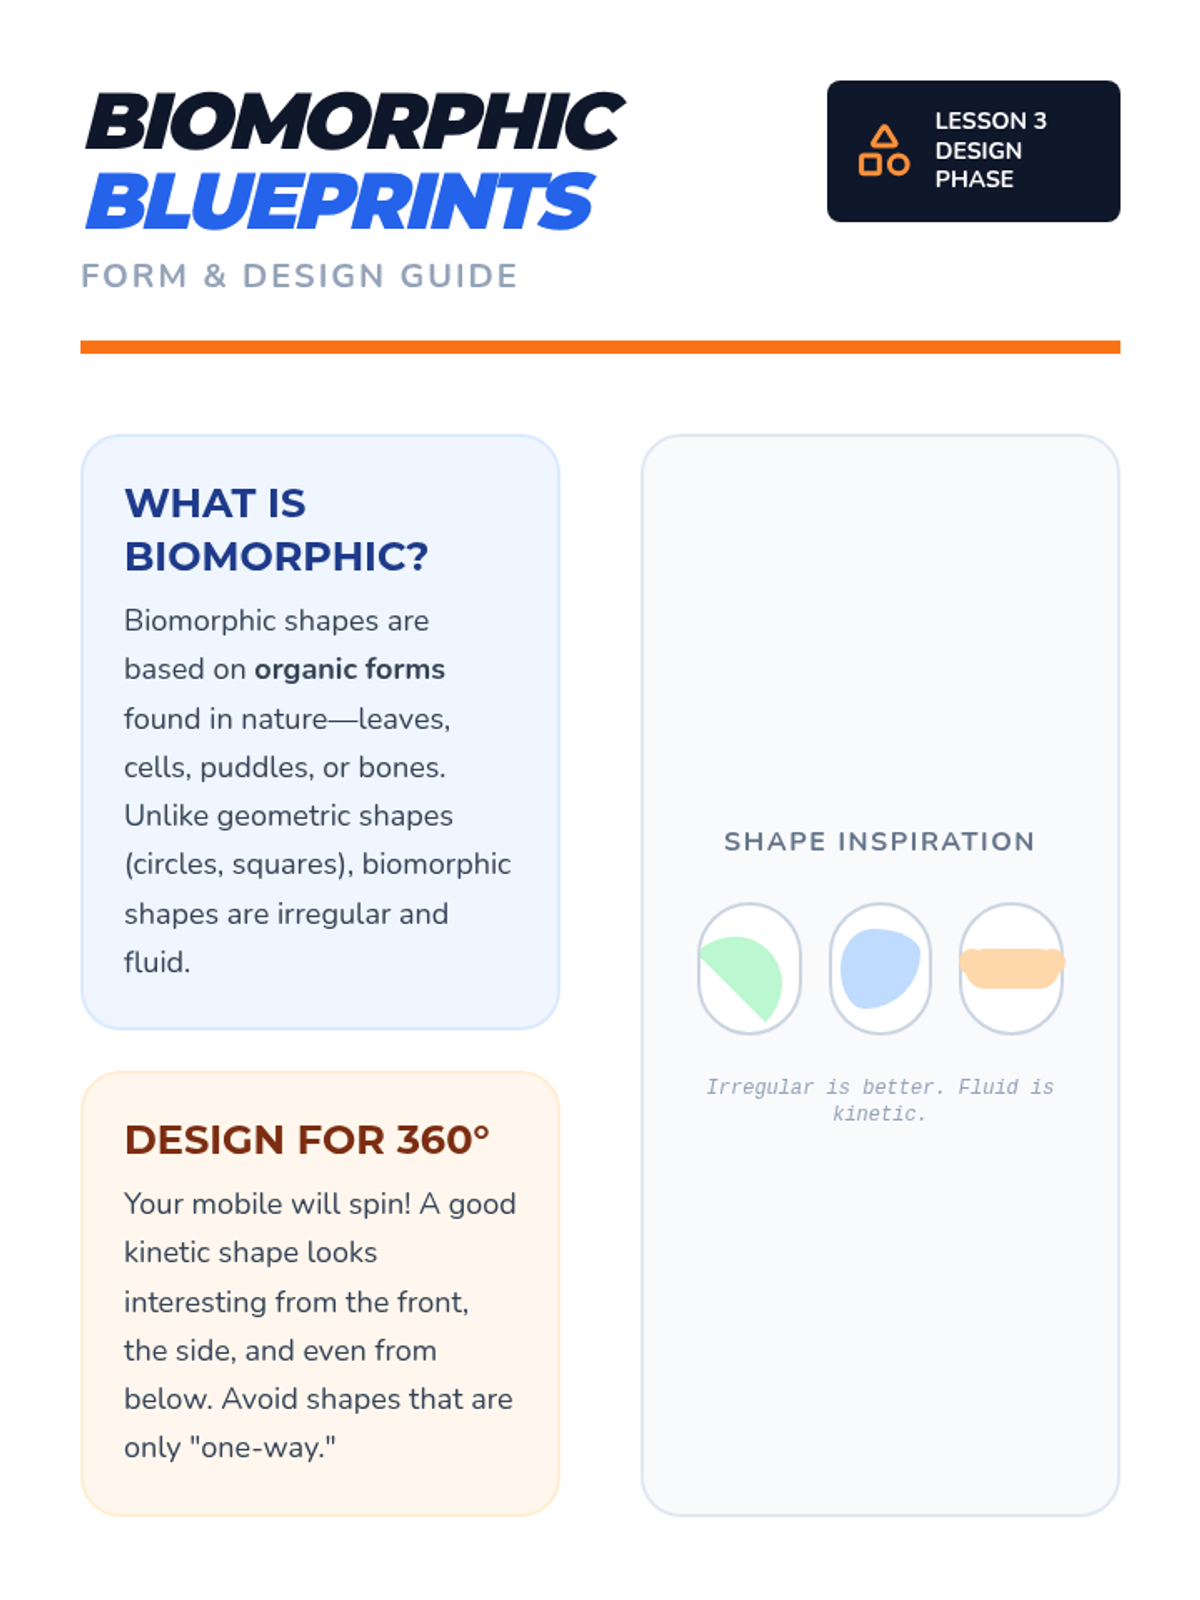
Students design and cut biomorphic shapes for their sculptures, focusing on organic forms and 360-degree visual interest.
A hands-on lab where students explore the physics of balance, fulcrums, and center of gravity using simple tools and irregular shapes.
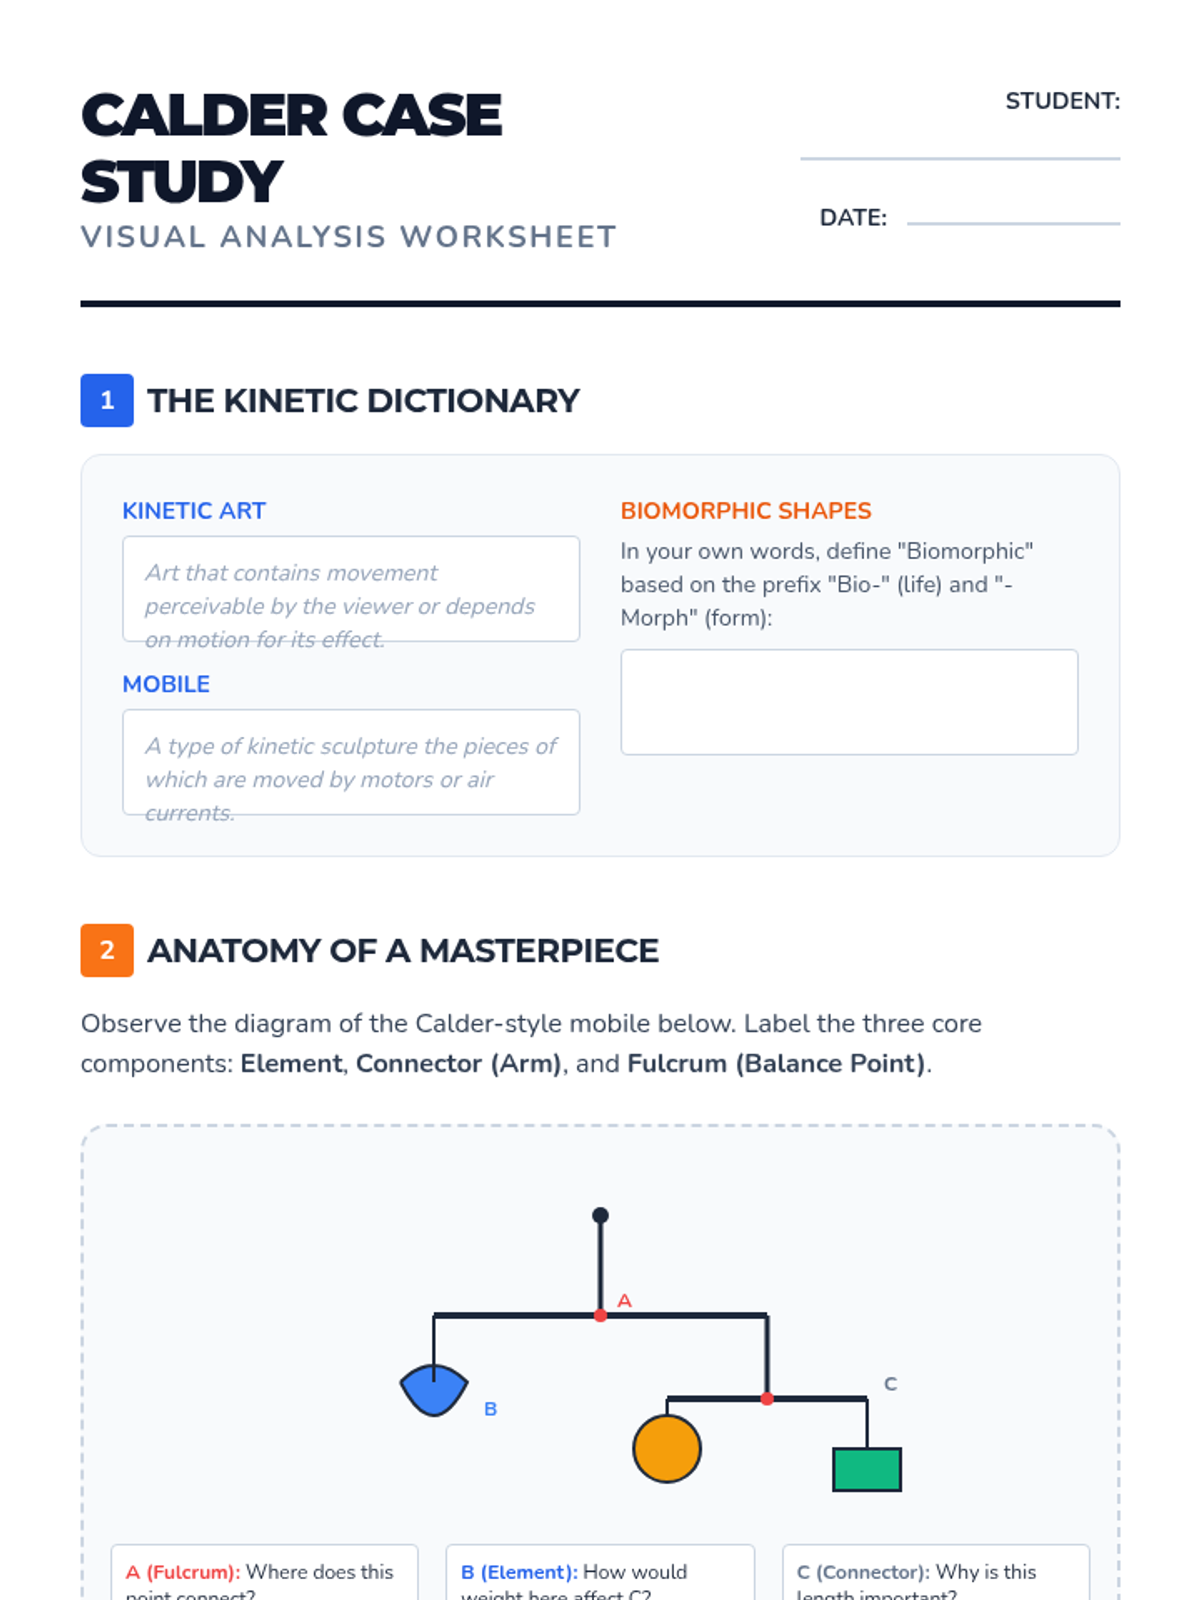
Students analyze the kinetic sculptures of Alexander Calder, focusing on the shift from static to moving art and identifying the key components of a mobile.
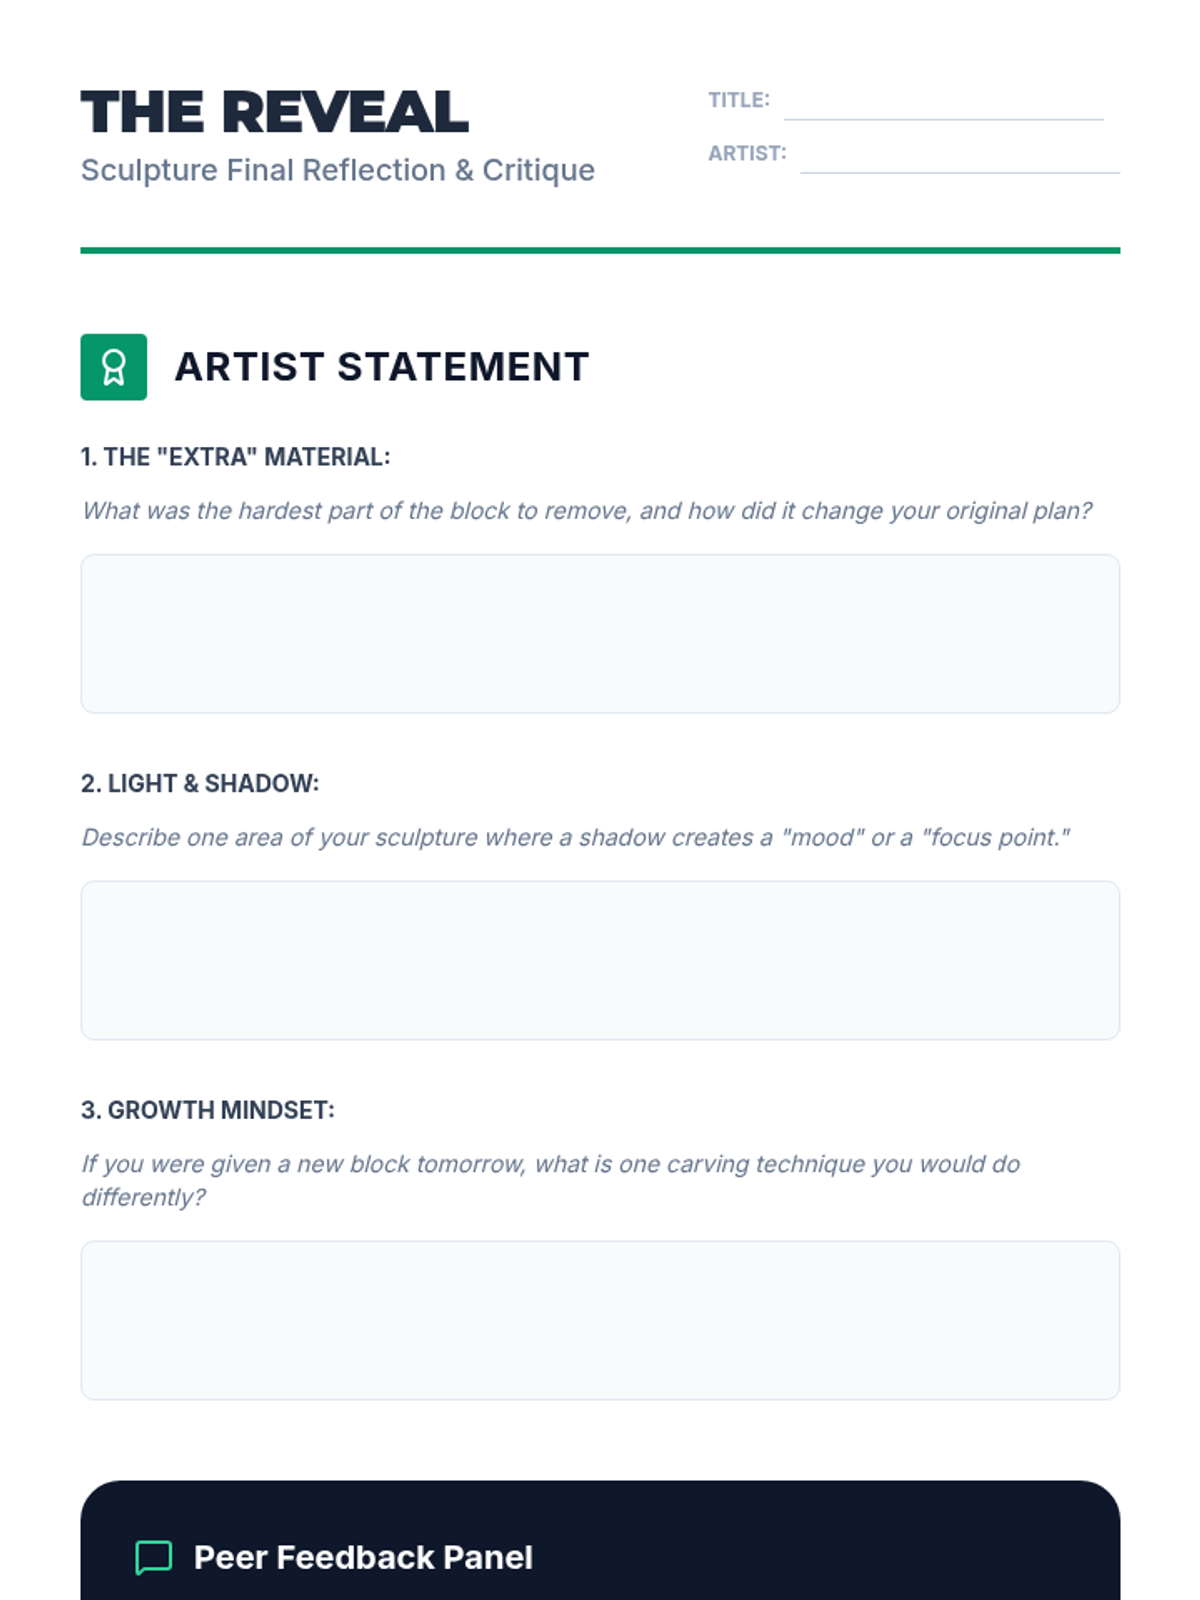
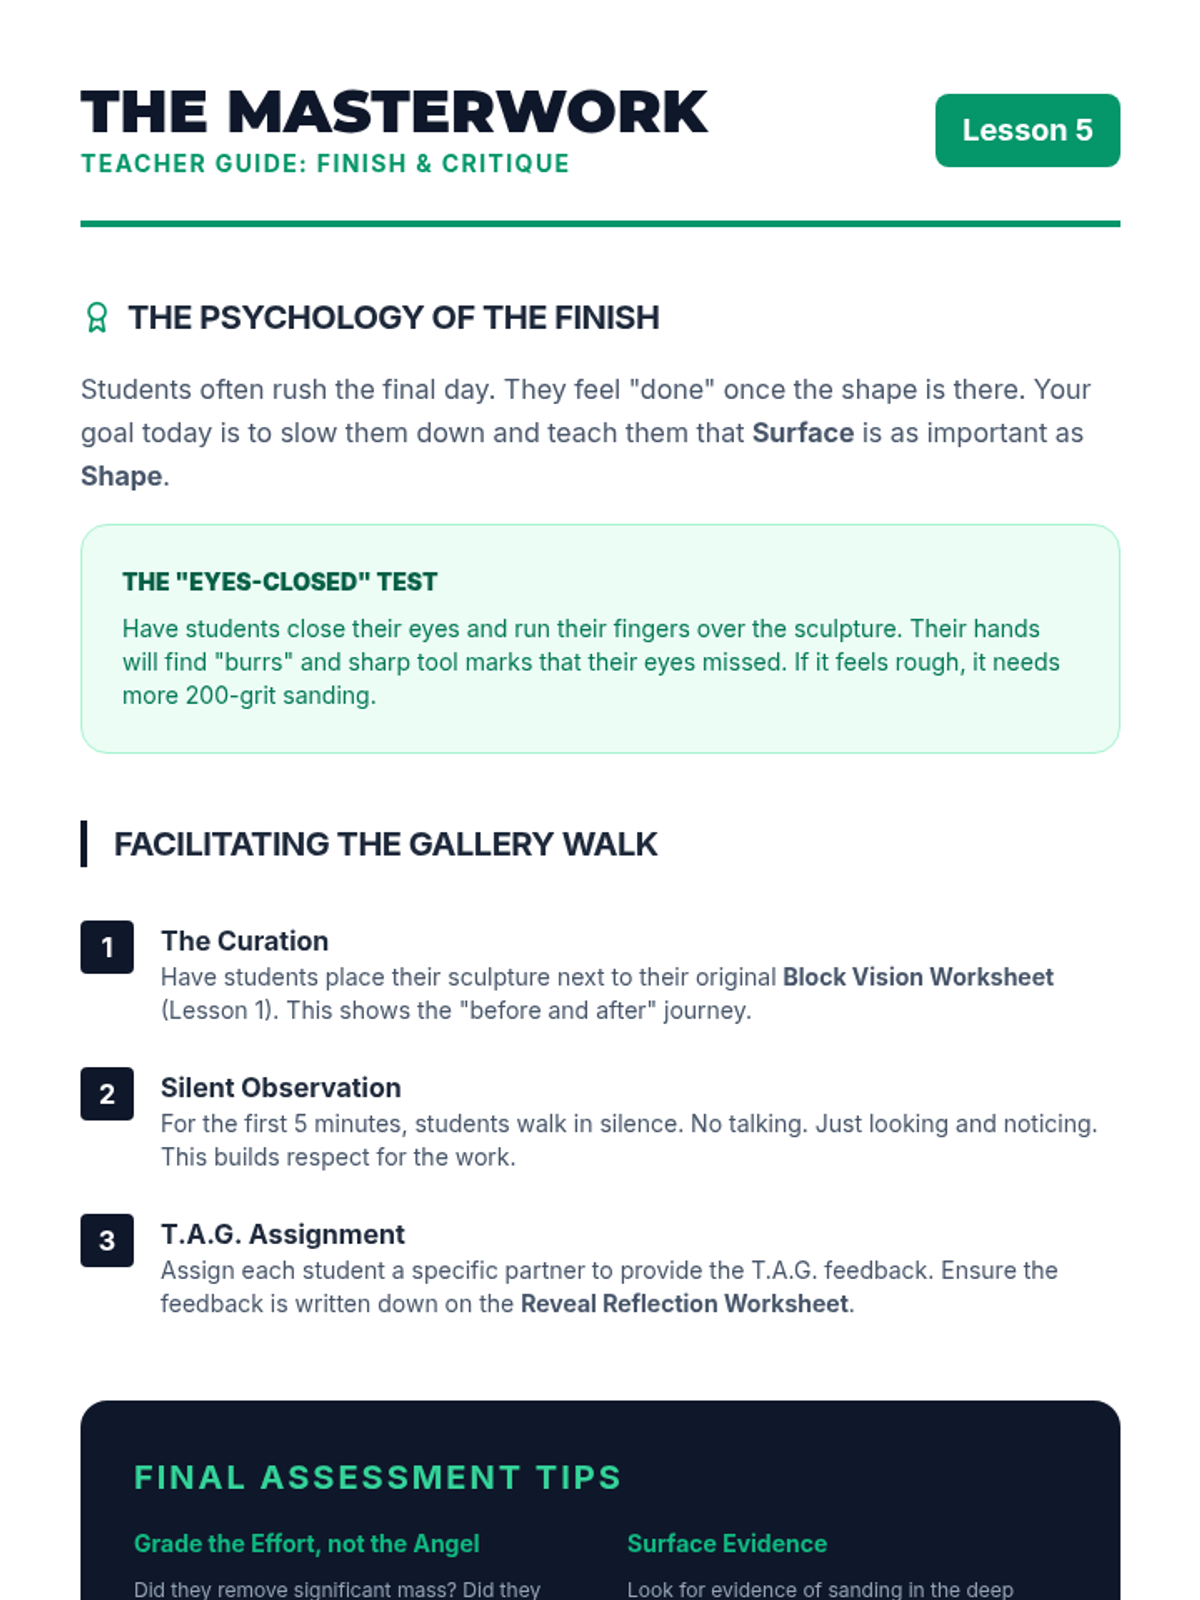
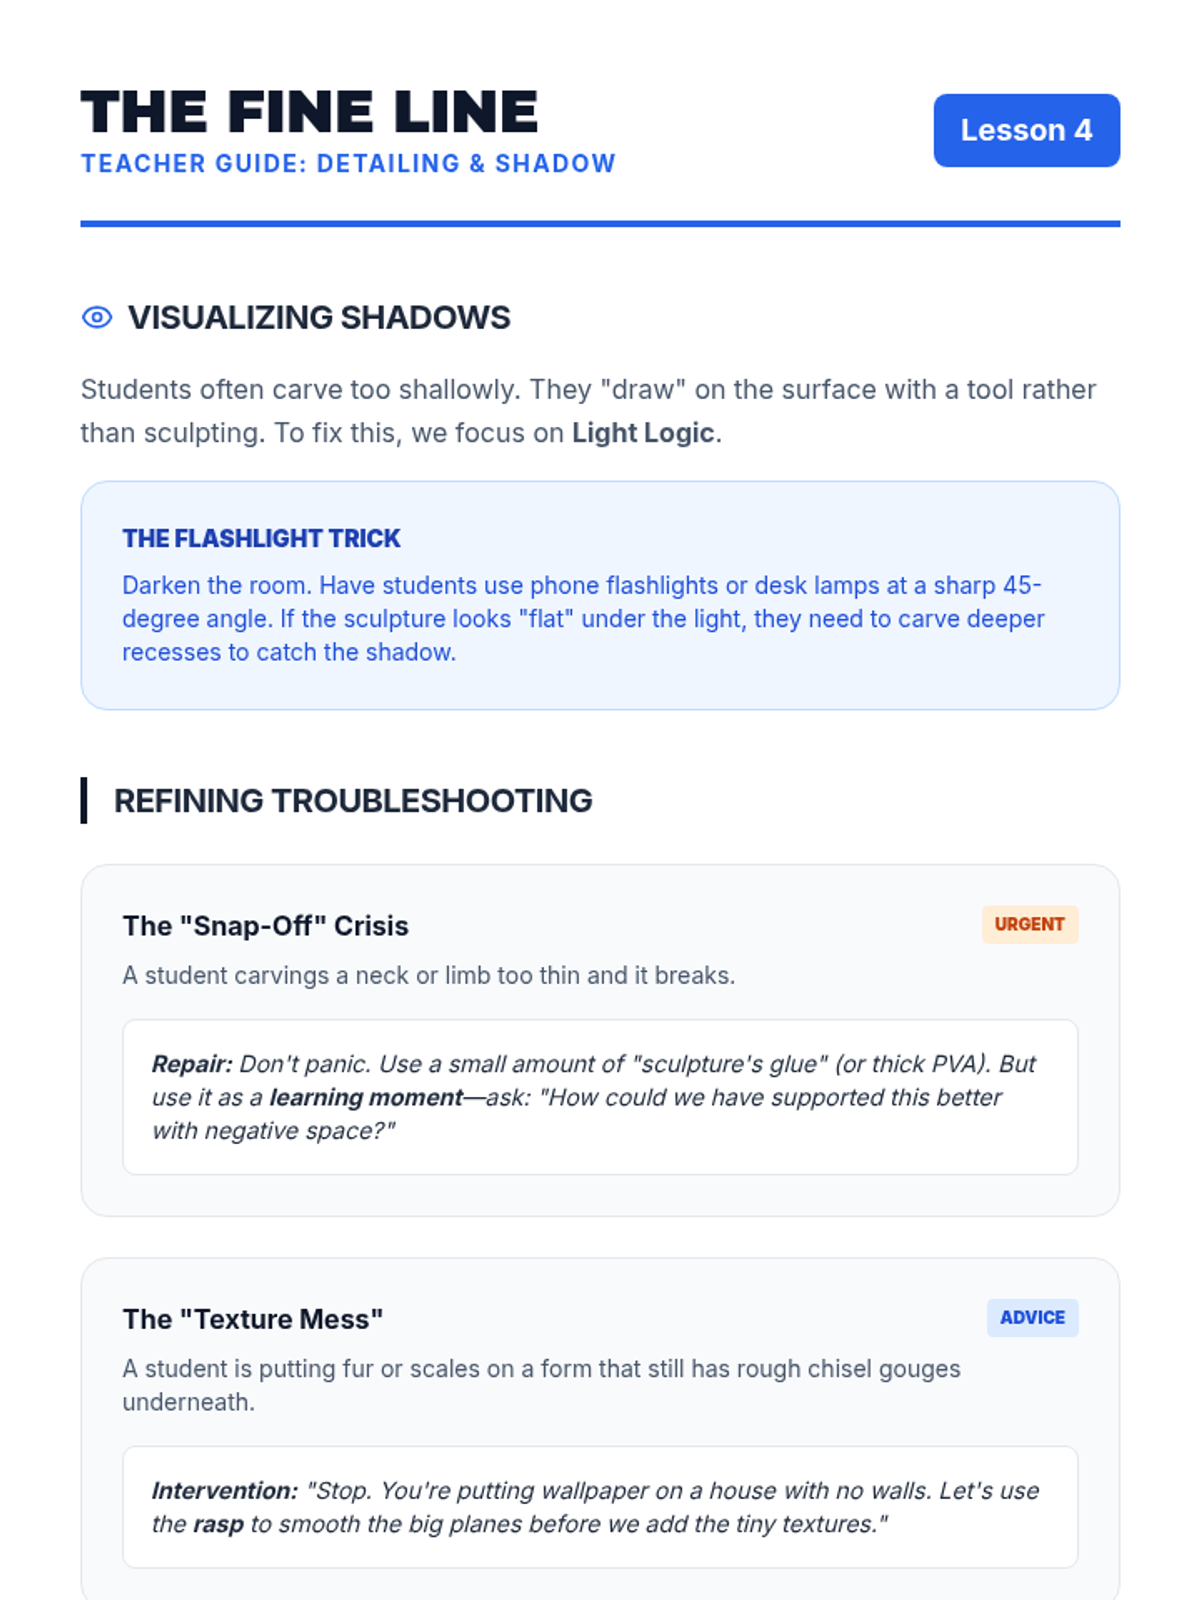
The final stage of the carving process involves smoothing surfaces and polishing. Students engage in a final critique to evaluate how light interacts with their finished forms.
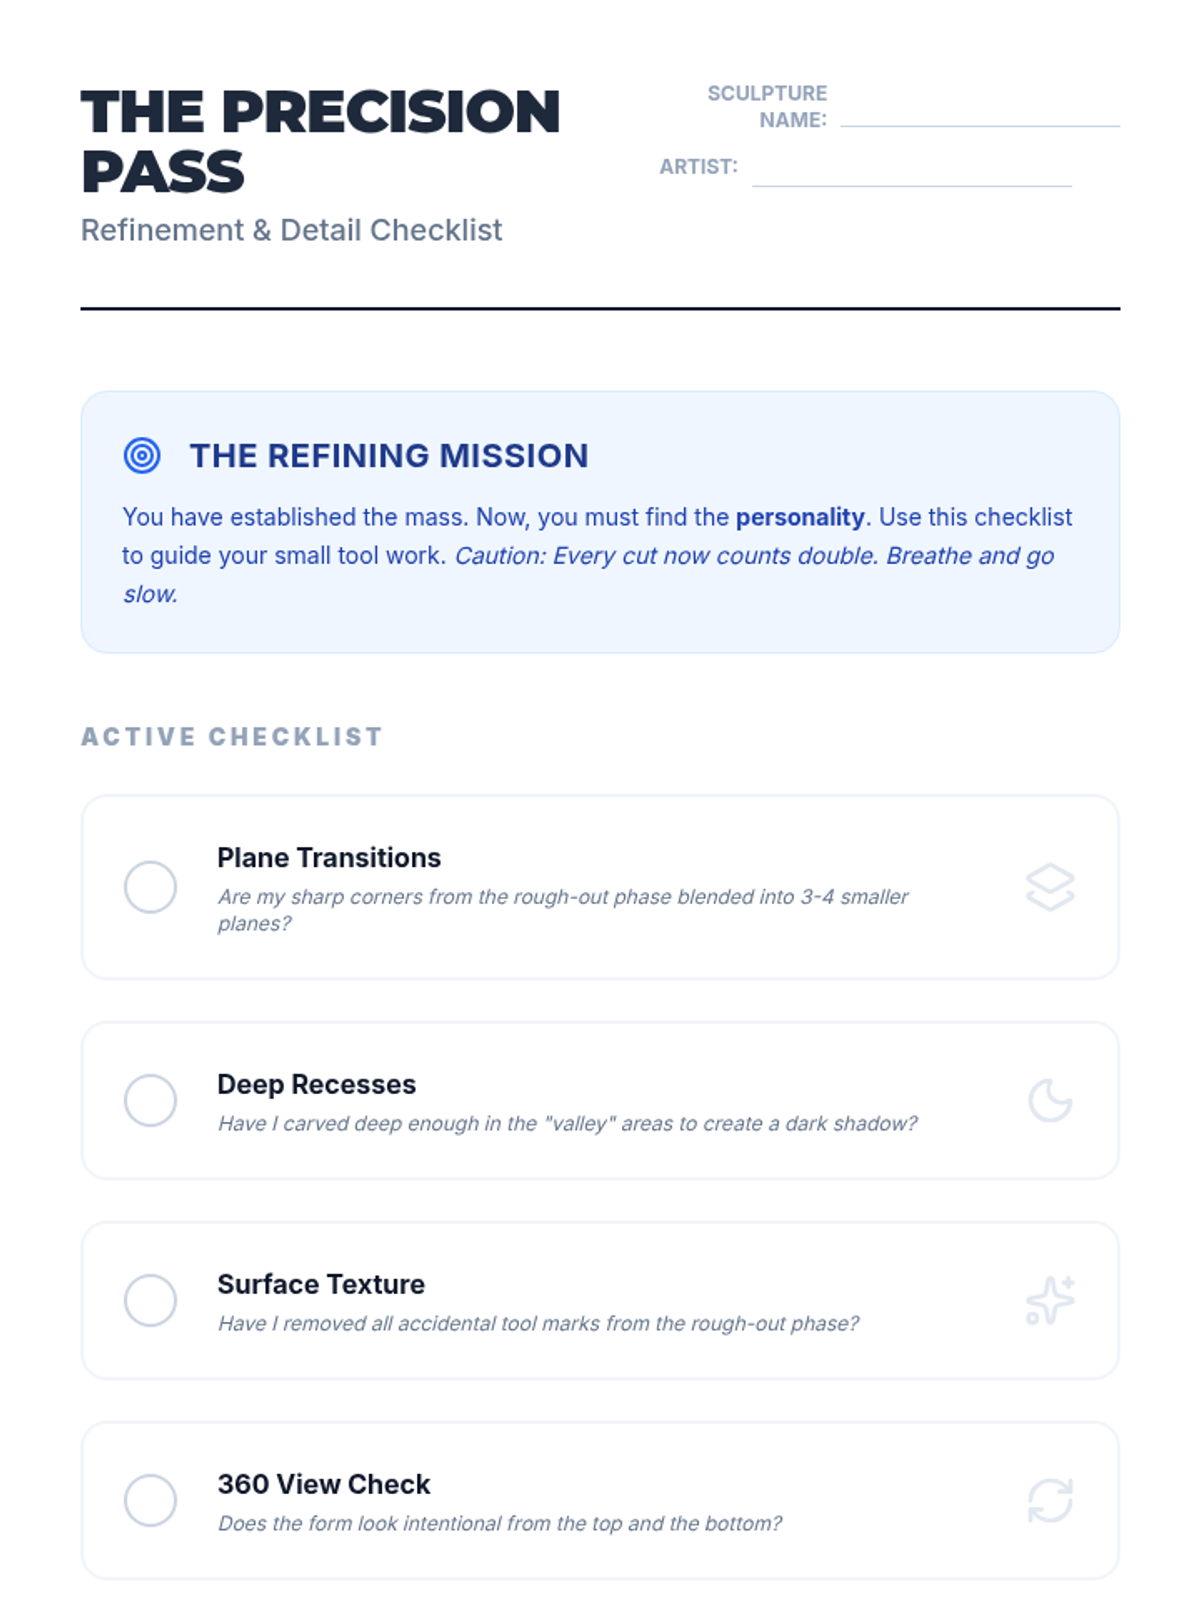
Students transition to fine detailing, focusing on the relationship between planes, deep recesses, and the play of light and shadow on their sculpture's surface.
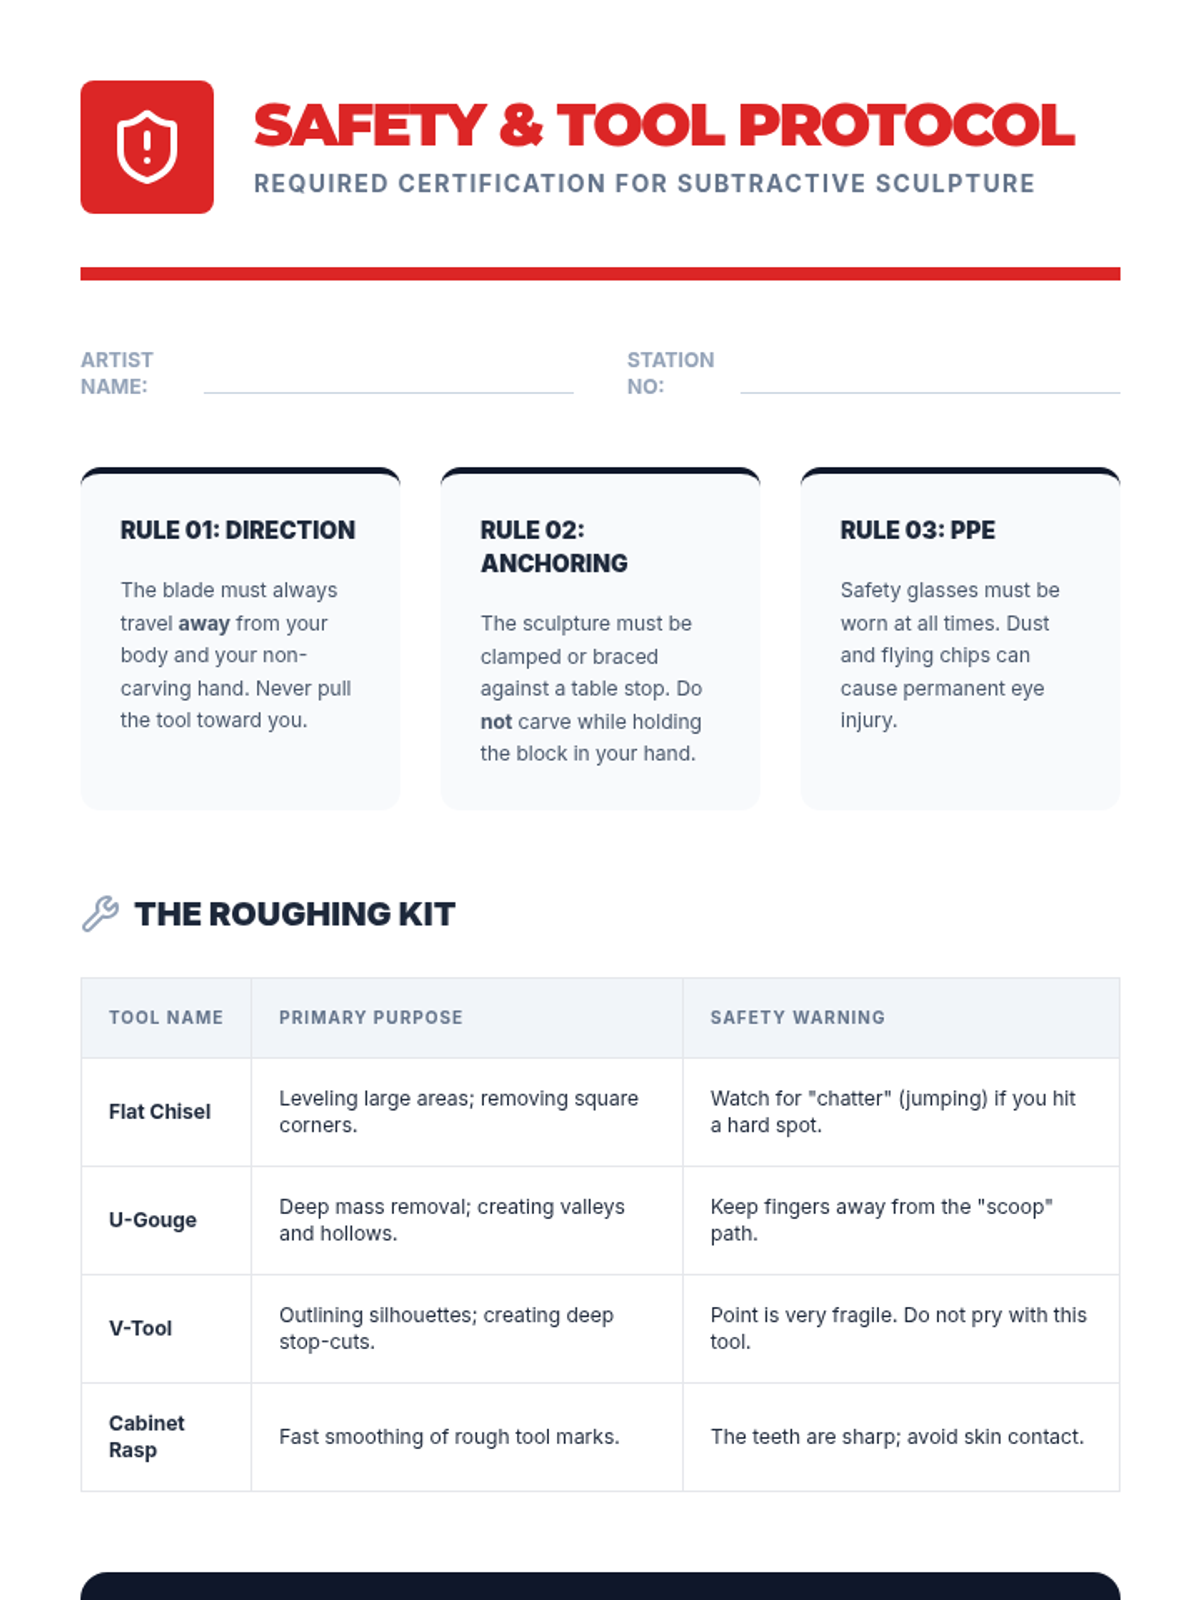
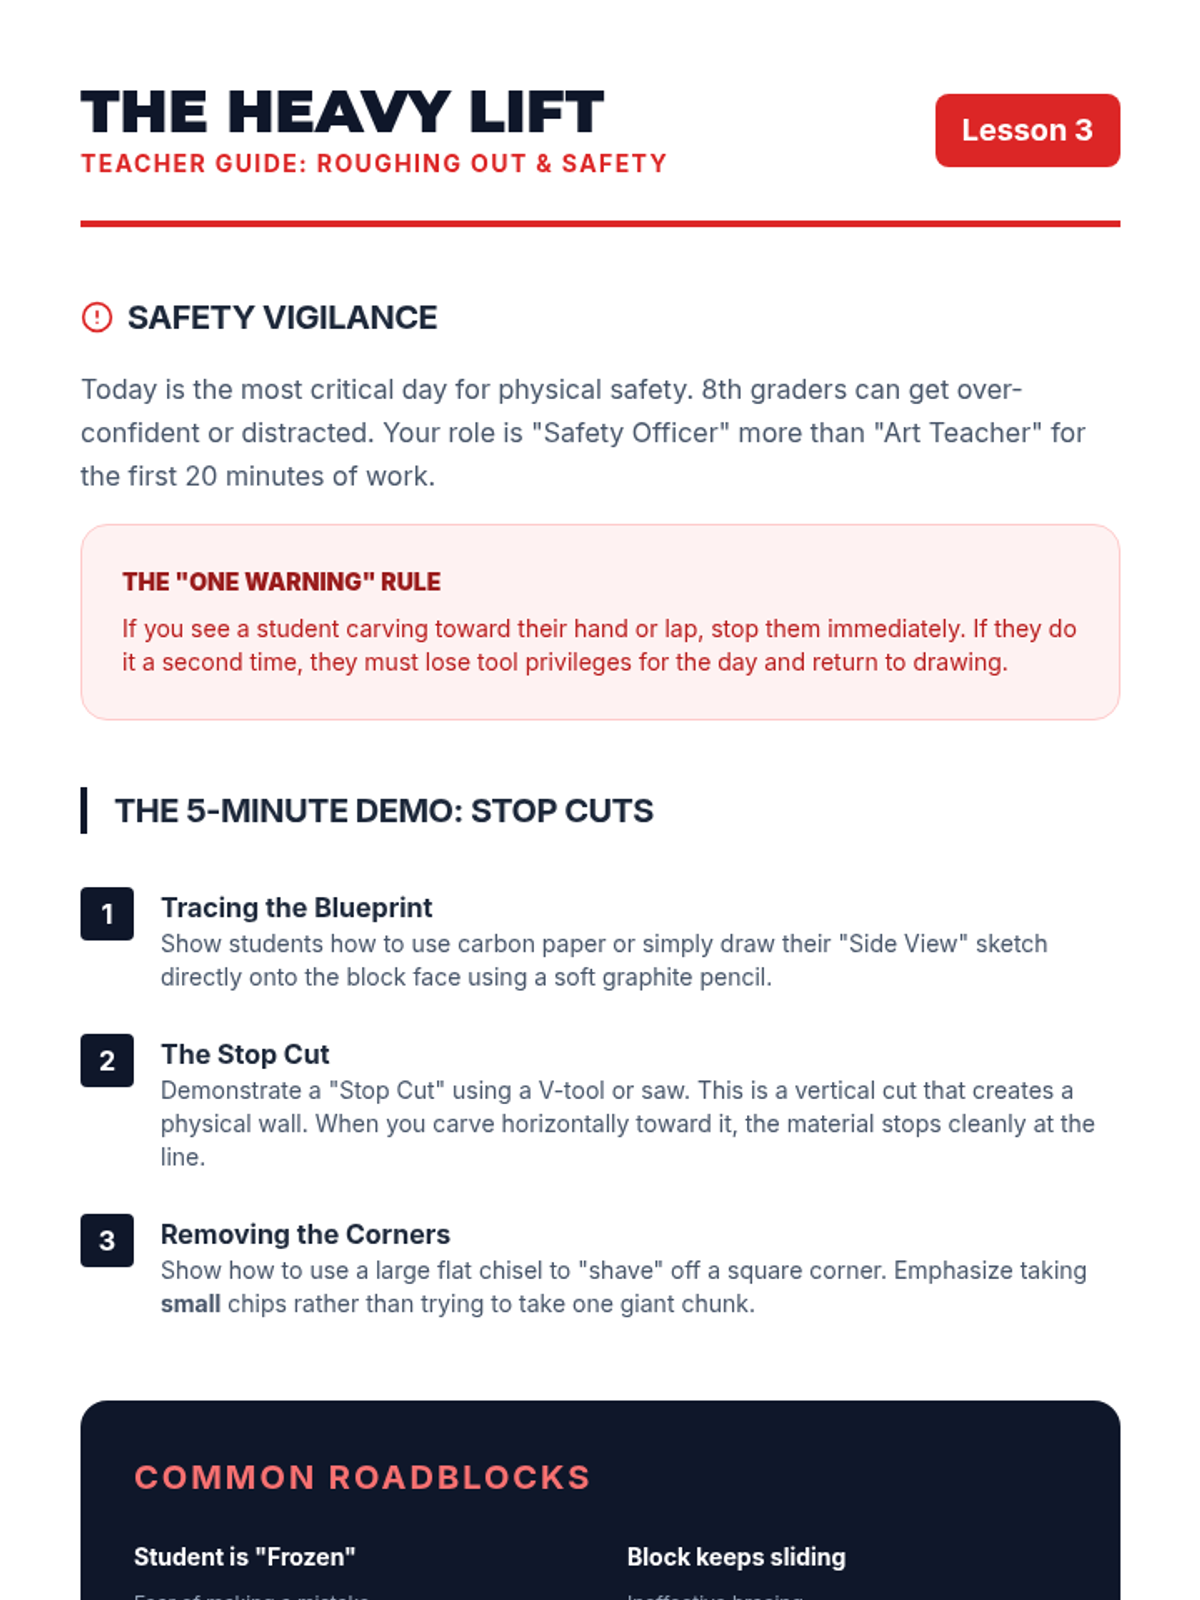
Hands-on carving begins with 'roughing out' the primary silhouette. Students master tool safety and use large gouges to remove bulk material and establish basic planes.
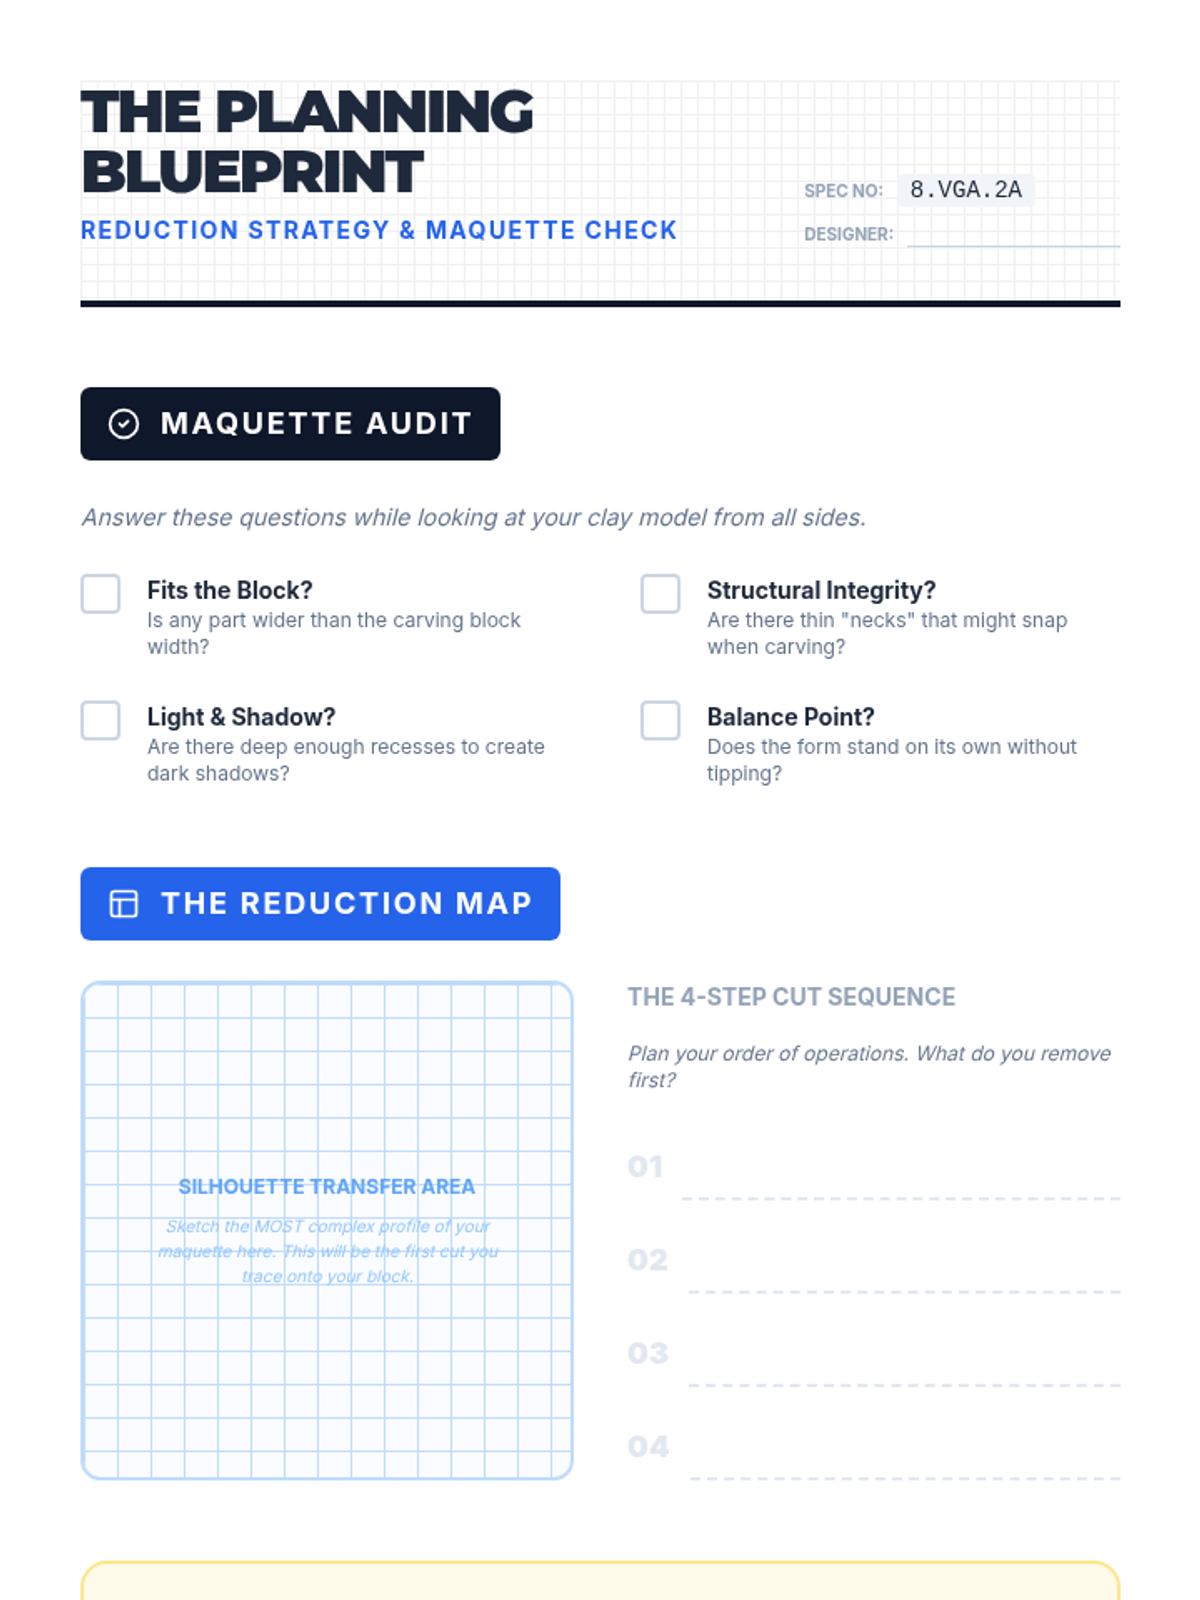
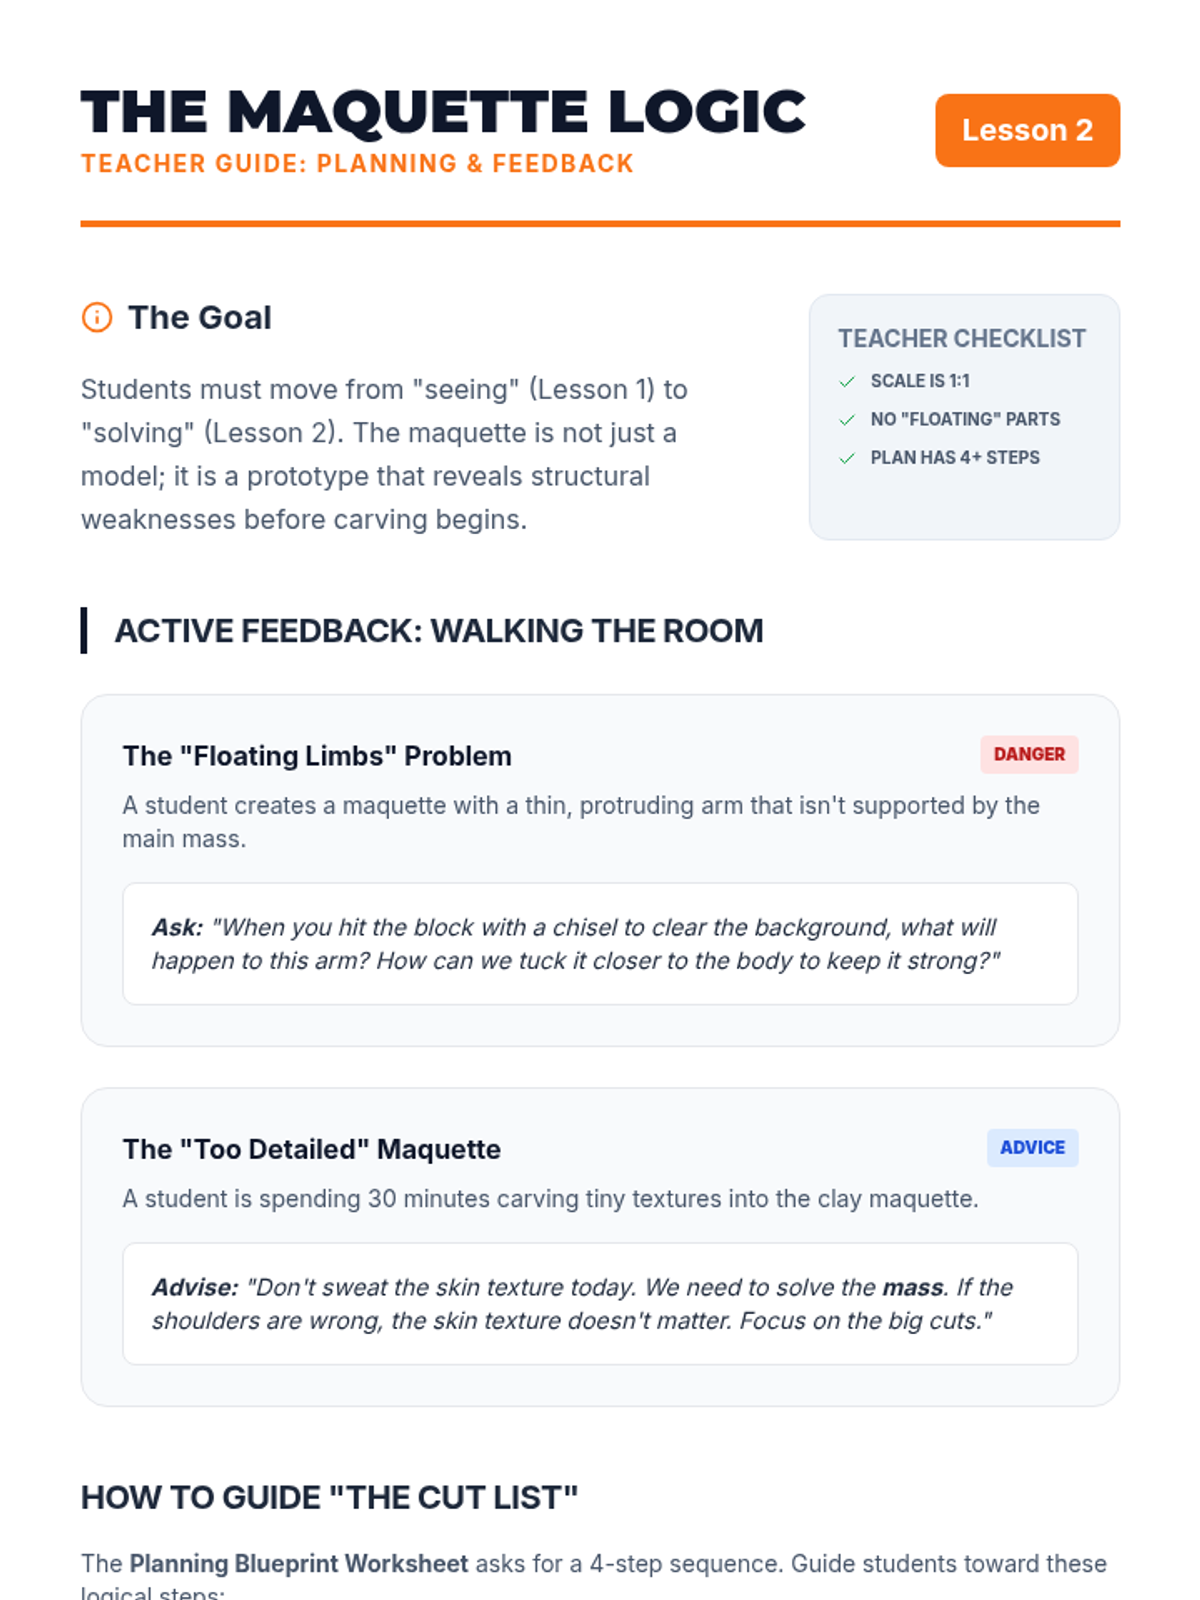
Focuses on the importance of planning in subtractive sculpture. Students create clay maquettes to understand 3D volume and map out their planned cuts on paper to avoid irreparable mistakes.
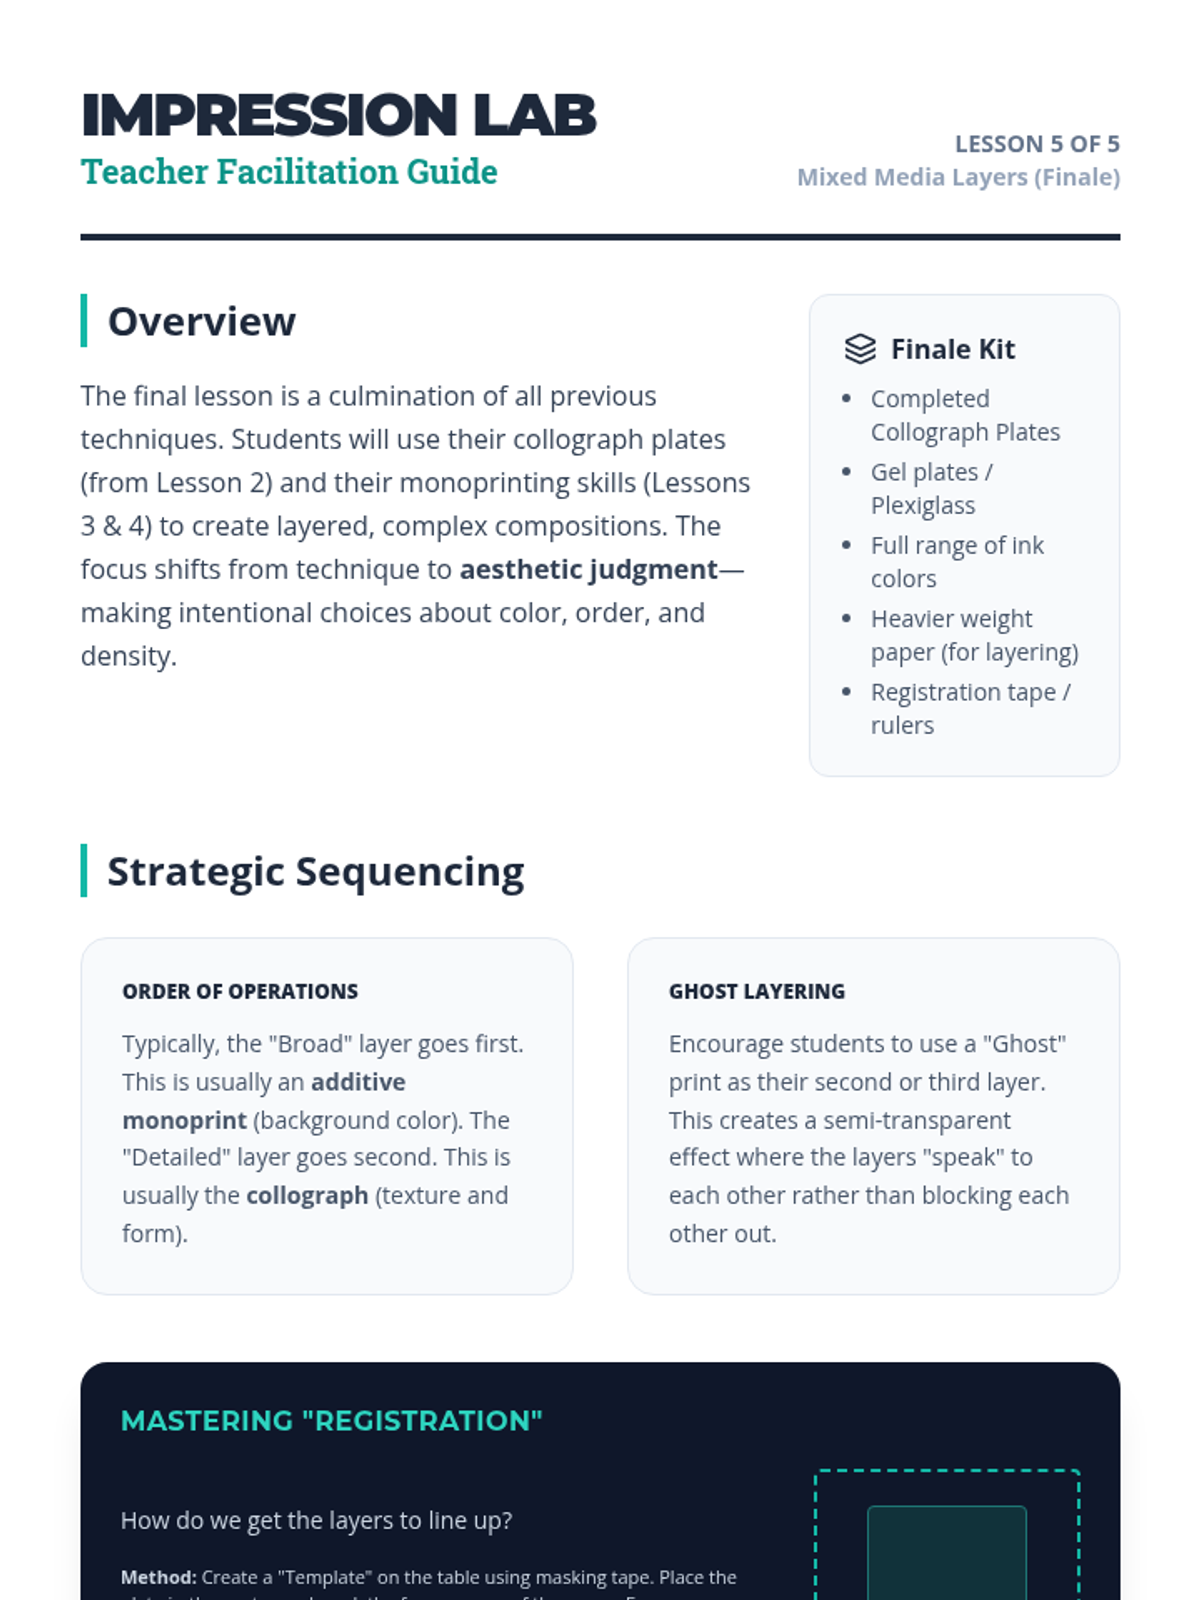
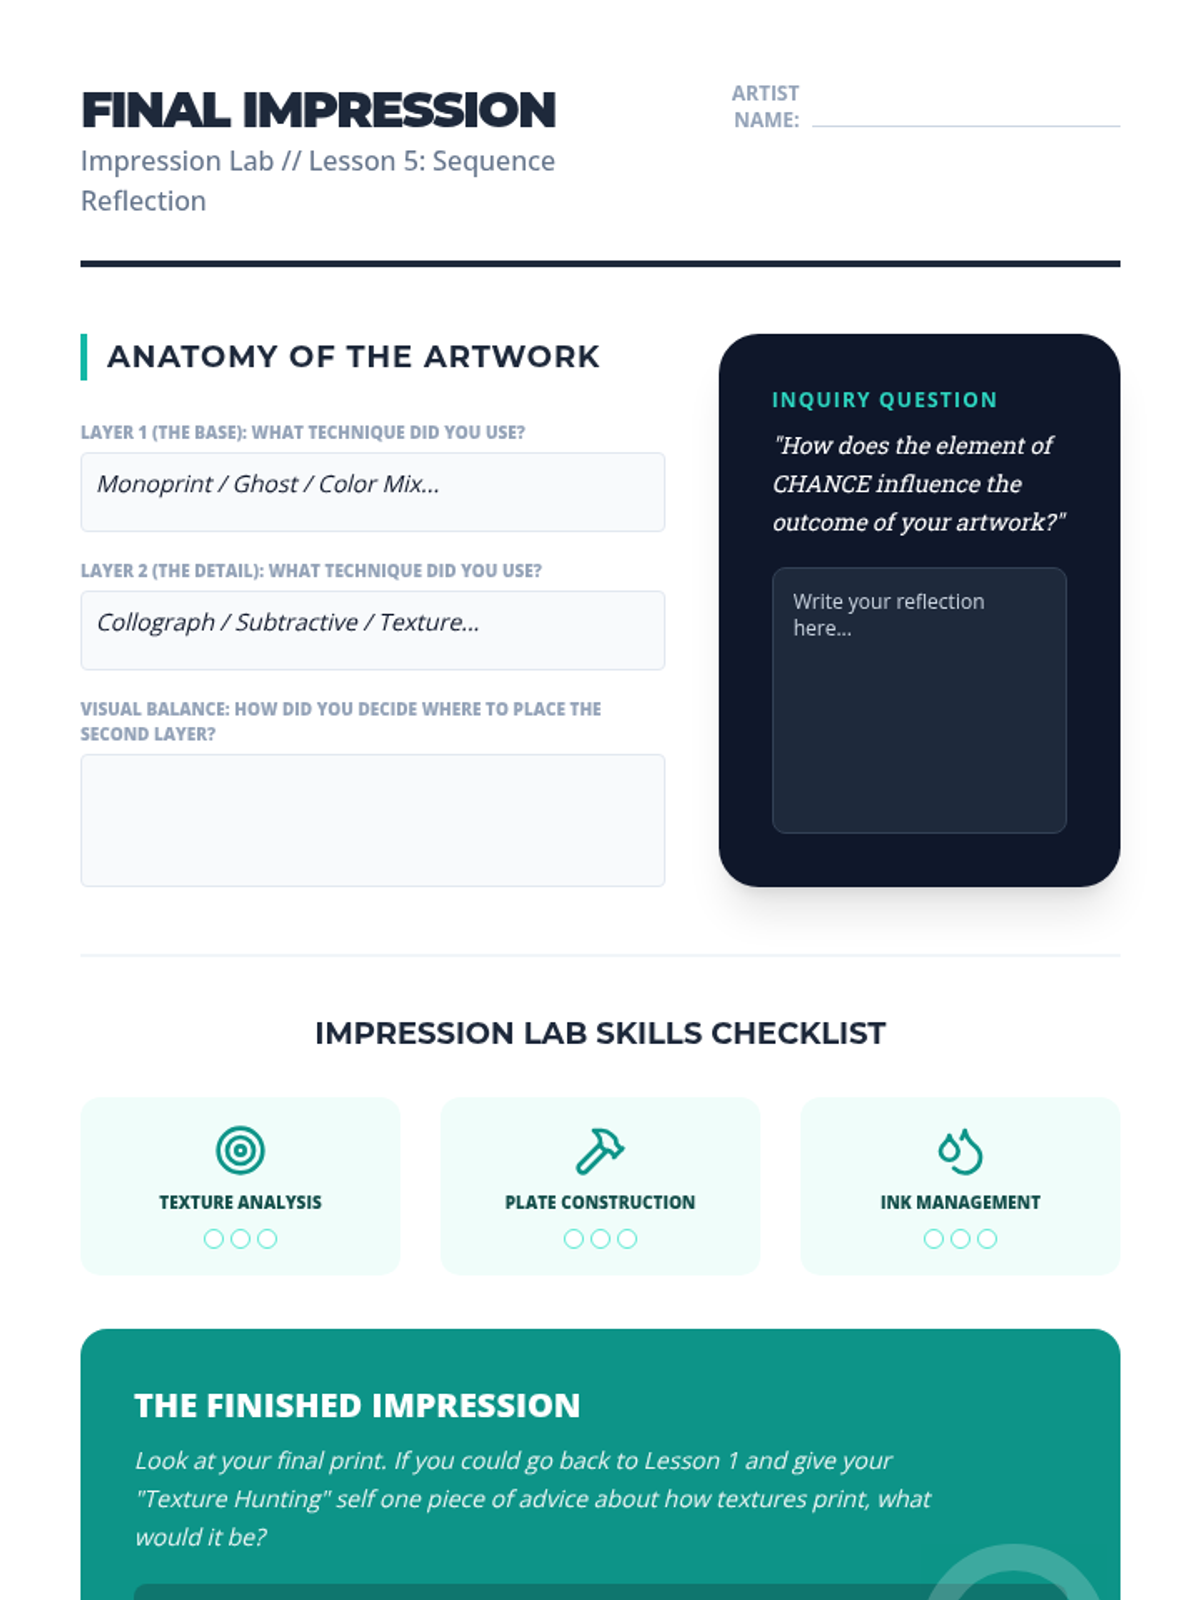
Students combine their collograph and monoprinting skills, layering multiple impressions to create complex, multi-textured visual compositions.
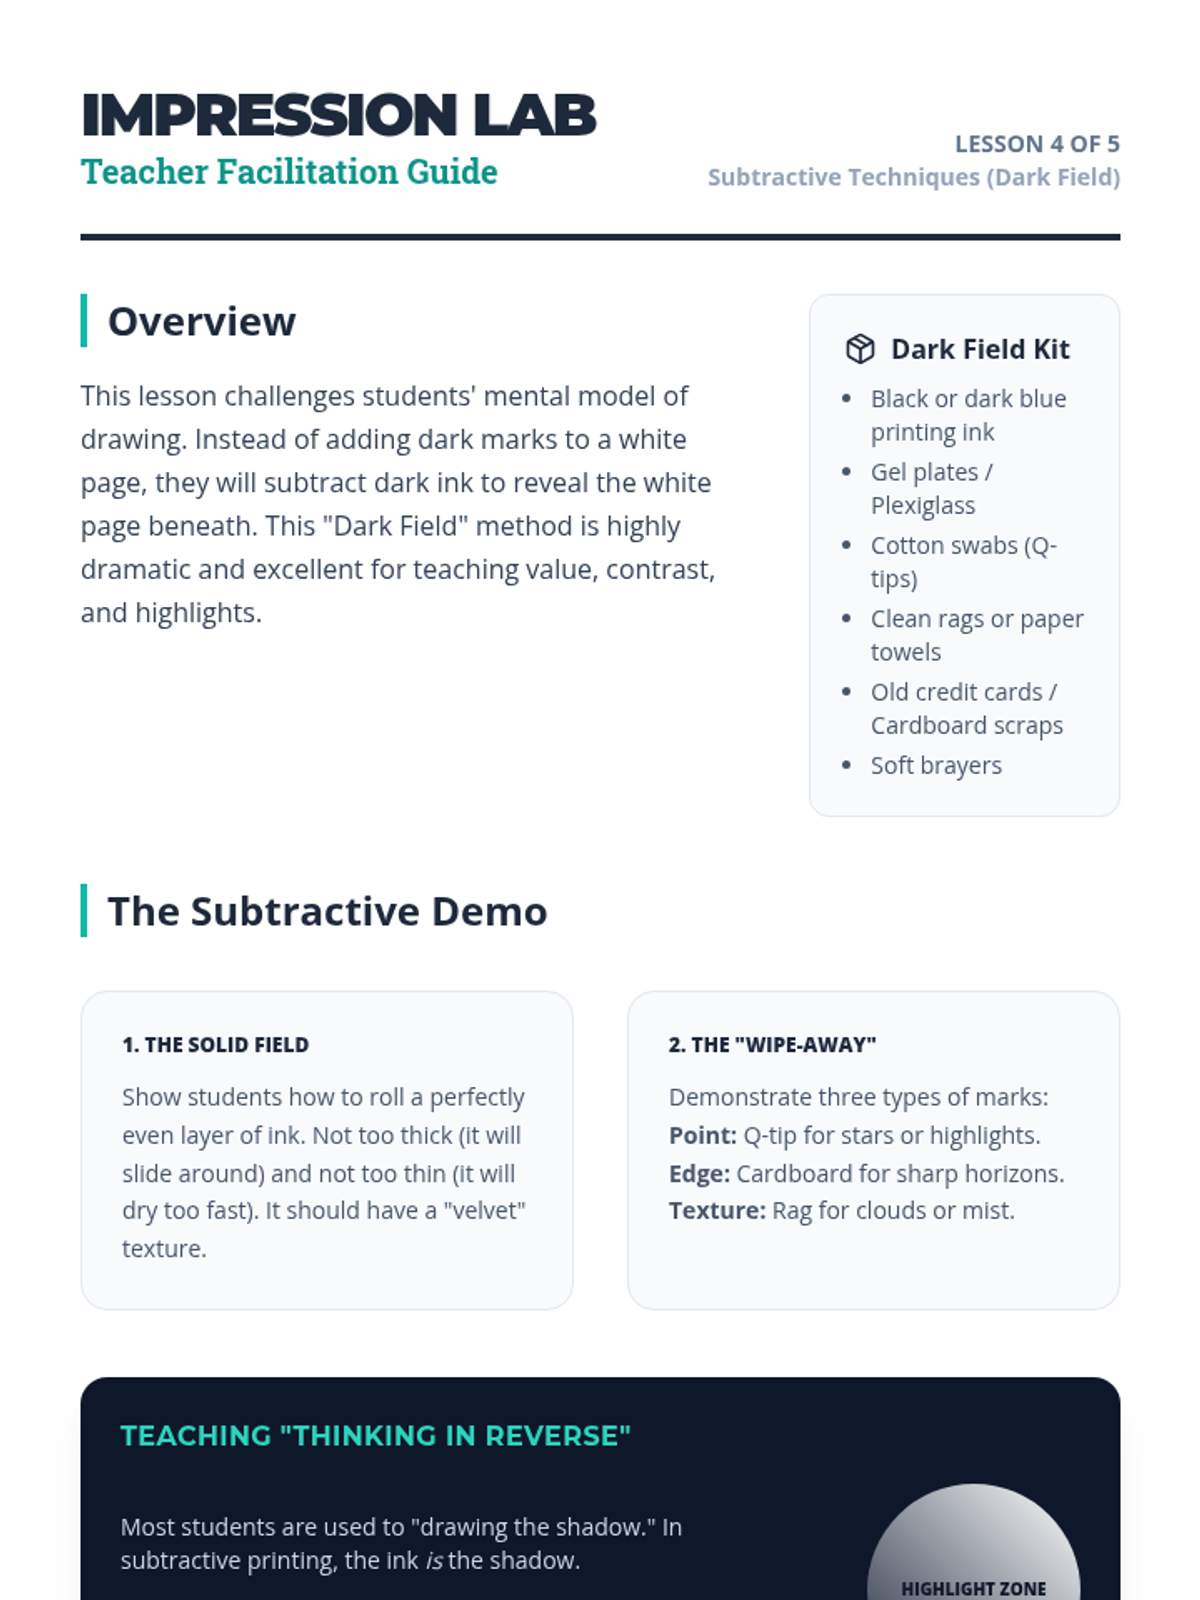
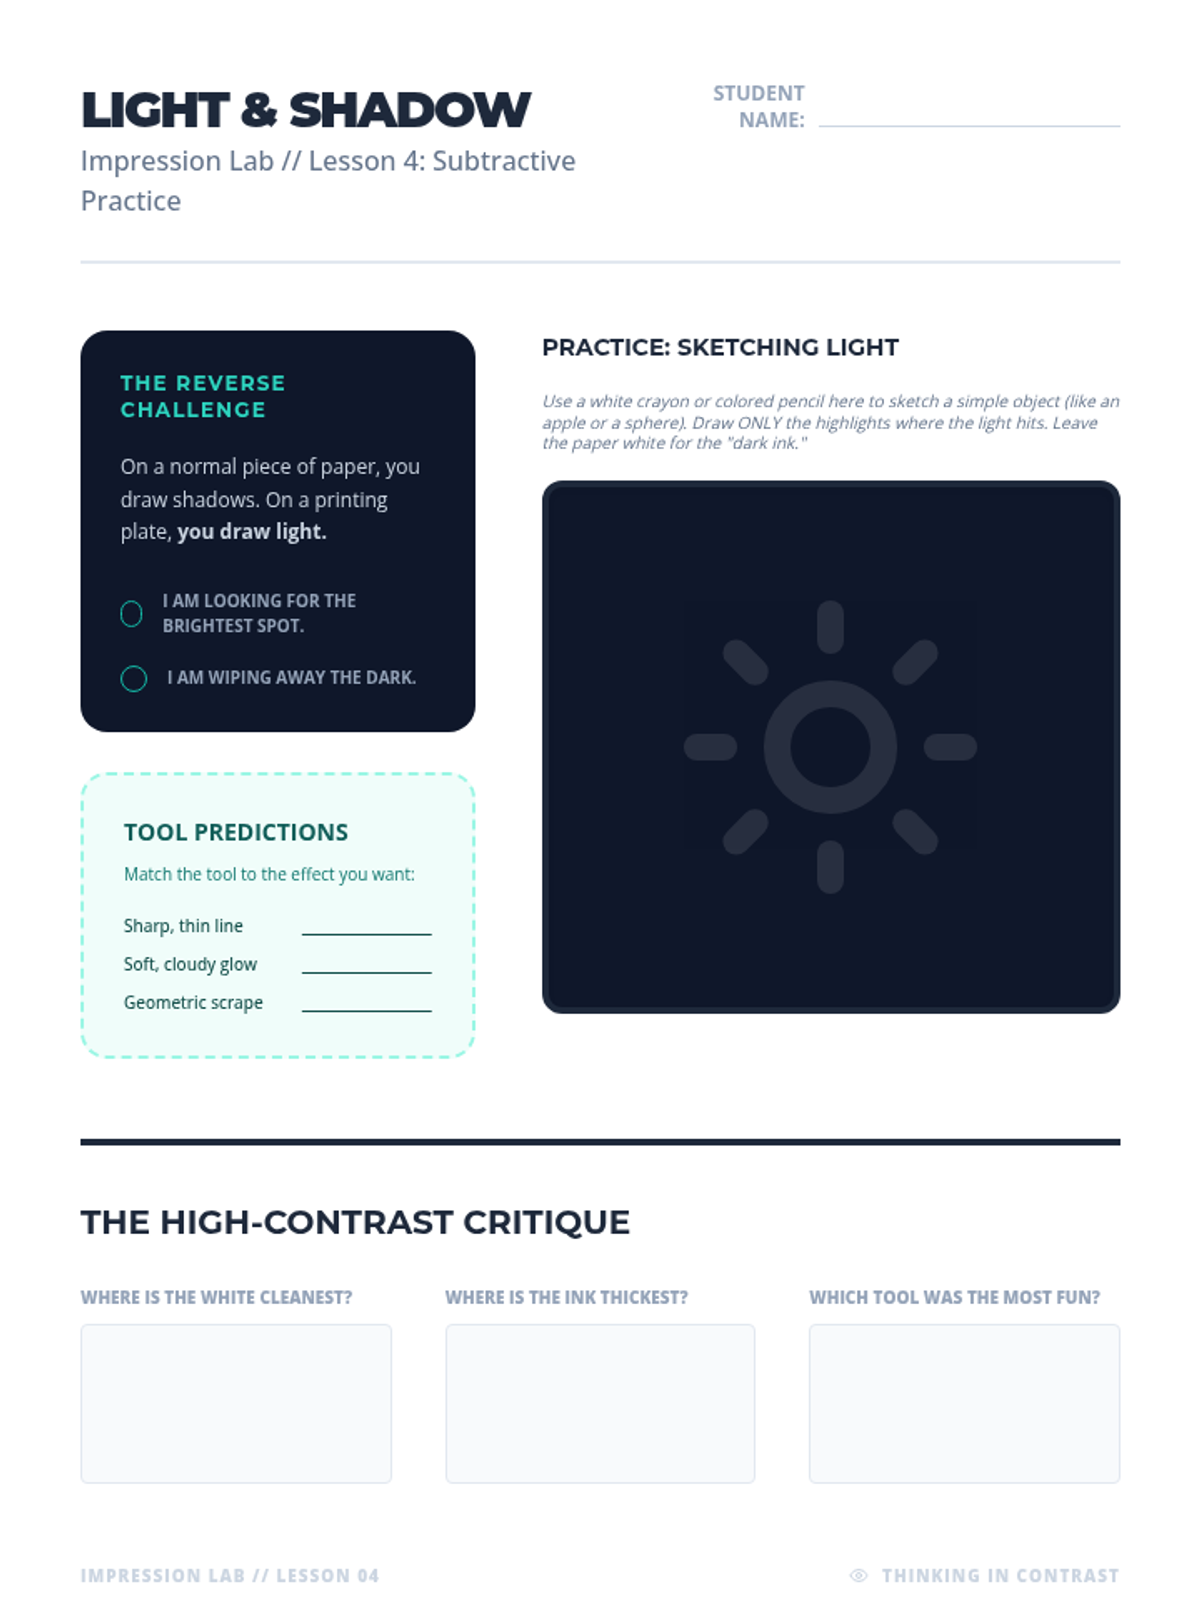
Students explore the "dark field" method of monoprinting, using subtractive tools to remove ink from a fully coated plate to create high-contrast images of light.
The final stage where students incorporate color through chine-collé and refine their compositions for a final edition.
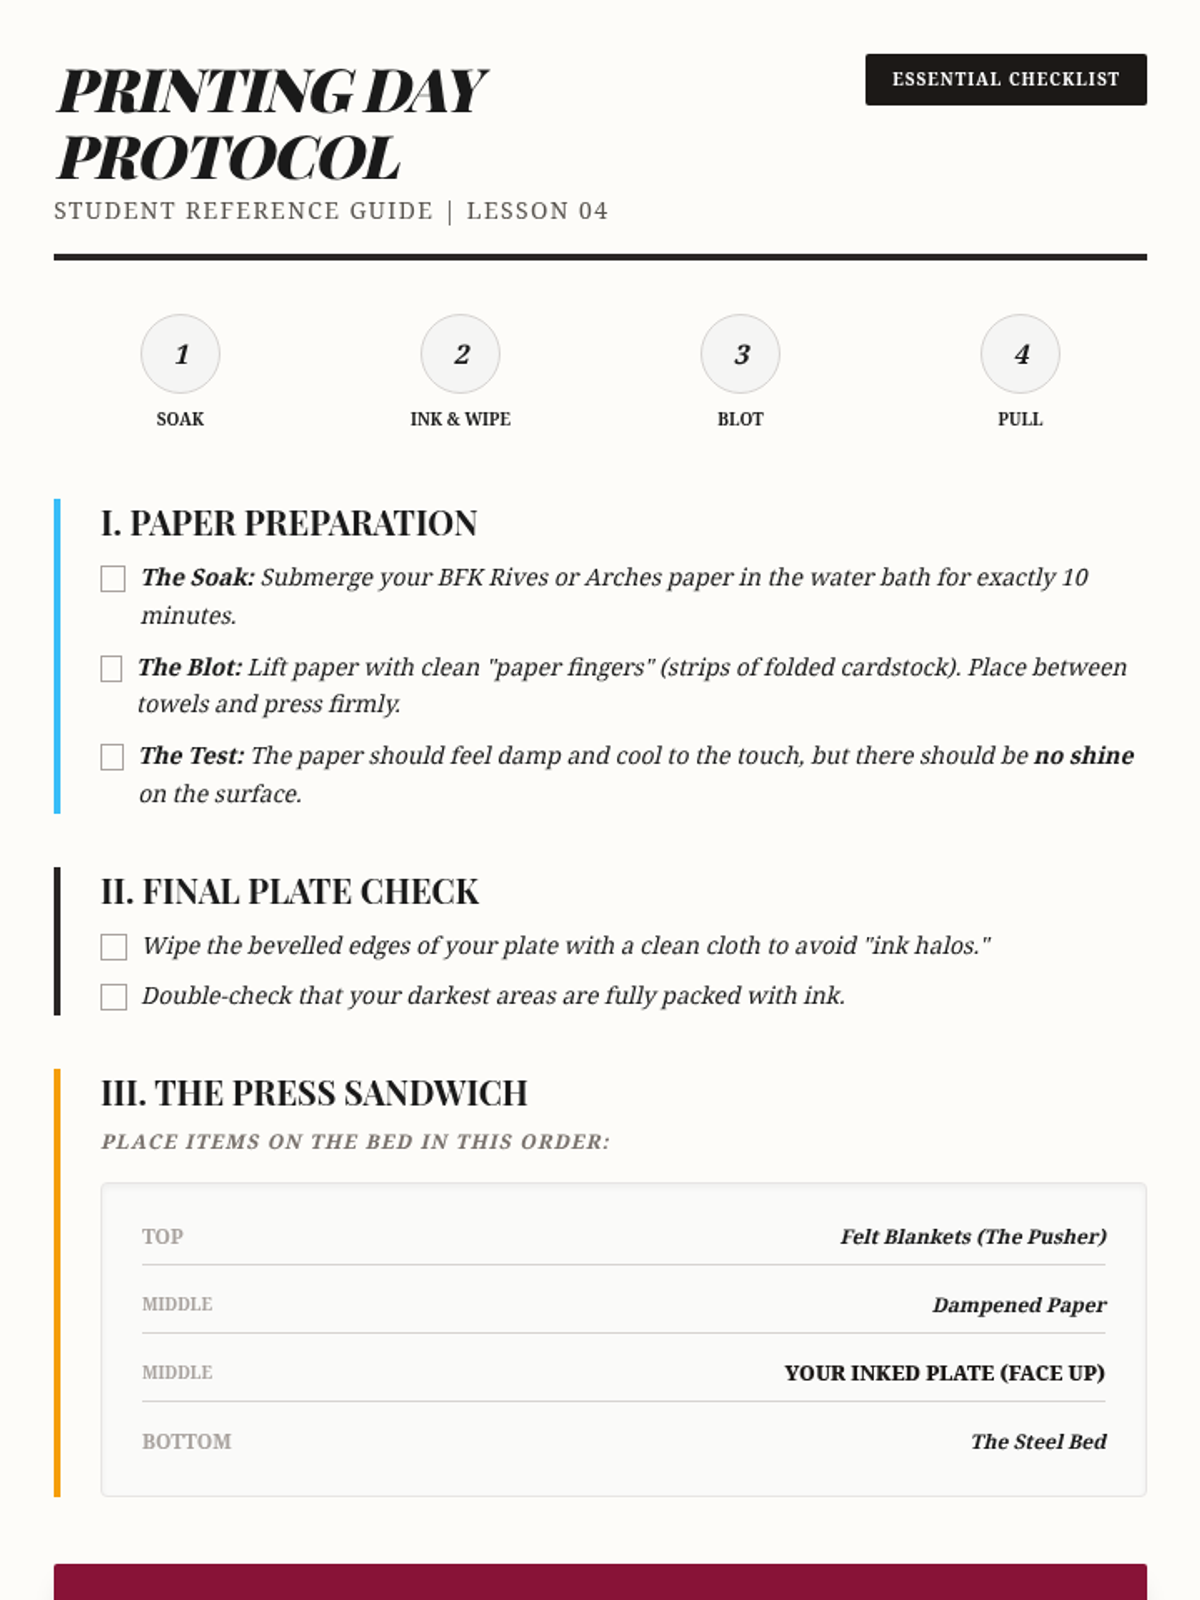
Students master the preparation of damp paper and the operation of the etching press to transfer their images.
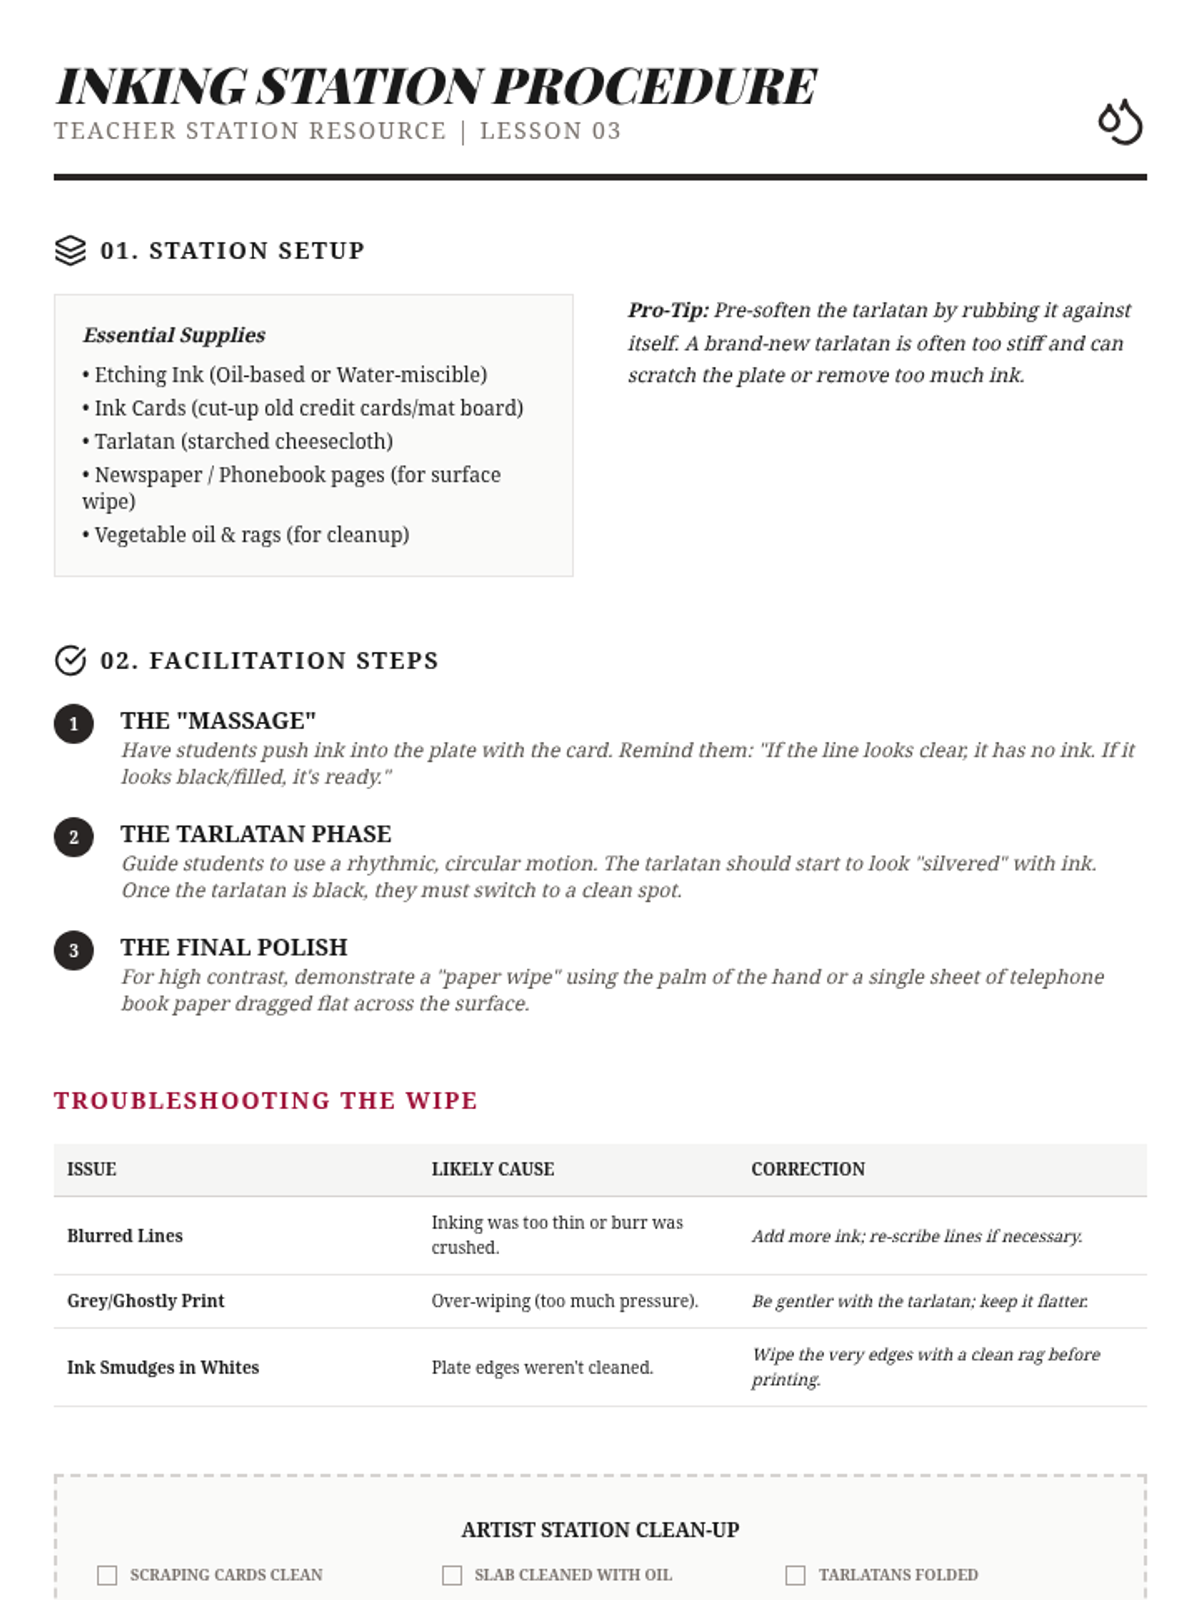
A technical dive into the physical process of inking a plate and the delicate art of wiping with tarlatan.
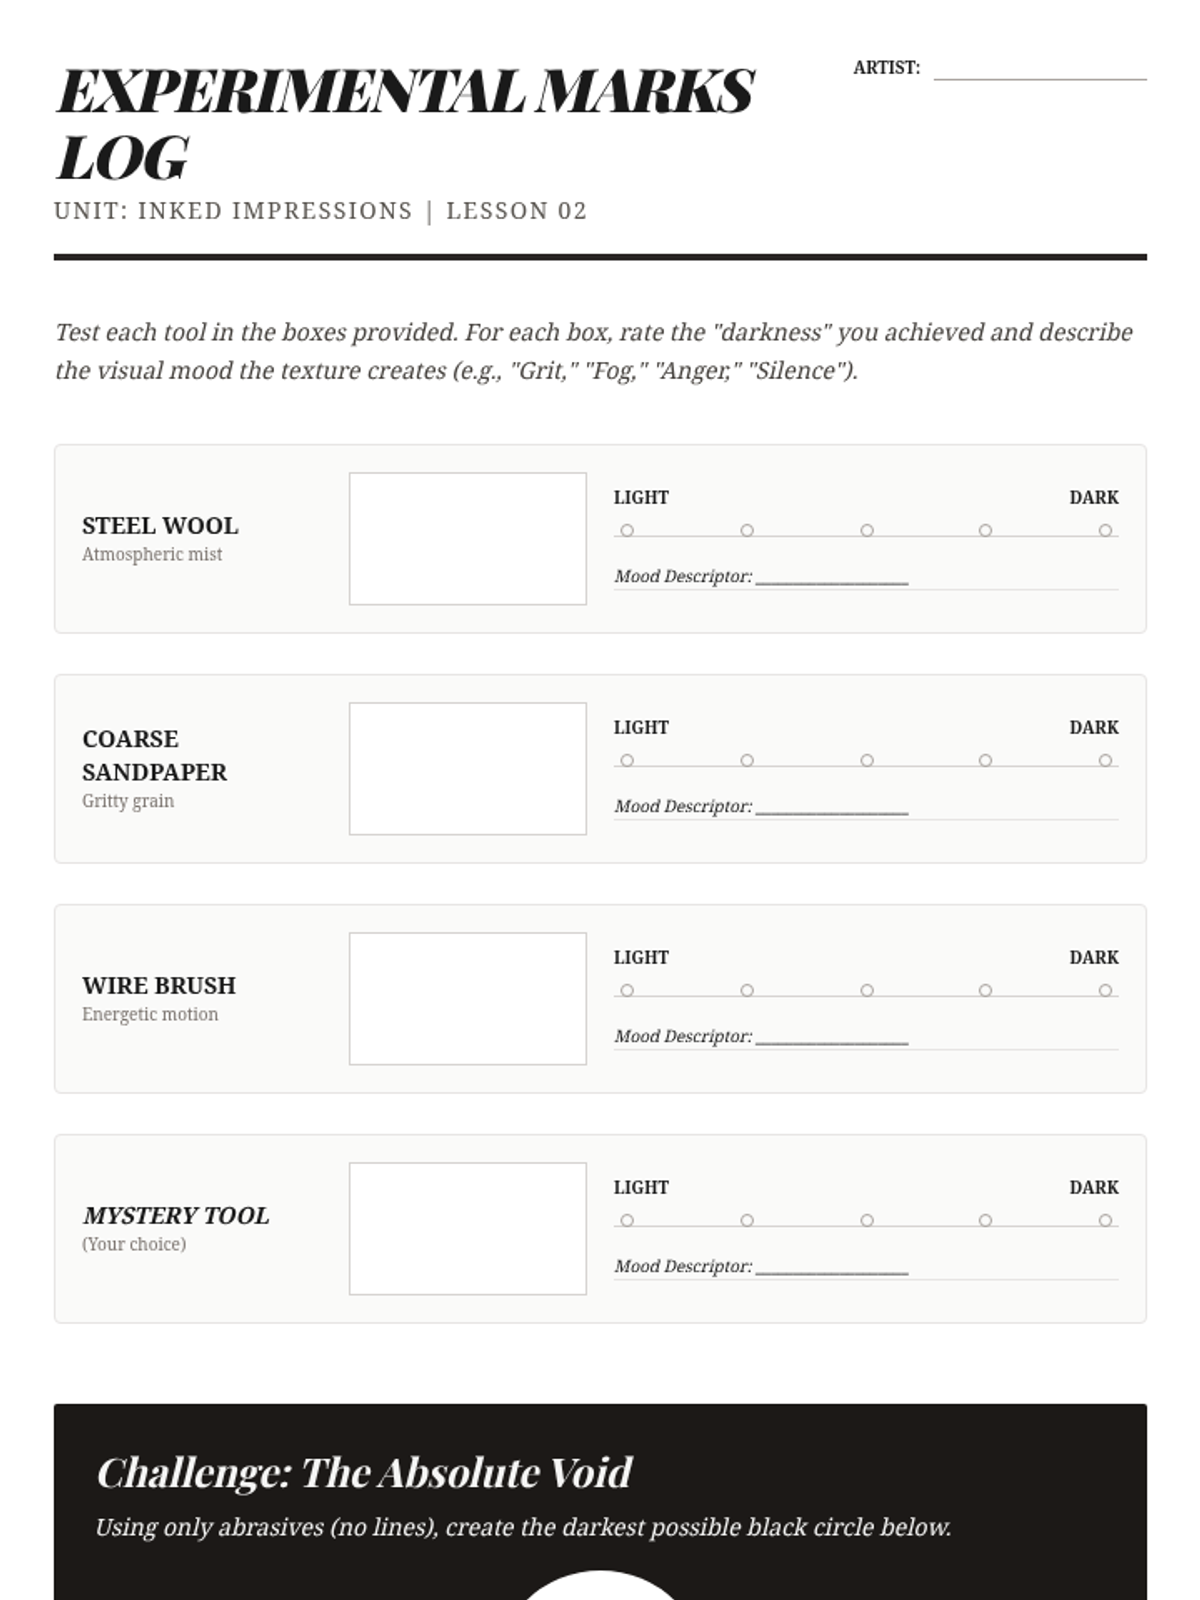
Focuses on creating value and atmosphere using abrasive tools and hatching techniques to hold plate tone.
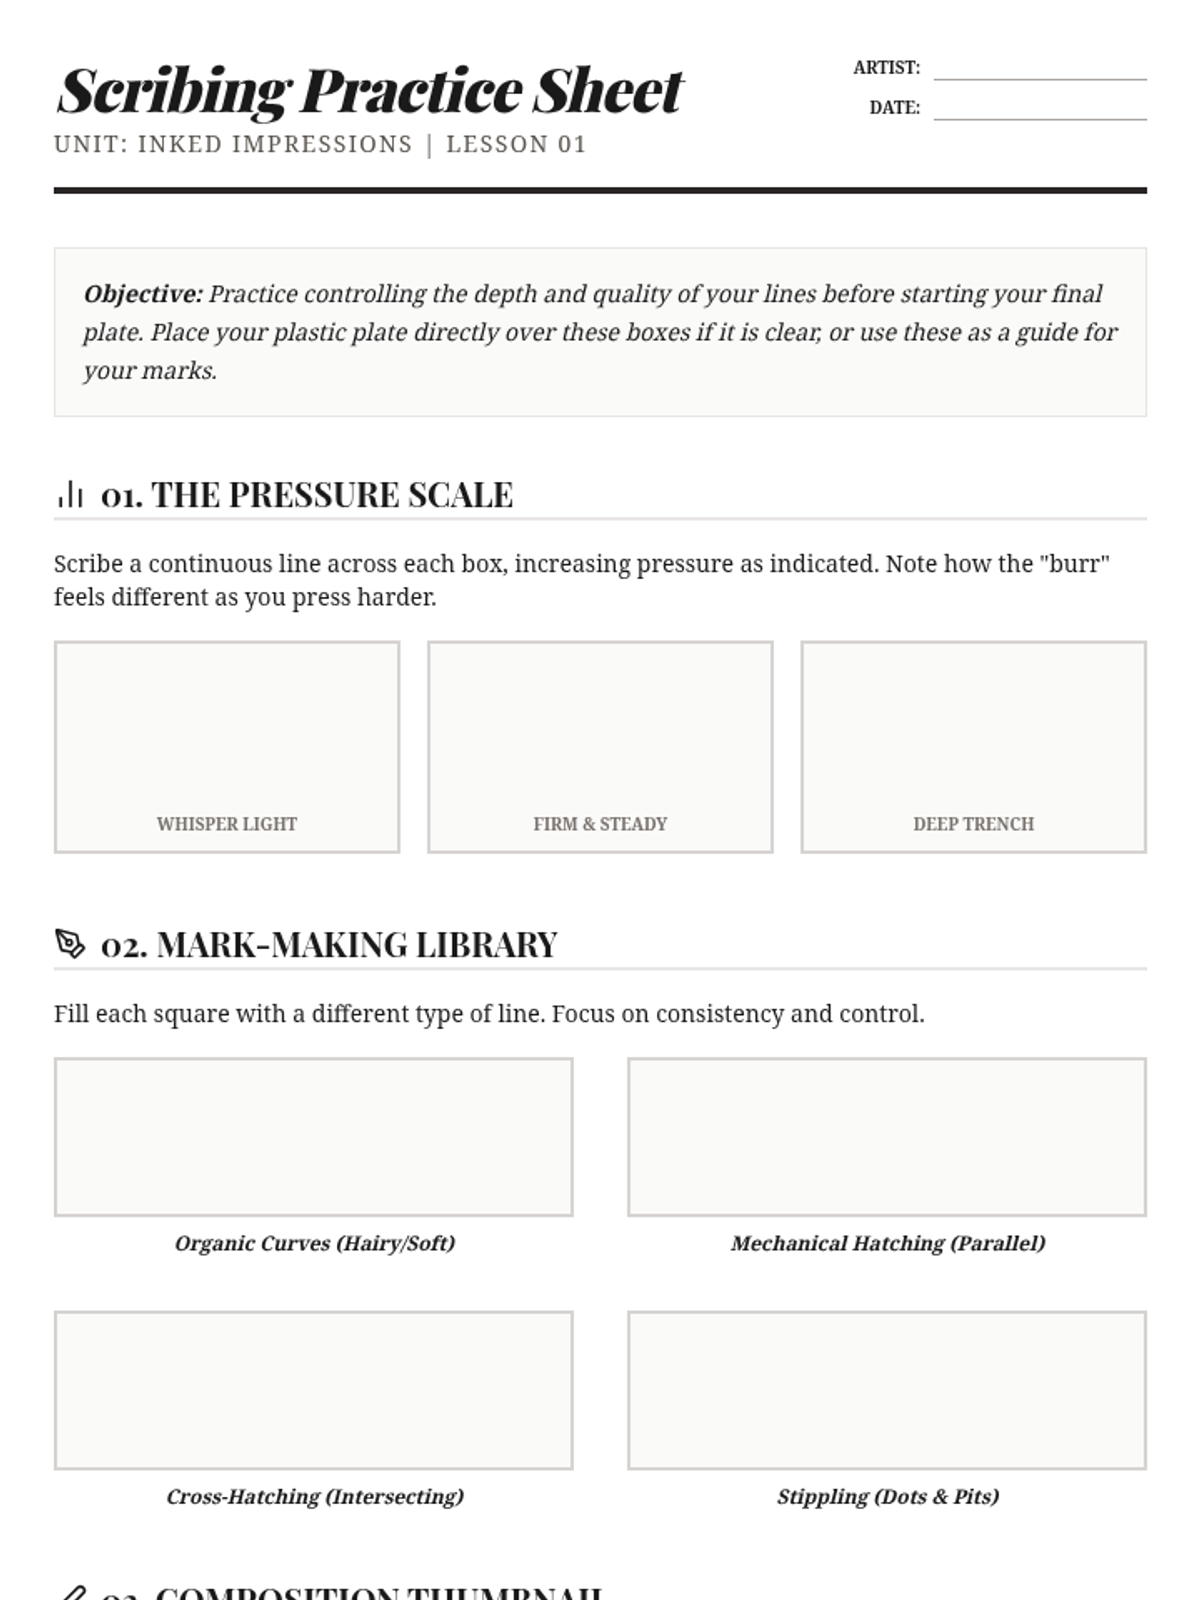
Students learn the fundamental difference between relief and intaglio printing and practice scribing lines into plastic plates with varying pressure.