Fundamental techniques for drawing, painting, sculpture, and photography alongside modern digital design principles. Analyzes historical artistic movements while building skills in printmaking and graphic media.
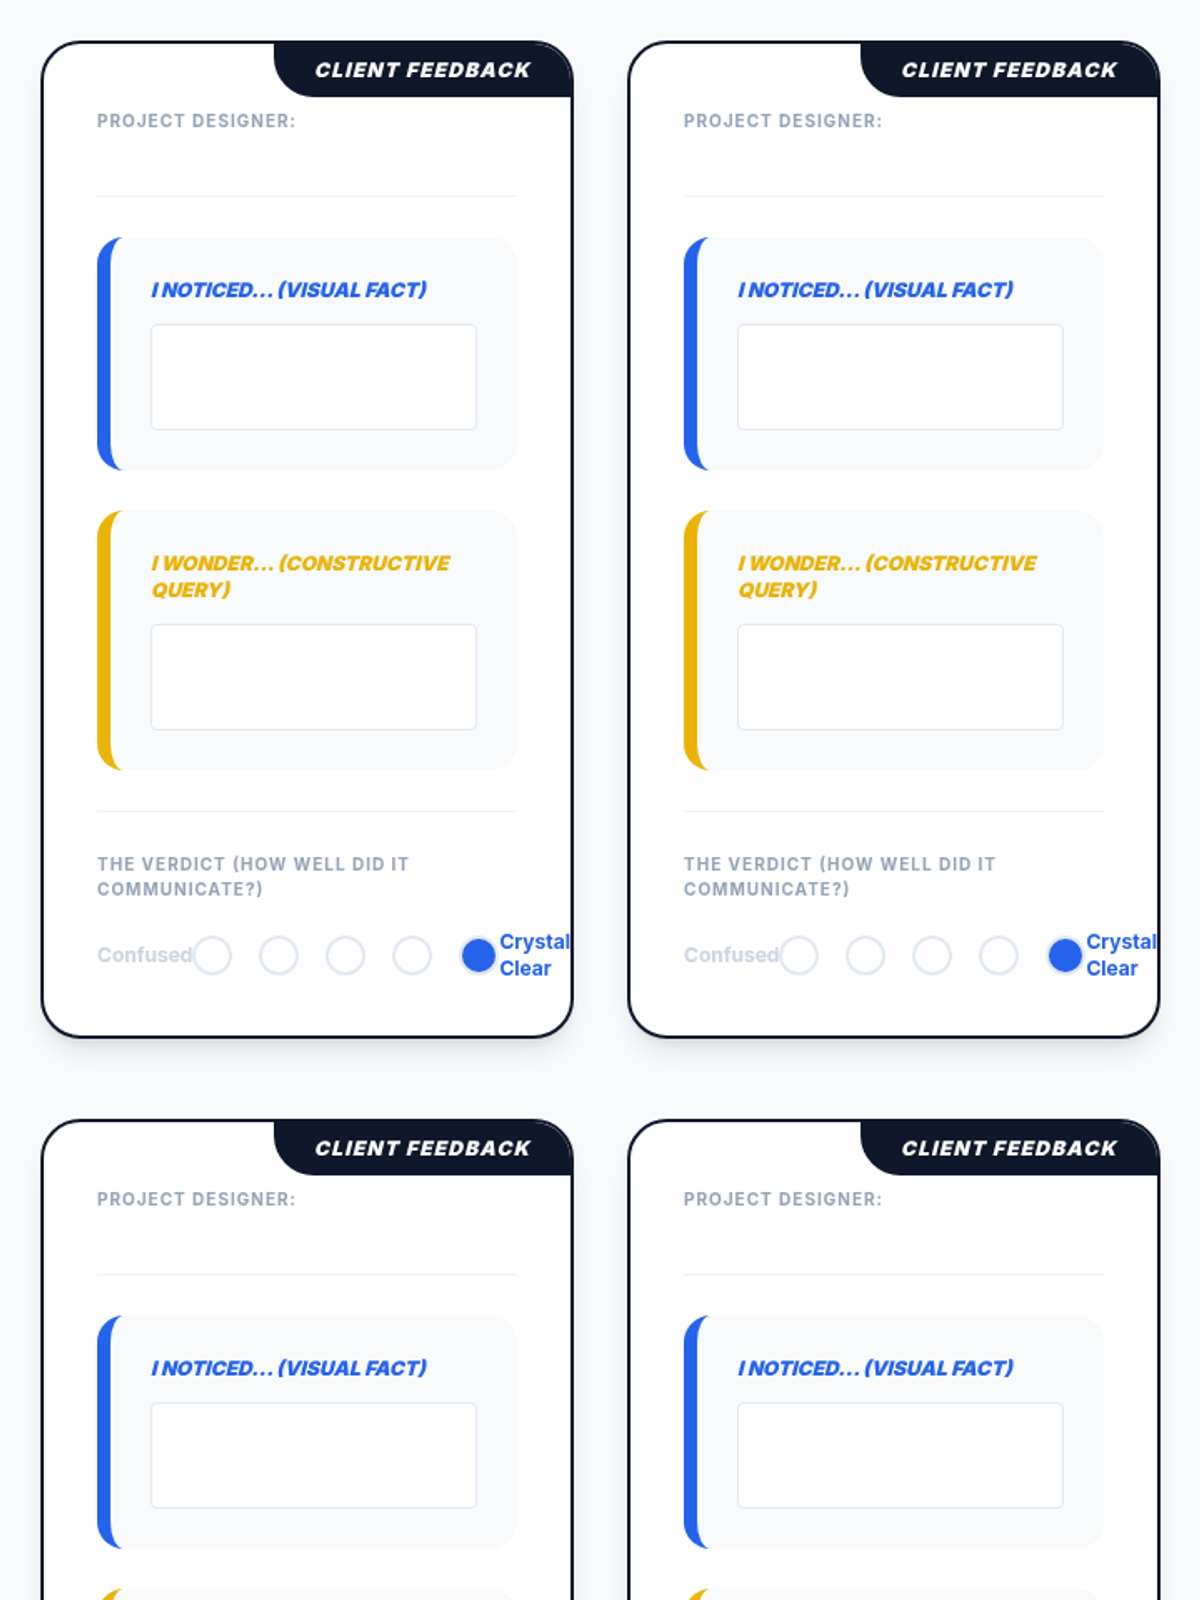
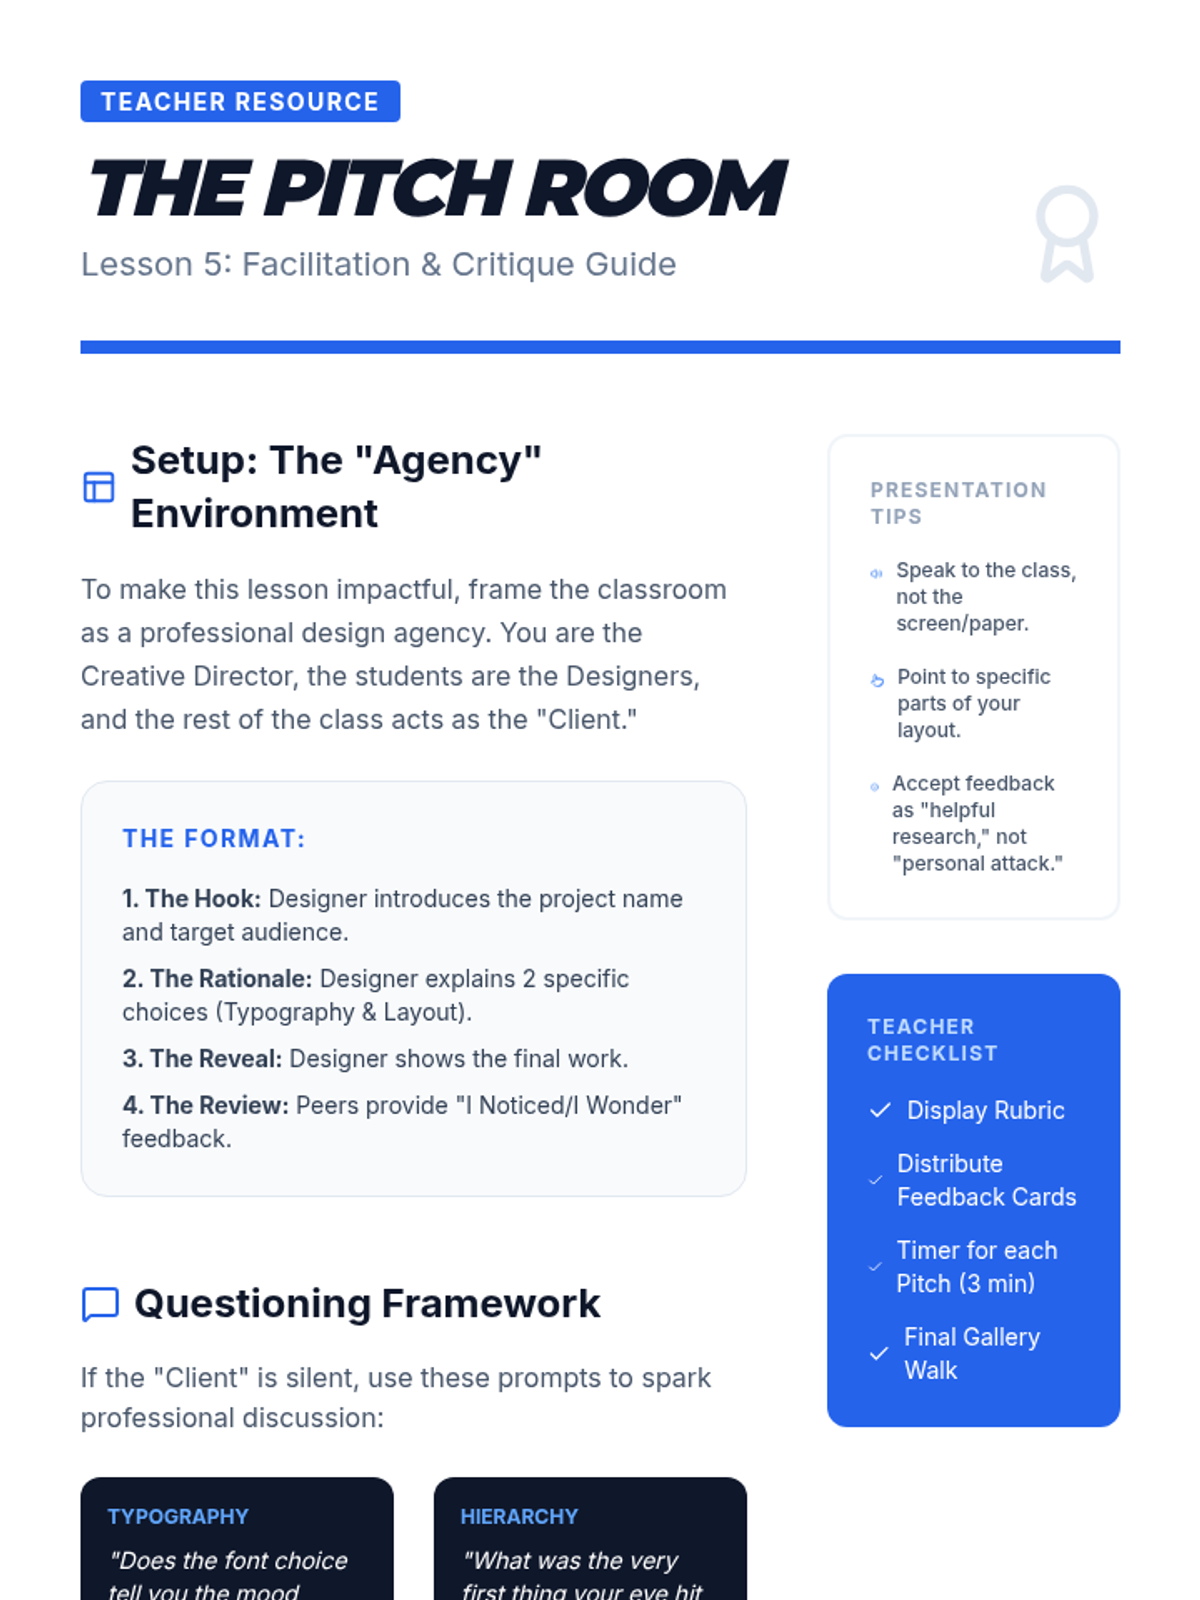
The capstone of the sequence where students present their work to the 'client' (their peers). Focus is on design justification and constructive feedback using professional terminology.
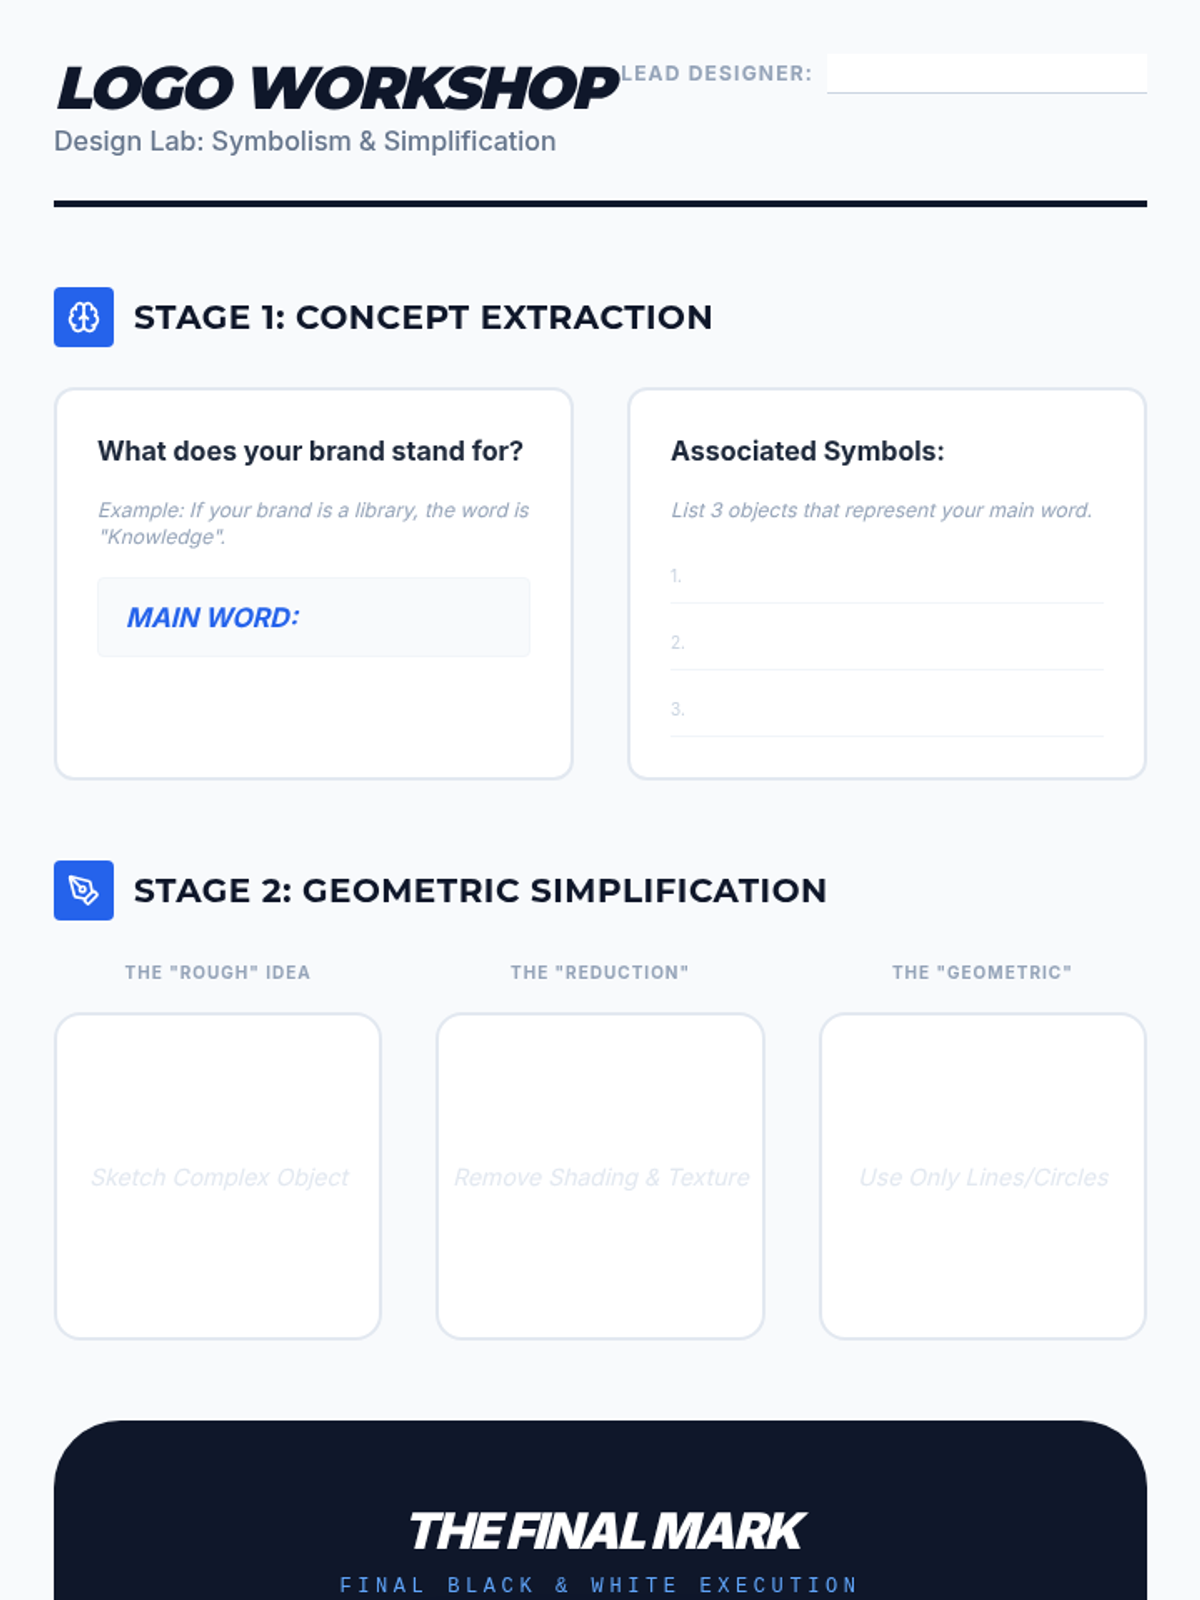
An exploration of minimalism and symbolism, where students learn to distill complex ideas into simple icons or logos that work across various scales and media.
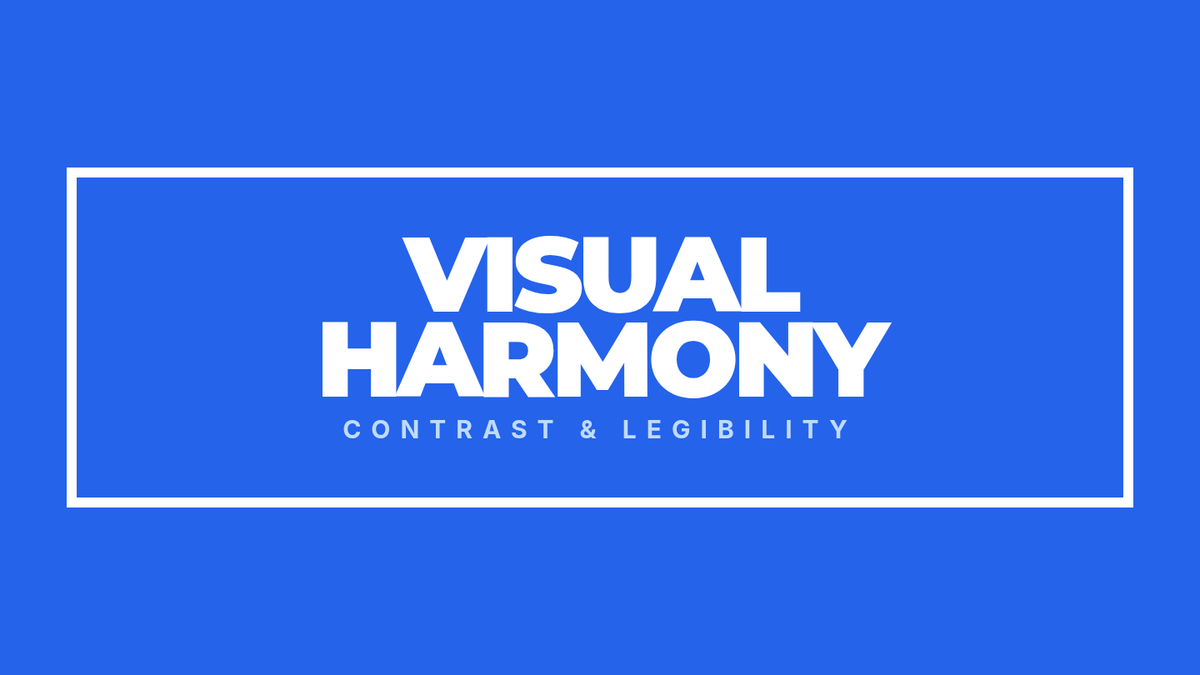
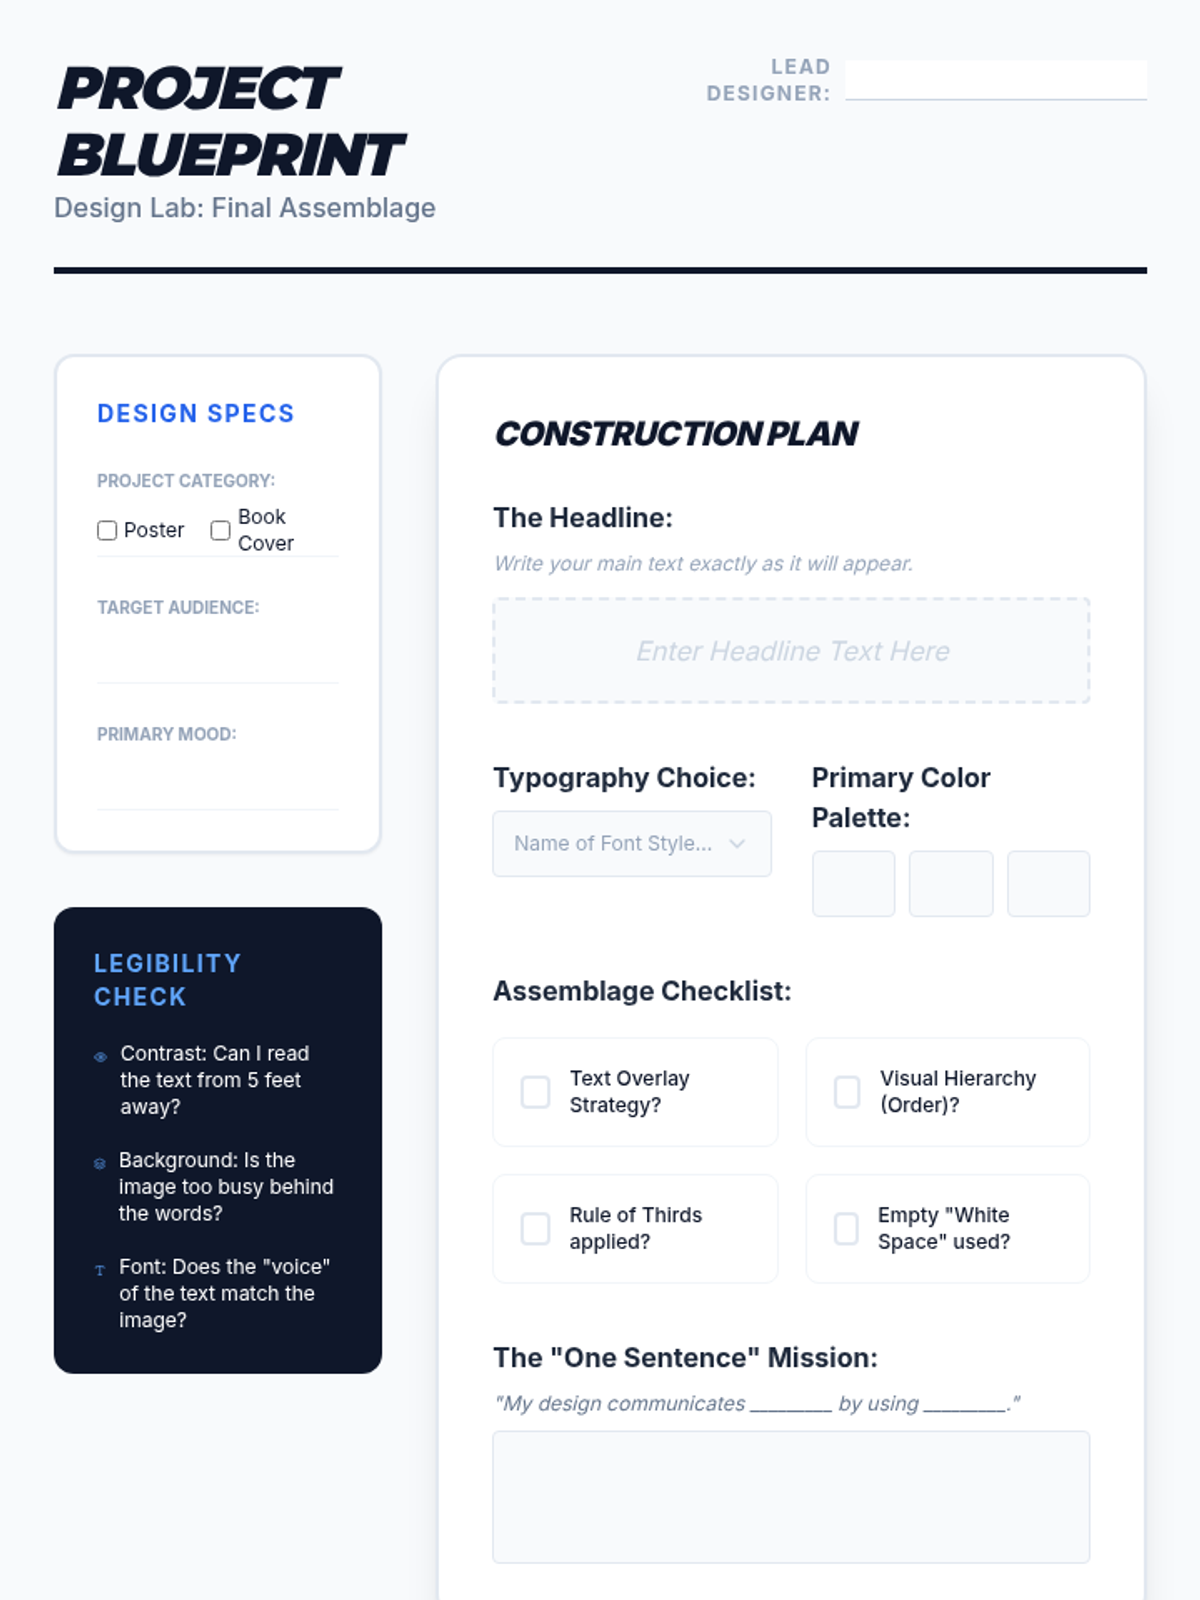
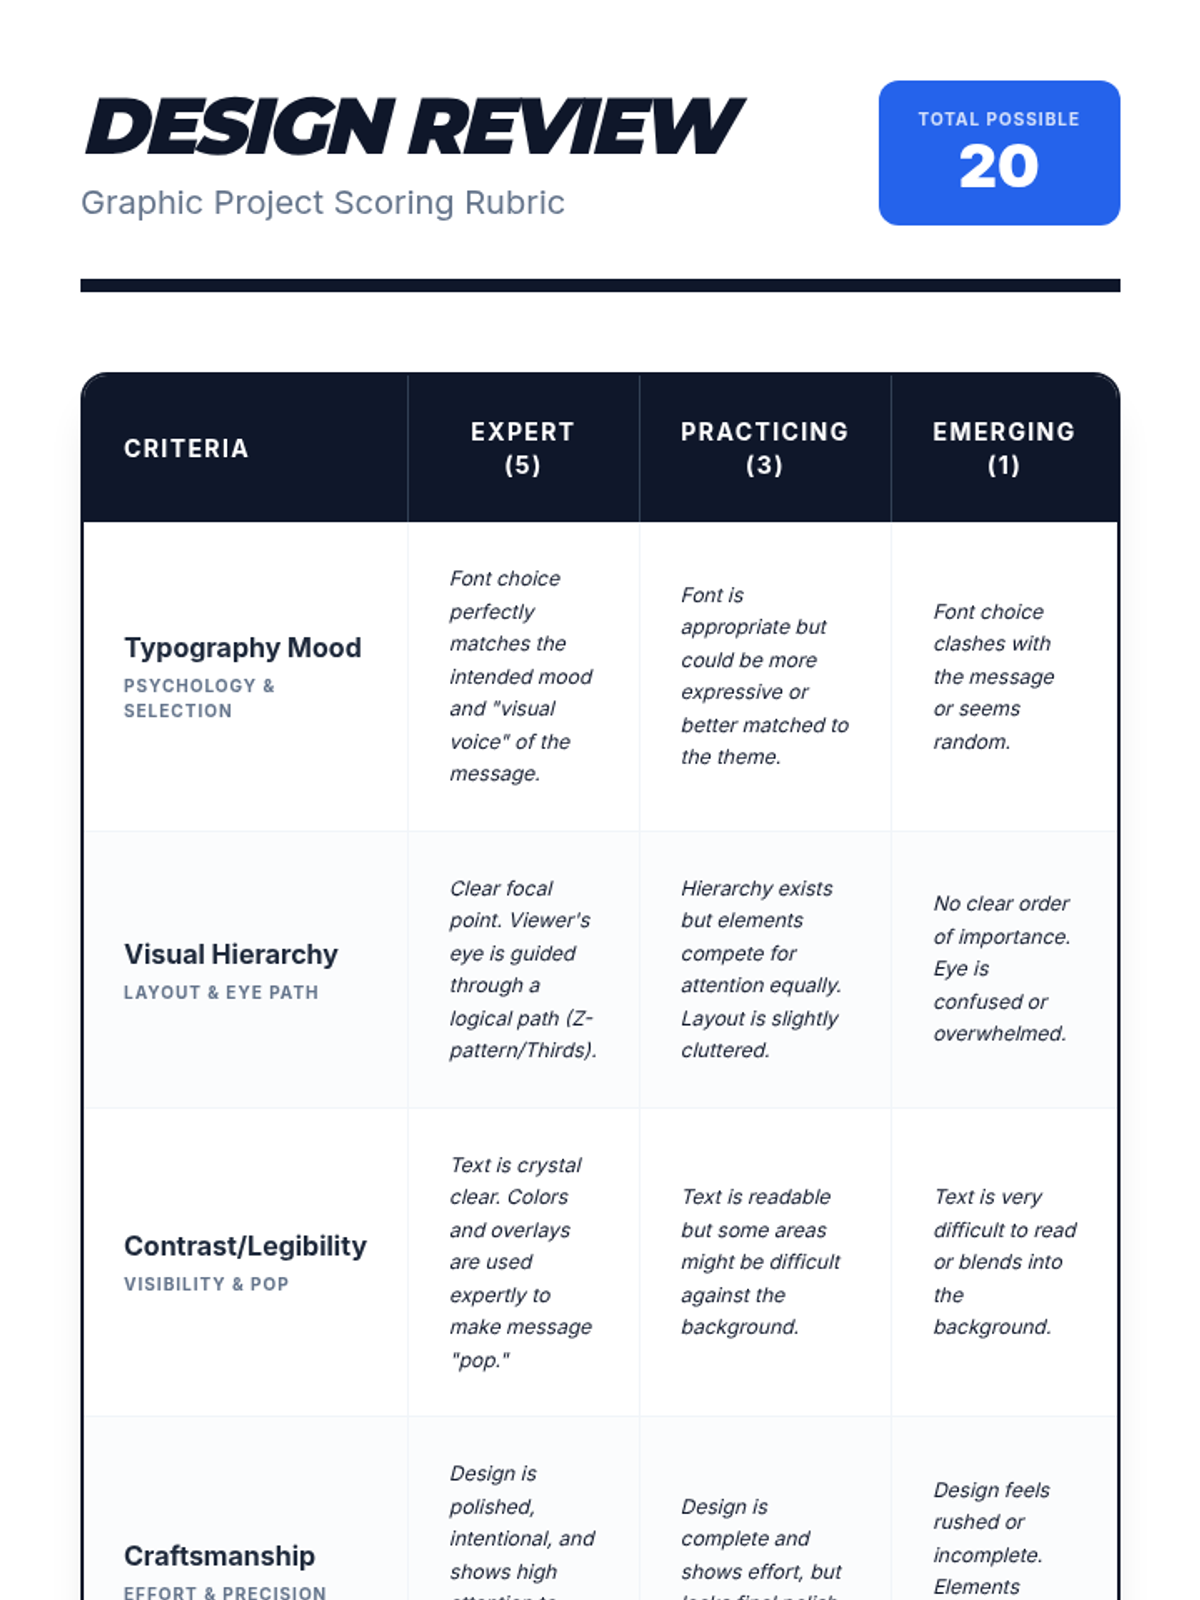
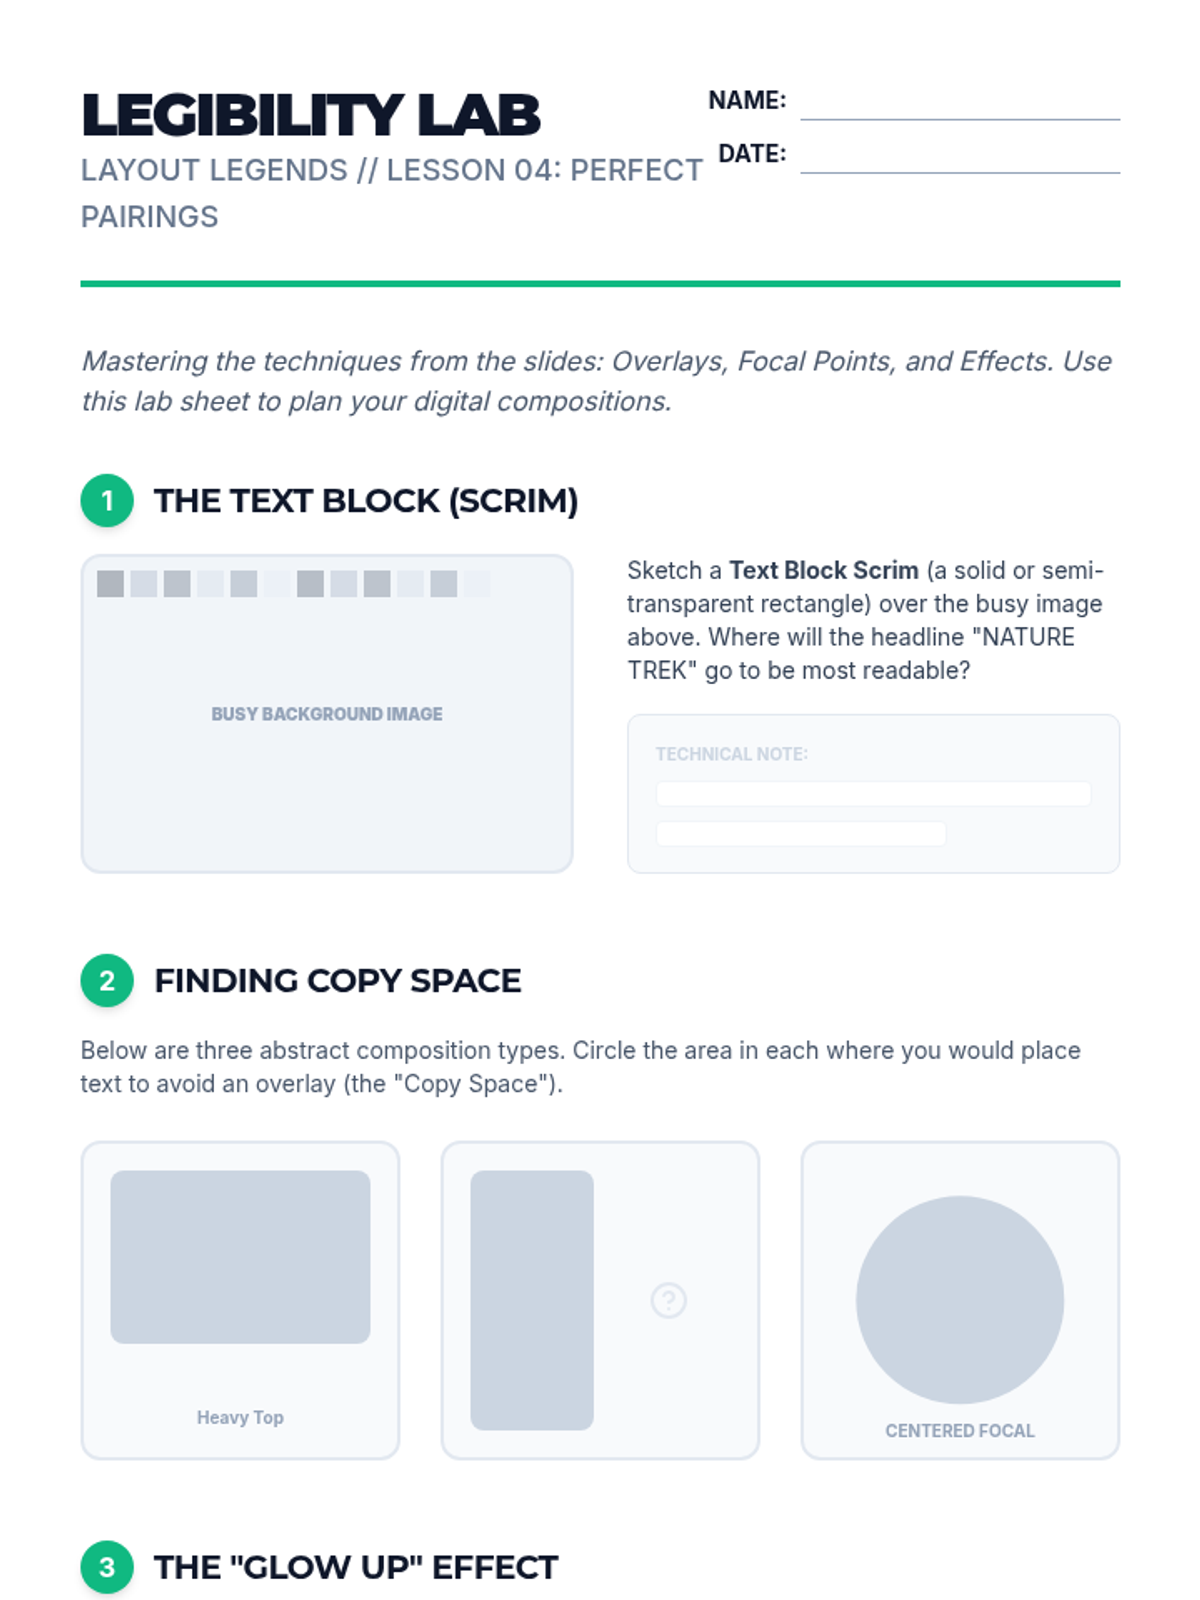
Students integrate their typography and layout knowledge to create a cohesive project, focusing on contrast and legibility. They learn how to make text 'pop' against complex backgrounds.
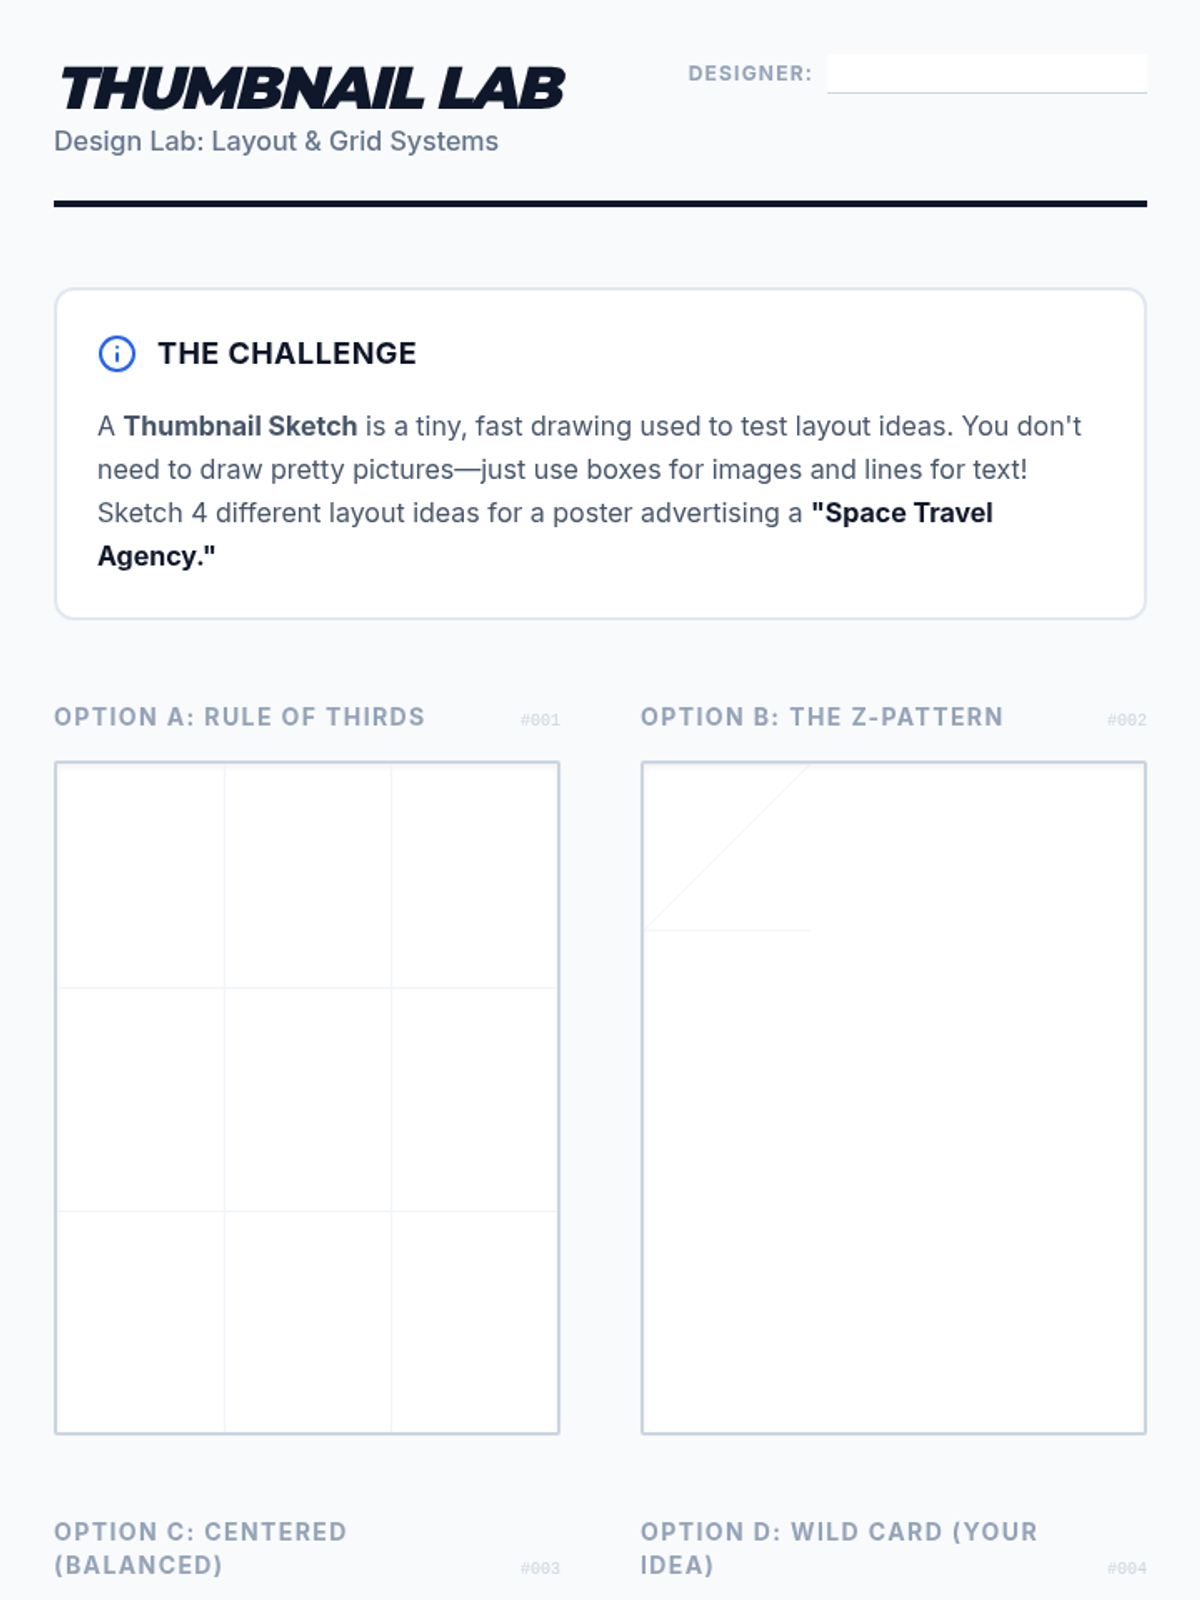
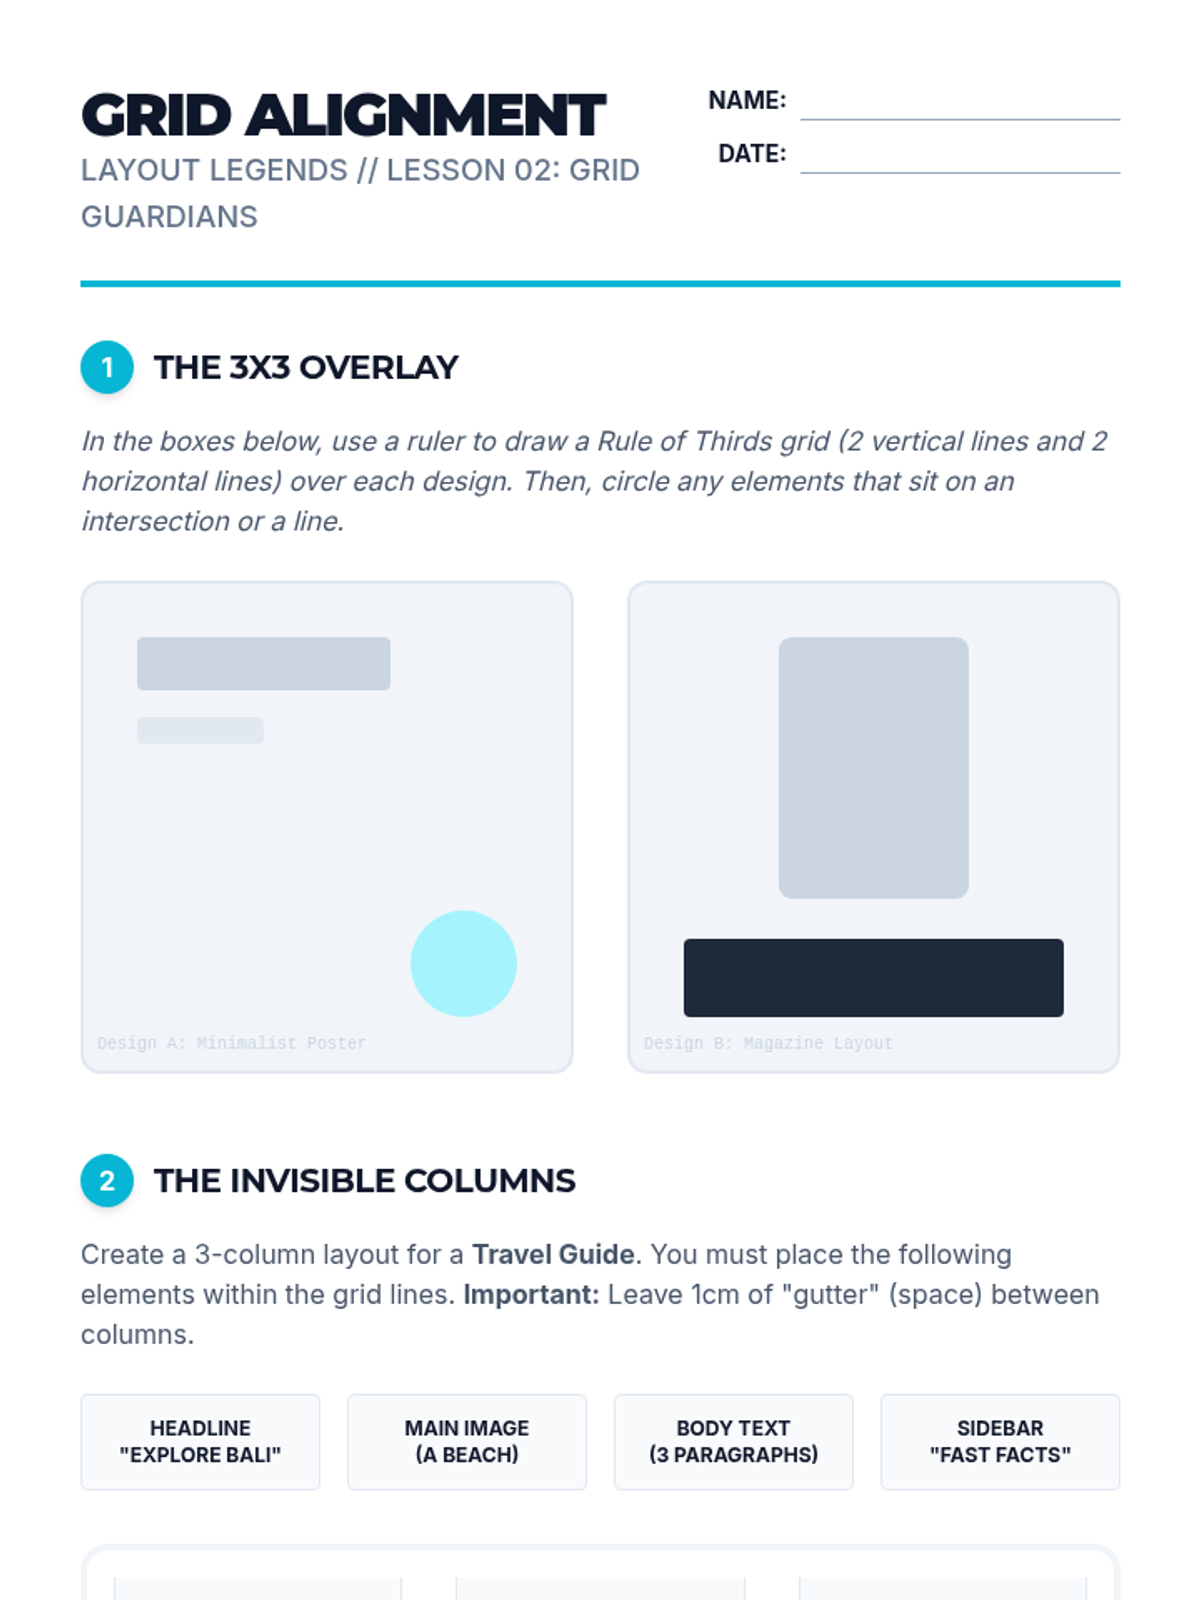
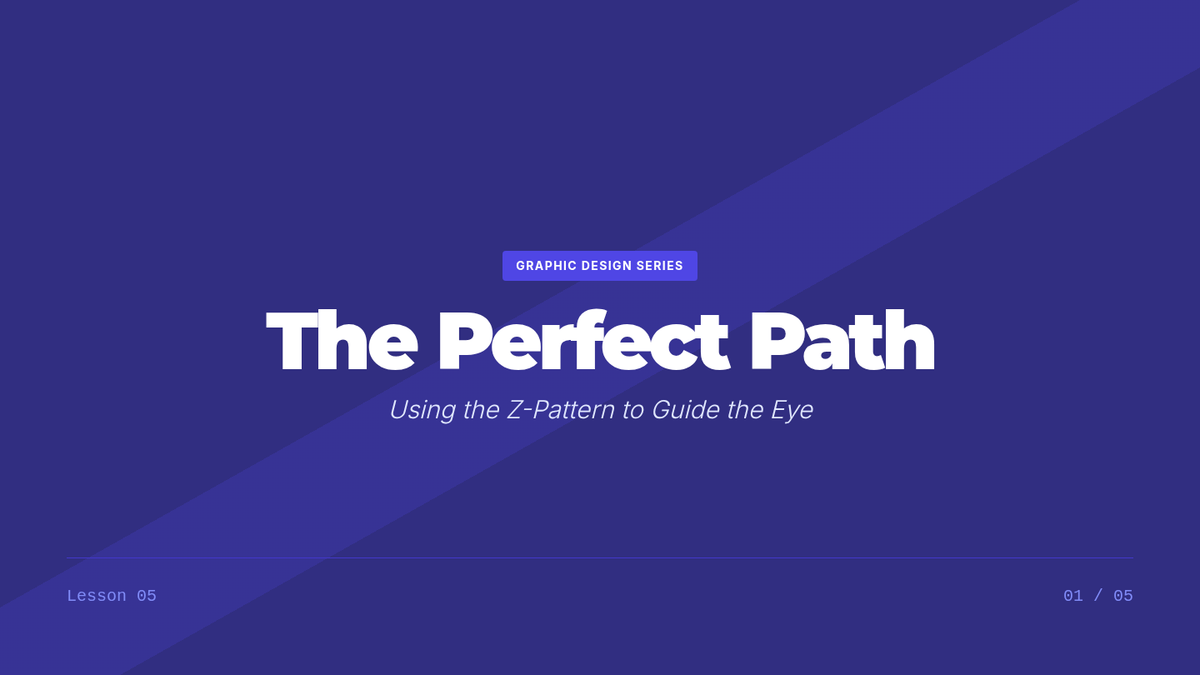
Focuses on the structural 'grid' behind every great design, introducing the Rule of Thirds and Z-pattern layout. Students practice organizing information to guide a viewer's eye effectively.
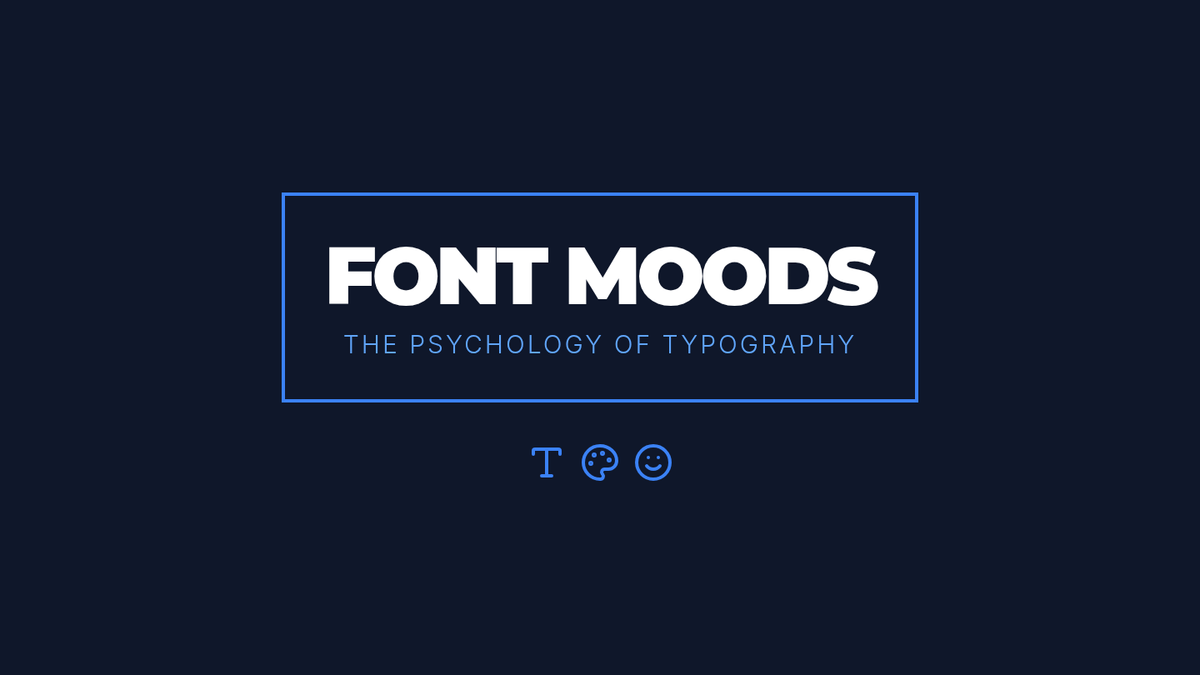
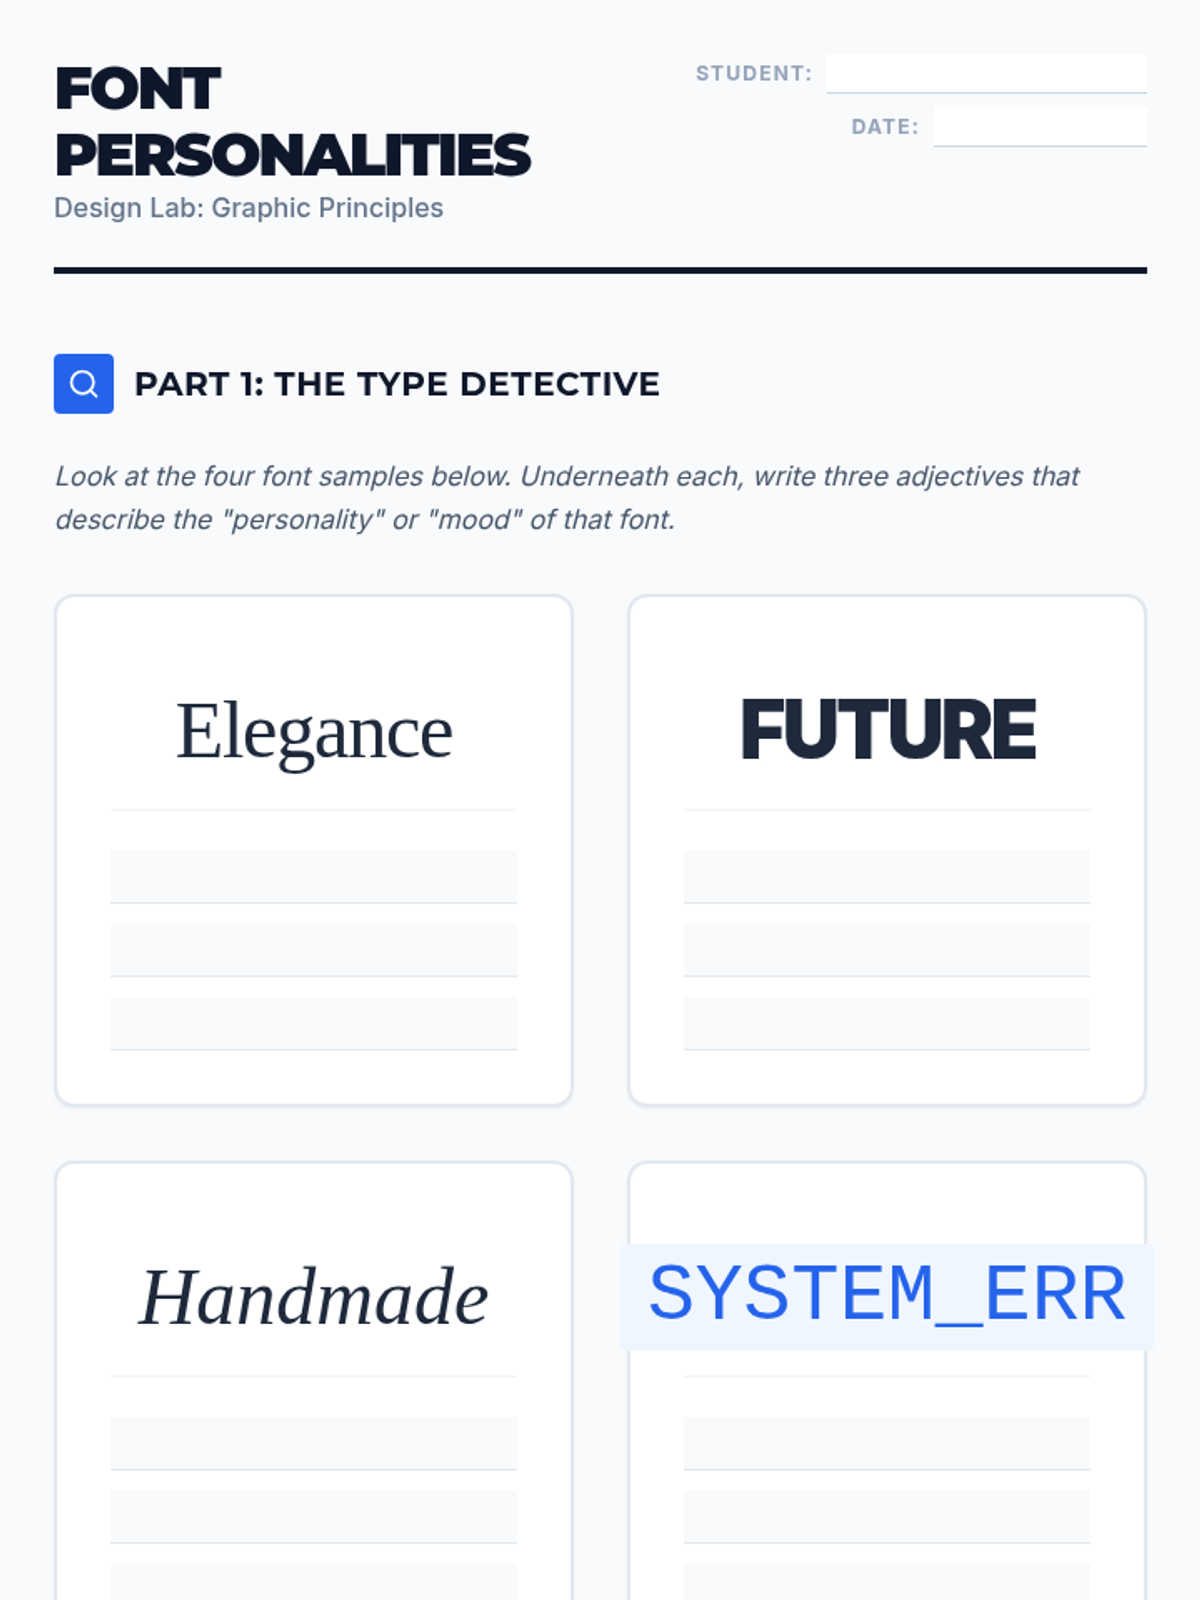
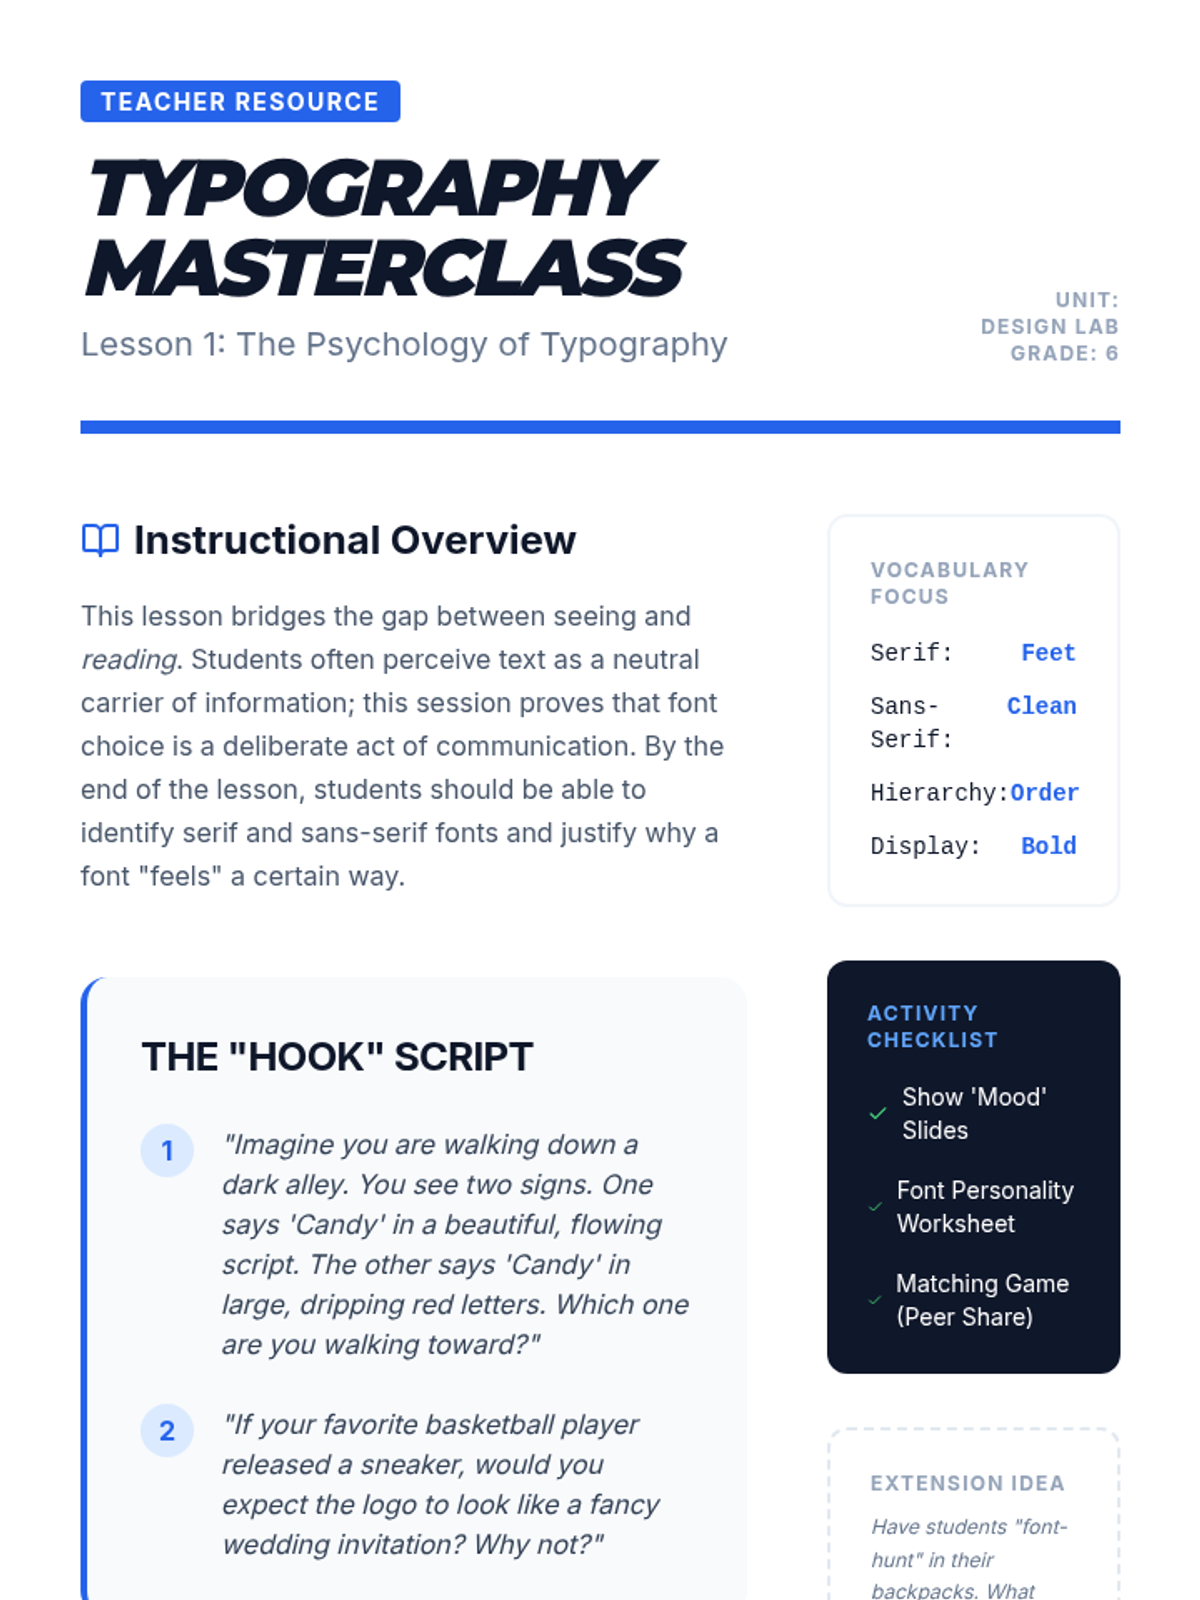
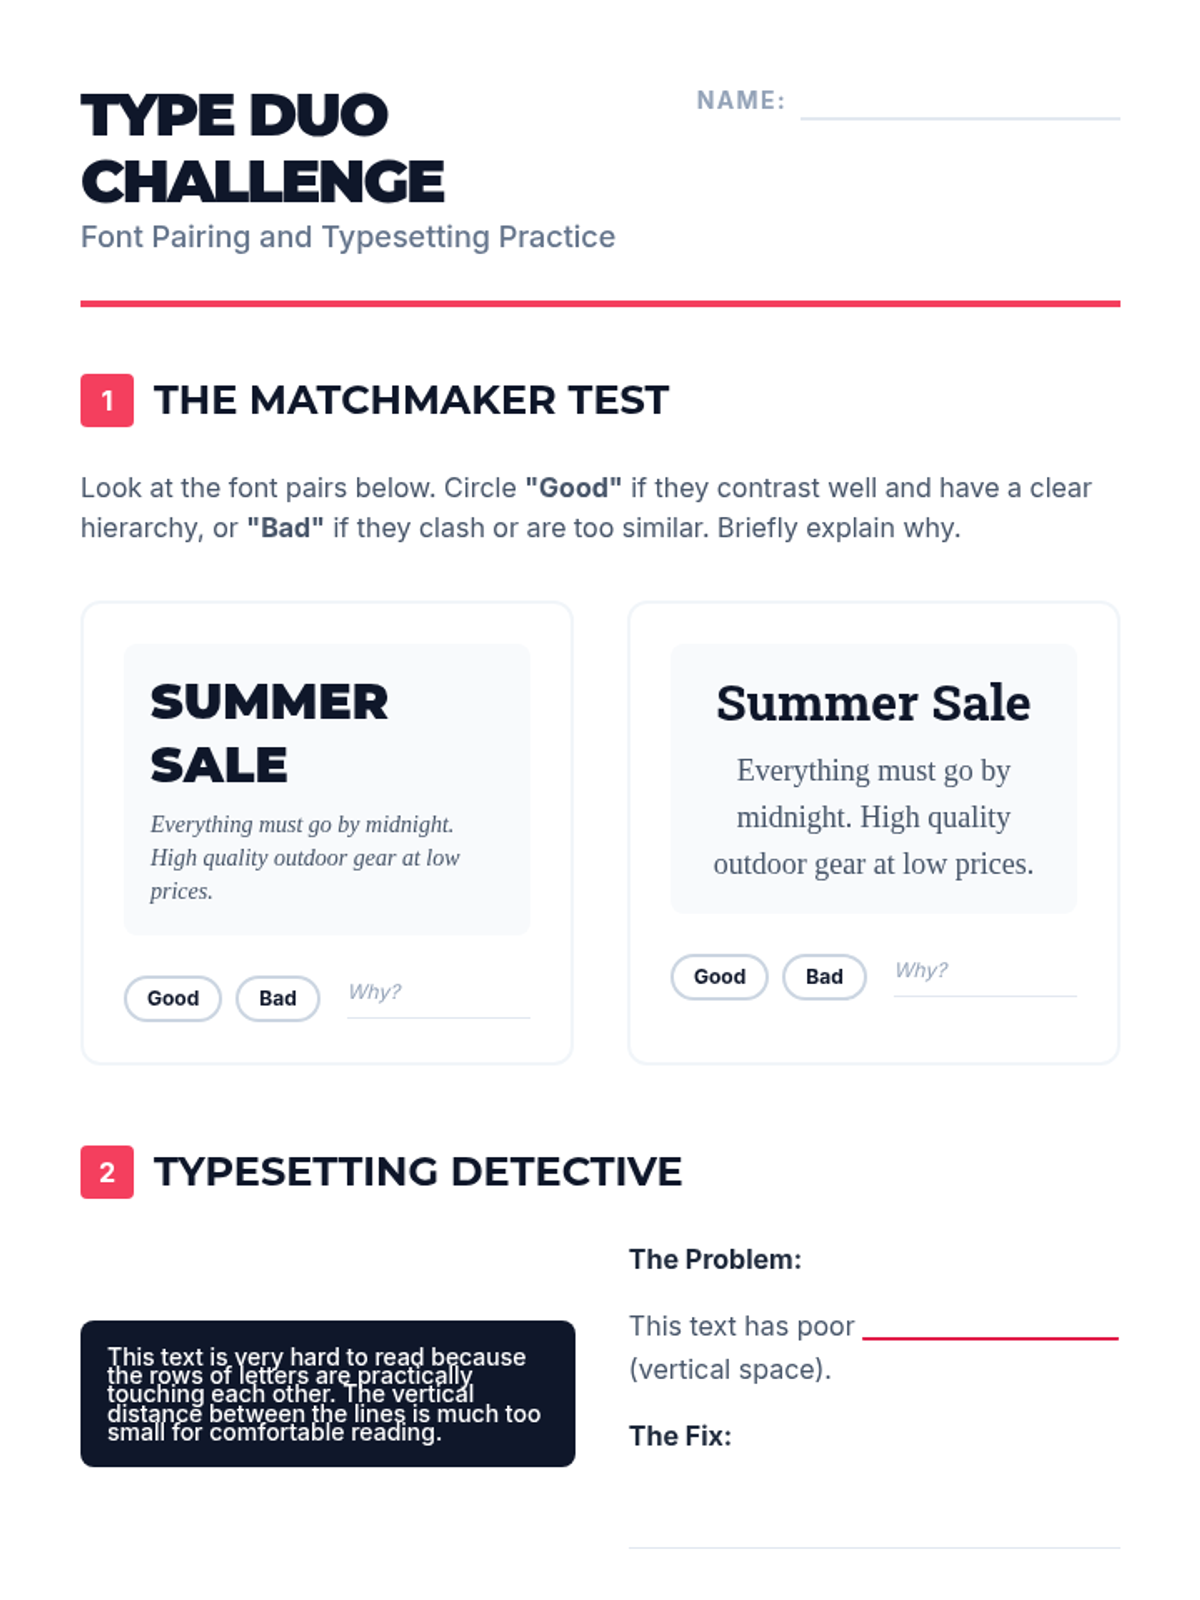
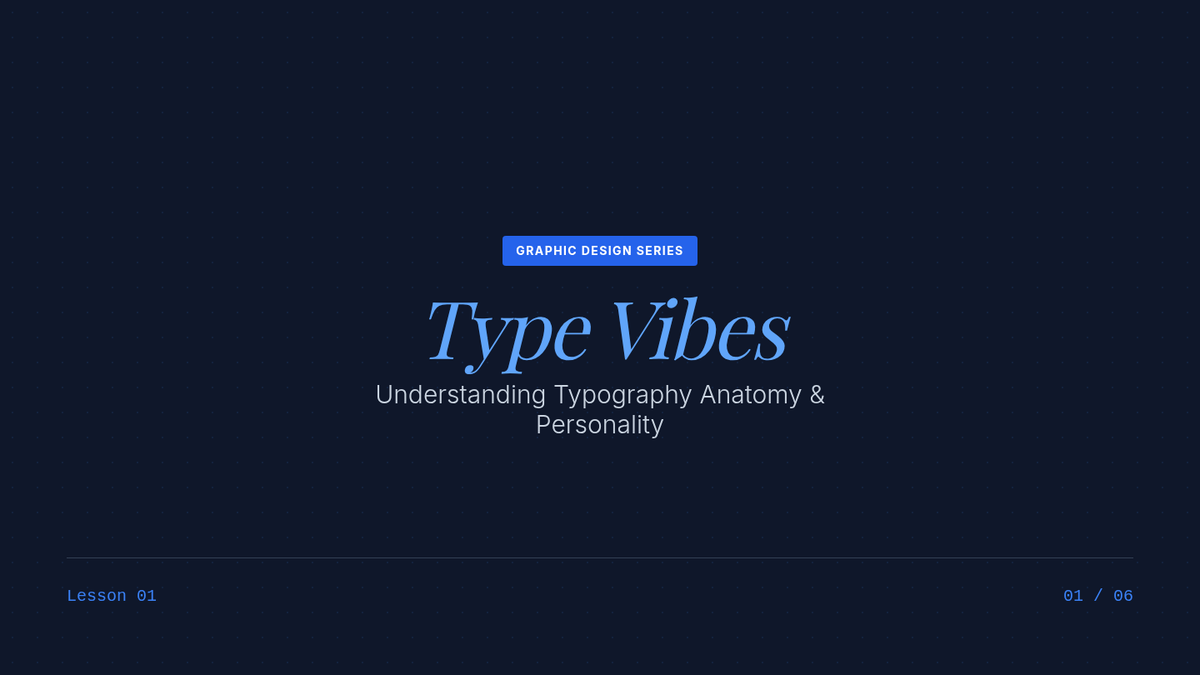
Students explore the emotional impact of different typefaces and learn to categorize fonts into serif, sans-serif, and display styles. They practice matching font 'personalities' with specific products and messages.
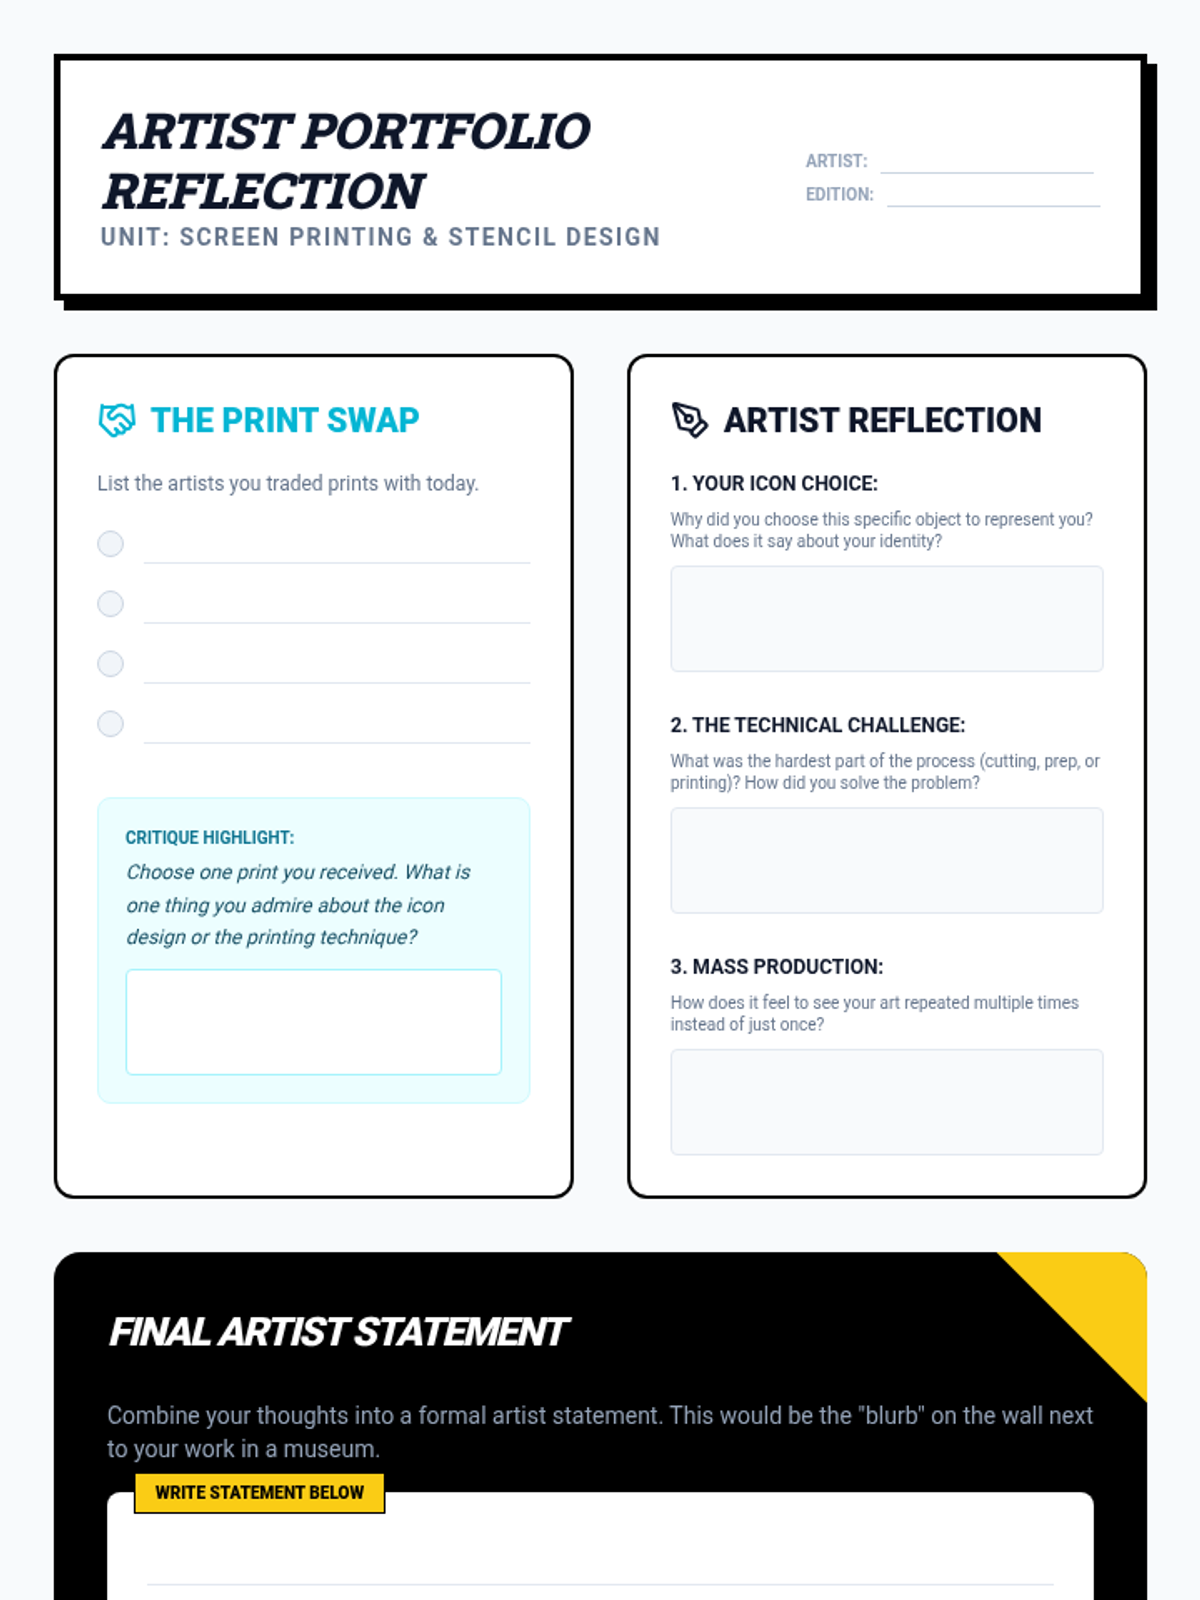
An essential part of the print studio, this lesson covers the cleaning and maintenance of tools. Students then engage in a 'print swap,' trading their prints with classmates to start their own art collection.
Students execute the printing process, learning the proper angle and pressure required to push ink through the mesh. They work in partners, facilitating a collaborative environment where one holds the screen while the other prints.
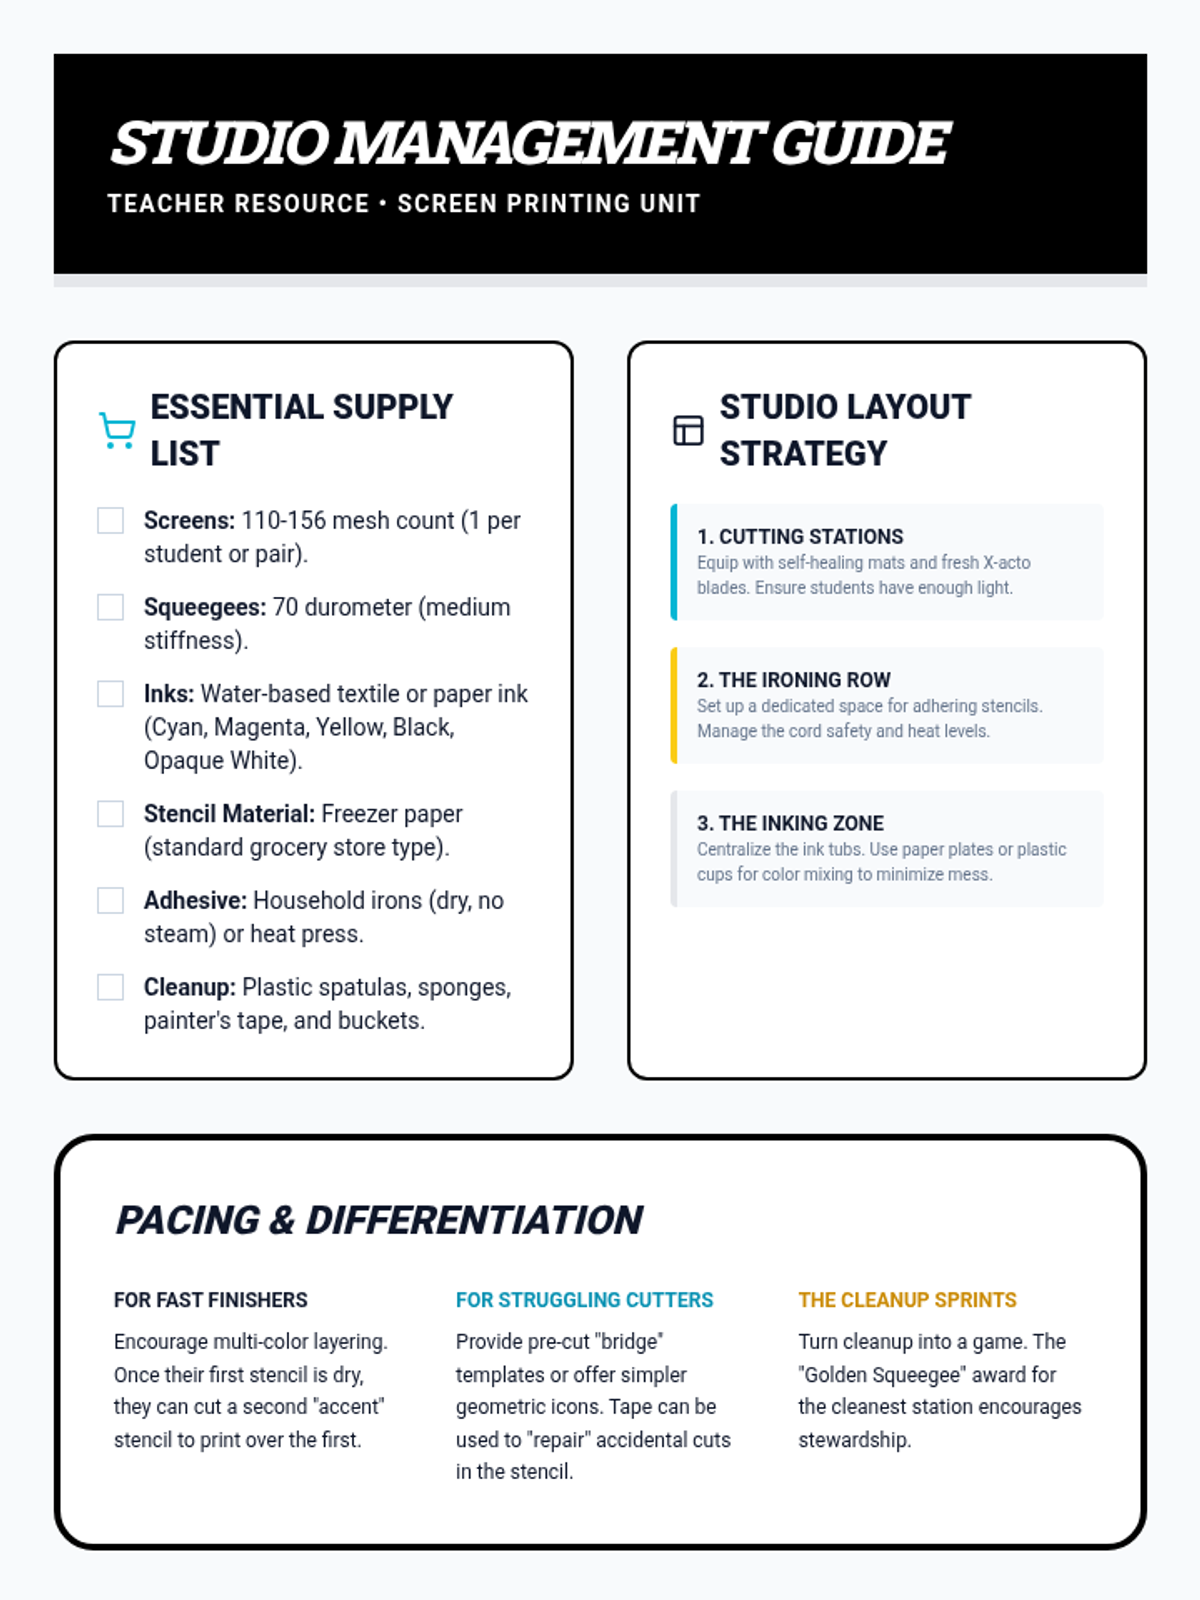
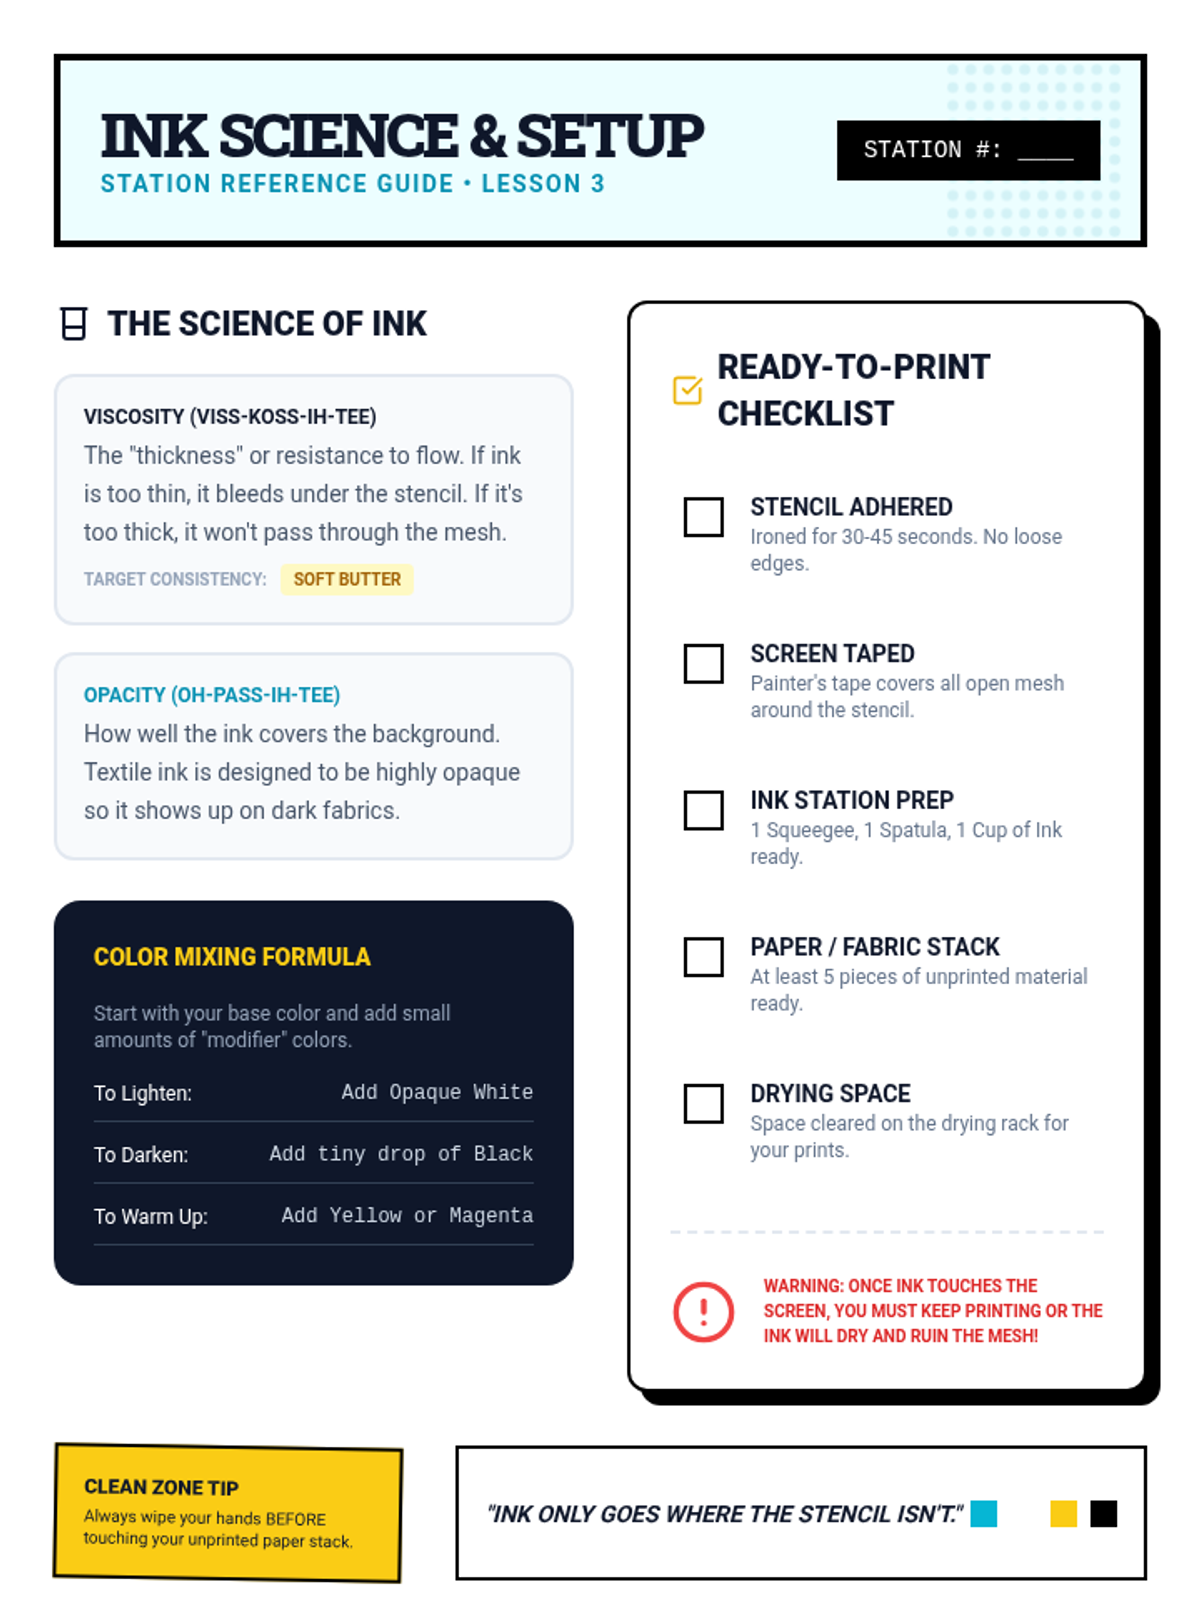
This workshop lesson demonstrates how to adhere the stencil to the screen mesh and prepare the printing station. Students learn about ink viscosity and how textile ink differs from paper ink, preparing them for the physical act of pulling a squeegee.
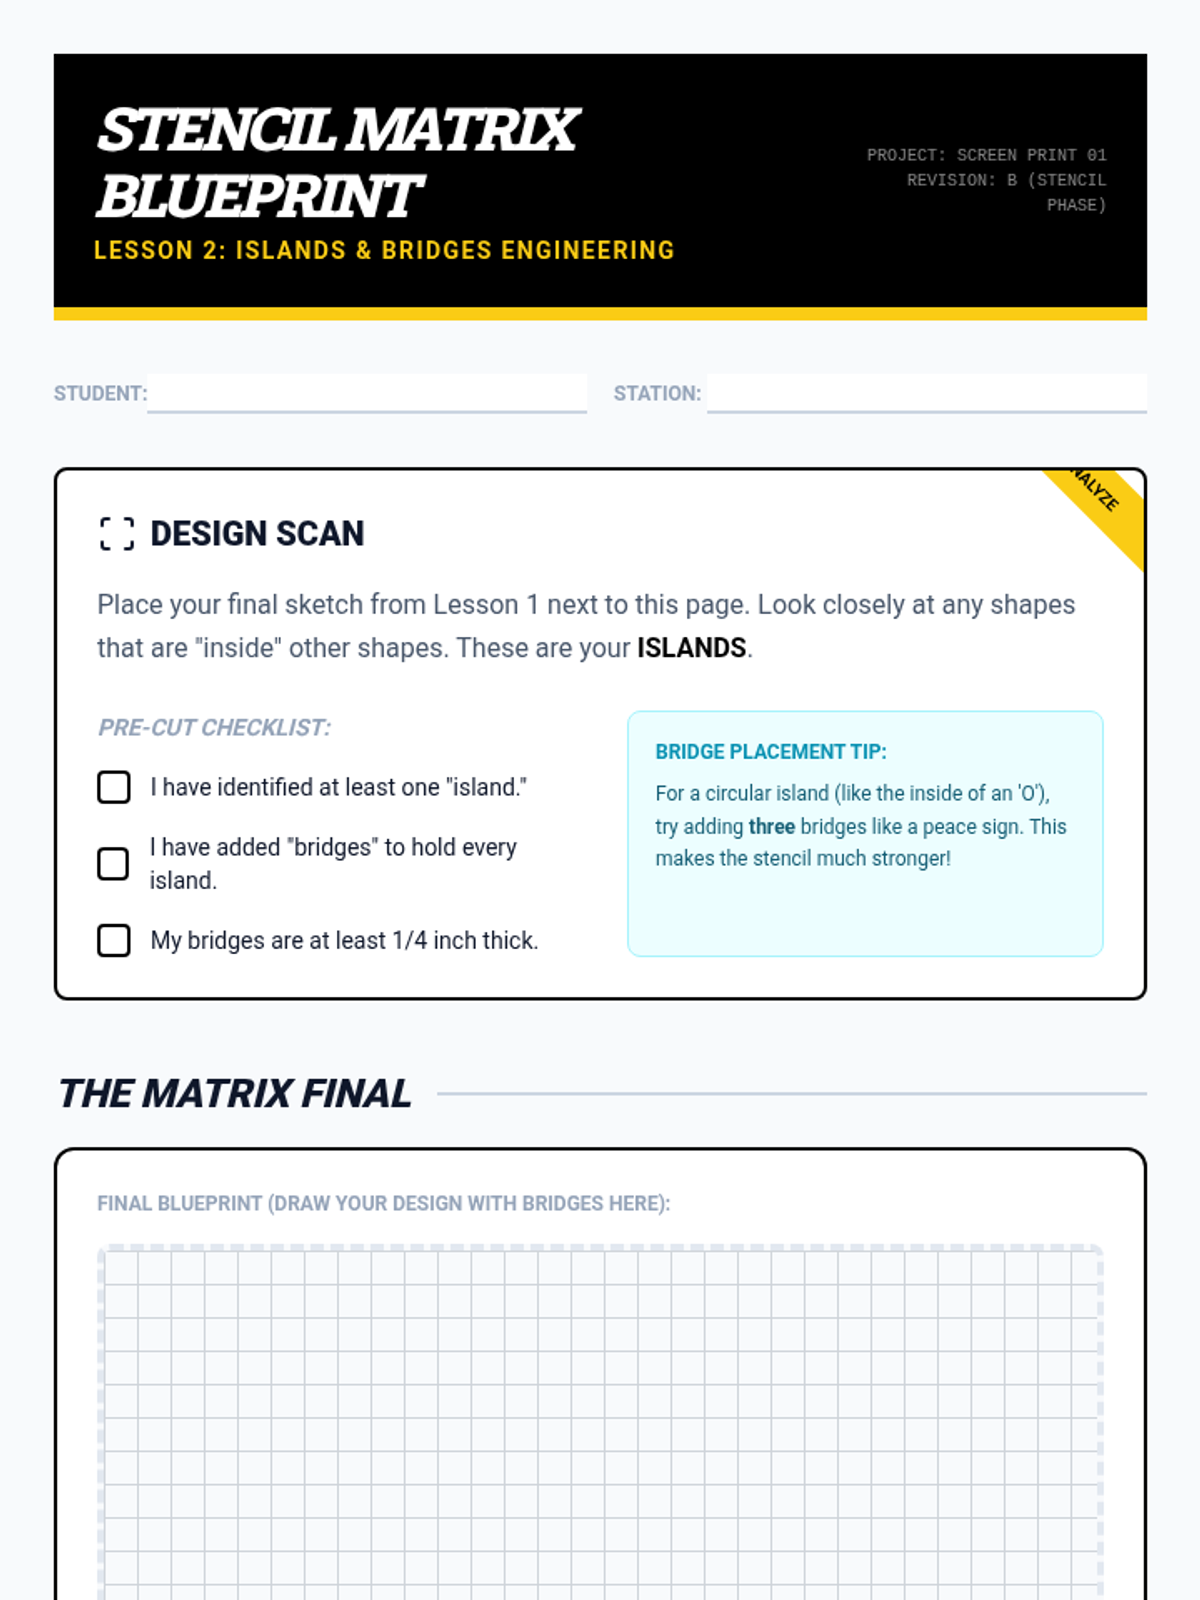
Students refine their designs into 'islands and bridges' to ensure their stencils hold together during the printing process. They cut their designs from freezer paper or acetate, learning to think in layers of color.
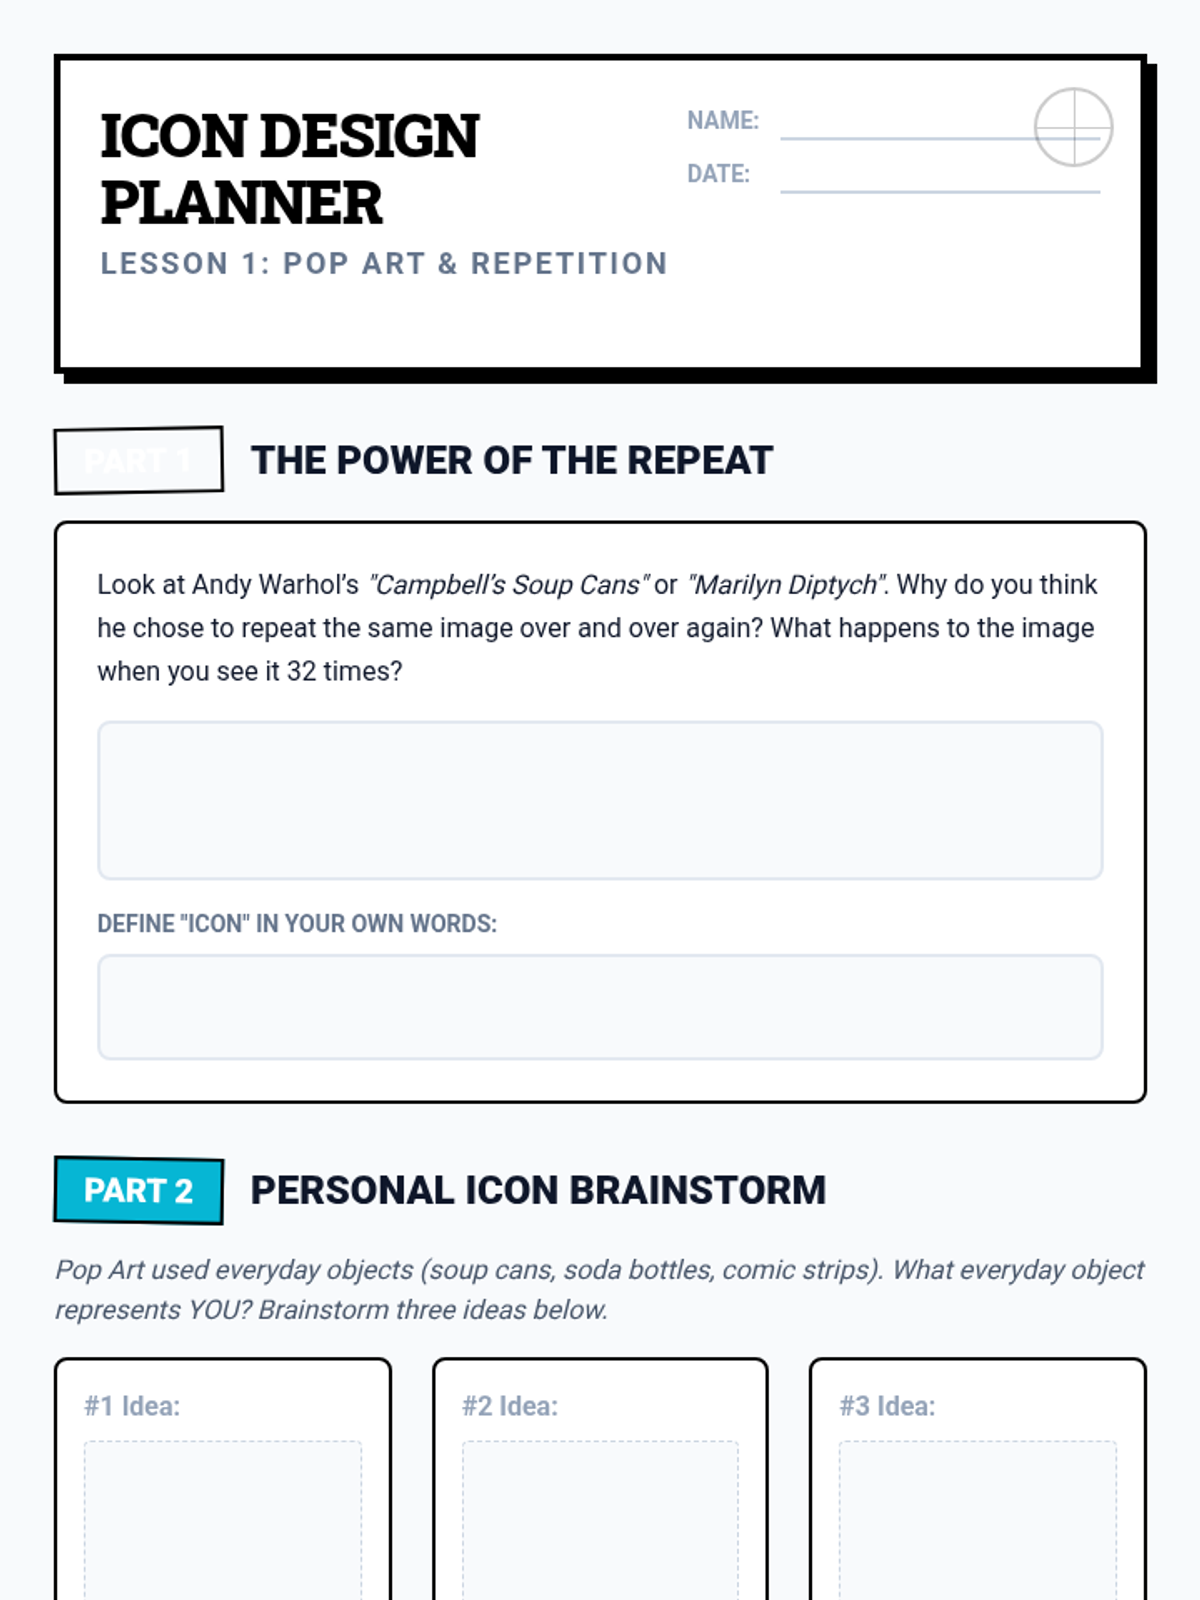
Students examine the works of Andy Warhol and Corita Kent to understand the cultural impact of screen printing. They begin sketching icon-based designs that are simple enough to be cut into stencils but bold enough to make a statement.
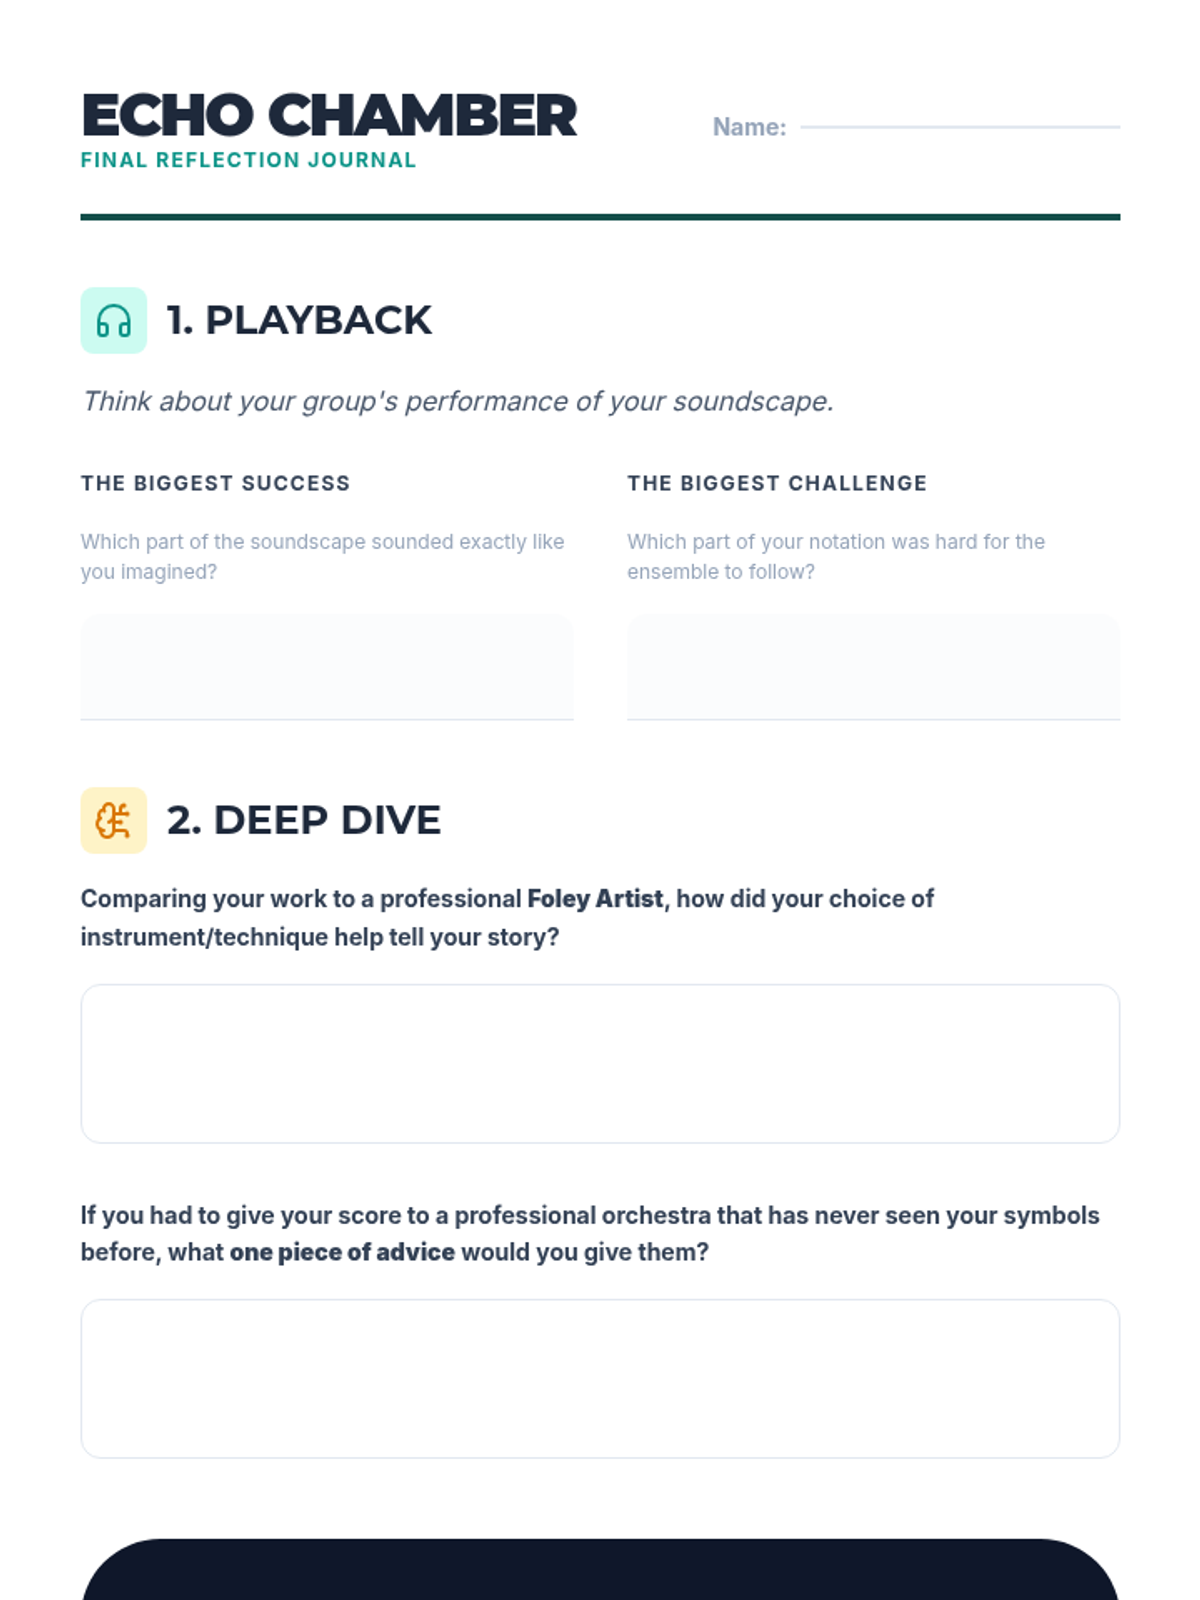
Students reflect on their compositions and performances, comparing their work to professional Foley artists.
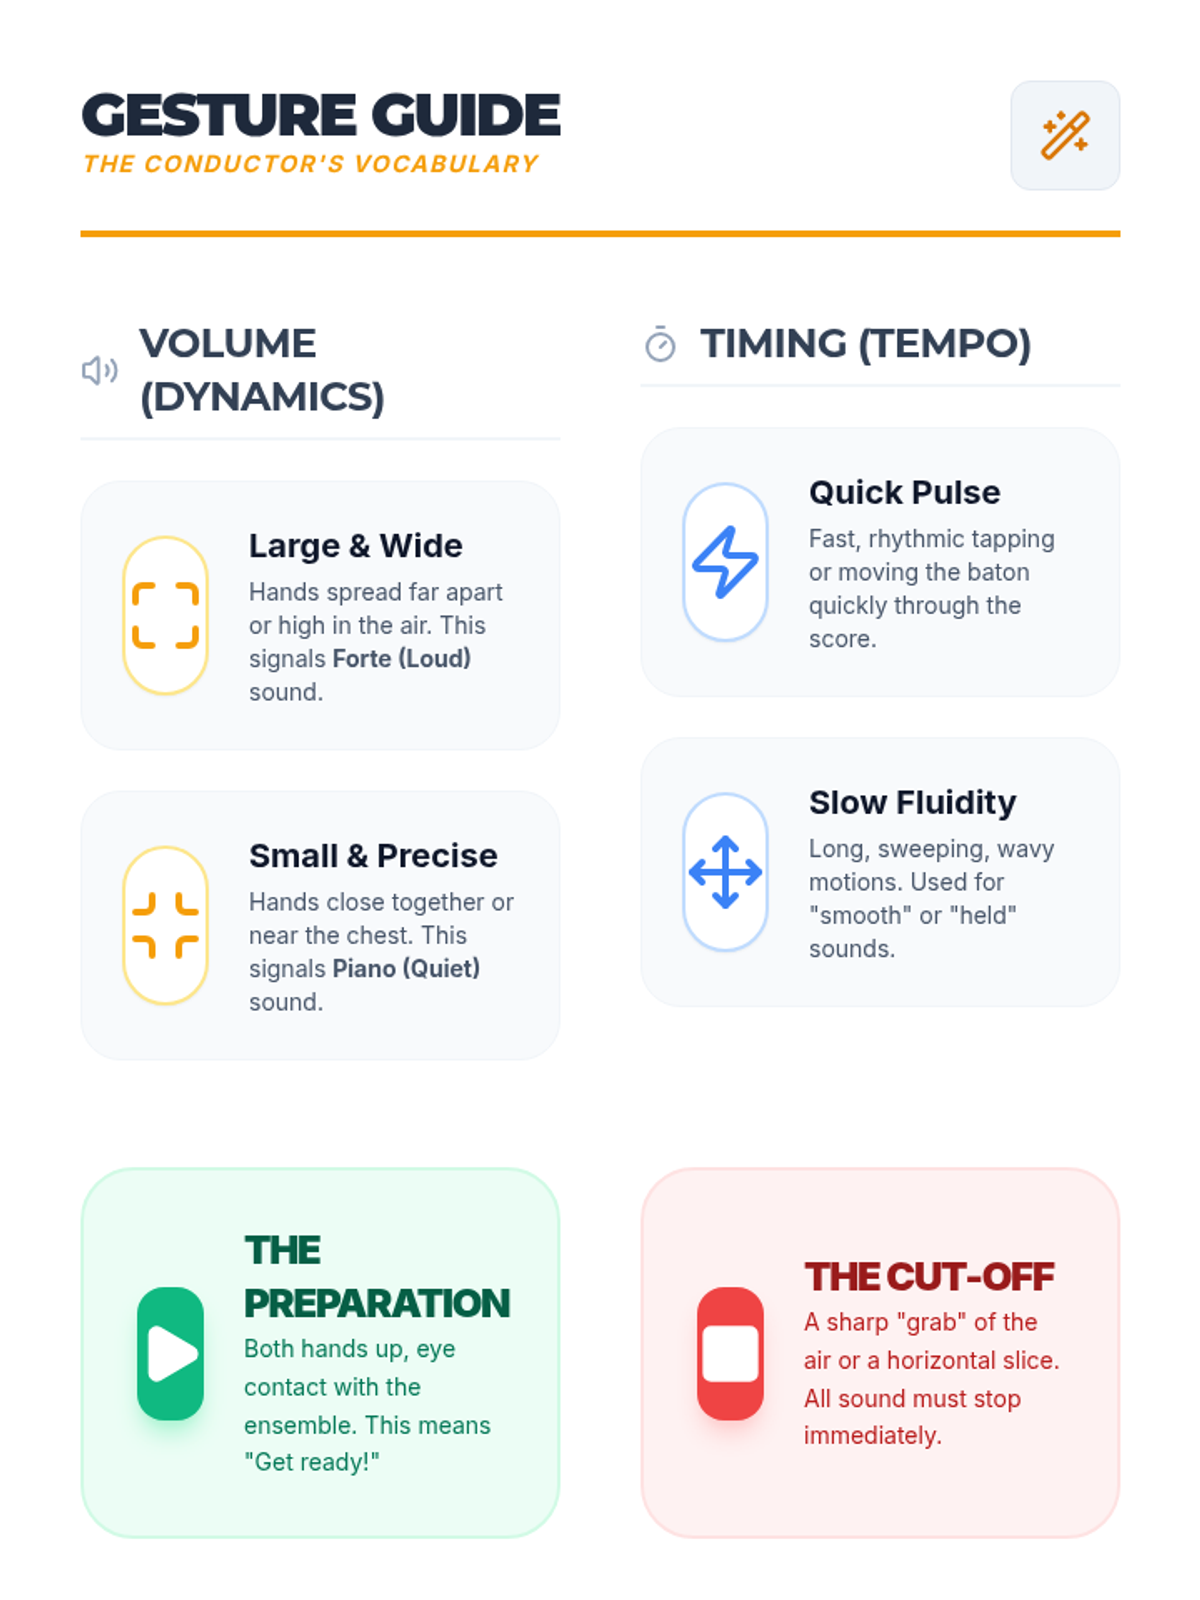
Young composers practice conducting their scores, using gestures to lead their peers through the visual music.
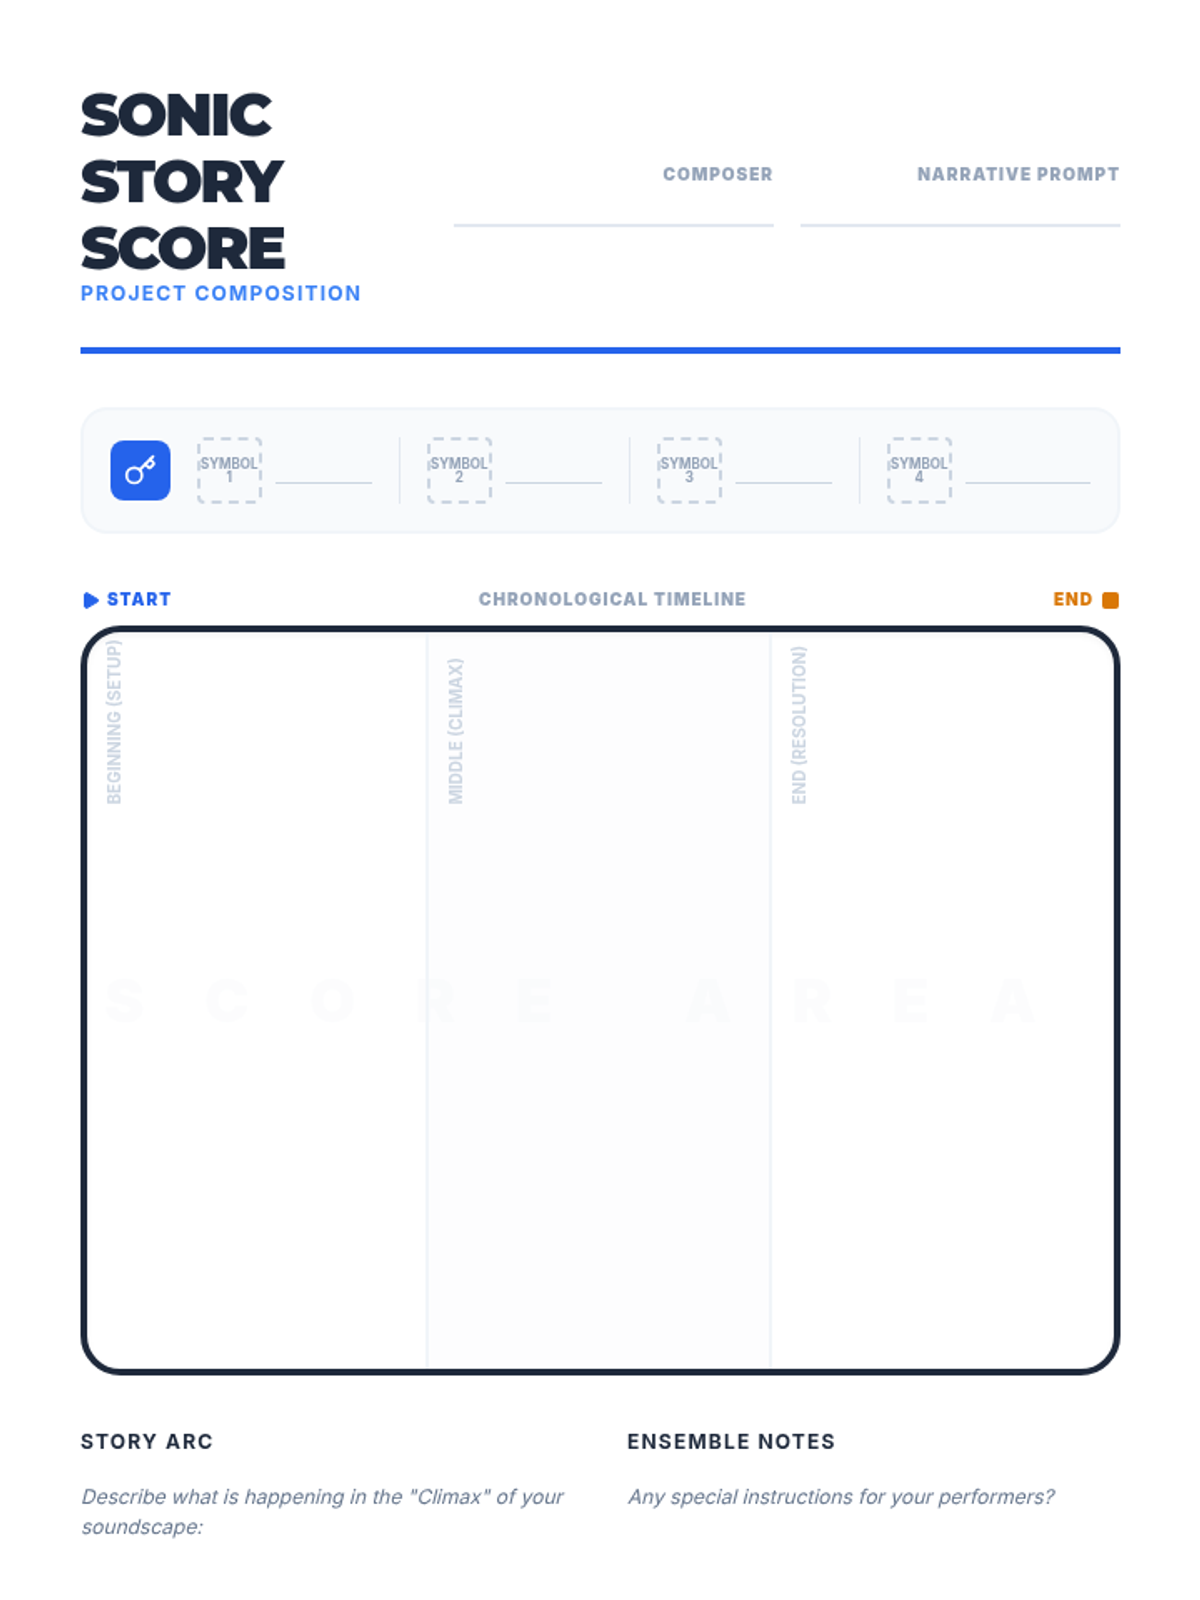
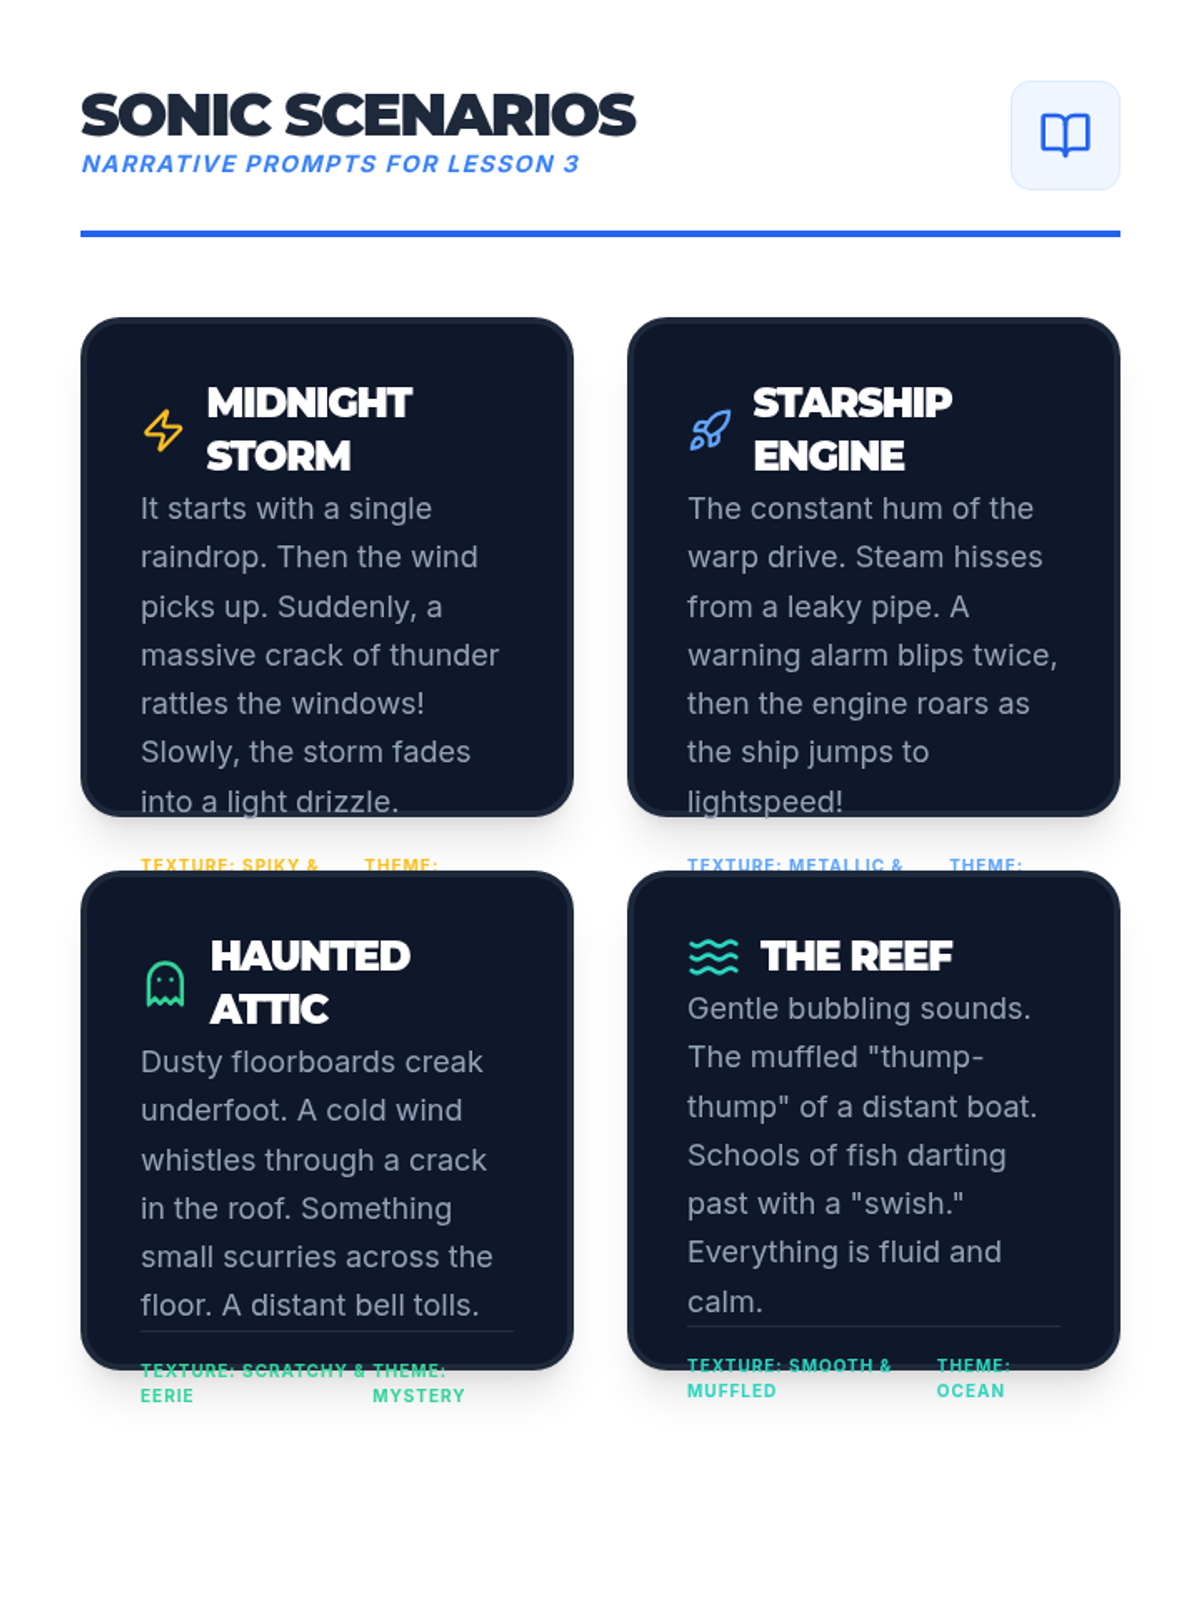
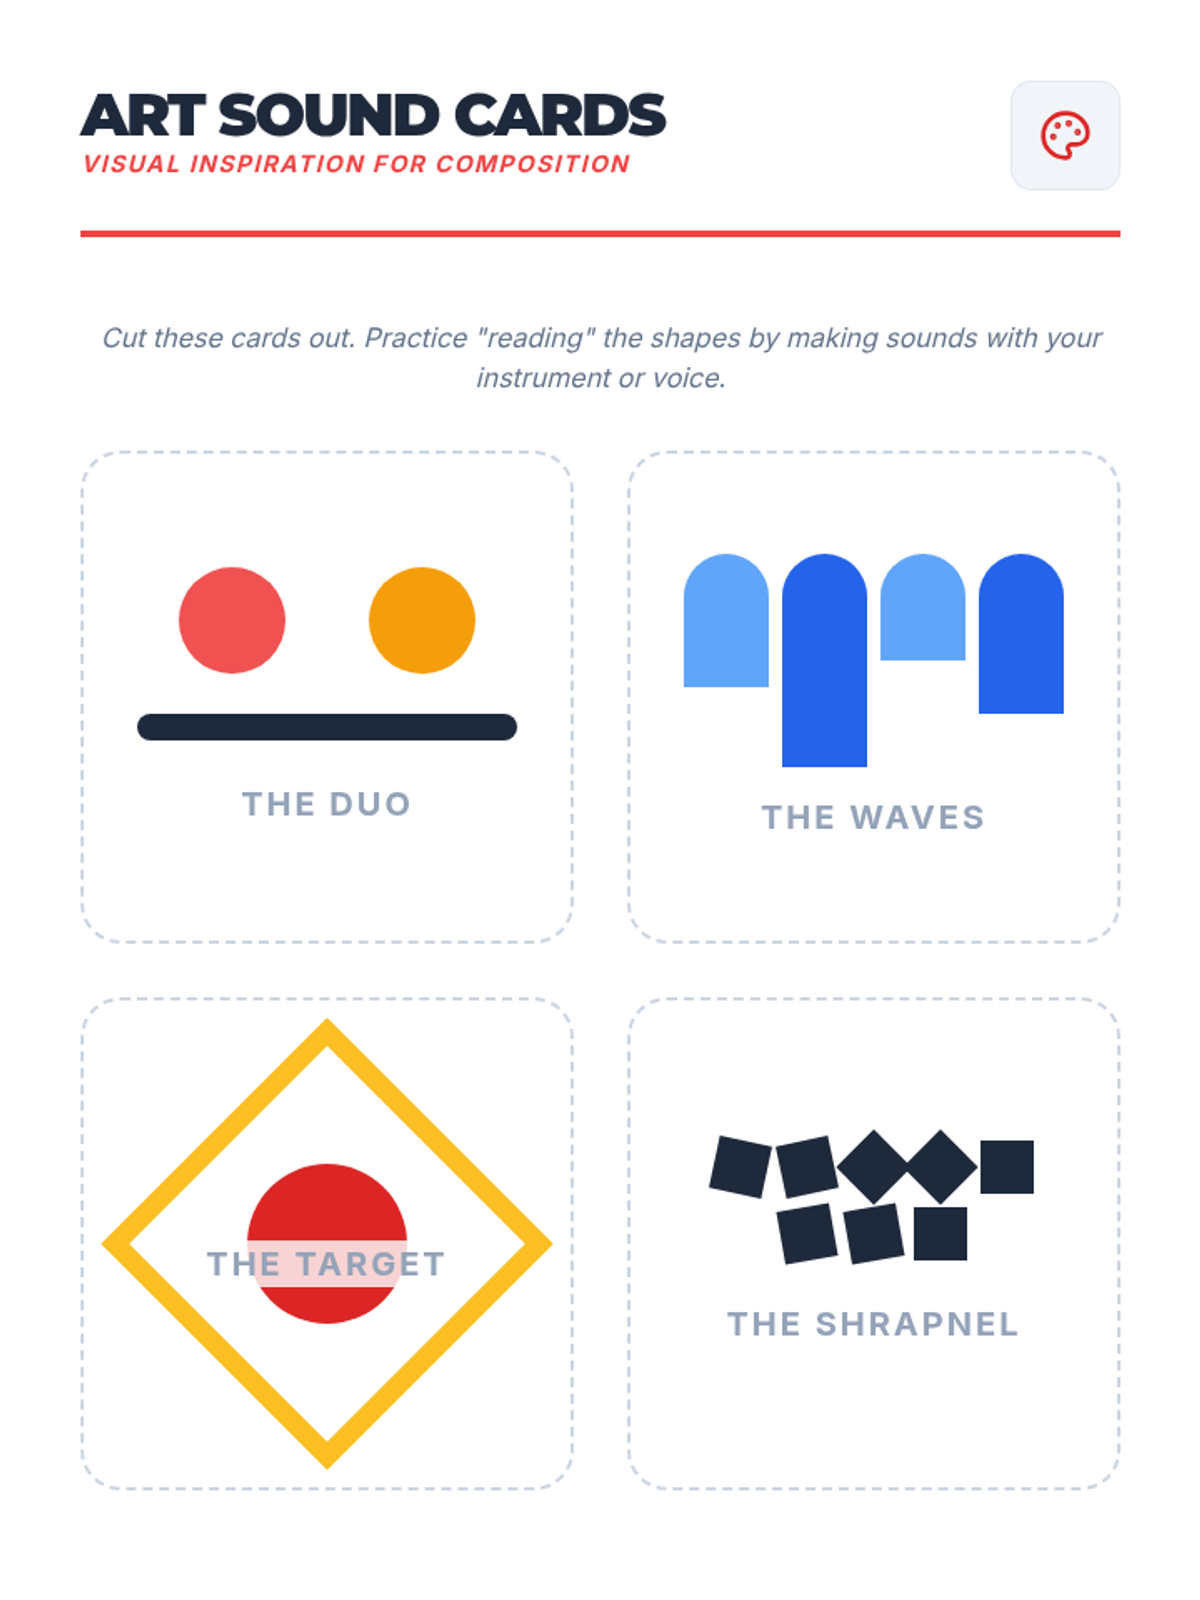
Students compose a narrative-driven graphic score that uses their symbols to tell a sonic story.
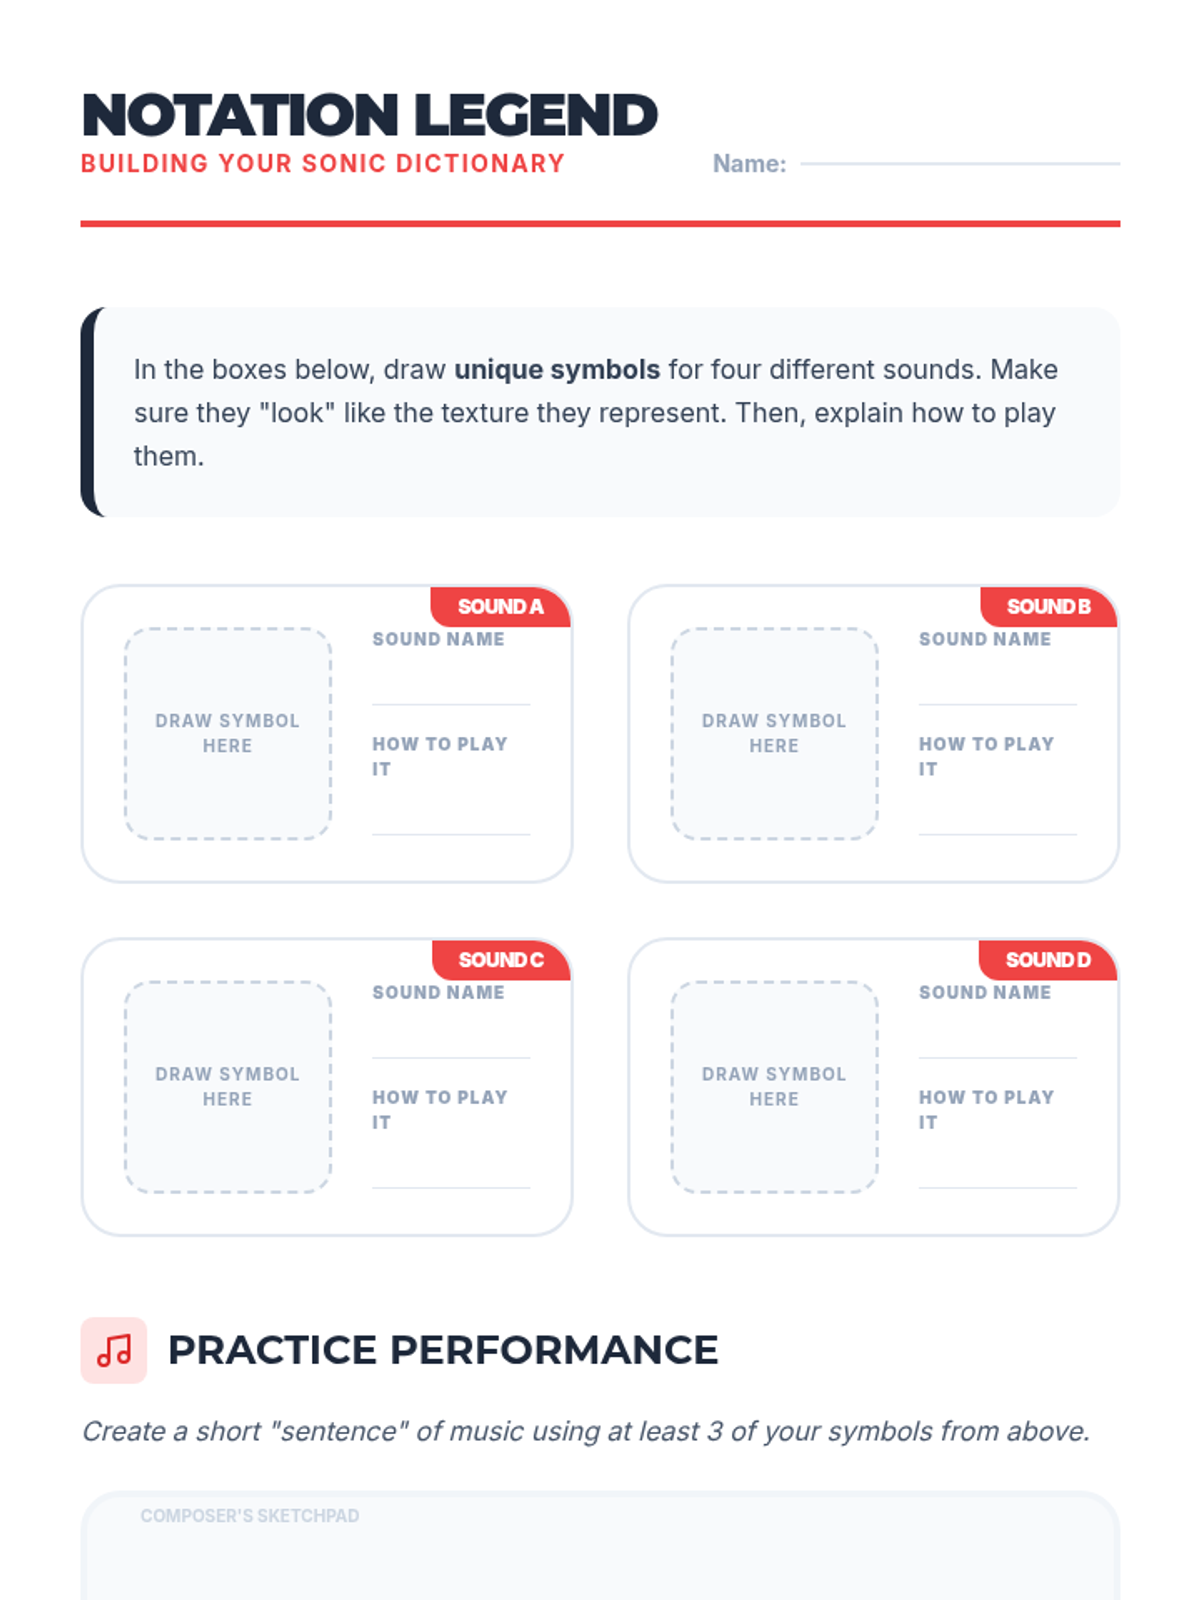
Learners translate sounds into visual symbols, creating a legend that maps shapes and colors to specific audio qualities.
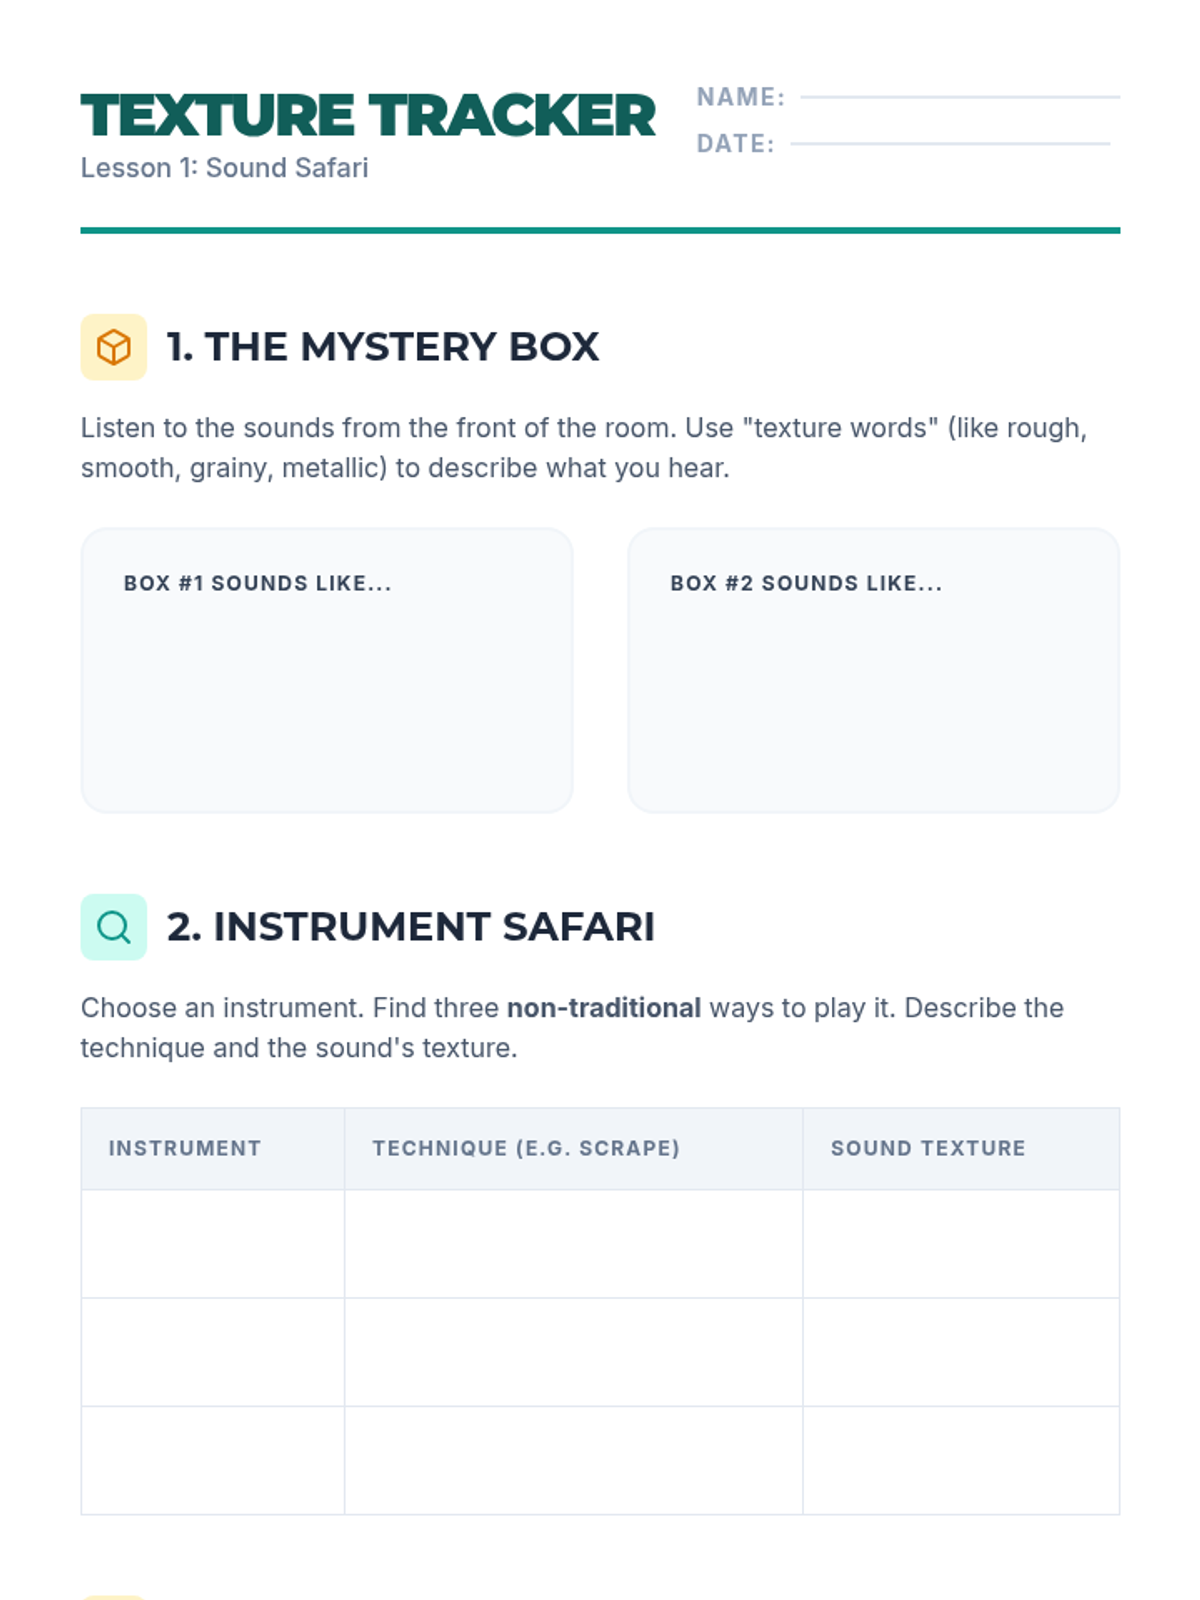
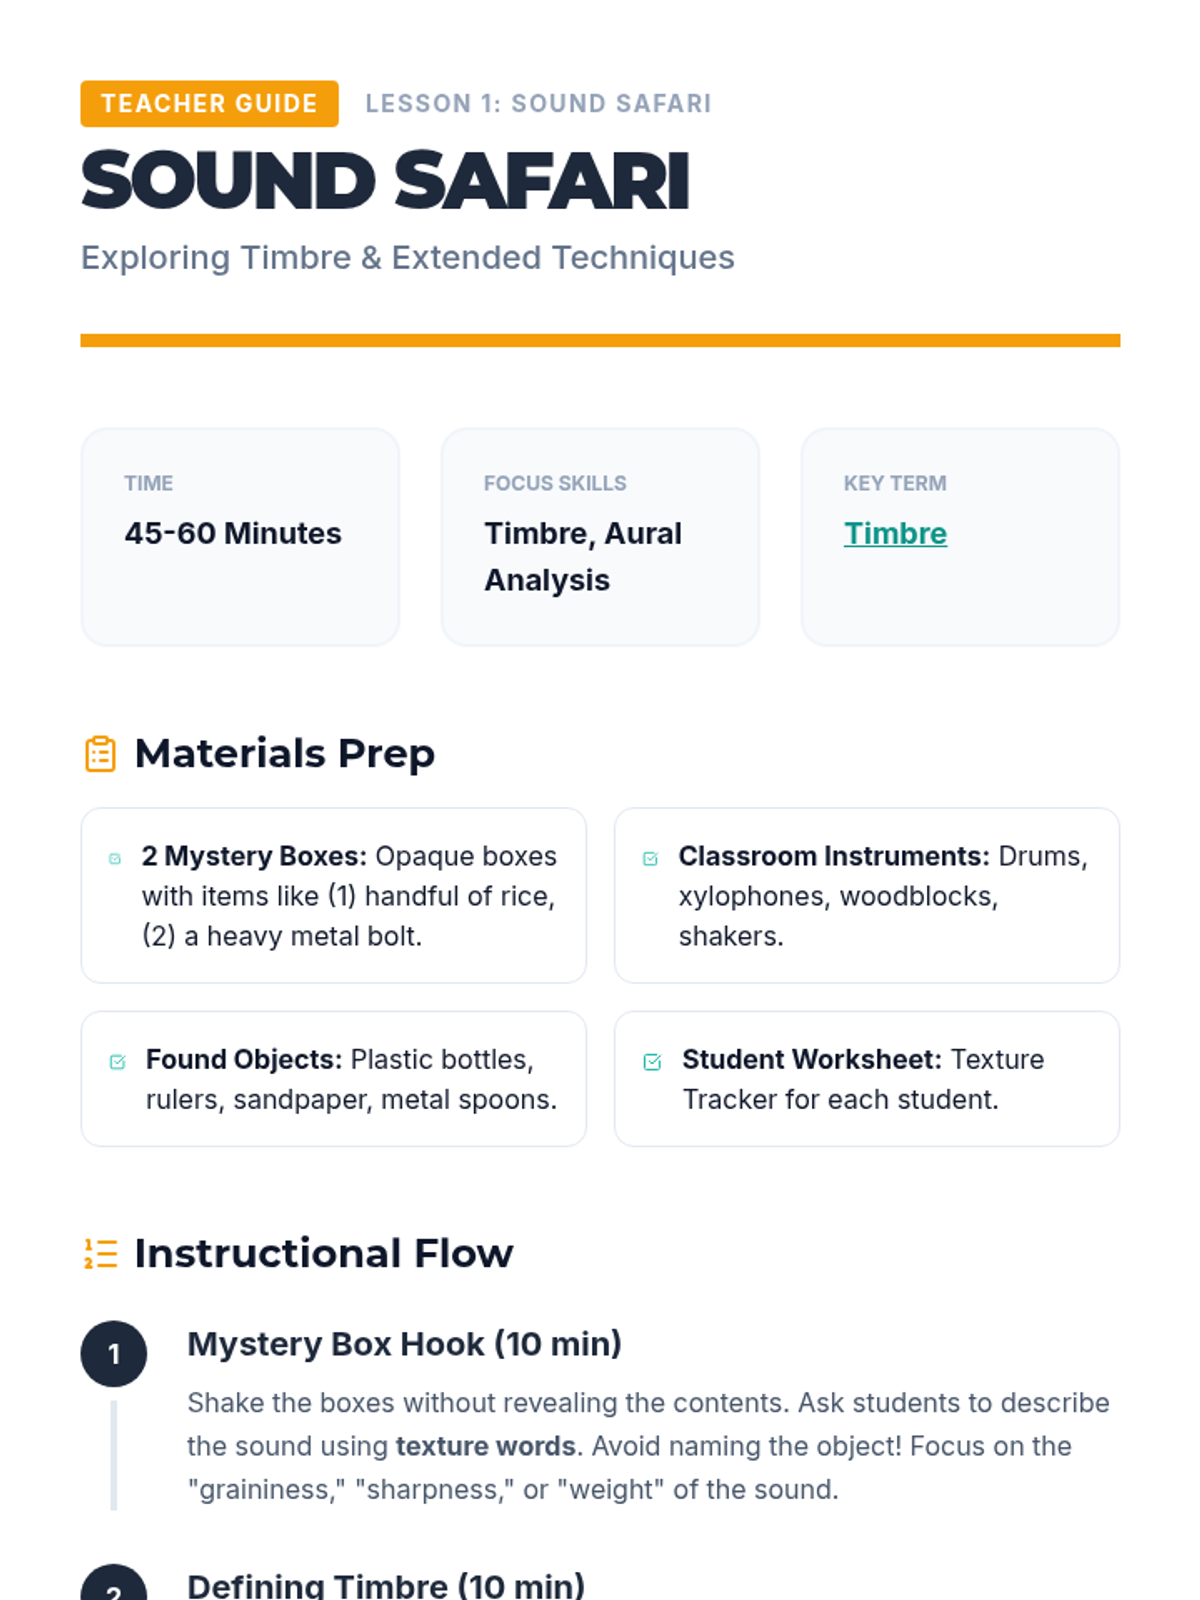
Students explore non-traditional sounds using classroom instruments and found objects, categorizing them by texture.
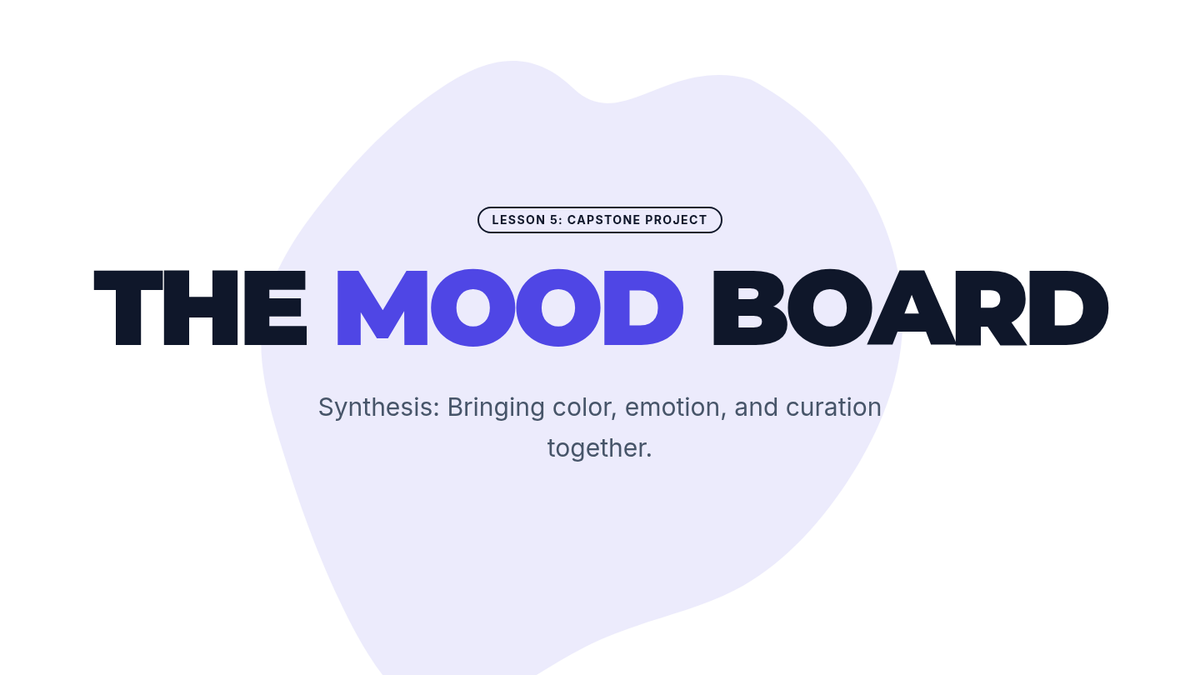
The final project where students synthesize all concepts to create a mood board for a specific emotion. They curate colors, images, and fonts to evoke a precise feeling.
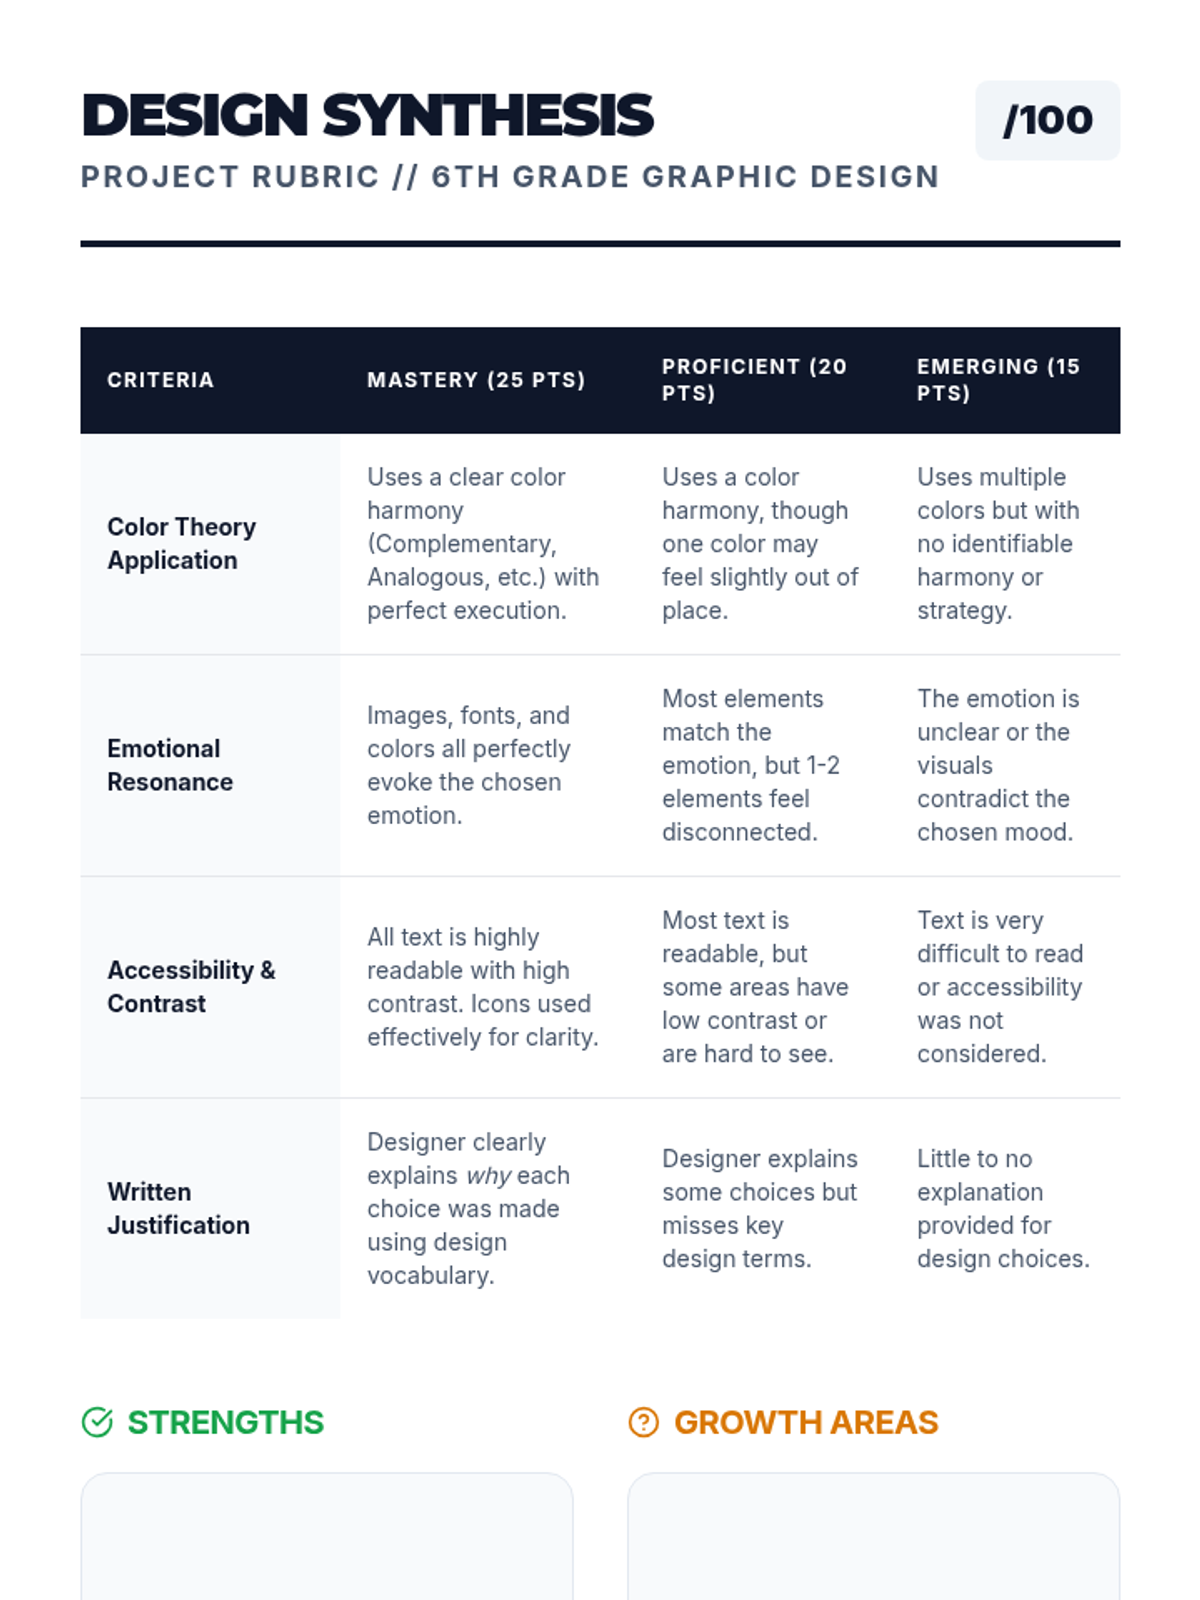
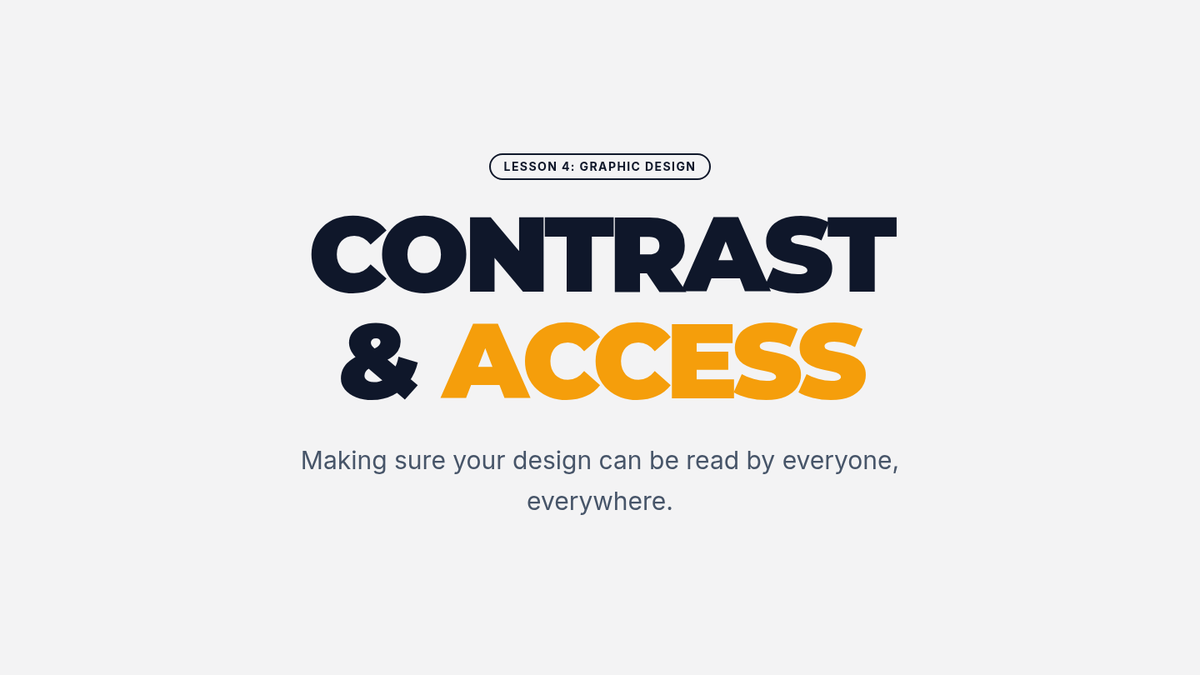
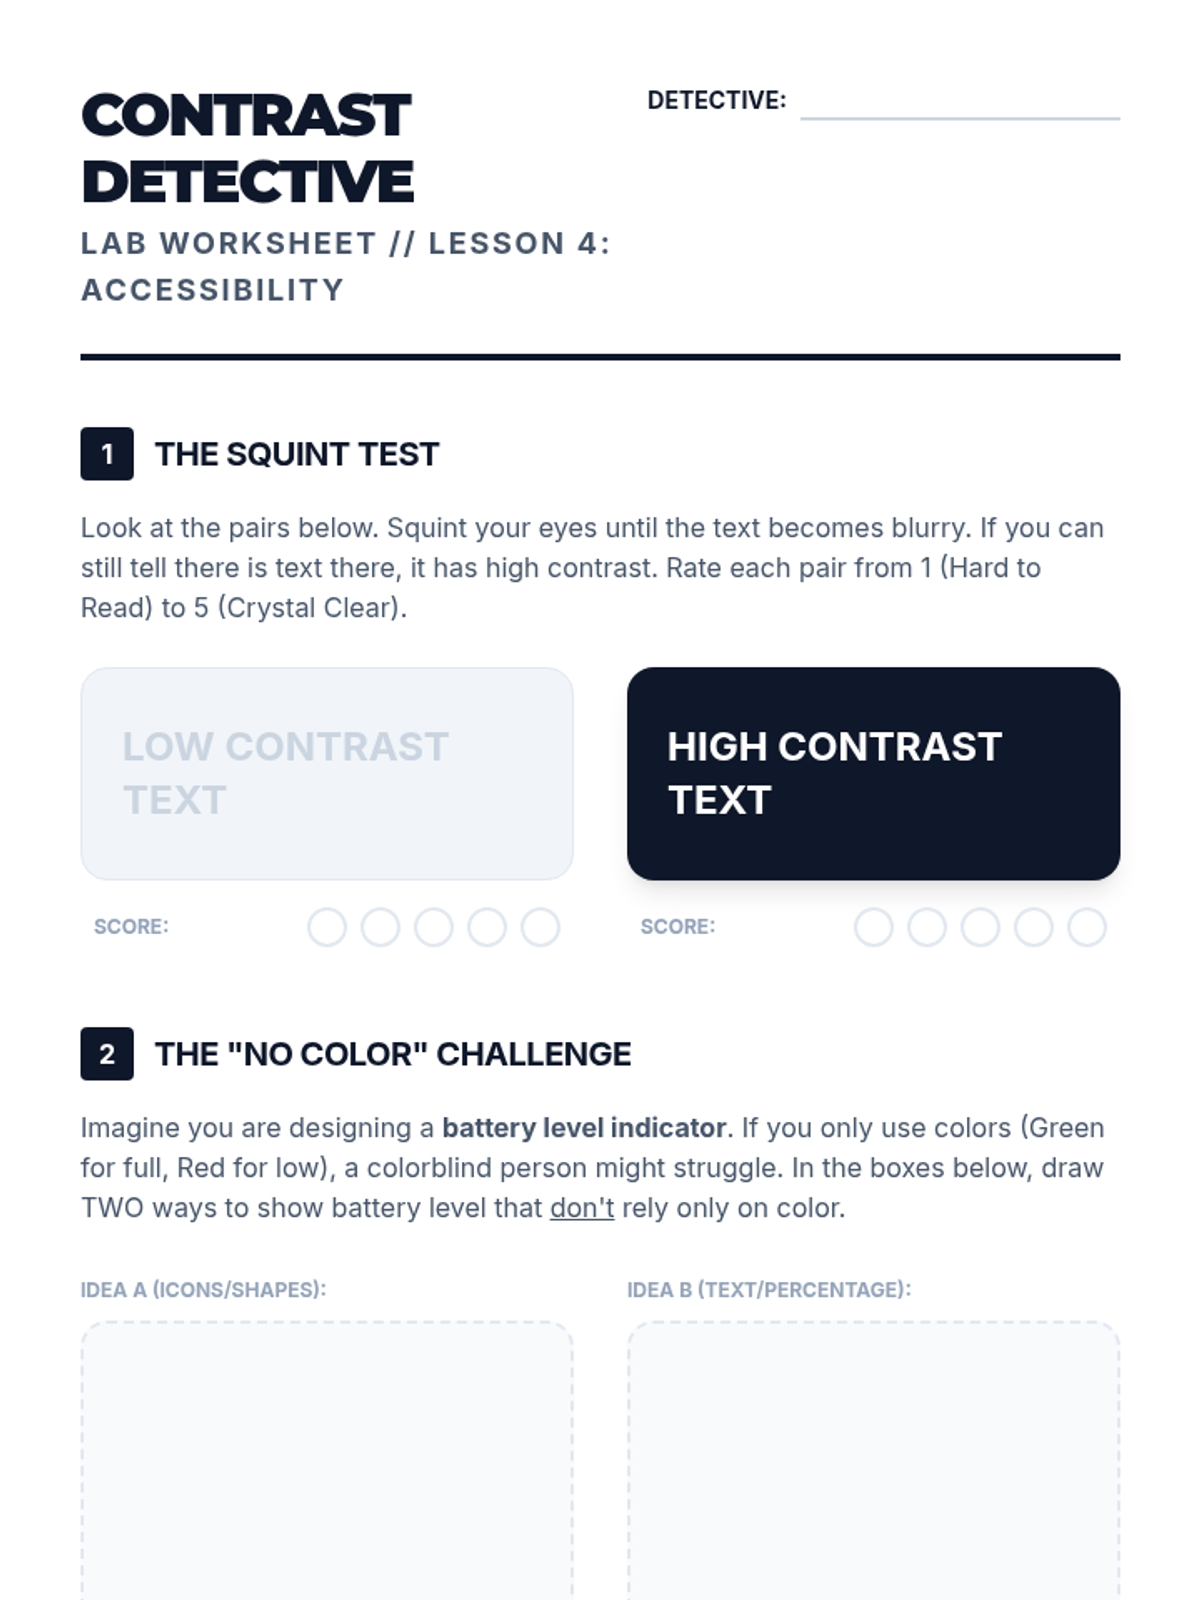
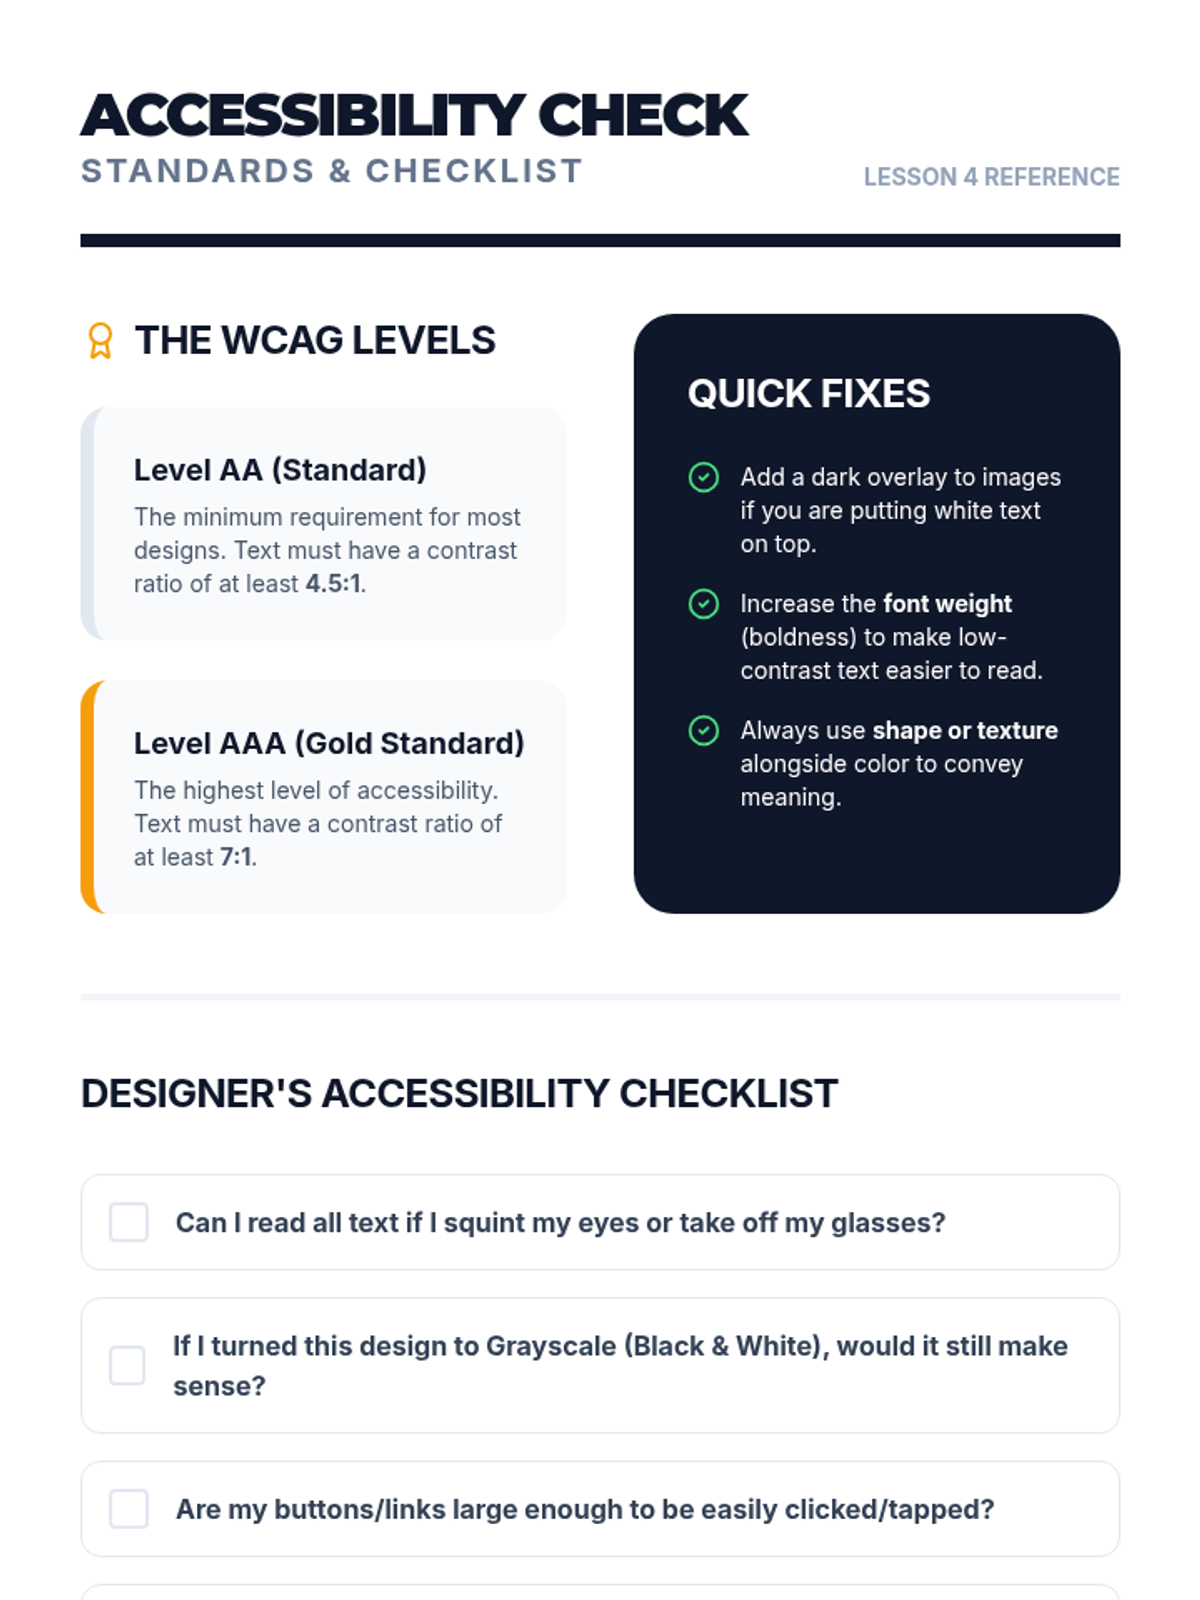
Focuses on the importance of contrast for readability and accessibility in design. Students test different color combinations and learn about AA/AAA standards.
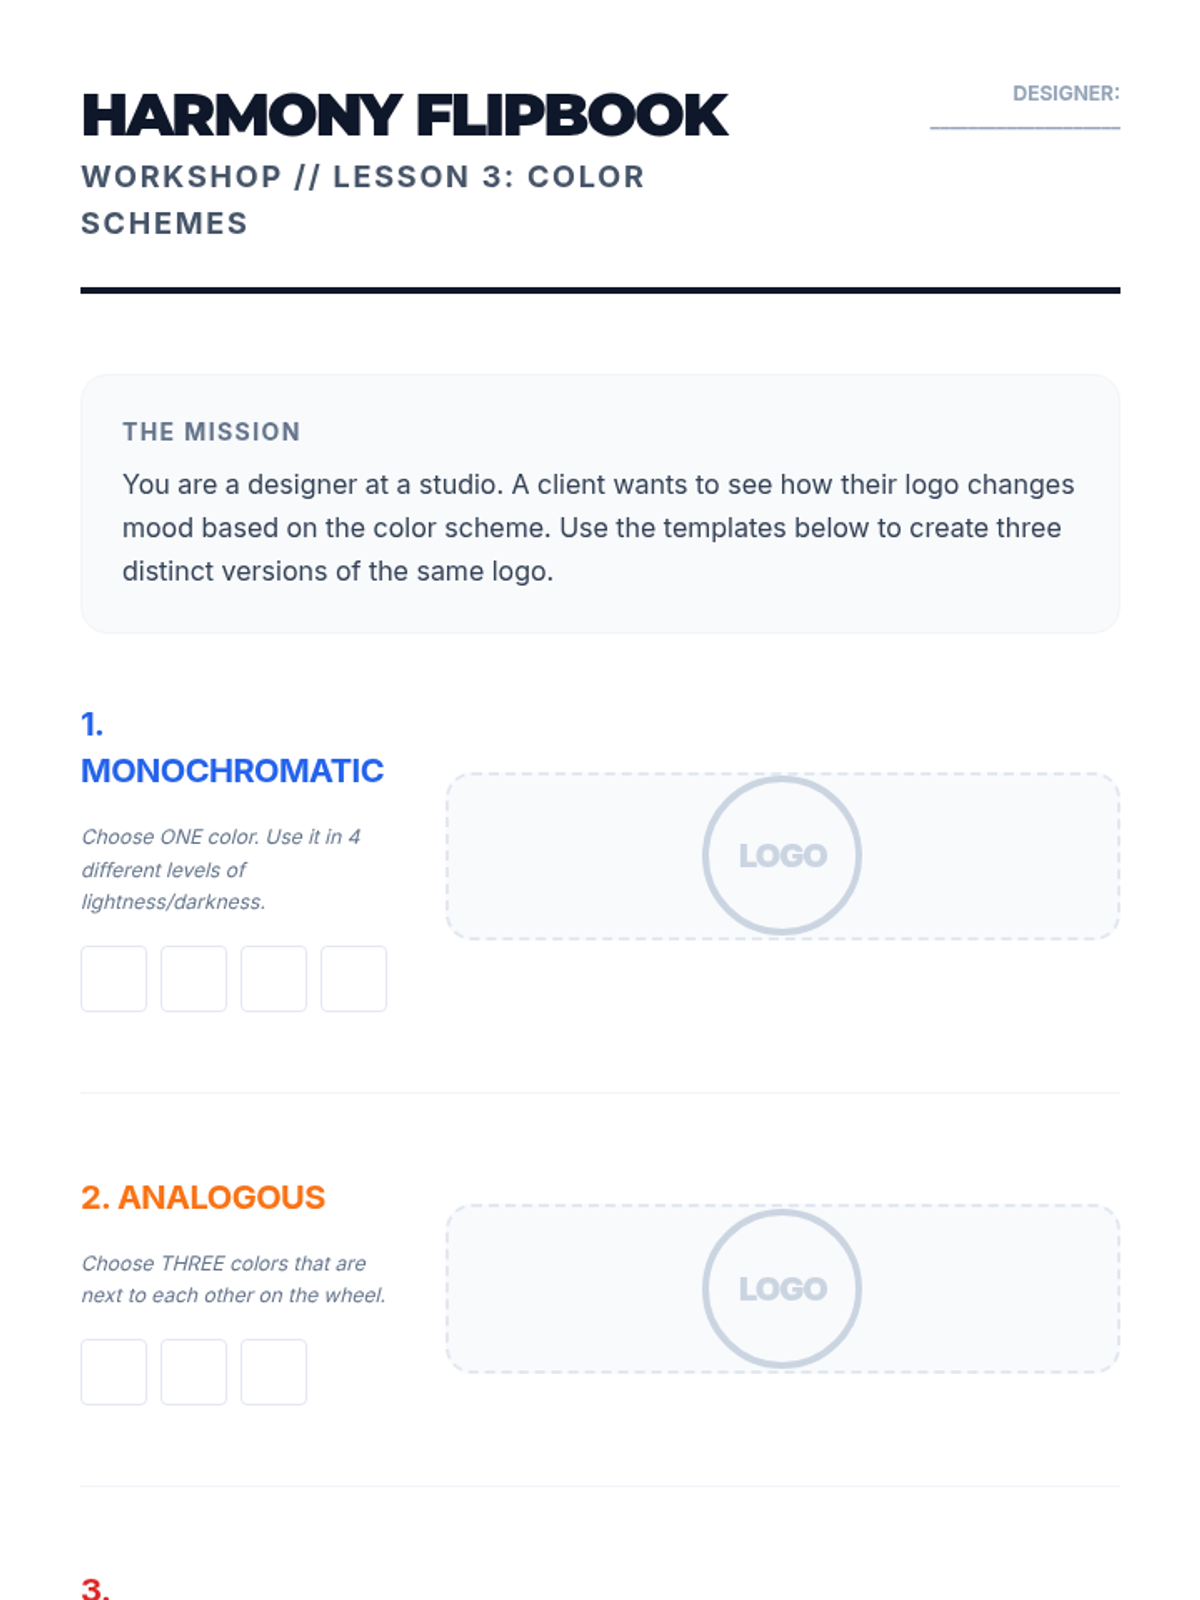
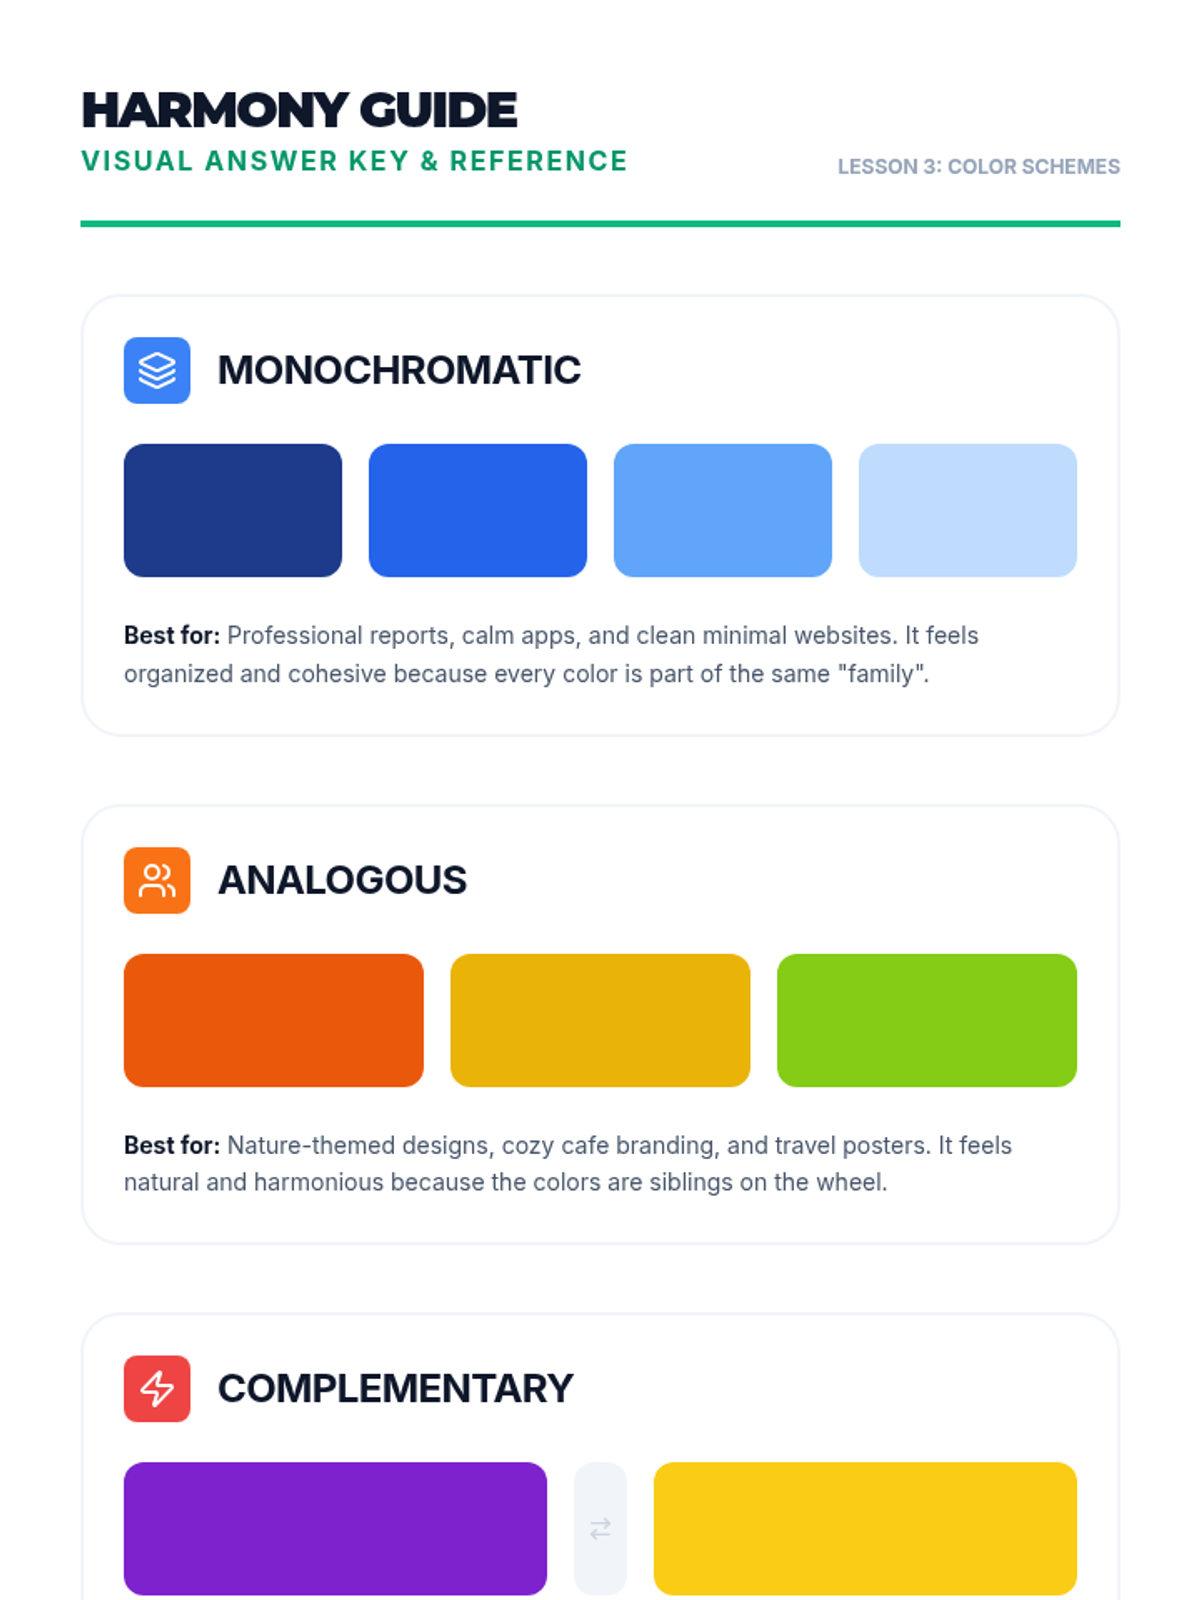
Focuses on building professional color palettes using standard harmonies (complementary, analogous, monochromatic). Students learn how to create balance and contrast.
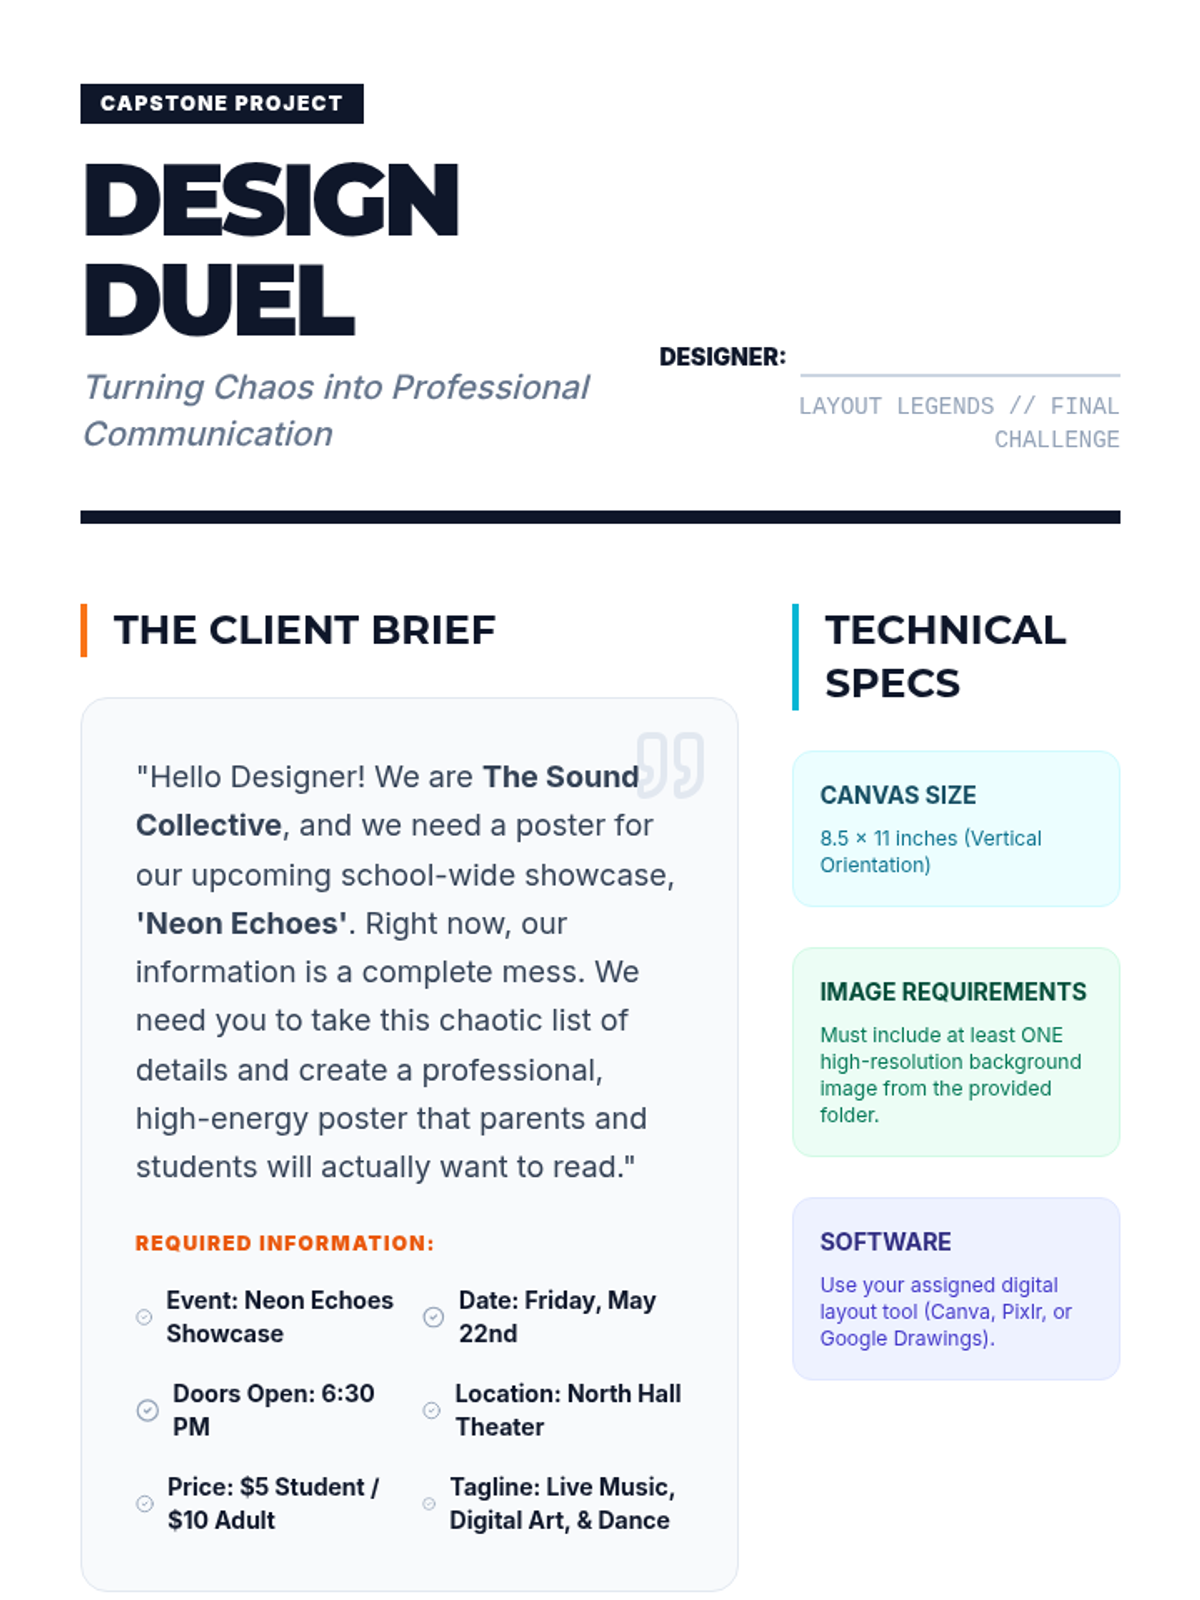
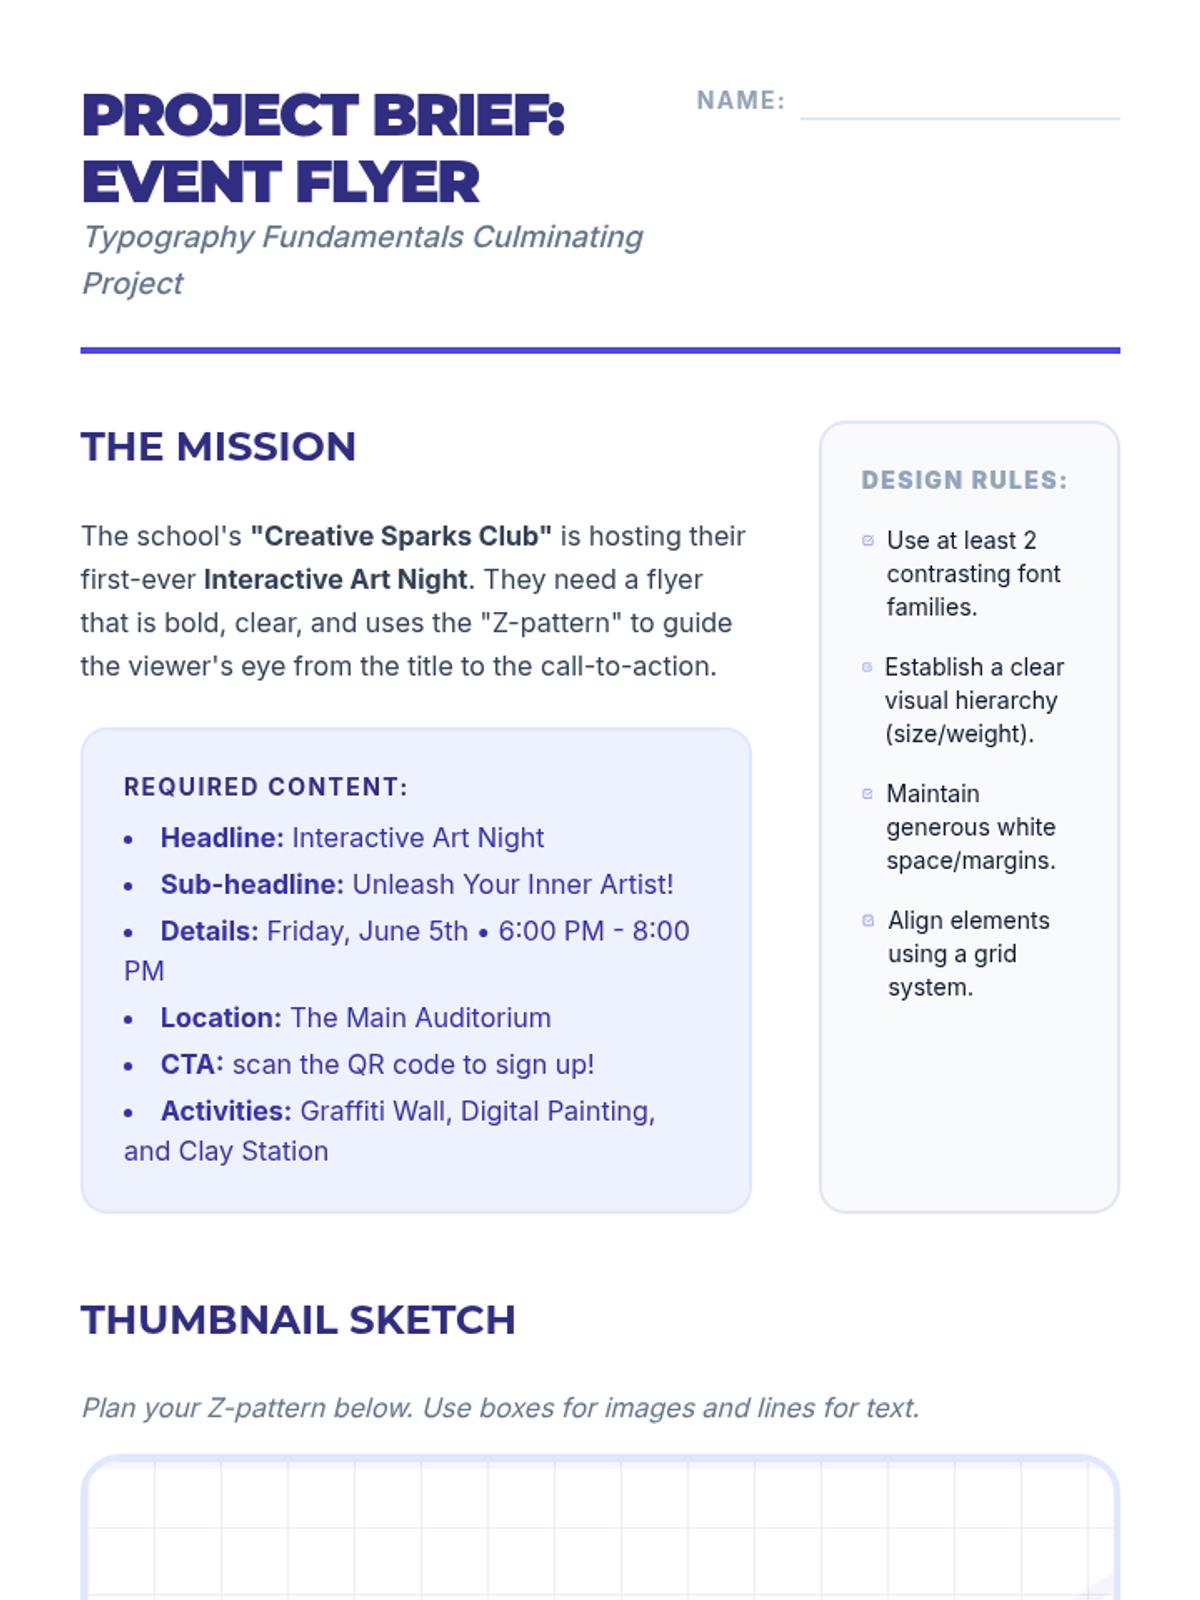
The capstone project where students apply all learned principles to fulfill a client brief and design a professional school event poster.
Focusing on the marriage of graphics and copy, students master techniques for placing legible text over complex background images.
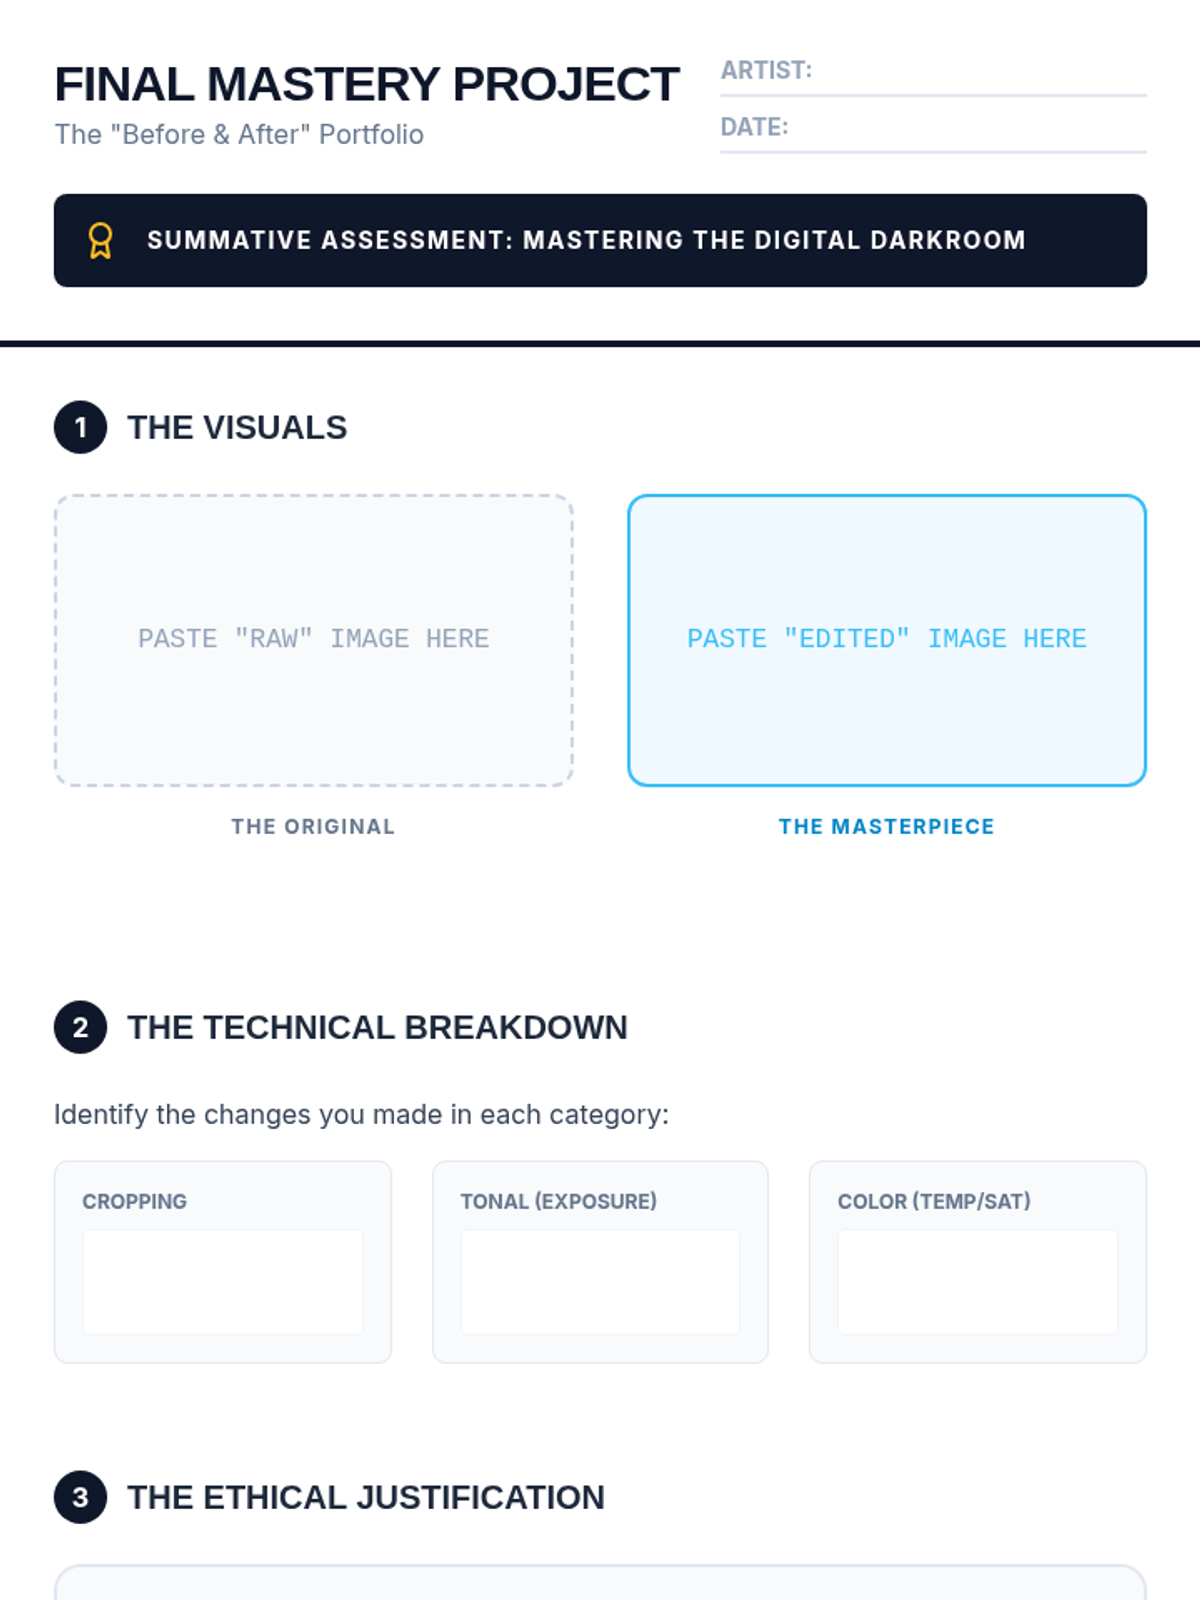
Students discuss the impact of filters and retouching, culminating in a final project where they justify their editing choices.
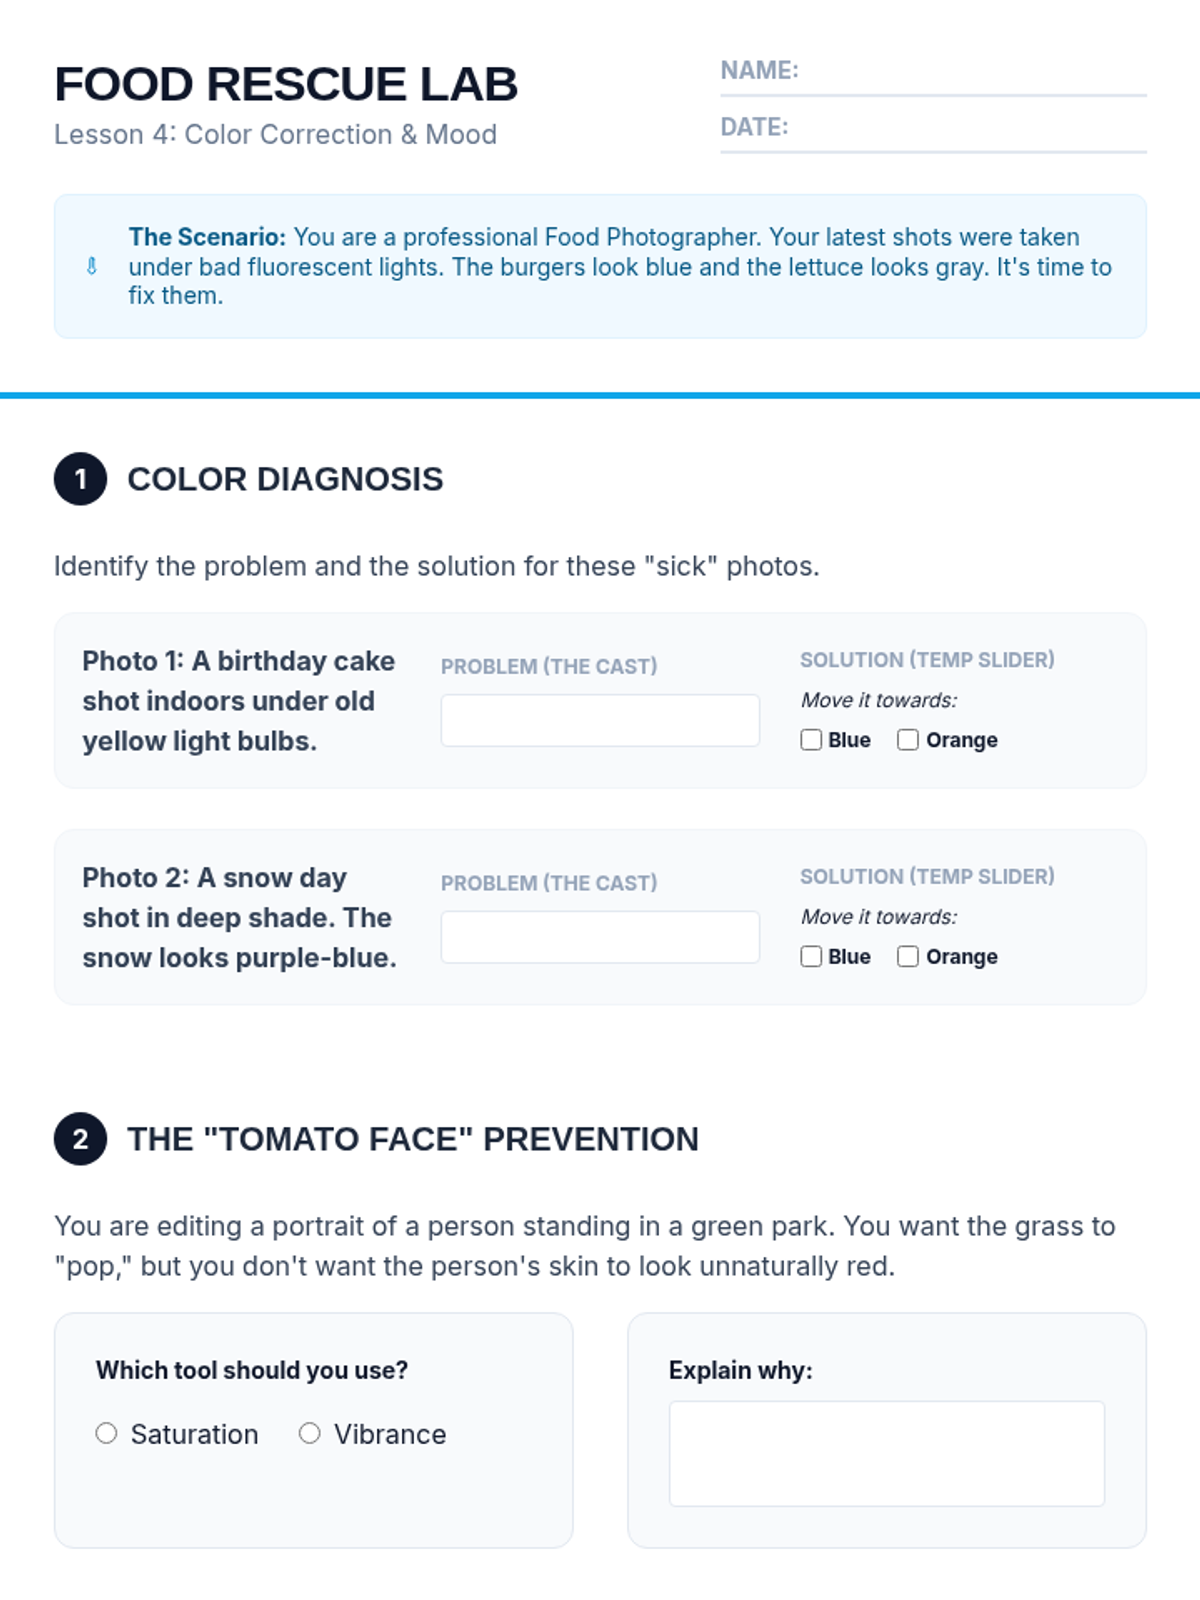
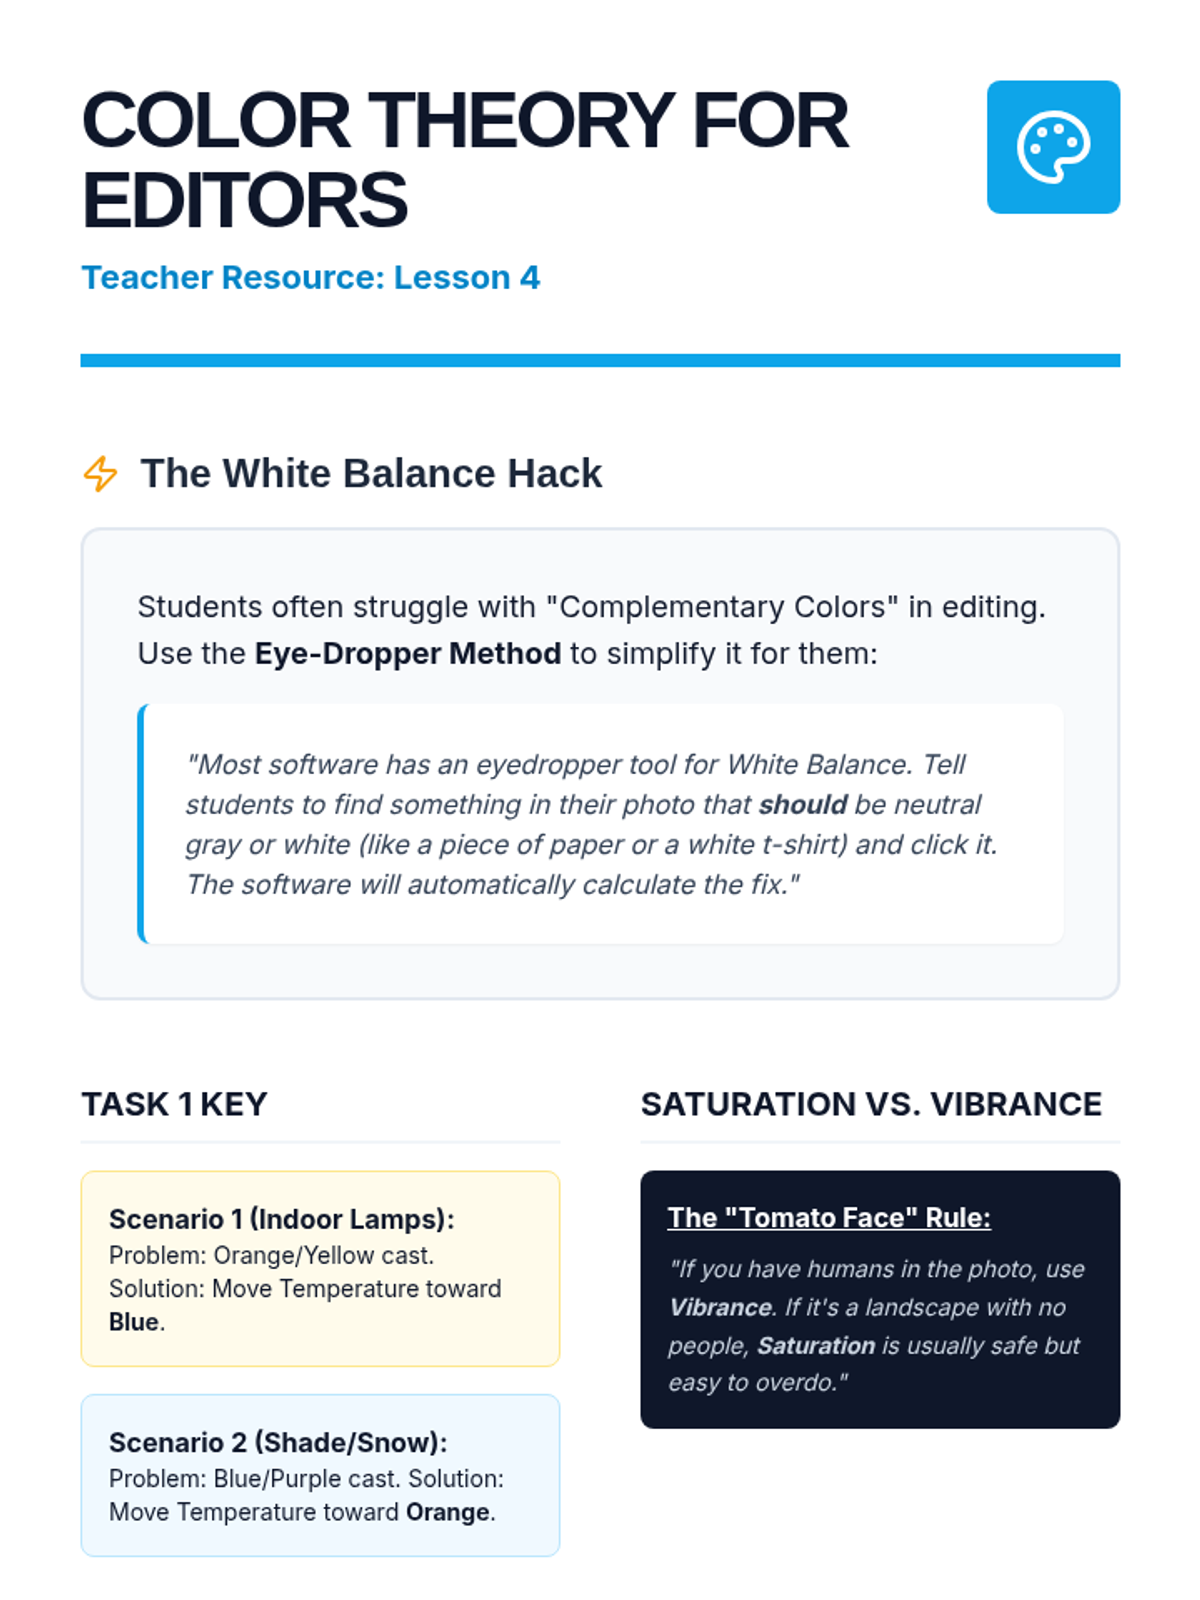
This lesson covers White Balance and Saturation, teaching students how to fix color casts and use color to emphasize texture.
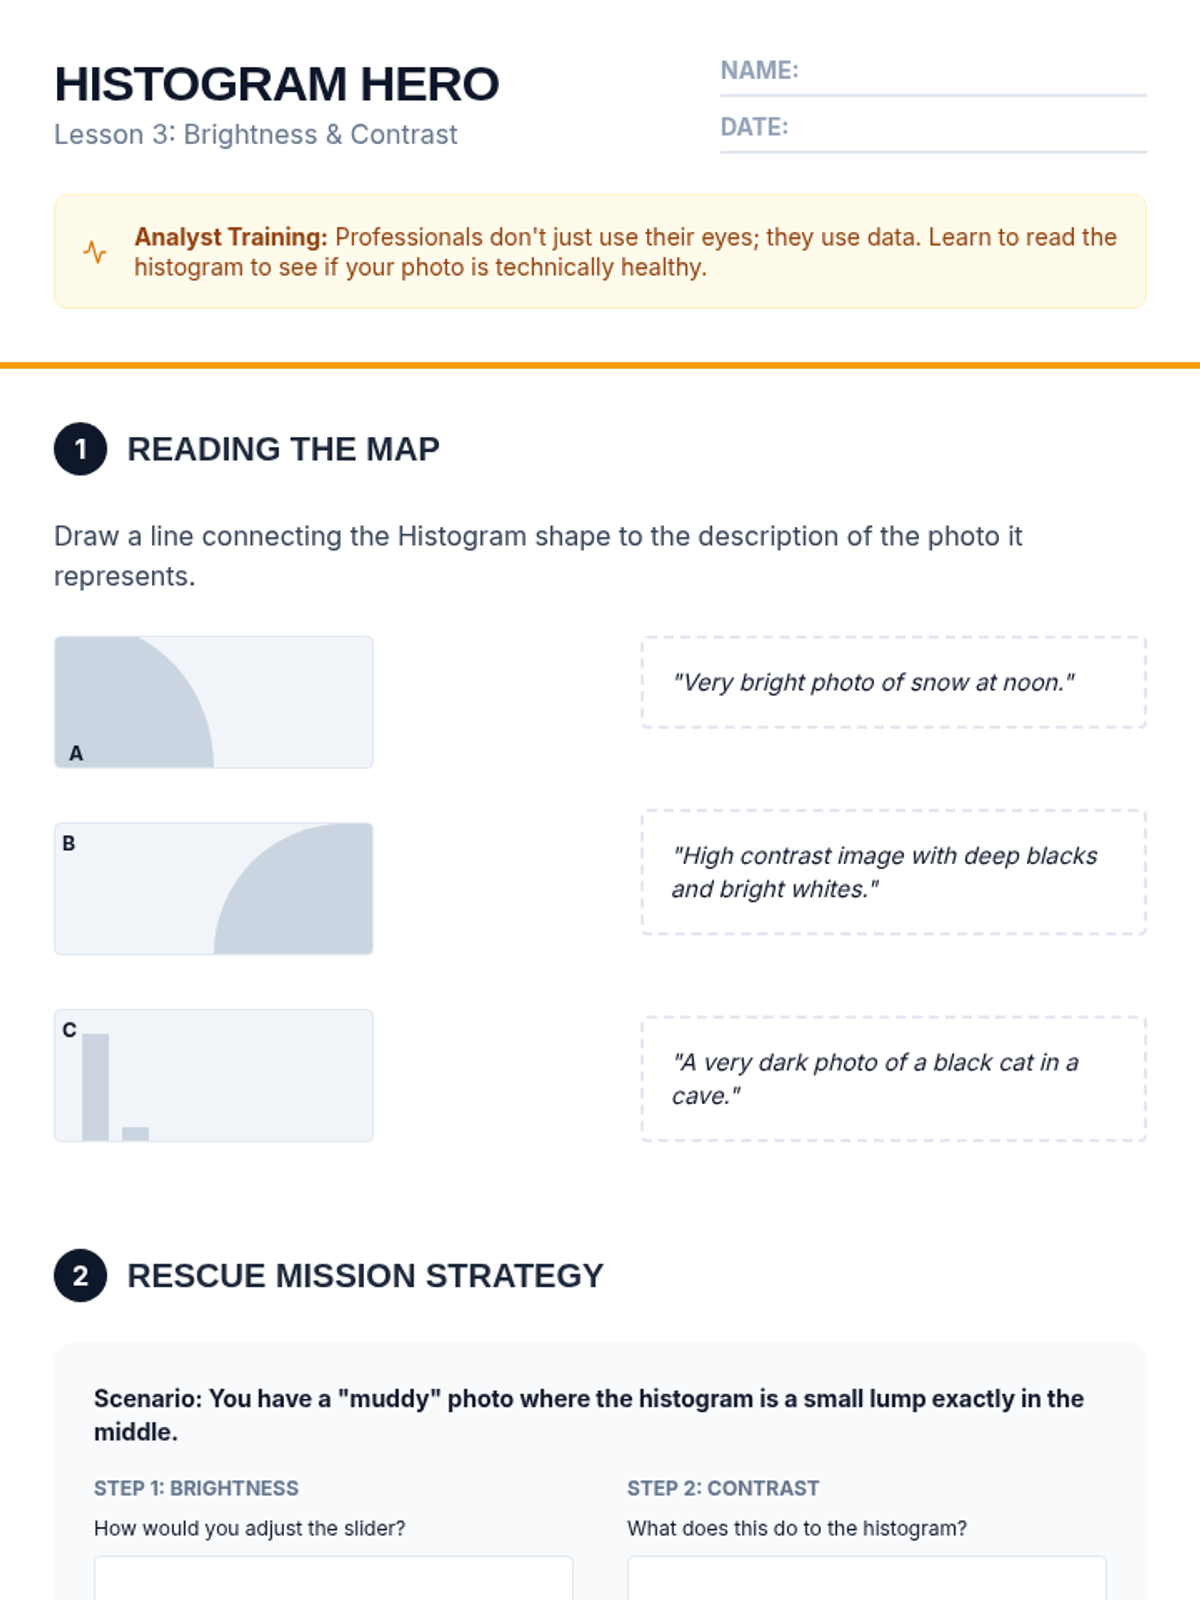
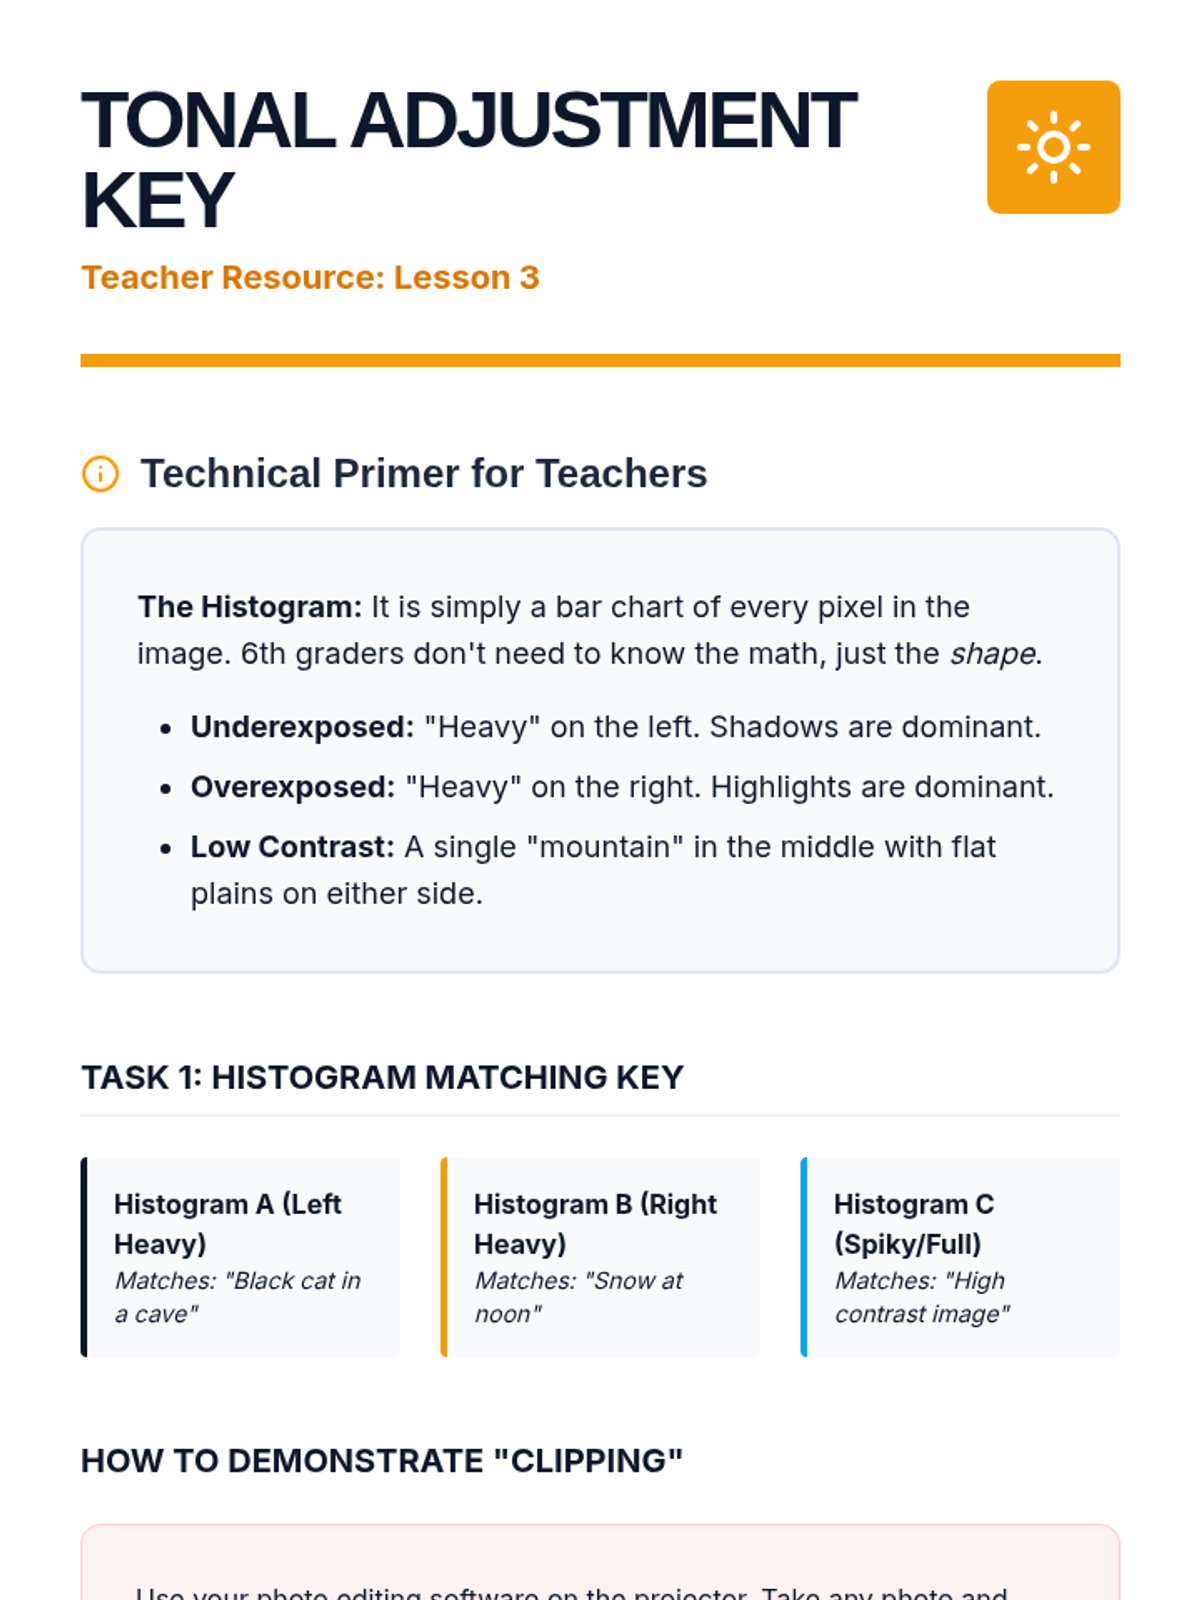
Students learn to read basic histograms and adjust exposure levels to rescue underexposed images and add 'pop' through contrast.
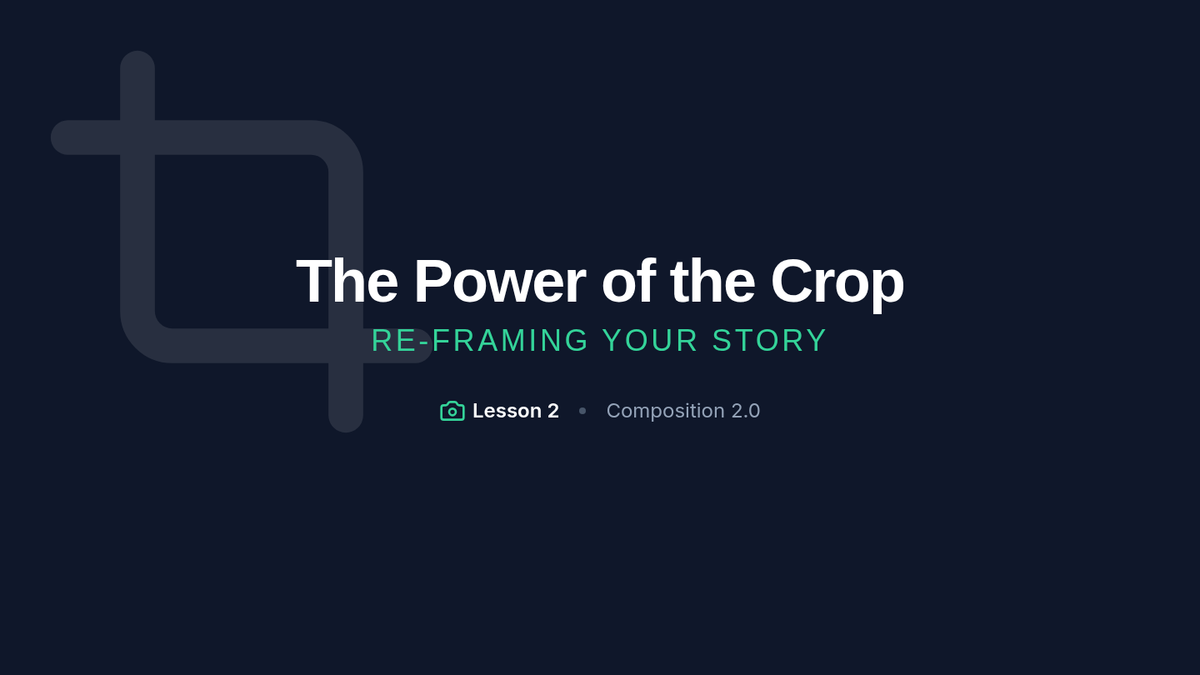
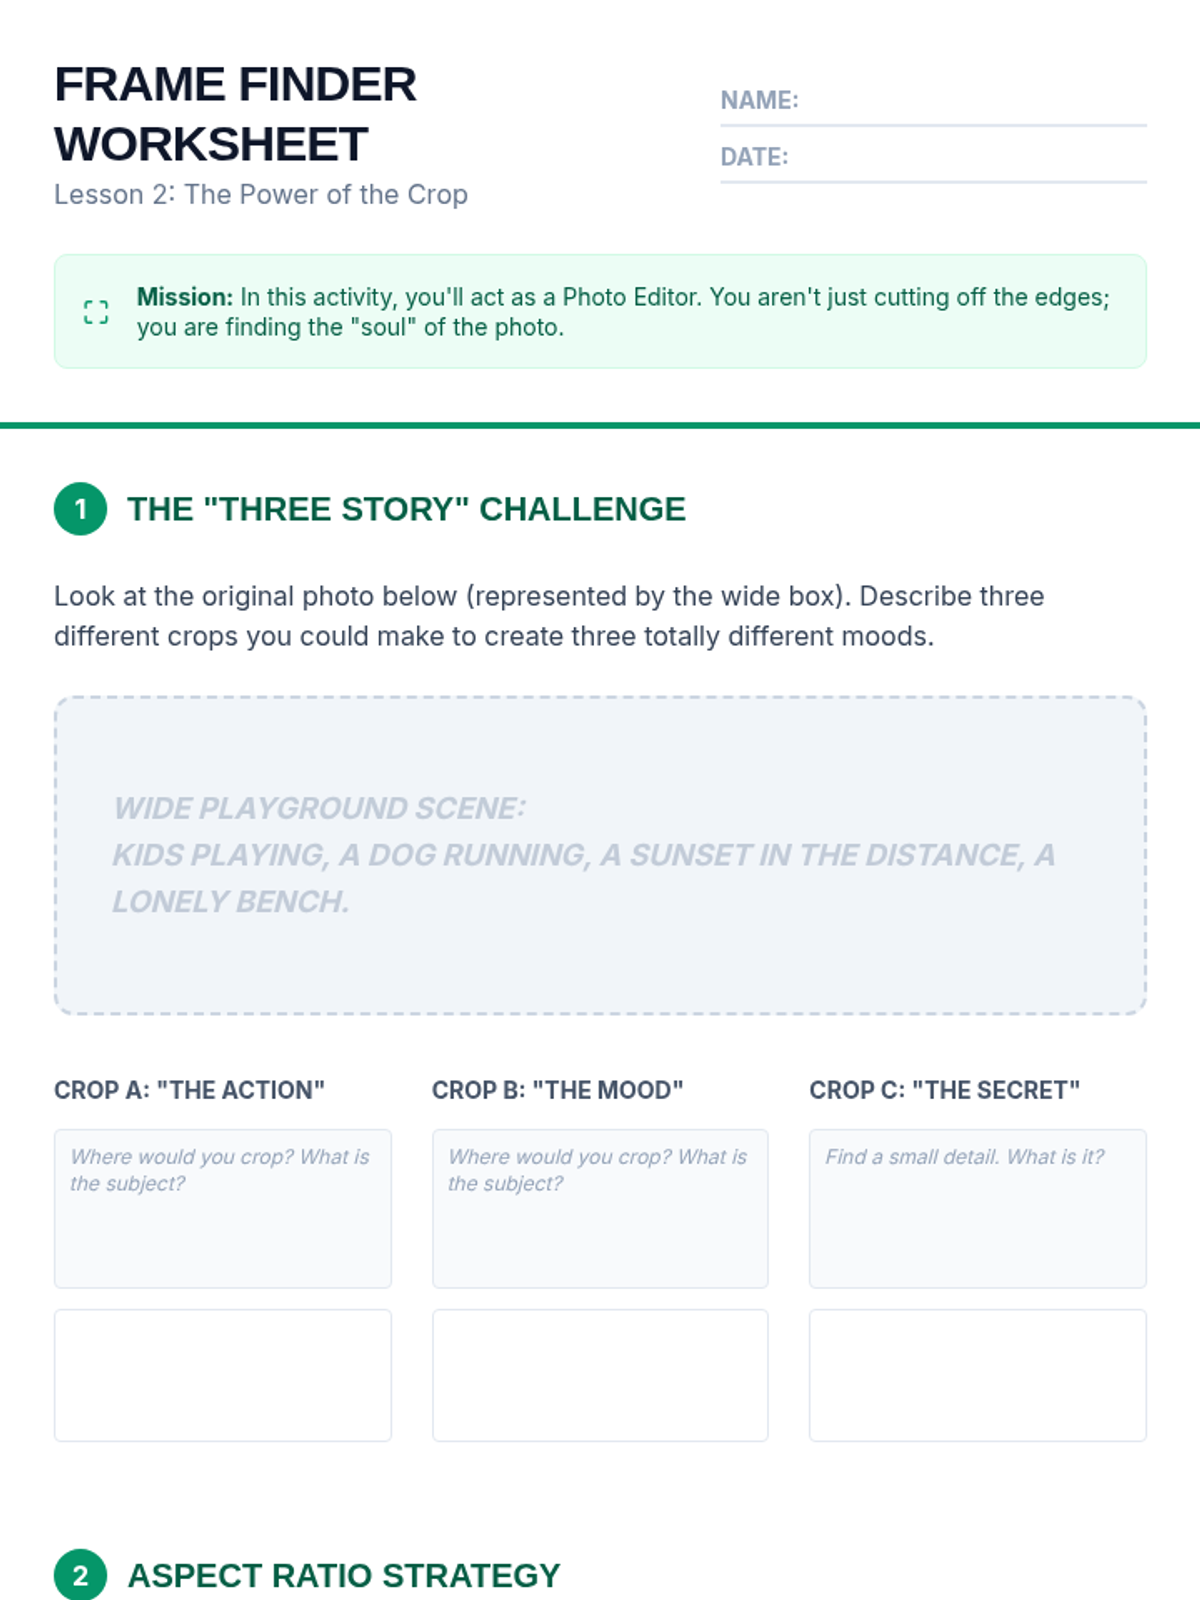
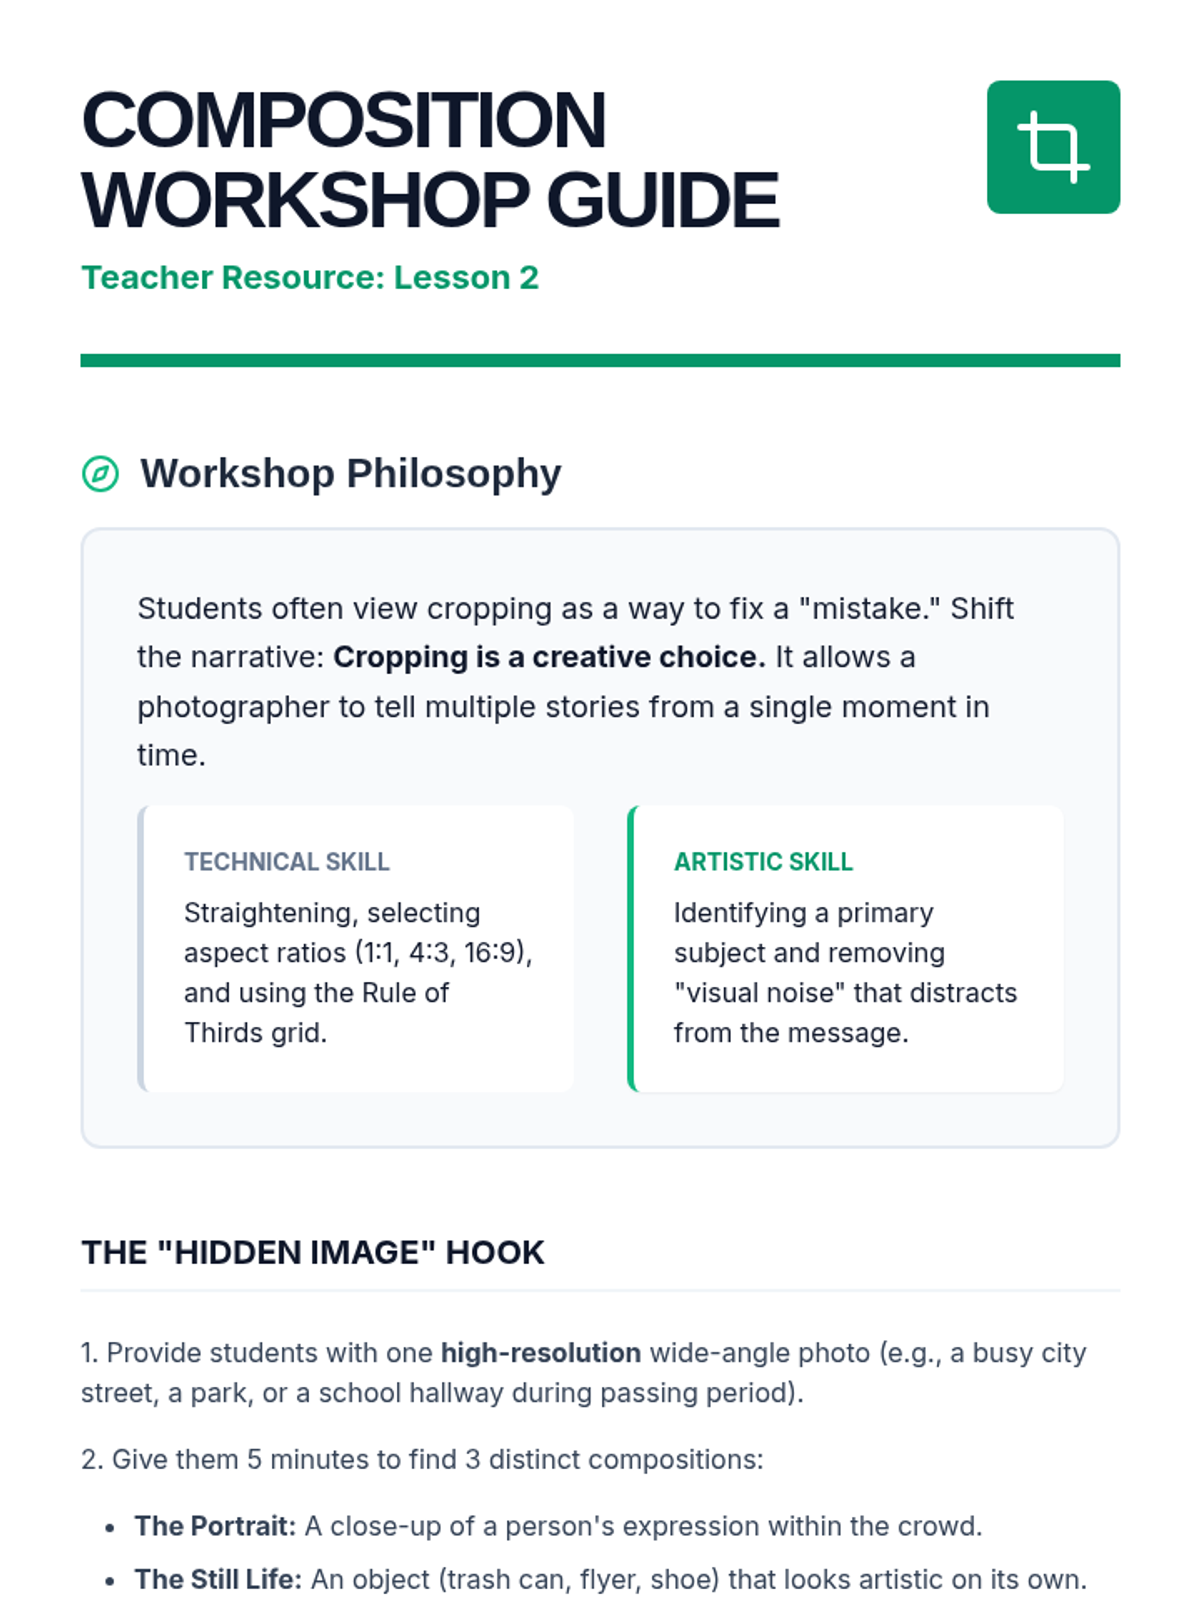
Learners revisit composition by cropping existing images to improve framing, experimenting with aspect ratios and straightening horizons.
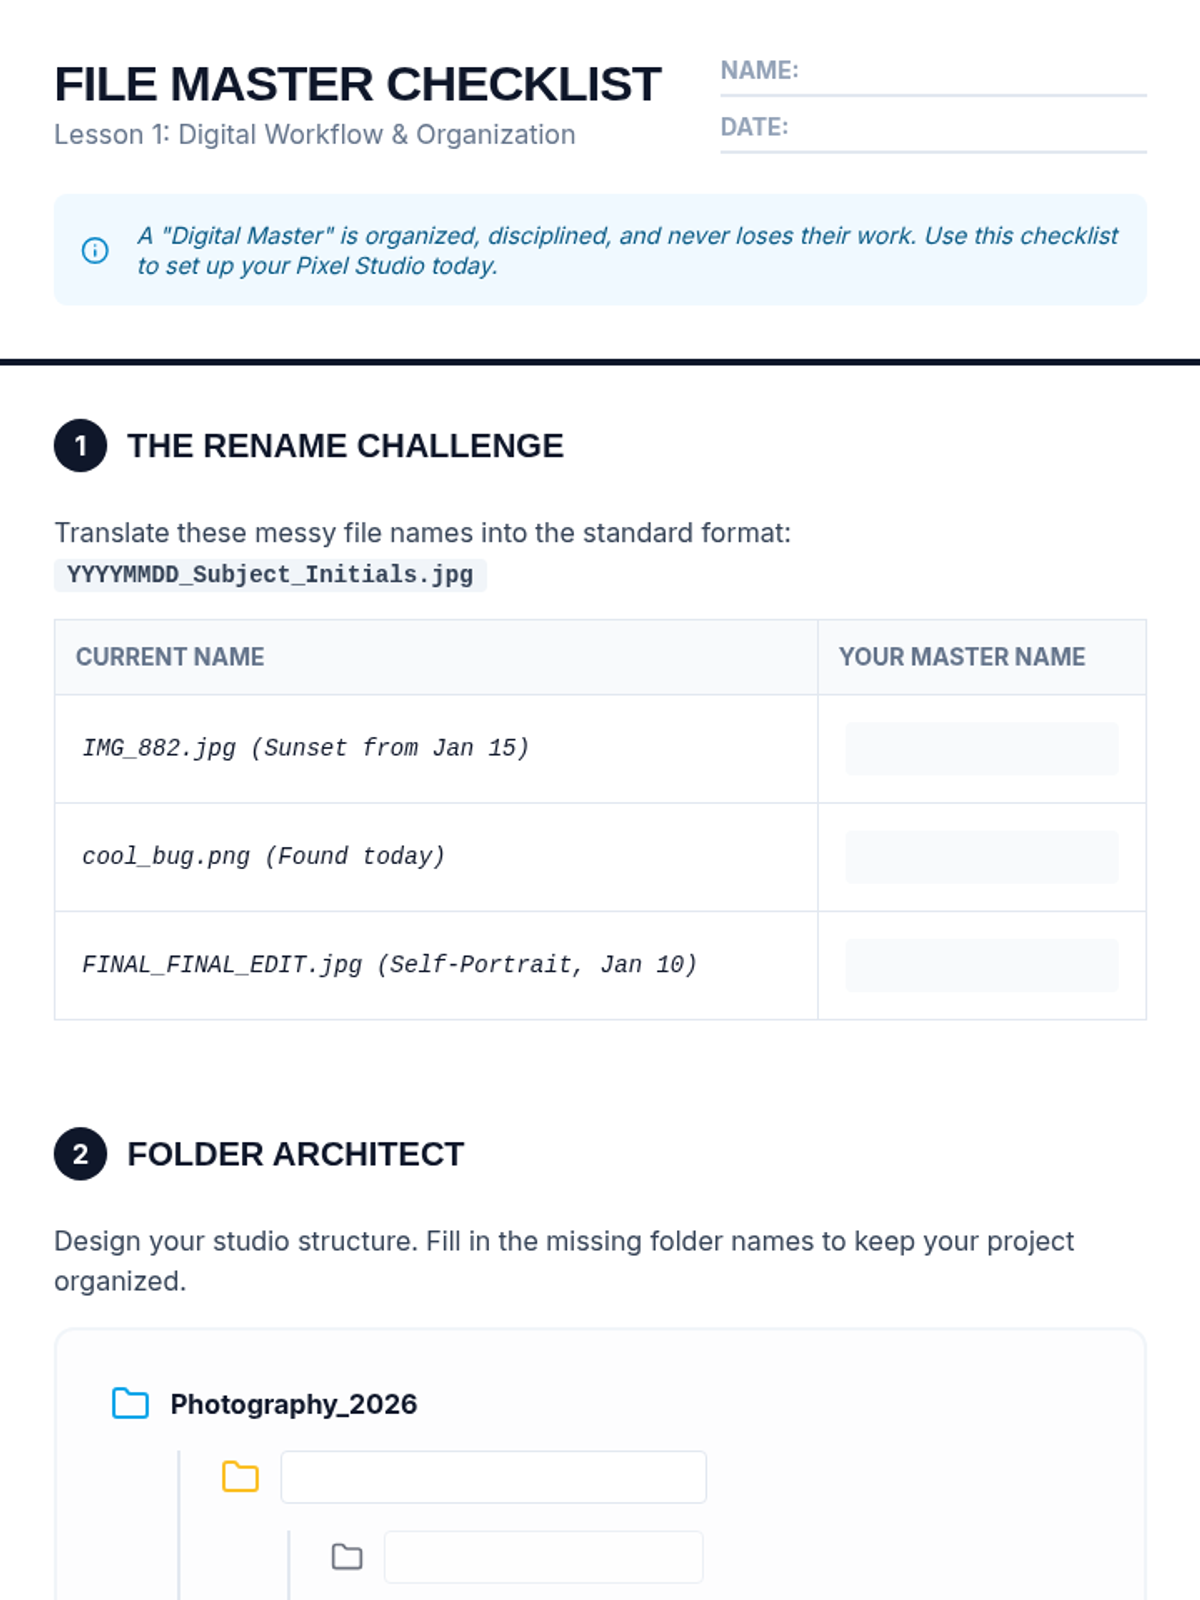
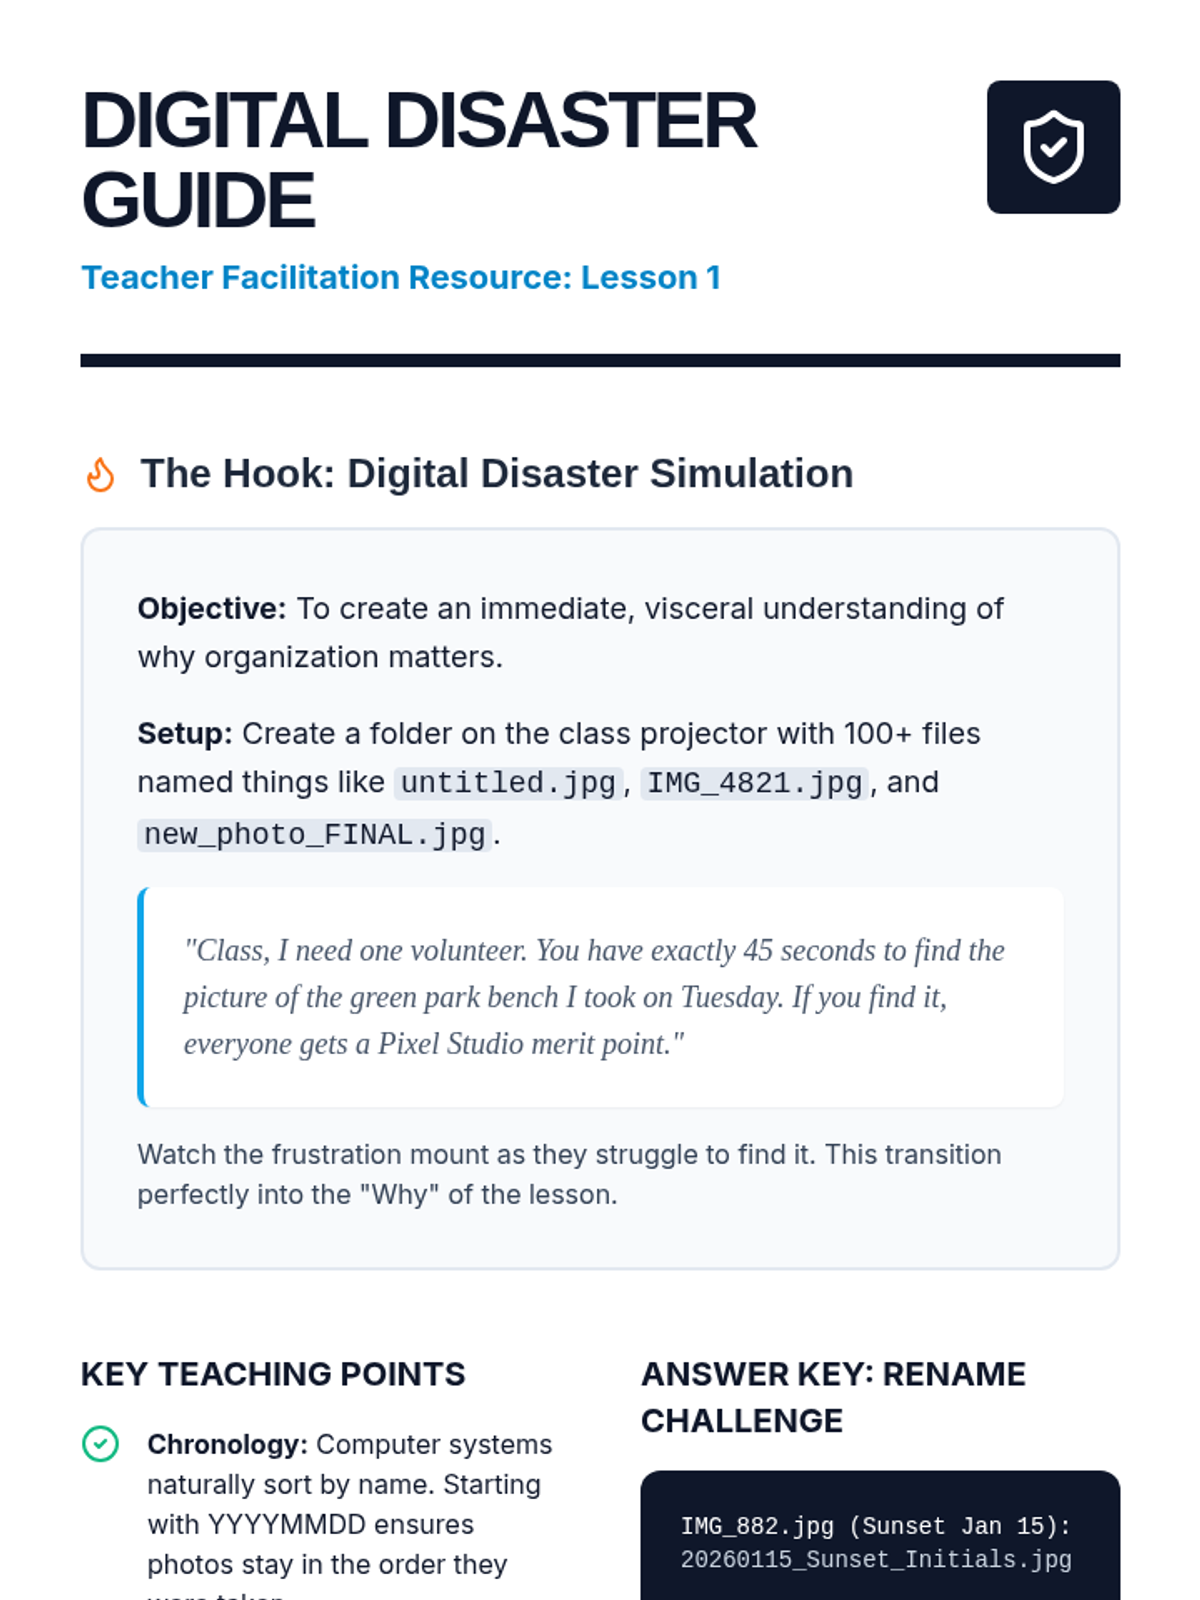
Students learn how to import, organize, and name their digital files, establishing a folder structure to keep original files safe before editing.
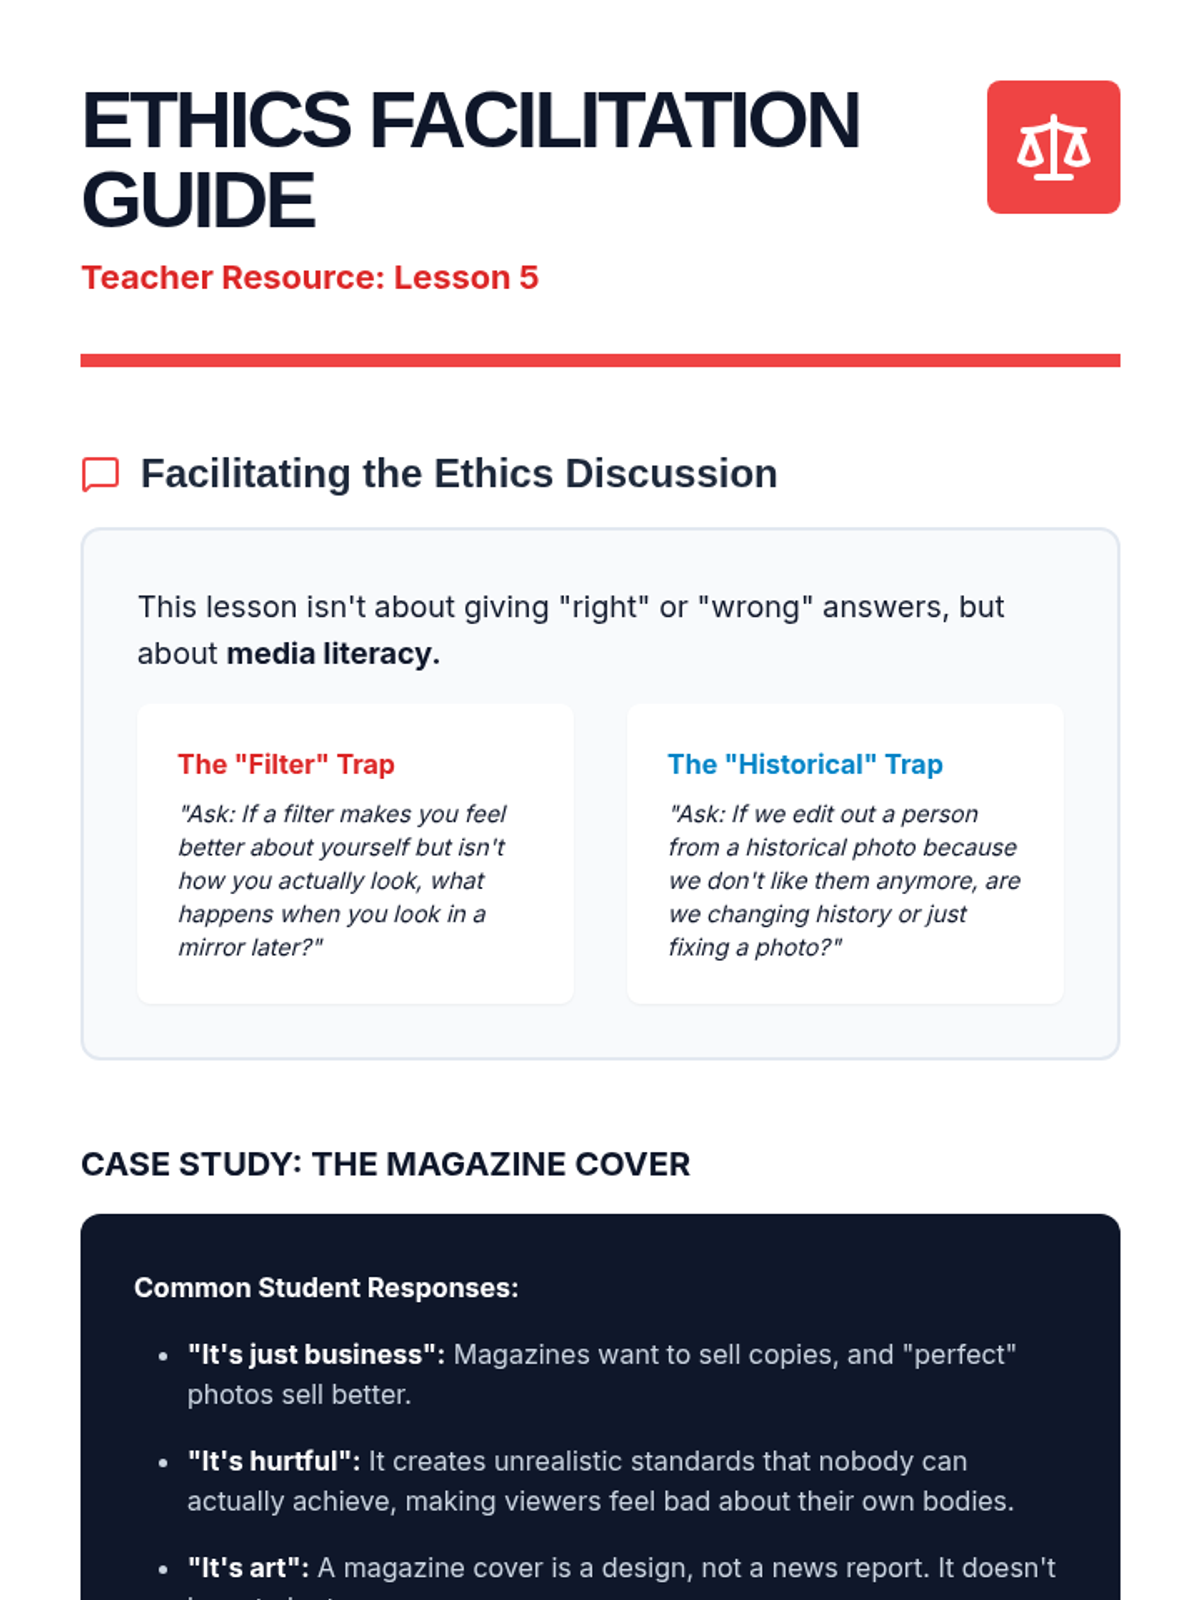
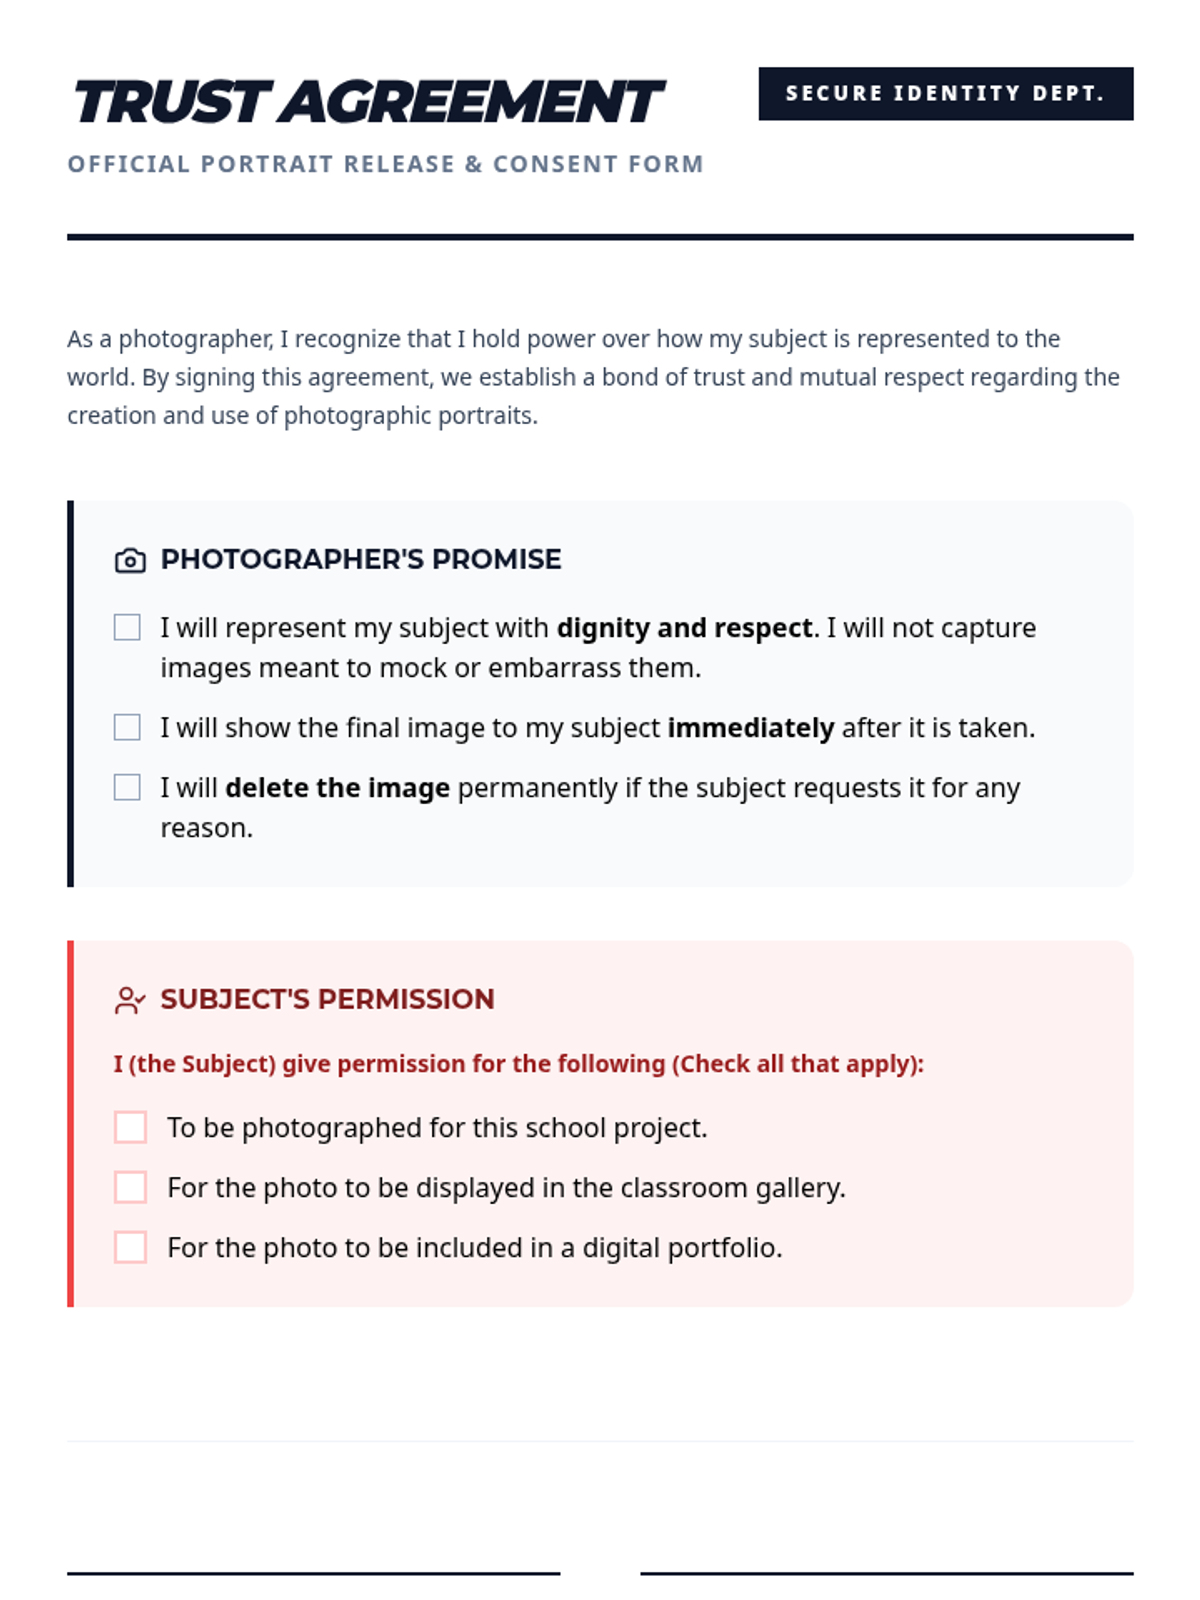
A deep dive into the ethics of photography, focusing on consent, respect, and the responsibility of the person behind the lens.
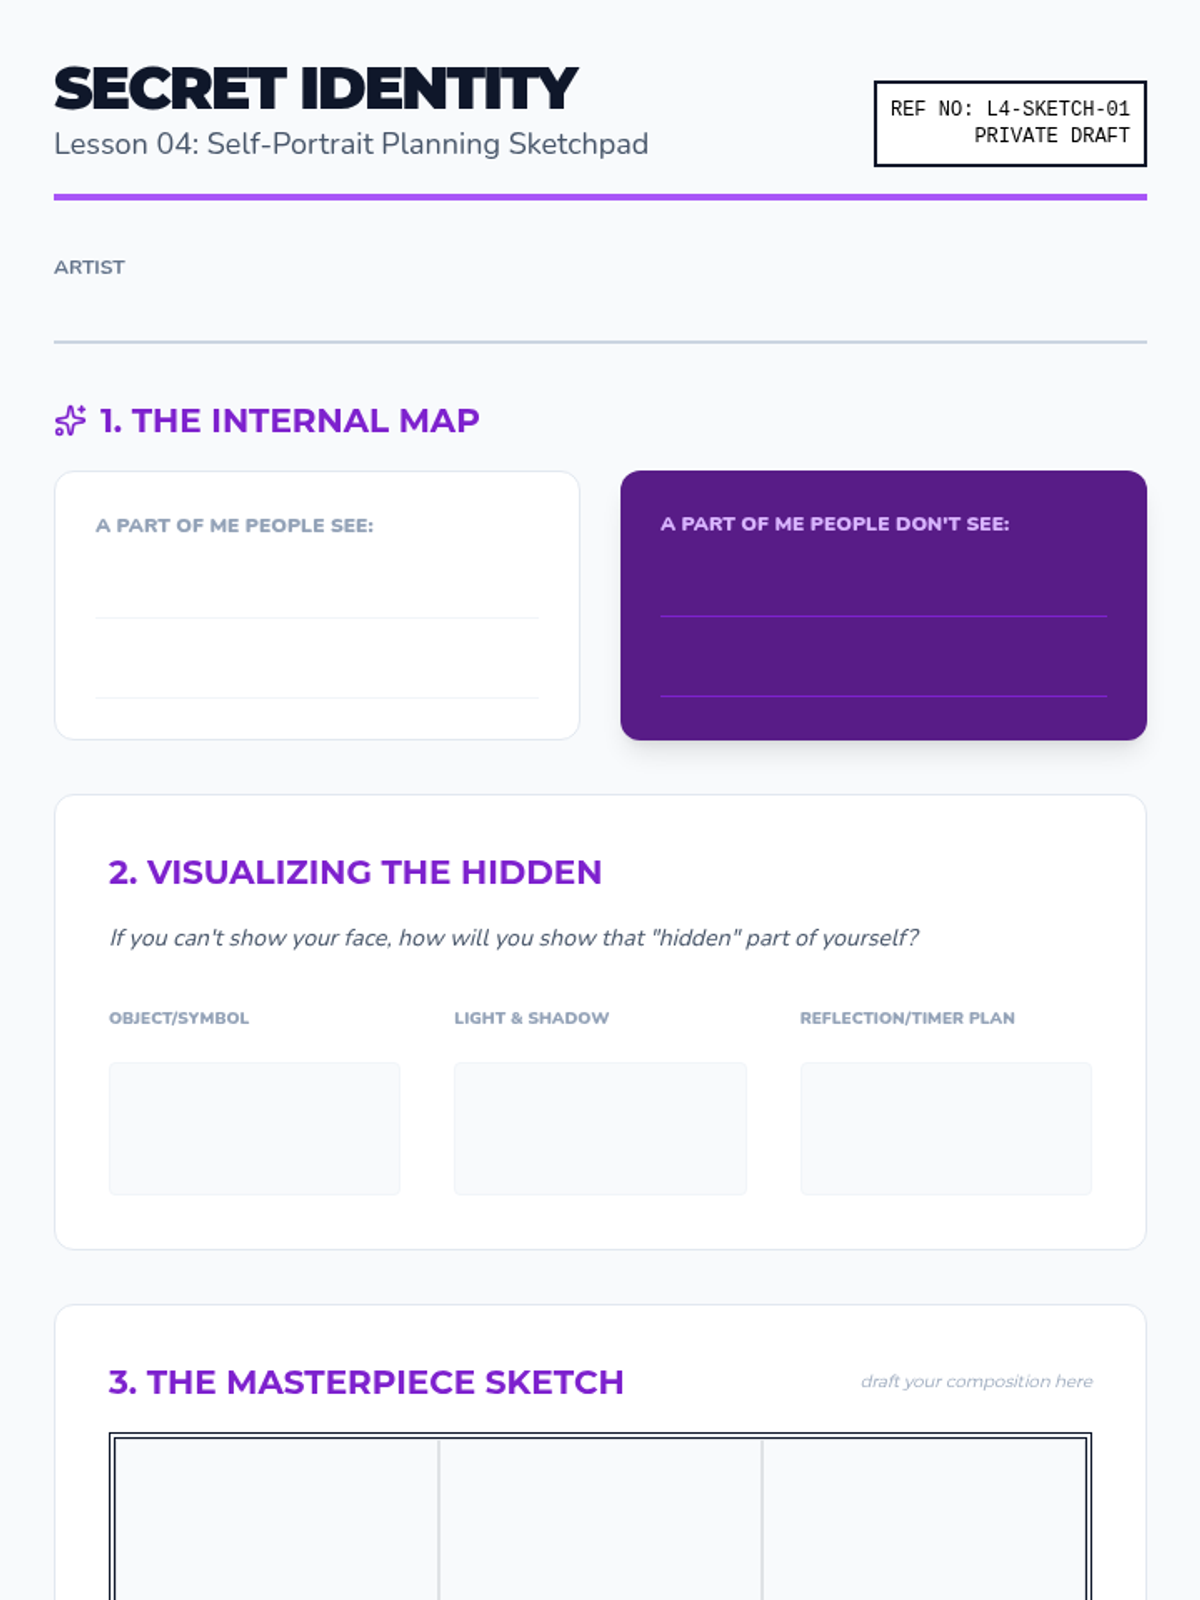
Exploring identity through the self-portrait, students use technical tools like timers to represent hidden aspects of themselves.
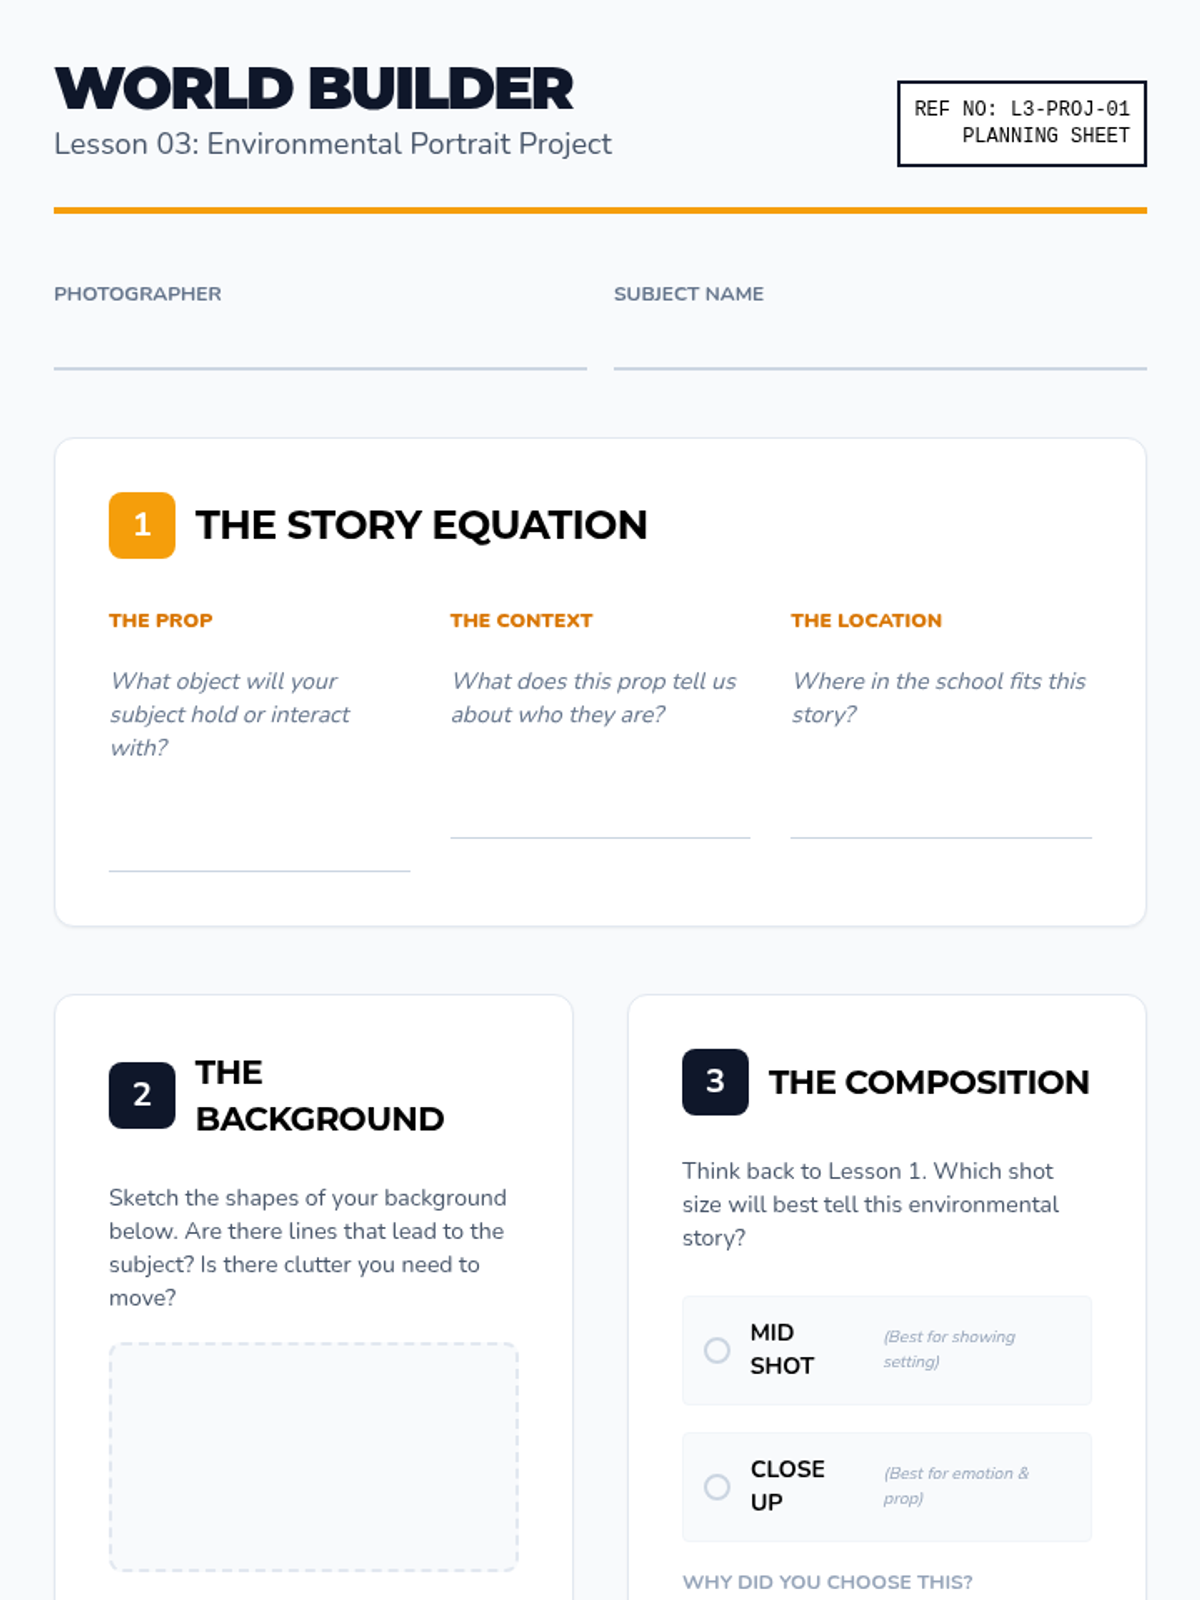
Students learn to use the subject's environment and props to tell a deeper story about who they are.
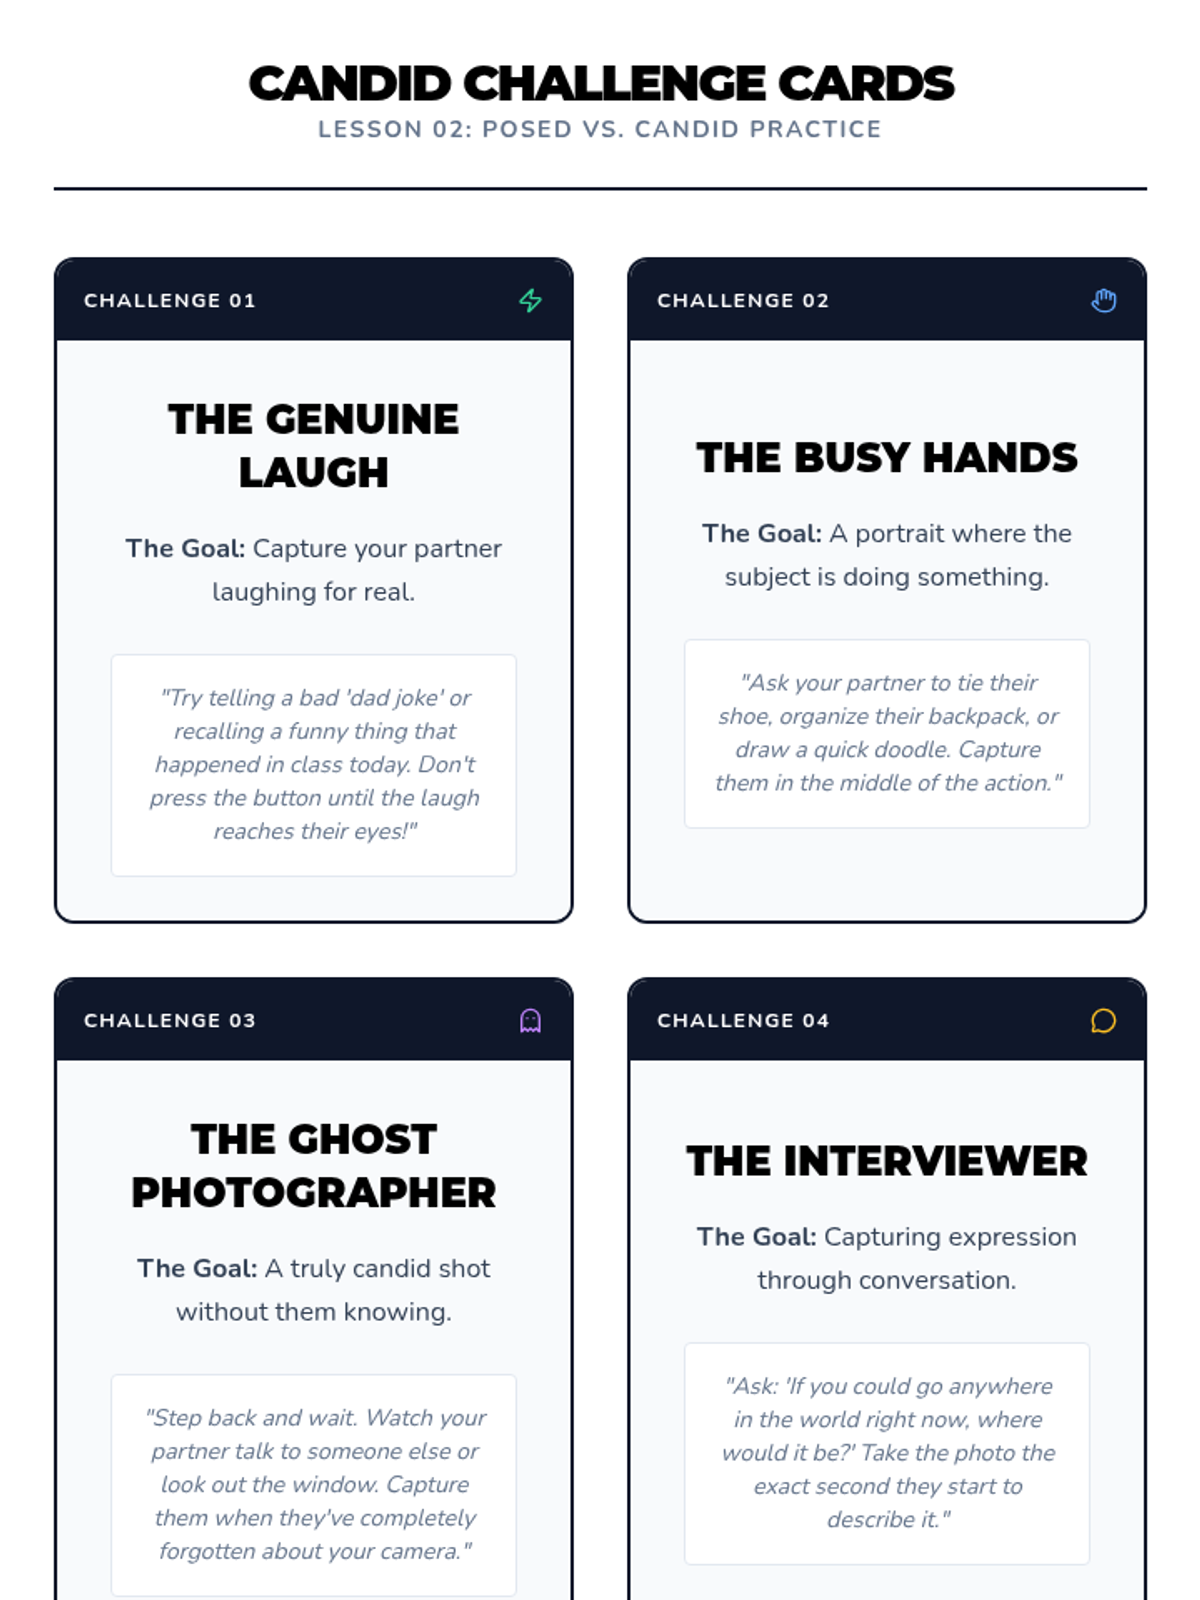
Learners distinguish between directed poses and candid moments, practicing ways to make subjects feel comfortable for natural expressions.
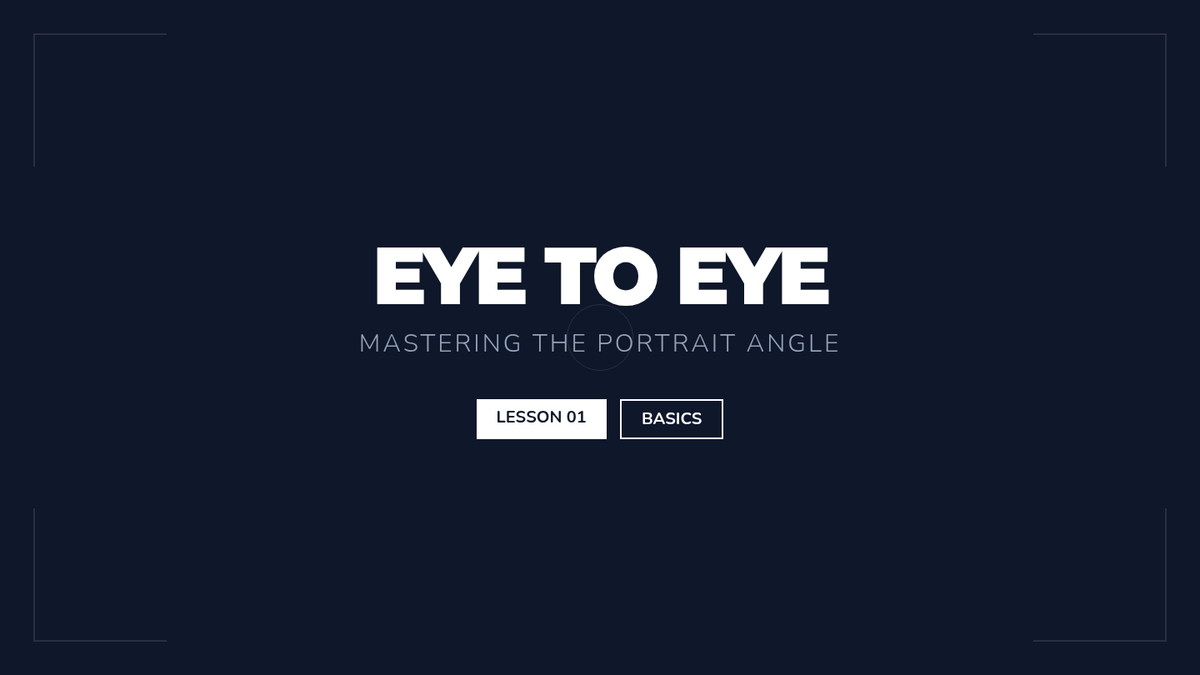
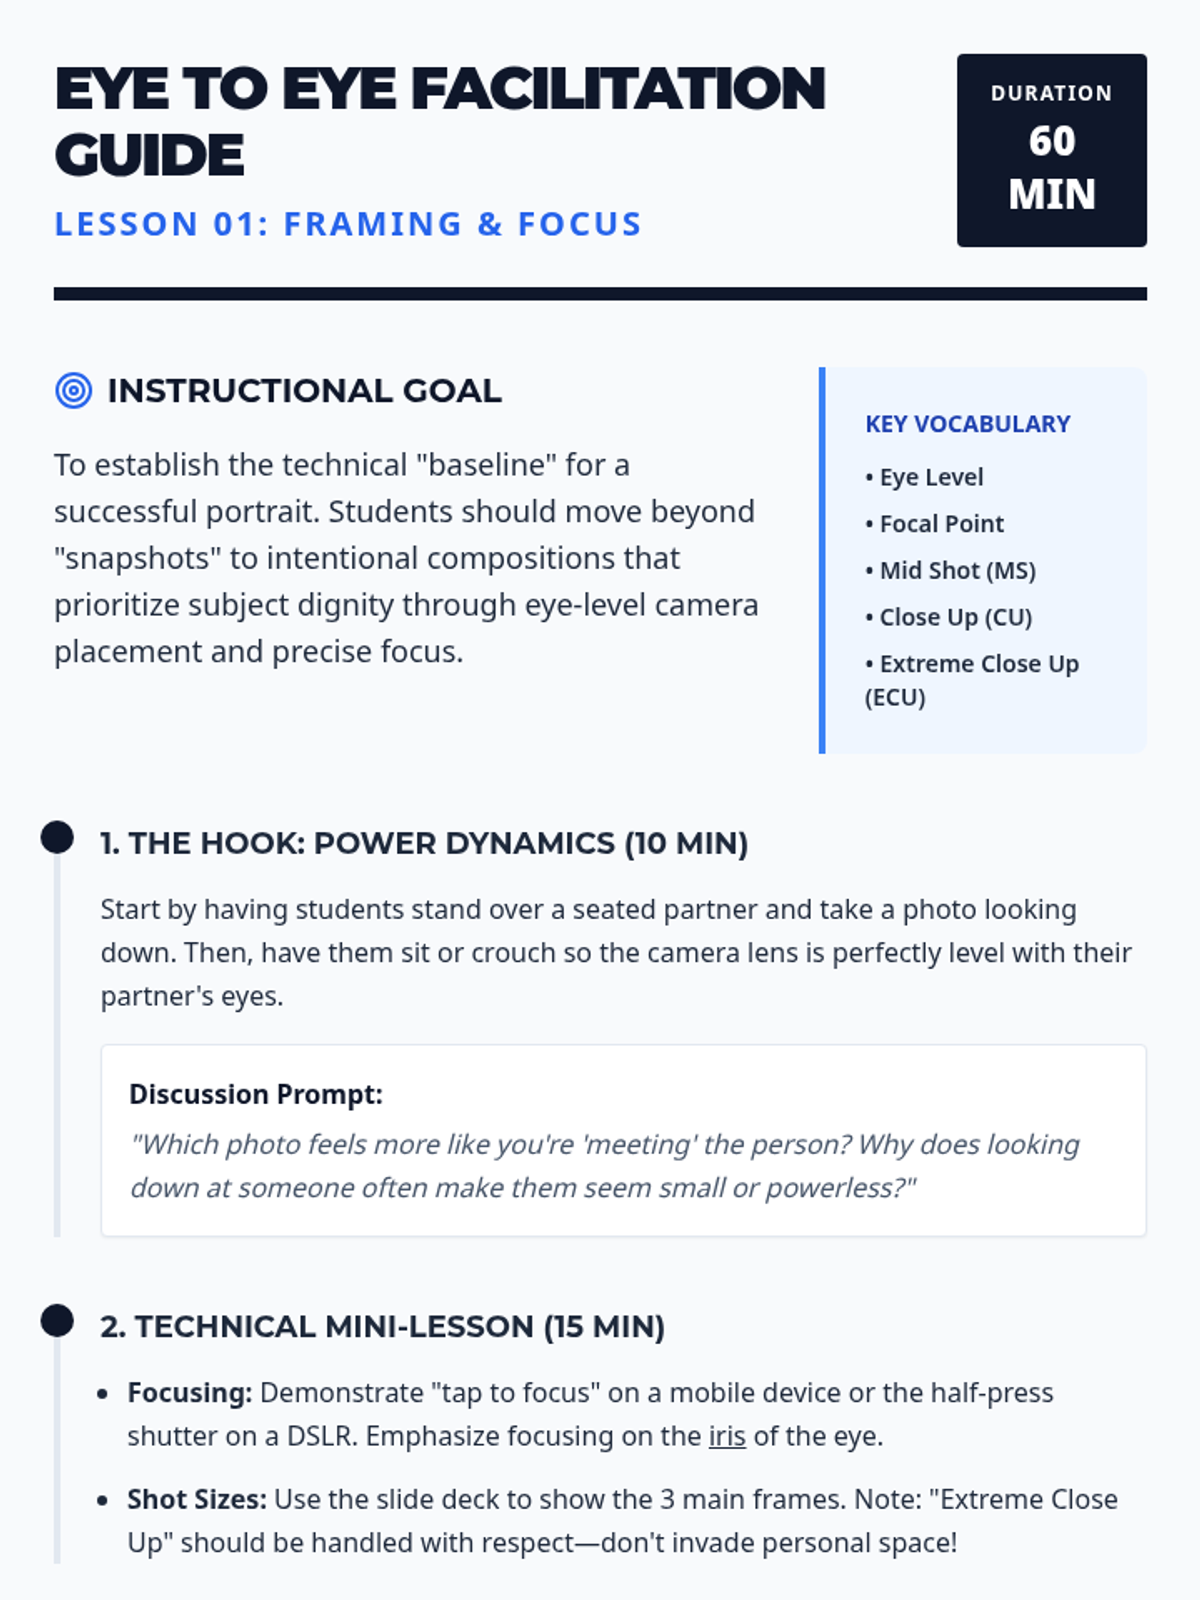
Students practice technical basics like eye-level angles and sharp focus, experimenting with how distance changes the intimacy of a portrait.
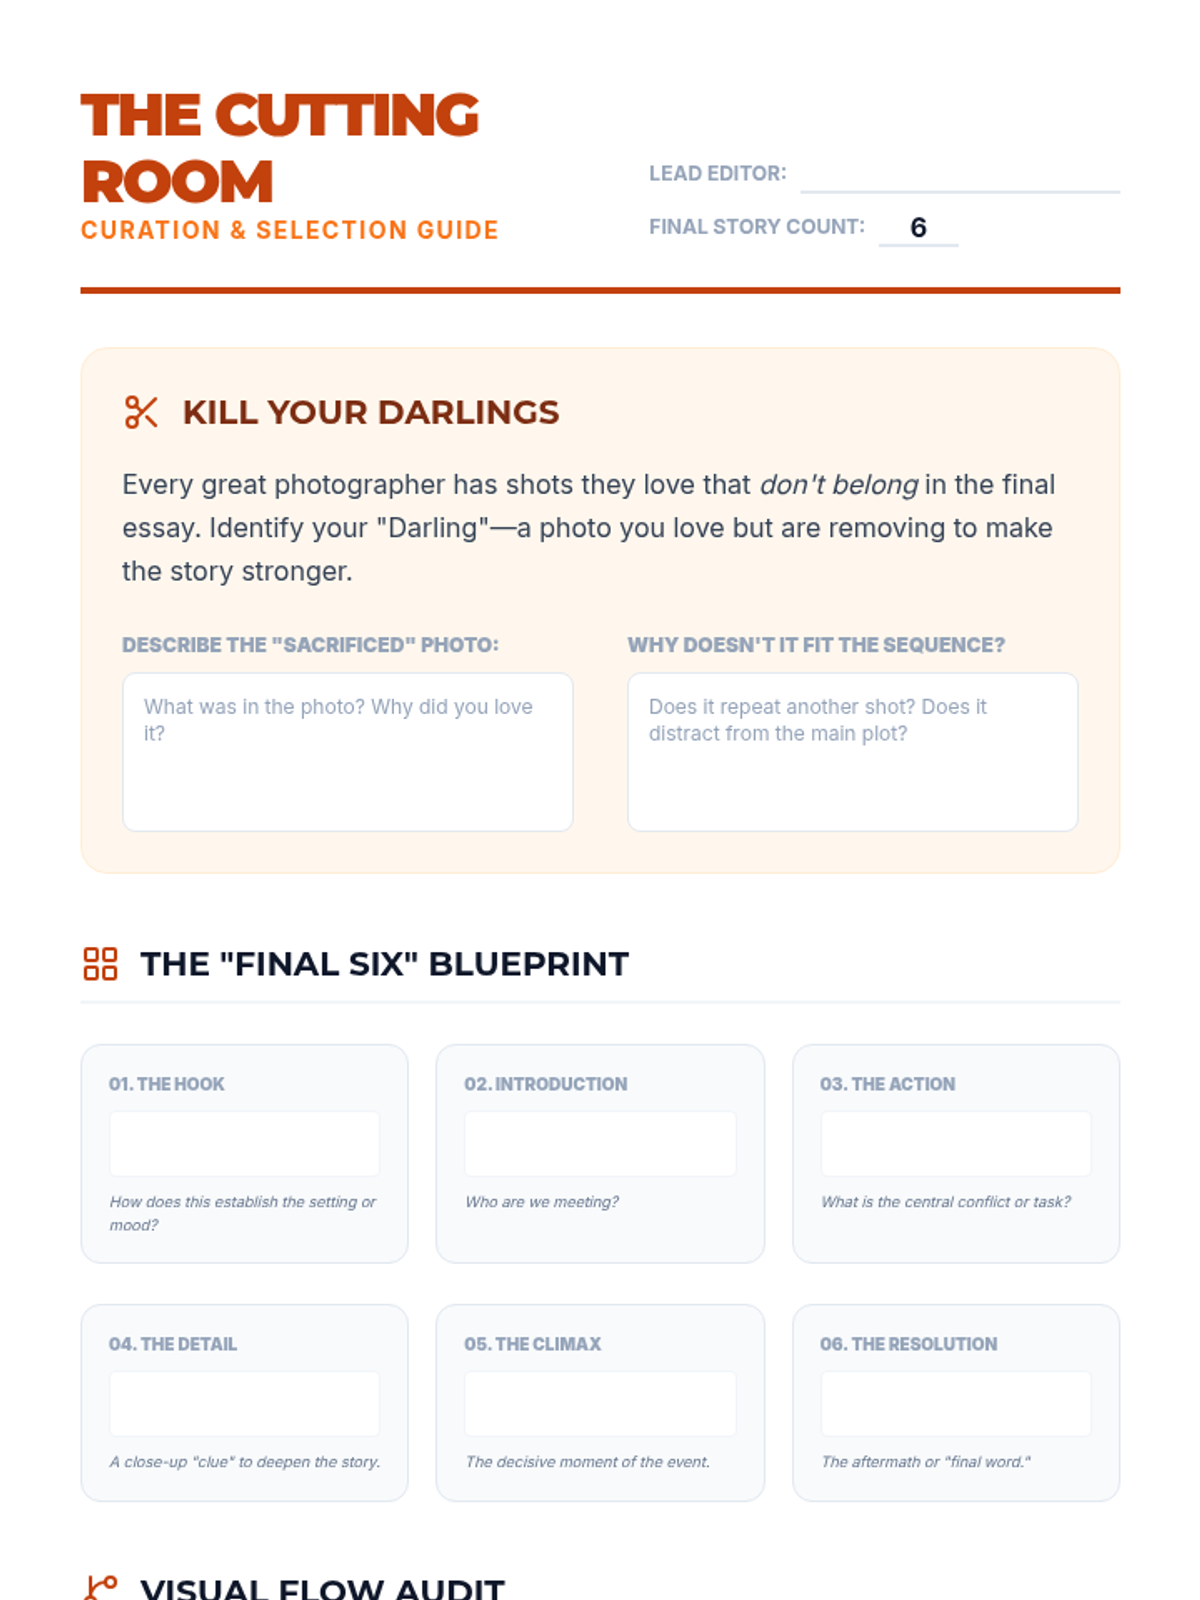
Students finalize their layouts and present their visual stories. They add minimal captions and reflect on how their sequencing choices impacted the viewer's interpretation.
Students print thumbnails or arrange digital files to sequence their stories. They learn the art of editing down, removing repetitive images, and ensuring visual flow.
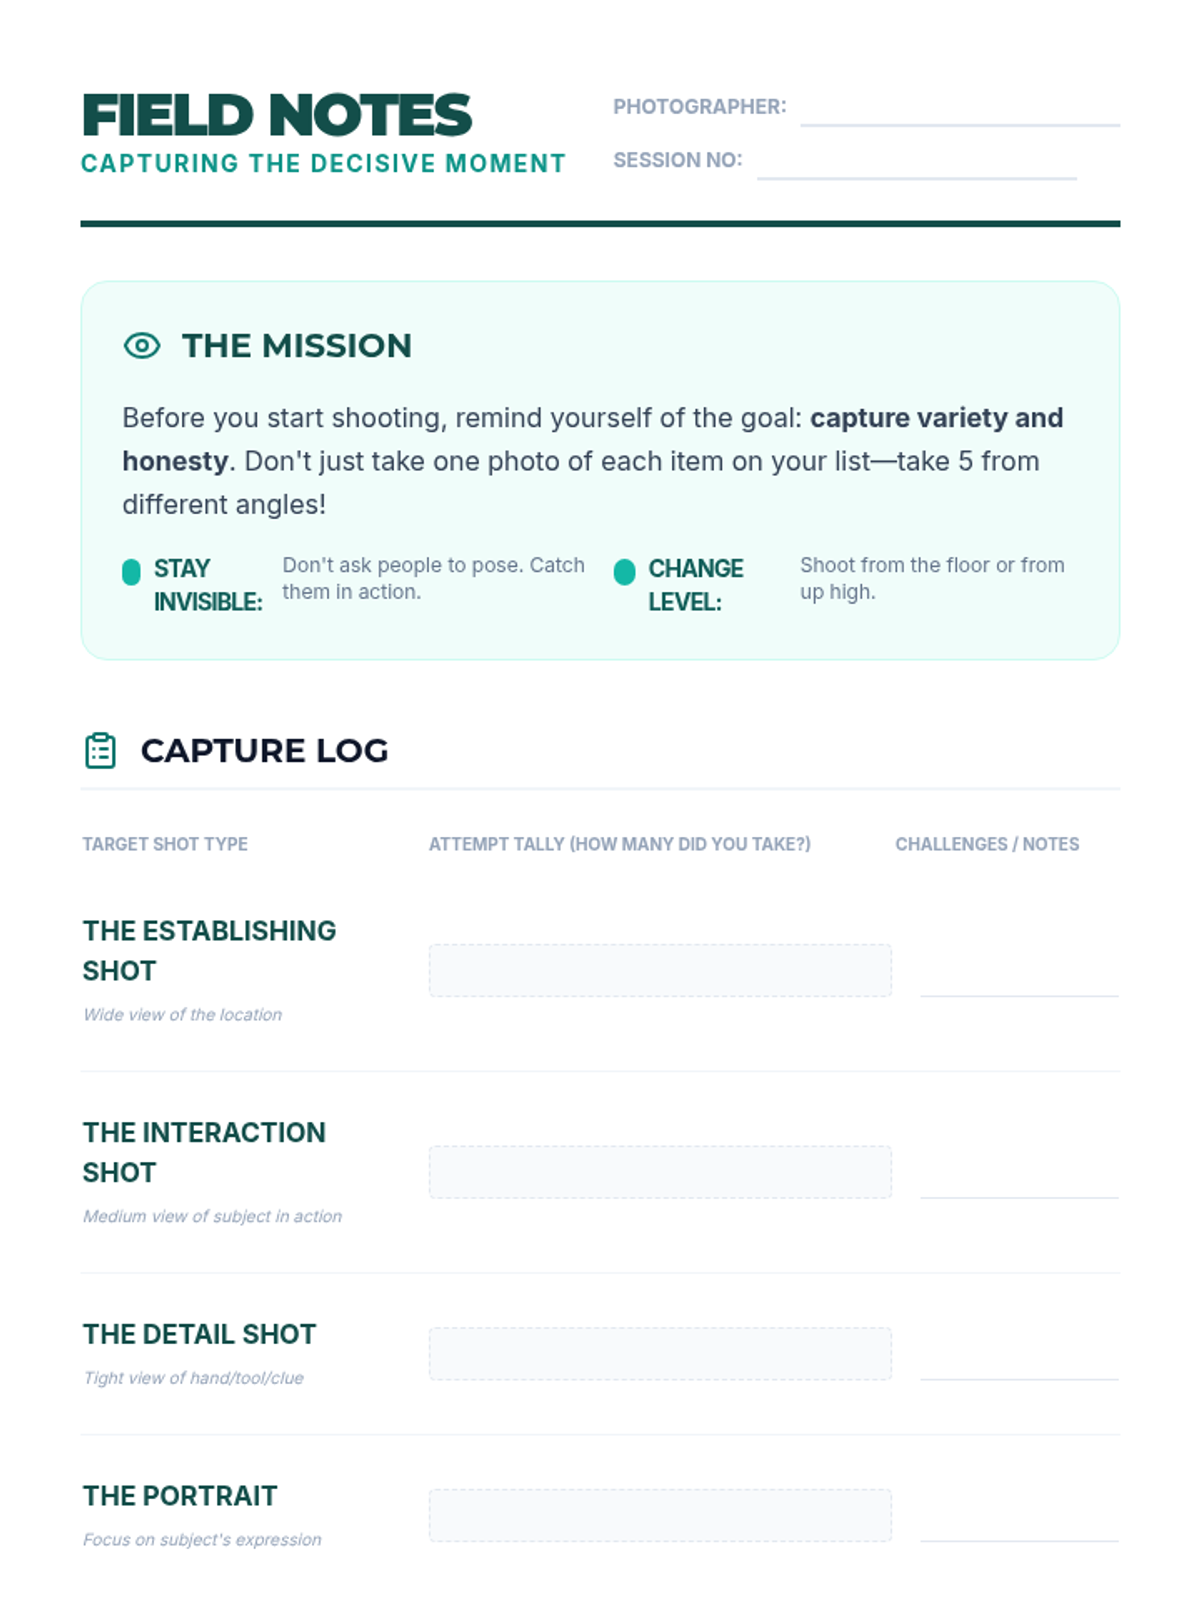
Students execute their shot lists, focusing on capturing decisive moments. They practice switching focus from the overall environment to specific details that advance the plot.
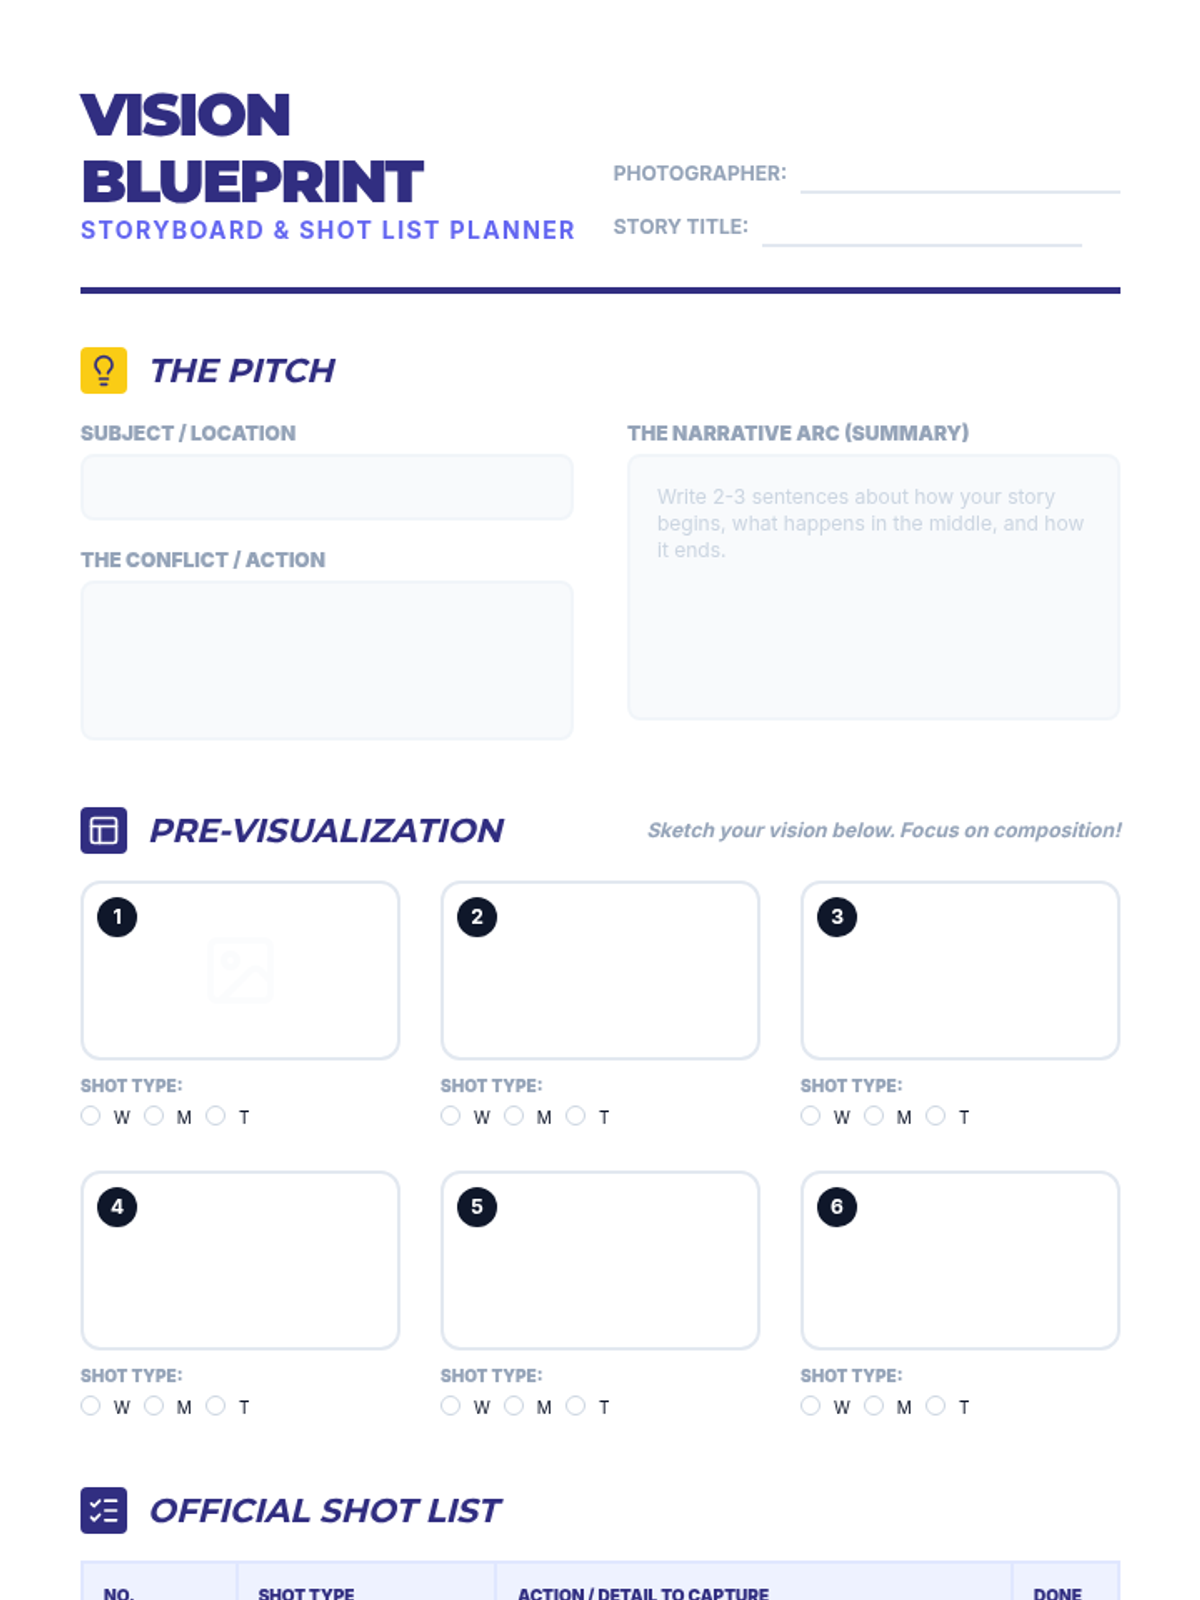
Learners brainstorm a simple story to tell about a school activity or routine. They create a shot list that ensures they capture variety (wide, medium, close-up) to support their narrative.
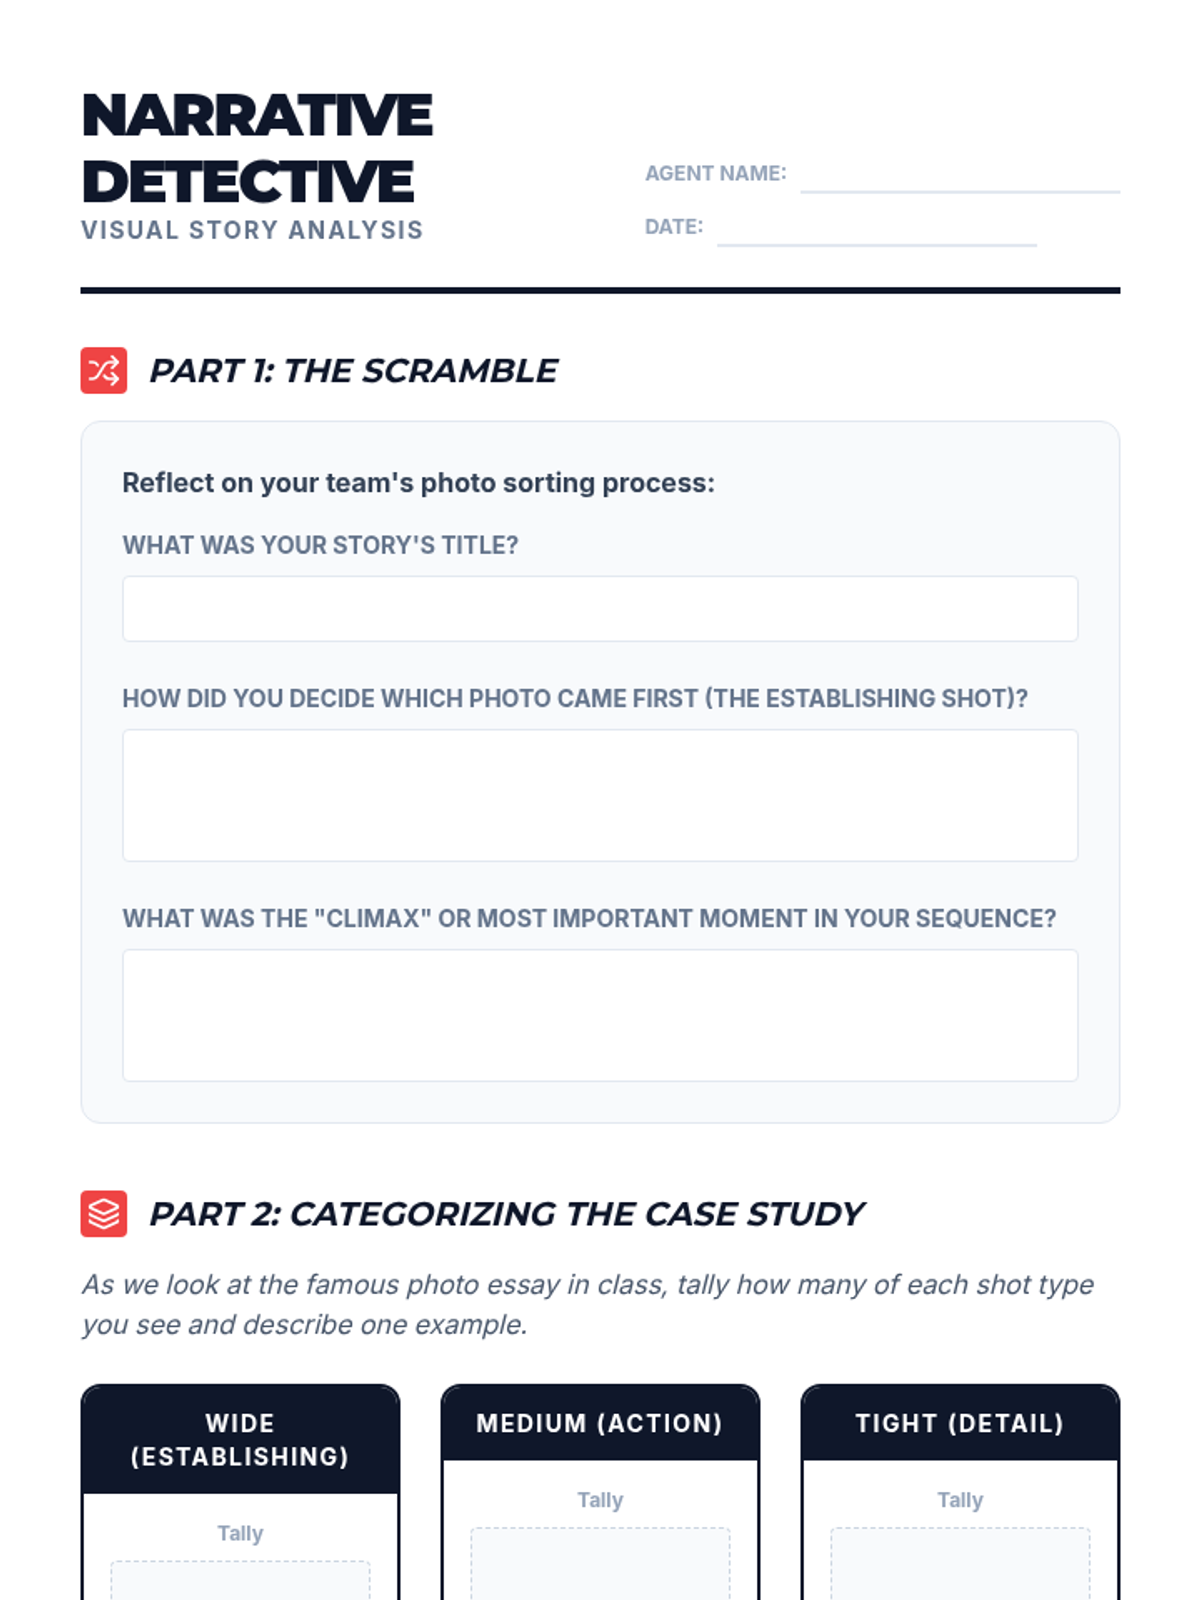
Students examine famous photo essays and picture books to identify the narrative arc. They categorize images into 'wide/establishing,' 'medium/action,' and 'tight/detail' shots.
Students review their images, selecting their best work for a portfolio and engaging in a structured peer review process.
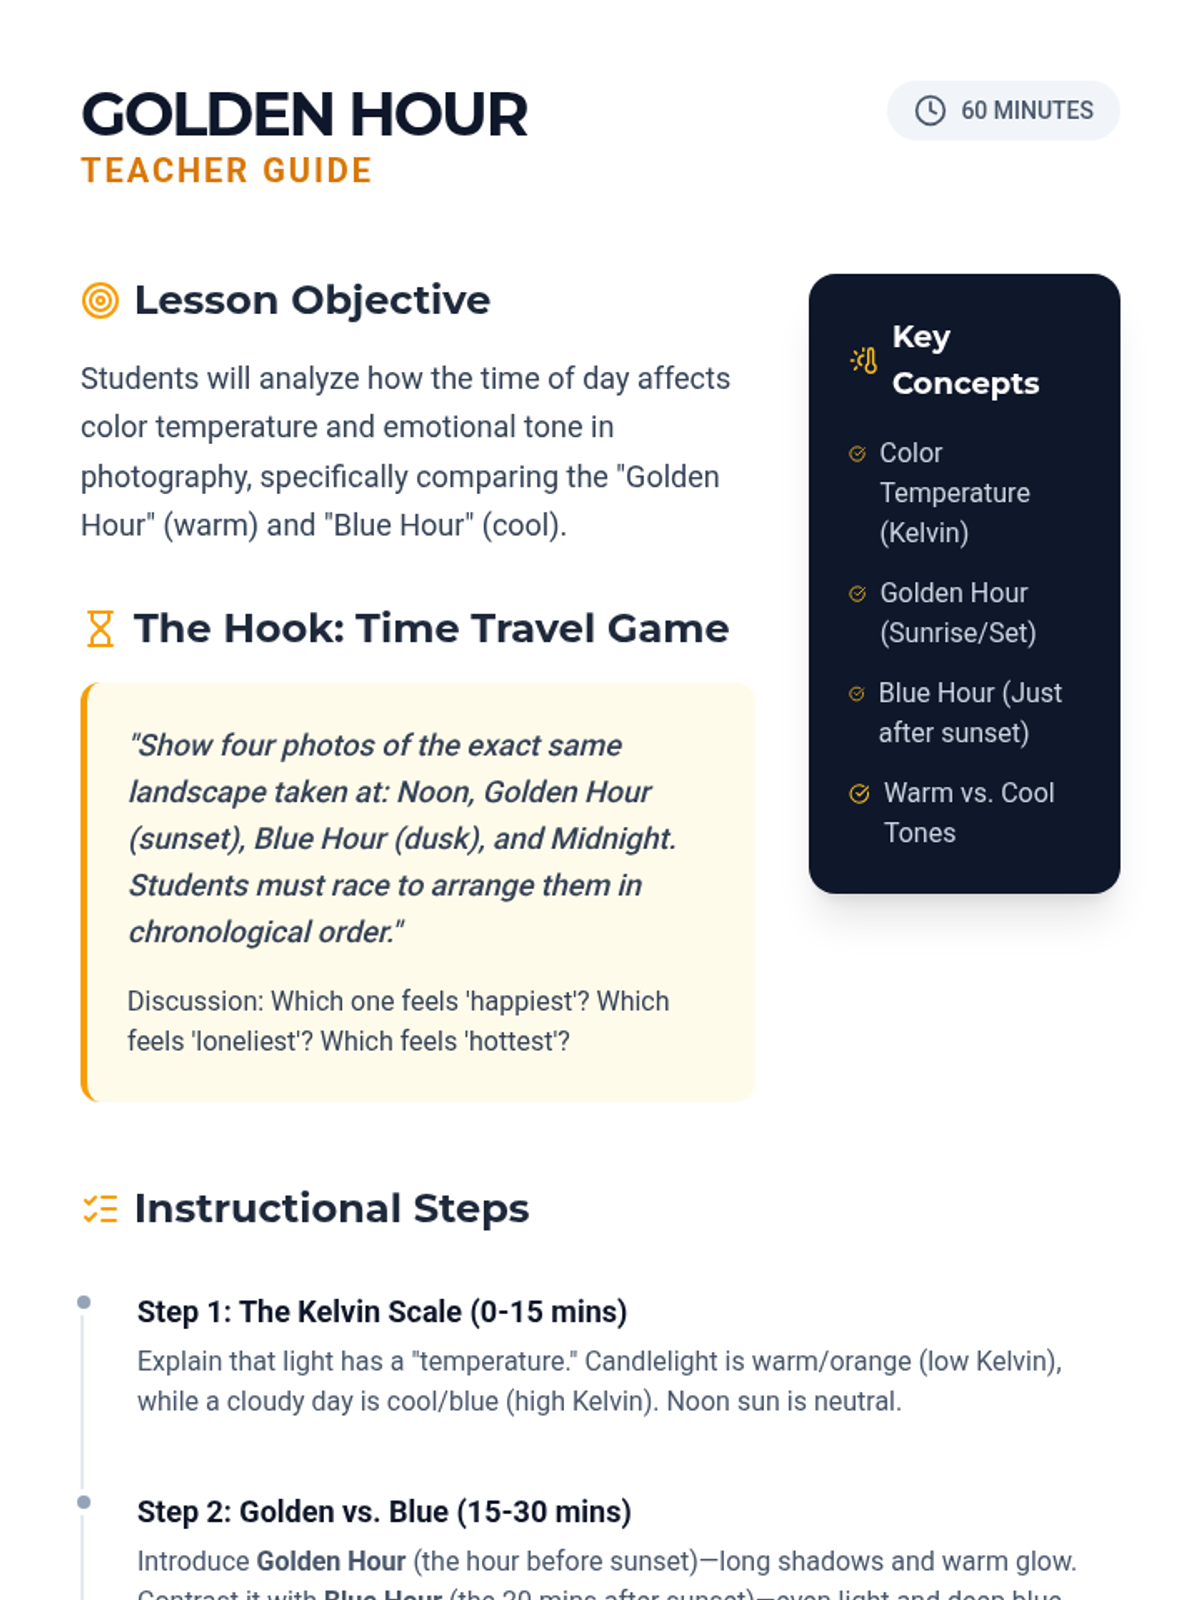
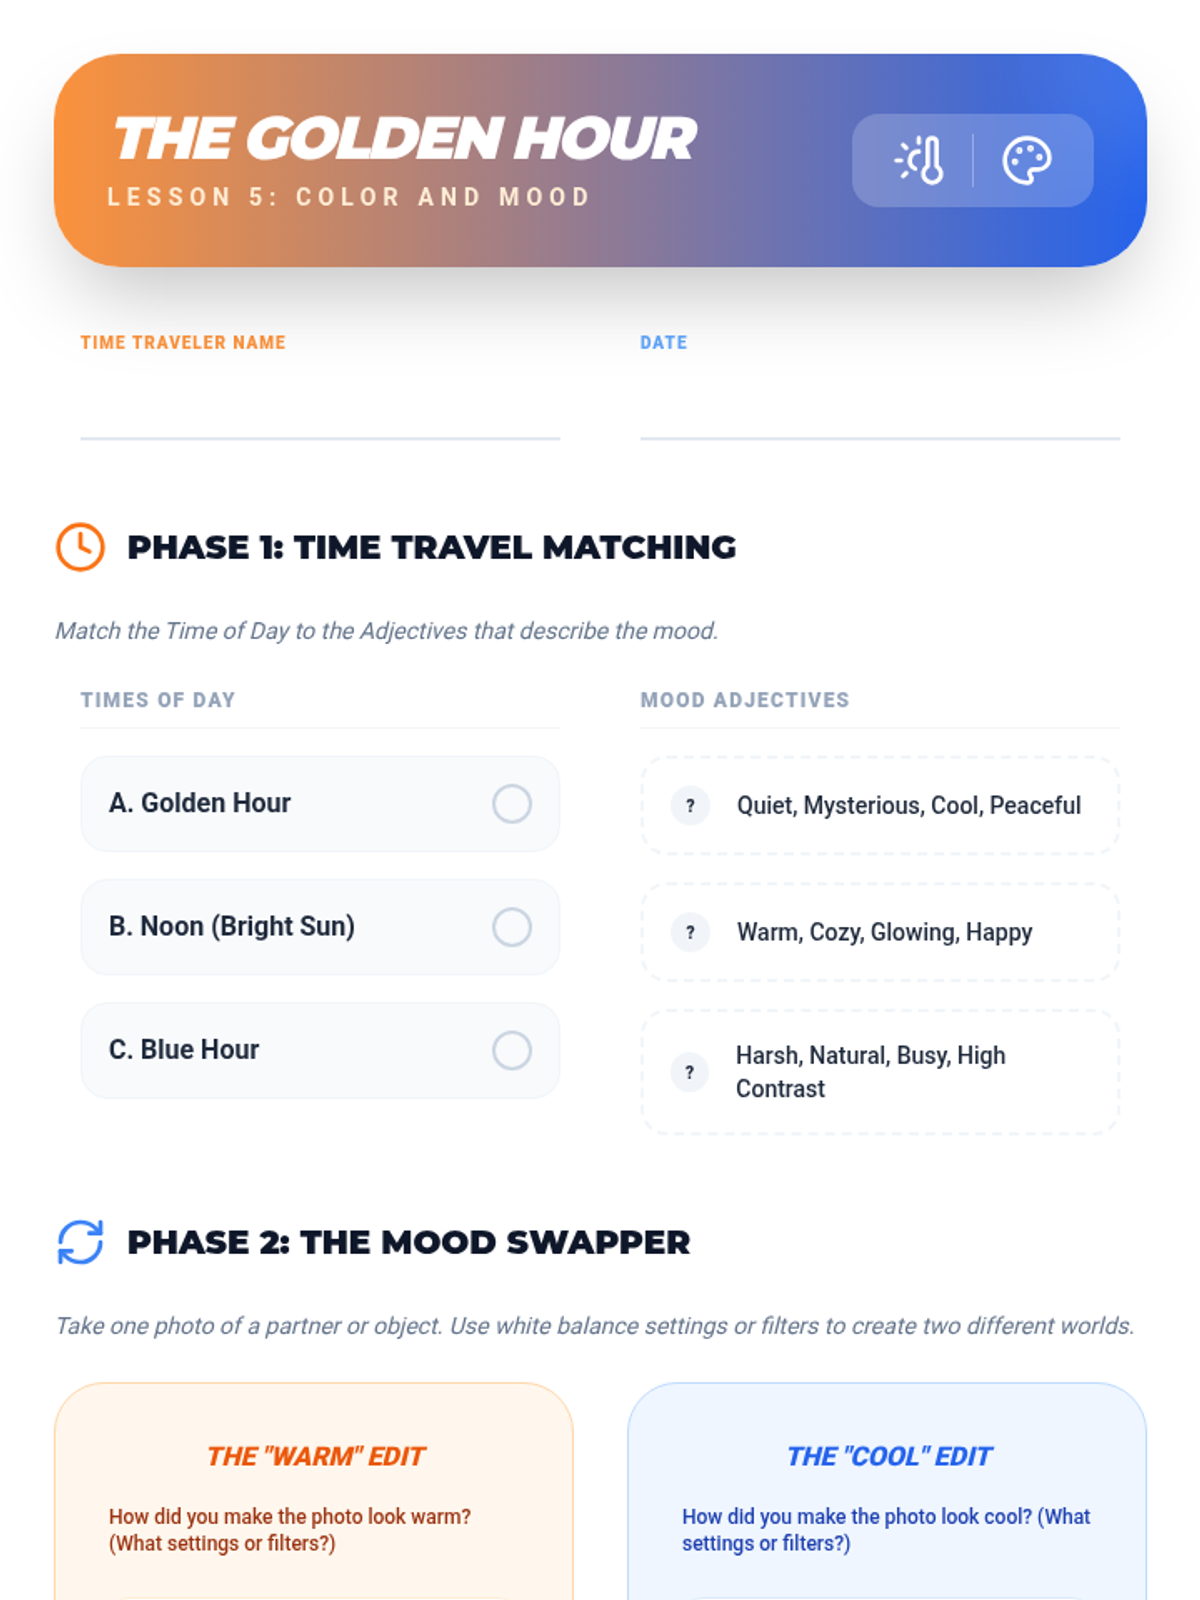
A comparative study of photography taken during different times of day, focusing on color temperature and emotional tone.
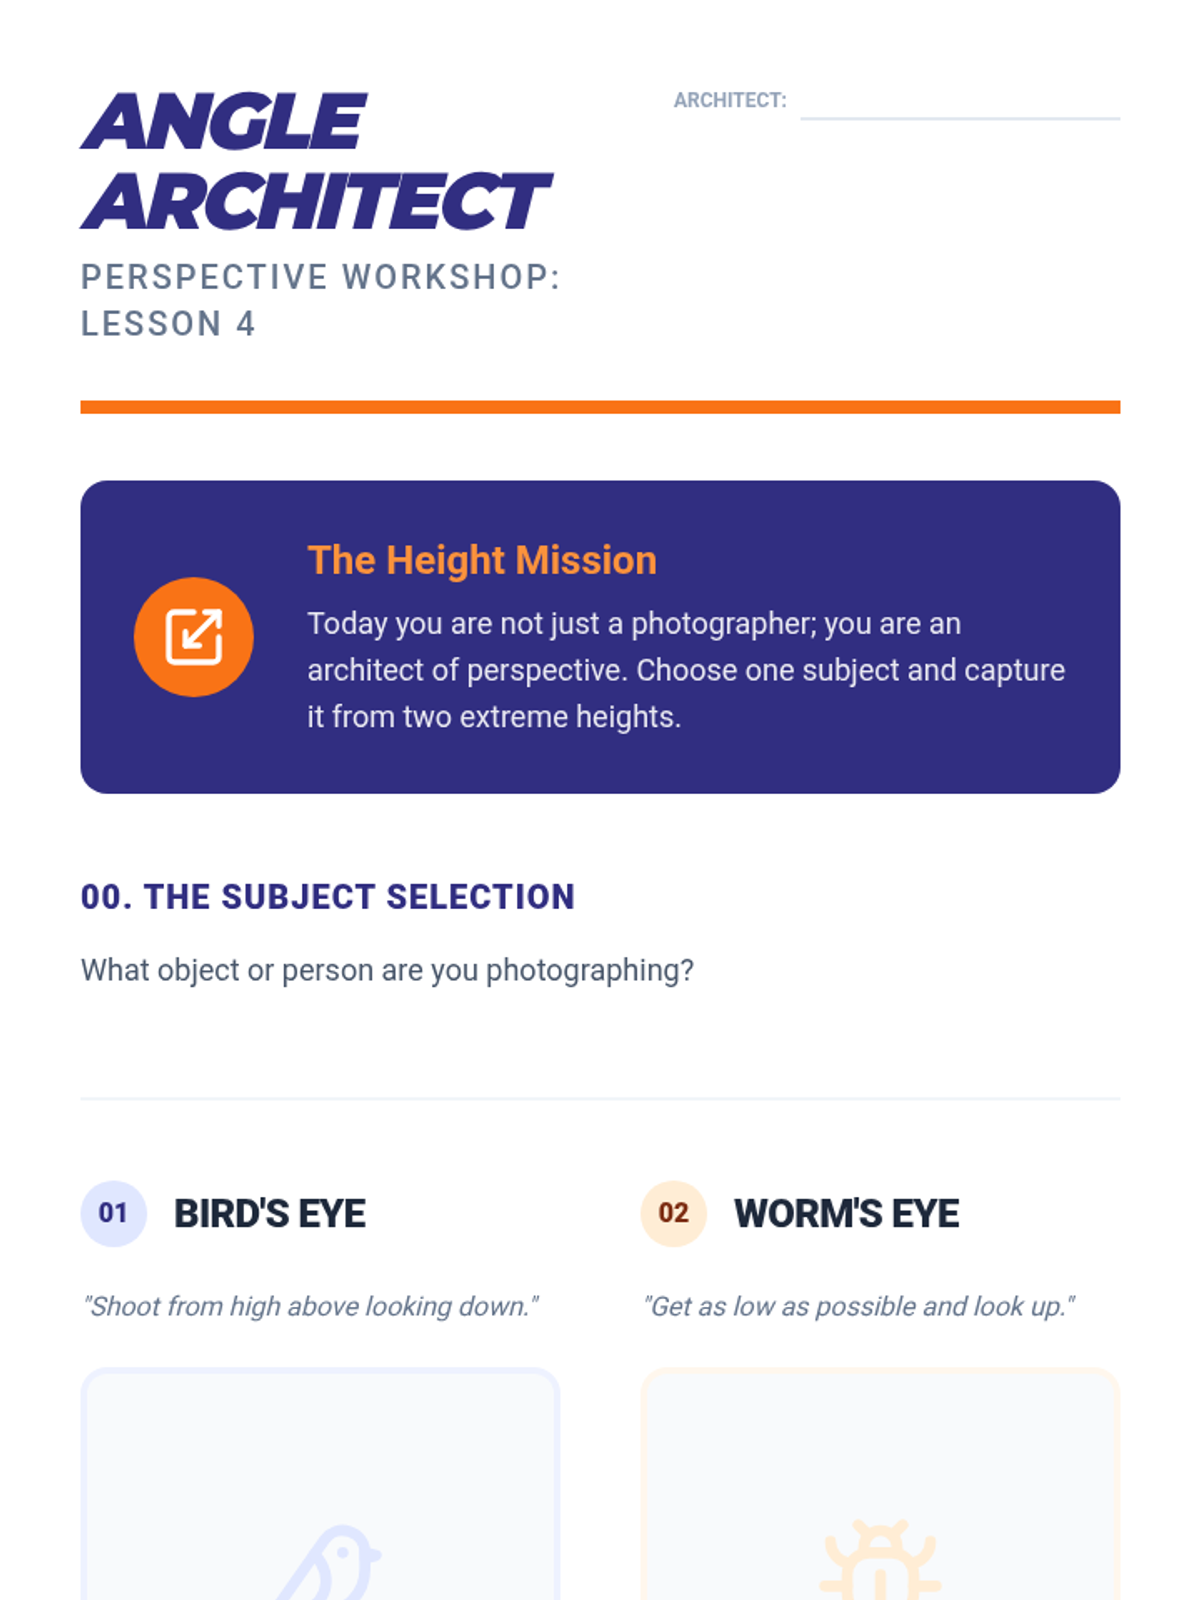
Students shoot from worm's-eye and bird's-eye views to analyze how camera angles convey power or vulnerability.
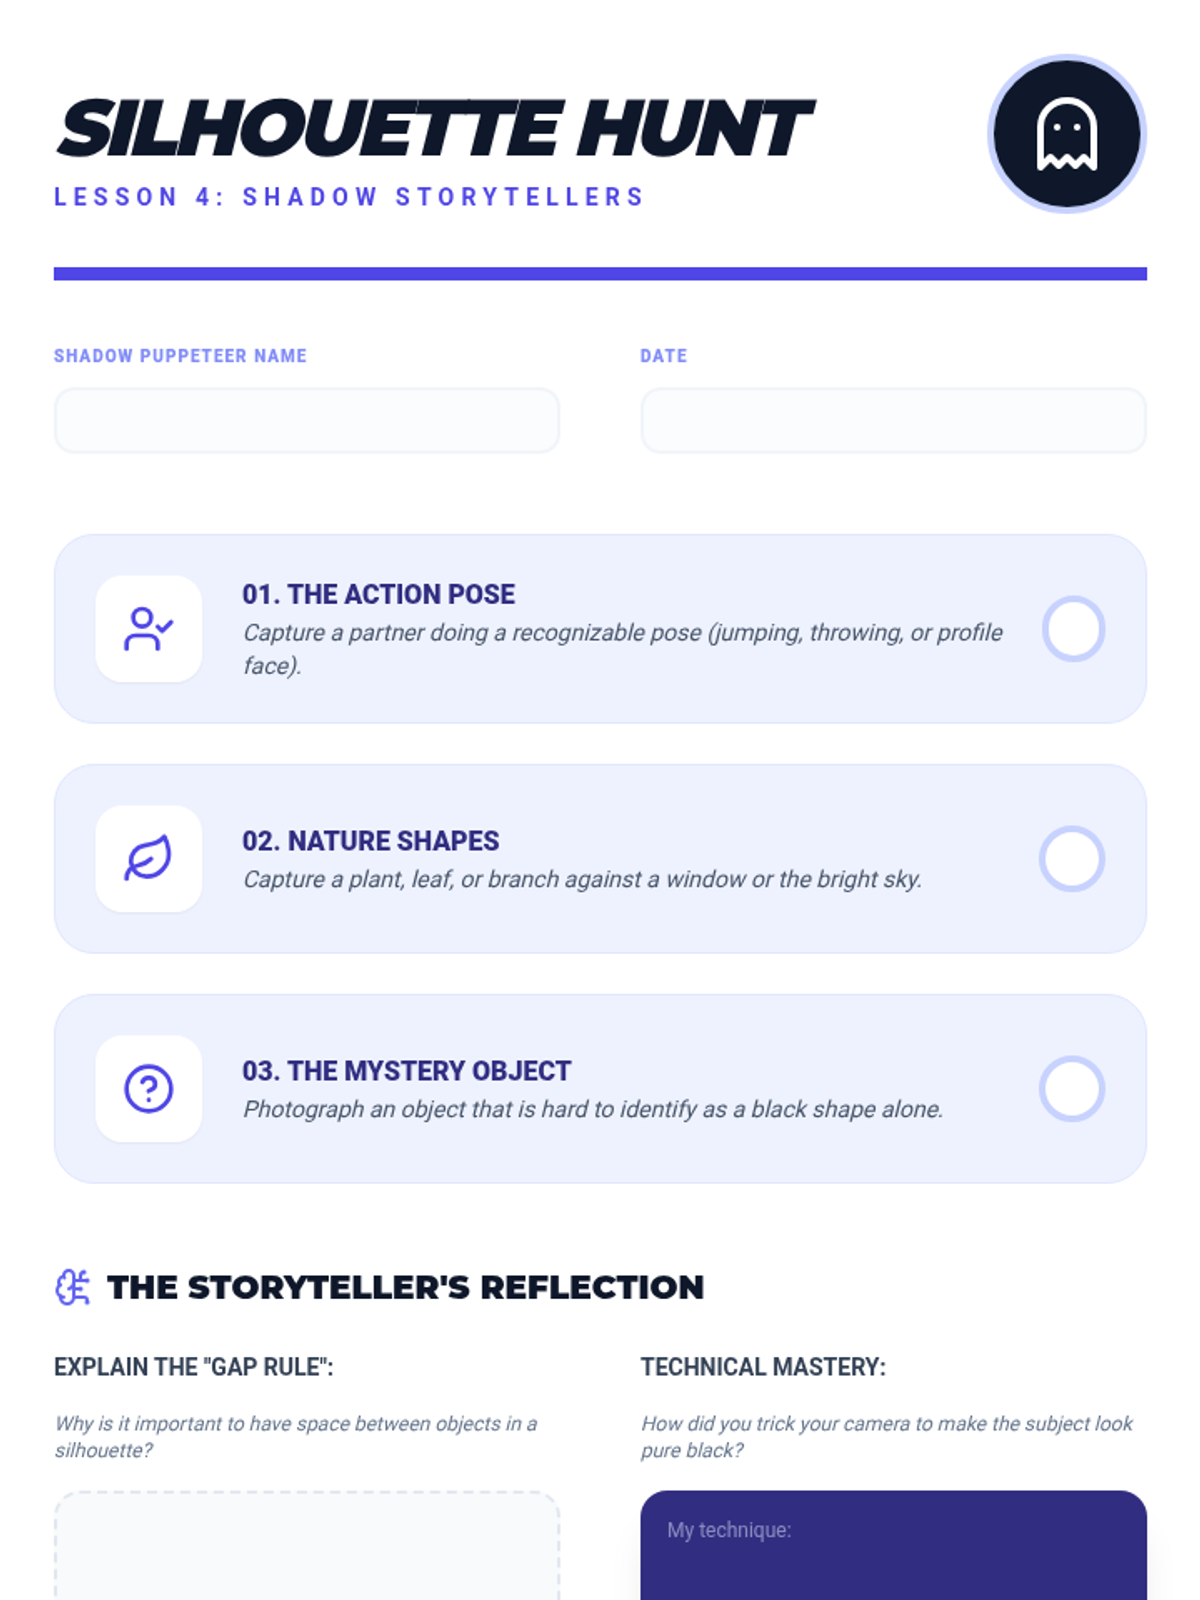
Focusing on backlighting, students learn to expose for the background to create silhouettes and use shadows as the primary subject.
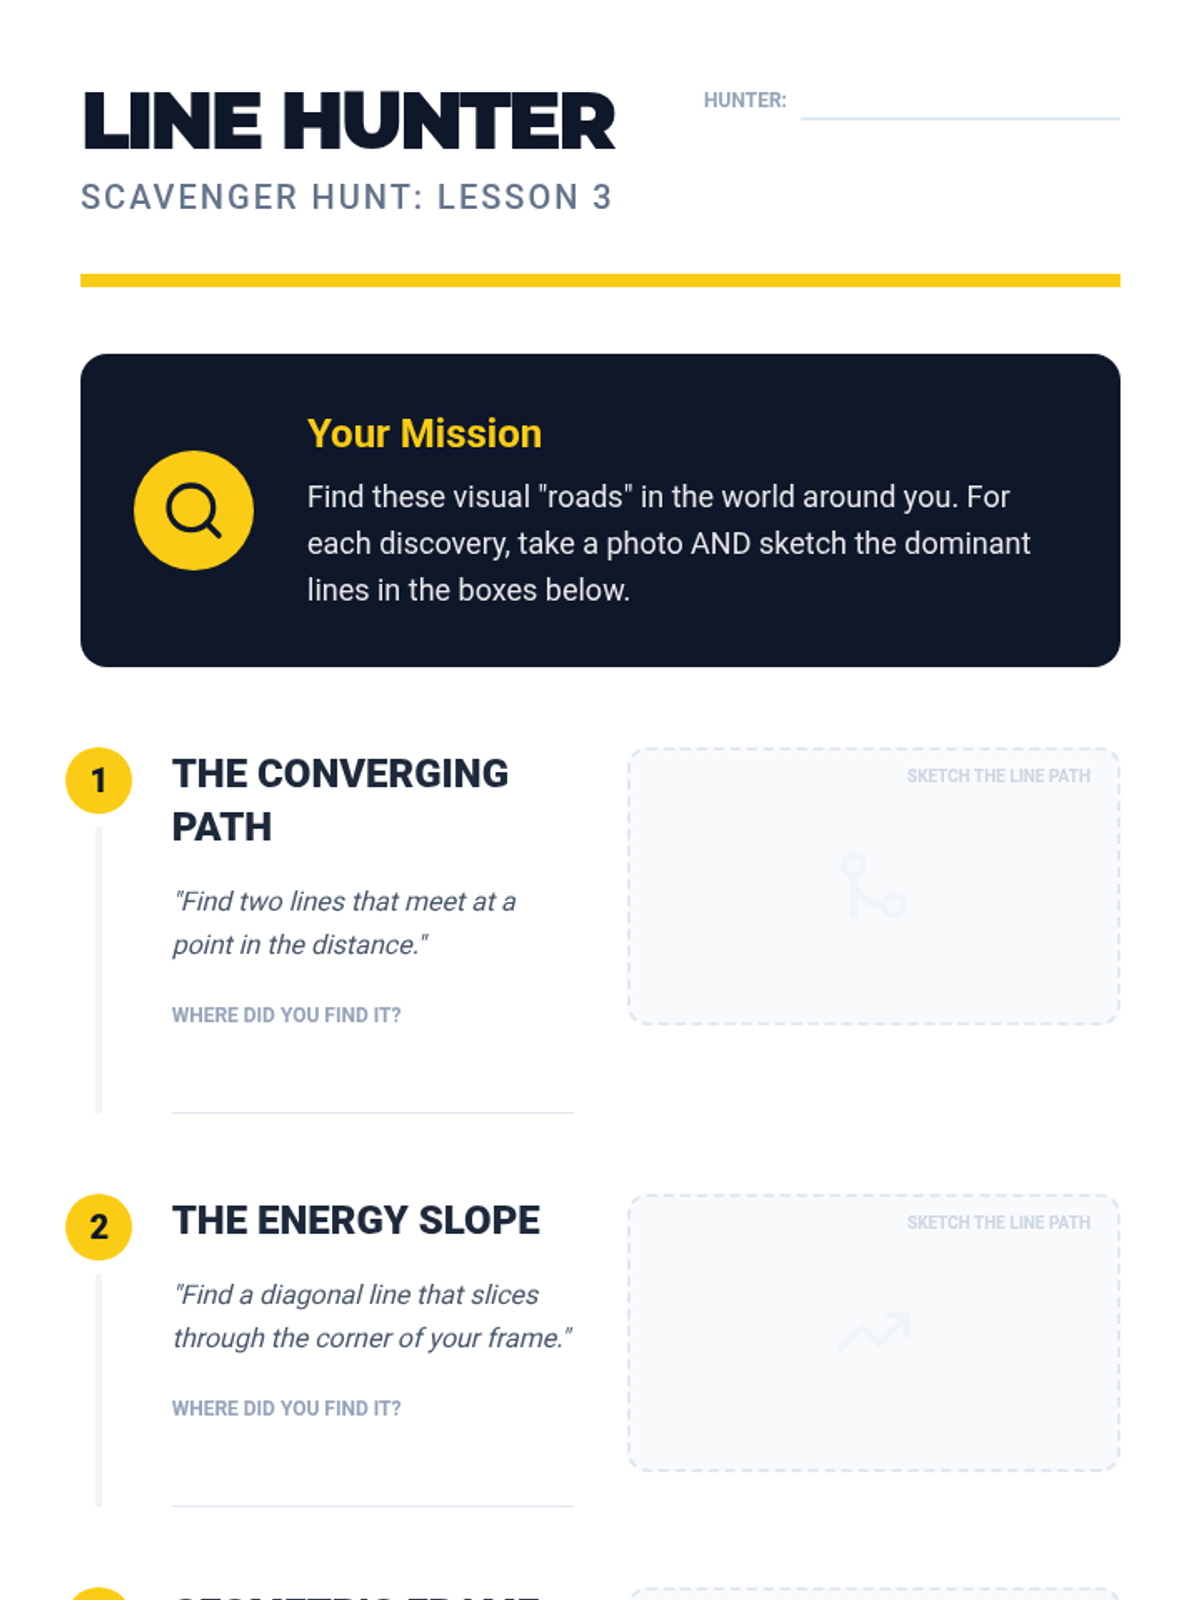
Students identify lines in architecture and nature that direct the eye toward a specific focal point through a 'line hunting' scavenger hunt.
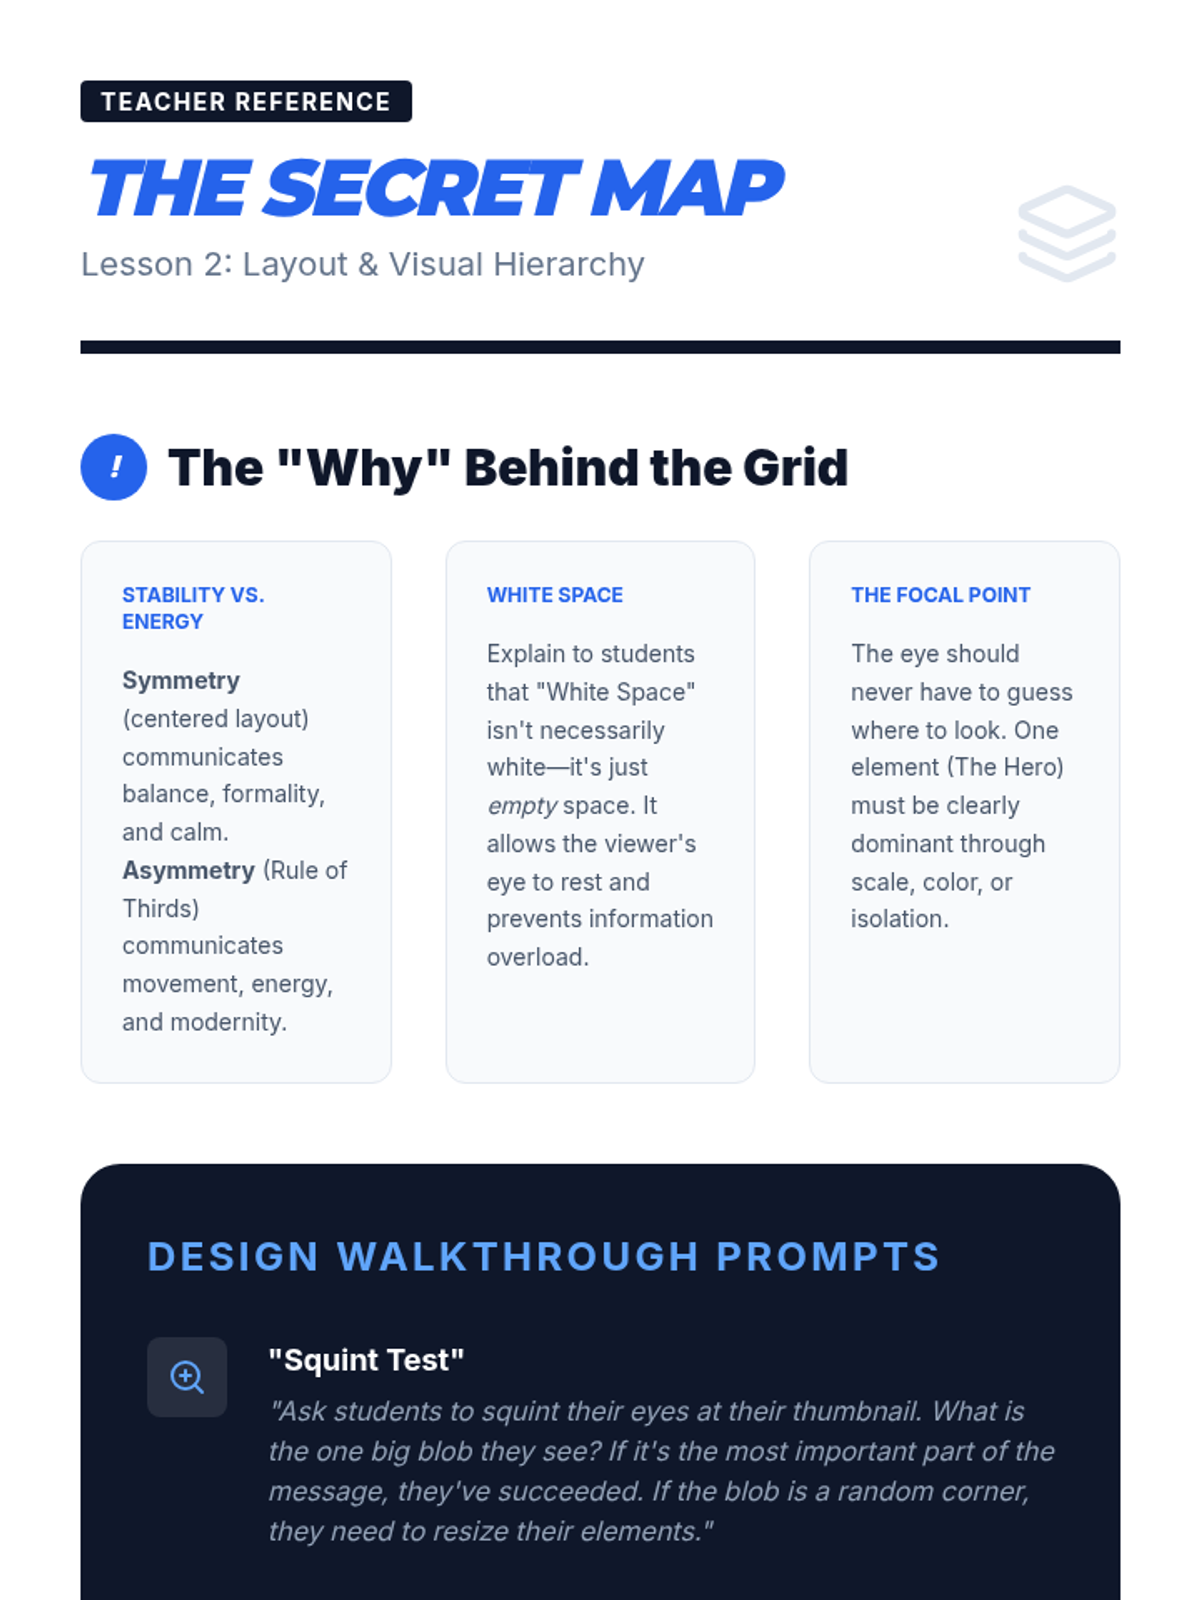
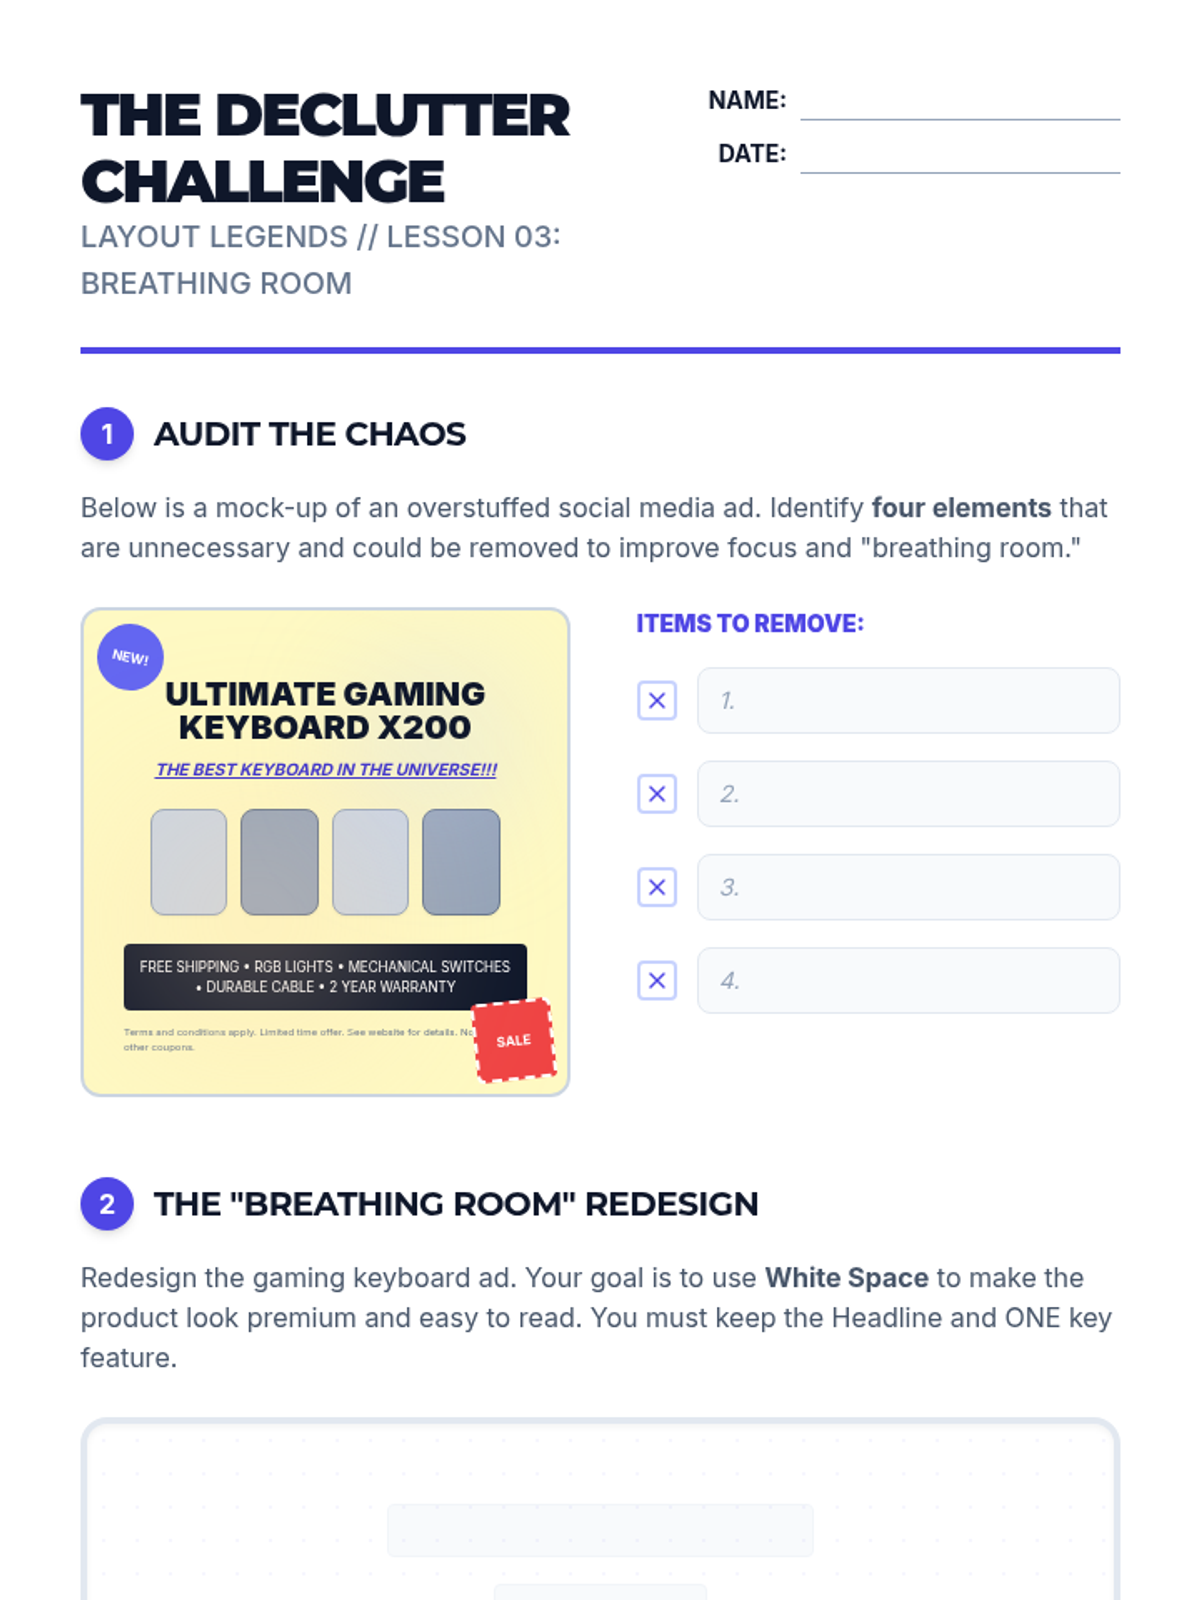
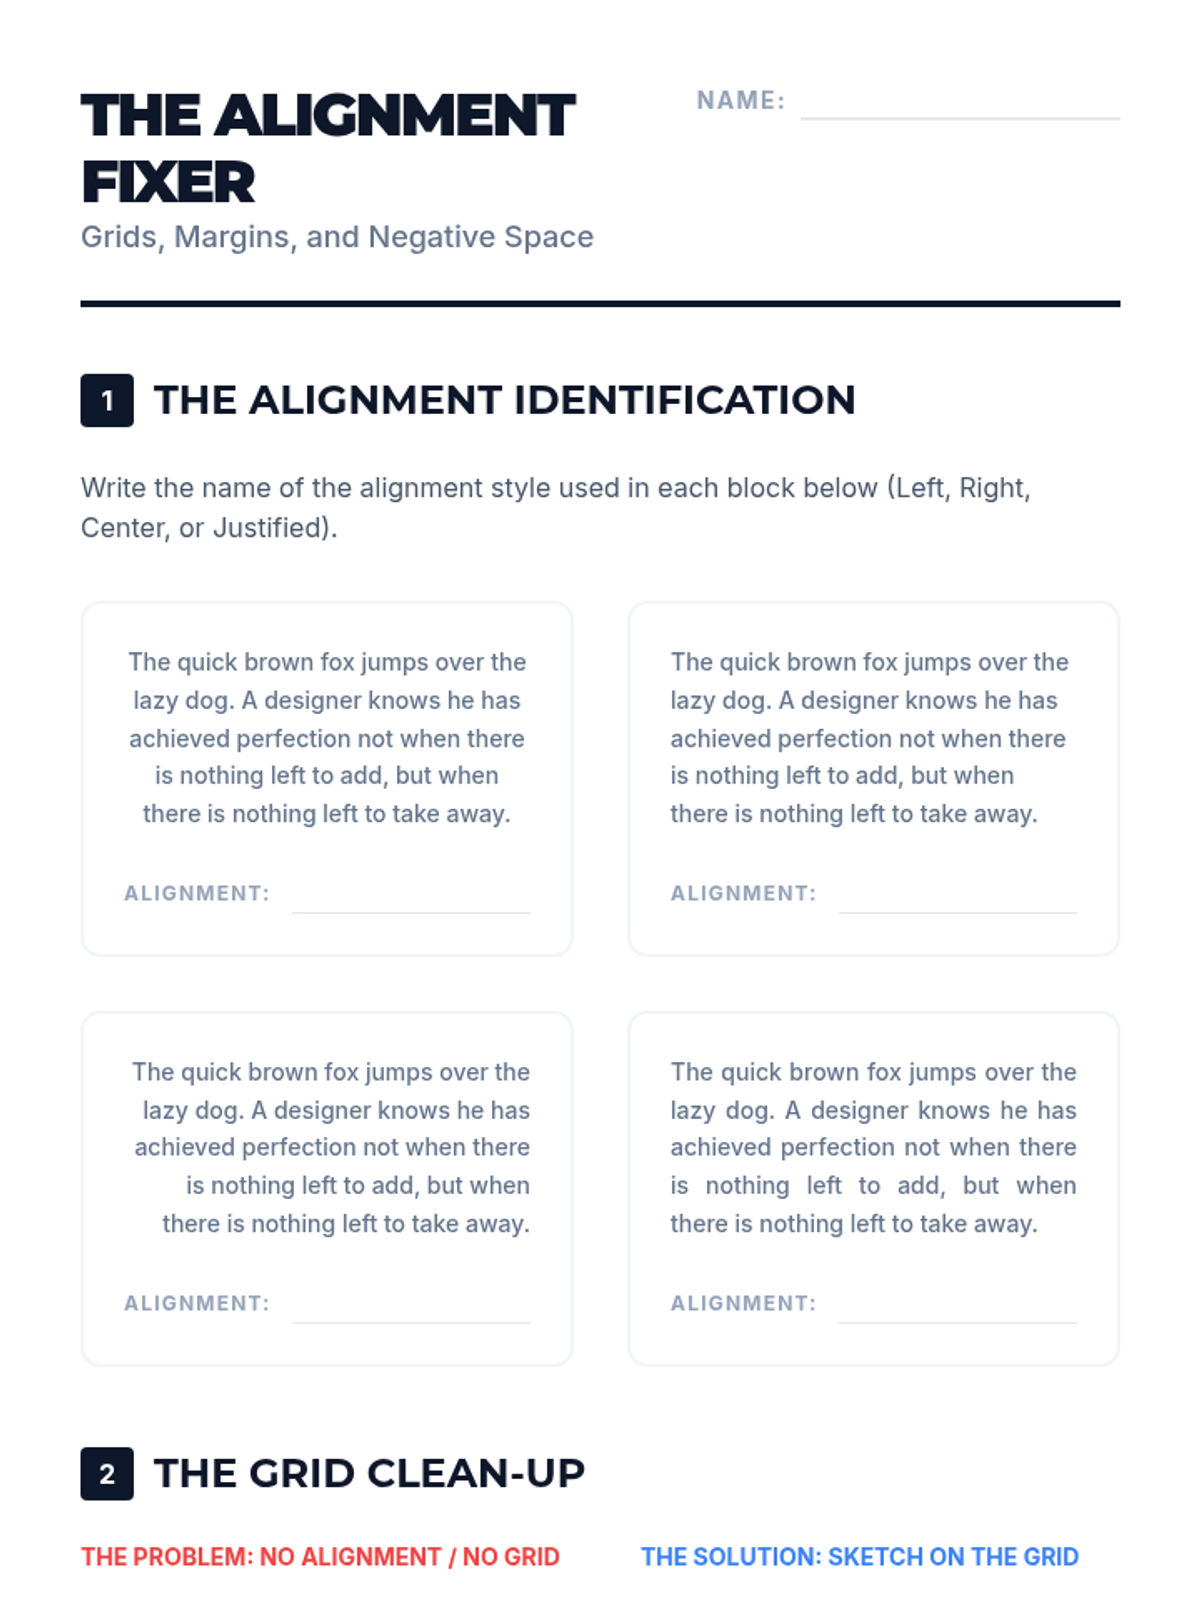
Students learn the power of negative space and the difference between symmetrical and asymmetrical balance to create "breathing room" in their designs.
This lesson introduces the invisible structures of design, teaching students to use grids and the Rule of Thirds to create organized and professional layouts.
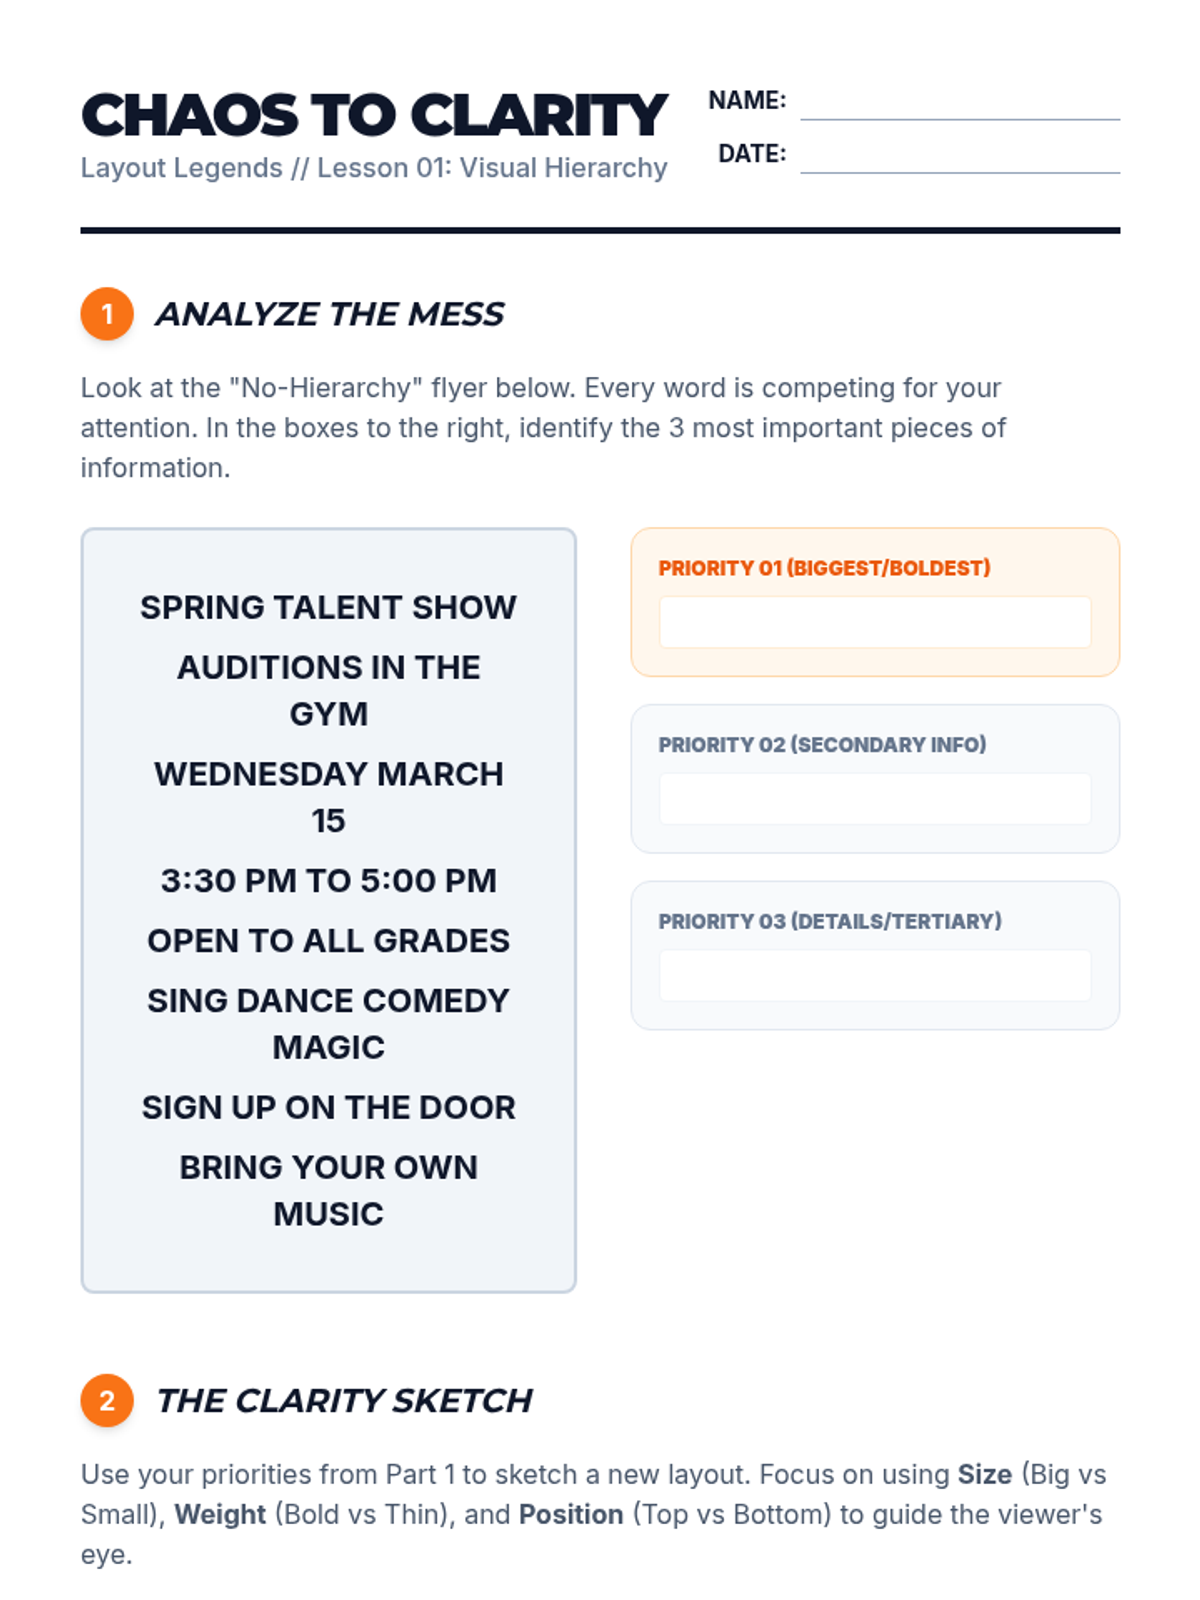
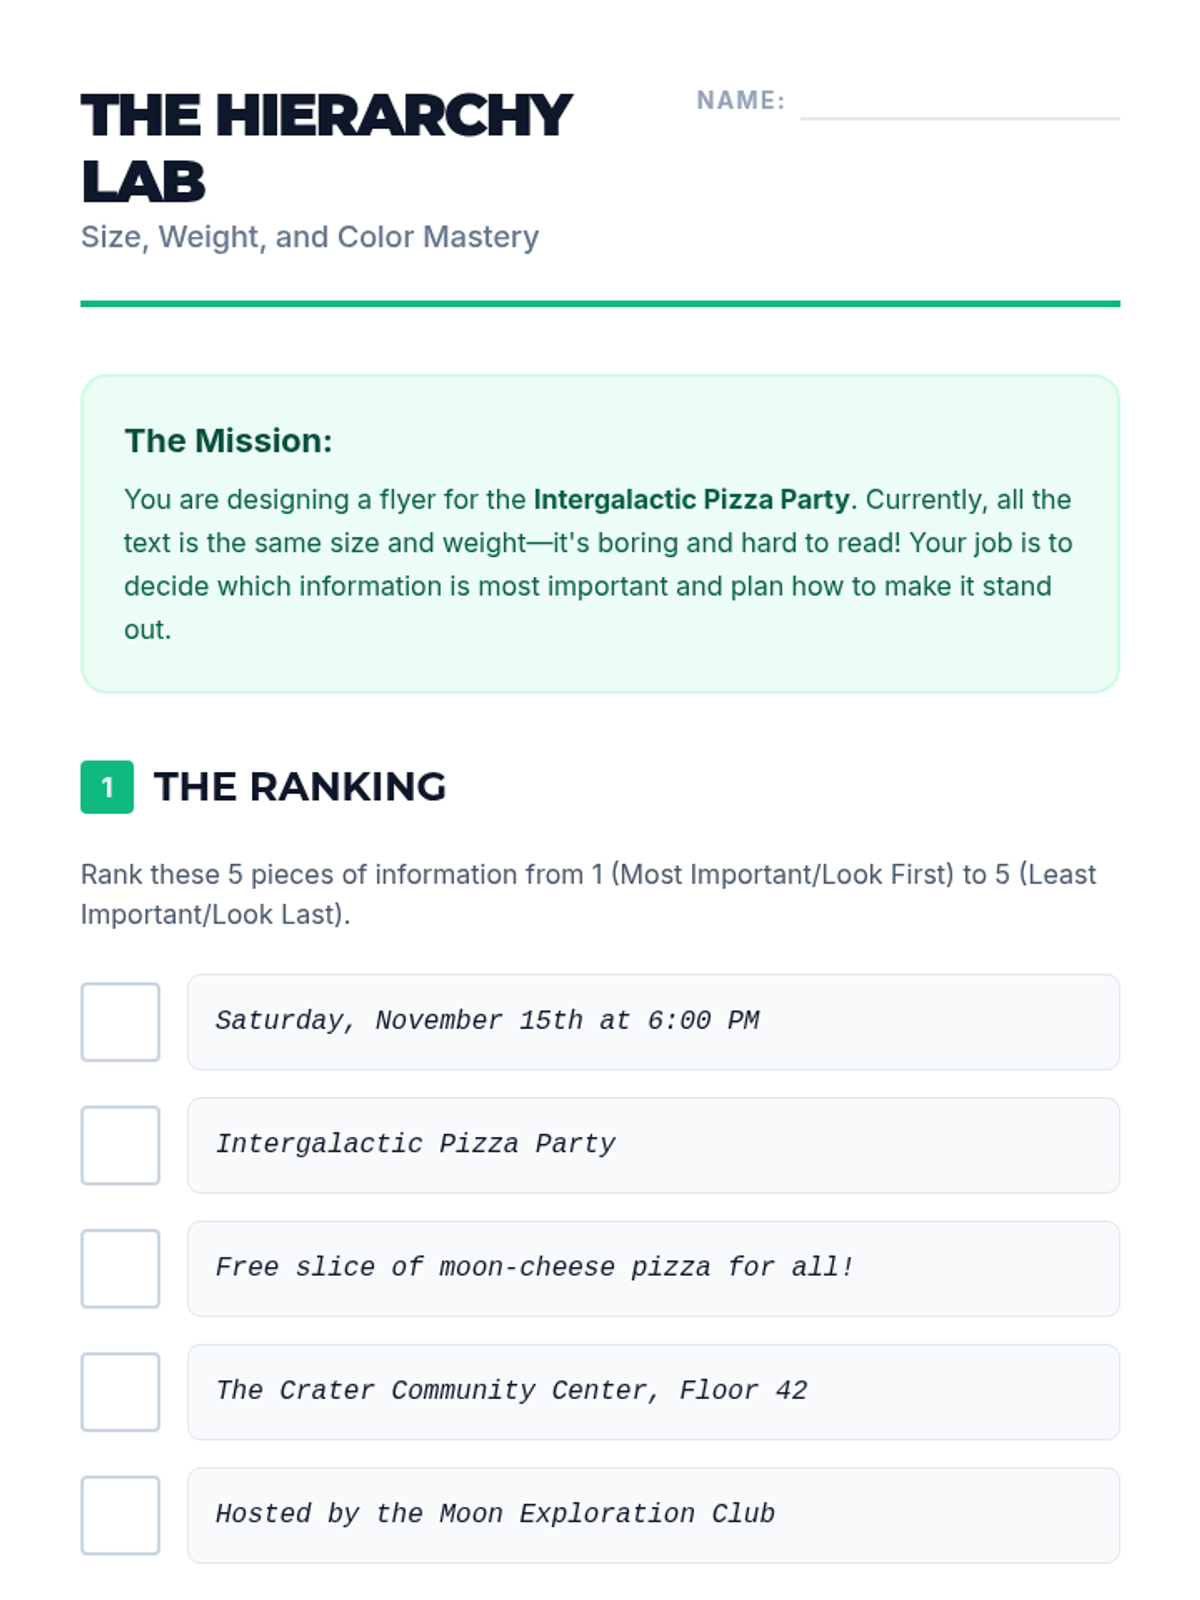
Students explore how size, weight, and position create a clear order of importance on a page, transforming "no-hierarchy" chaos into clear communication.
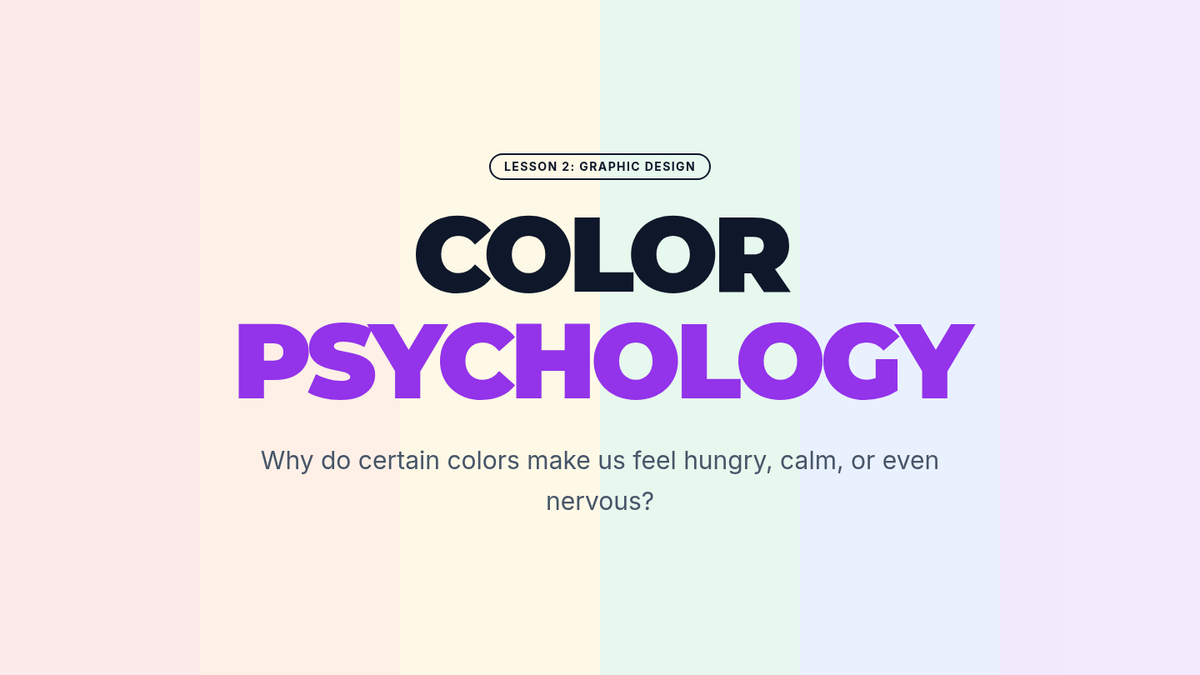
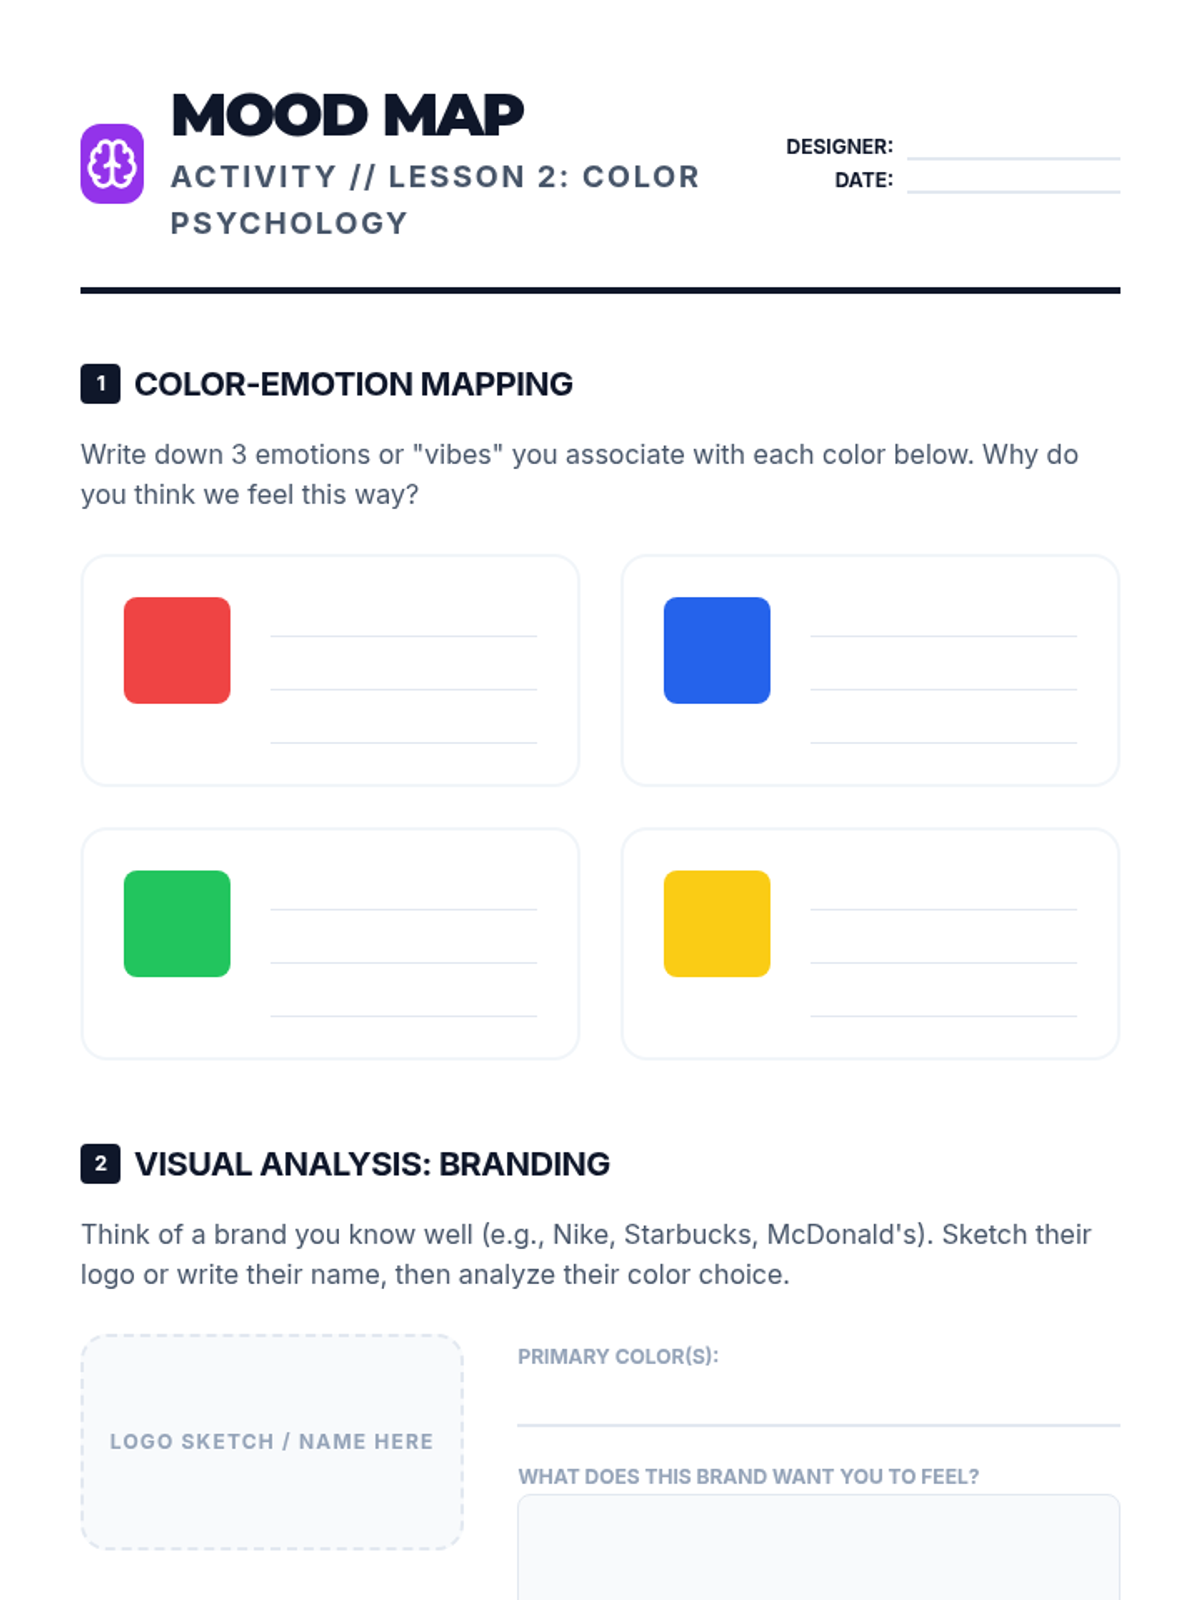
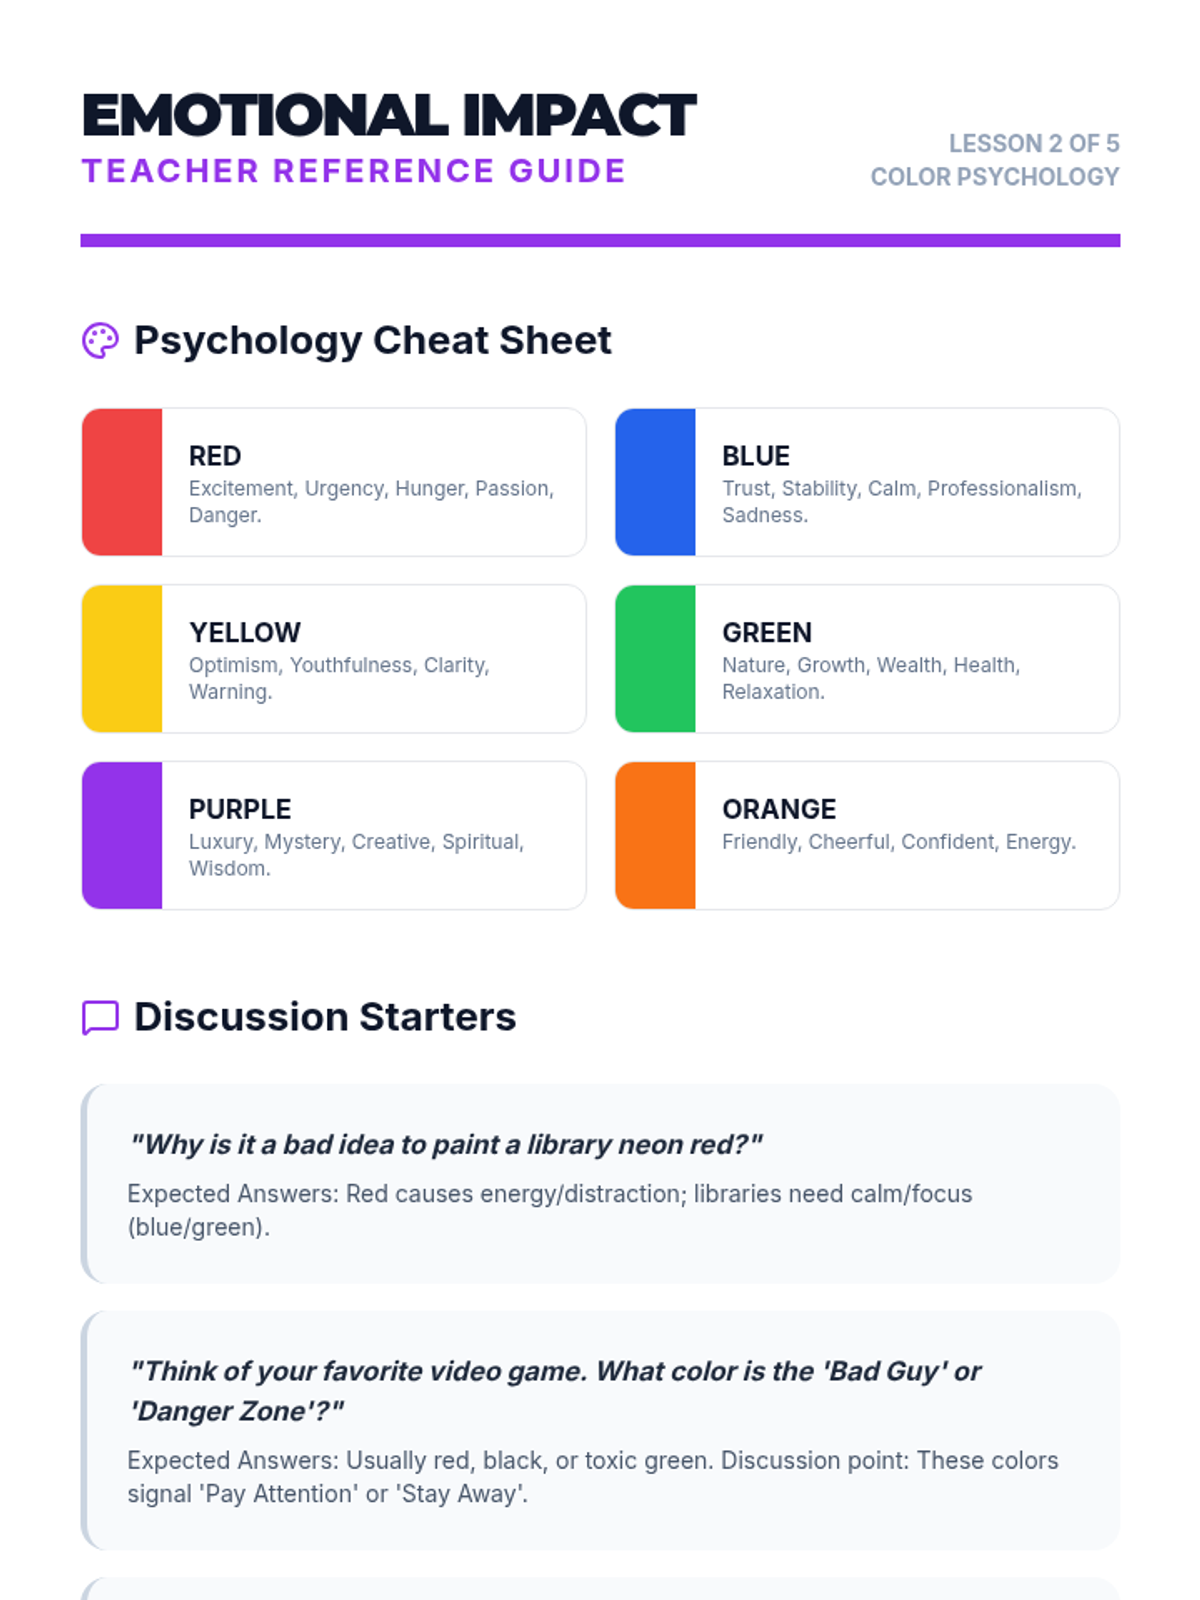
Explores the psychological impact of colors in branding and media. Students analyze real-world examples to understand how colors evoke specific emotions.
A culminating project where students apply all learned principles to design a balanced event flyer using the Z-pattern layout.
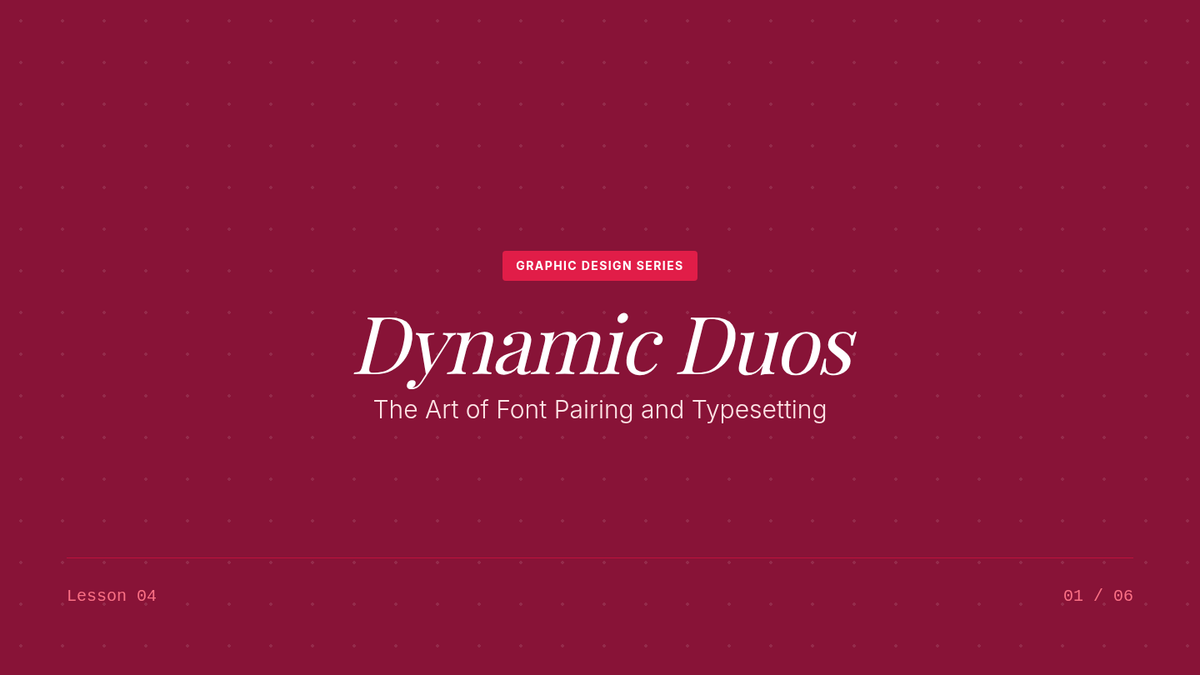
Focuses on the art of font pairing and technical typesetting adjustments like leading and tracking.
An exploration of negative space and alignment principles to create clean, professional-looking compositions.
Students learn to use size, weight, and color to establish a clear order of importance in text-based designs.
Introduction to font classifications (serif, sans-serif, script, display) and the psychological 'personality' of typefaces.
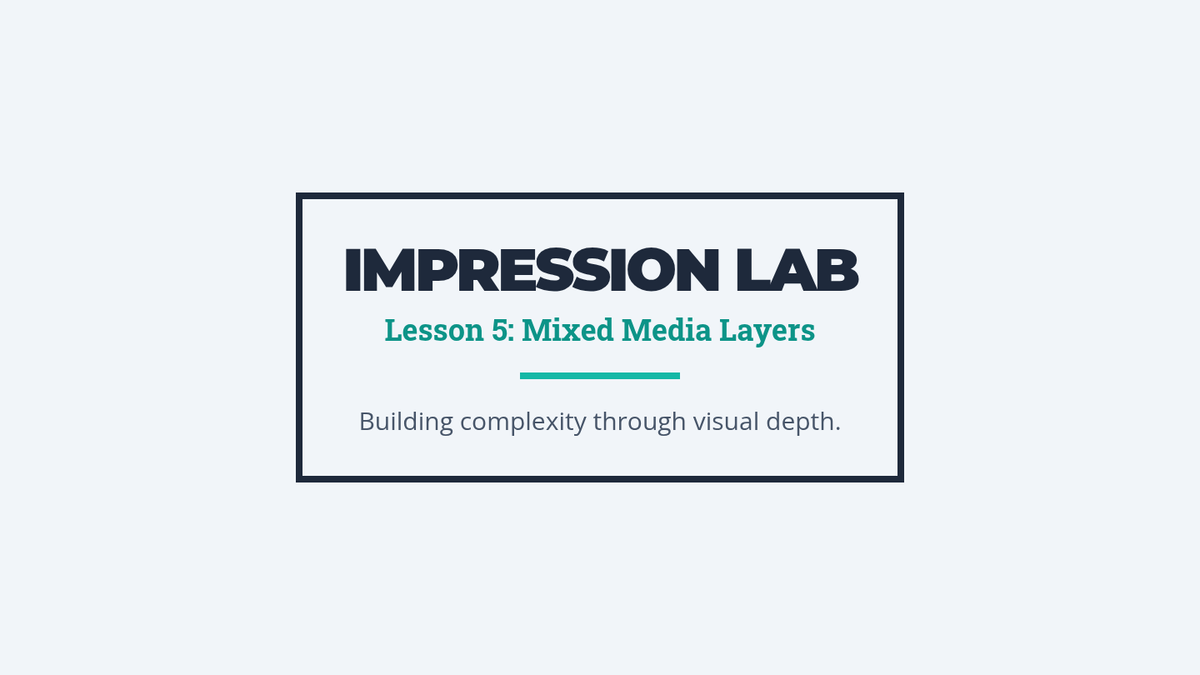
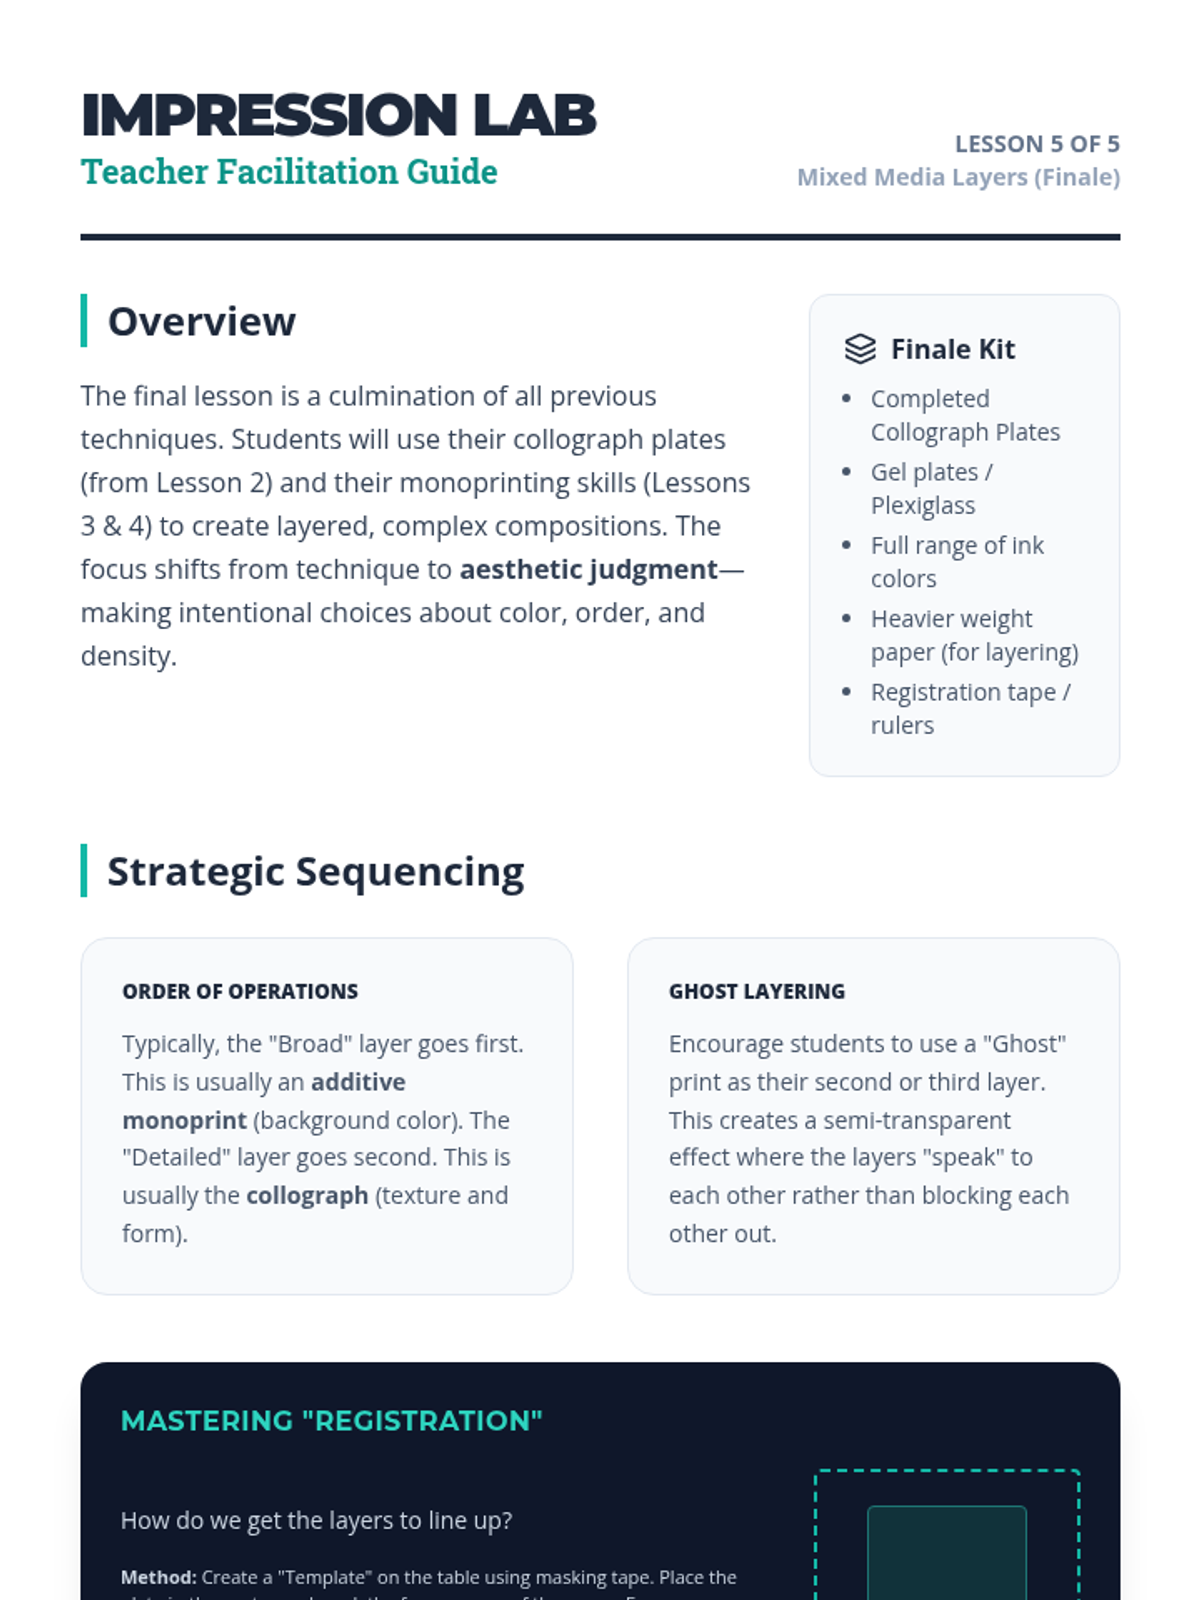
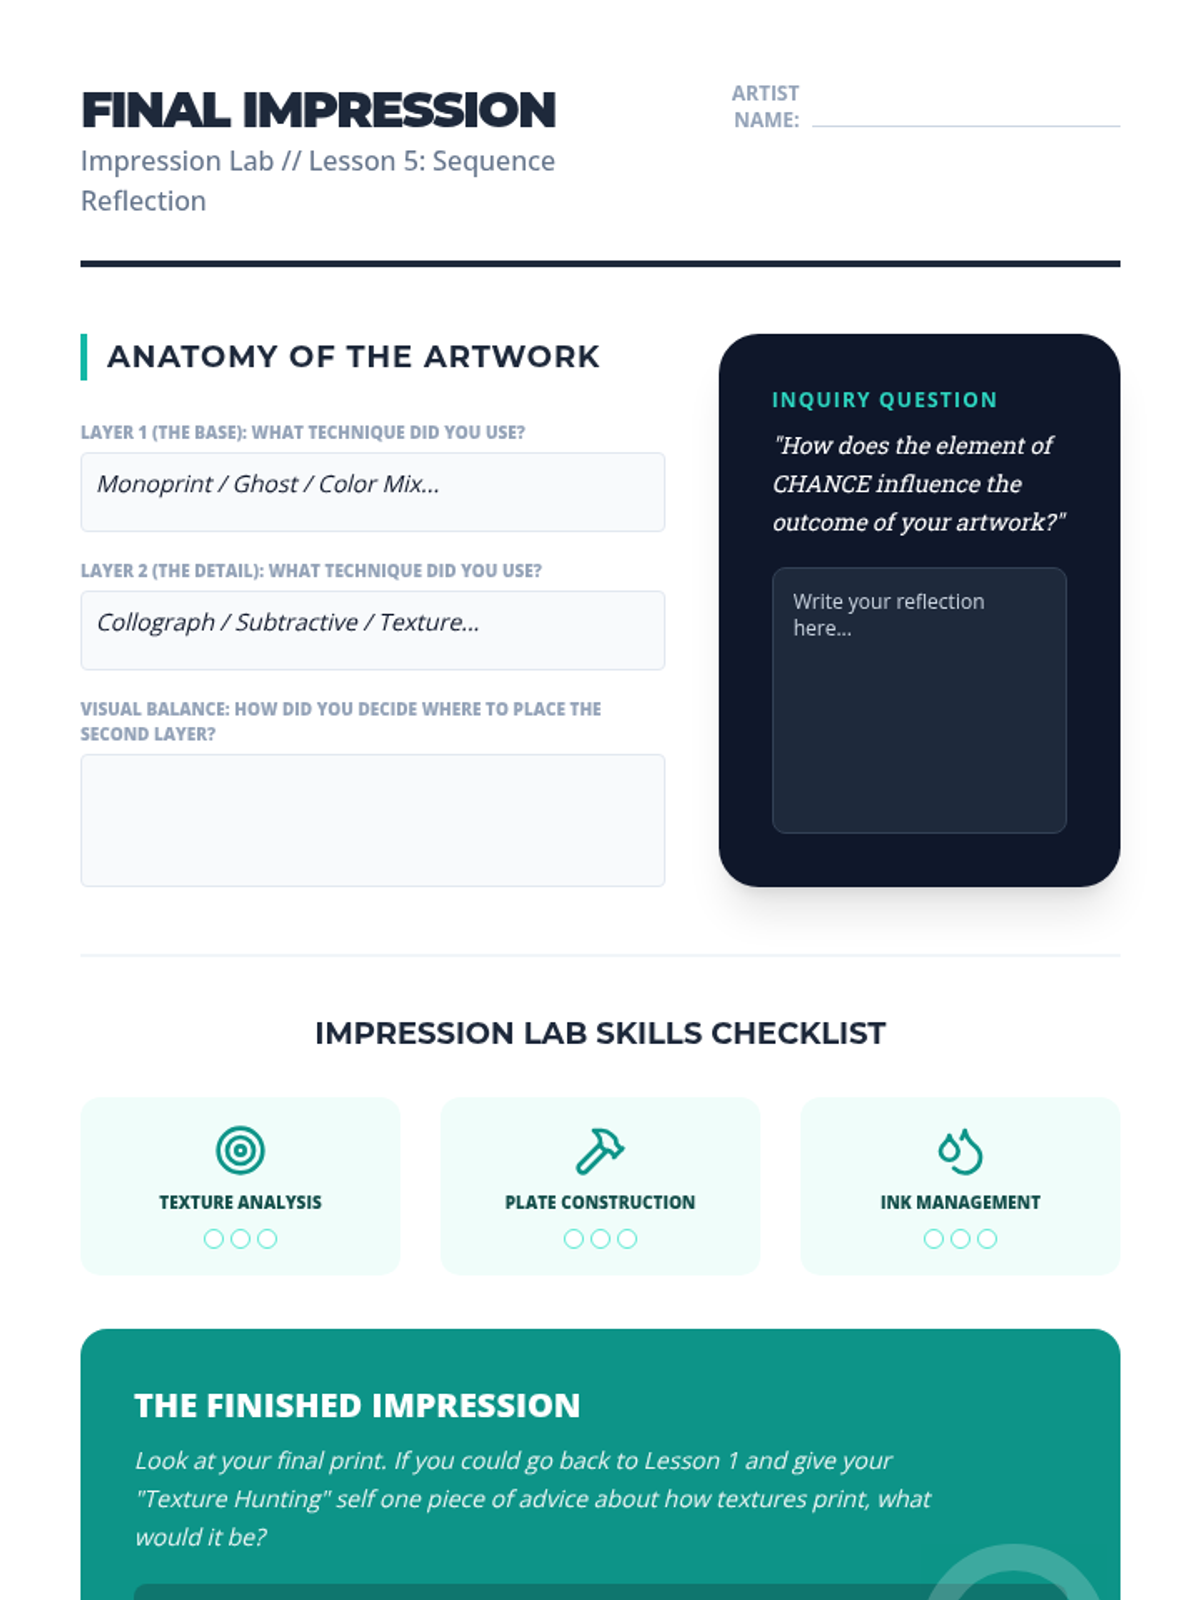
Students combine their collograph and monoprinting skills, layering multiple impressions to create complex, multi-textured visual compositions.
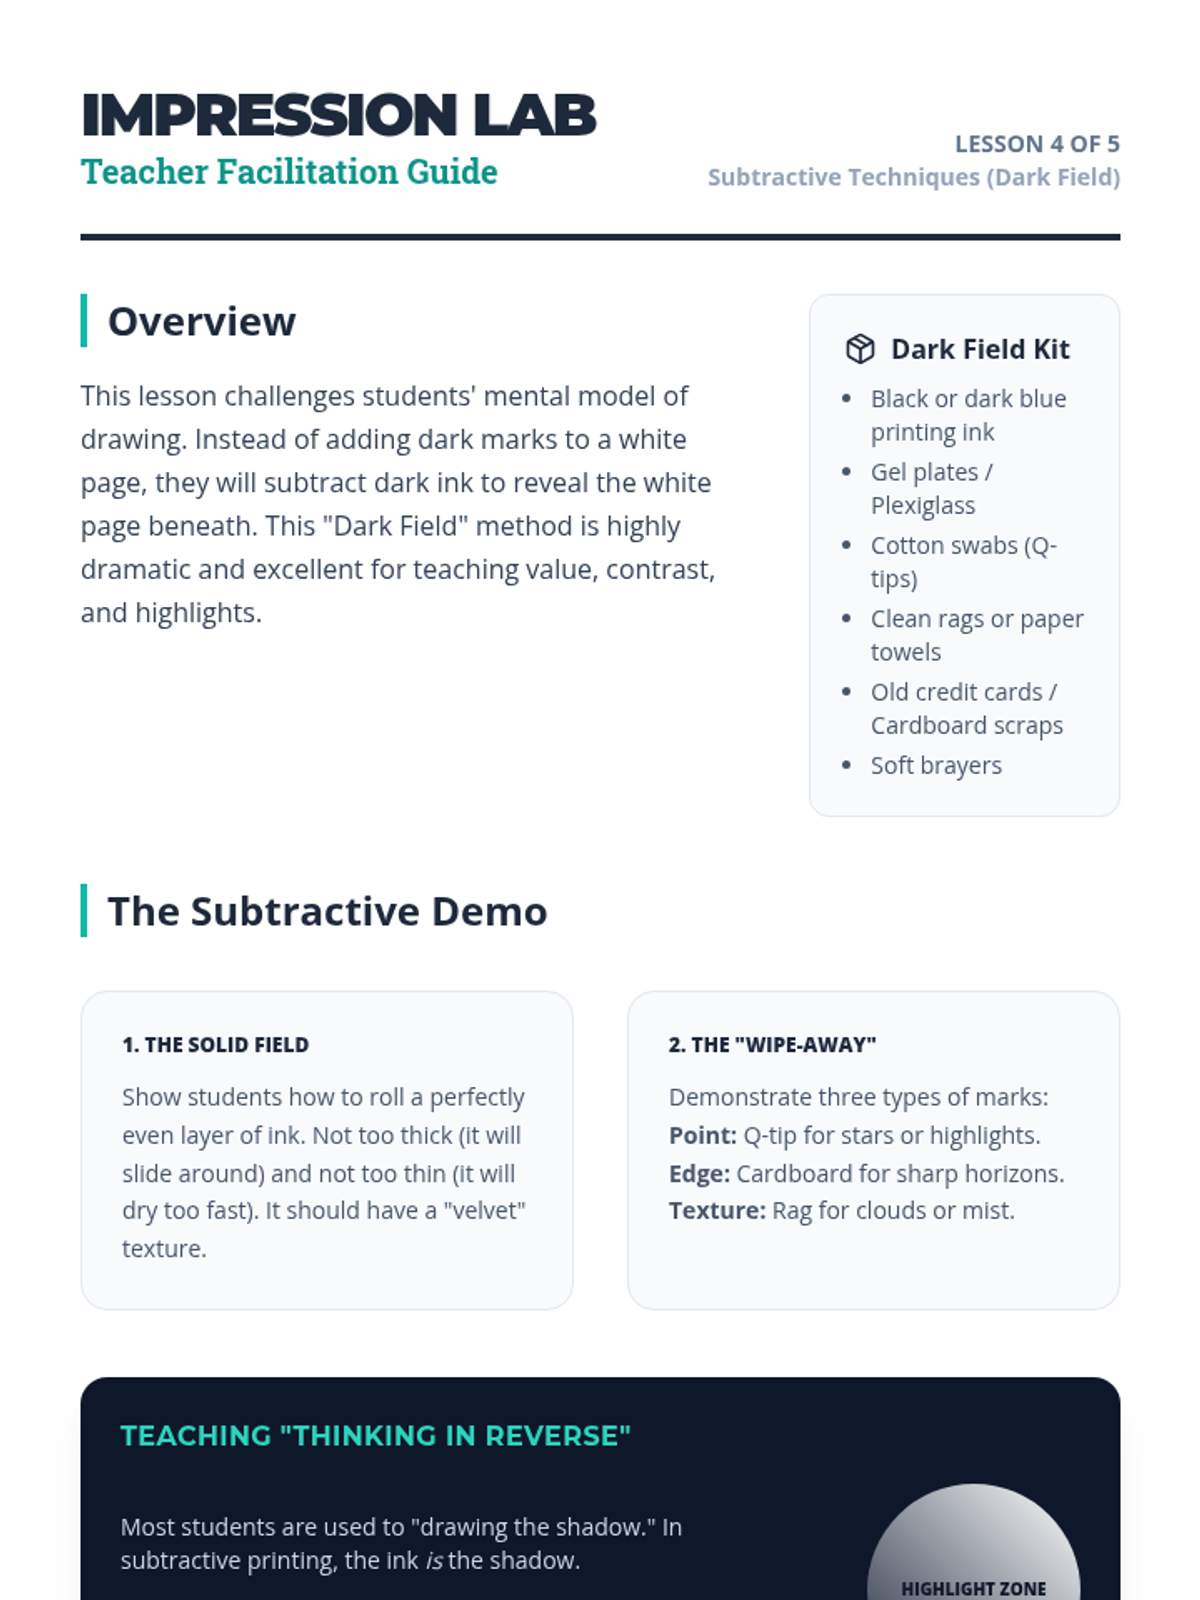
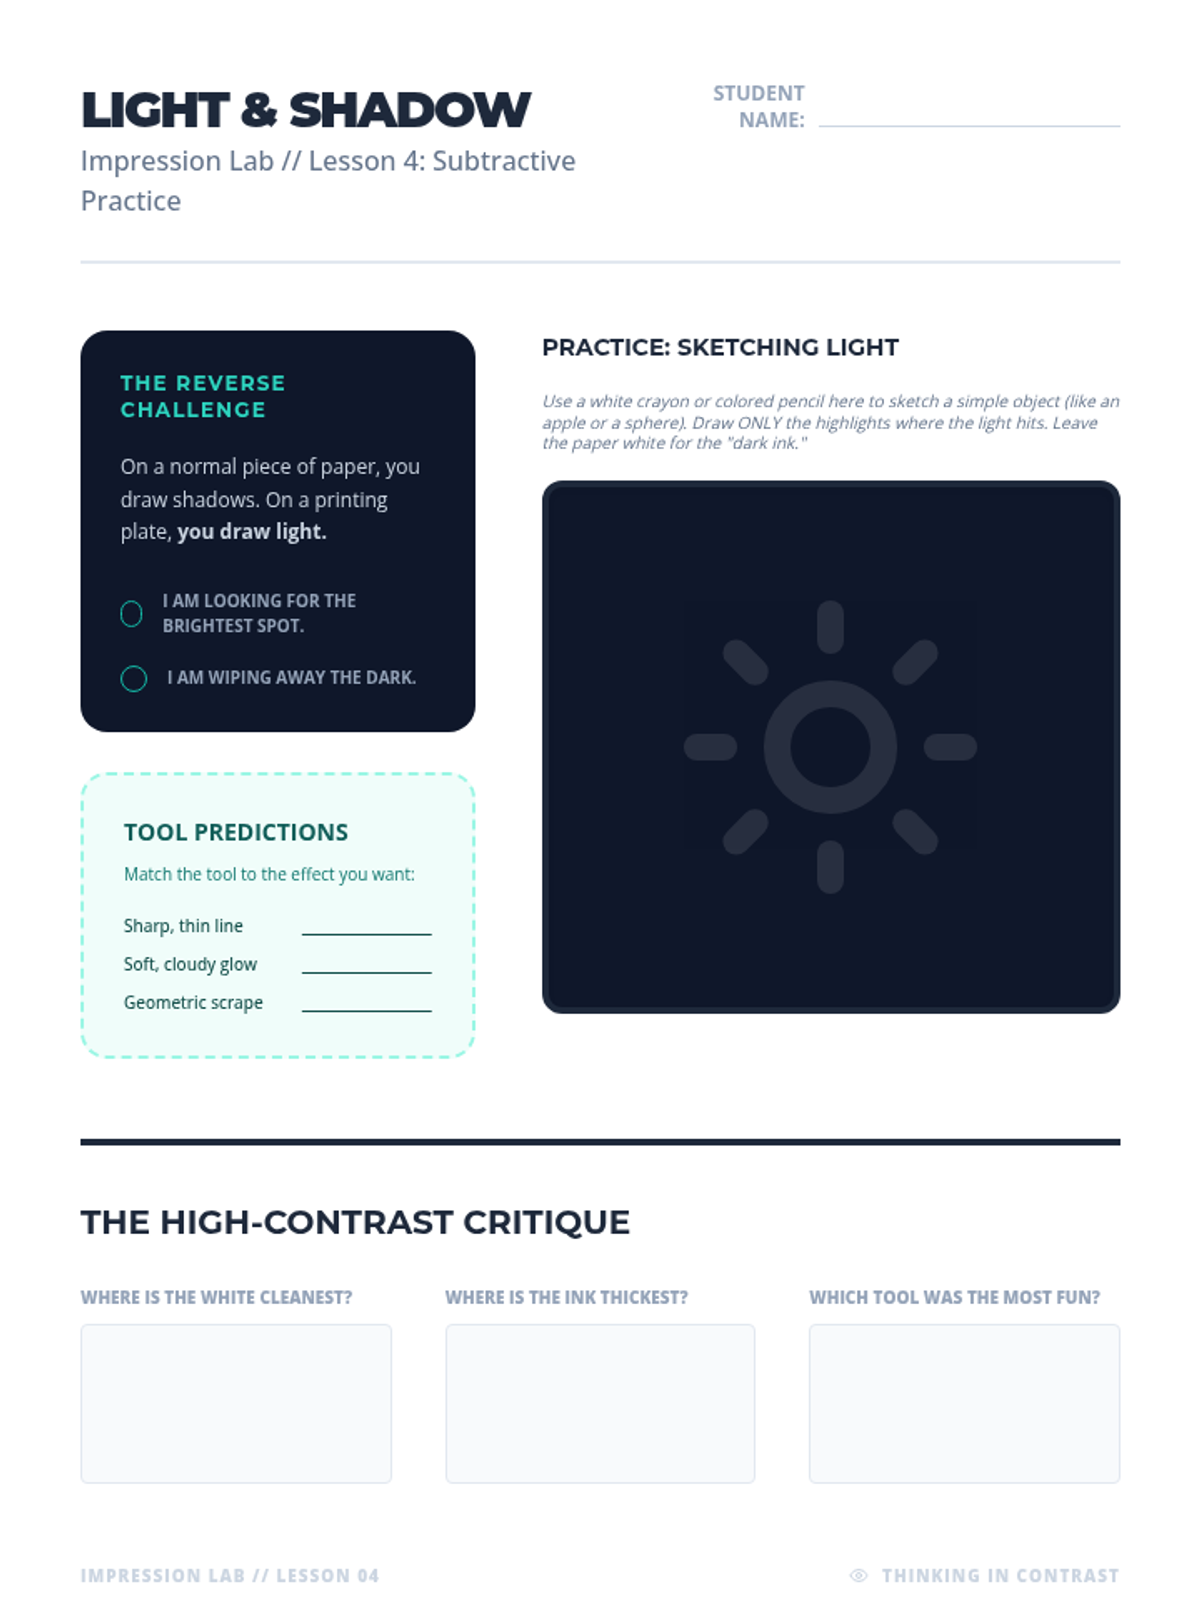
Students explore the "dark field" method of monoprinting, using subtractive tools to remove ink from a fully coated plate to create high-contrast images of light.
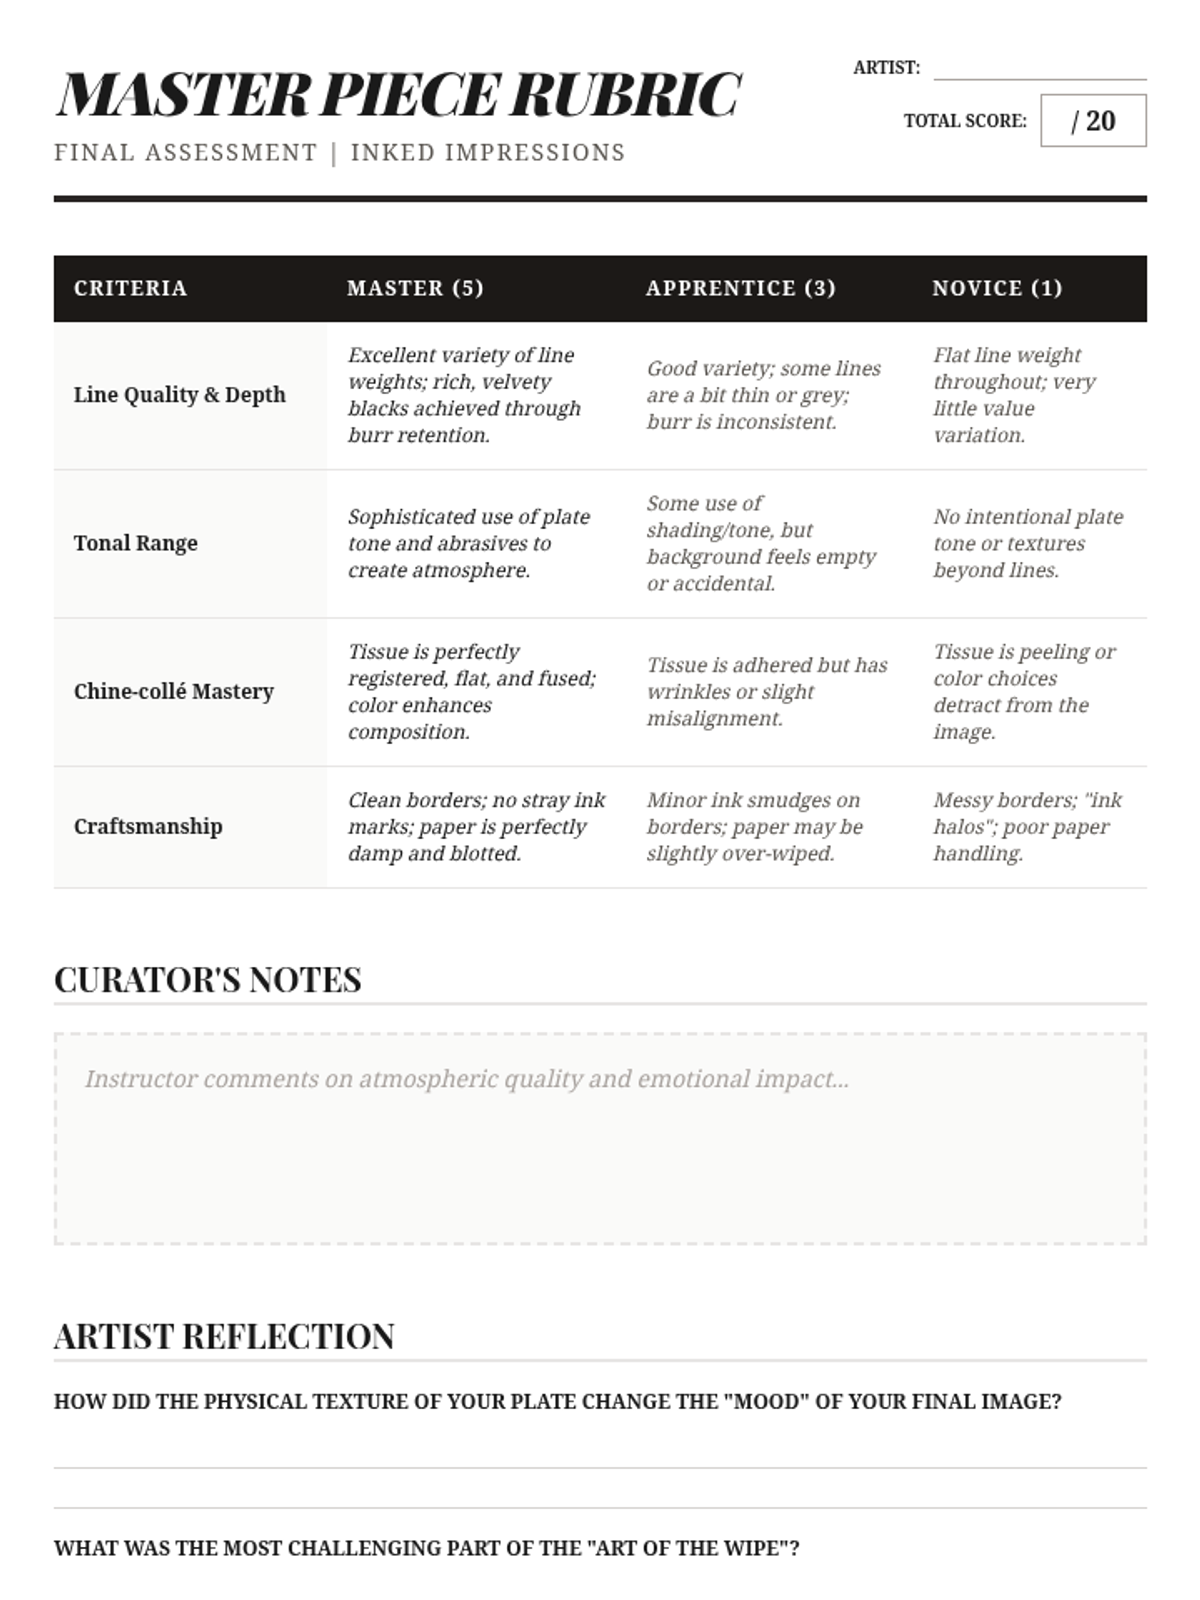
The final stage where students incorporate color through chine-collé and refine their compositions for a final edition.
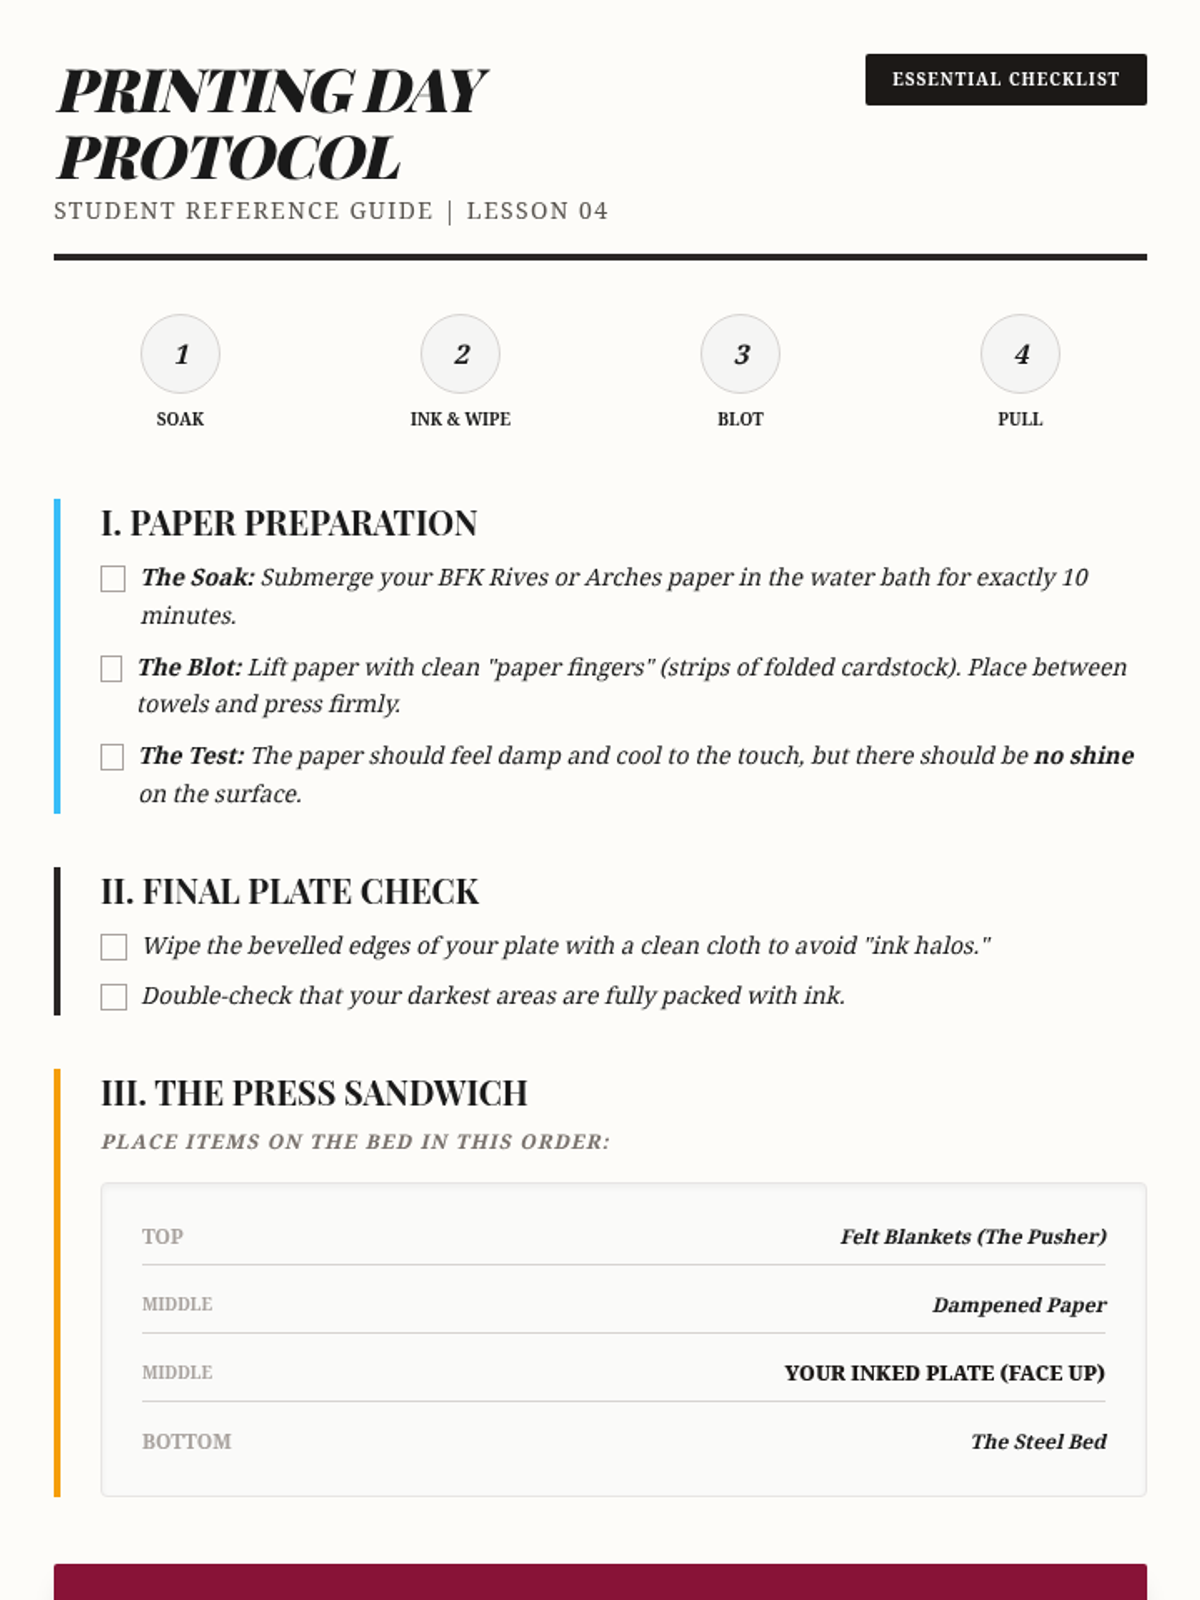
Students master the preparation of damp paper and the operation of the etching press to transfer their images.
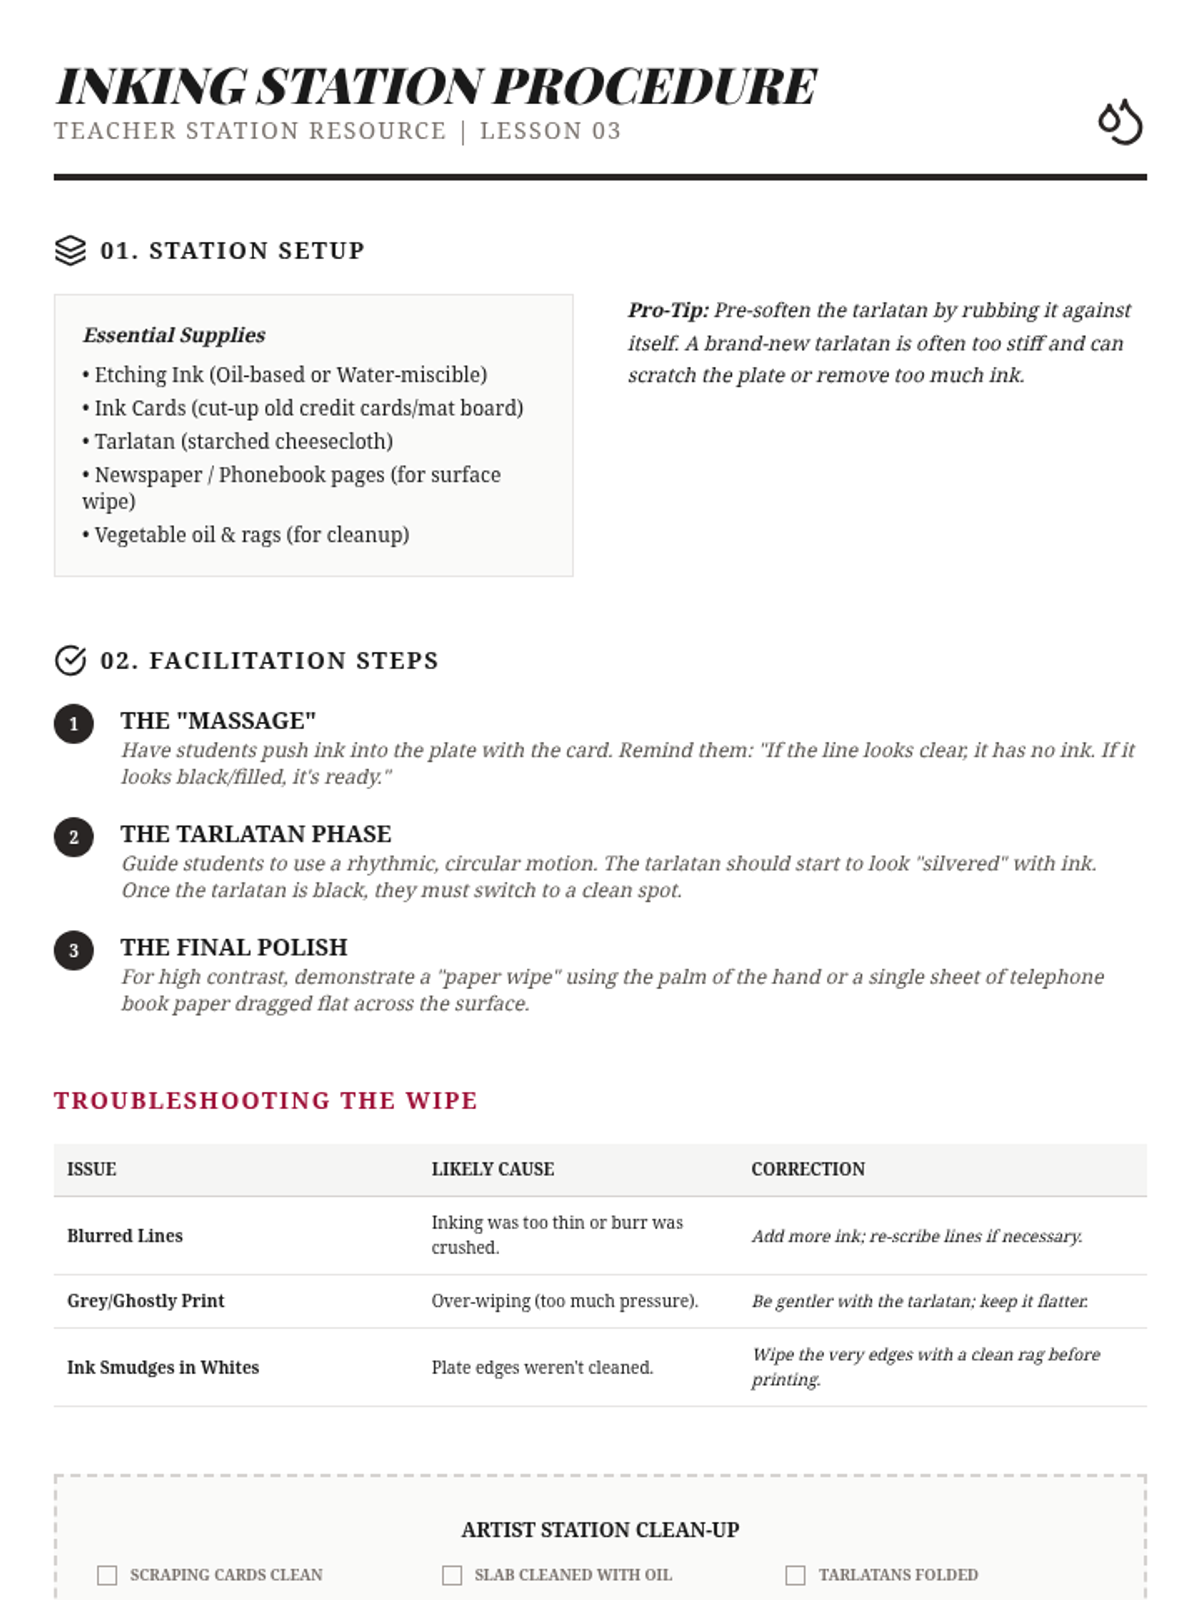
A technical dive into the physical process of inking a plate and the delicate art of wiping with tarlatan.
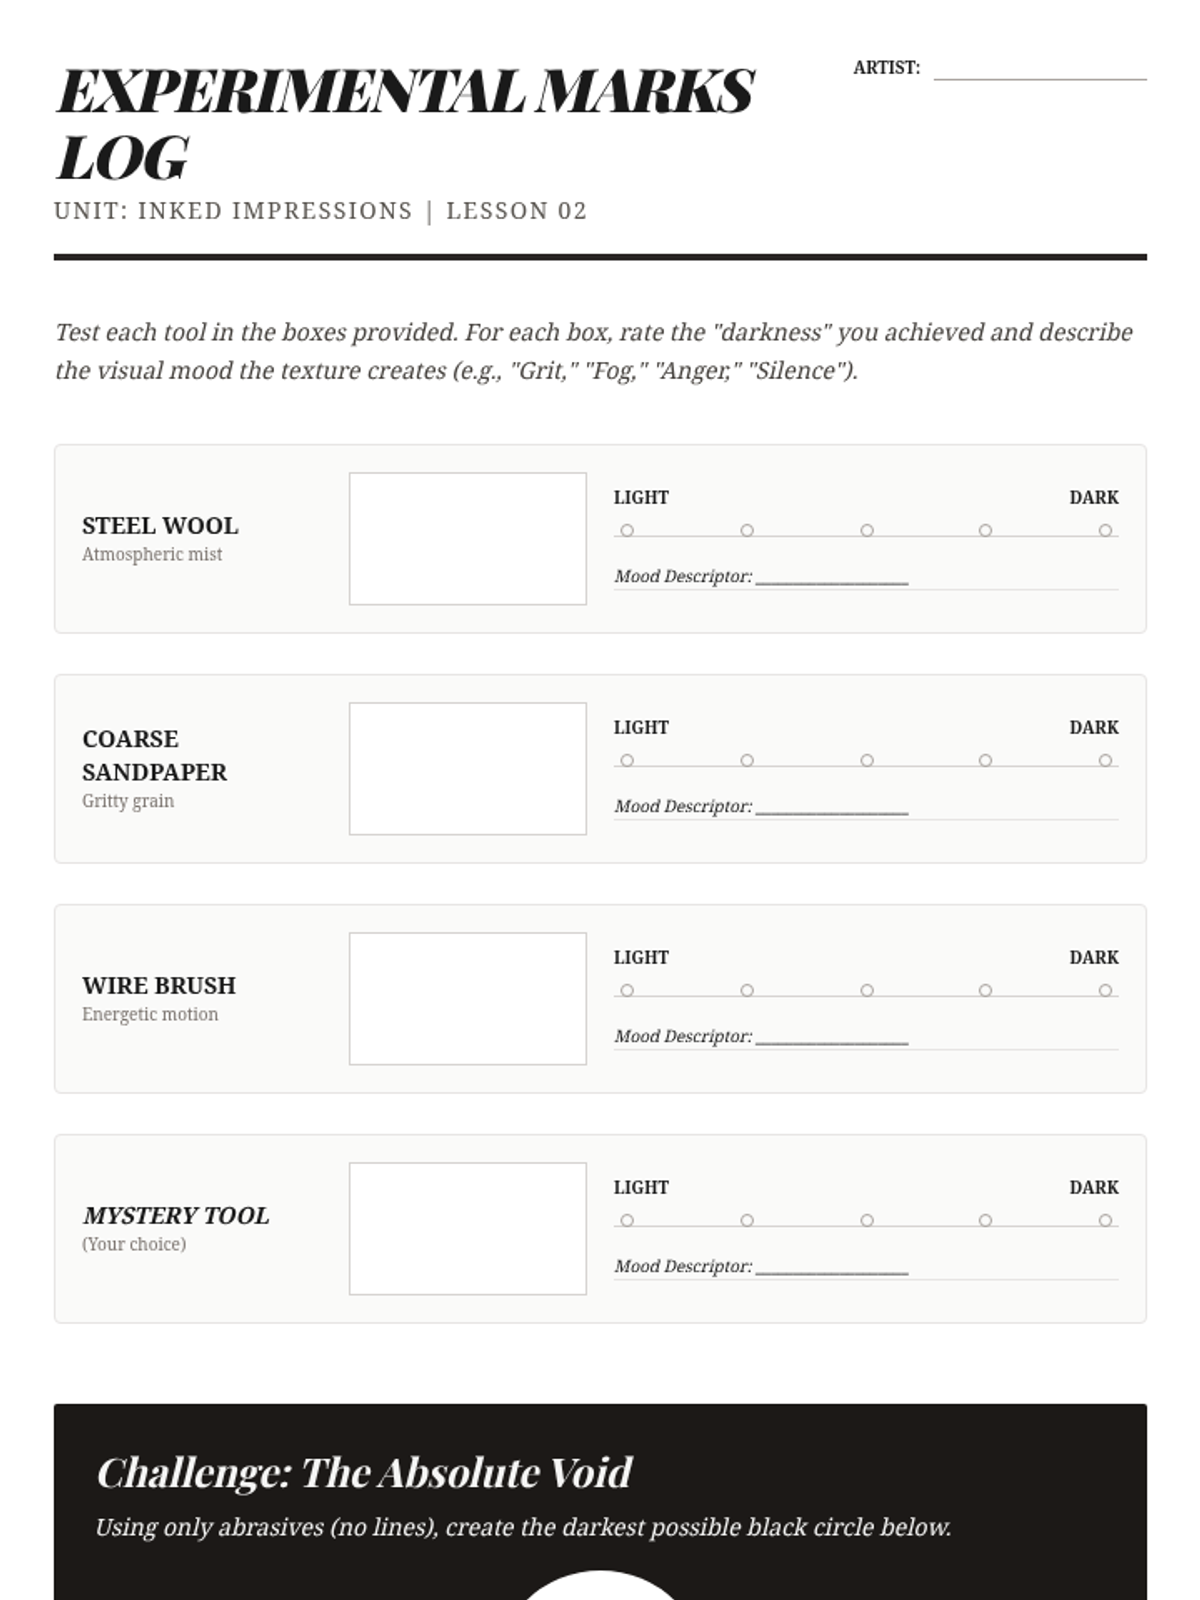
Focuses on creating value and atmosphere using abrasive tools and hatching techniques to hold plate tone.
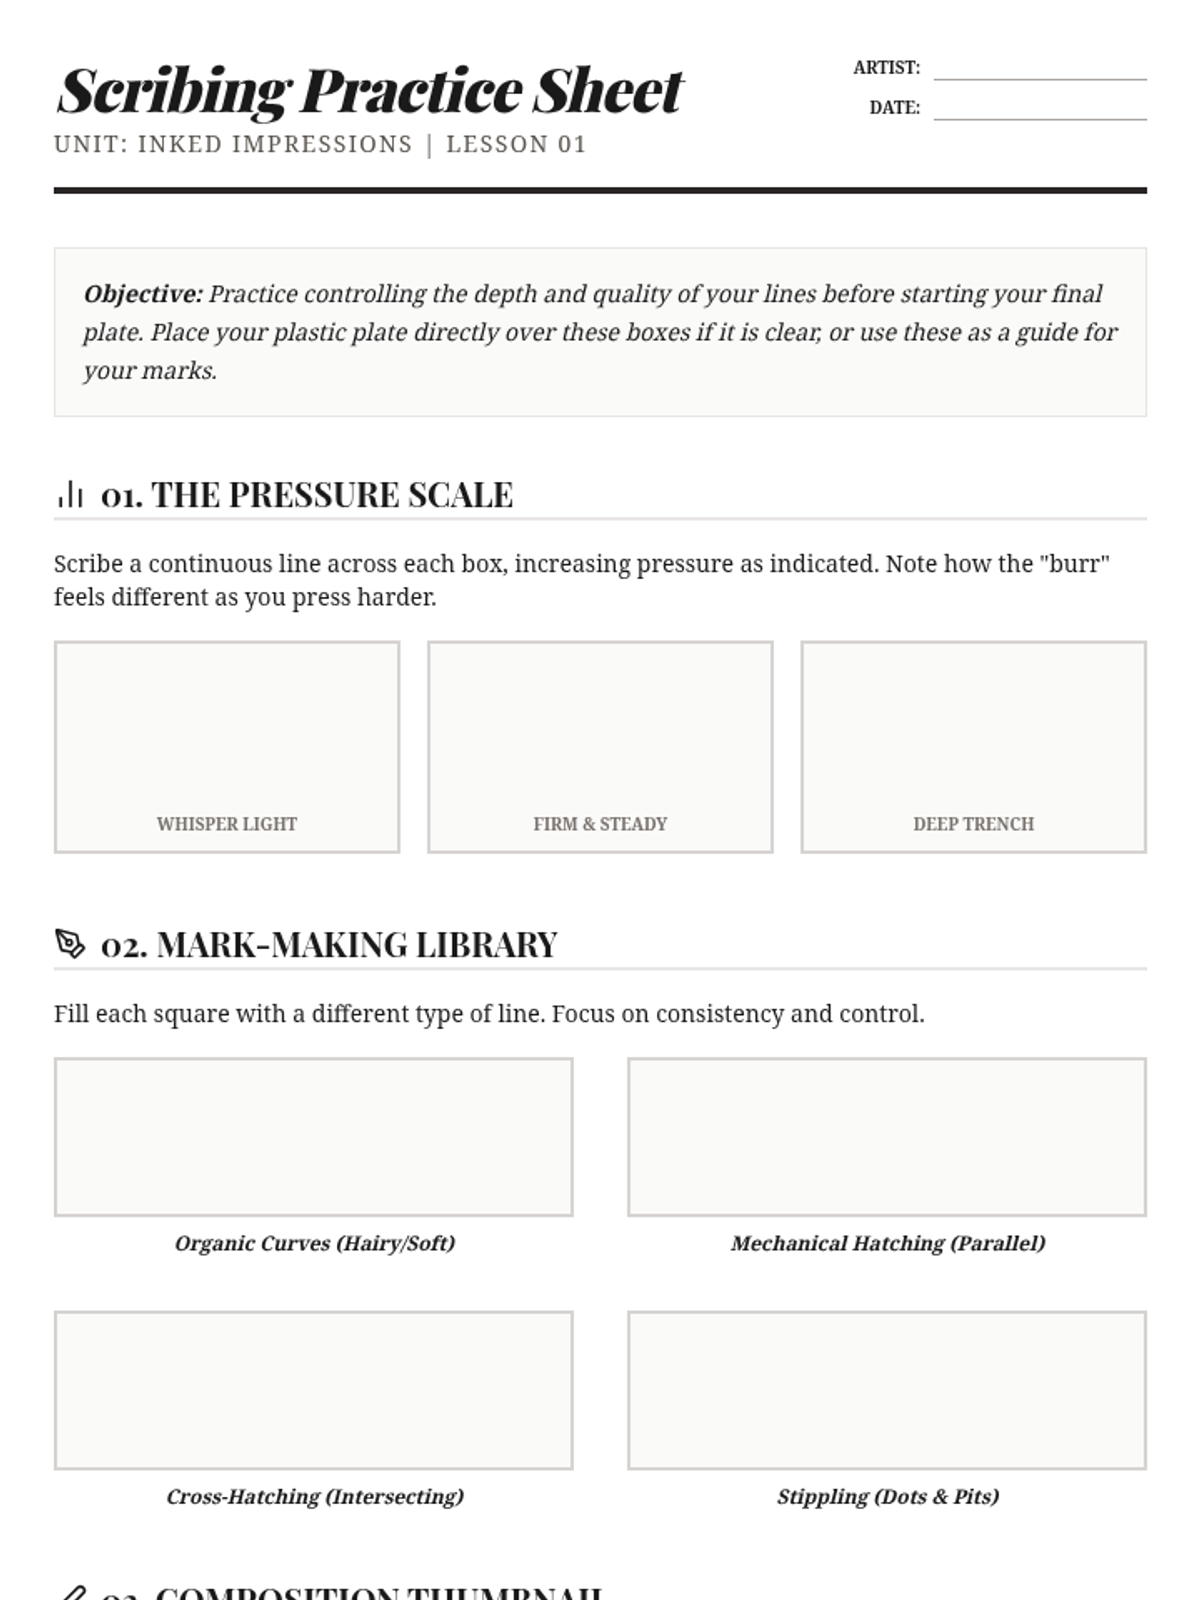
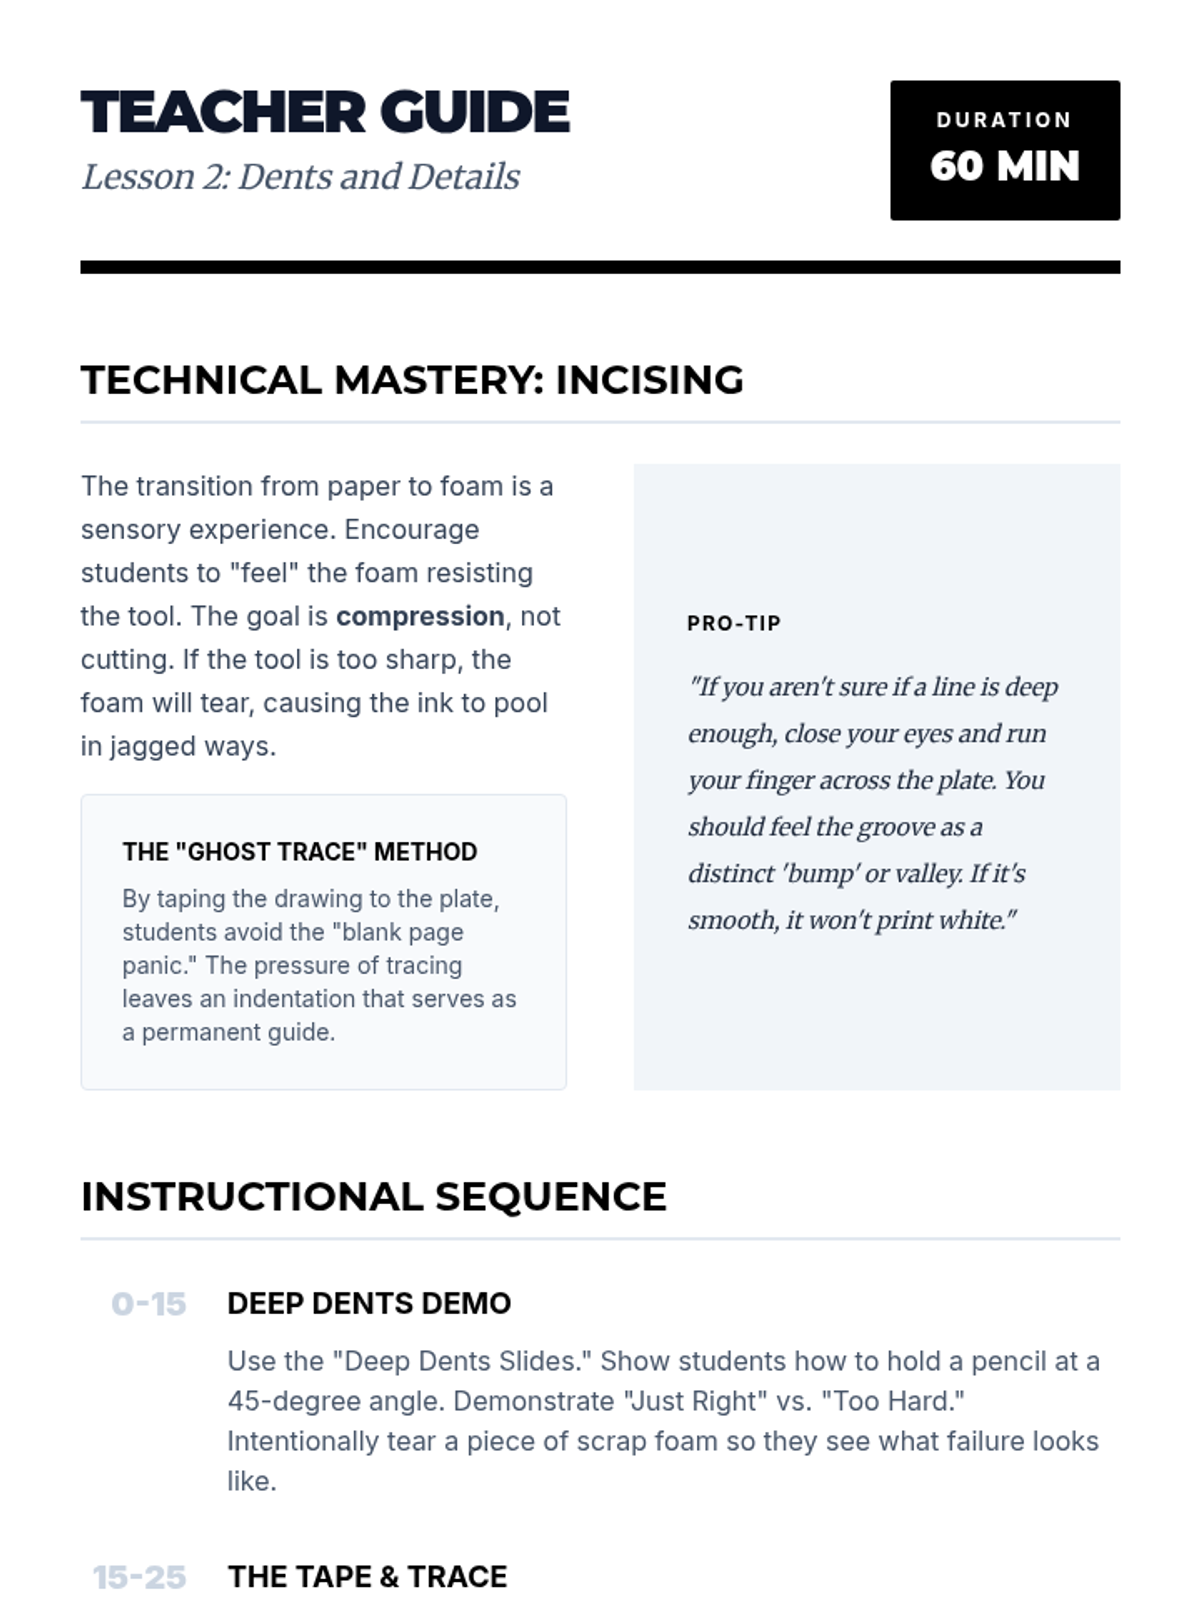
Students learn the fundamental difference between relief and intaglio printing and practice scribing lines into plastic plates with varying pressure.
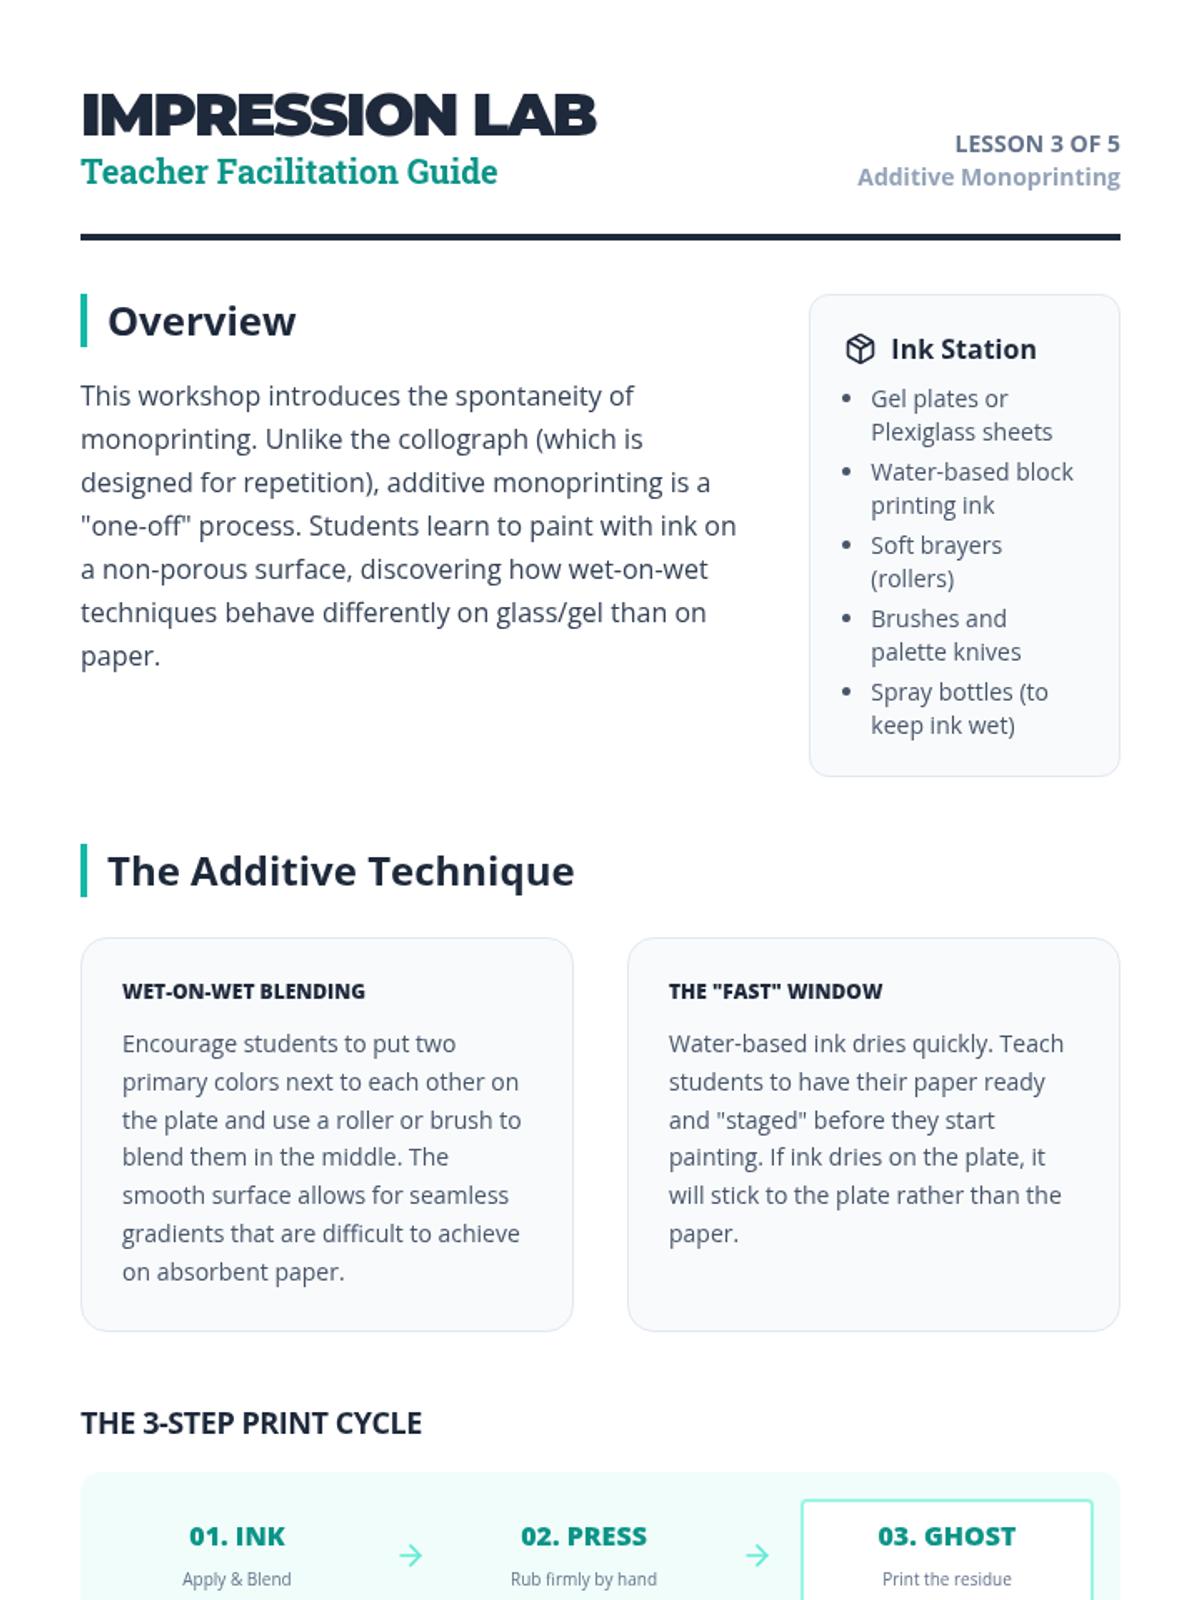
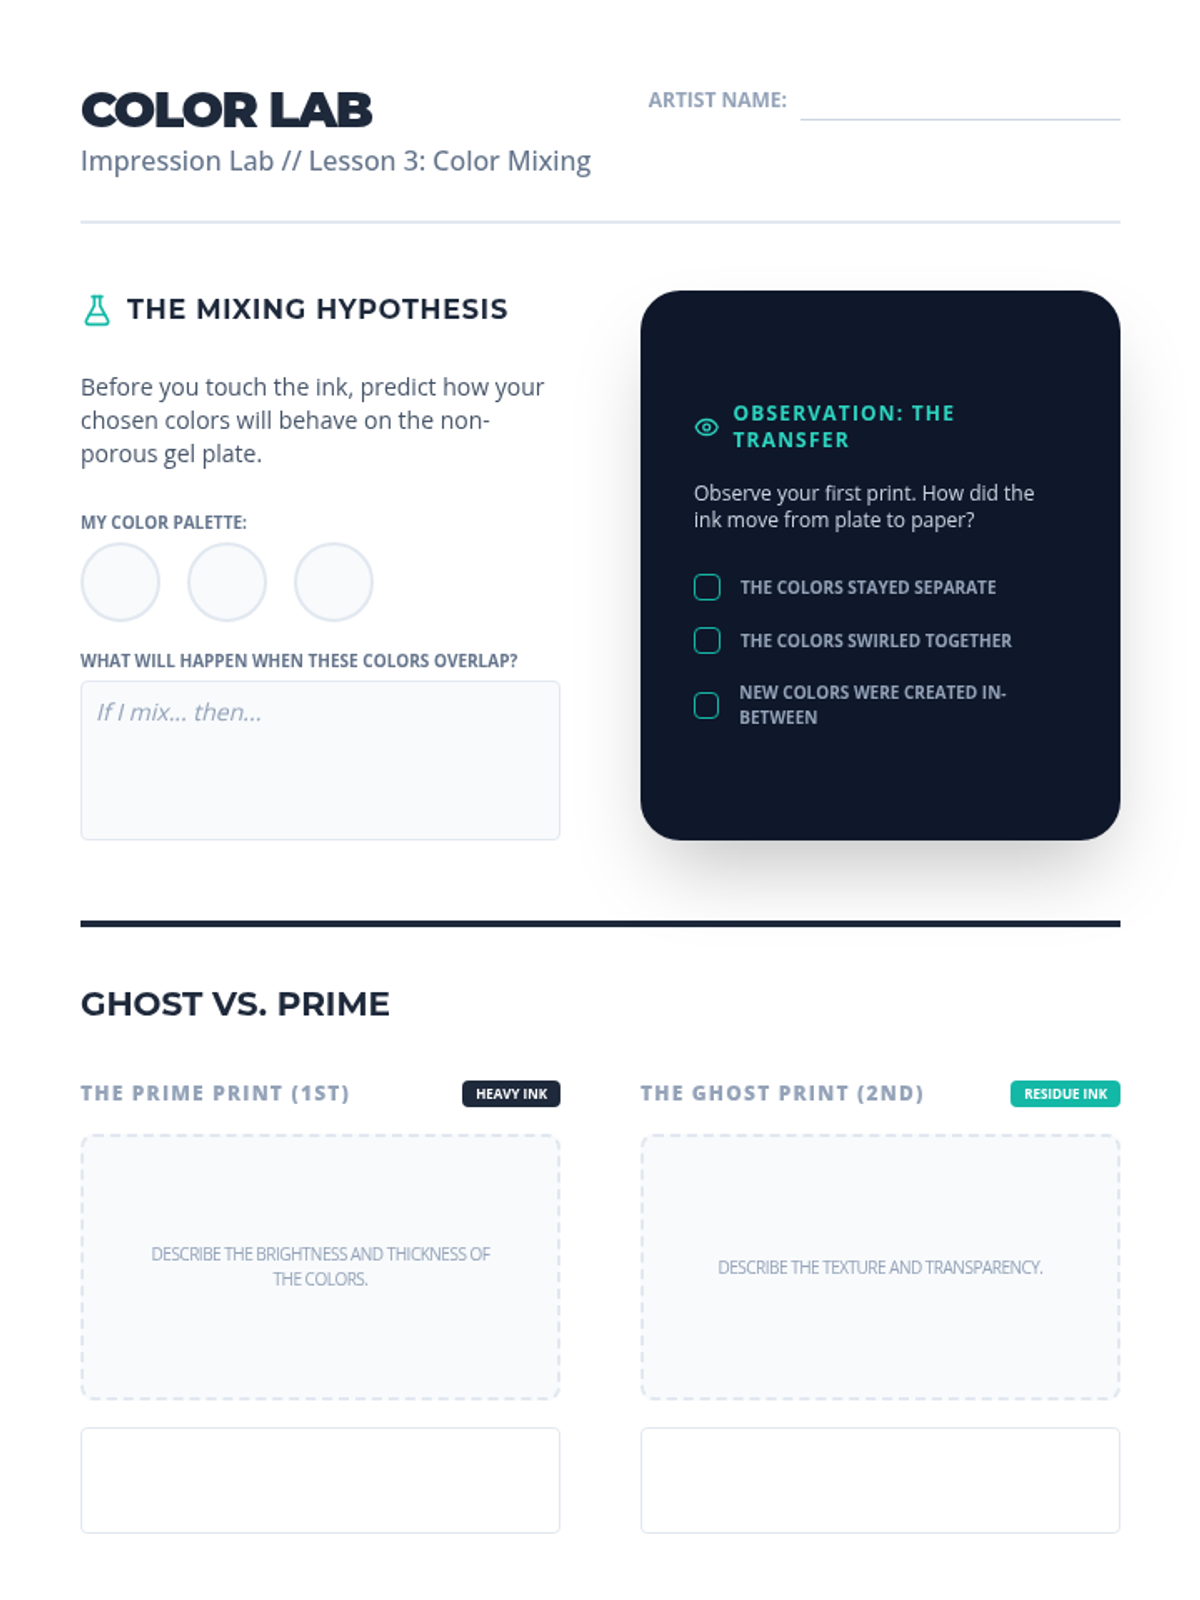
Students practice additive monoprinting on gel plates, focusing on spontaneous color blending and the unique nature of the "one-off" print.
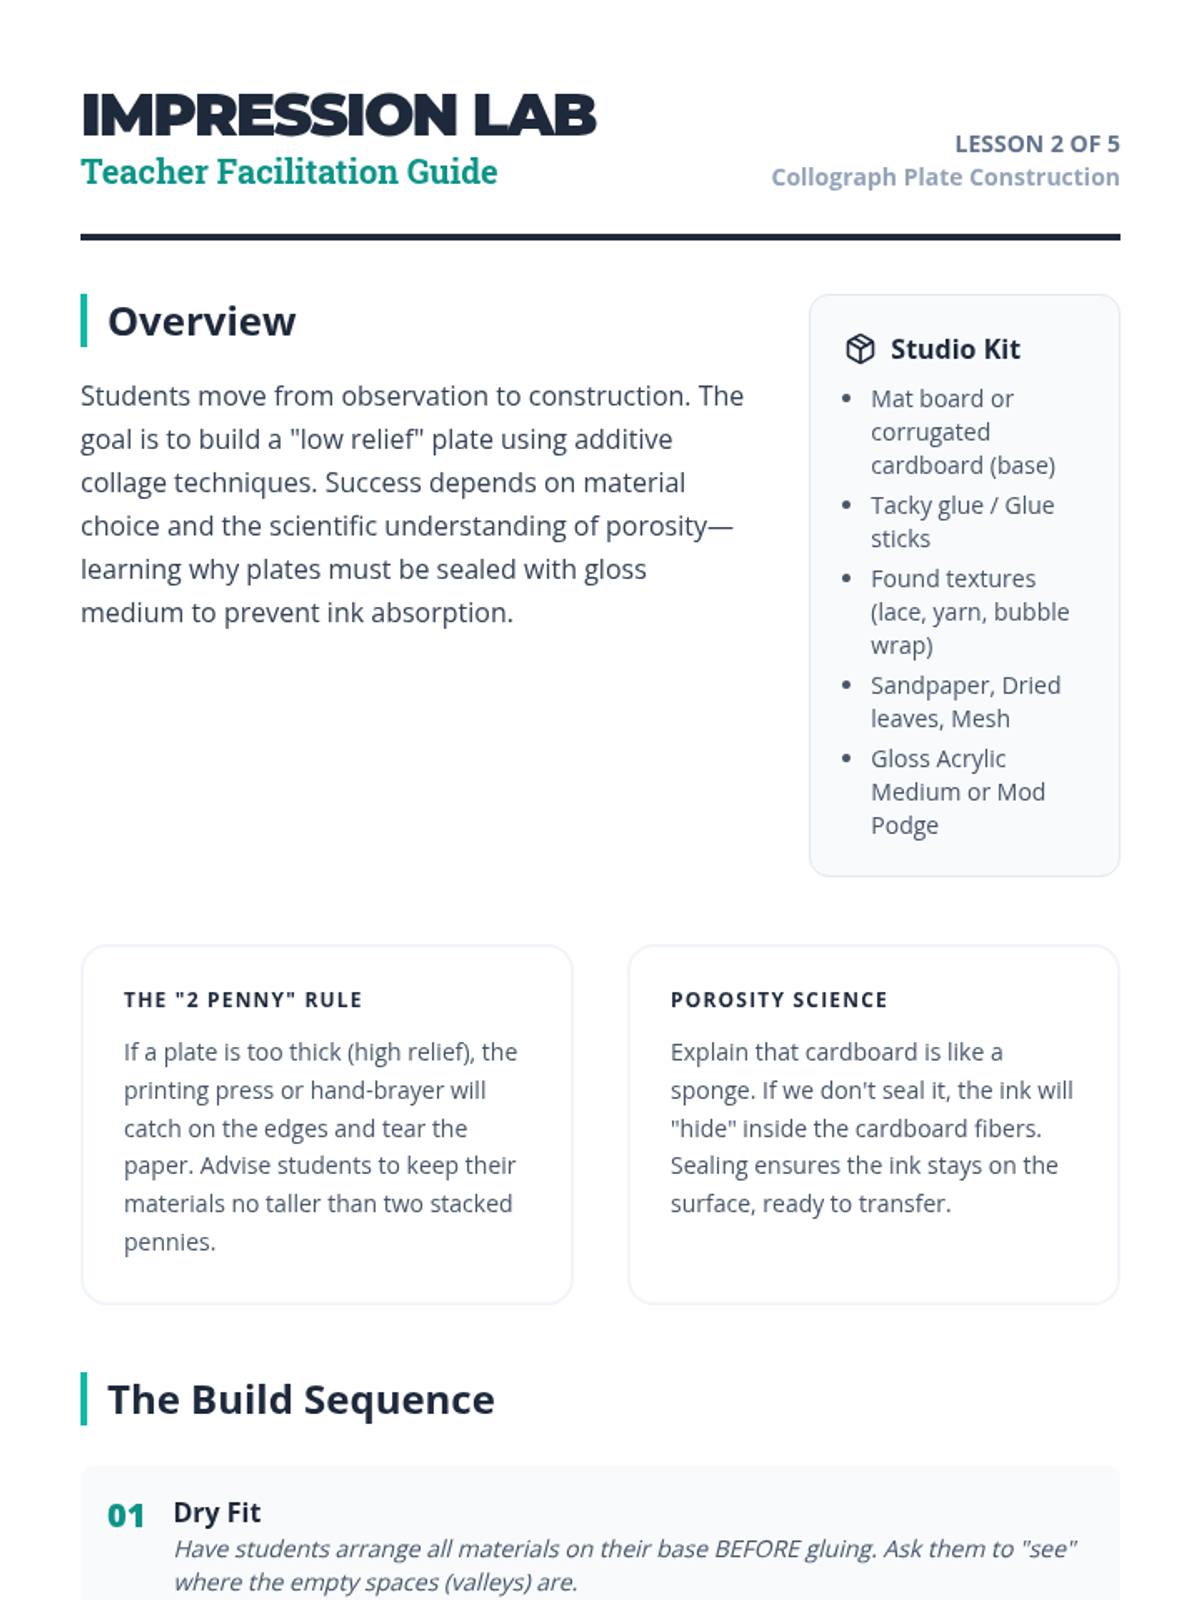
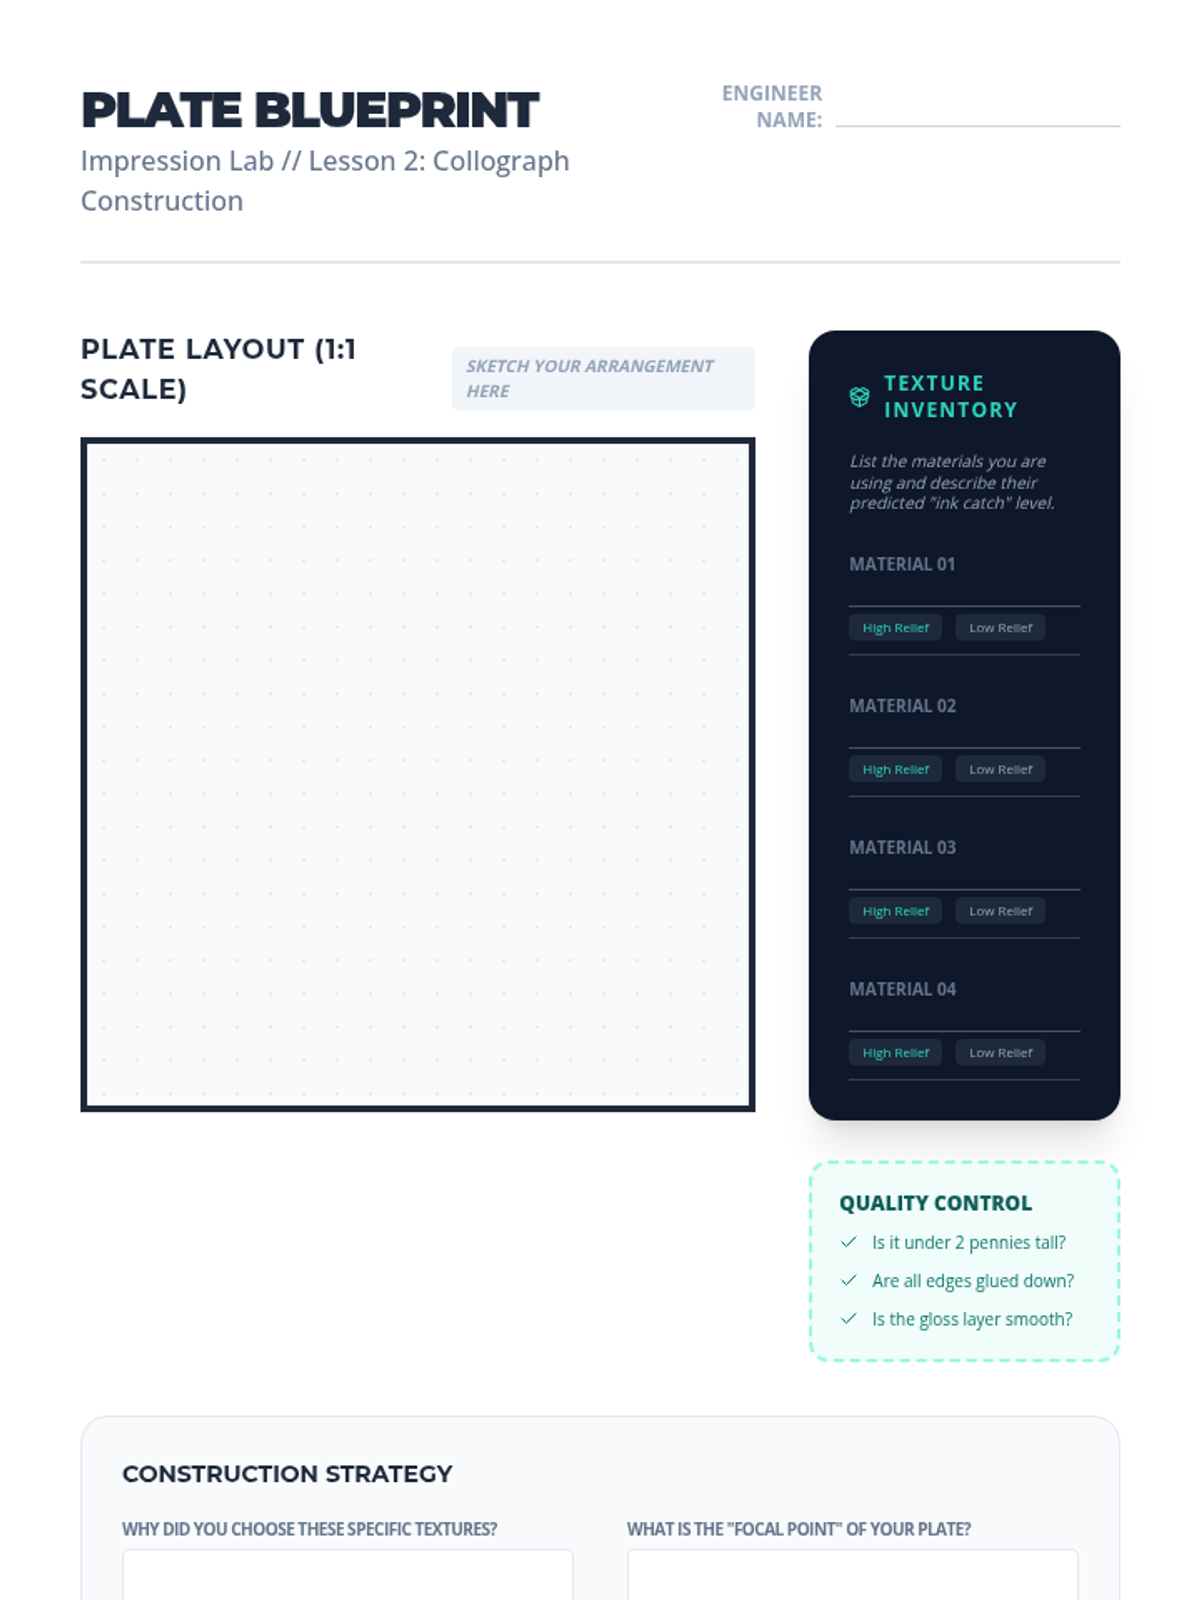
Students design and build a low-relief collograph plate using found materials, learning how physical height and texture create a printable surface.
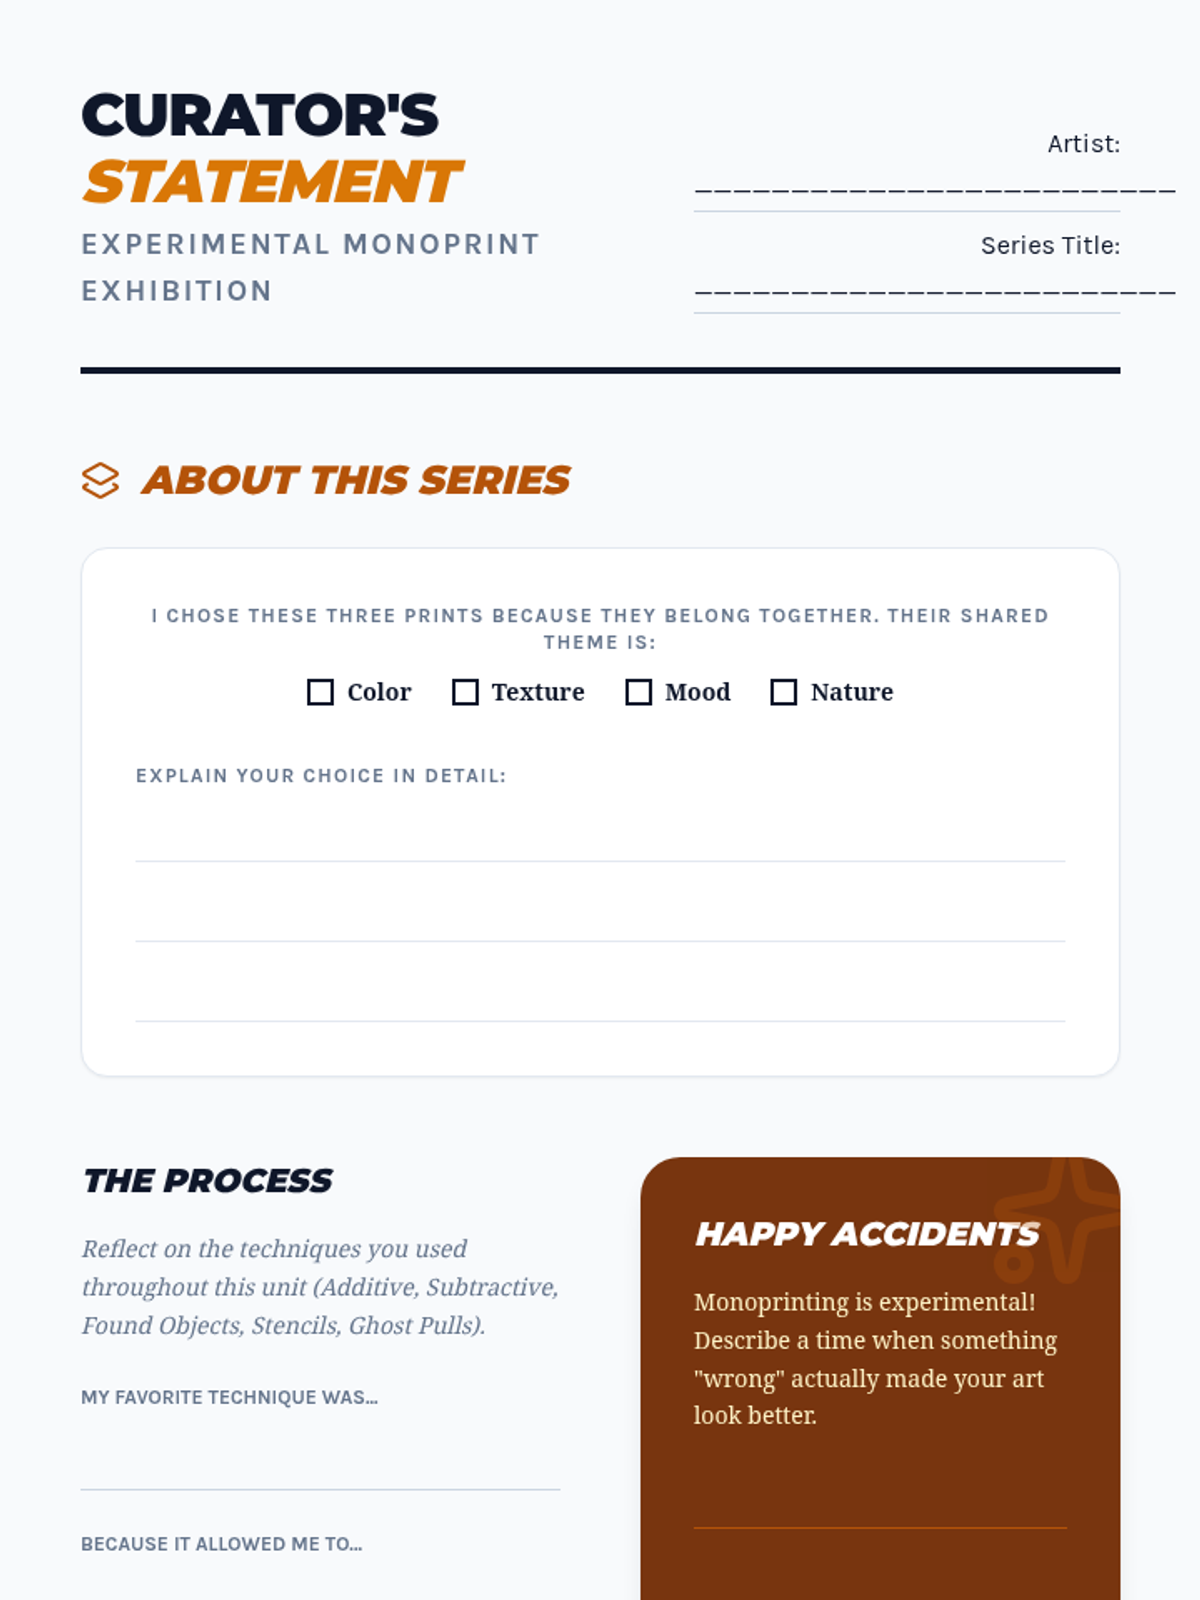
Students curate their experimental prints and select a cohesive series. They add finishing touches with drawing materials and write a brief curator's statement about their process.
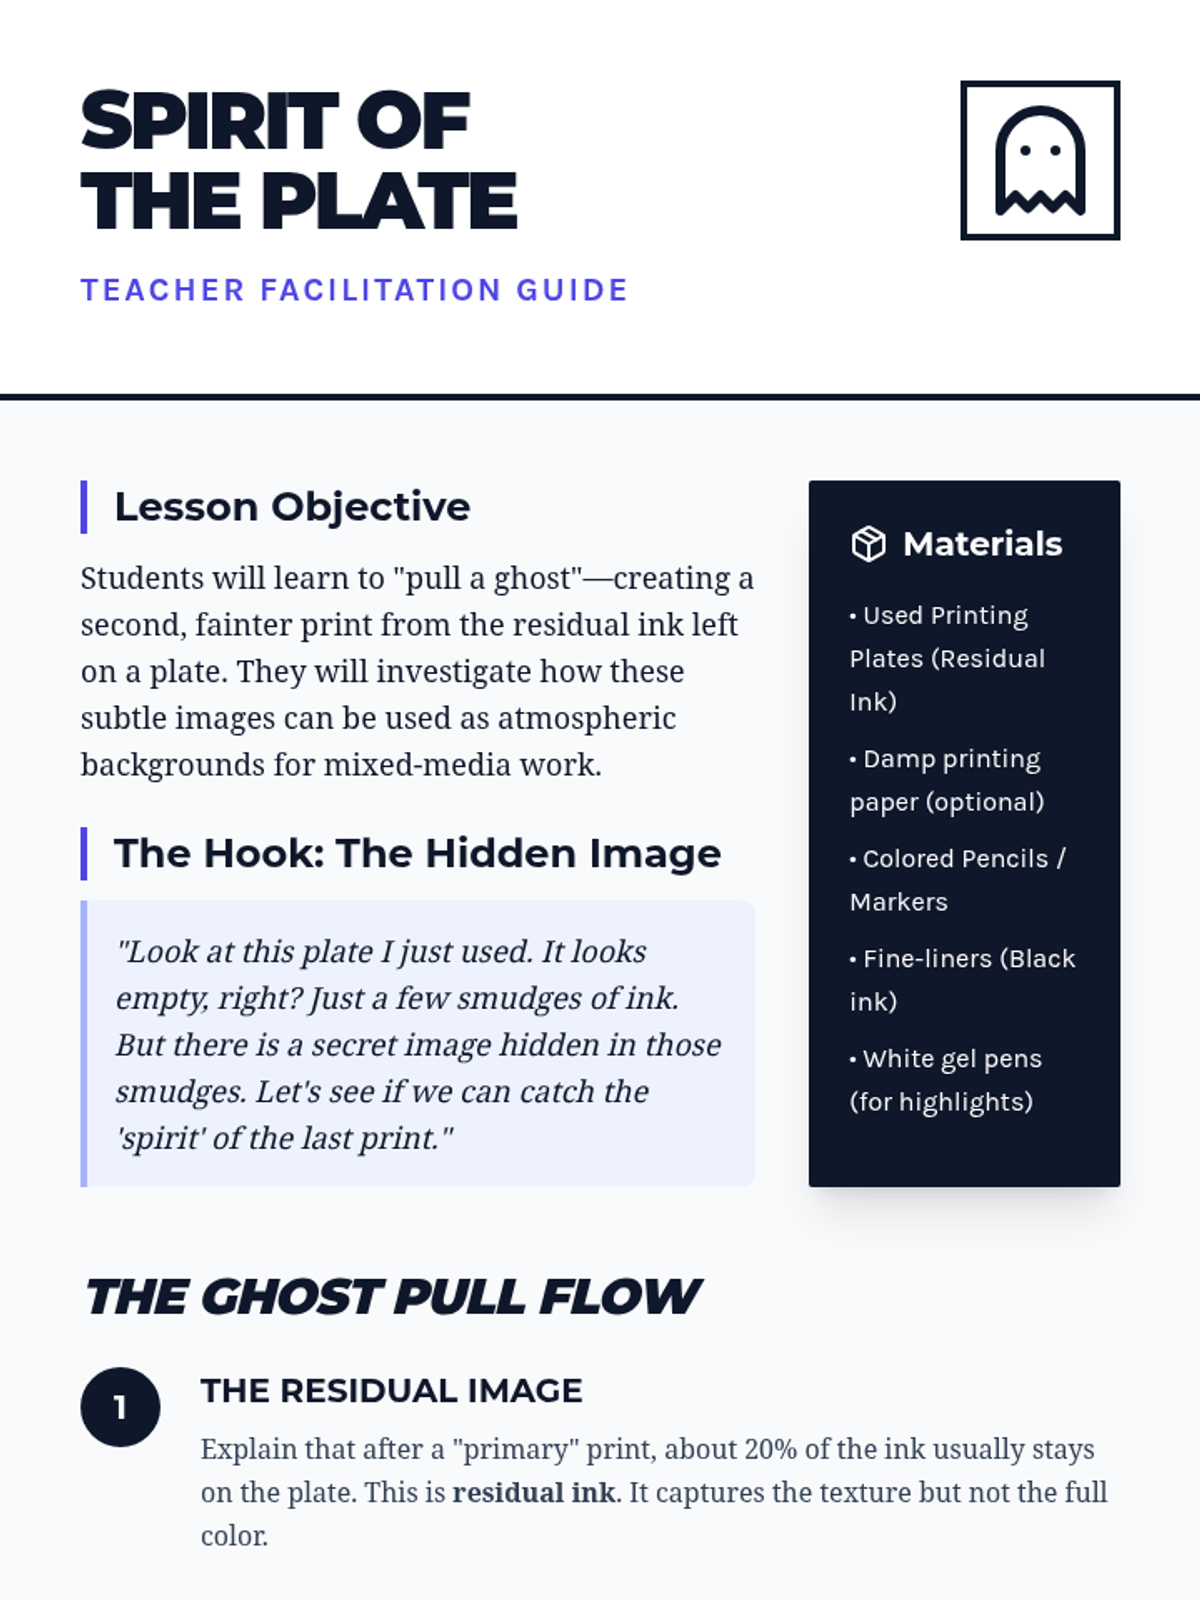
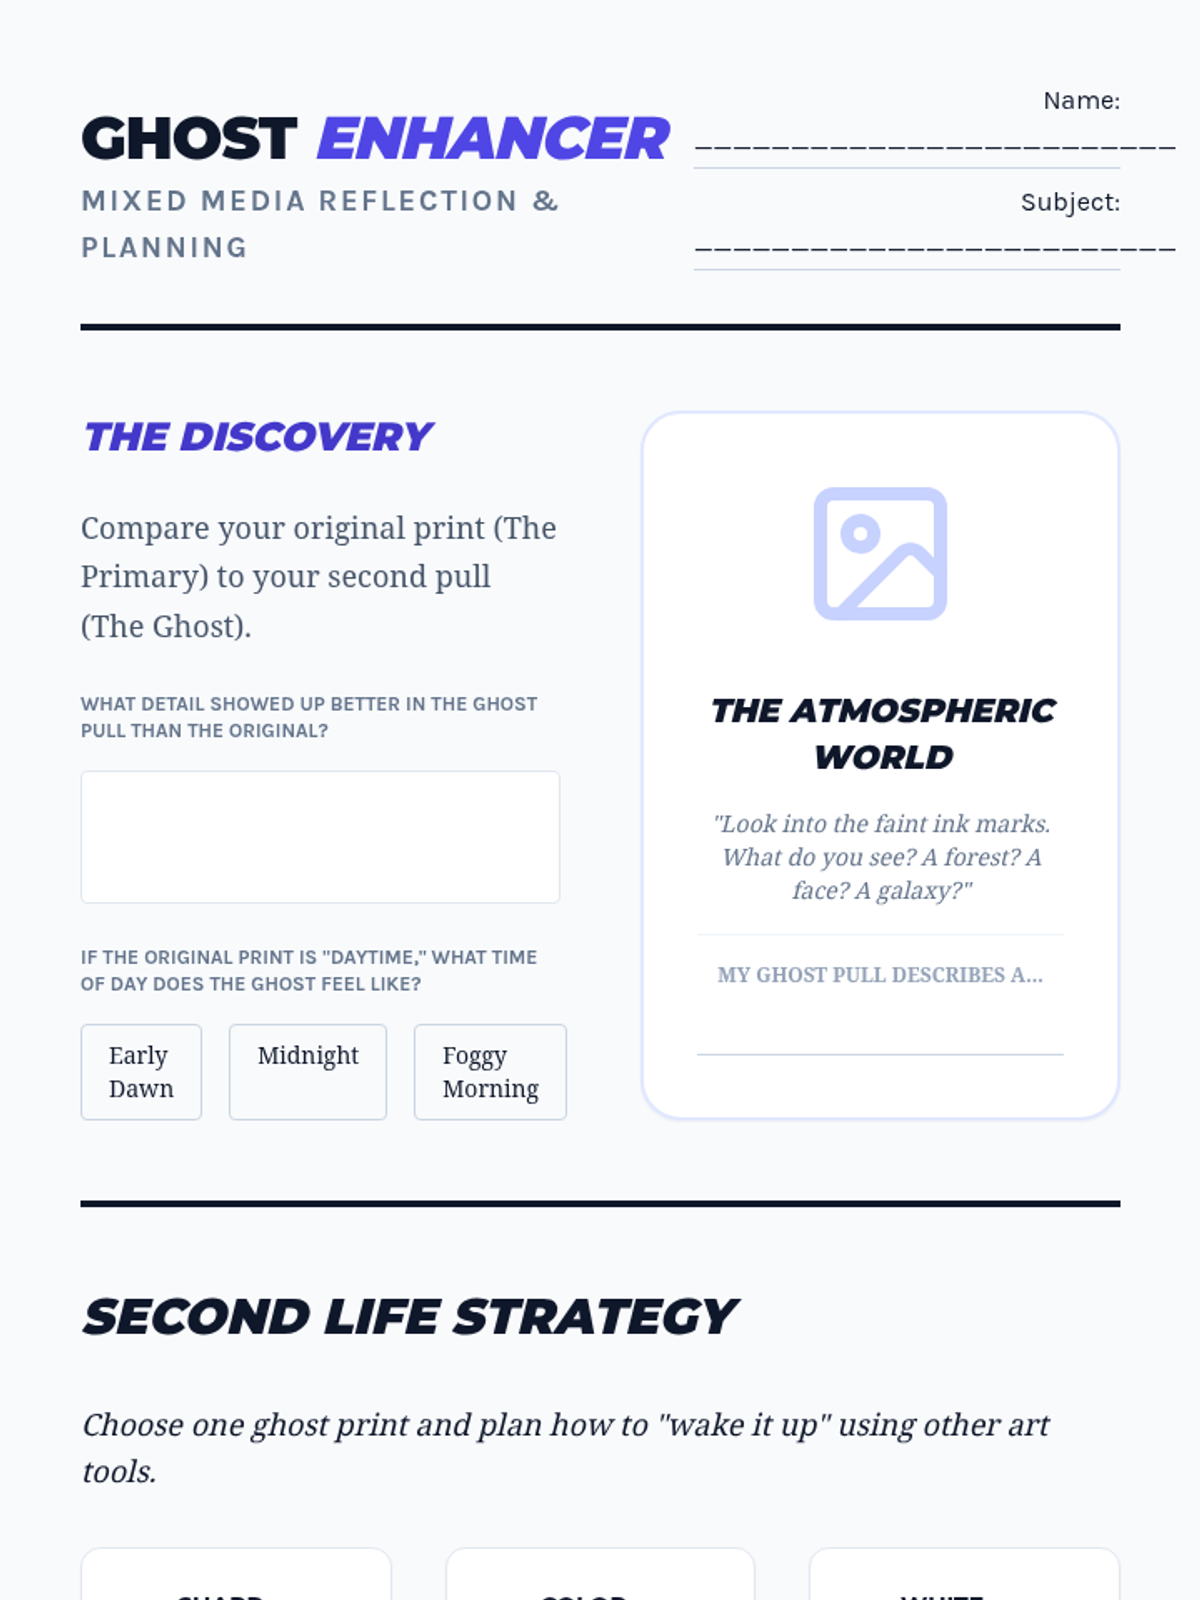
Students explore the concept of residual ink by pulling 'ghost prints'. They investigate how faint images can serve as backgrounds for further artistic development.
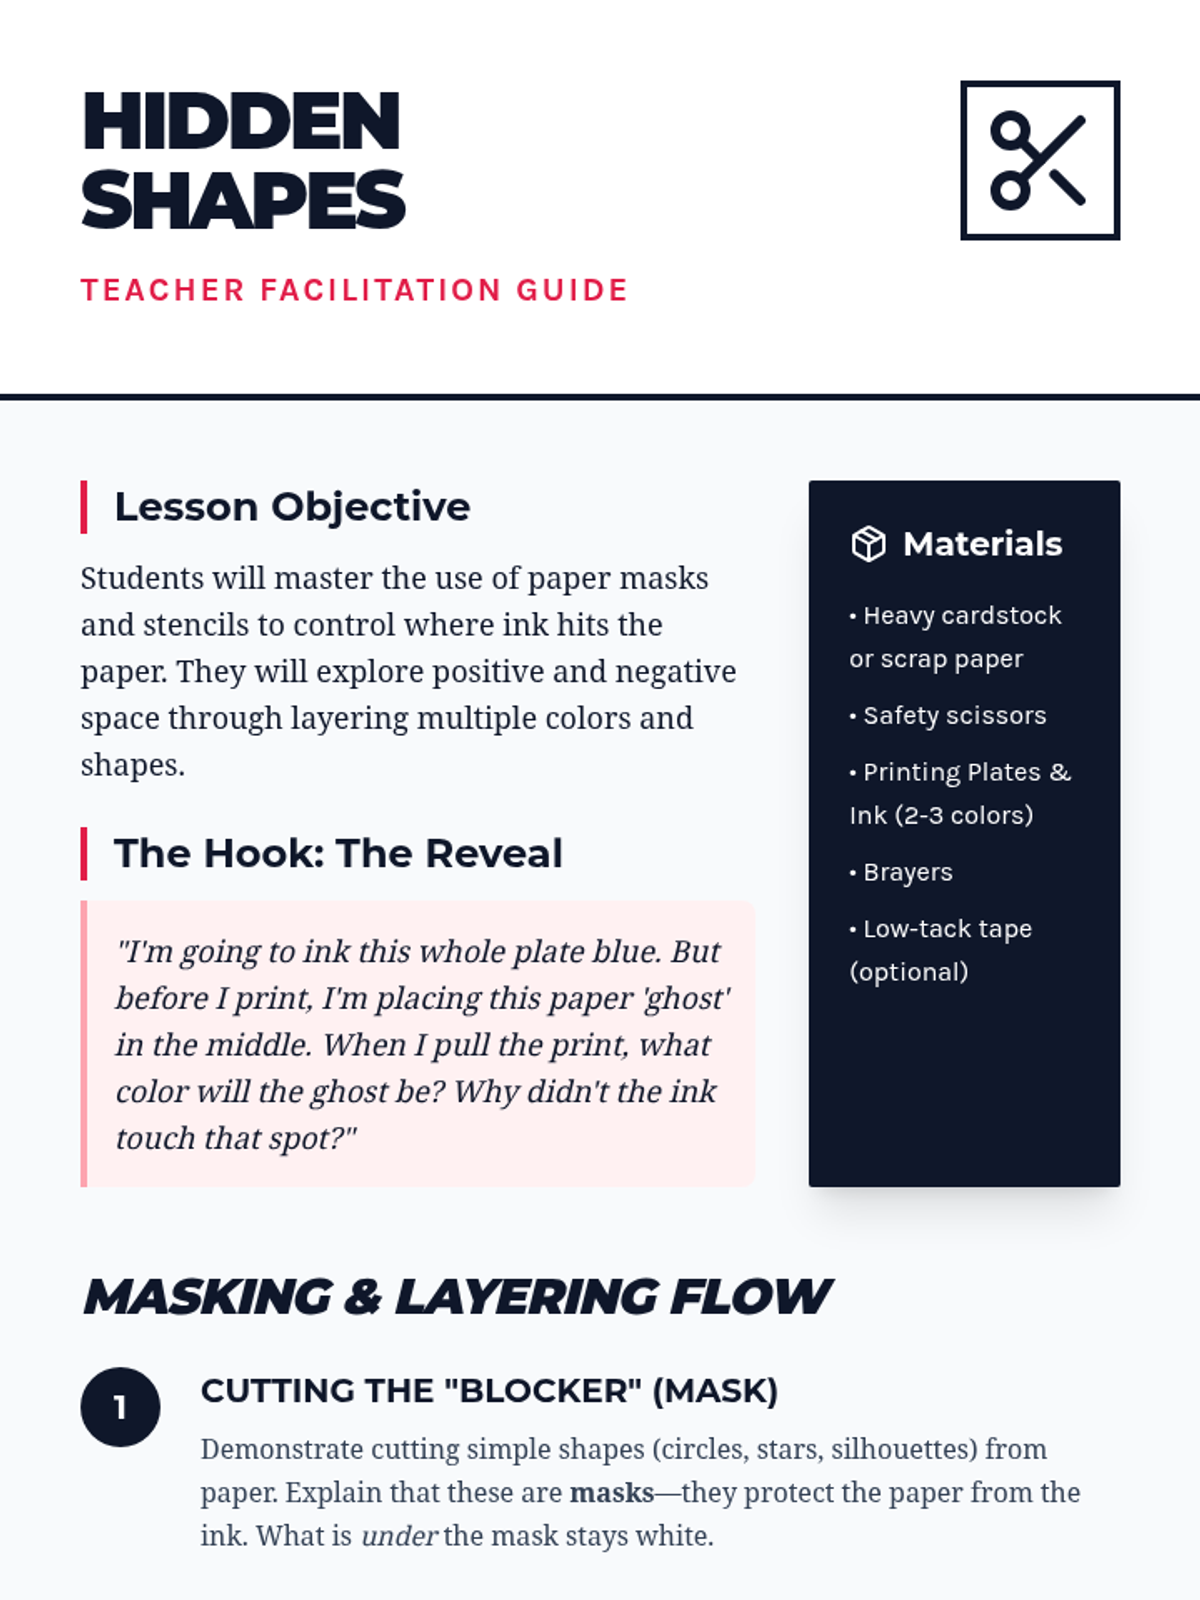
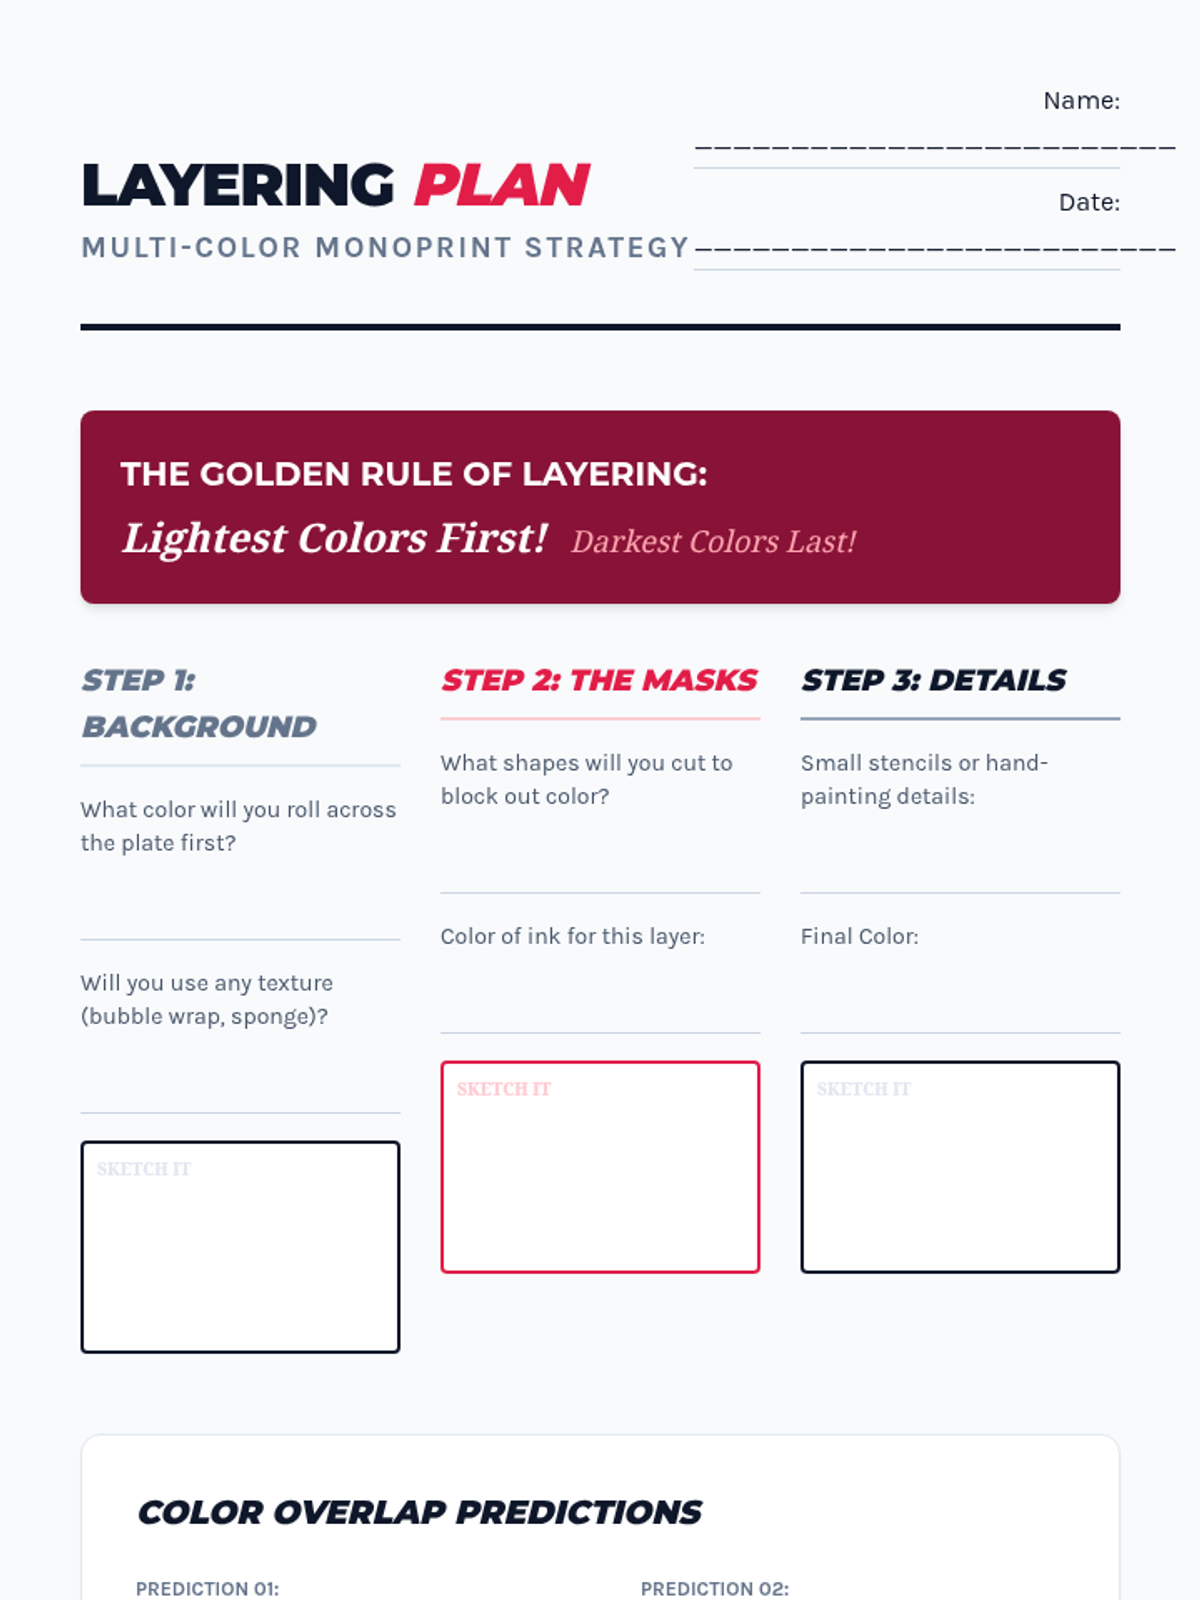
Students create paper masks to block areas of the plate, exploring positive and negative space. They learn to layer colors and preserve white space in their compositions.
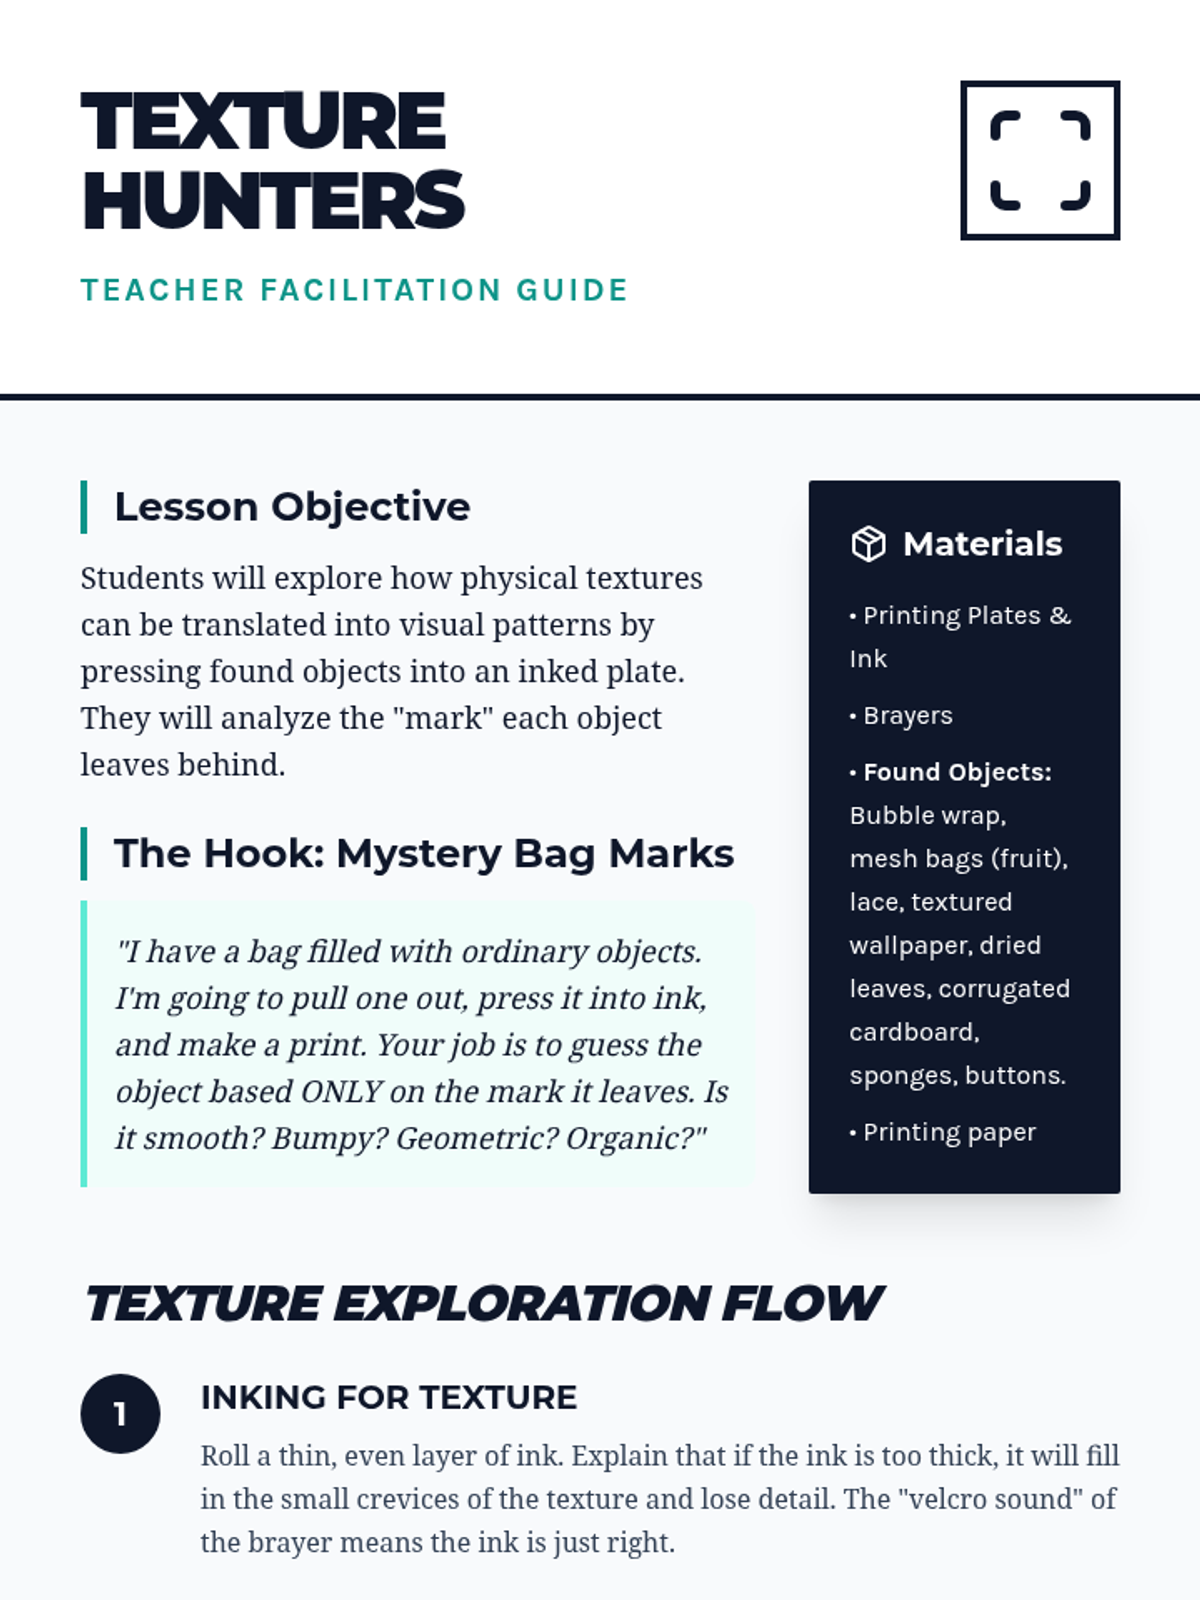
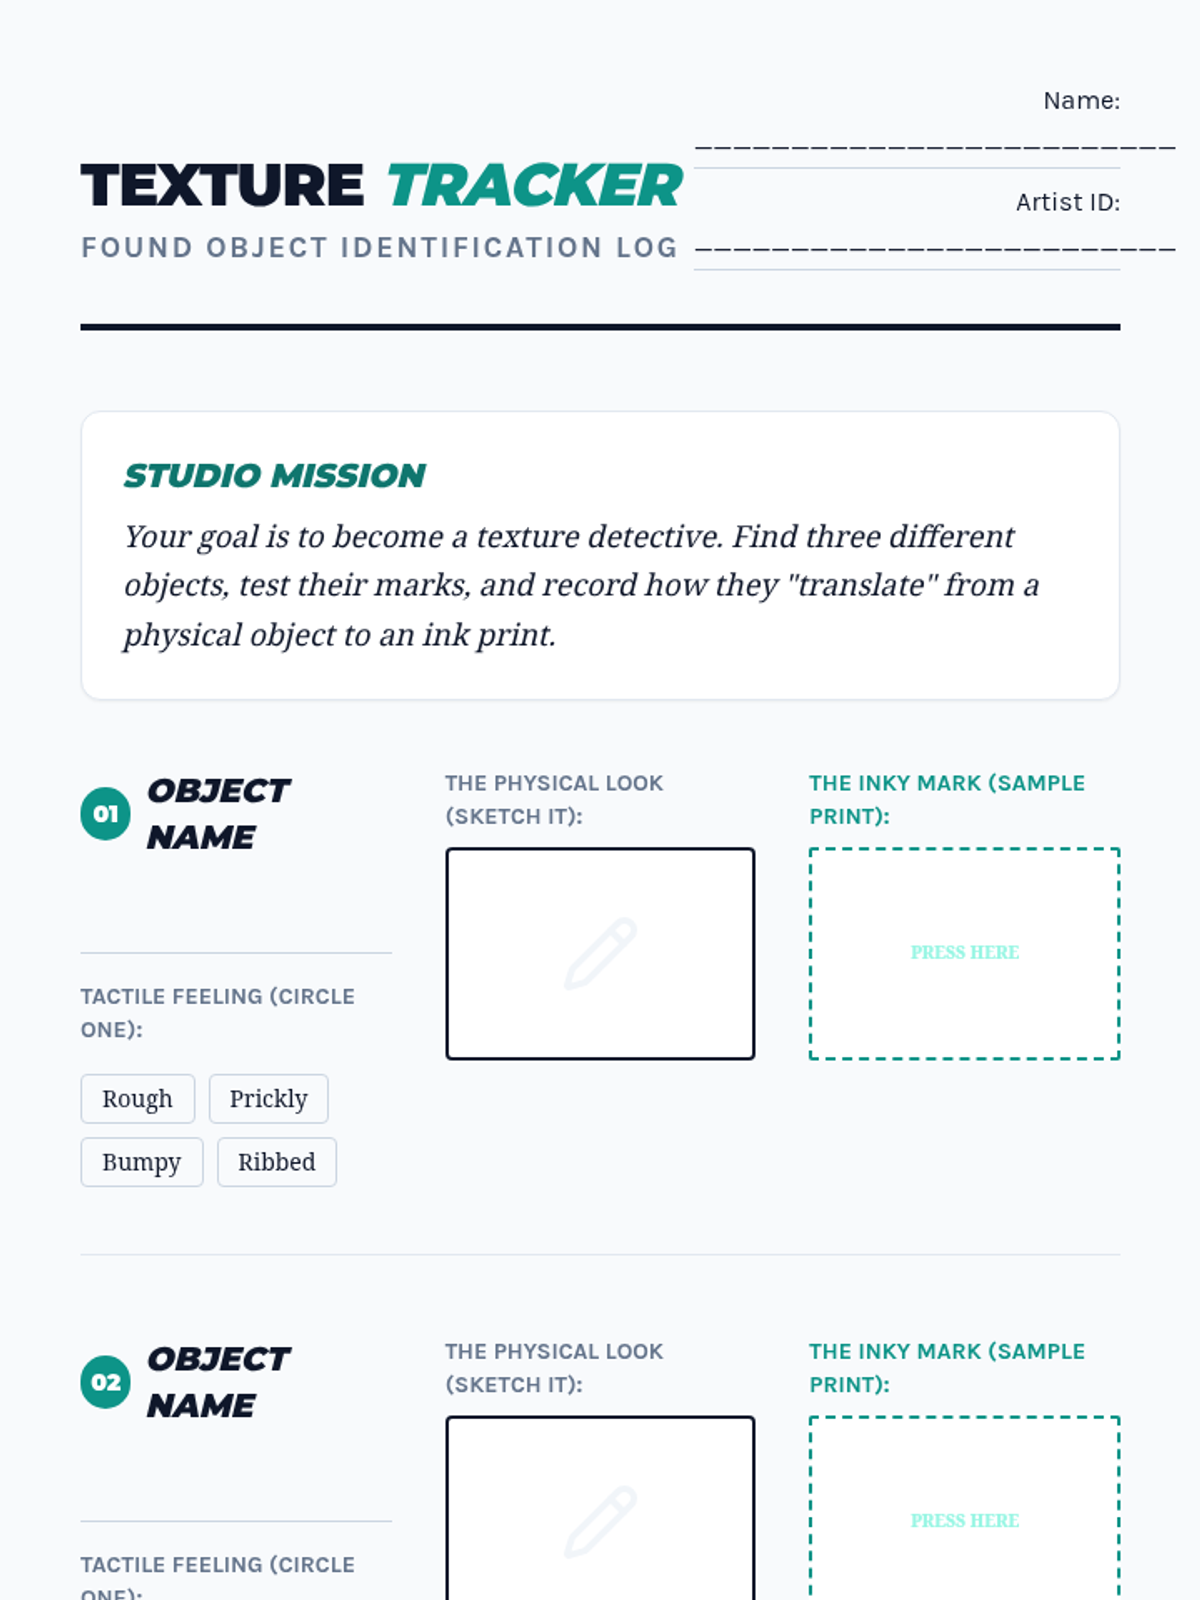
Students use textured materials like bubble wrap and lace to transfer patterns. They analyze how different materials leave distinct visual imprints on the printing plate.
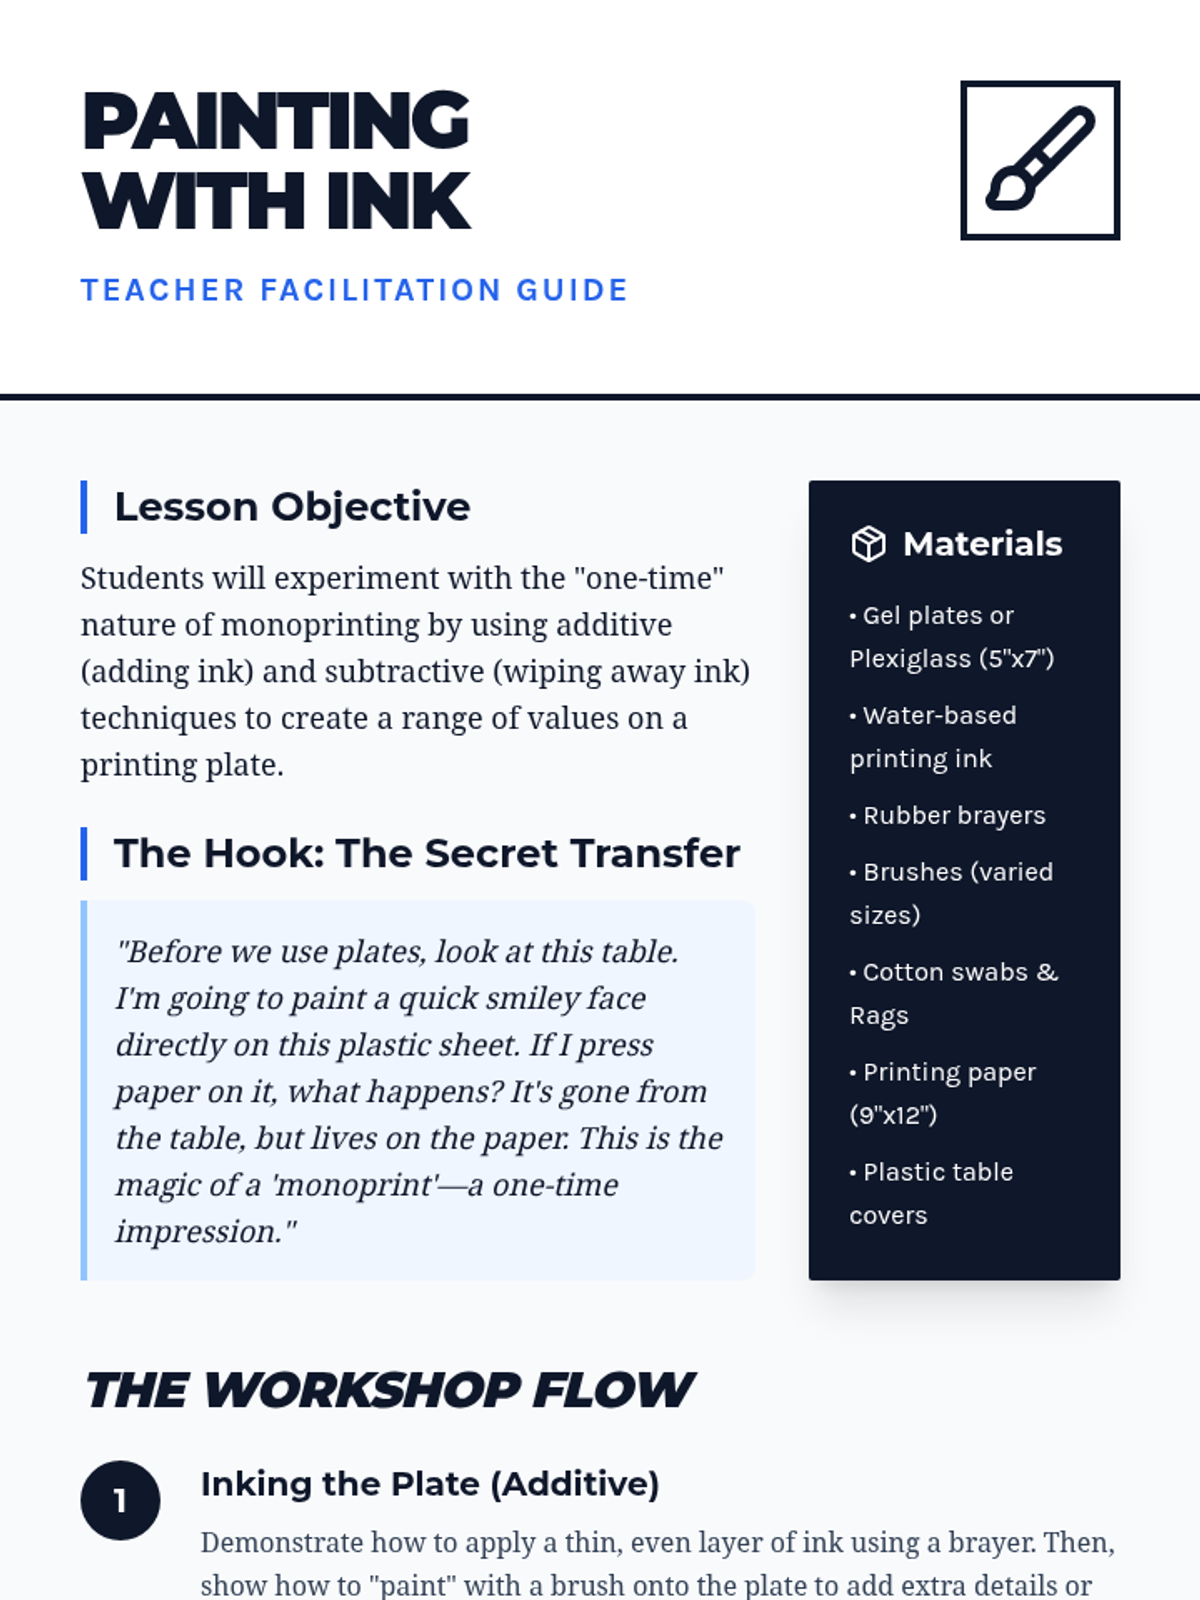
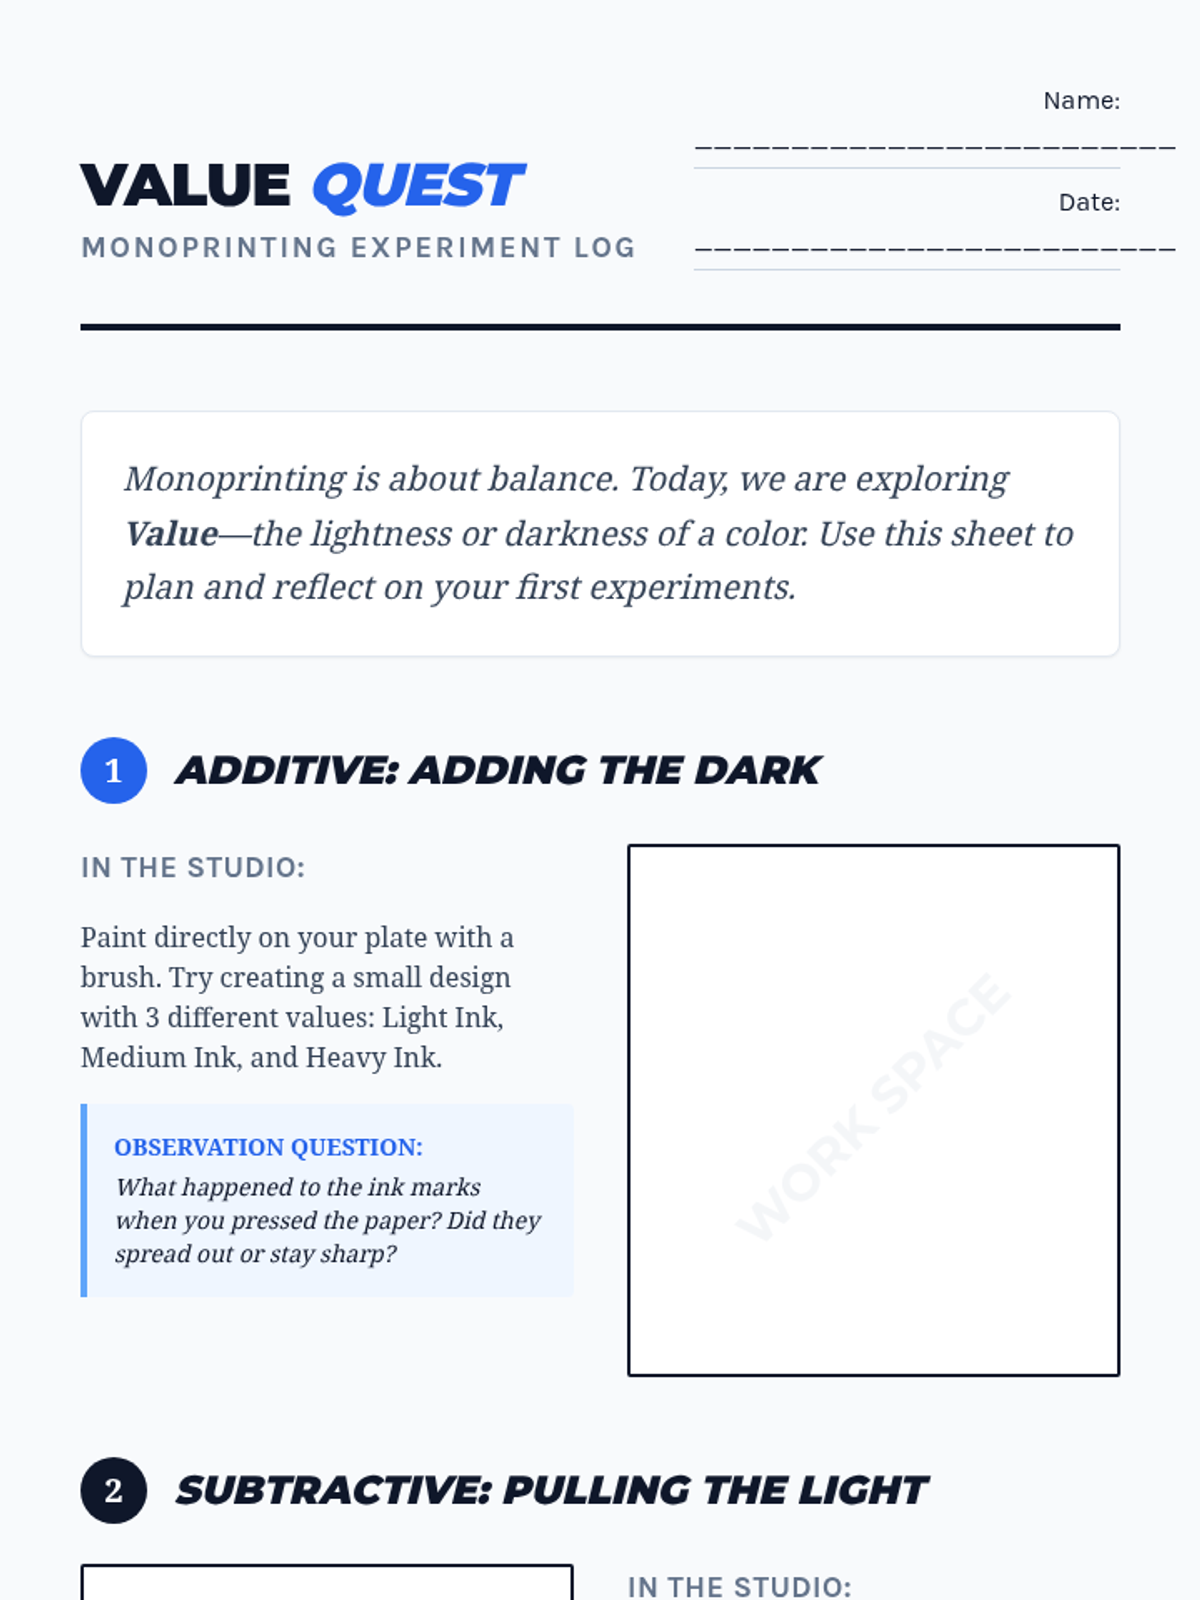
Students explore the printing plate as a surface for painting and wiping away ink. They learn additive and subtractive techniques to create light and dark values in a 'one-time' print.
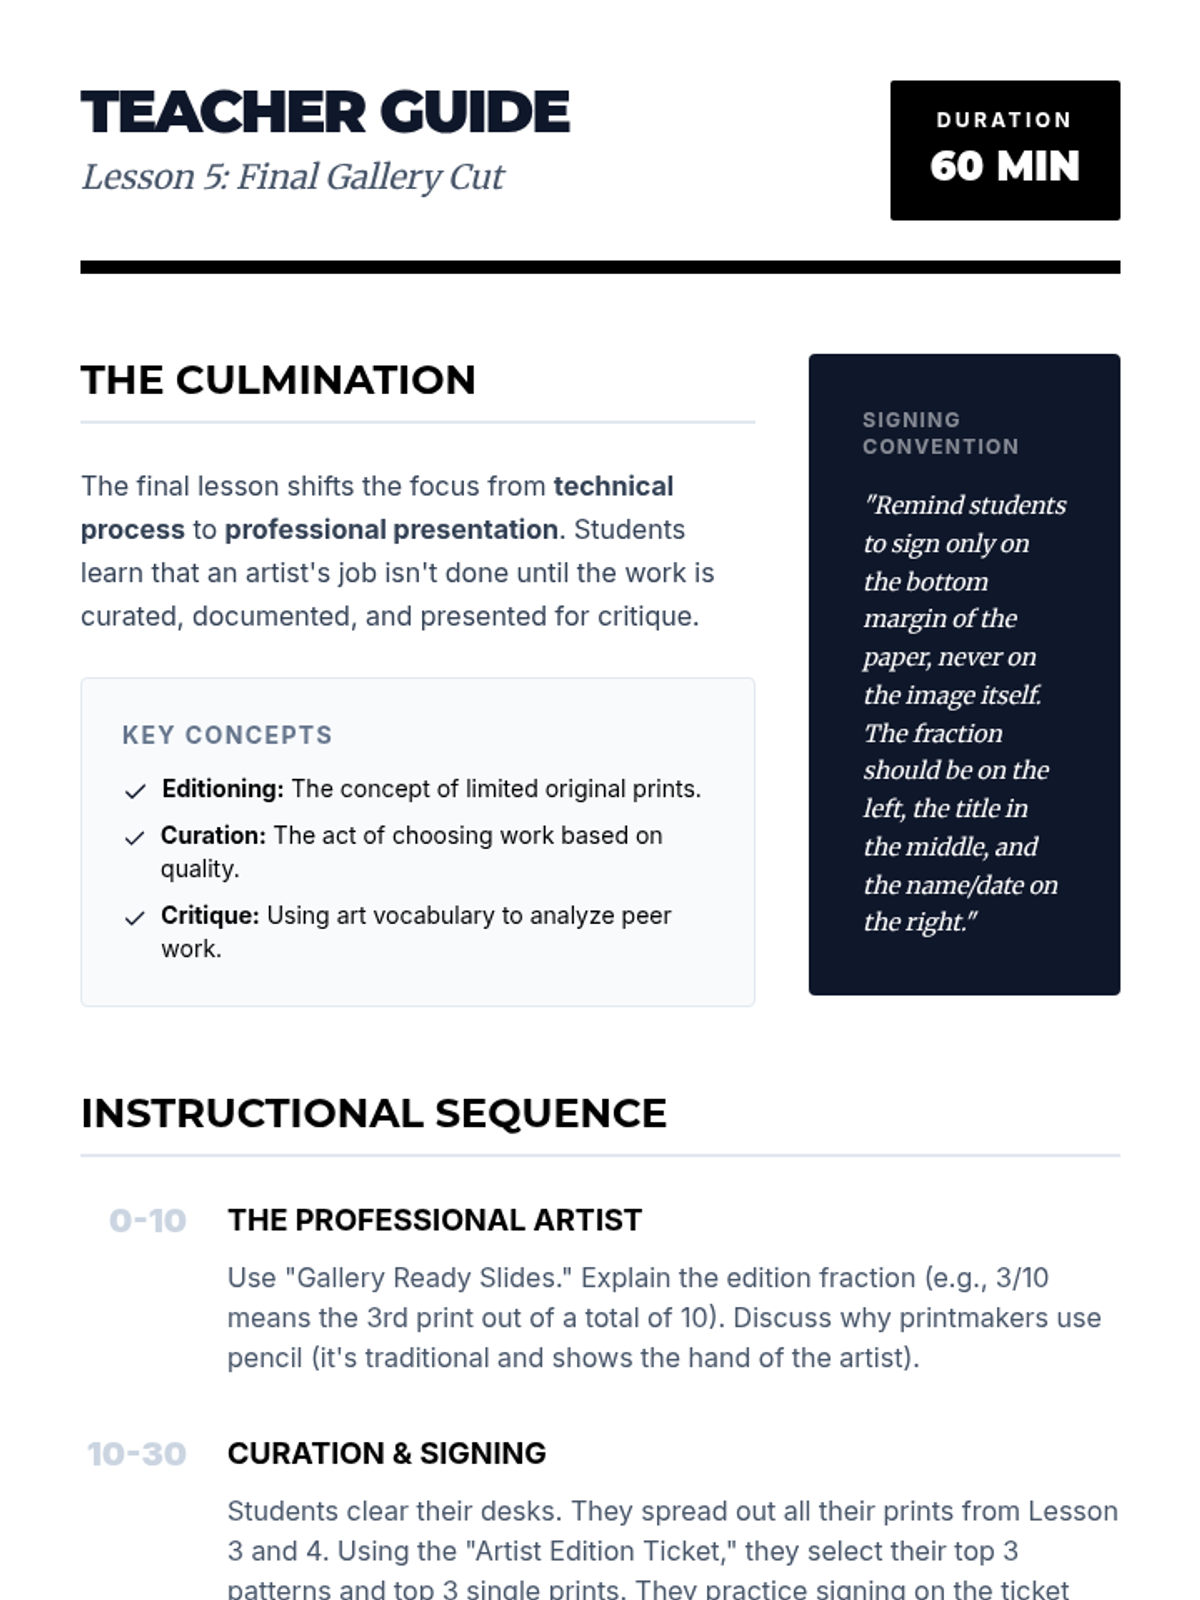
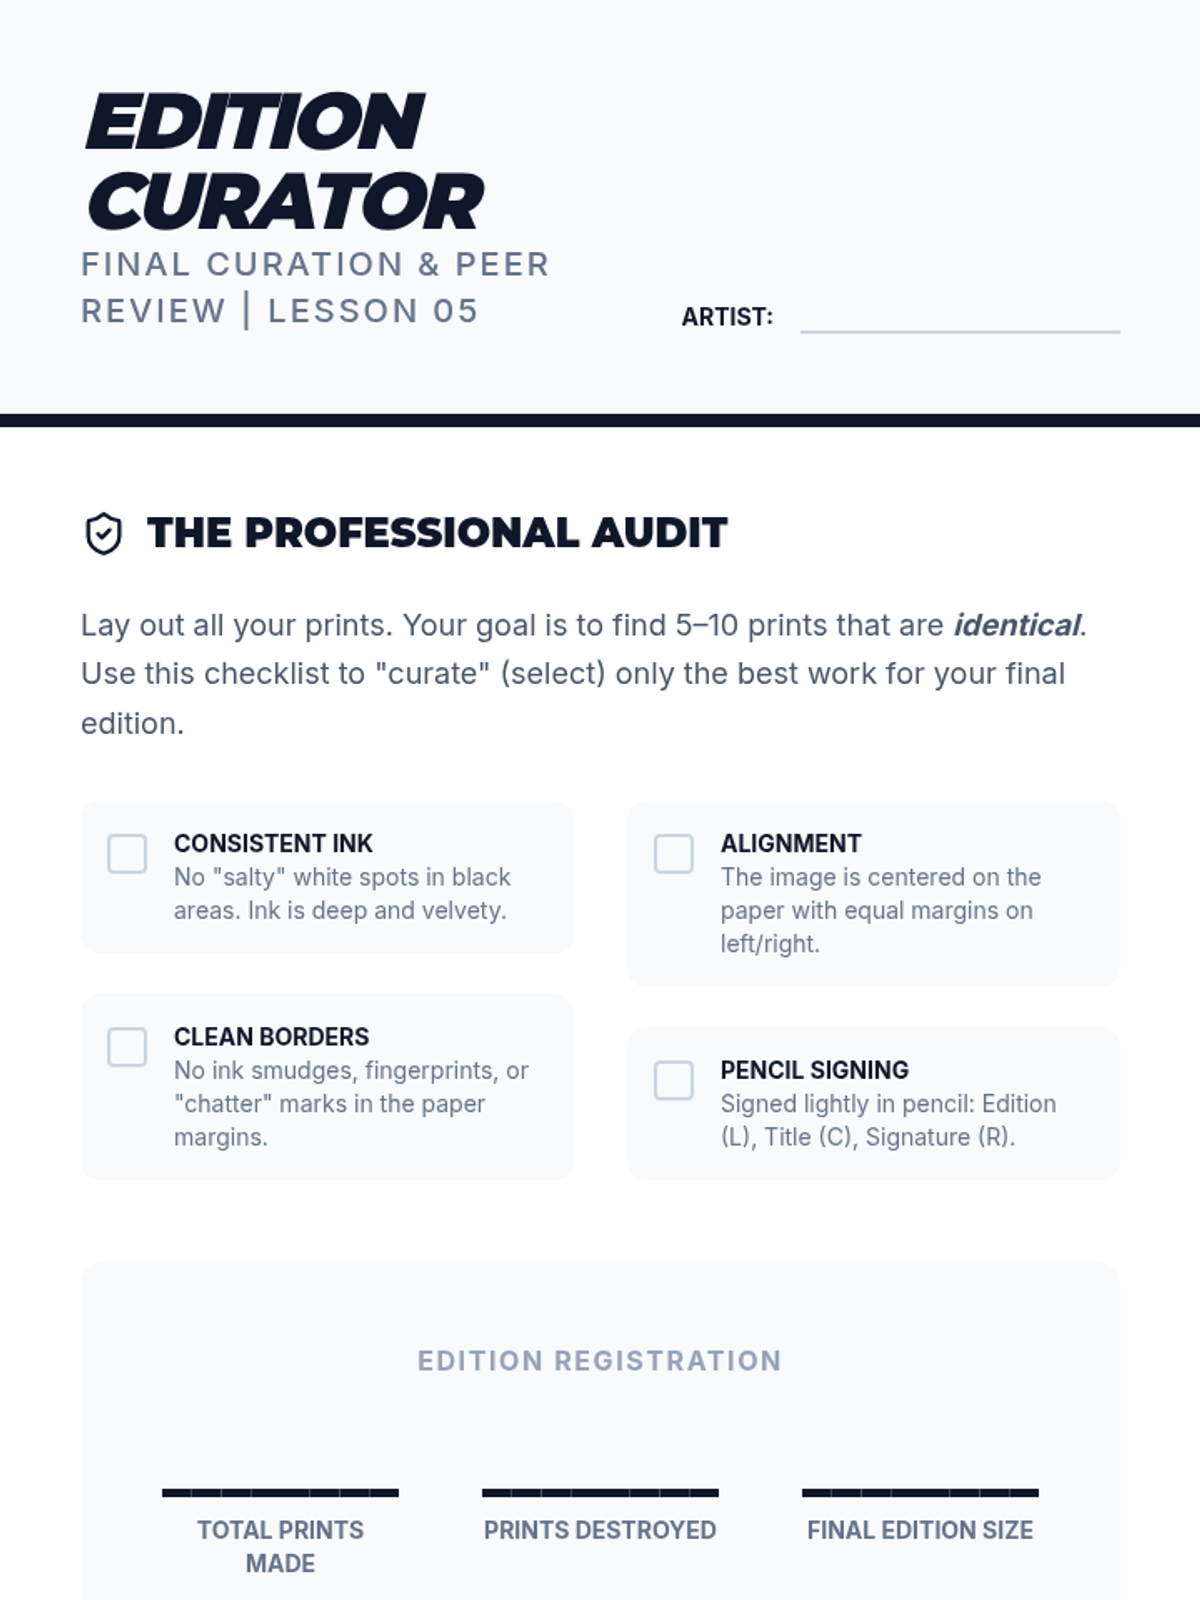
Students sign, number, and curate their final print editions followed by a peer gallery walk.
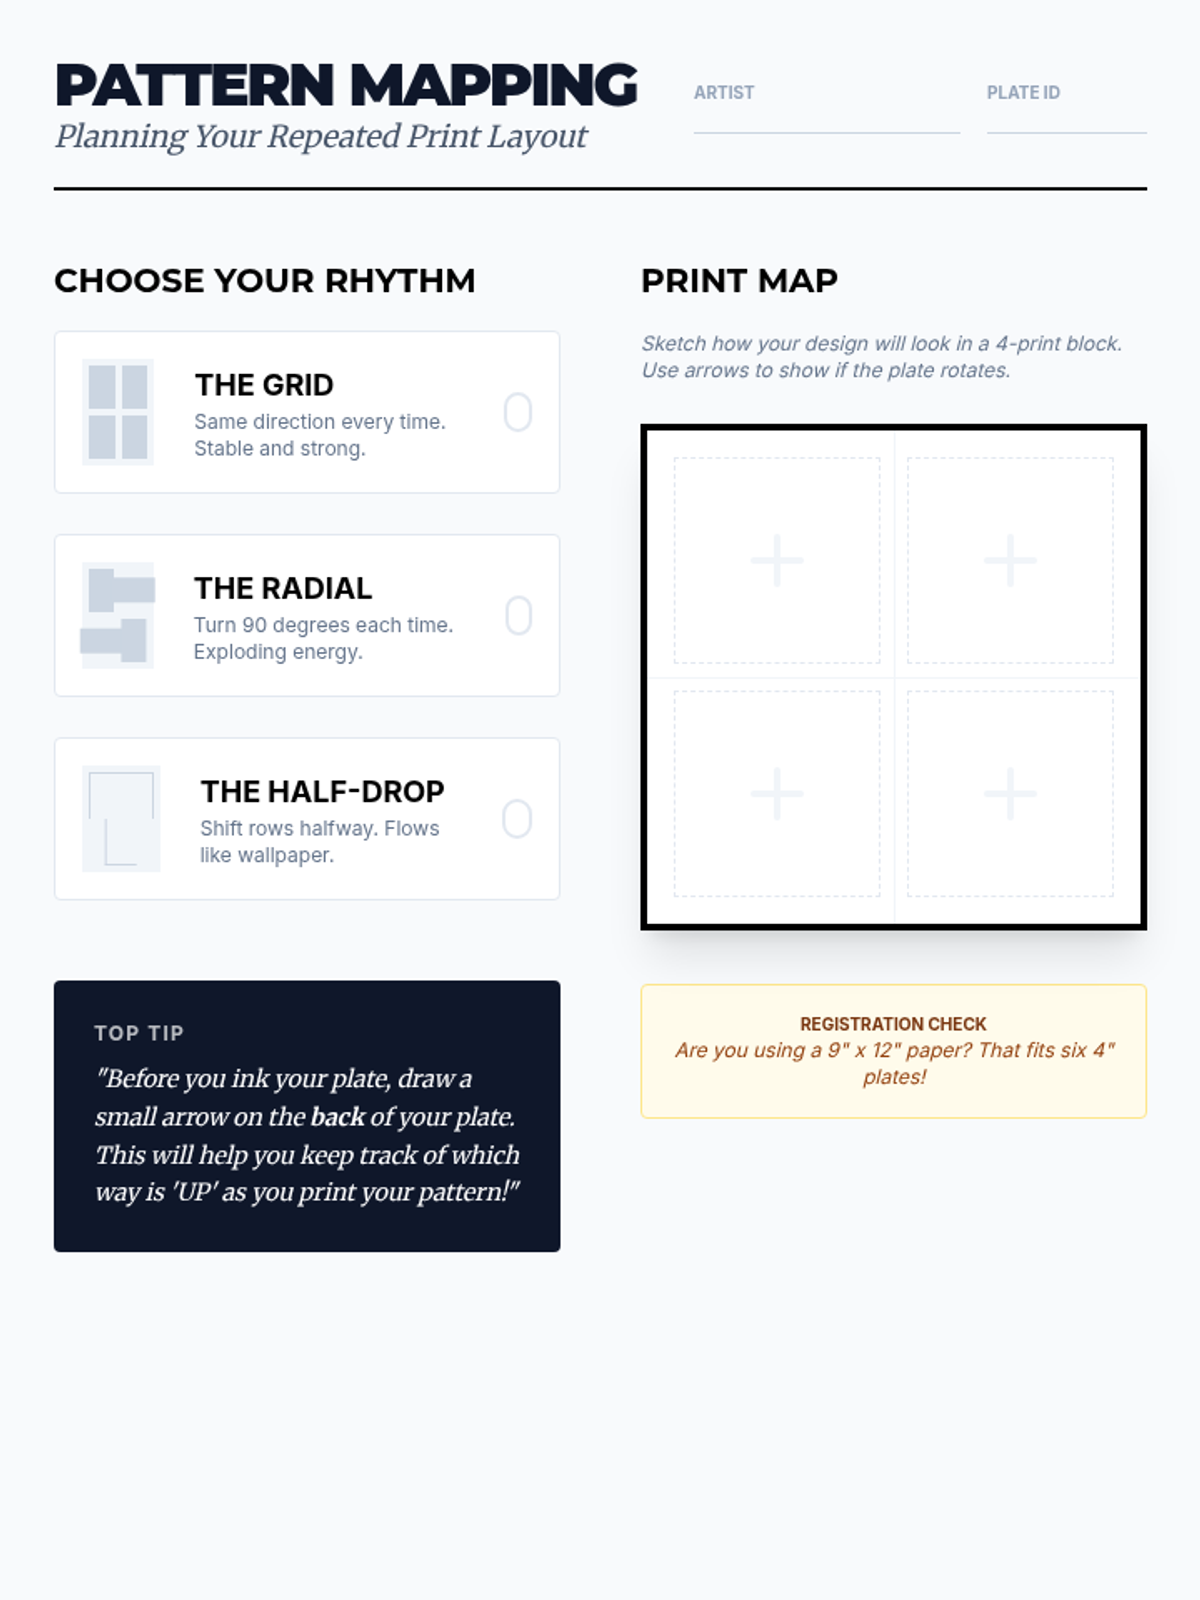
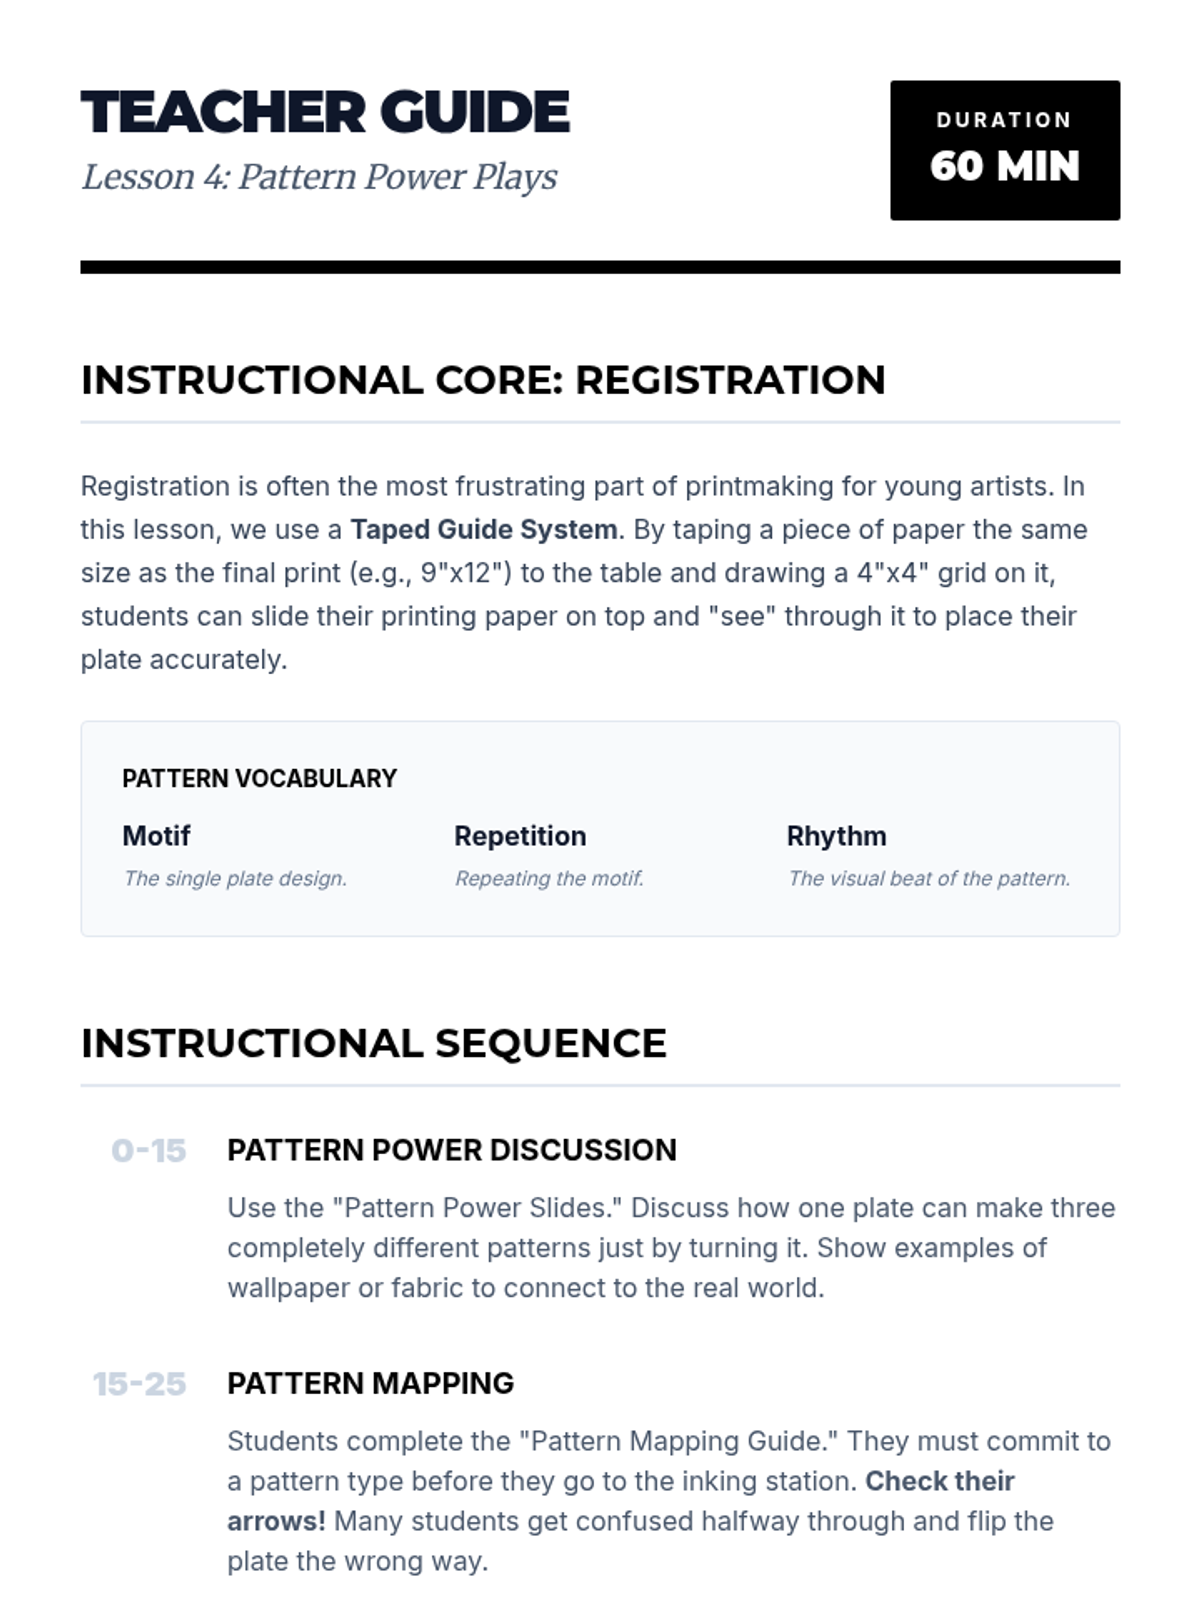
Students create complex patterns by repeating their prints using registration techniques for alignment.
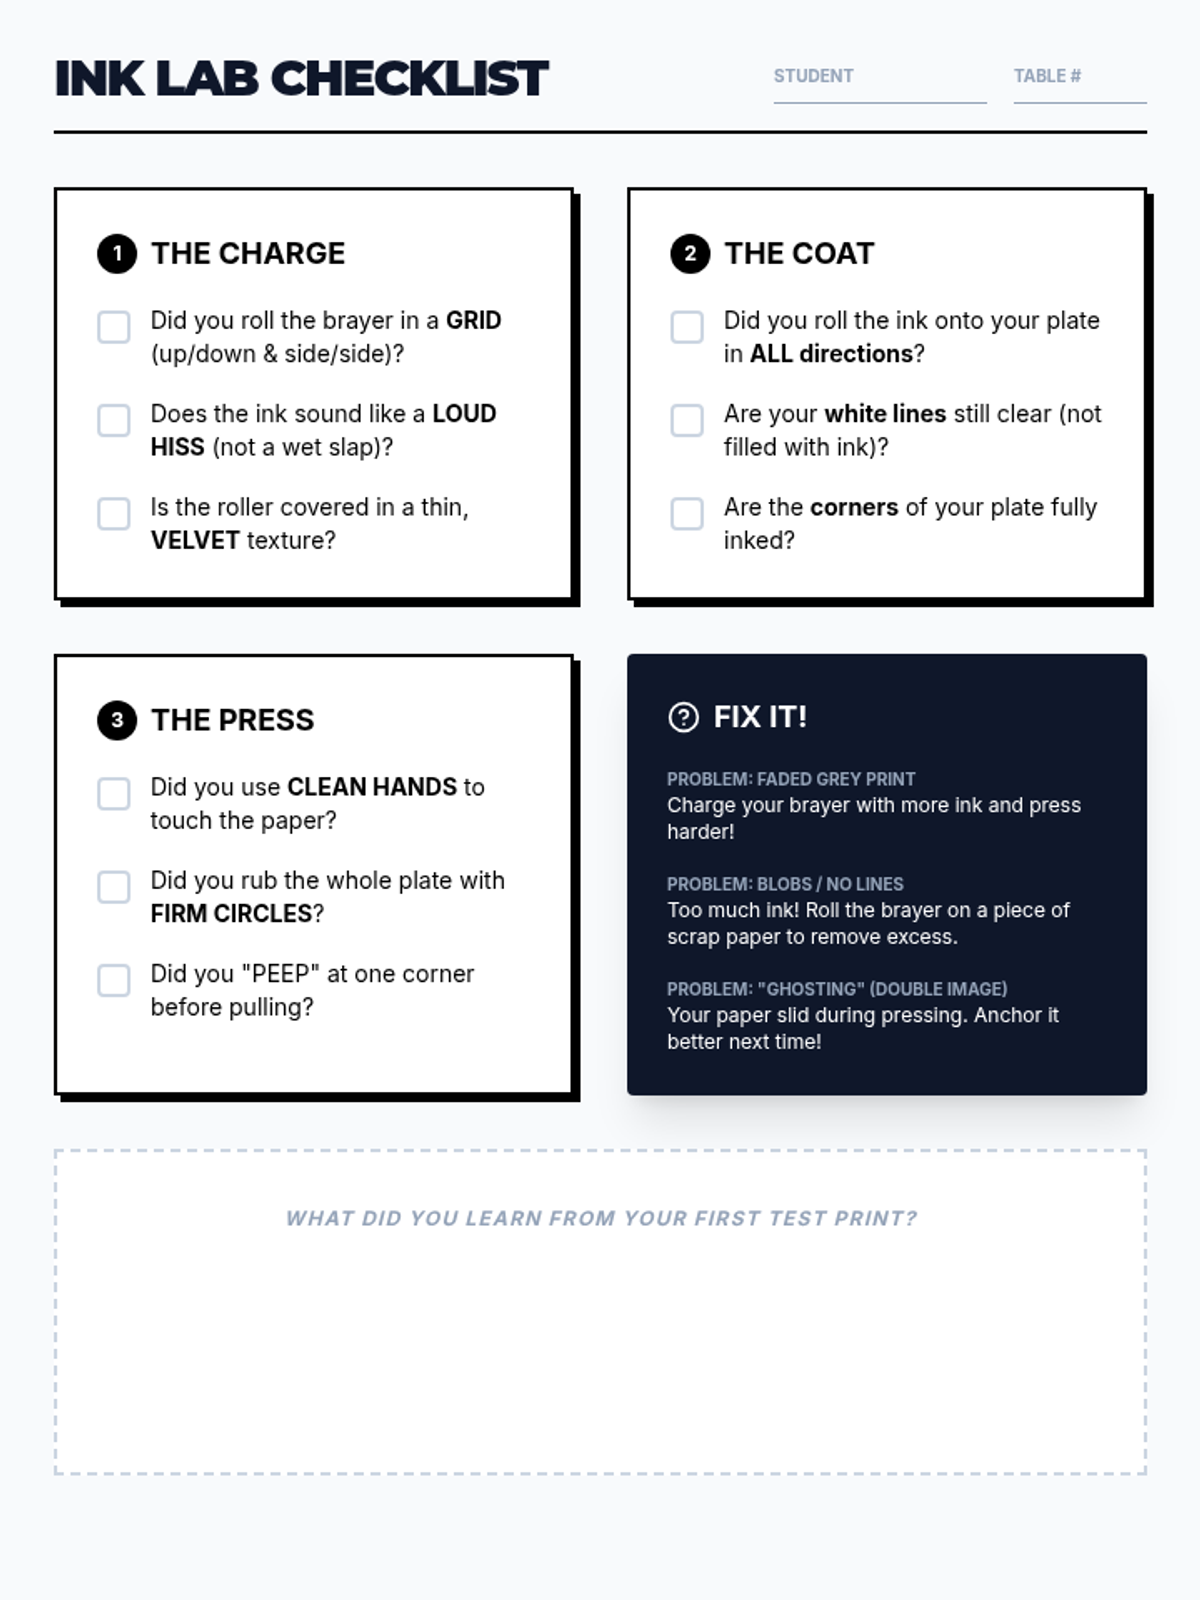
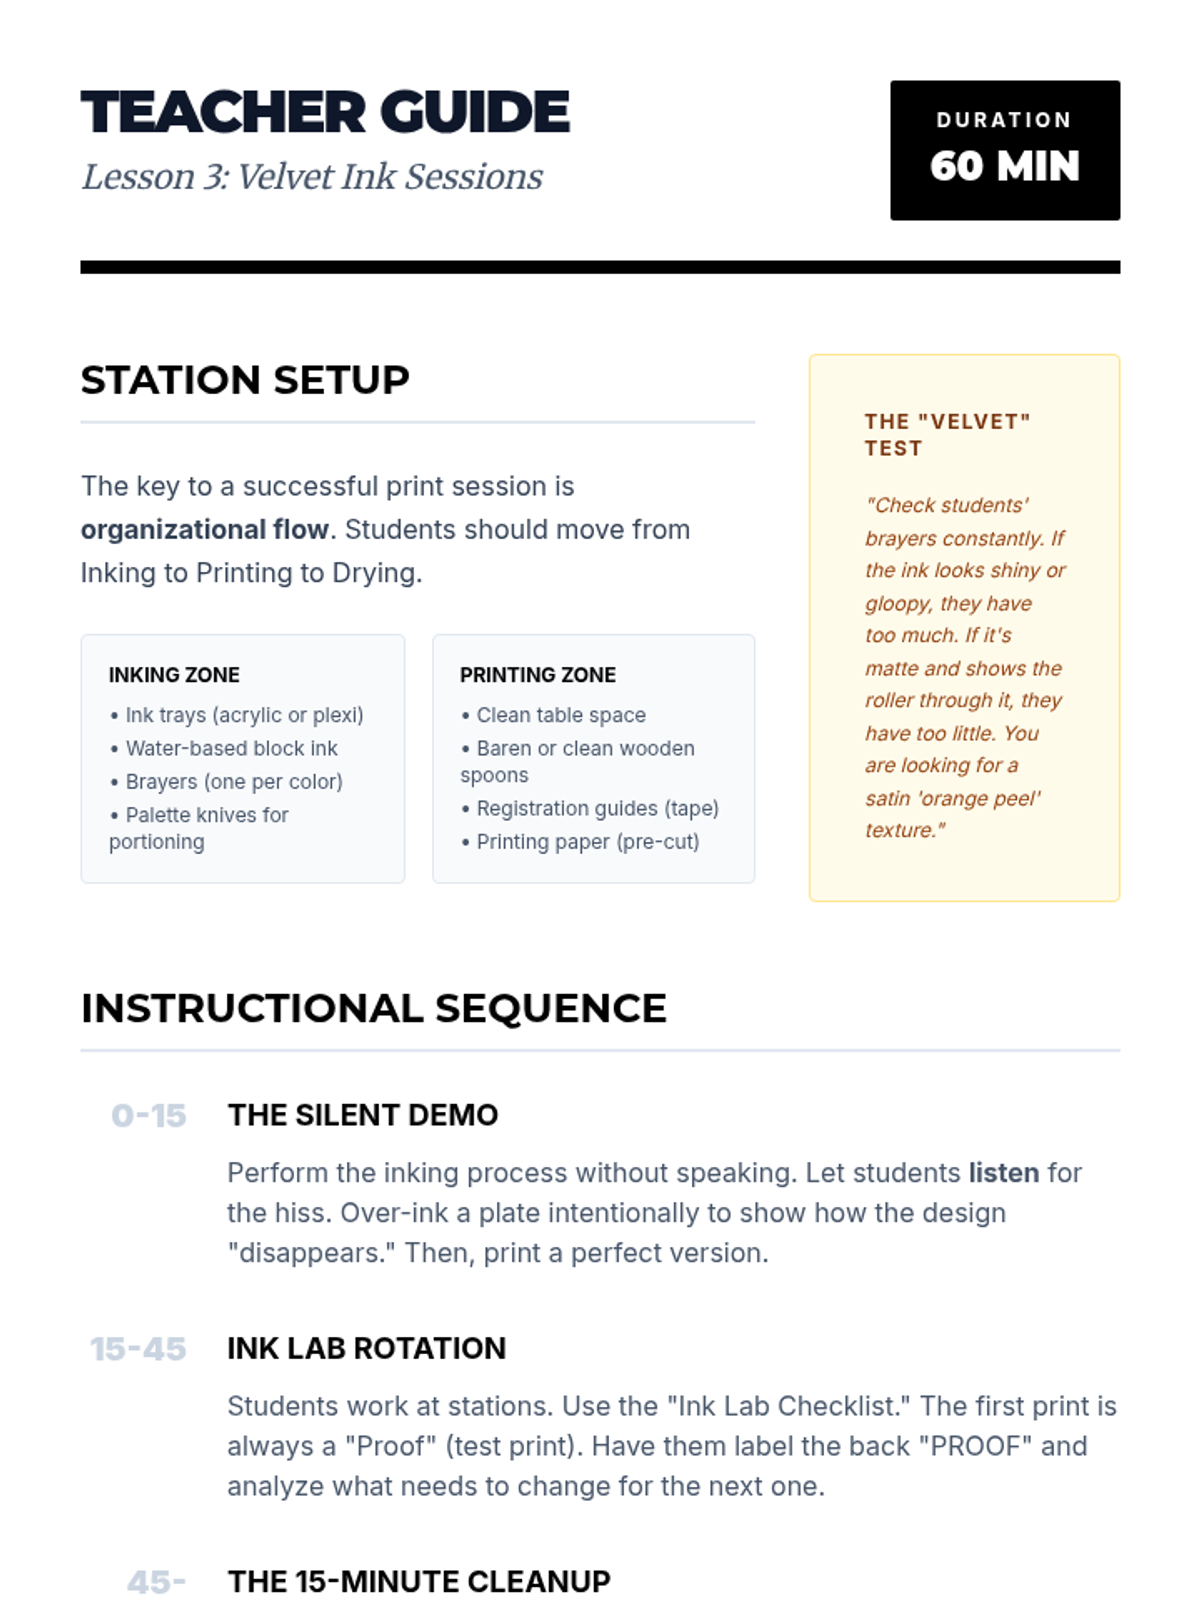
Focuses on the technical aspects of rolling ink, achieving the perfect 'velvet' texture, and charging the plate.
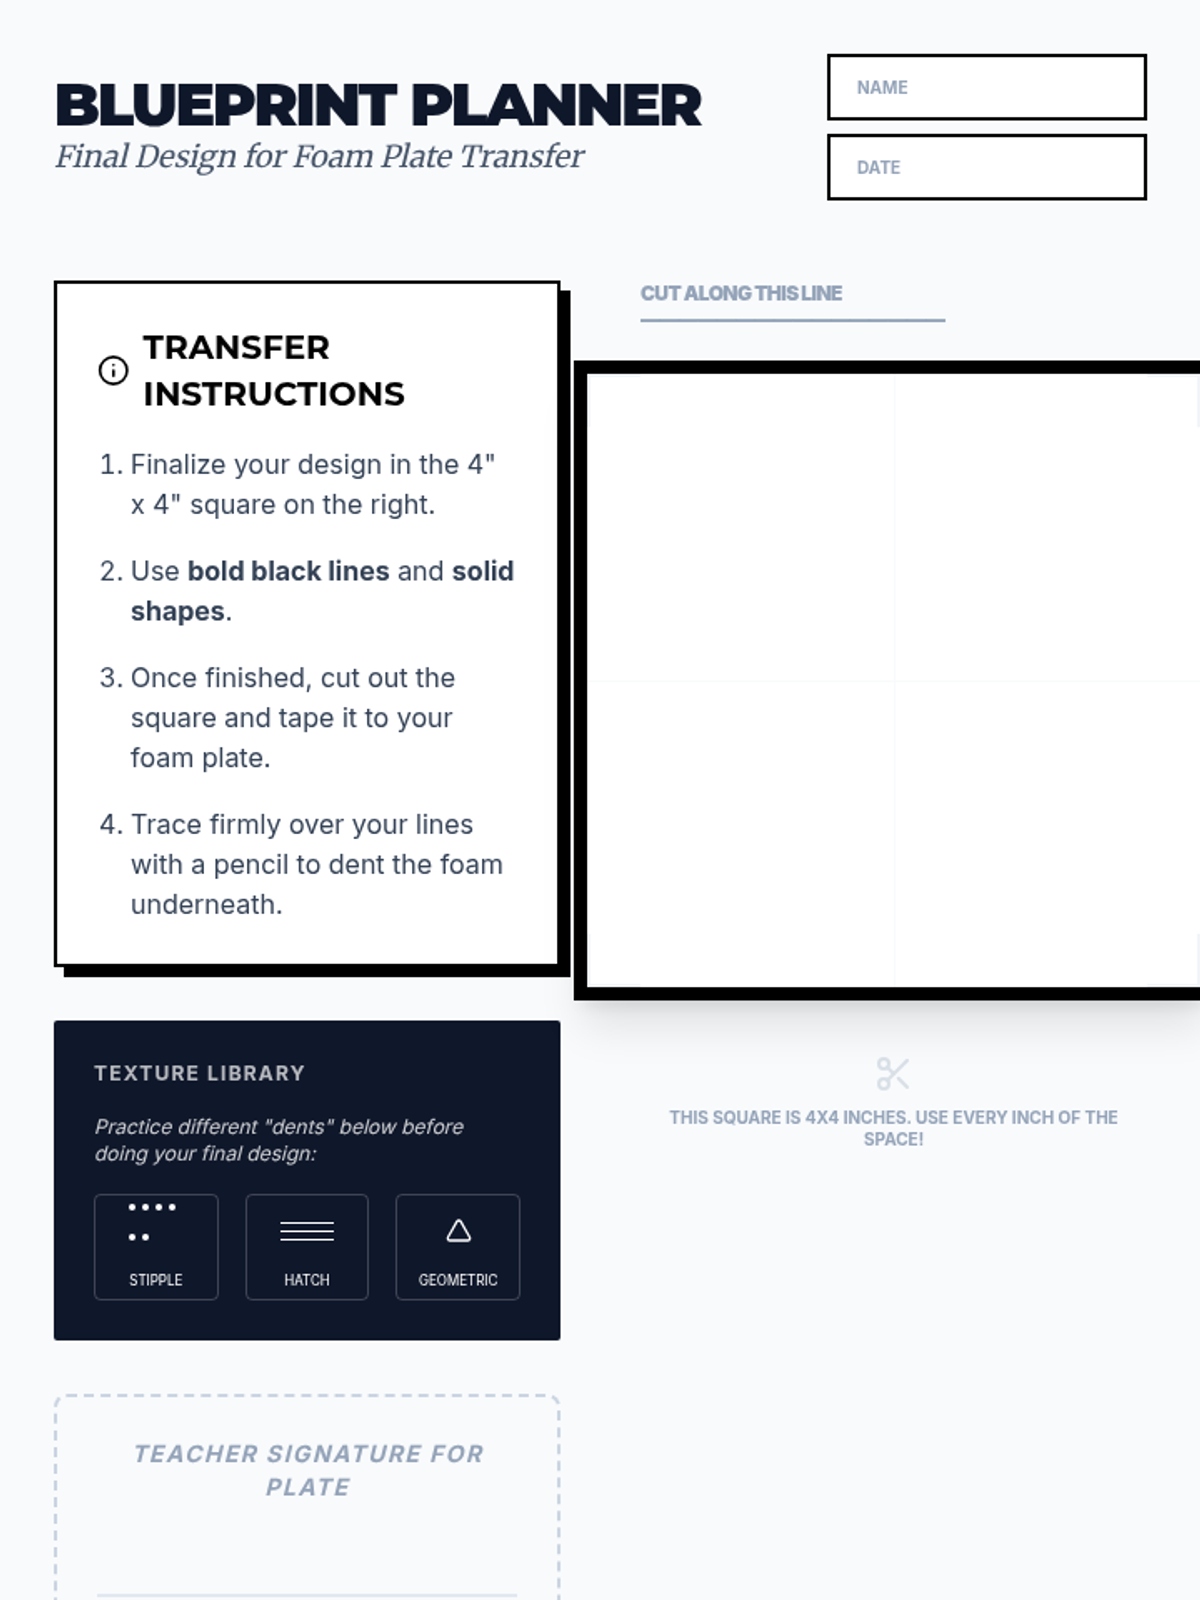
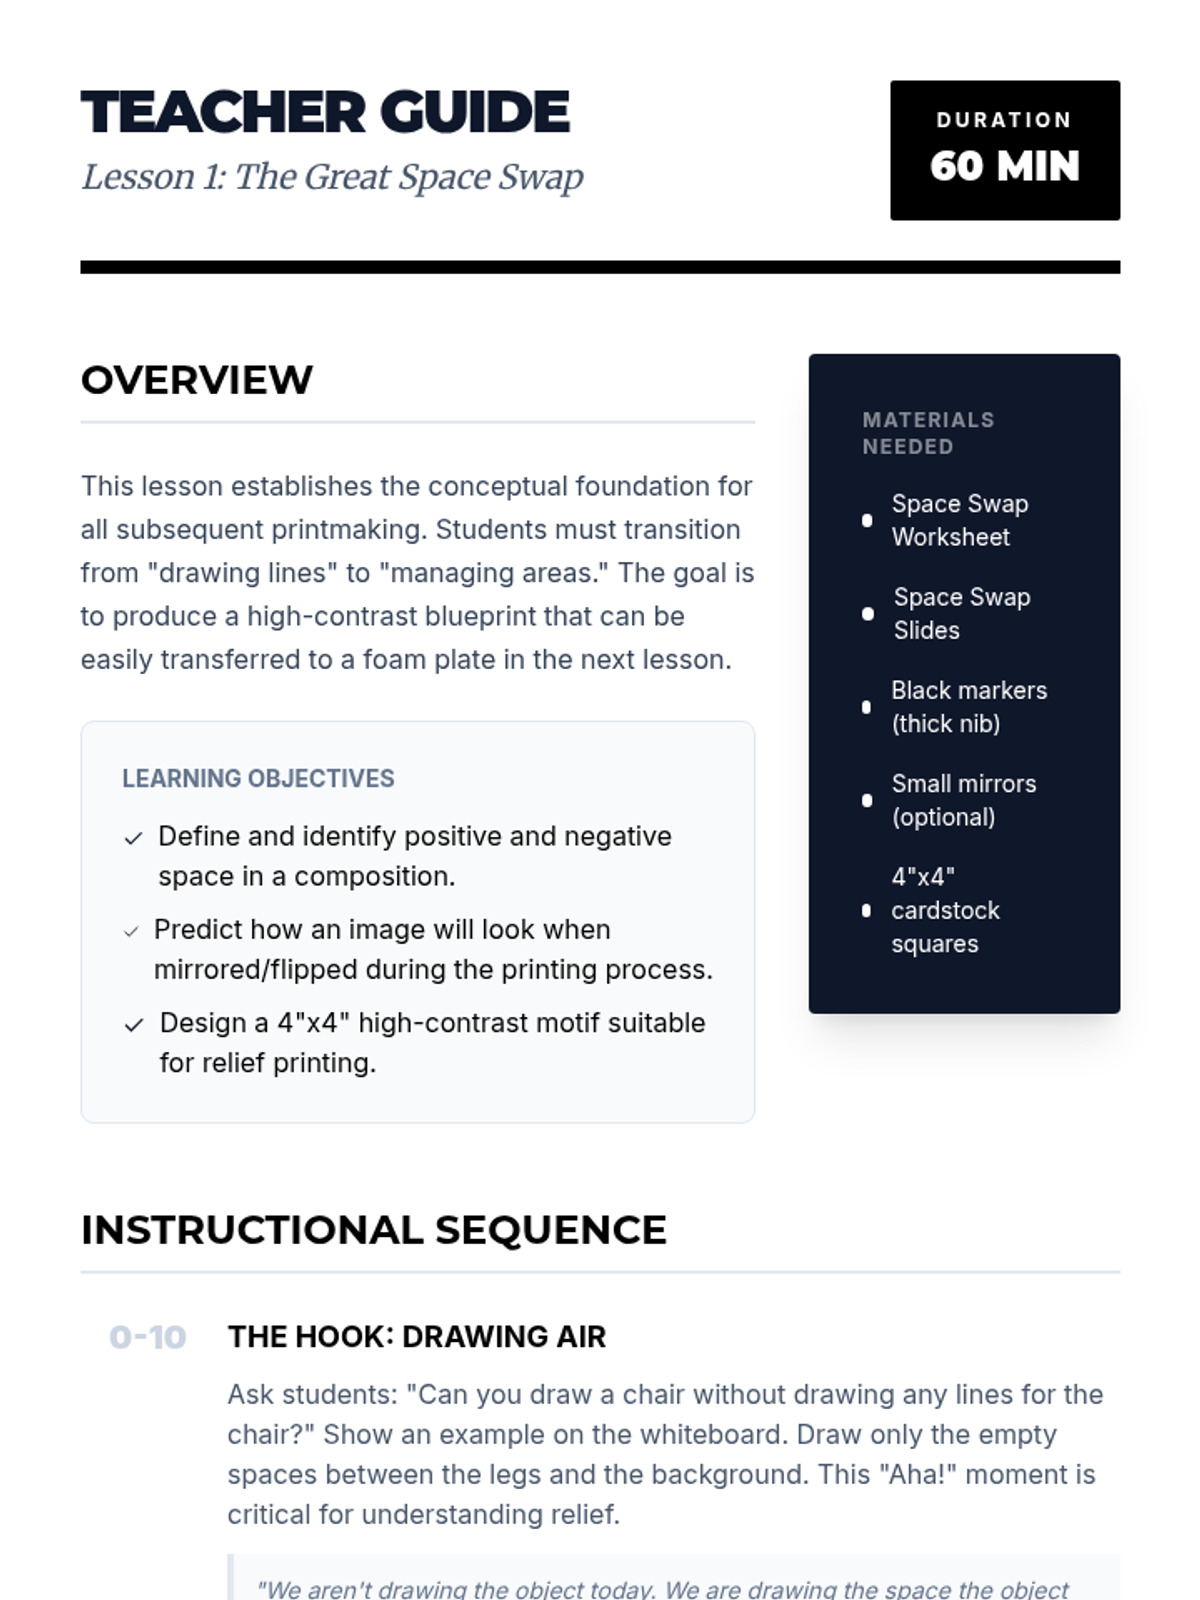
Students transfer designs to foam plates and experiment with line weight and texture using incising tools.
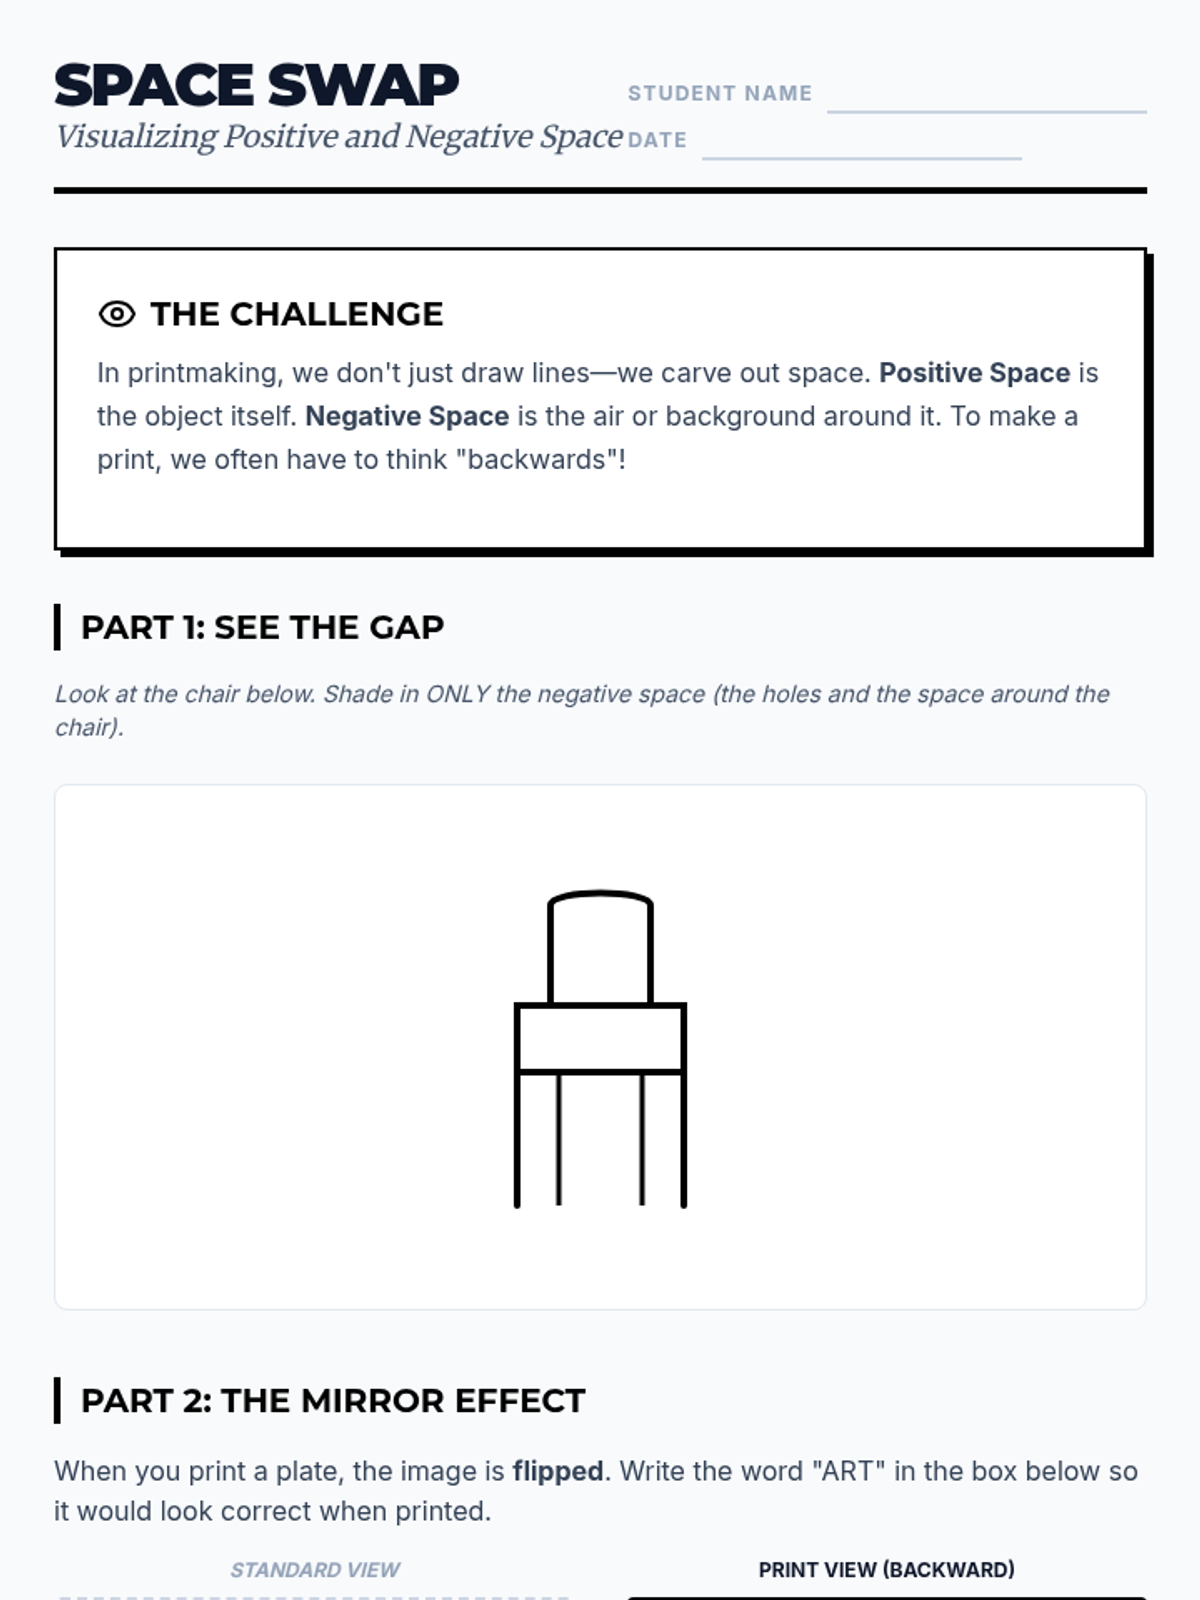
Students investigate positive and negative space through high-contrast drawing and learn how images mirror when printed.
Produce a consistent edition of prints using registration techniques. Students learn the professional standards for signing, numbering, and presenting their work.
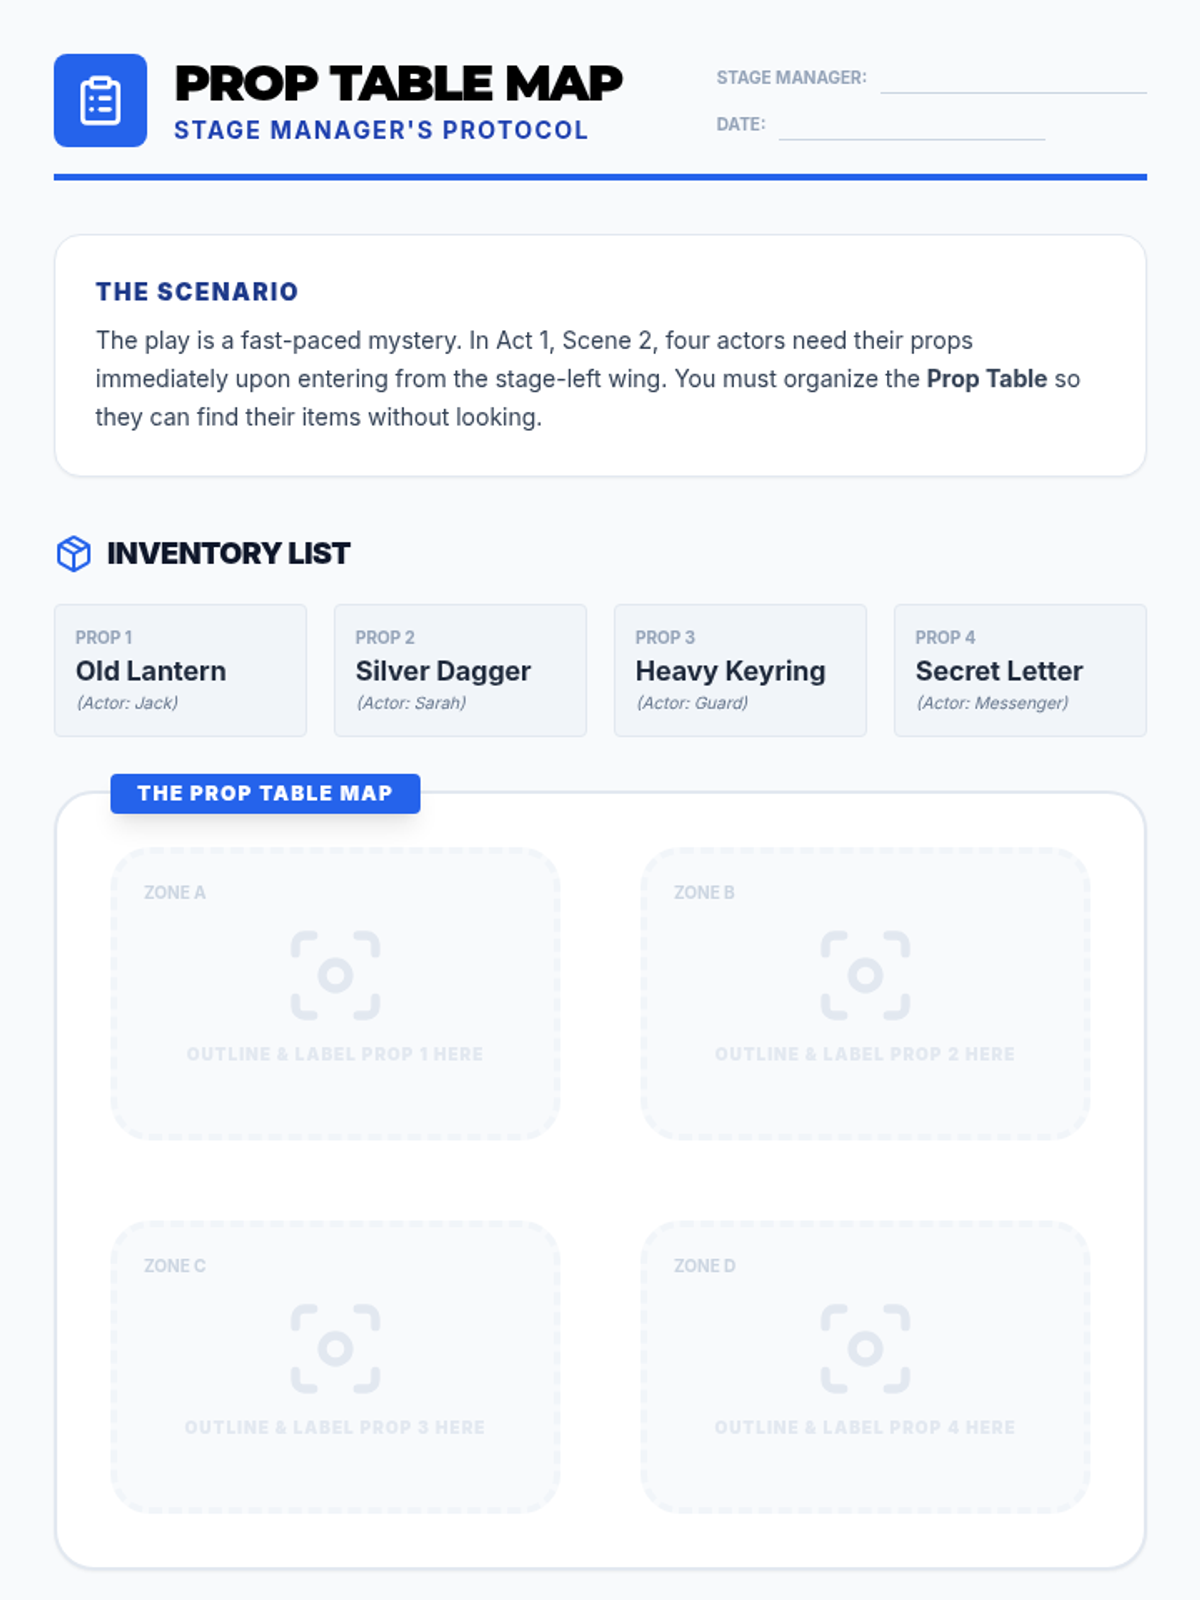
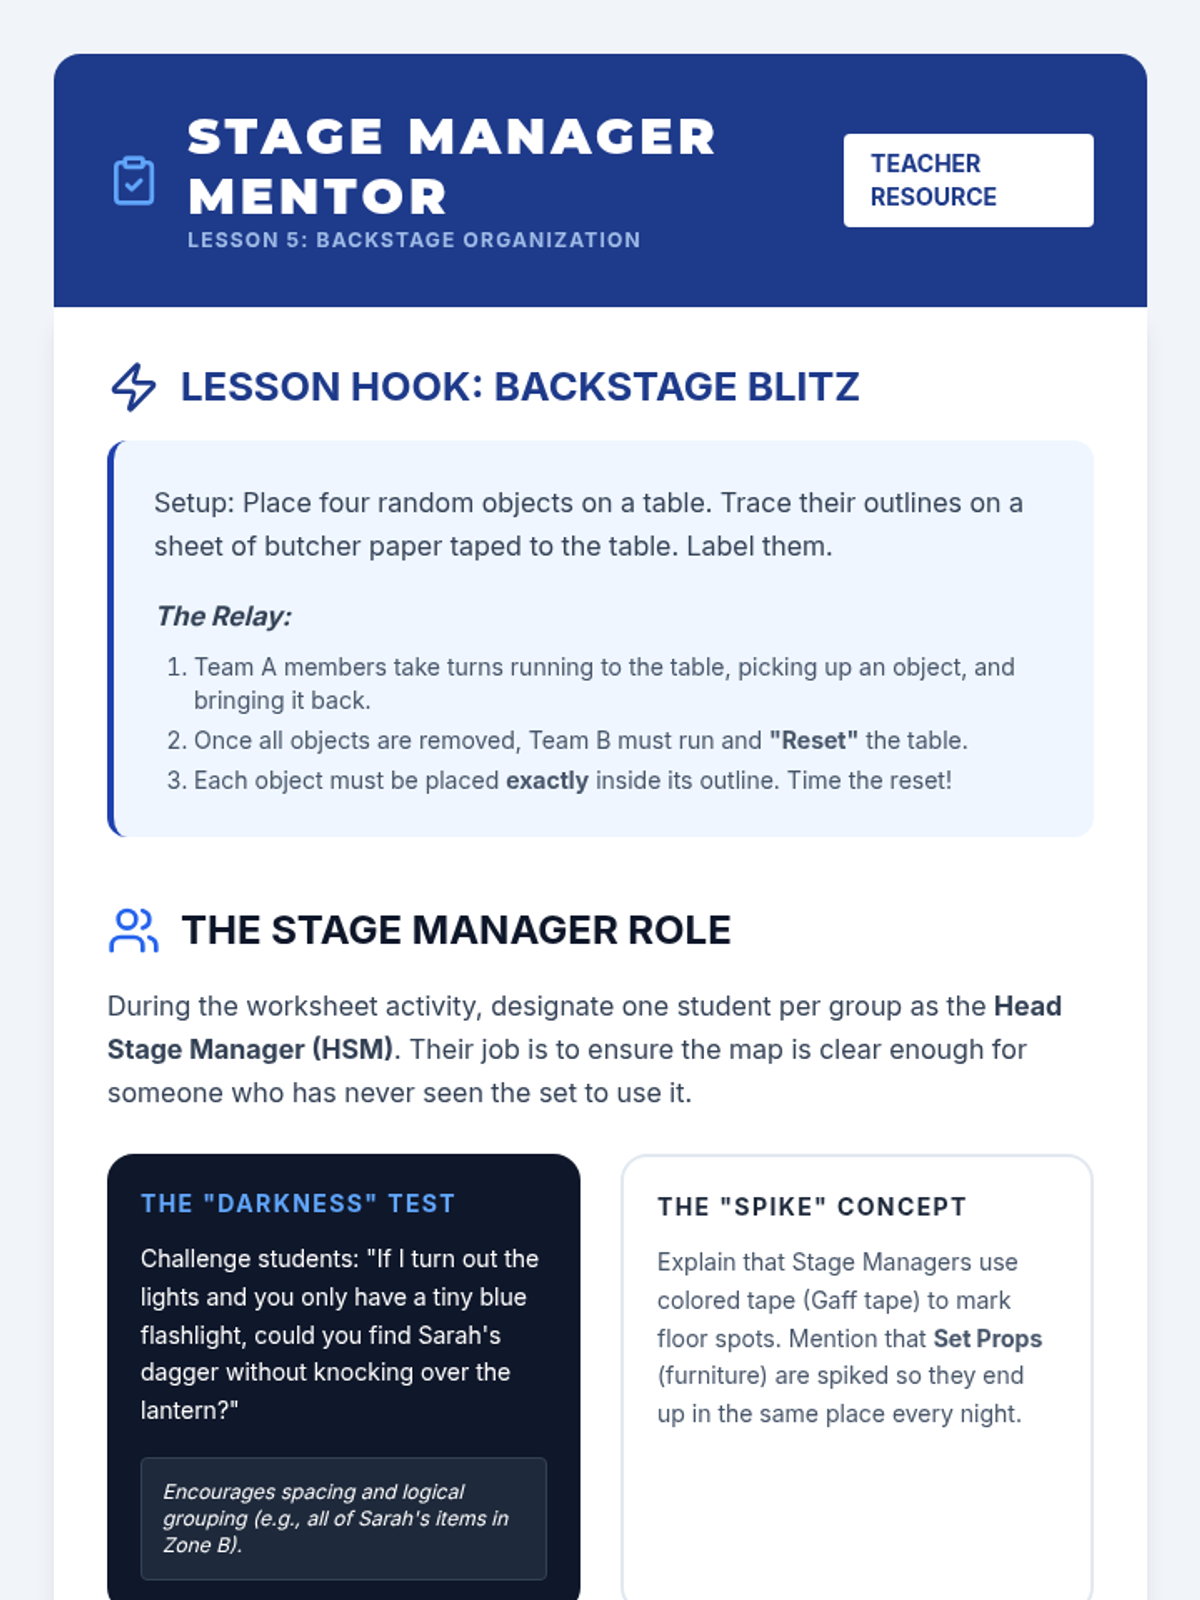
Students step into the role of Stage Managers to learn about organization. They create a 'prop table' map, outlining where items go ensuring actors can find them in the dark, and practice resetting a scene quickly.
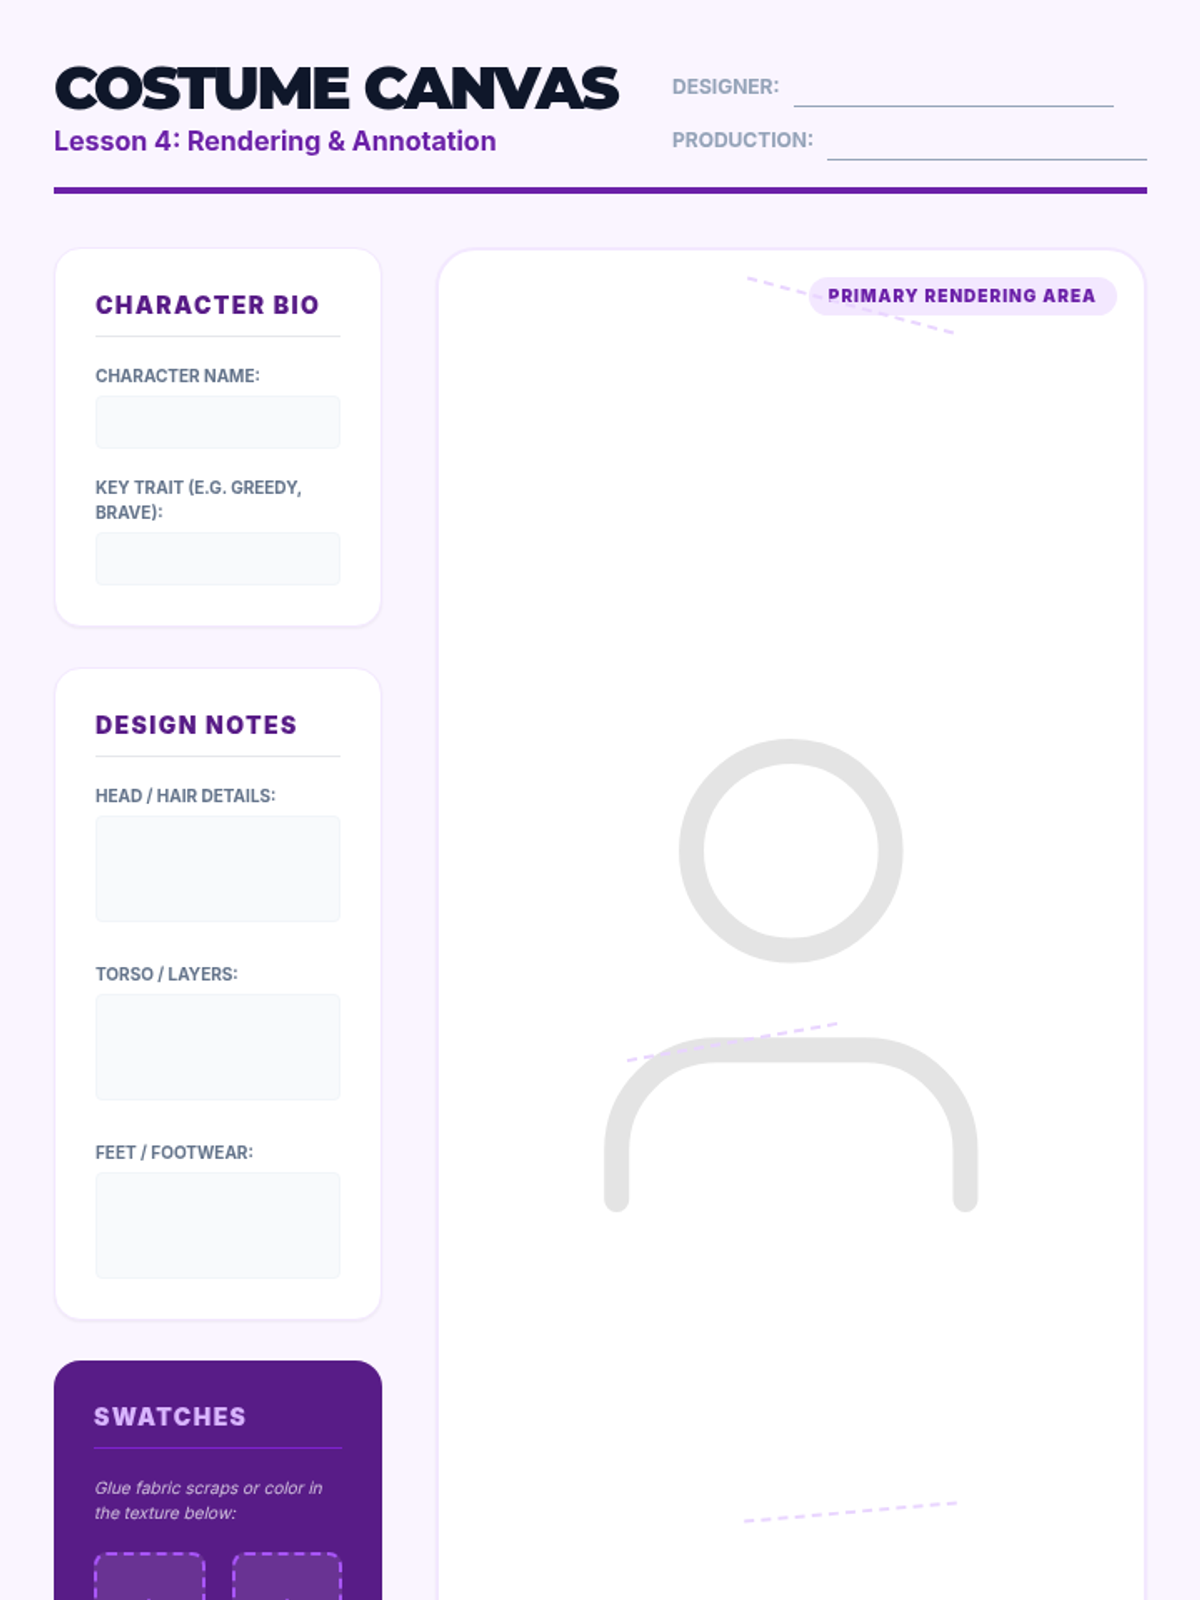
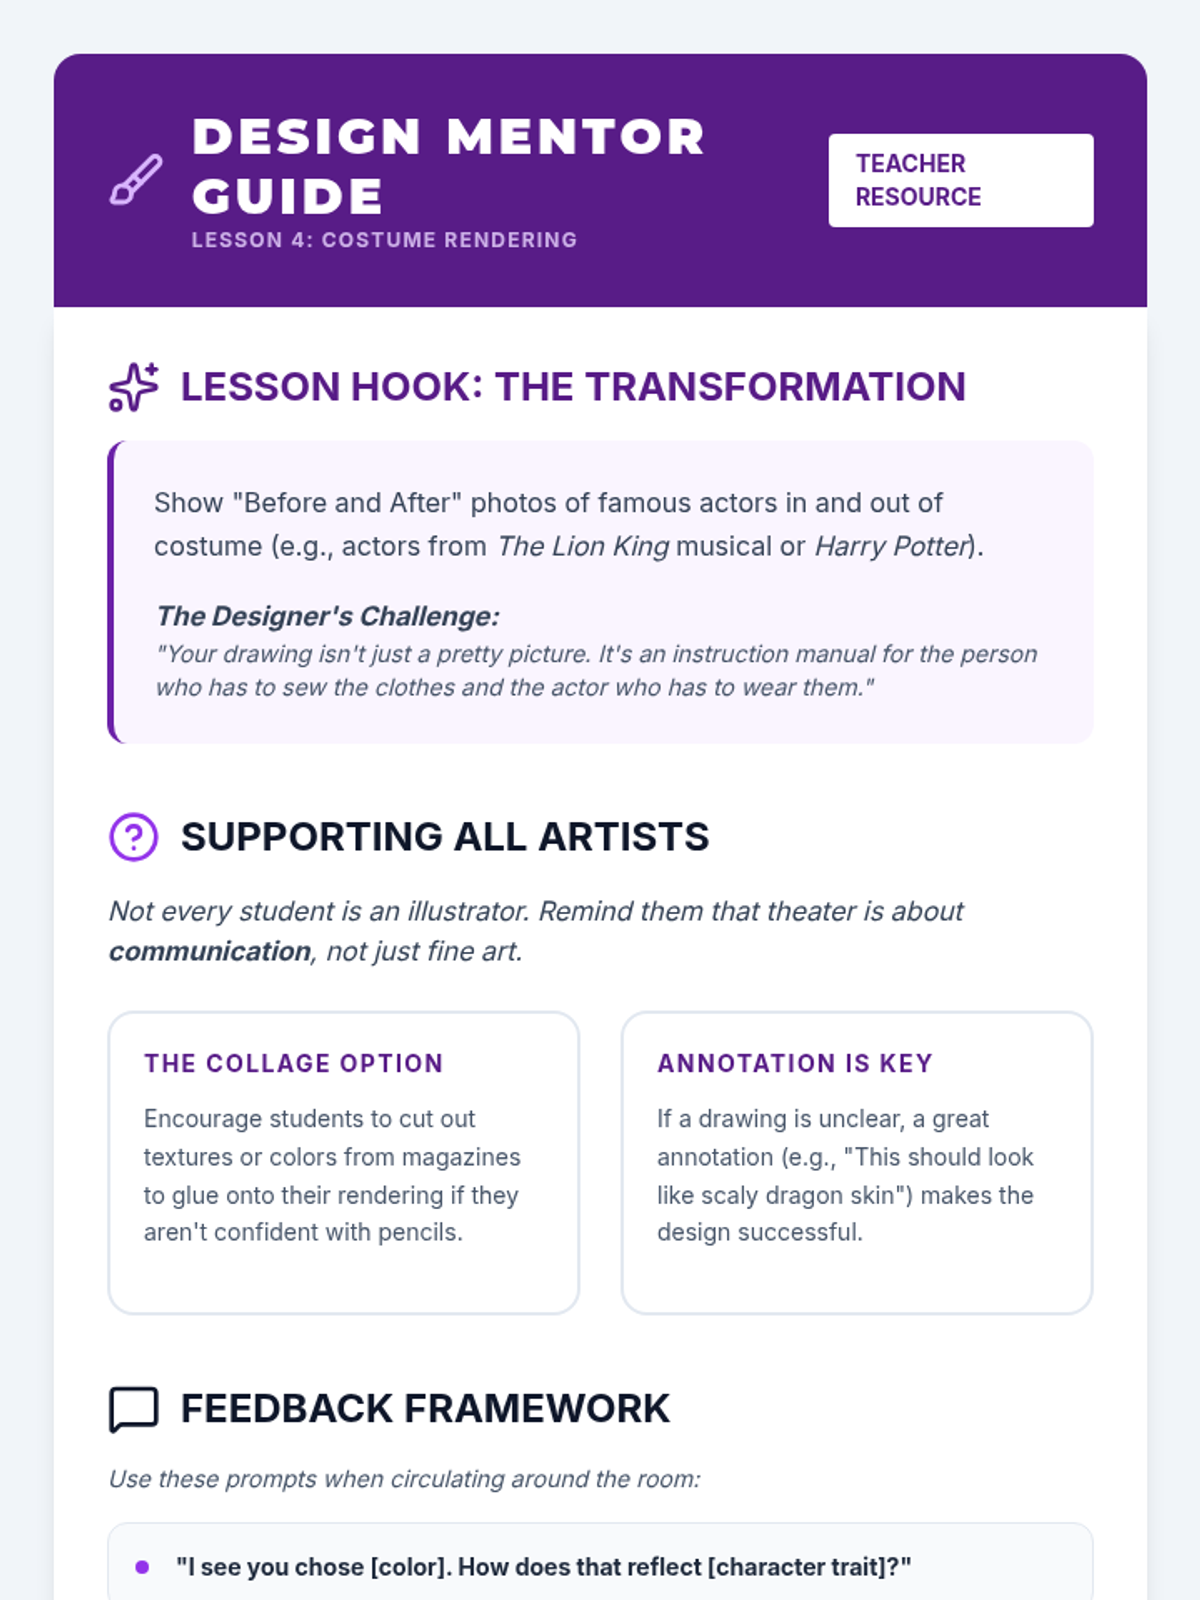
Students create a costume rendering for a specific character using drawing or collage techniques. They must annotate their design to explain how their choices relate to the character's age, job, and personality.
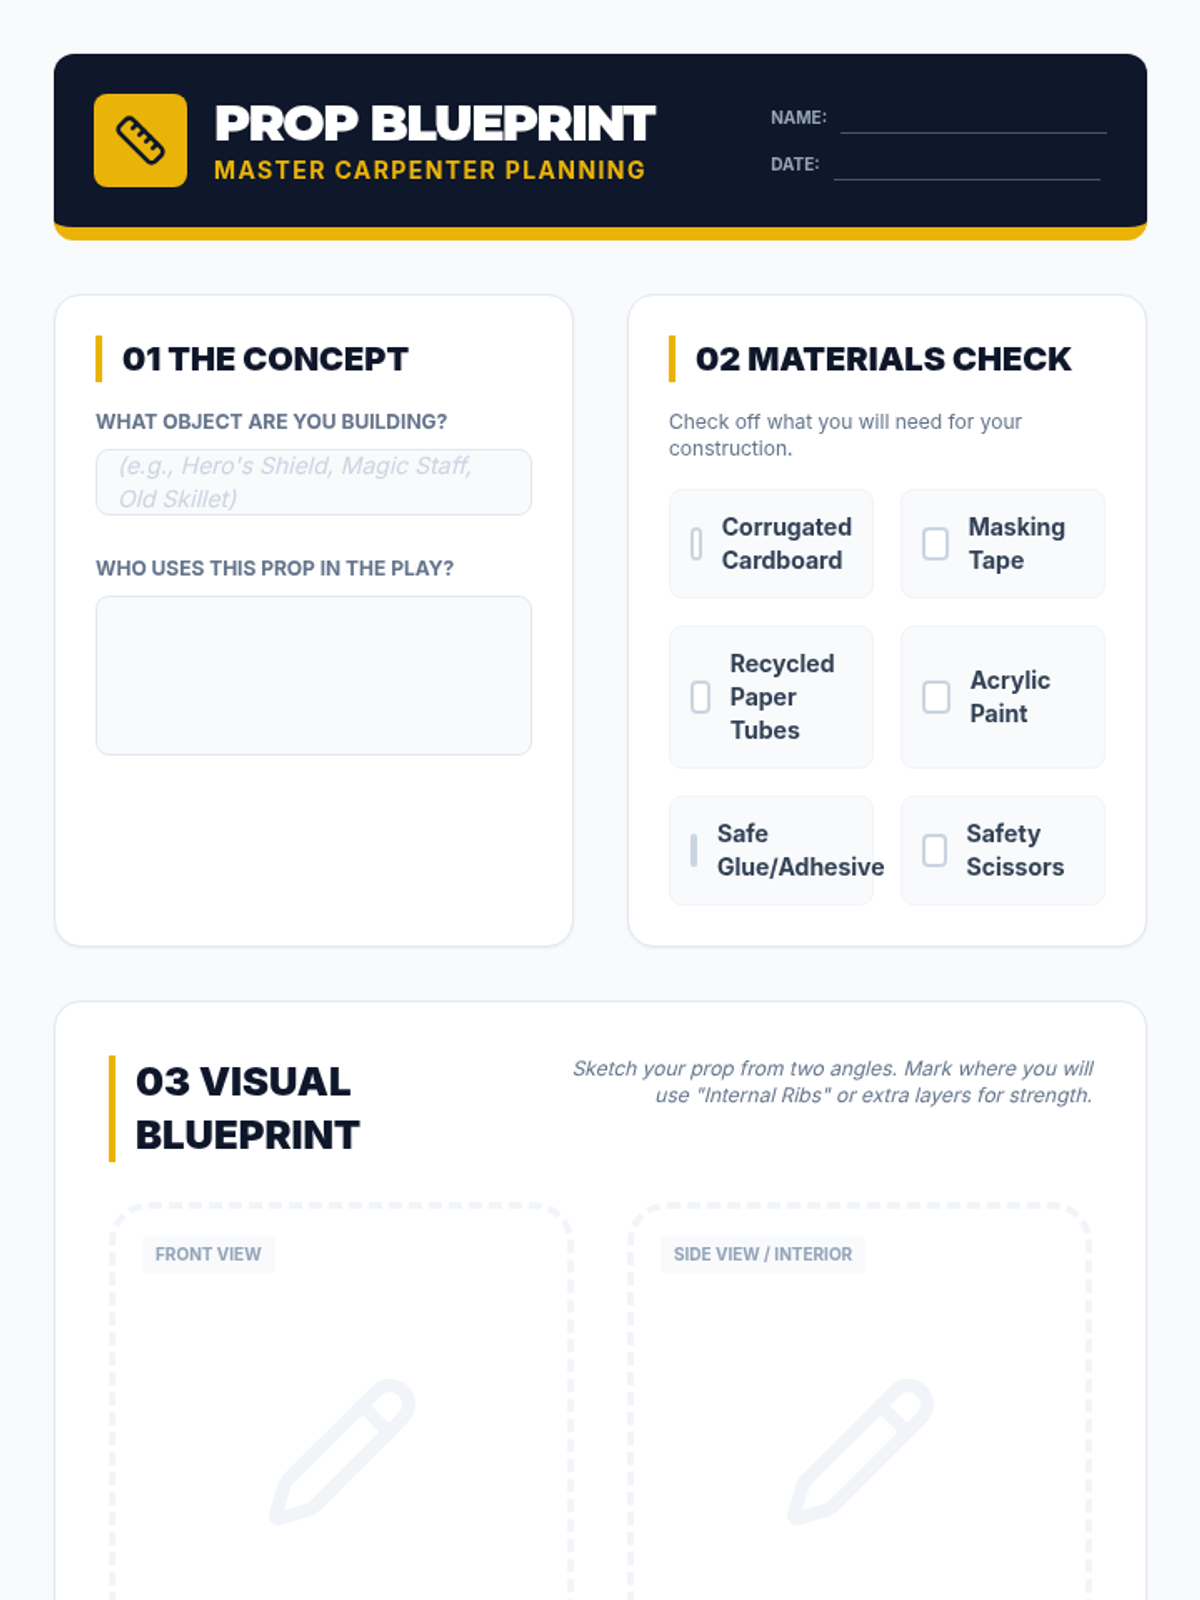
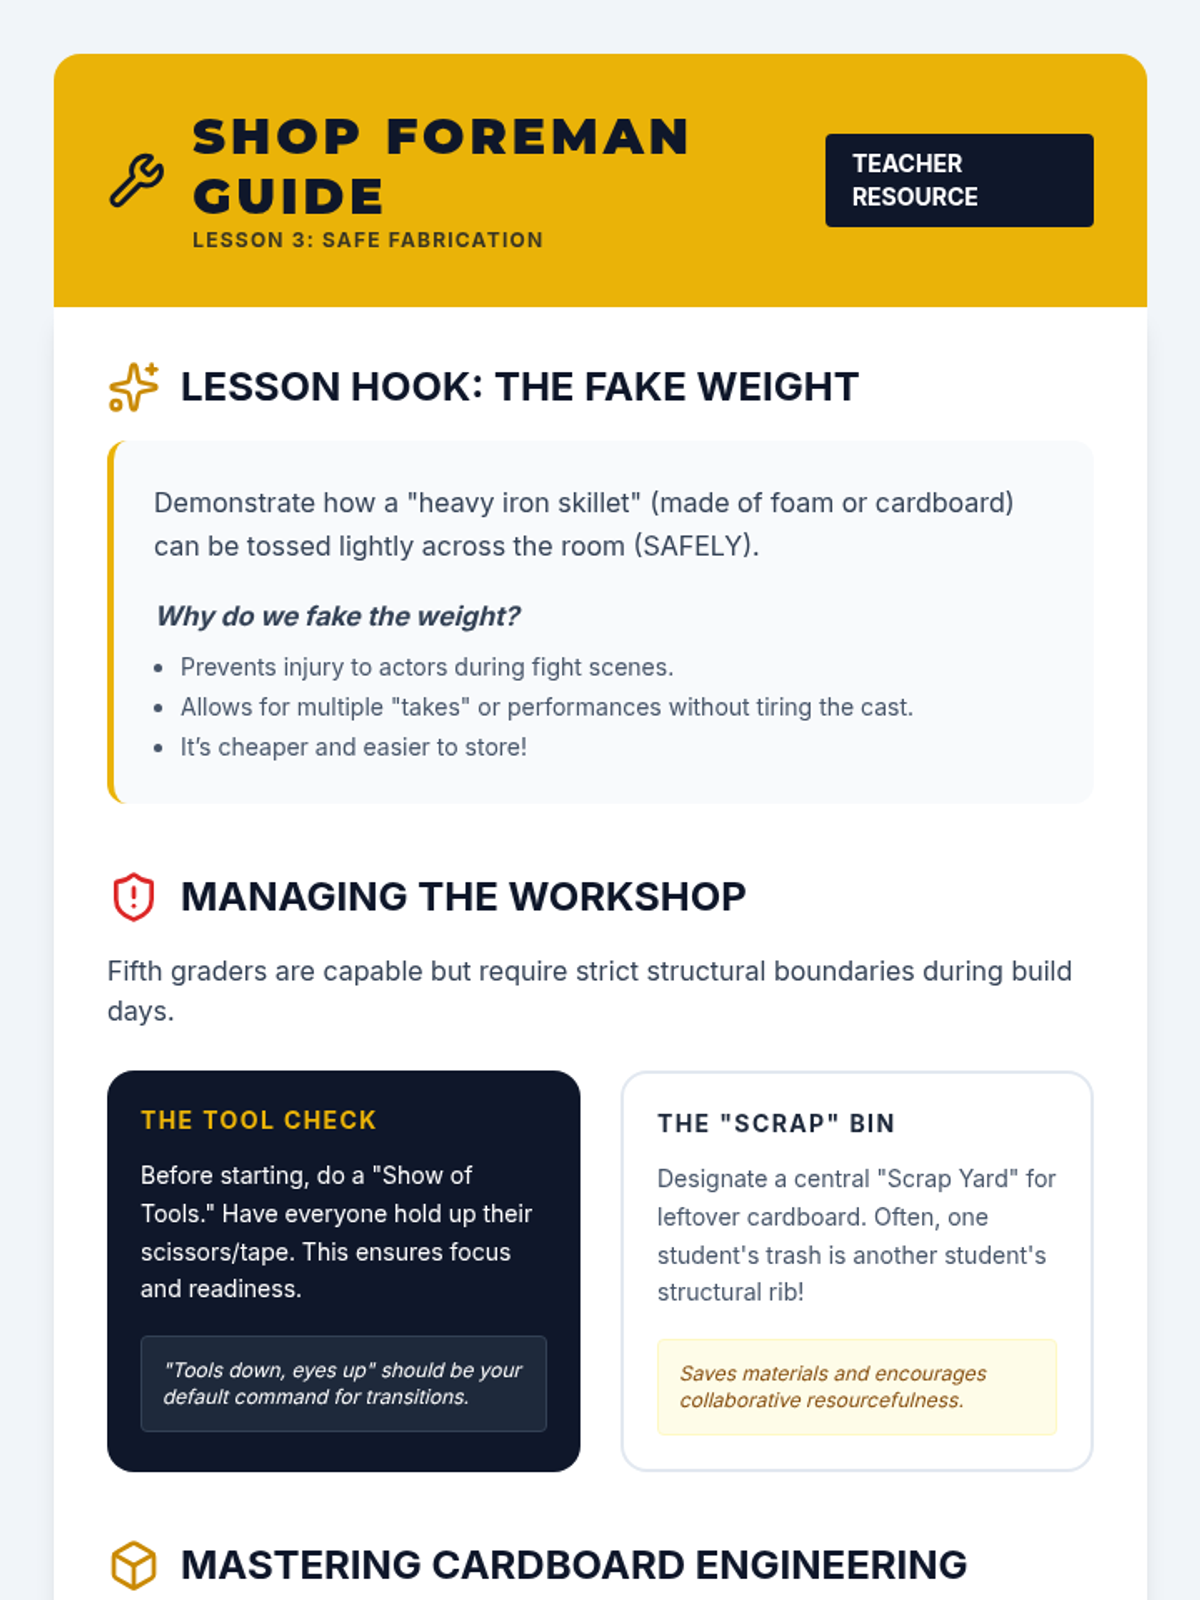
Focusing on safety and resourcefulness, students learn to build a specific hand prop using cardboard, tape, and safe adhesives. The lesson covers structural integrity and how to make lightweight objects look heavy or metallic.
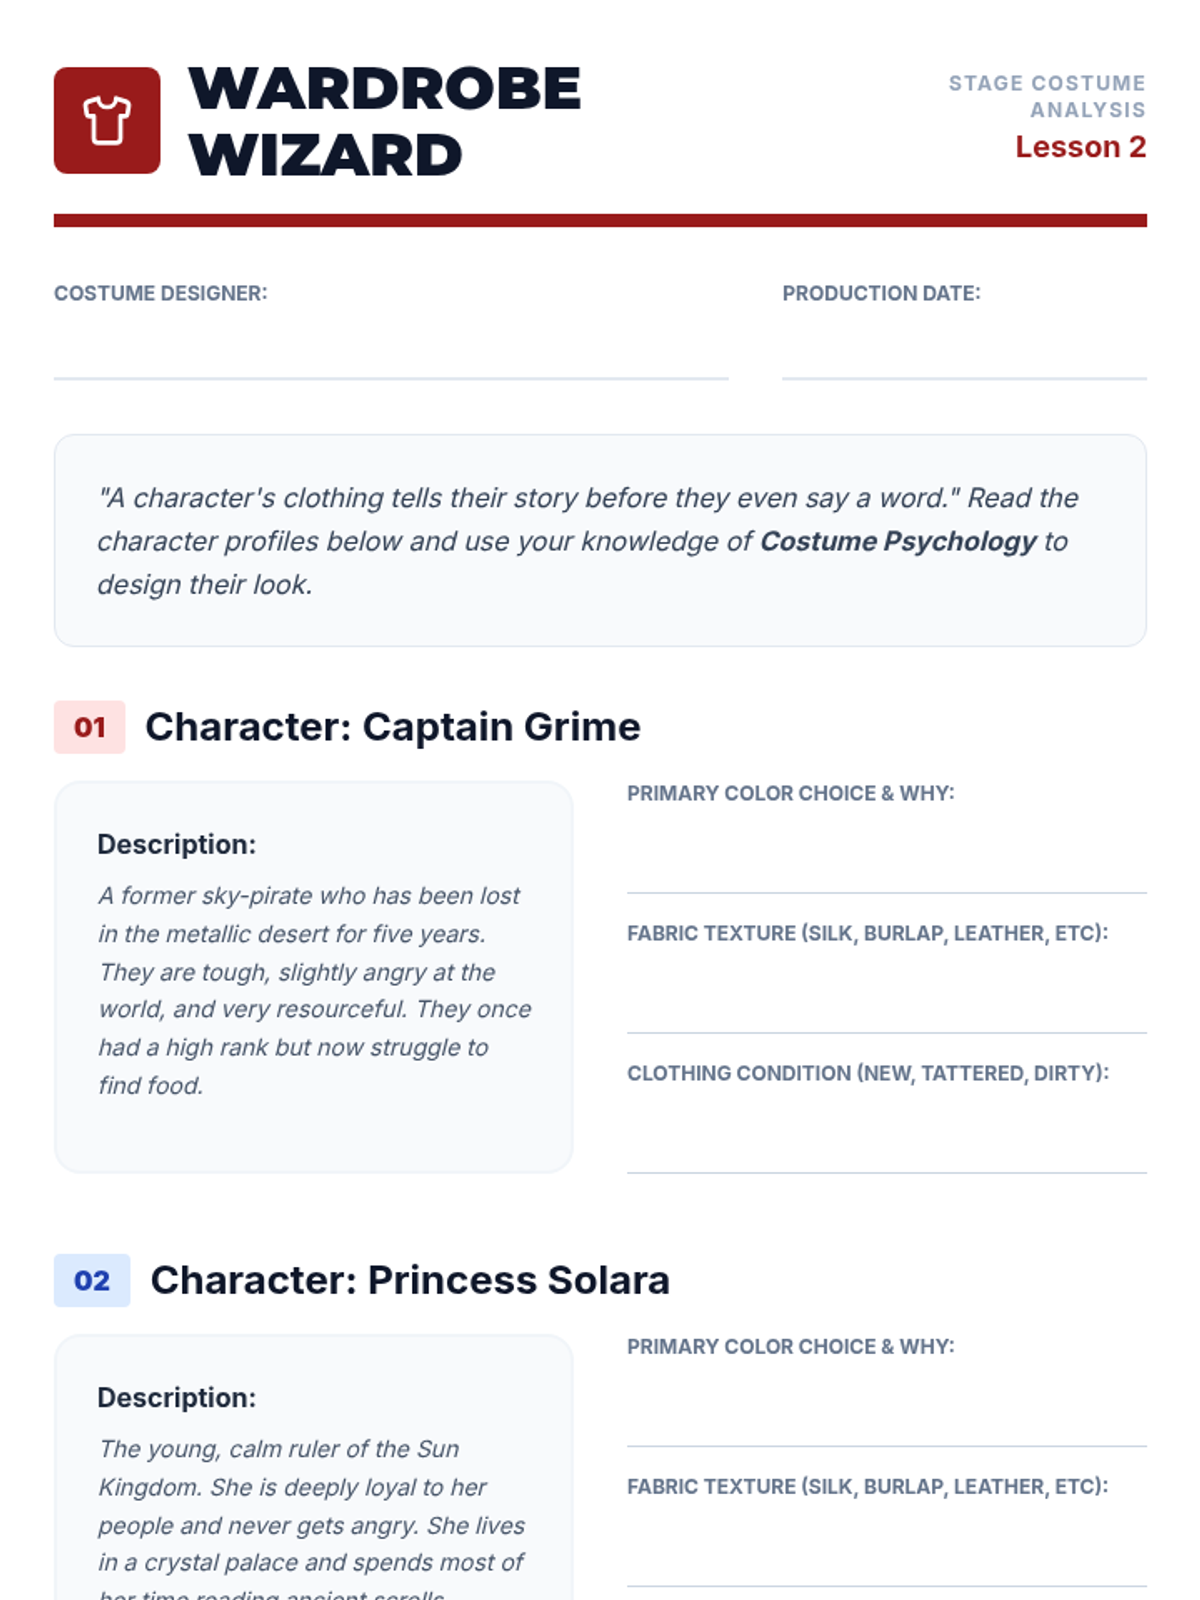
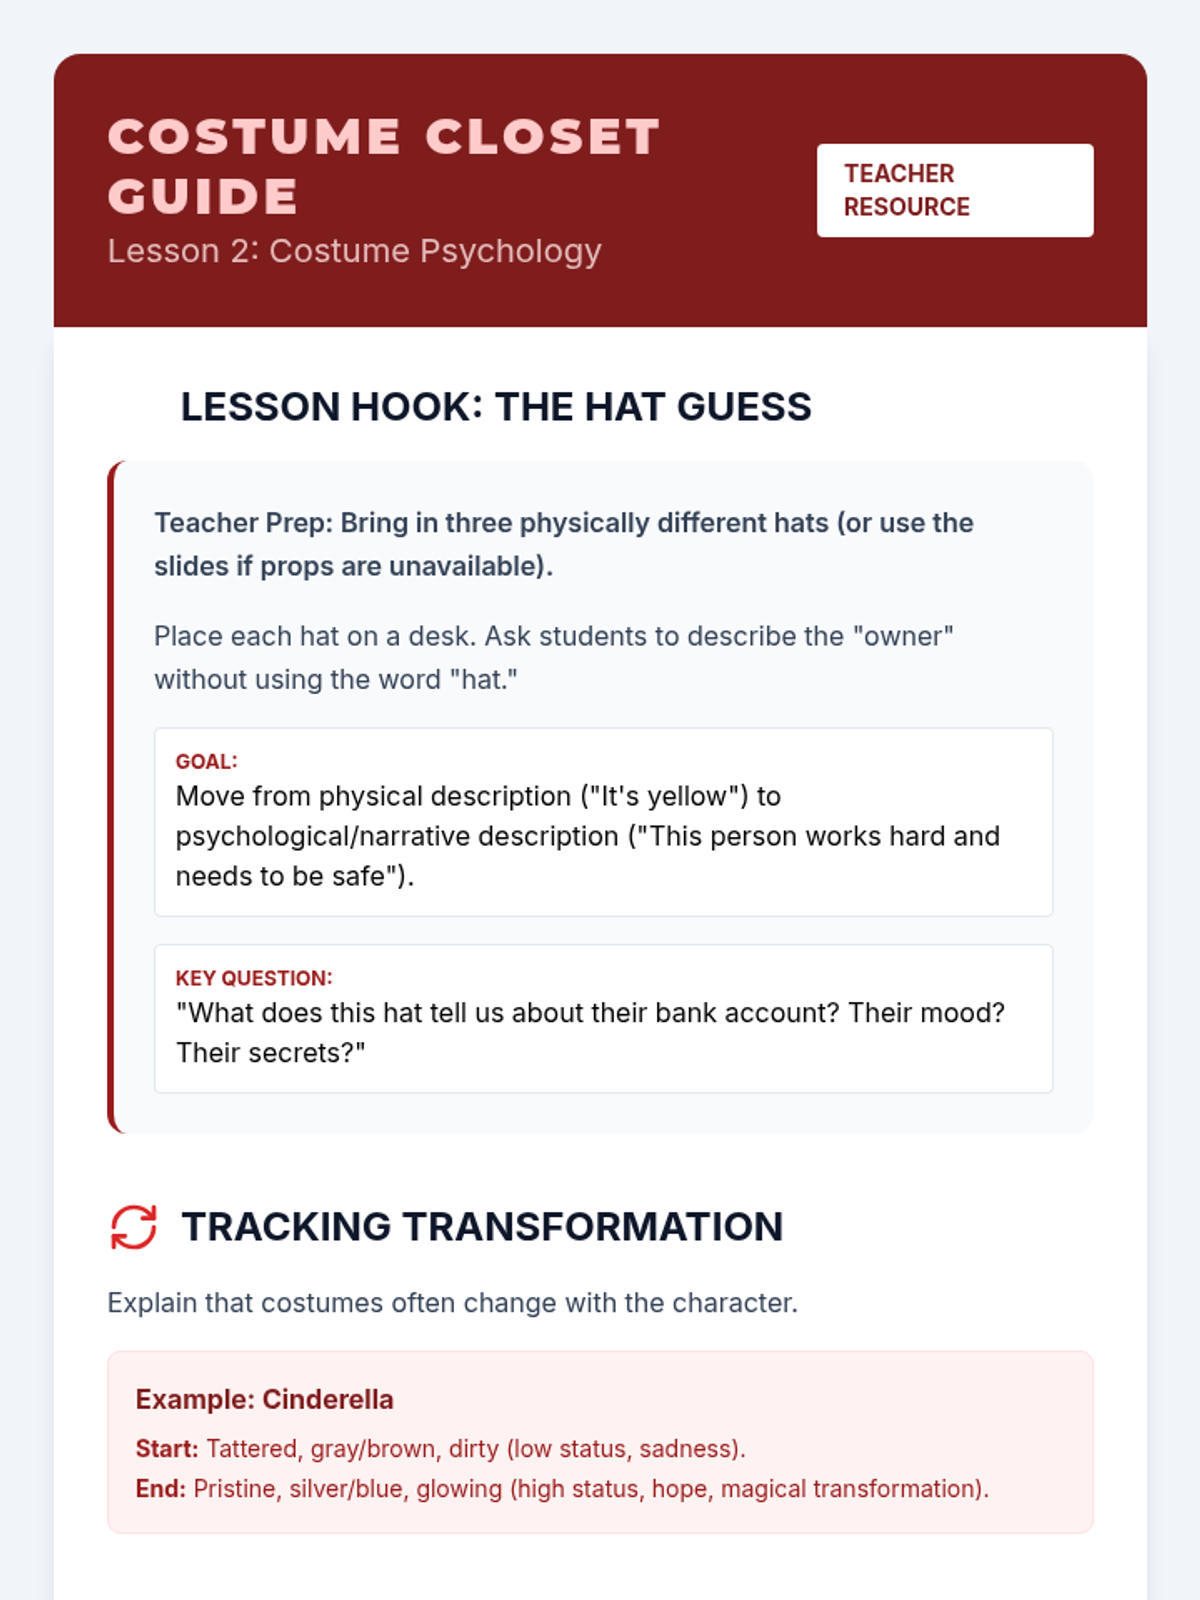
Students explore how color, condition, and fit of clothing communicate character traits. They analyze character descriptions and select fabric swatches or colors that represent the character's personality and status.
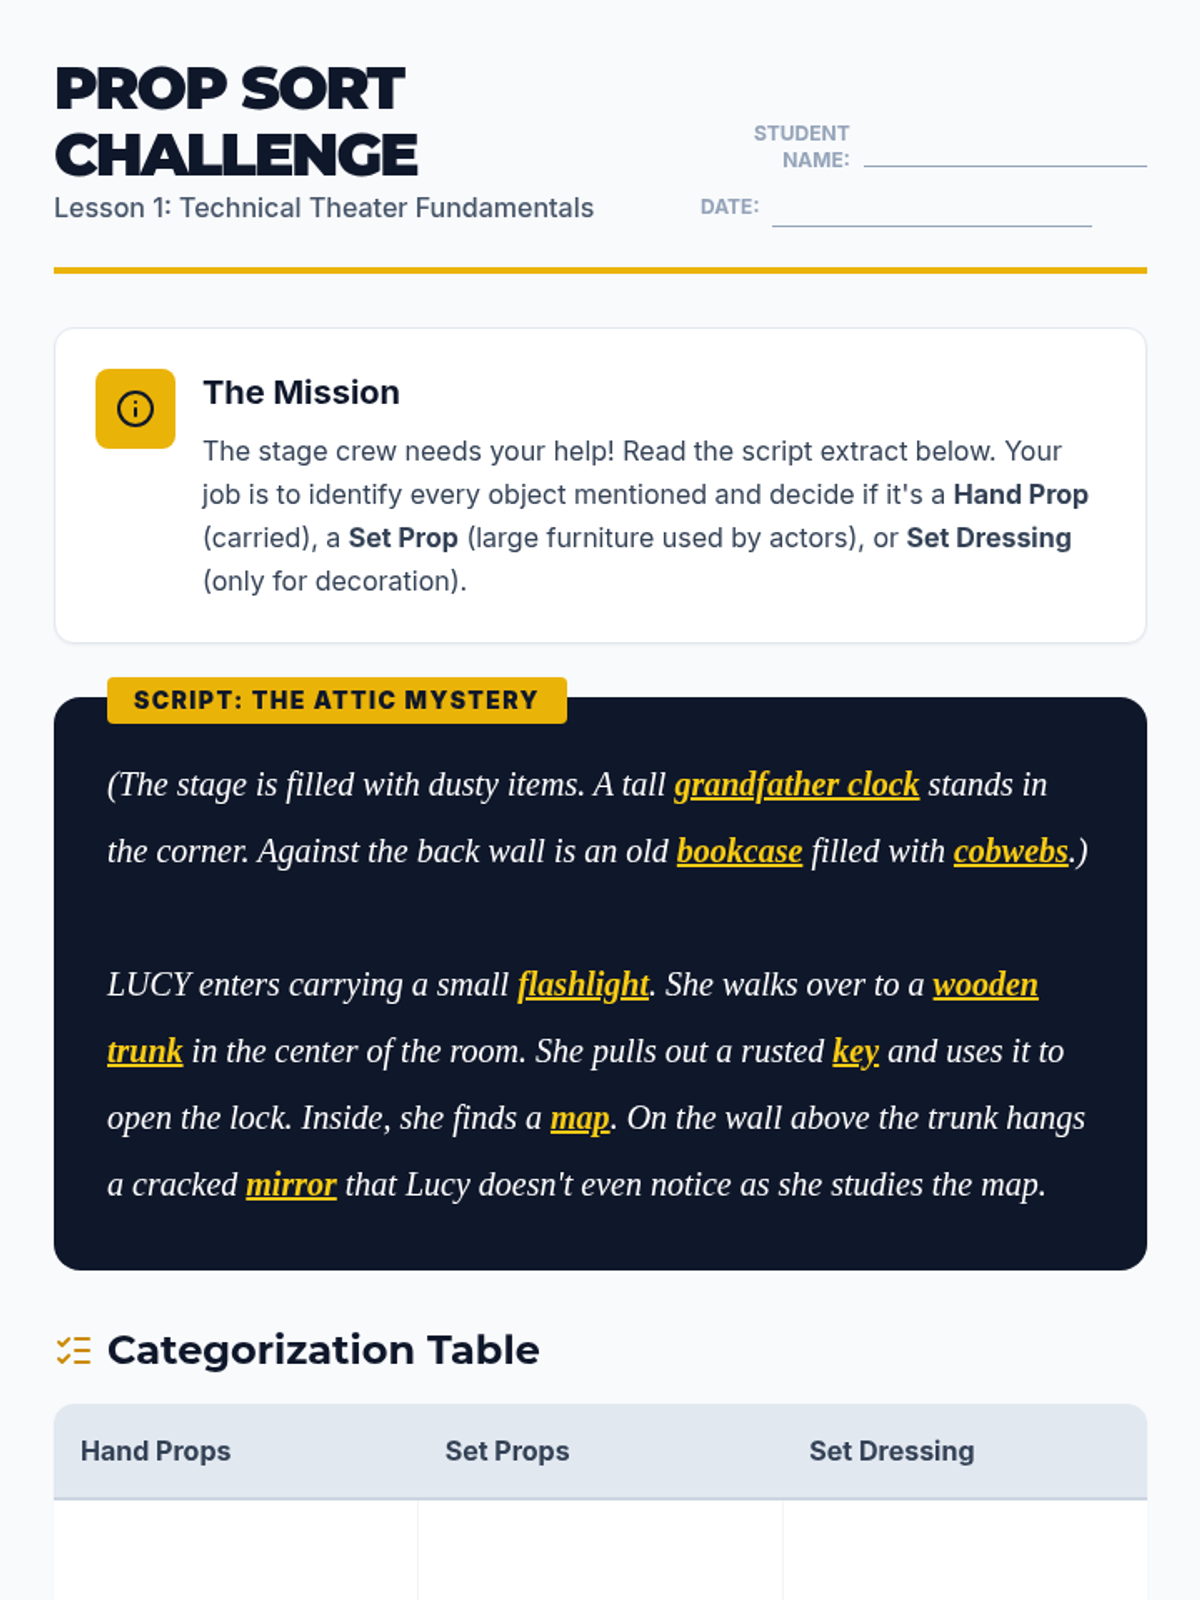
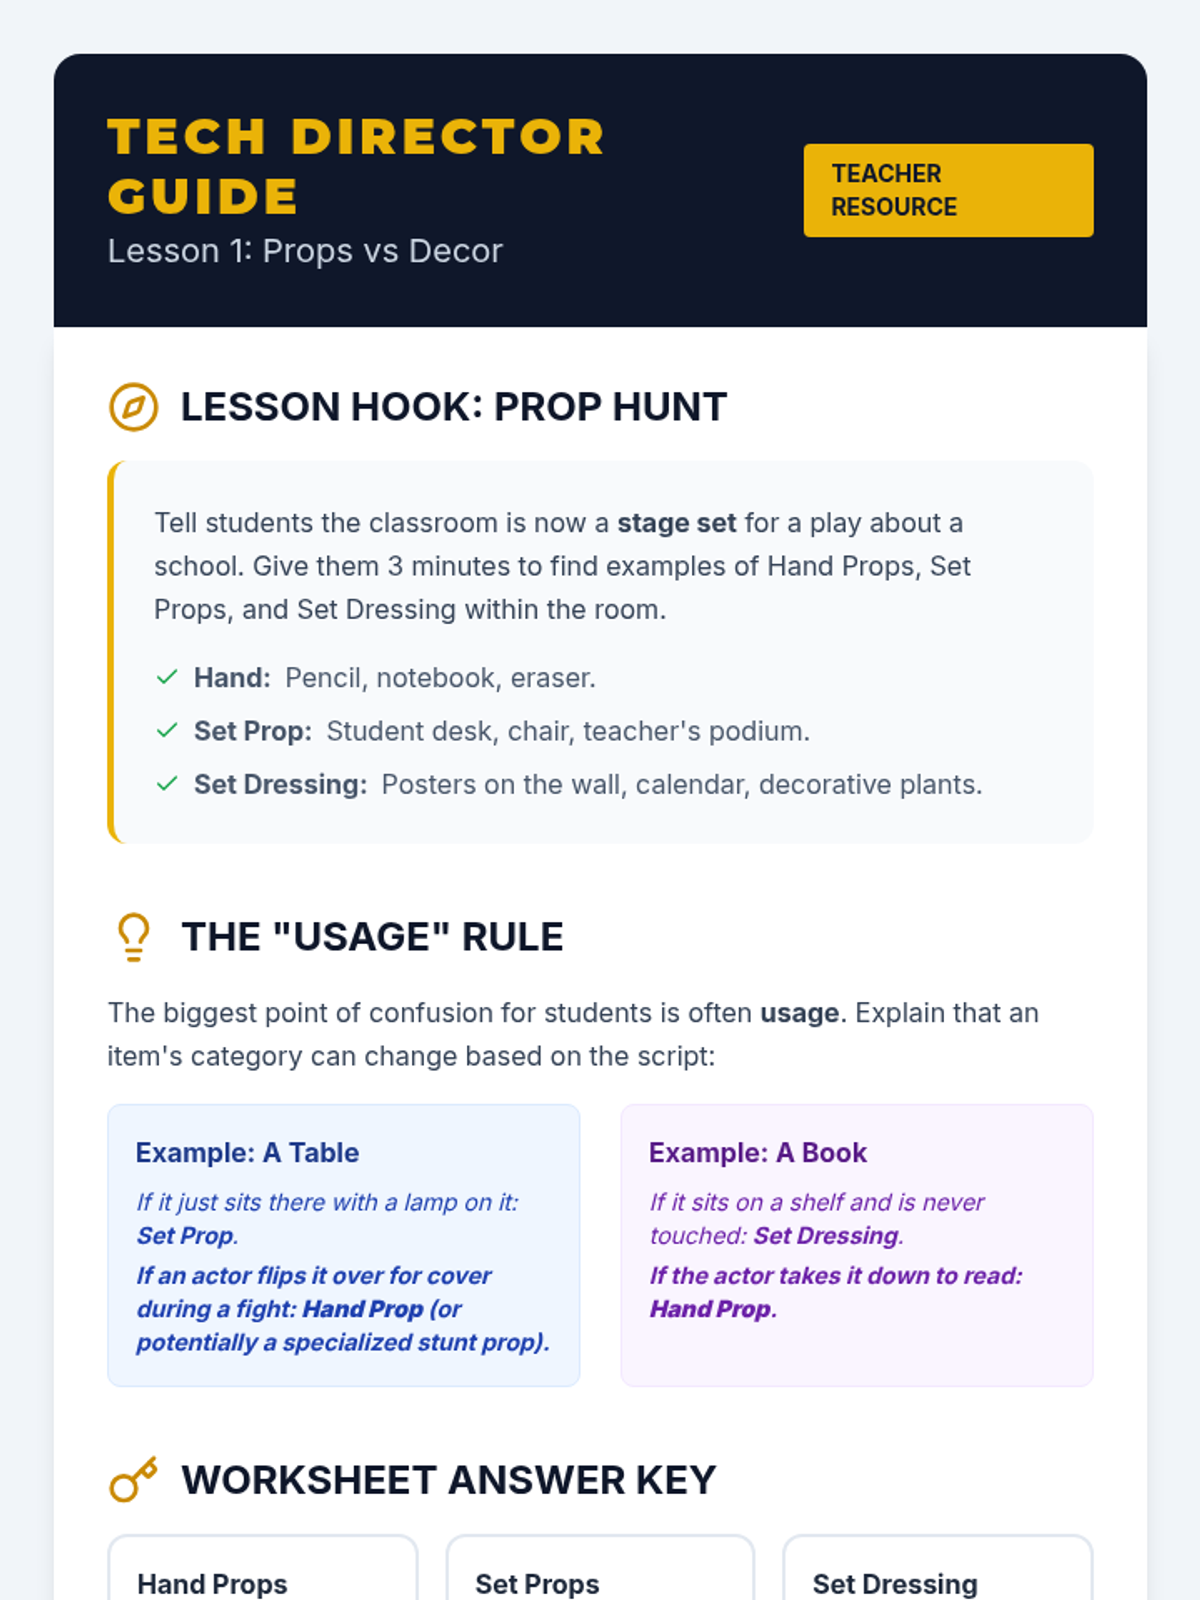
Students learn to categorize items as Hand Props, Set Props, or Set Dressing through sorting activities. They analyze a scene to determine which items are handled by actors versus which items just set the scene.
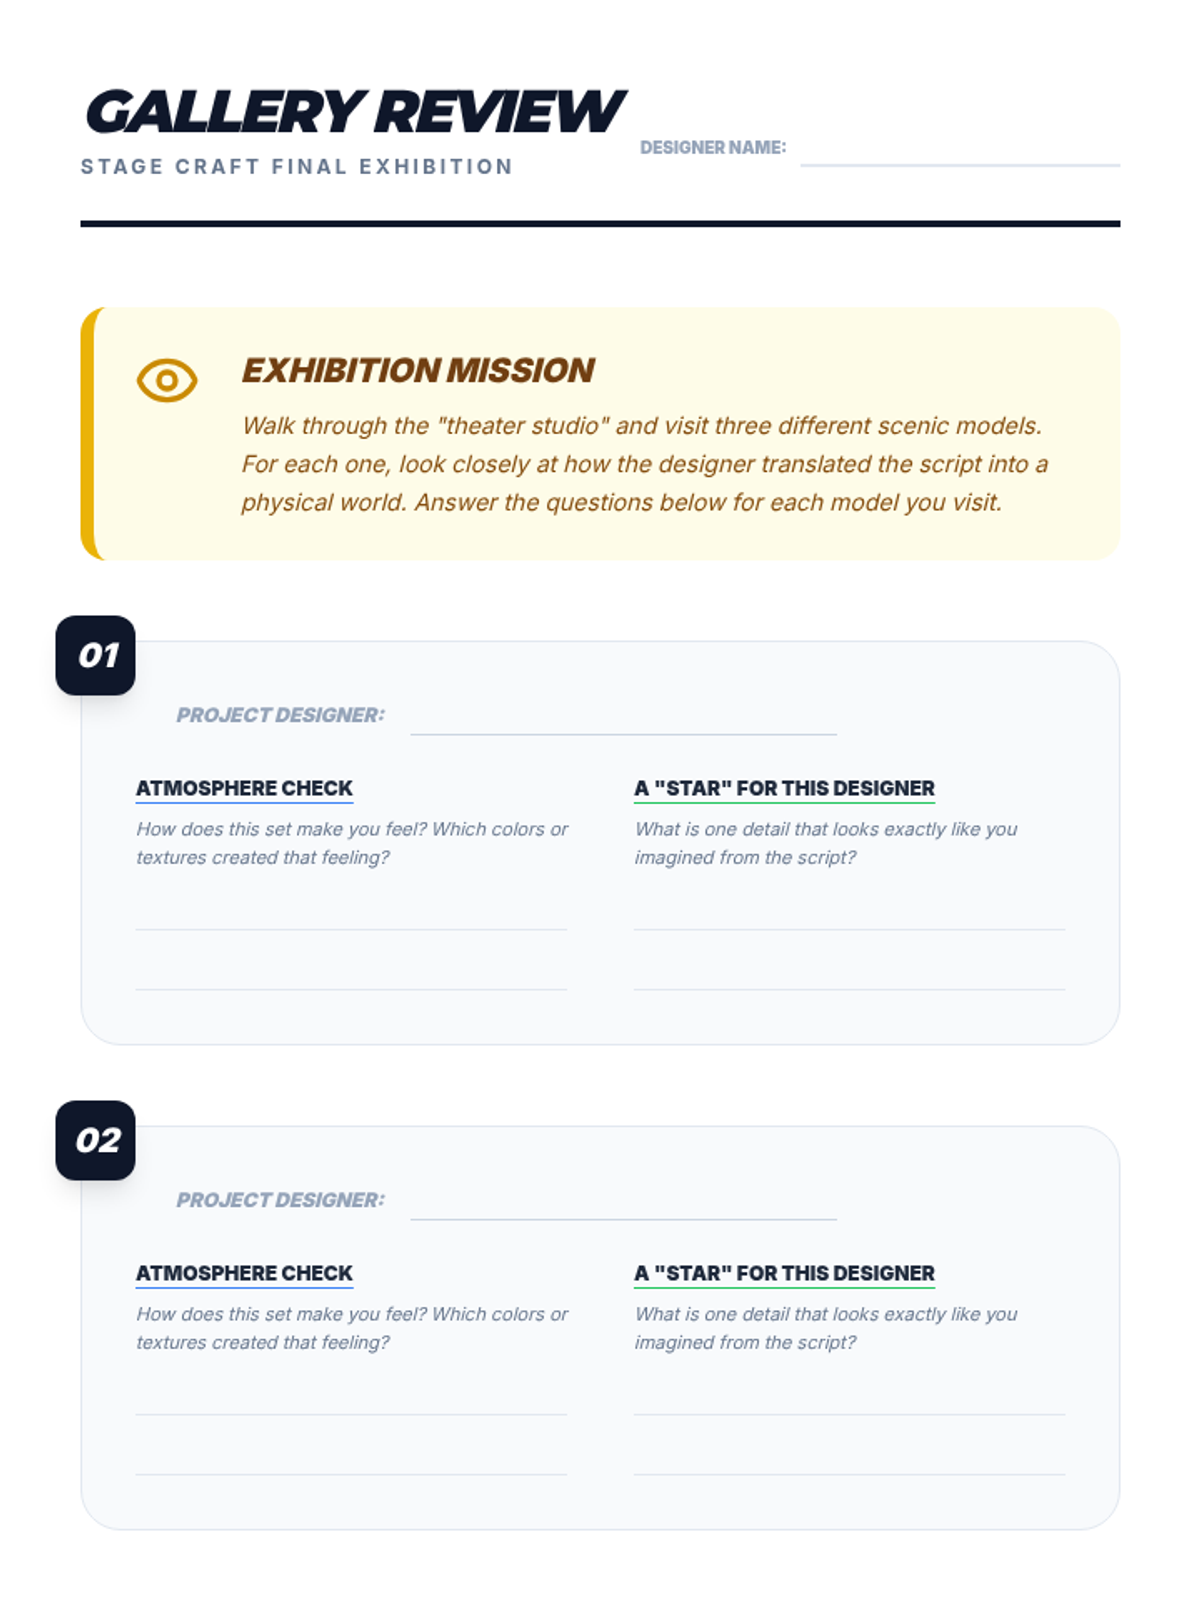
Students complete their models by adding furniture pieces, architectural details, and applying color or texture. The sequence concludes with a gallery walk where students critique how well the designs serve the script.
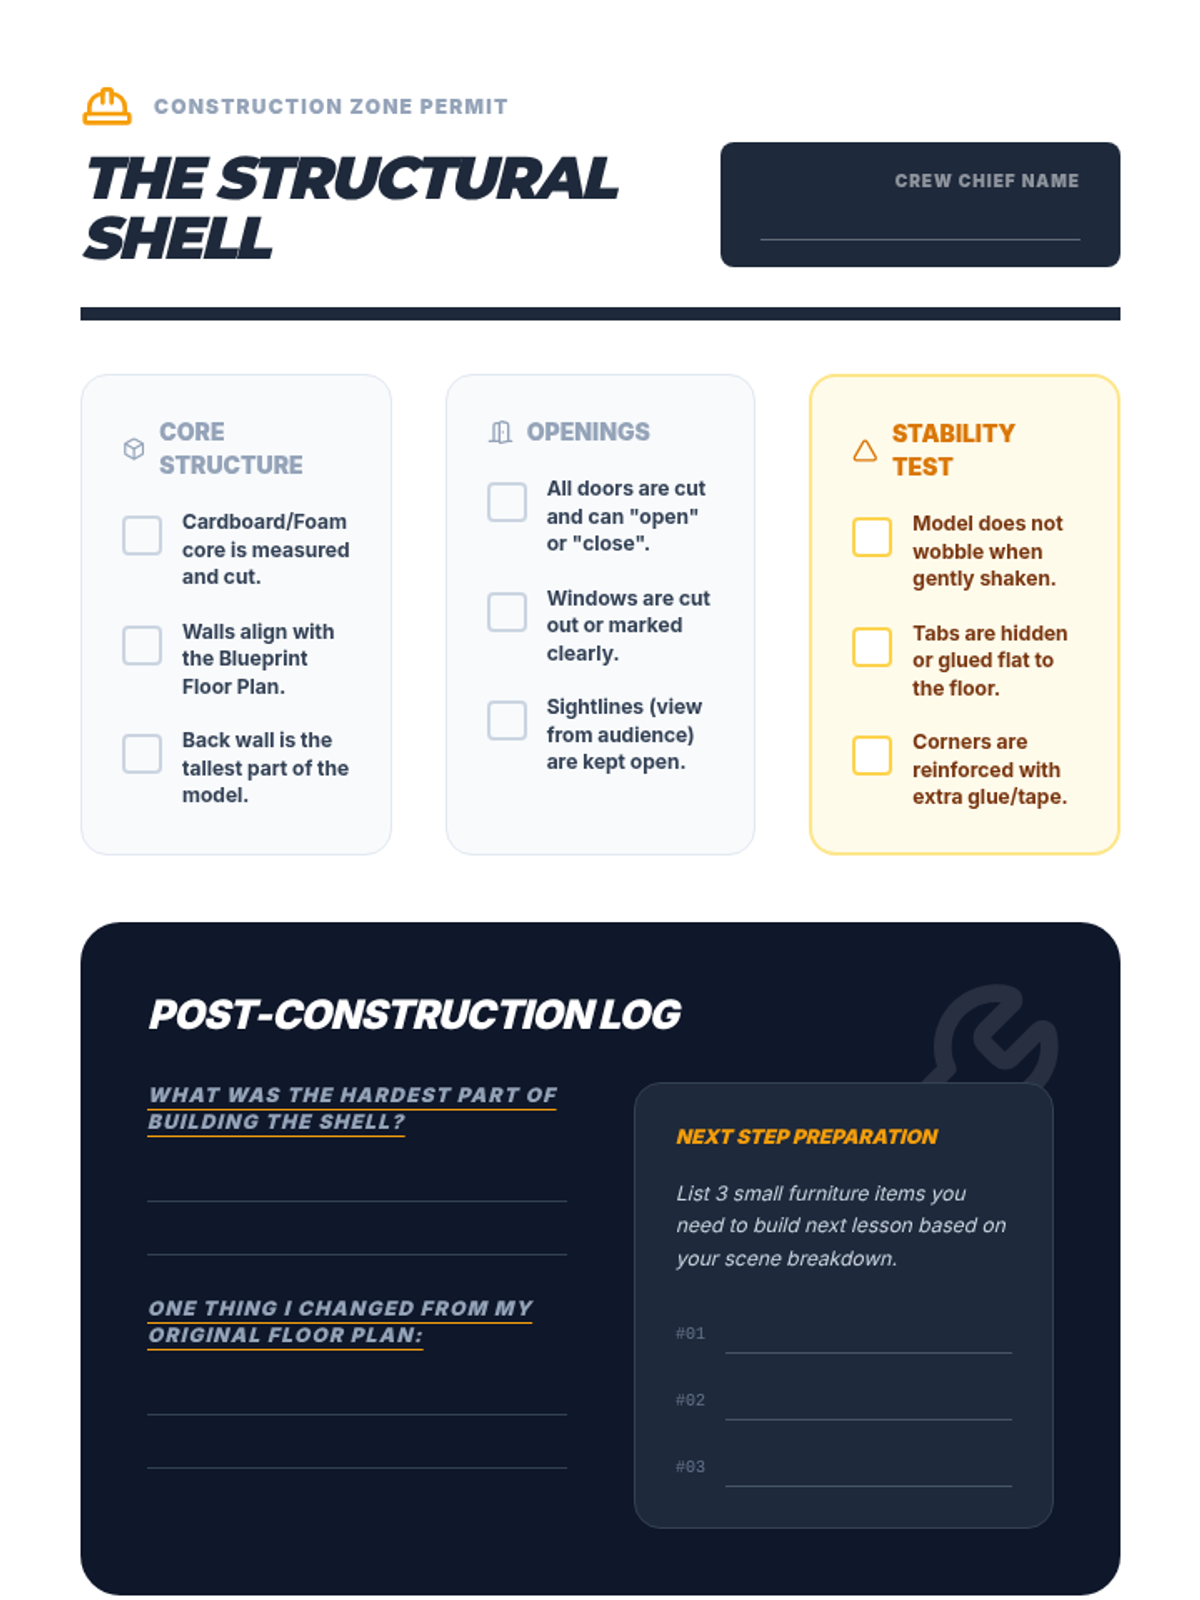
Students begin the hands-on construction of their scale model using cardstock, foam core, or shoeboxes. They build the perimeter walls and floor based on their earlier floor plans.
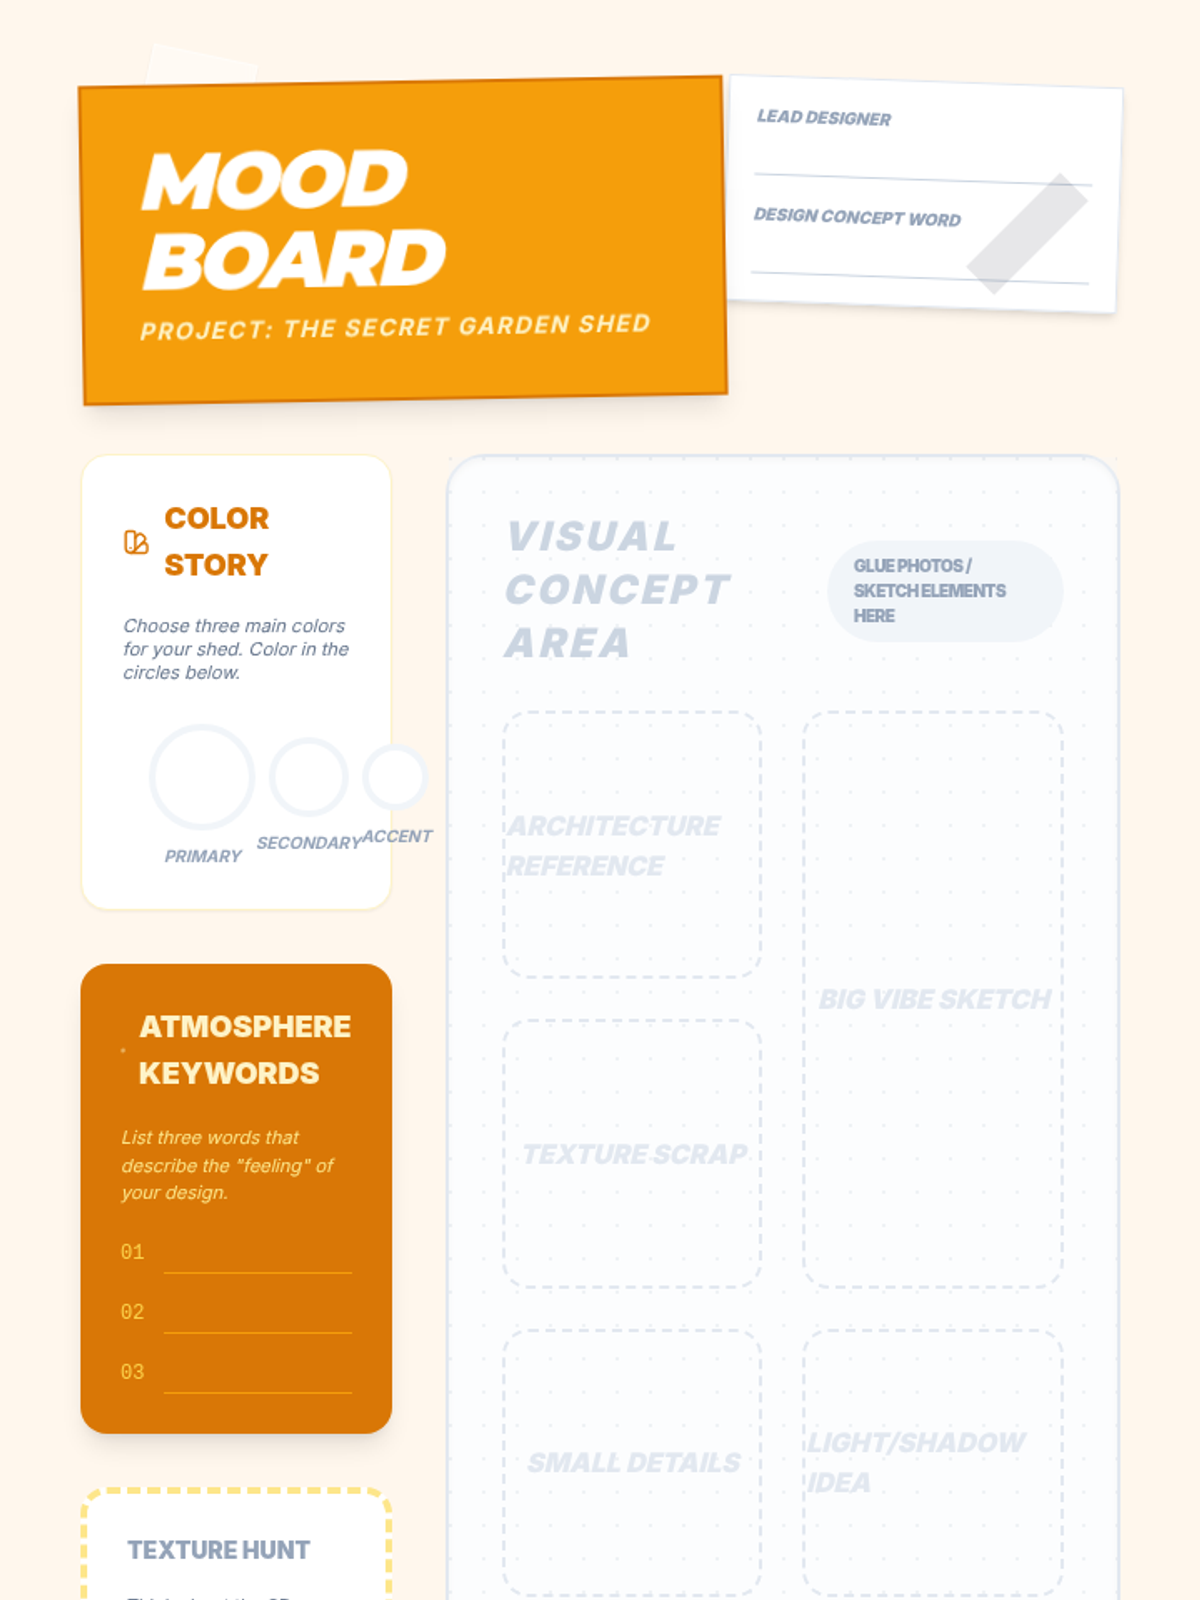
Focusing on the artistic atmosphere, students select color palettes, textures, and reference images that evoke the emotion of the scene. They compile these into a mood board that serves as the aesthetic guide for their final model.
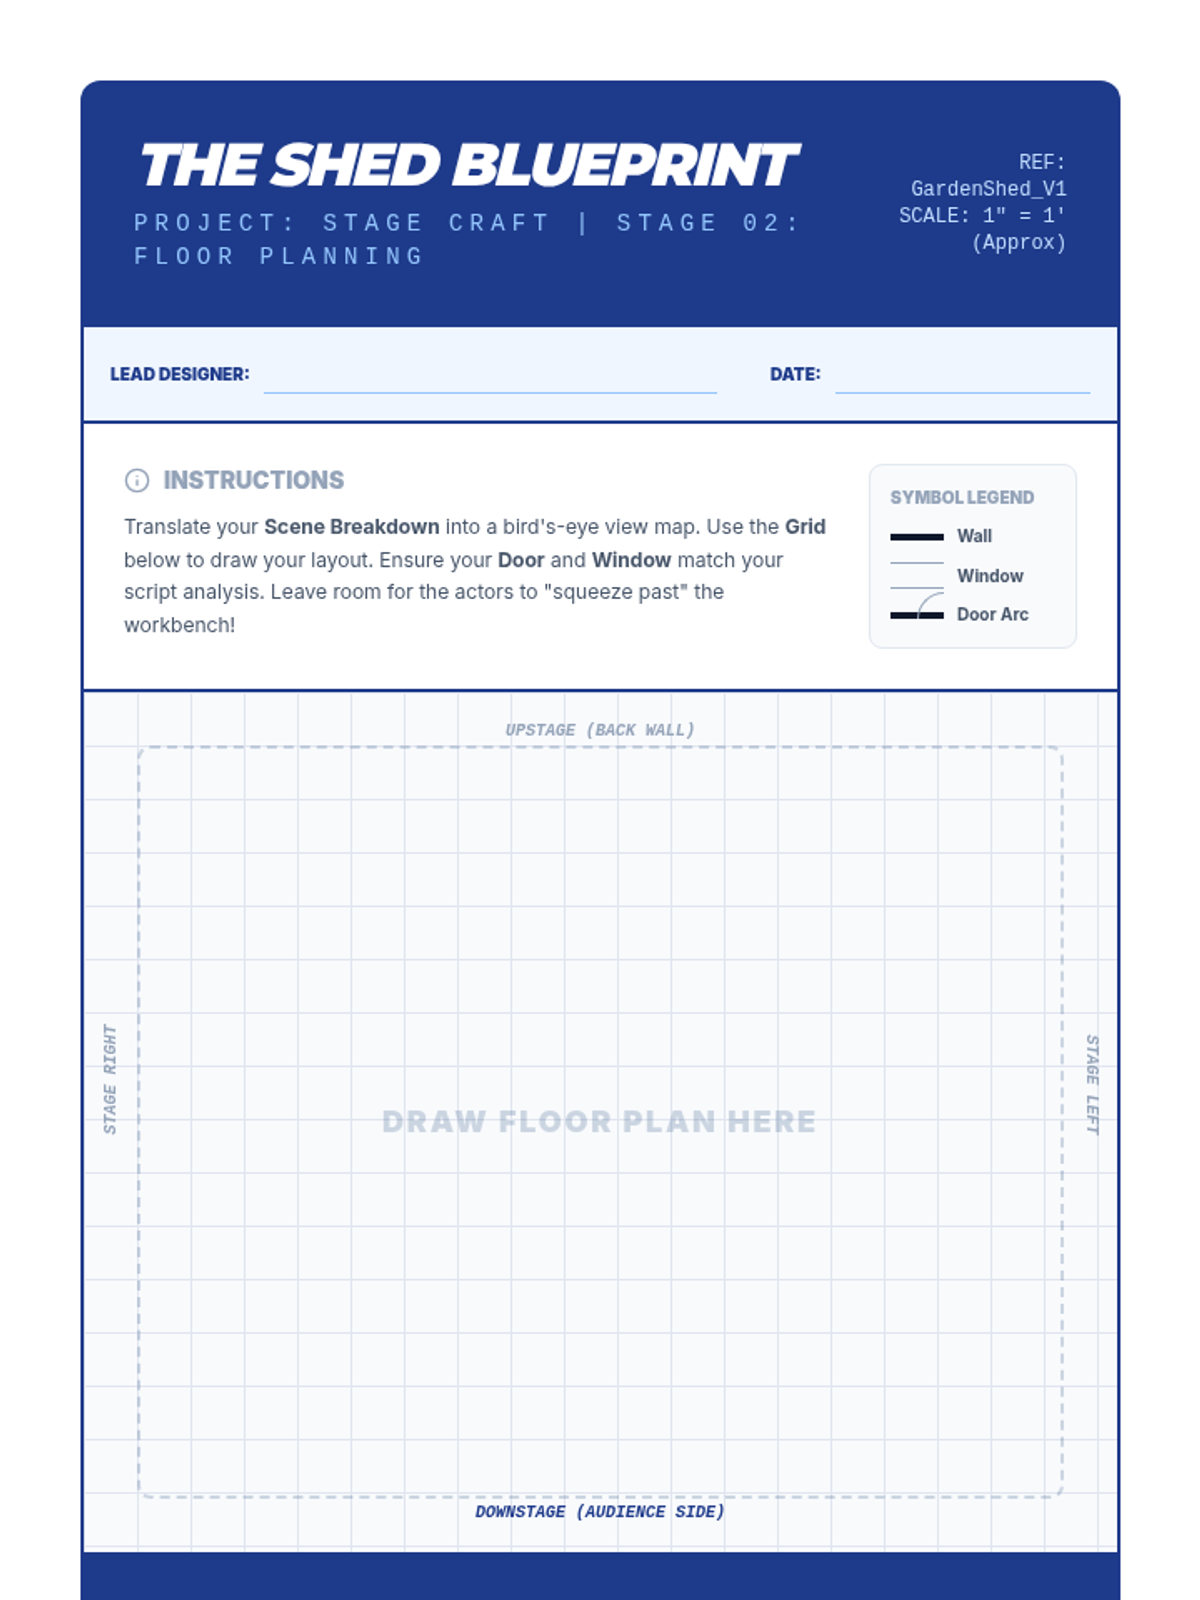
Students learn to translate their scene breakdown into a bird's-eye view floor plan, focusing on placement of furniture and walls to ensure actors have room to move and sightlines remain clear.
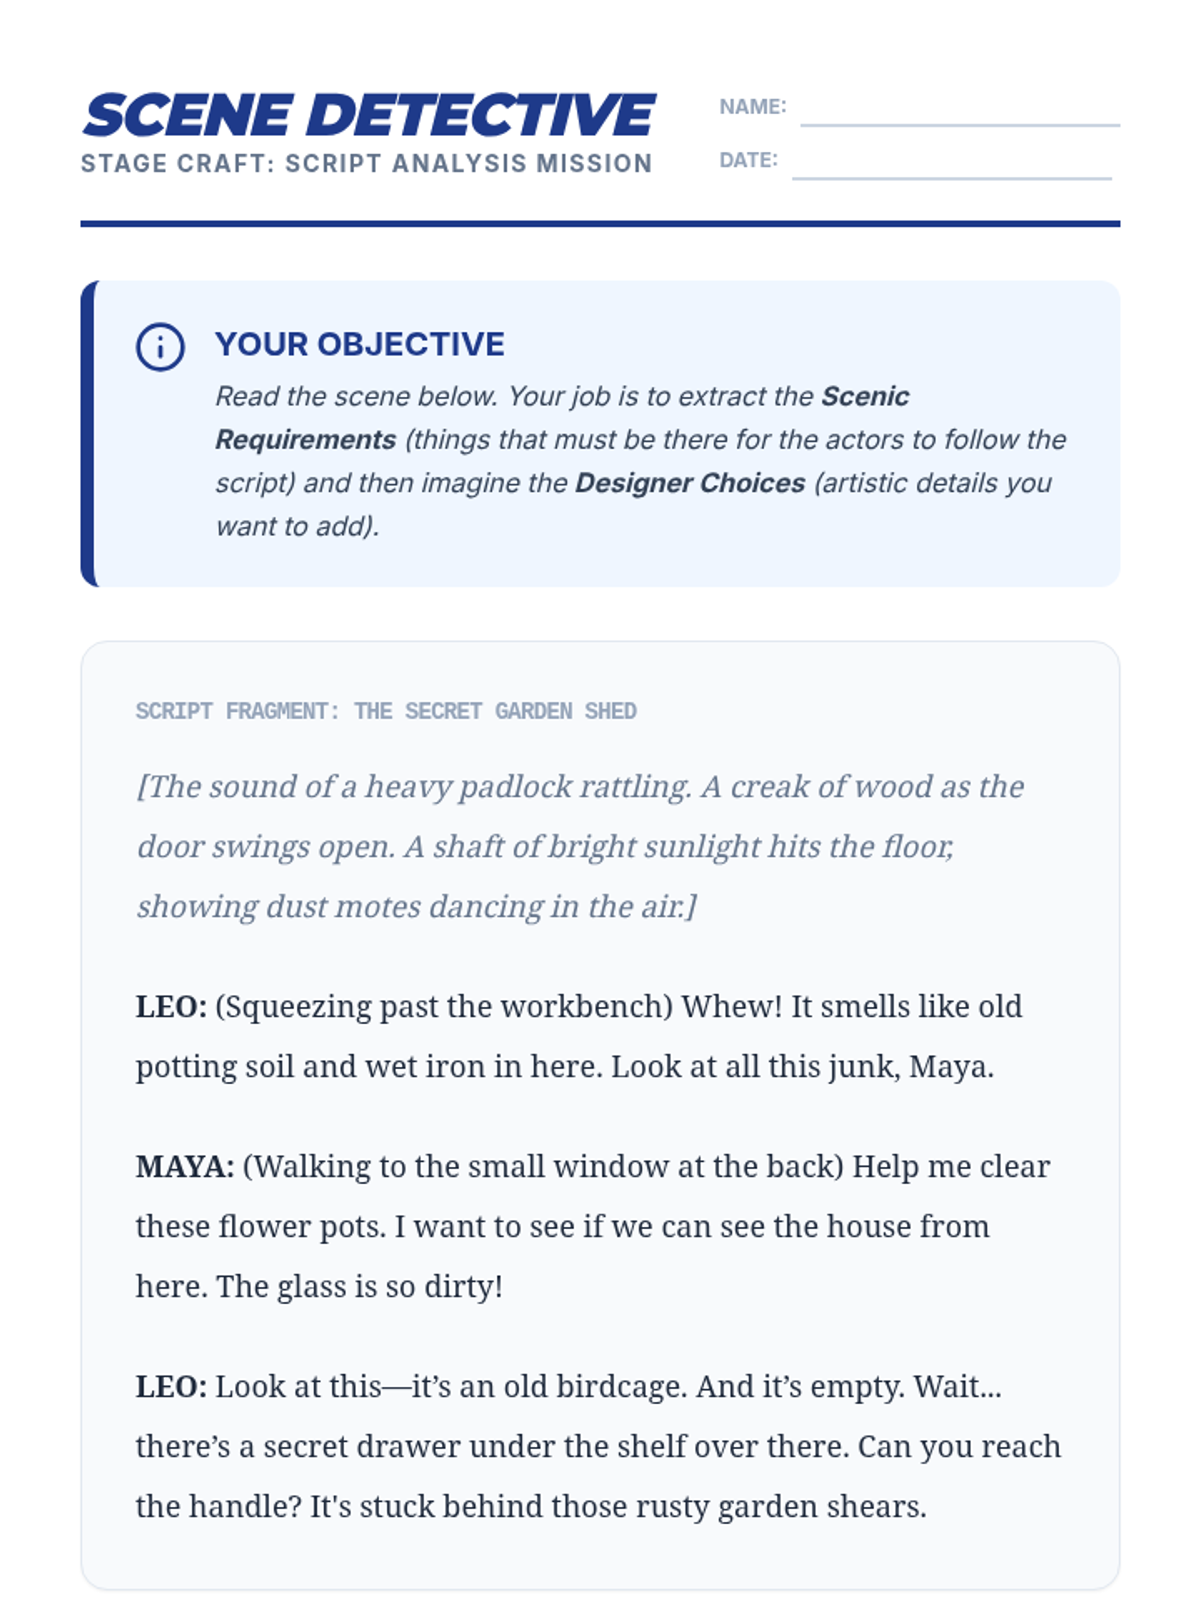
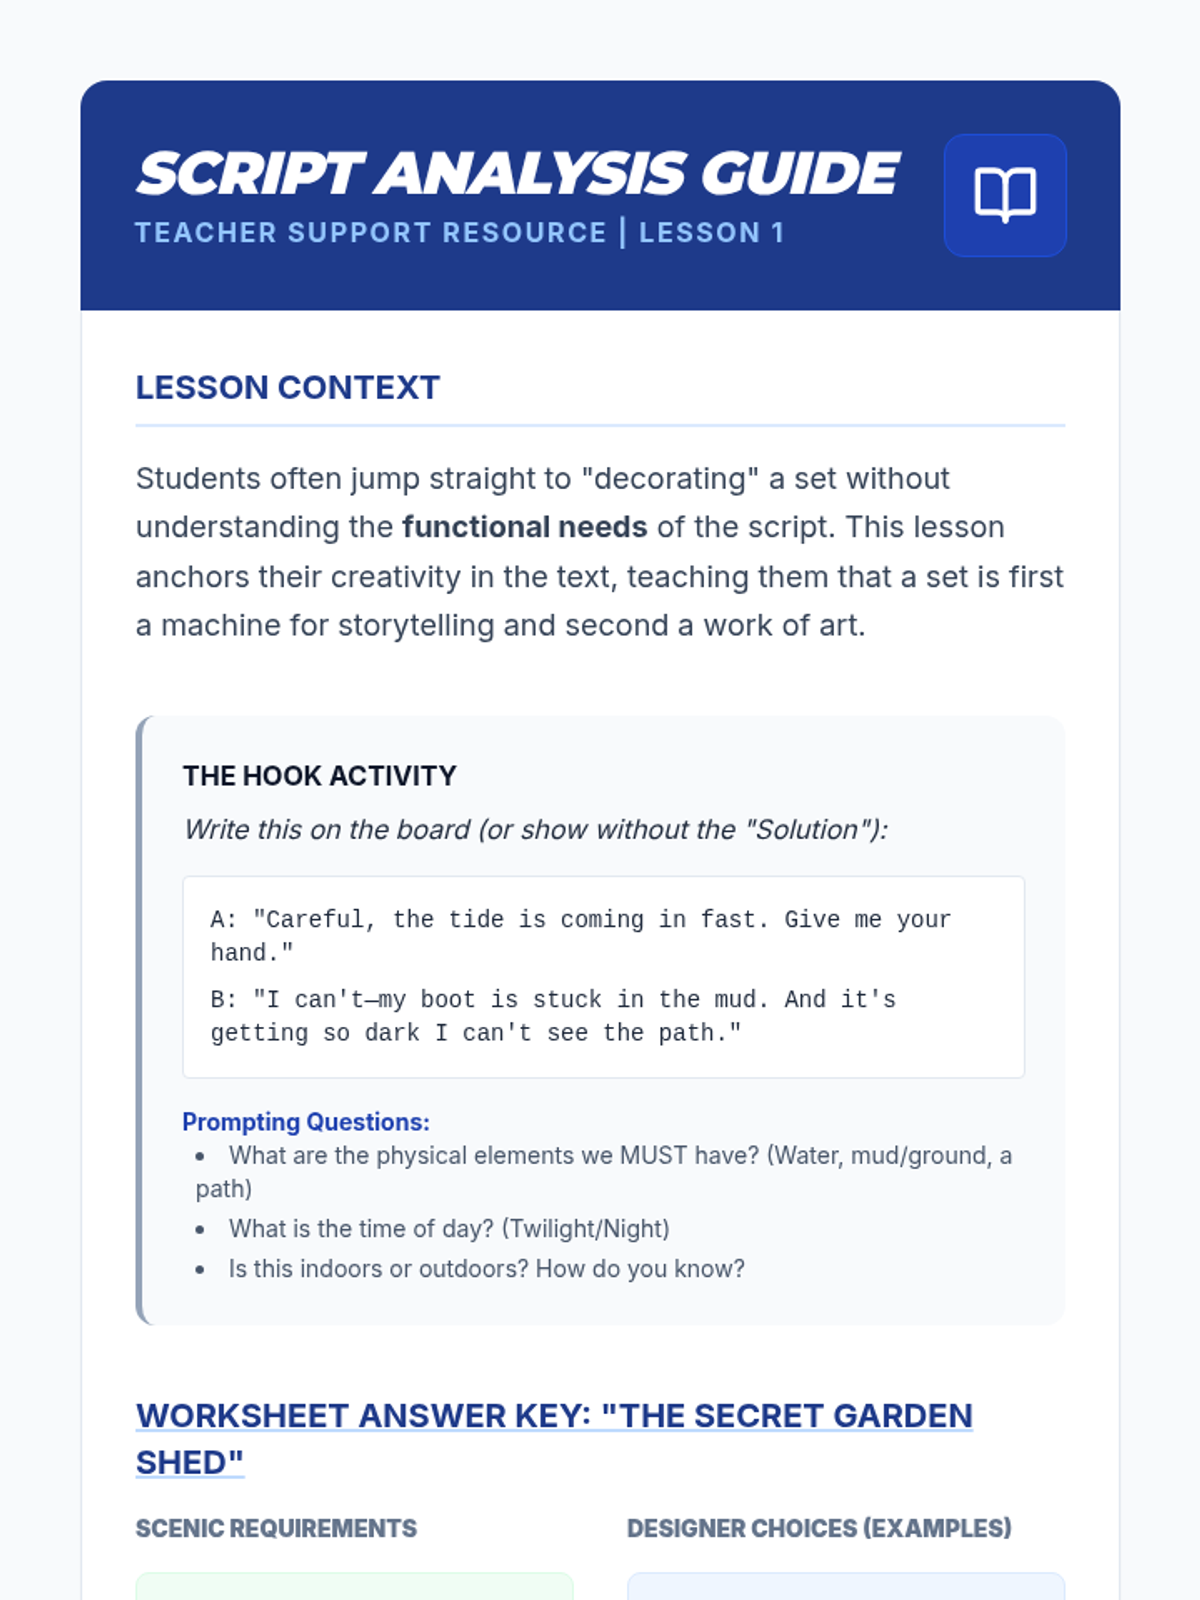
Students read a short scene to identify specific scenic needs, such as entrances, exits, furniture, and time period clues. They create a 'scene breakdown' list that categorizes these necessary elements versus artistic possibilities.
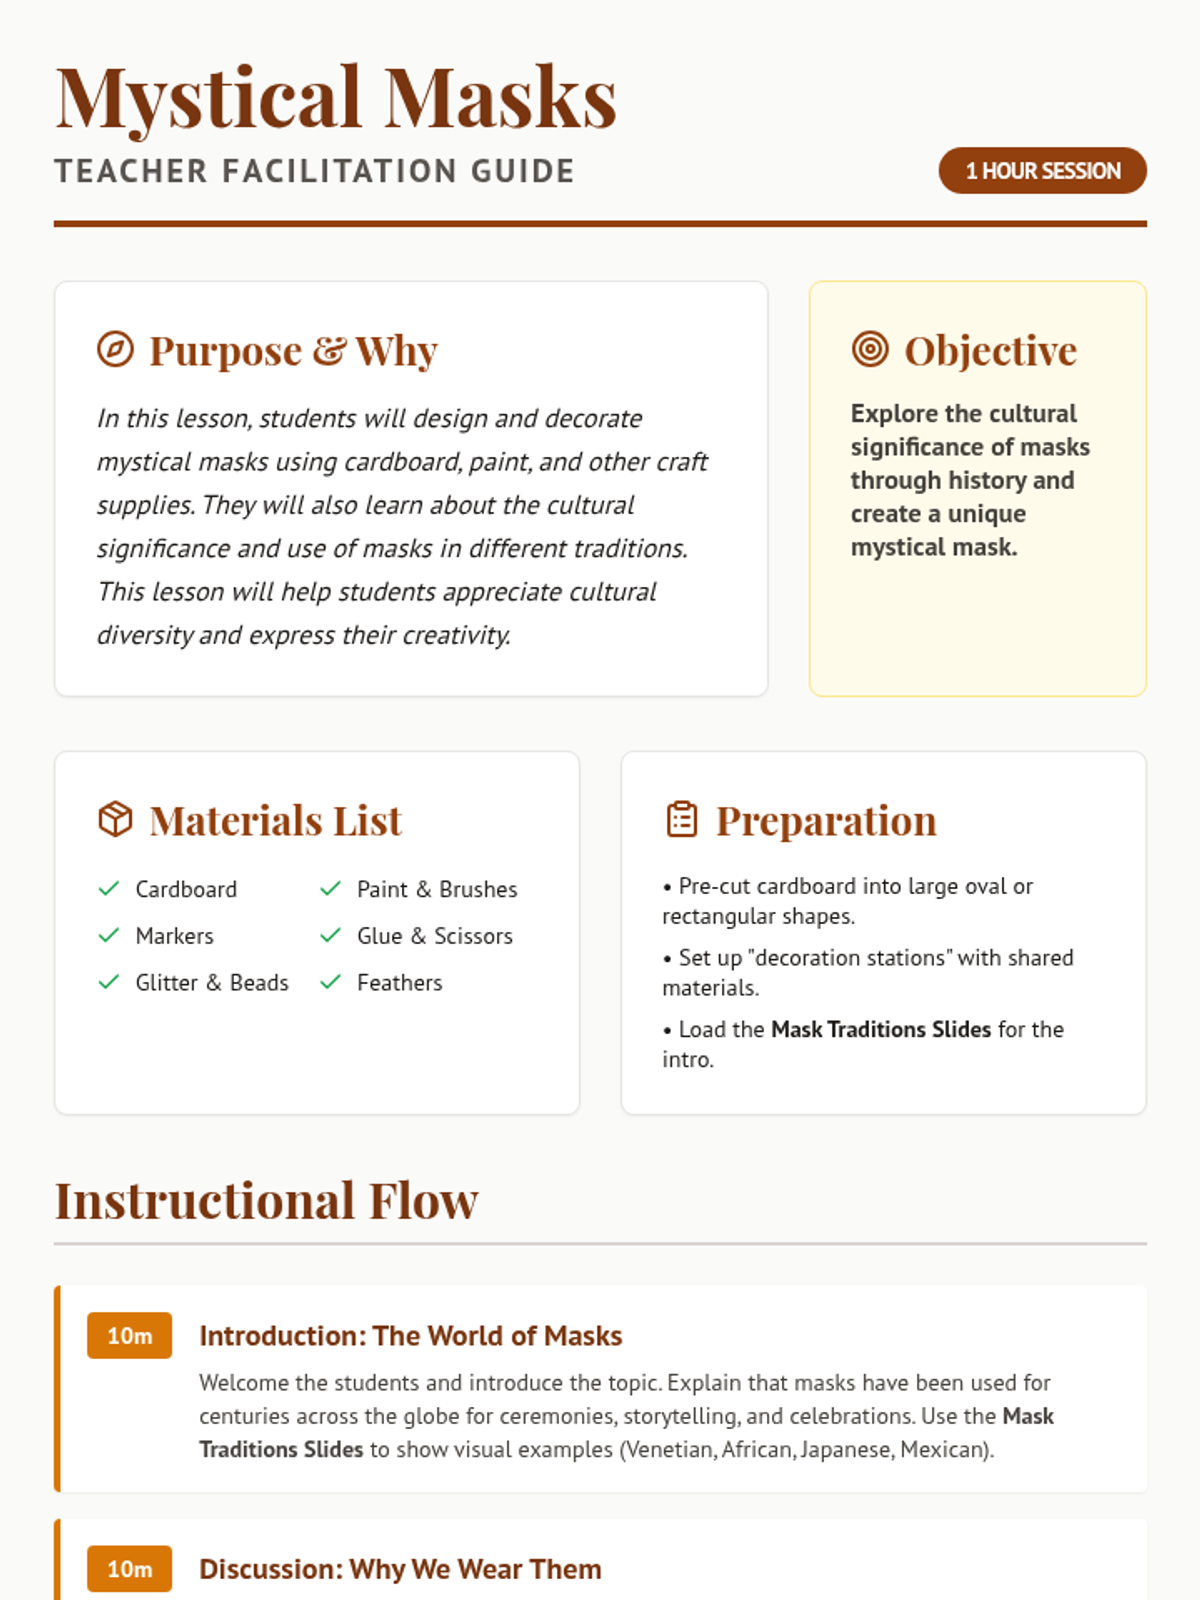
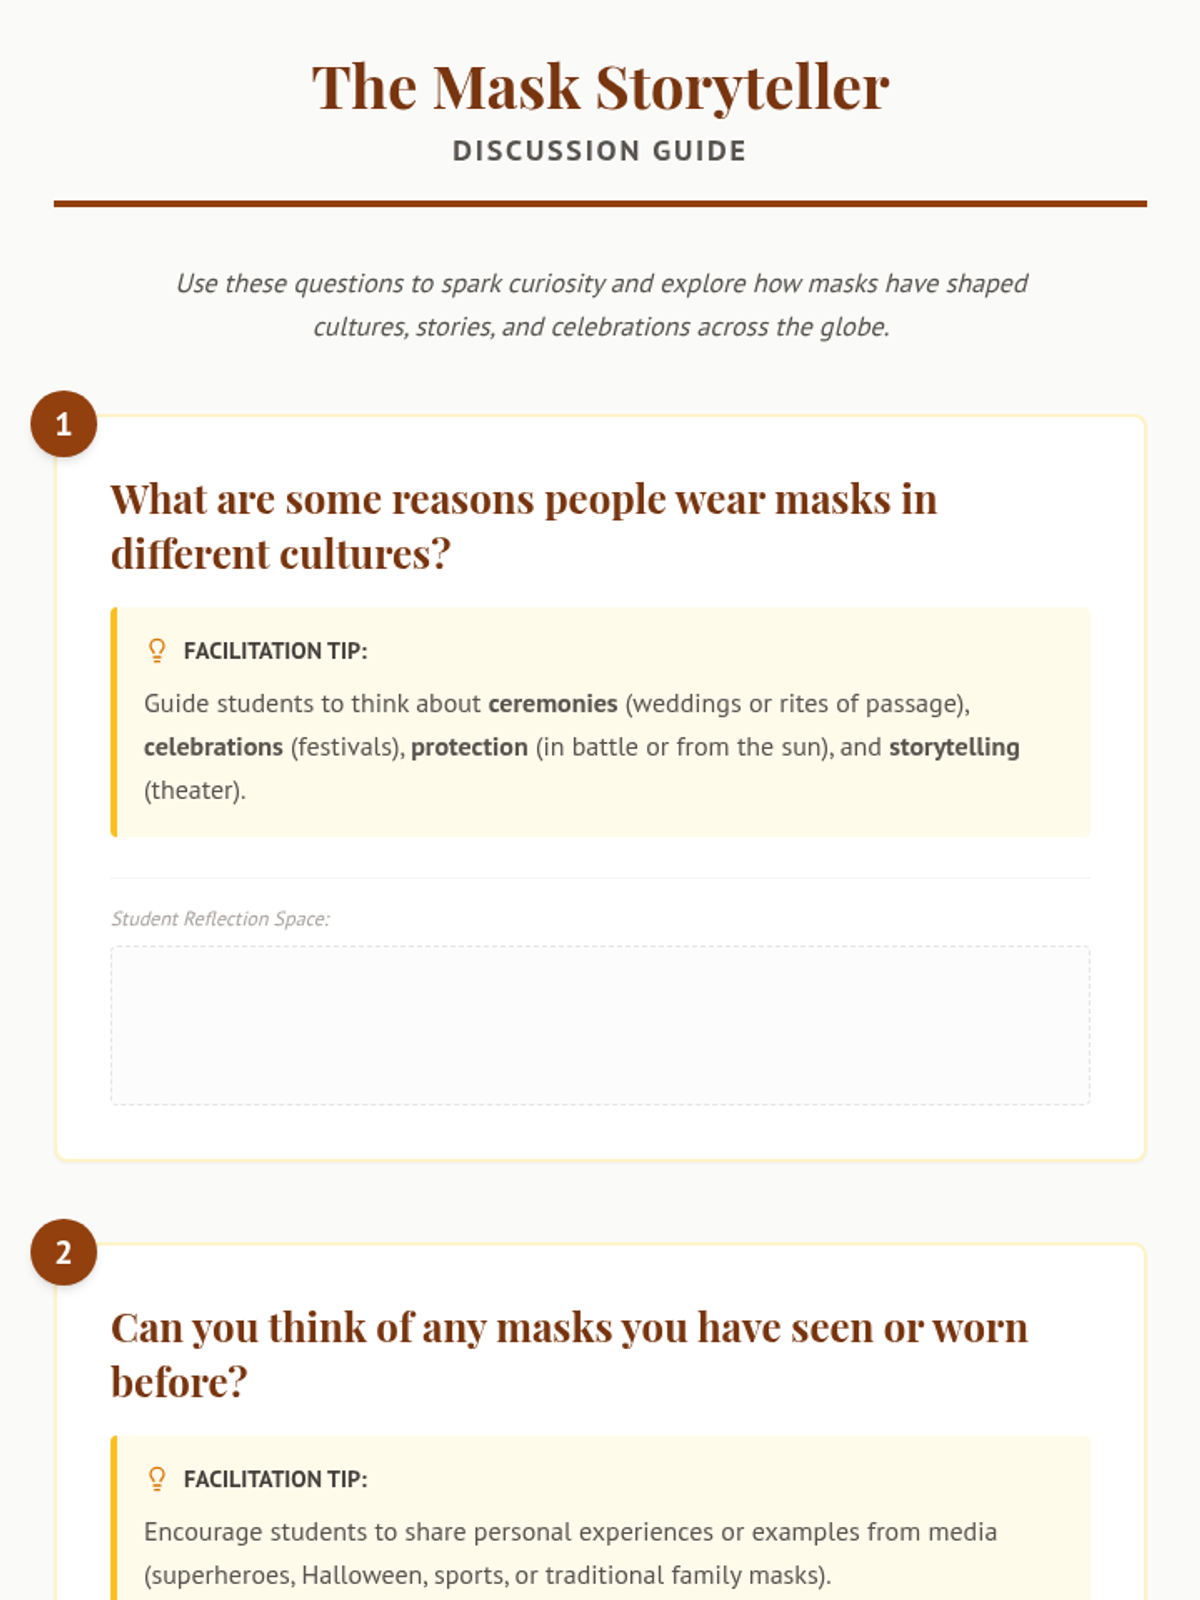
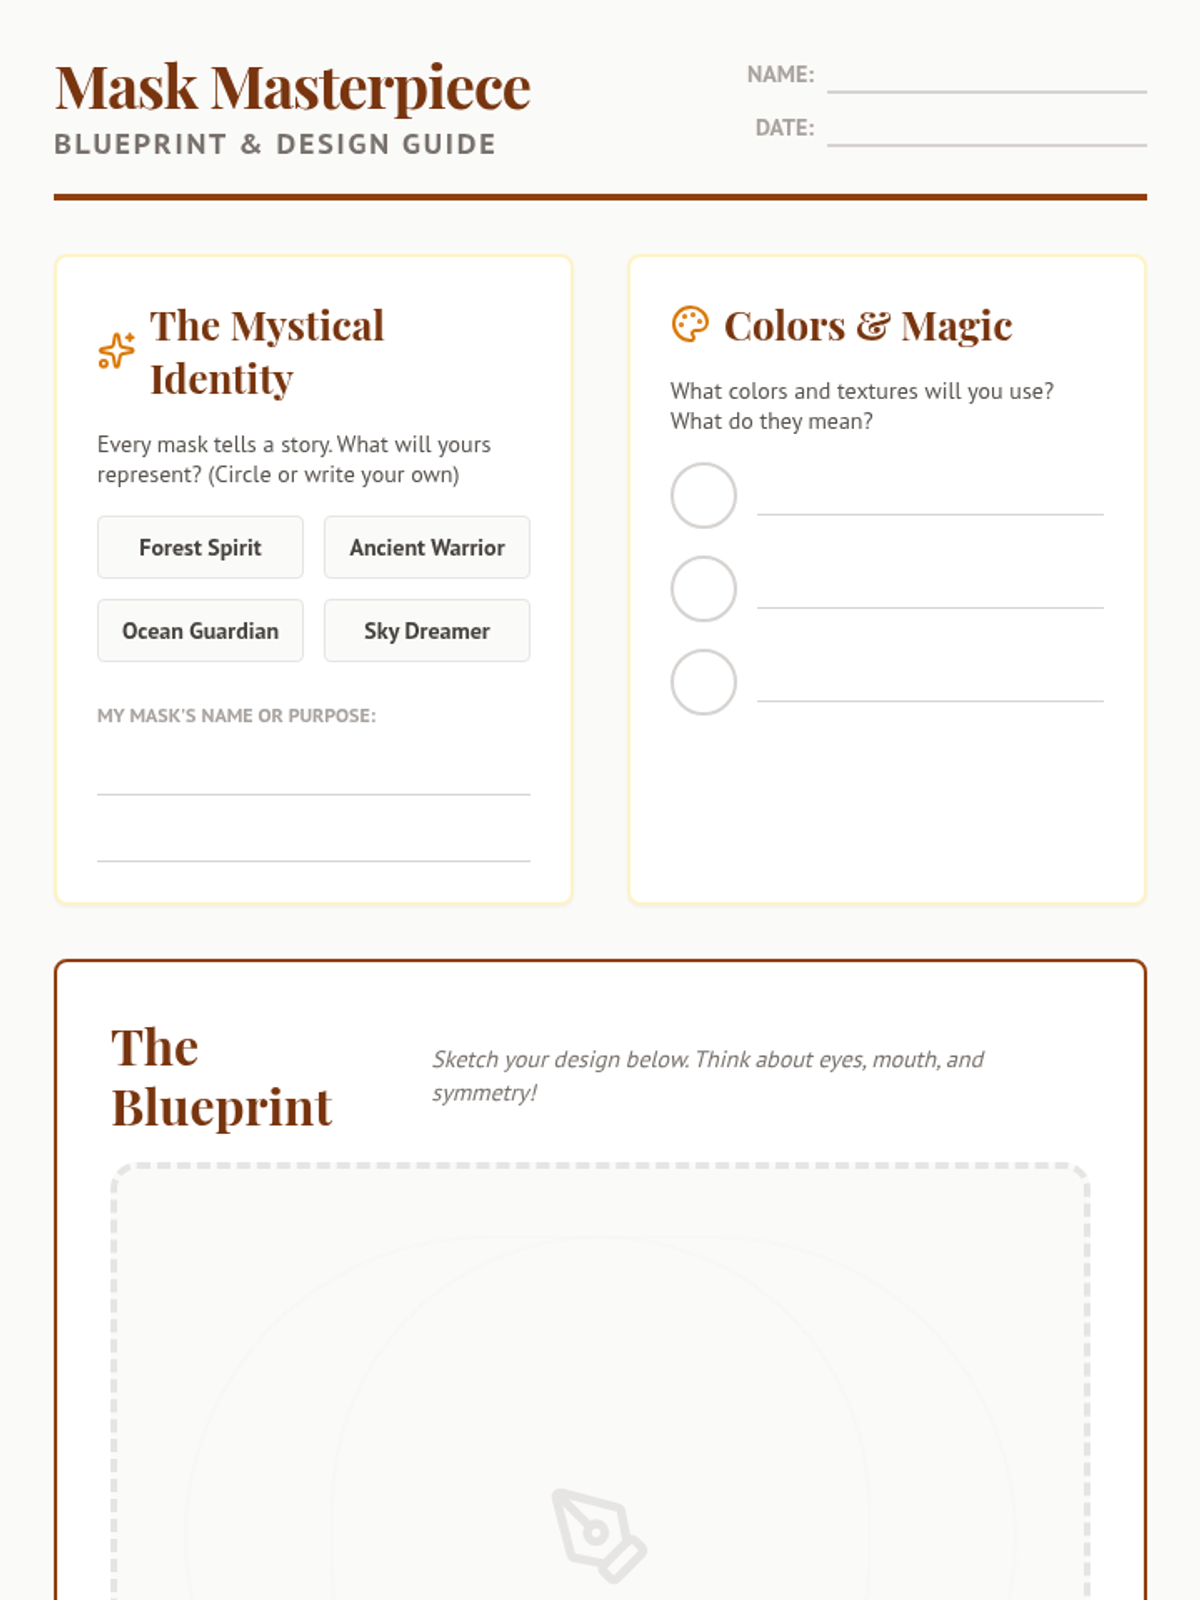
Students explore the cultural significance of masks from around the world and design their own mystical masks using cardboard and craft supplies.
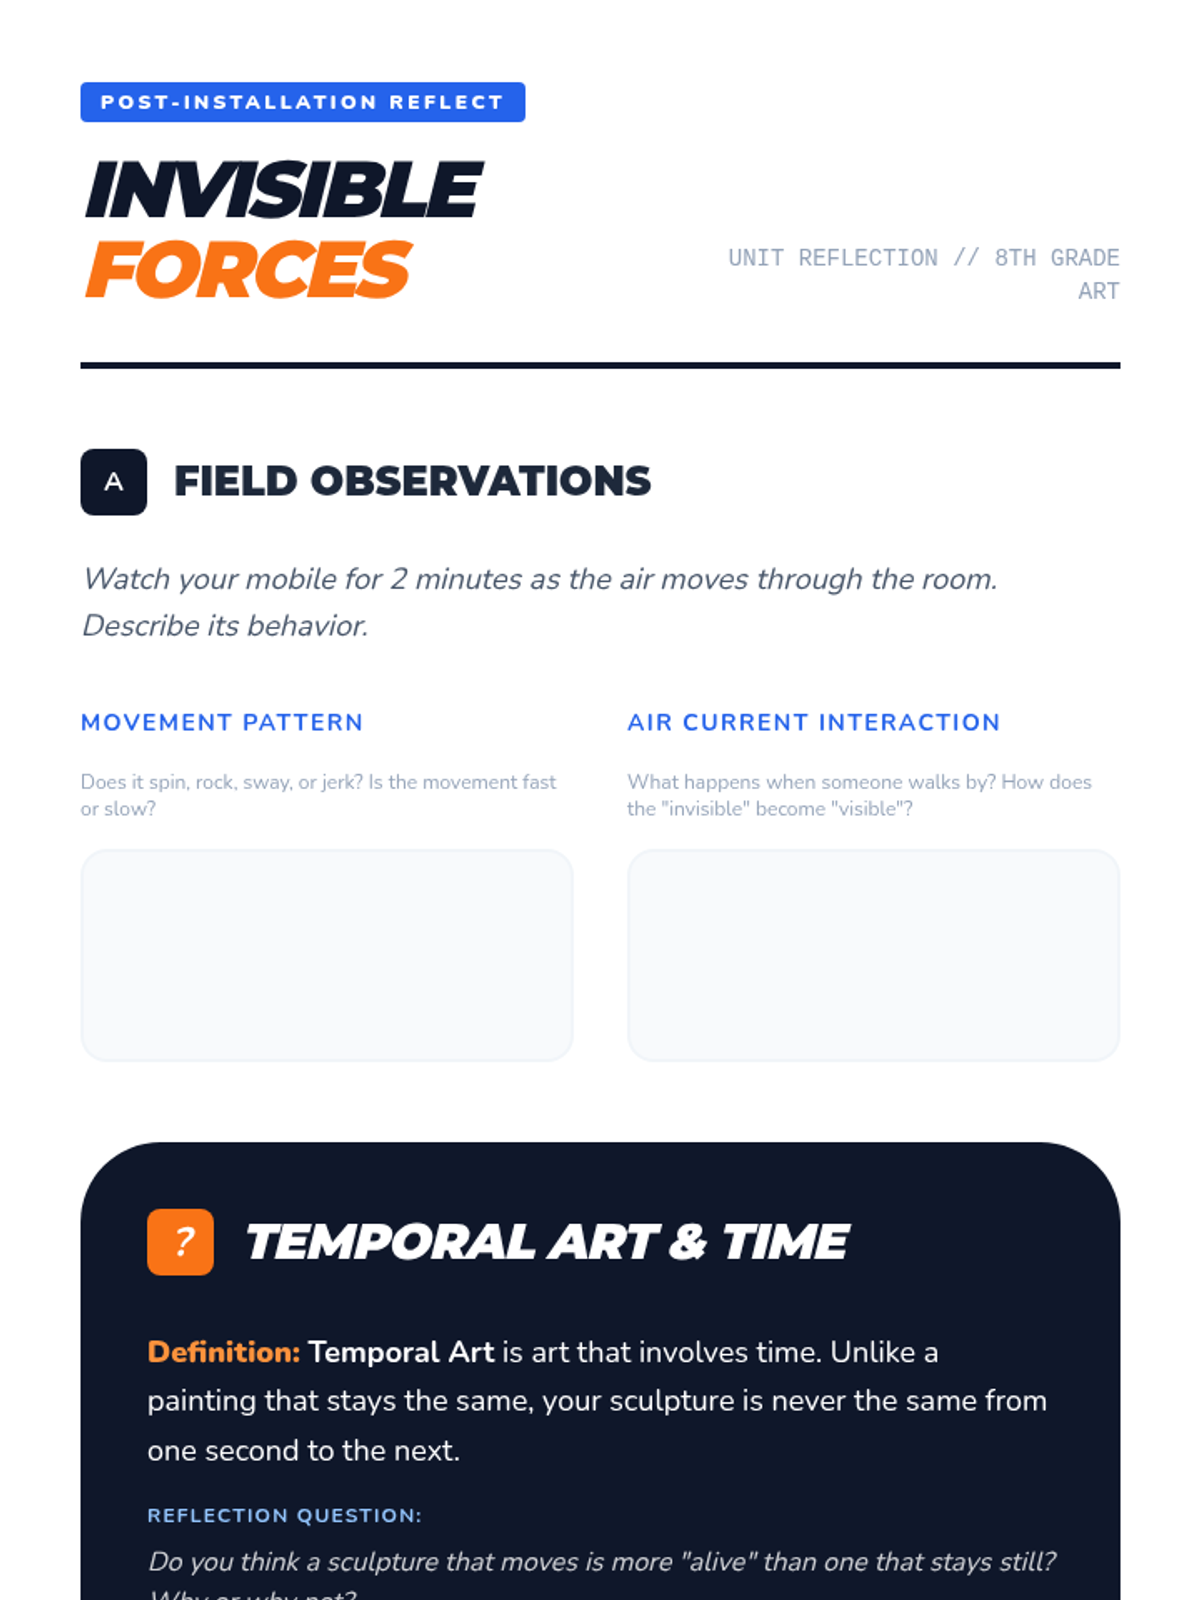
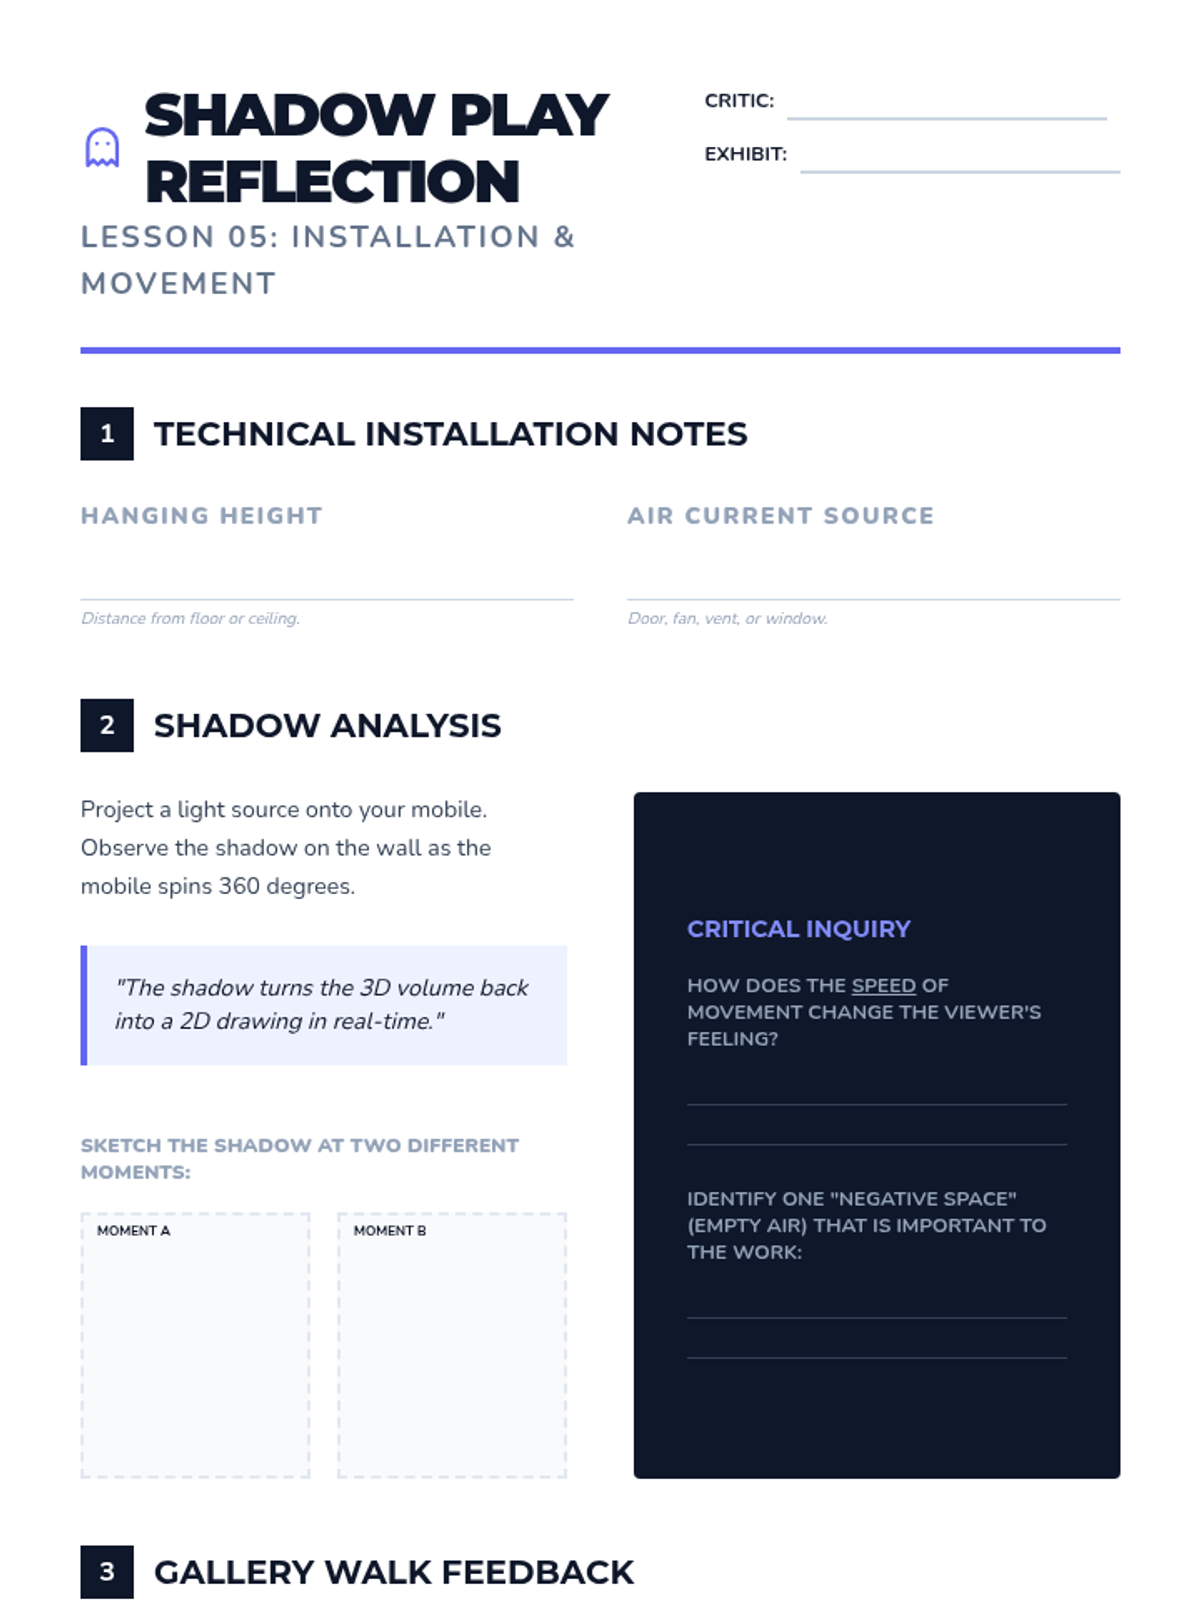
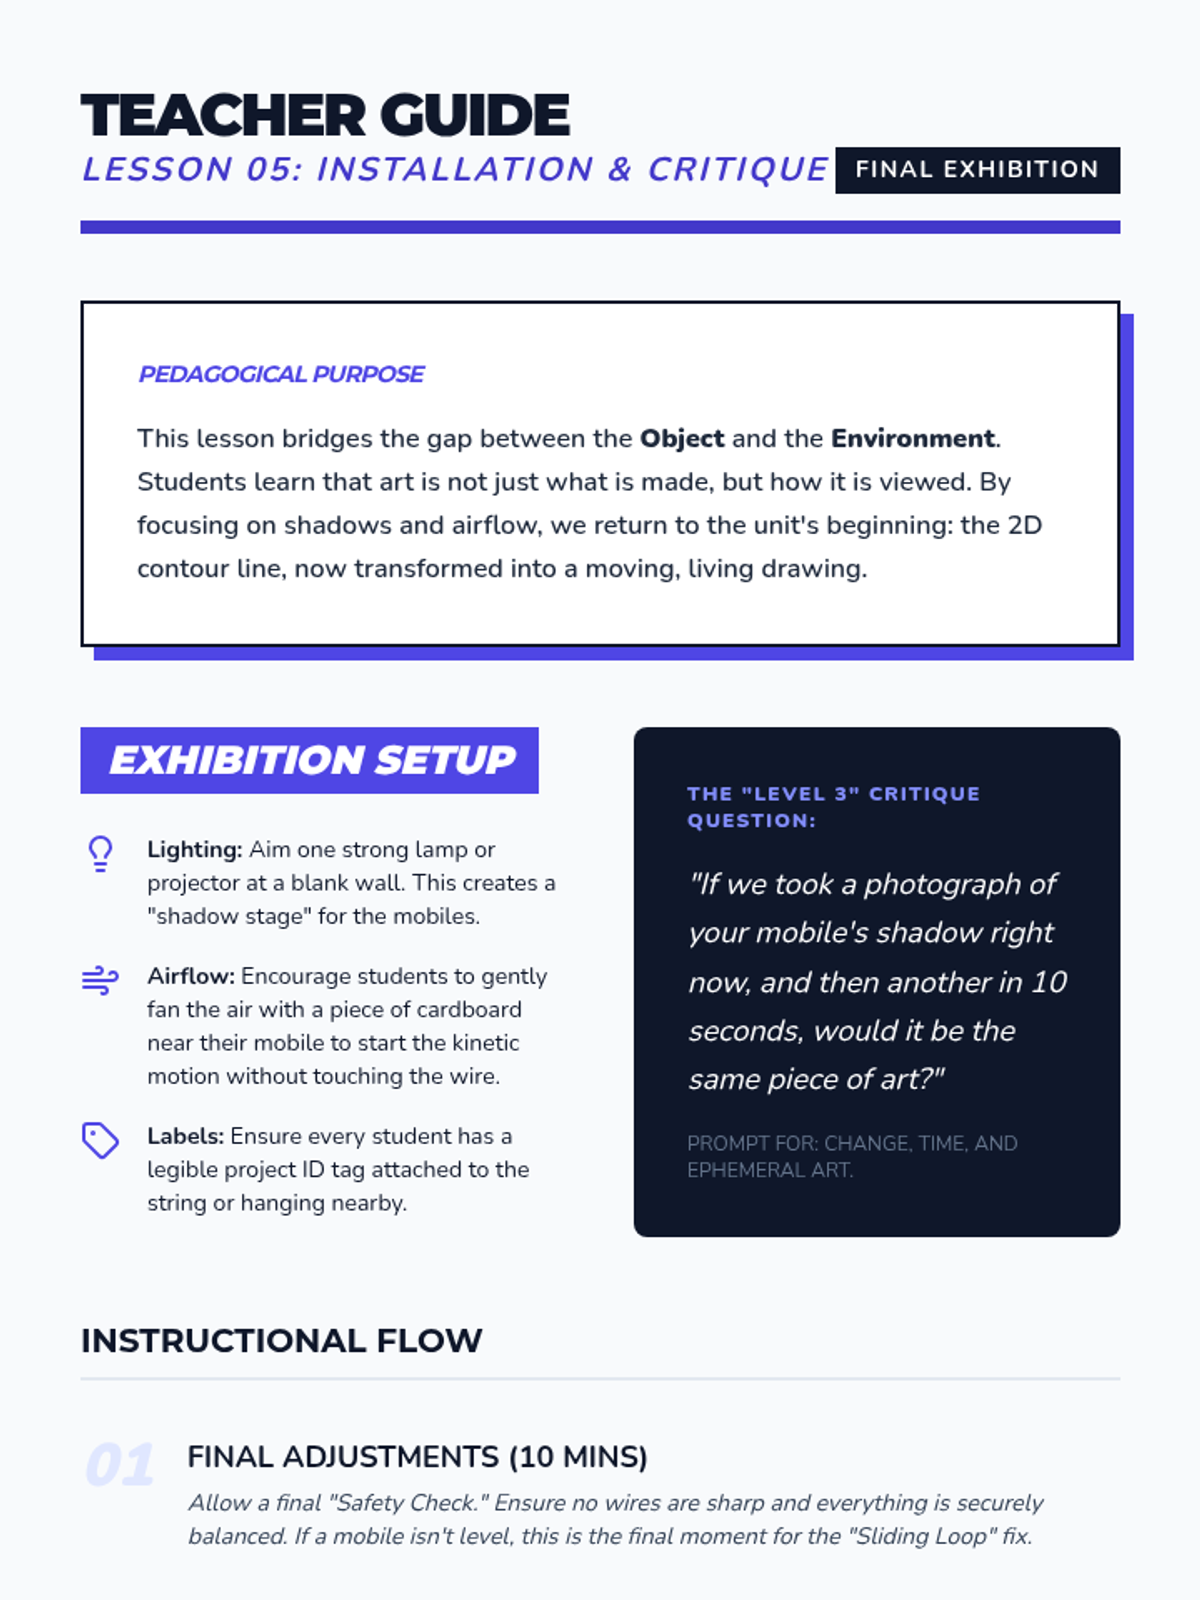
Students install their sculptures and observe how air currents interact with their work, reflecting on the concept of temporal art.
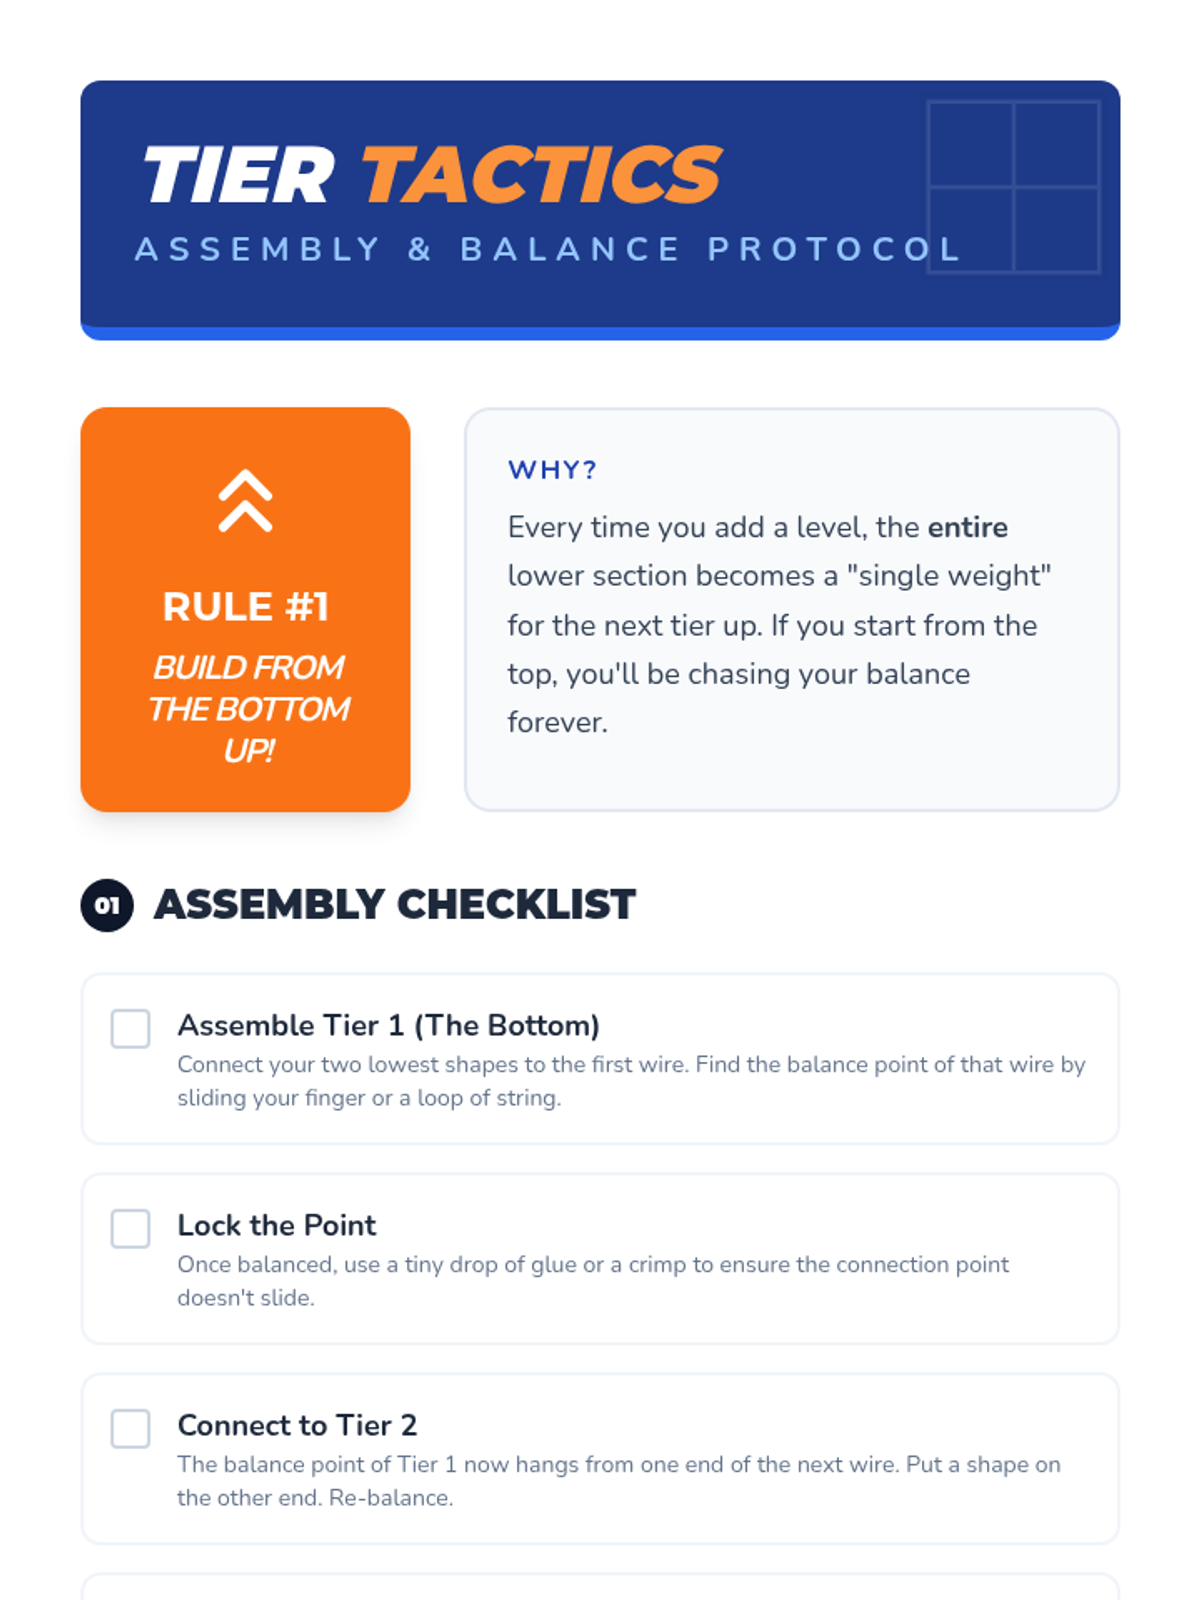
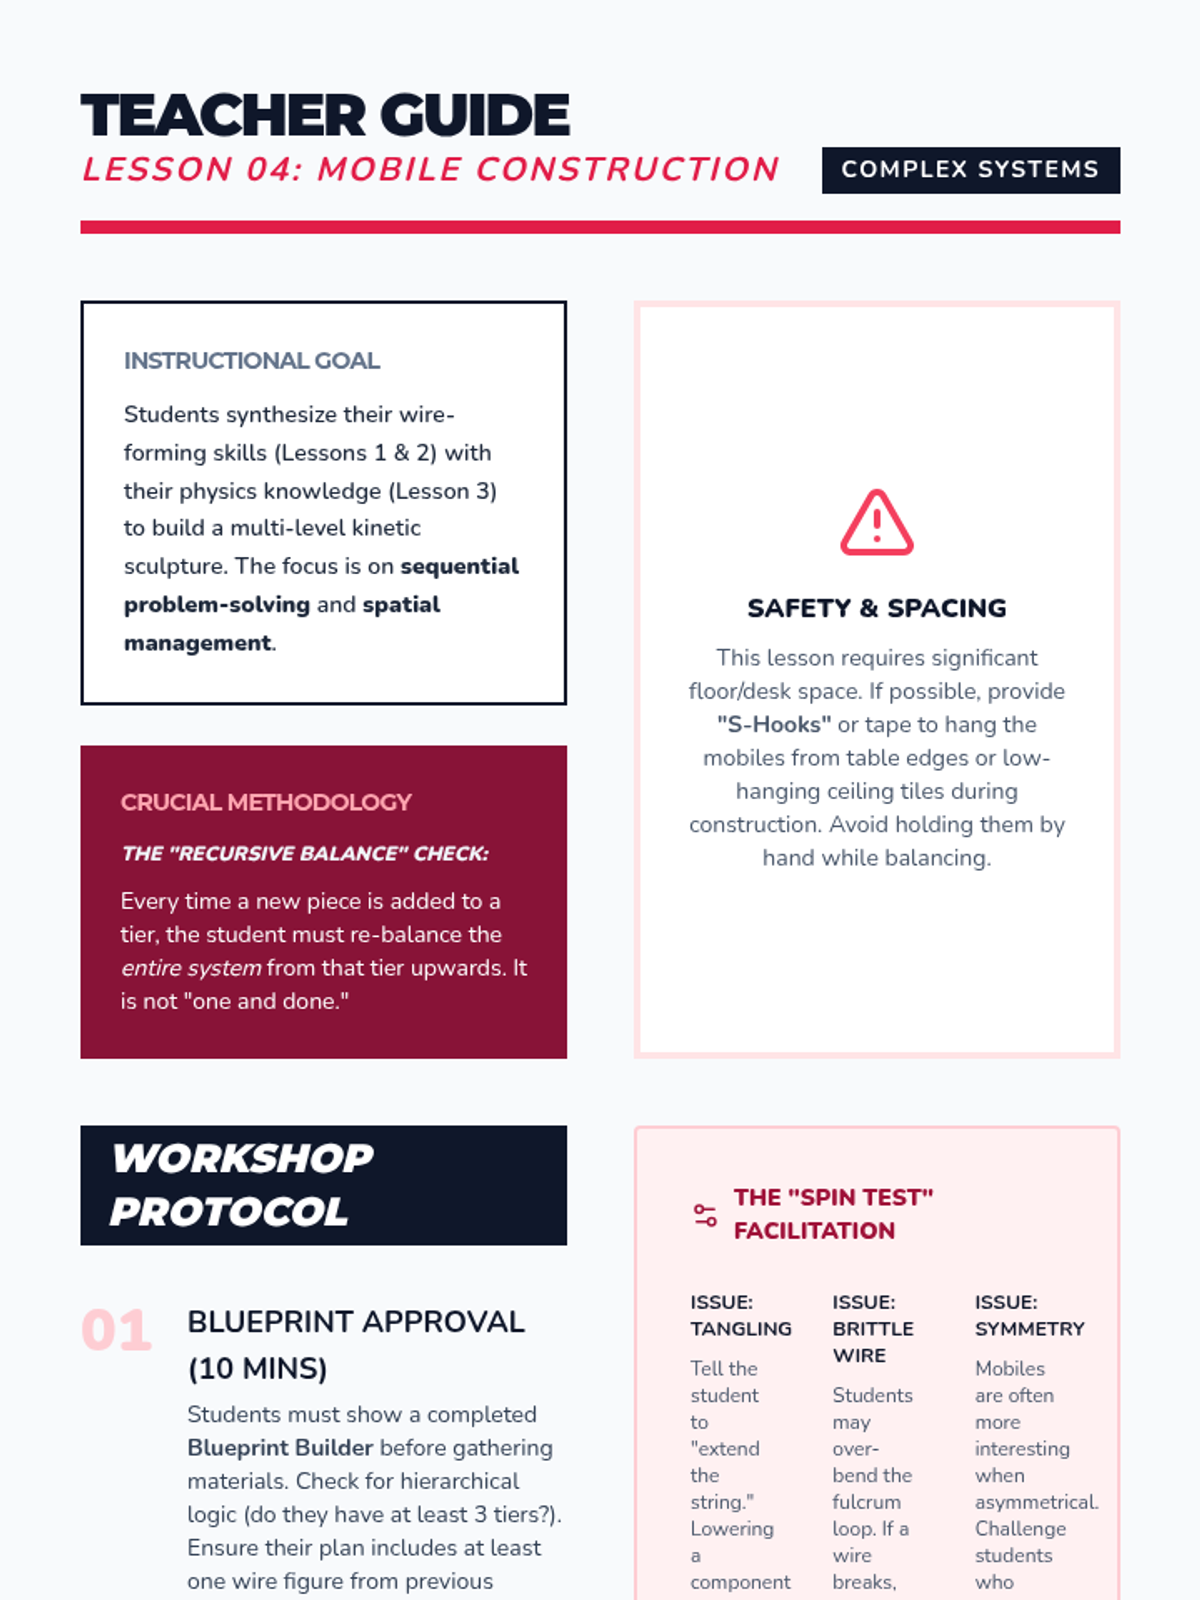
A workshop-style lesson focusing on the bottom-up assembly of multi-tiered mobiles and the iterative process of balancing.
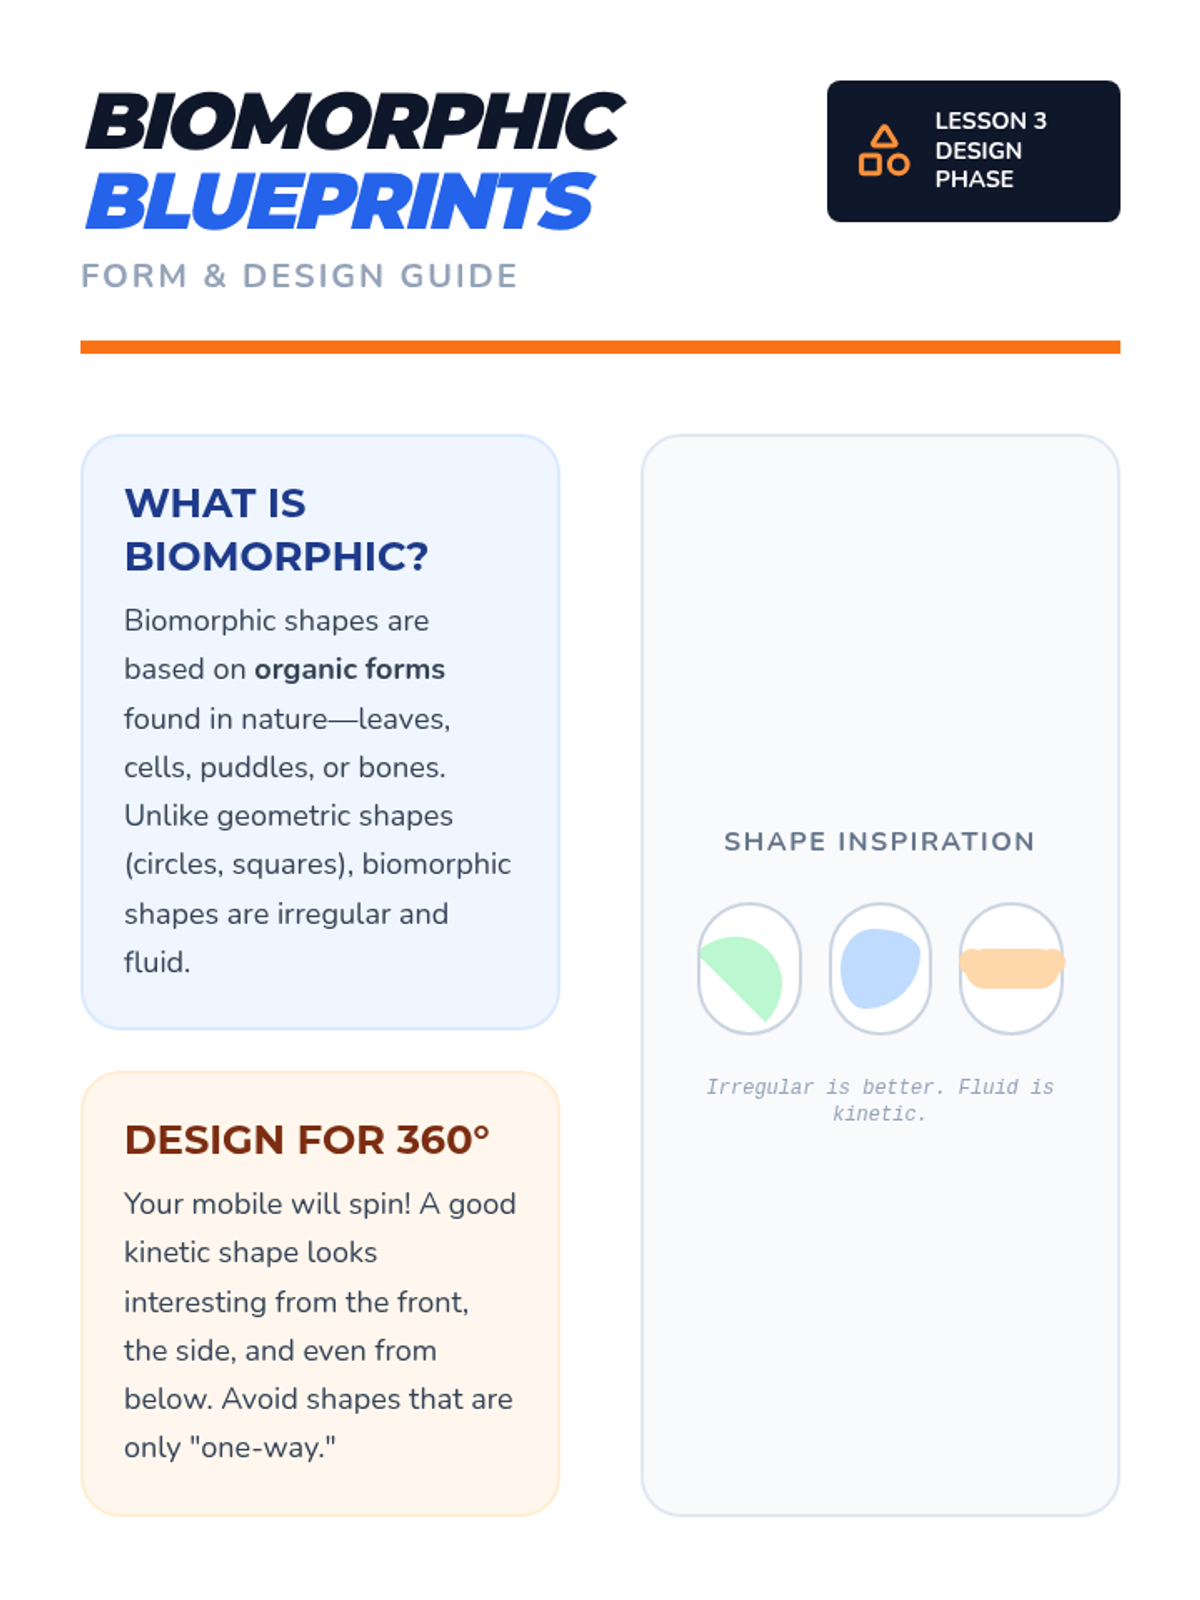
Students design and cut biomorphic shapes for their sculptures, focusing on organic forms and 360-degree visual interest.
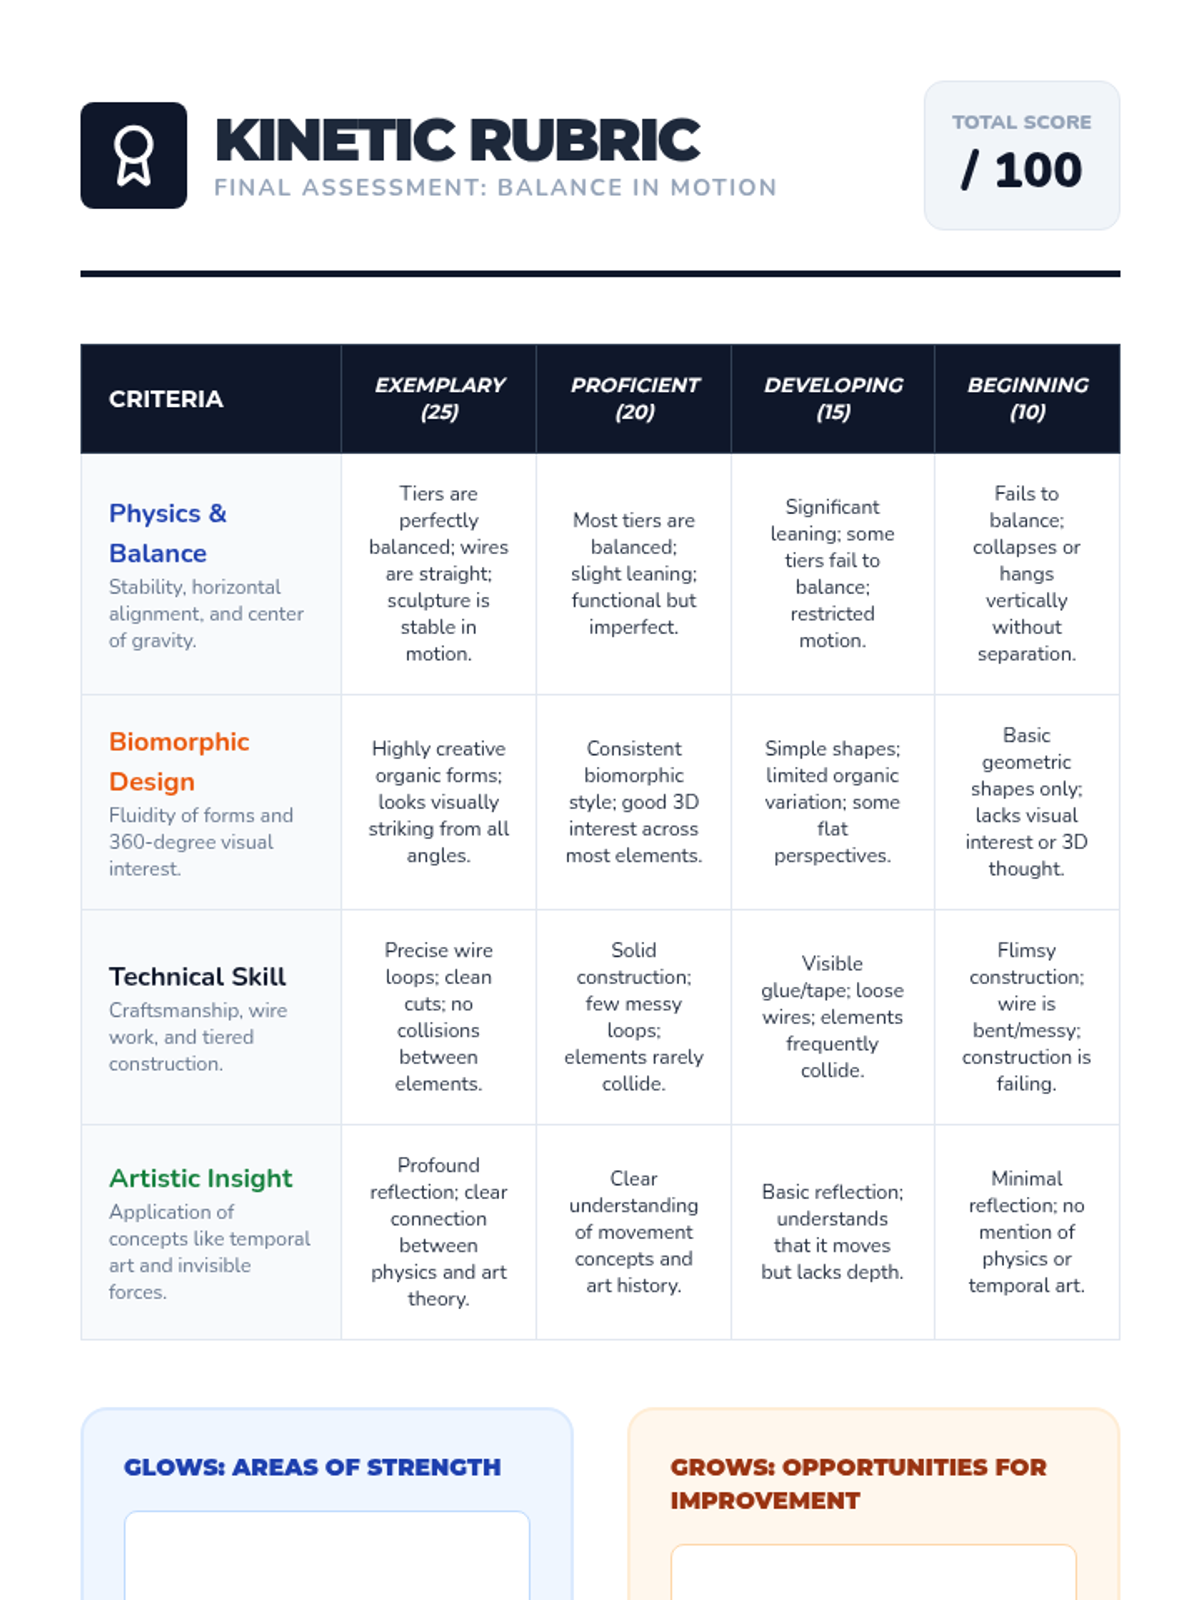
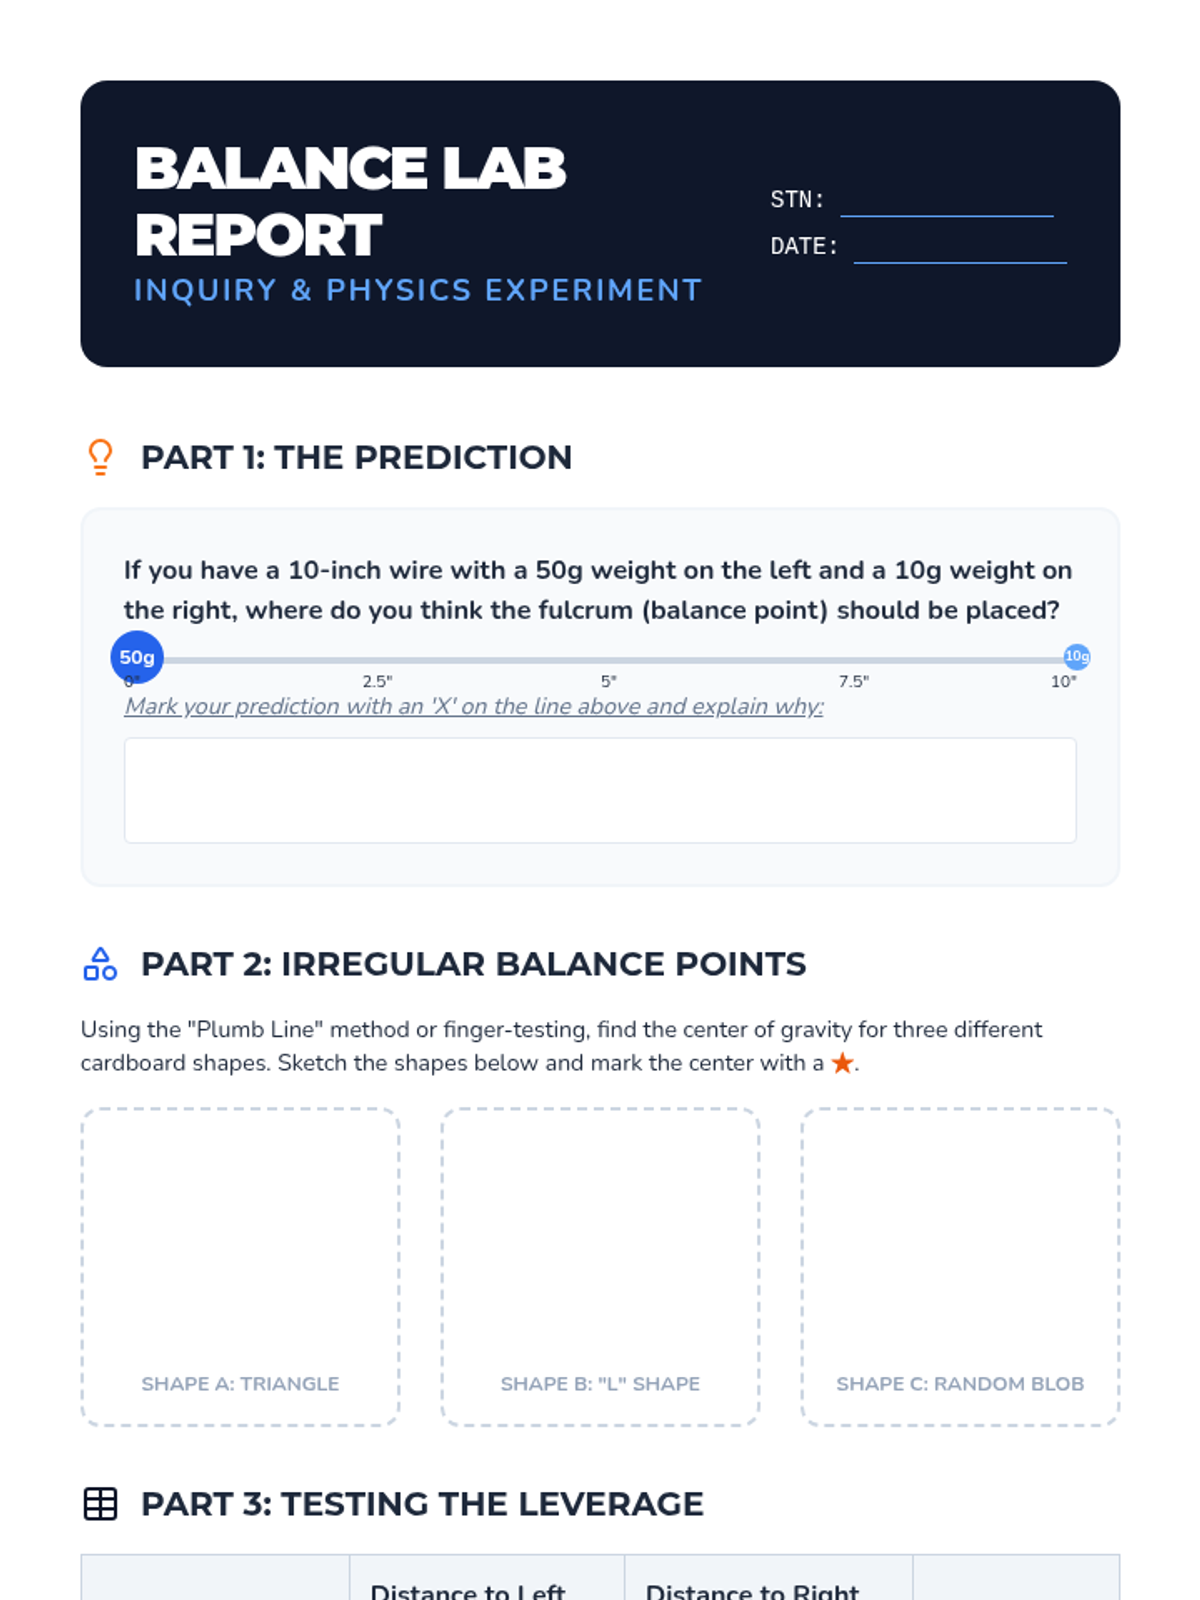
A hands-on lab where students explore the physics of balance, fulcrums, and center of gravity using simple tools and irregular shapes.
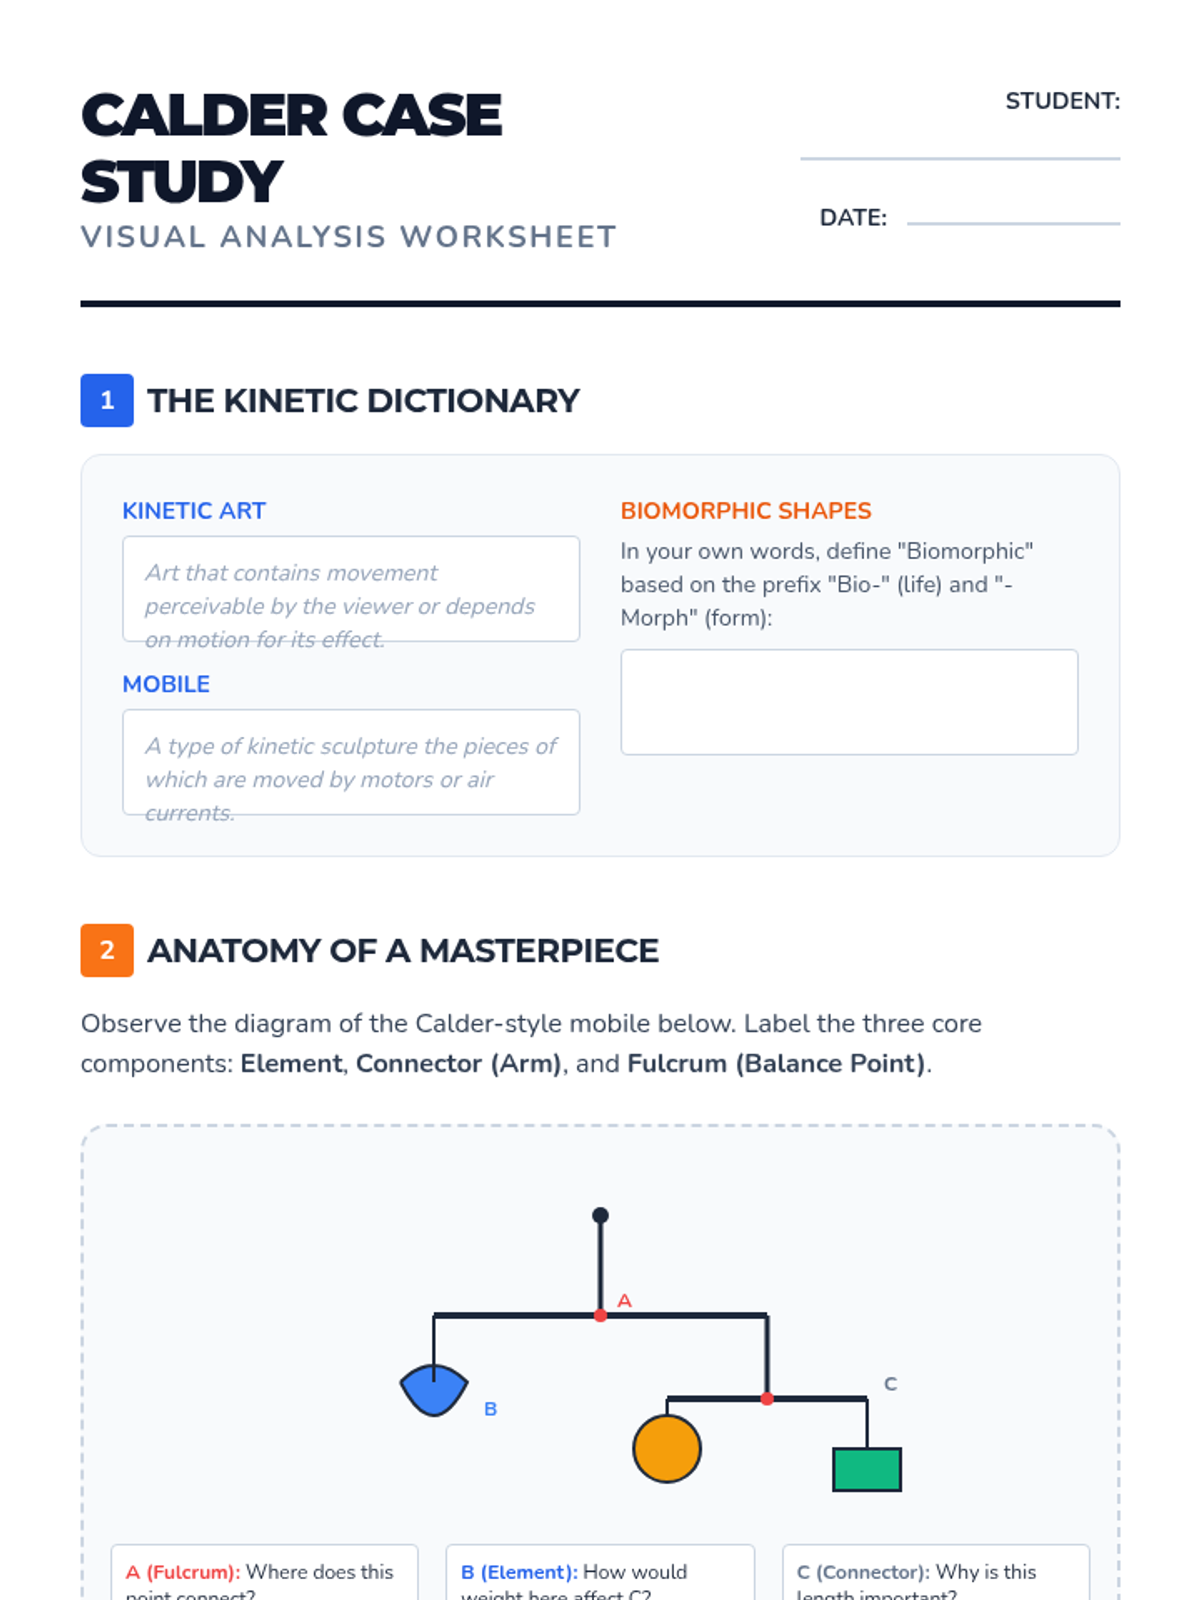
Students analyze the kinetic sculptures of Alexander Calder, focusing on the shift from static to moving art and identifying the key components of a mobile.
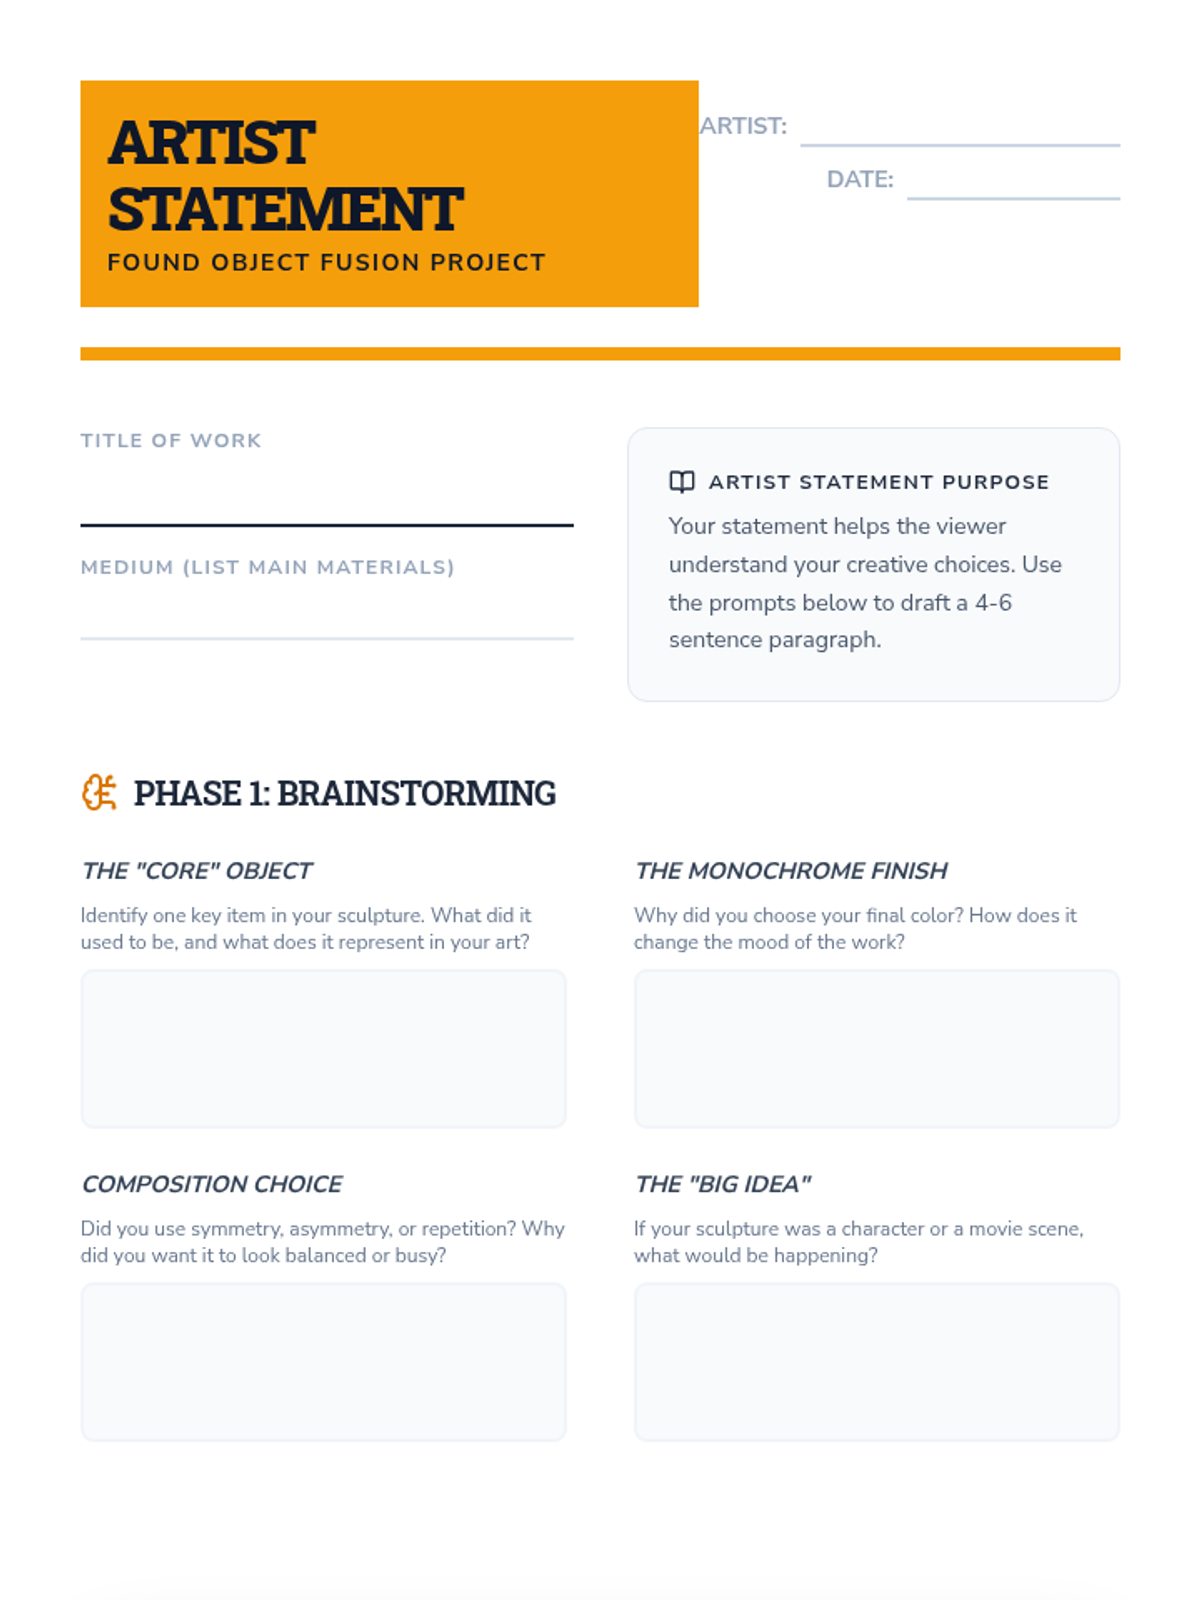
Students reflect on their creative process and the symbolic meaning behind their object choices. They draft artist statements that articulate the narrative of their work and present their finished sculptures to the class.
Students finalize their sculptures and apply a monochromatic finish. By painting the entire piece a single color, they explore how shadows, highlights, and textures unify diverse objects into a single, cohesive visual statement.
Students install their sculptures and engage in a critique focused on movement, air currents, and the relationship between the object and its environment.
Students design and assemble multi-tiered kinetic mobiles, applying their knowledge of wire forming and balance to create a functional moving sculpture.
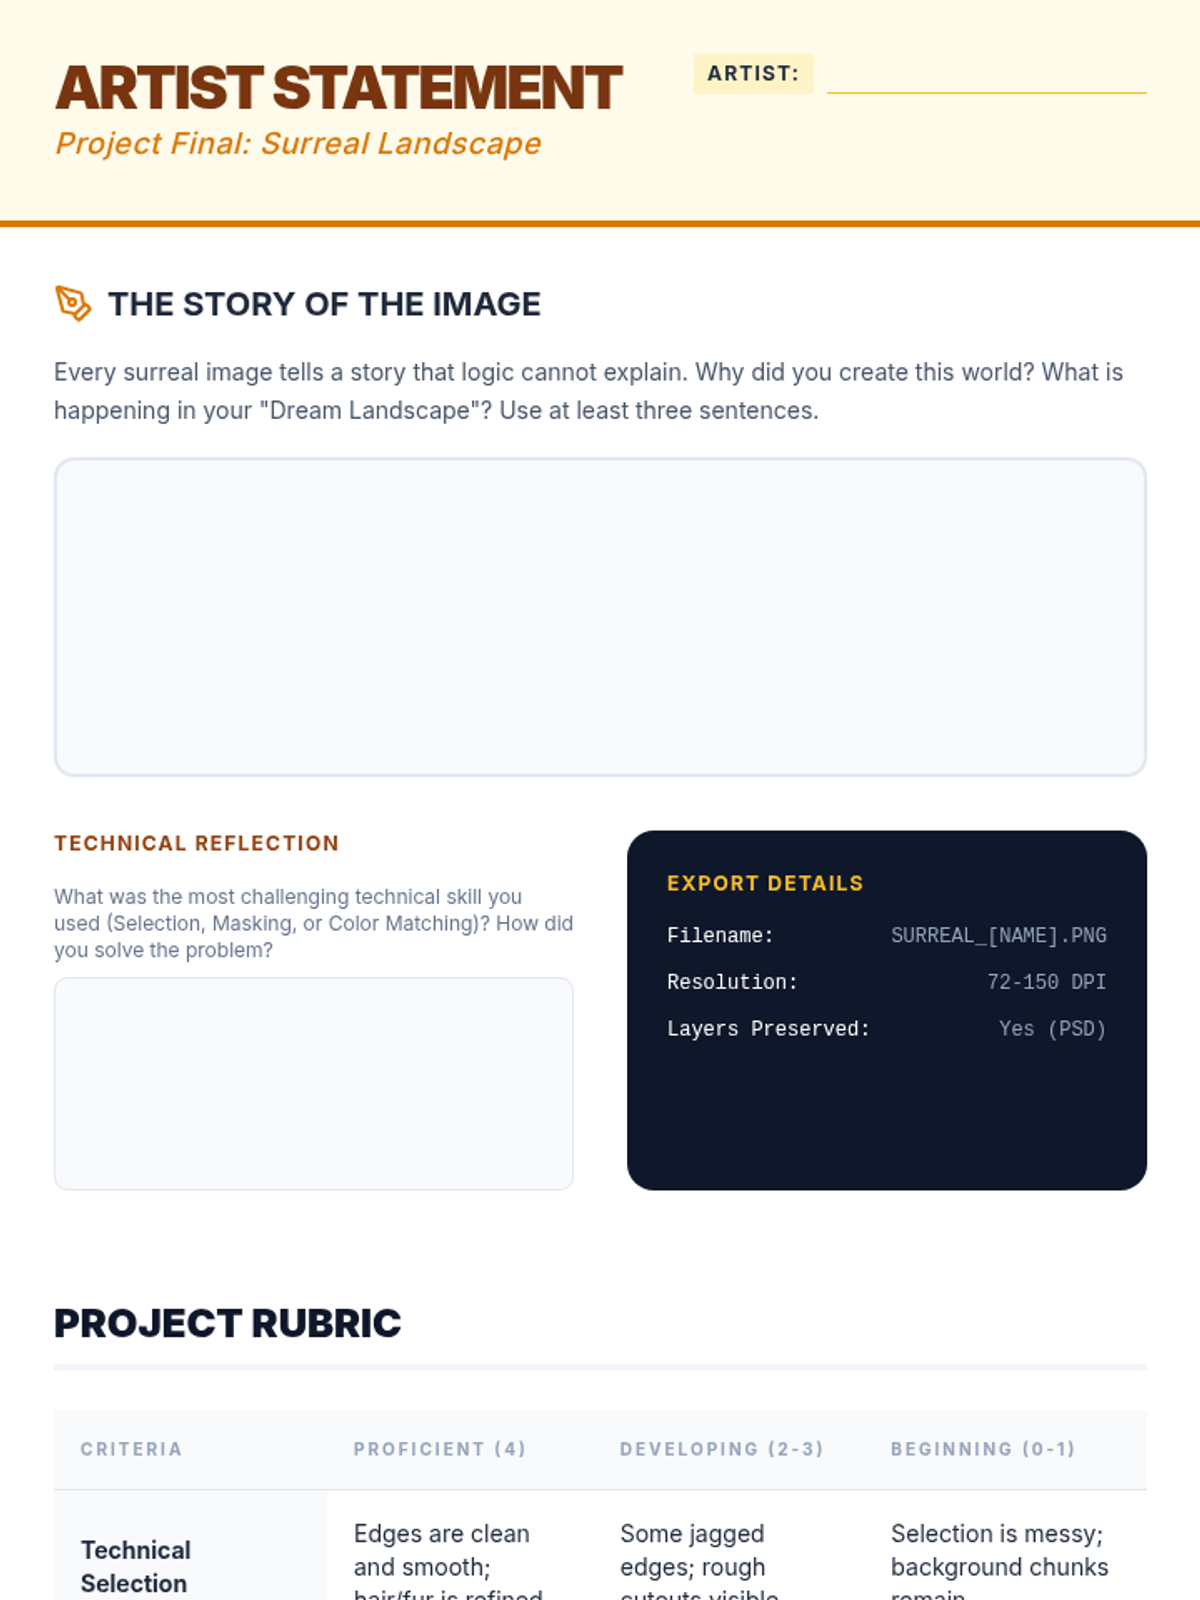
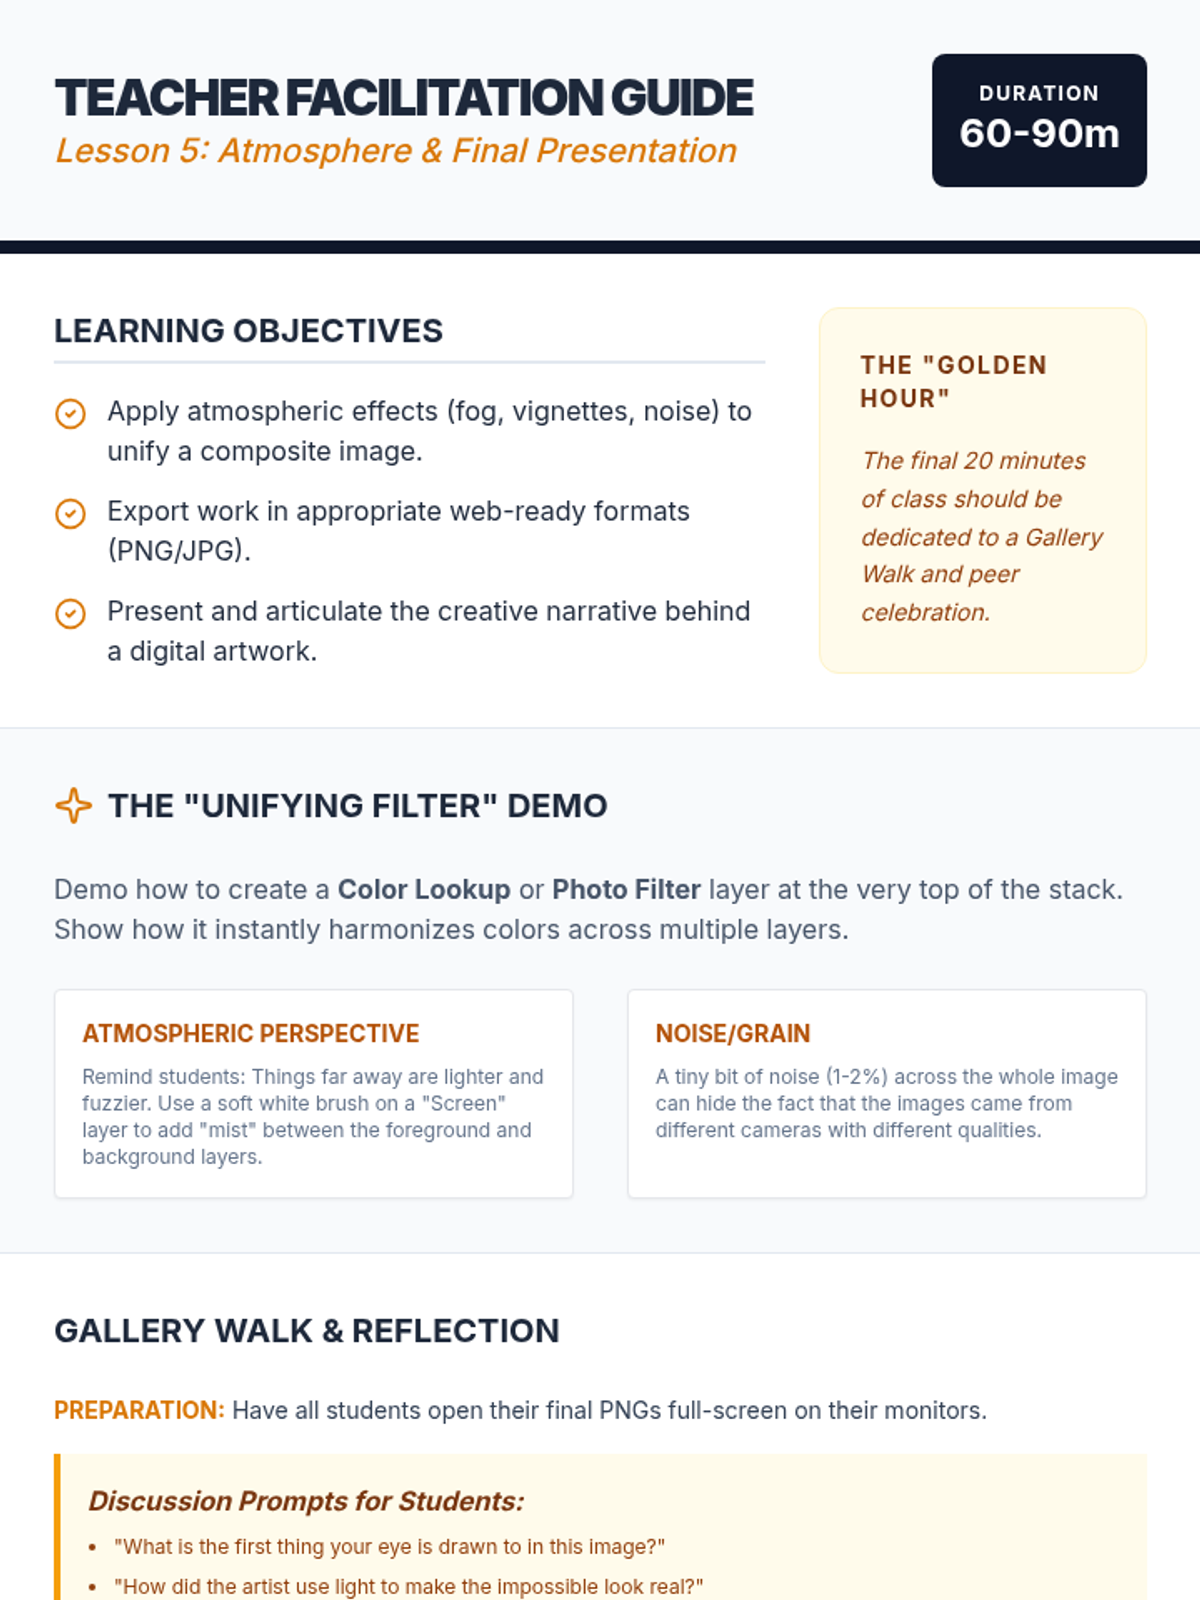
Students add atmospheric effects and finalize their projects with a professional polish.
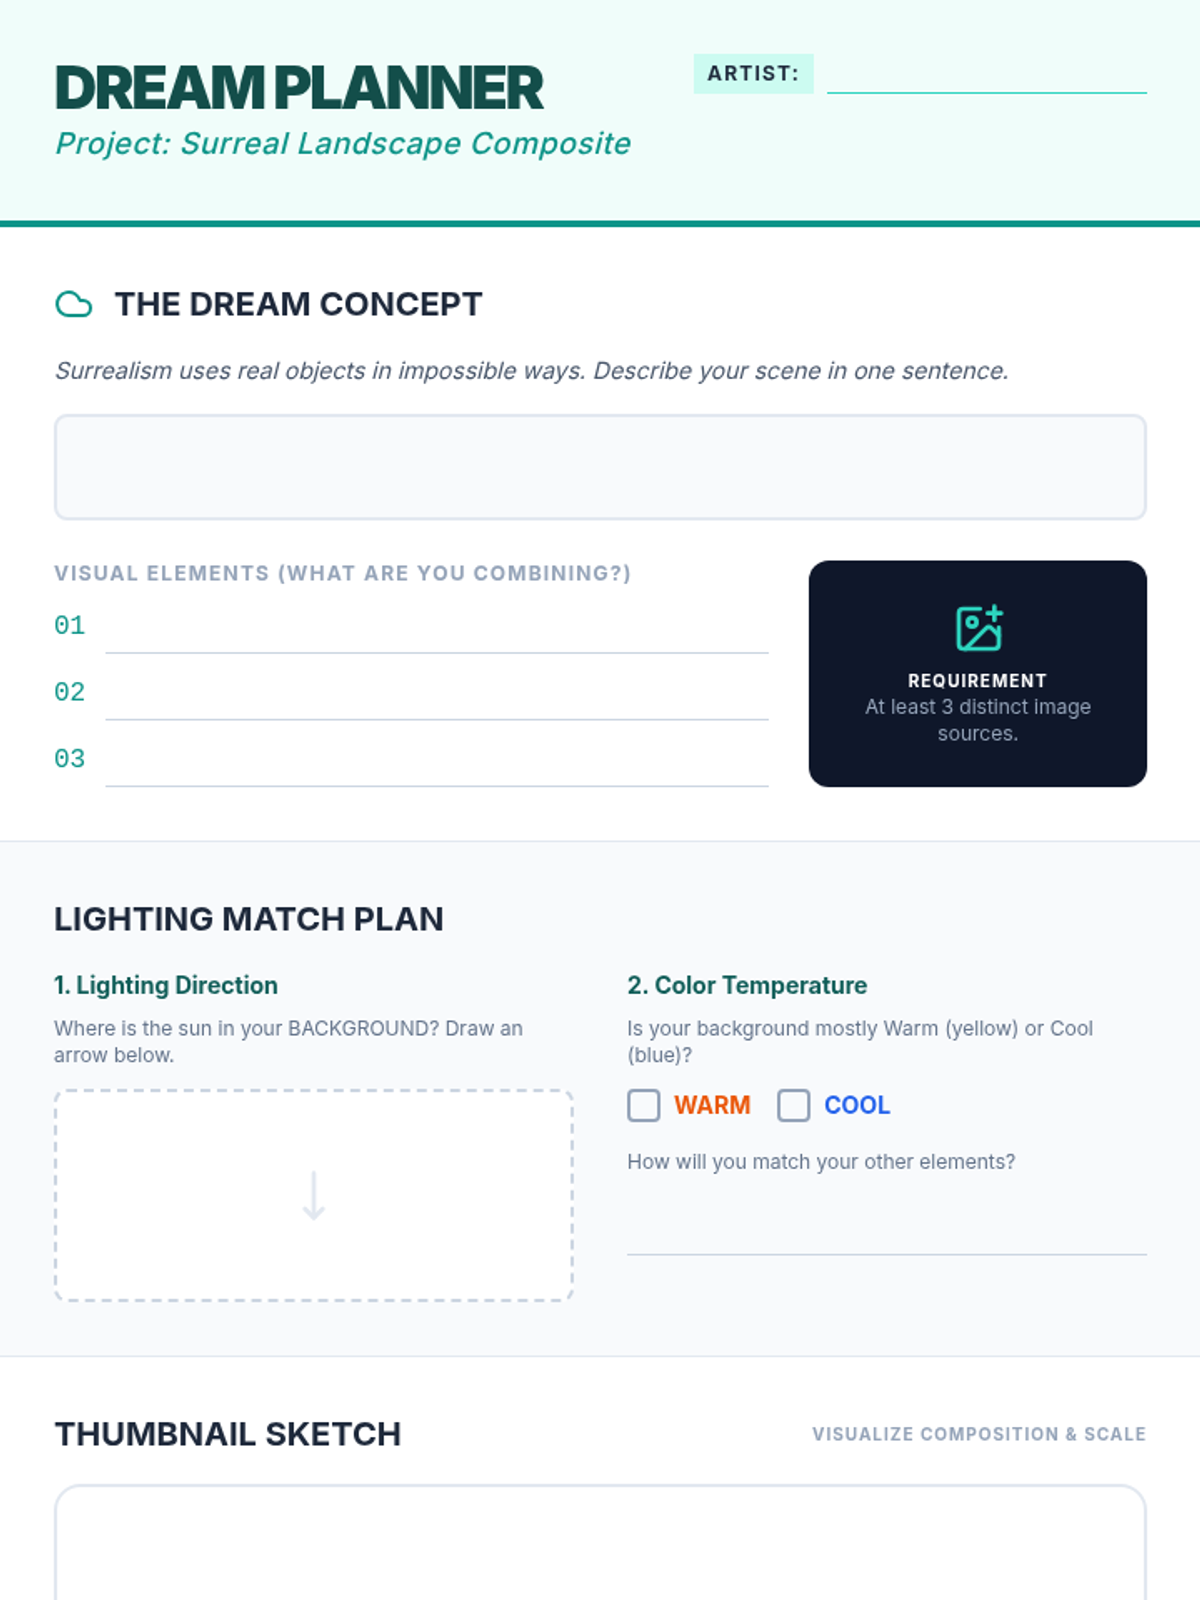
Students combine multiple images and learn to match colors and lighting for a cohesive look.
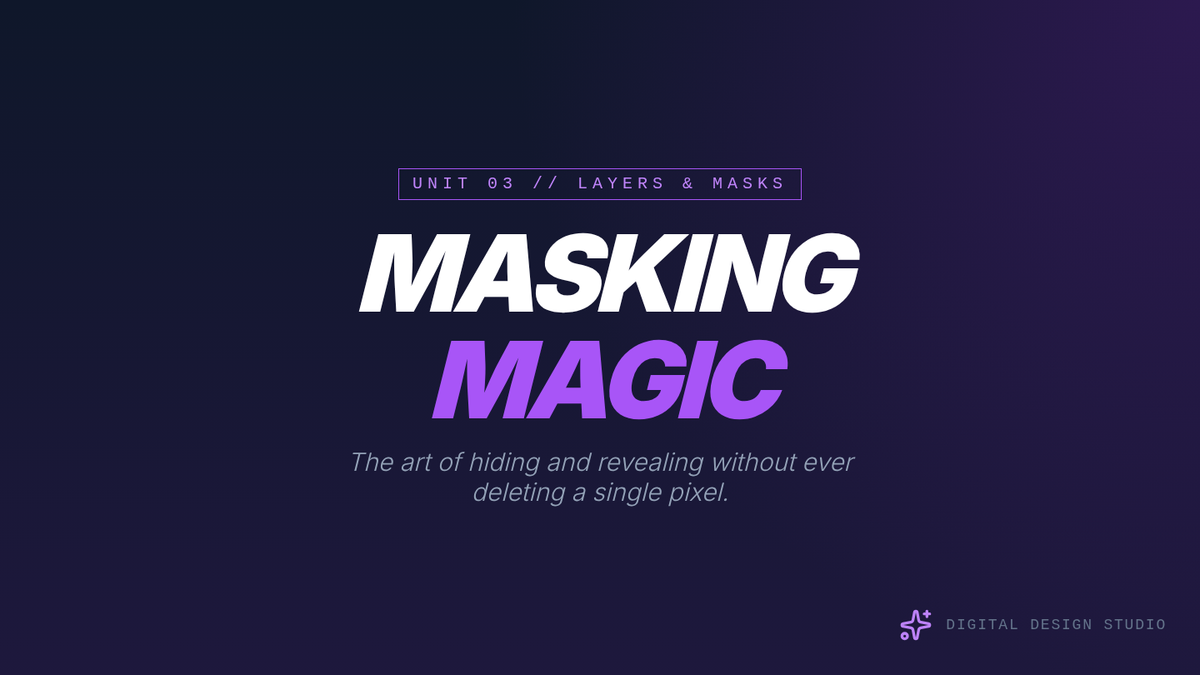
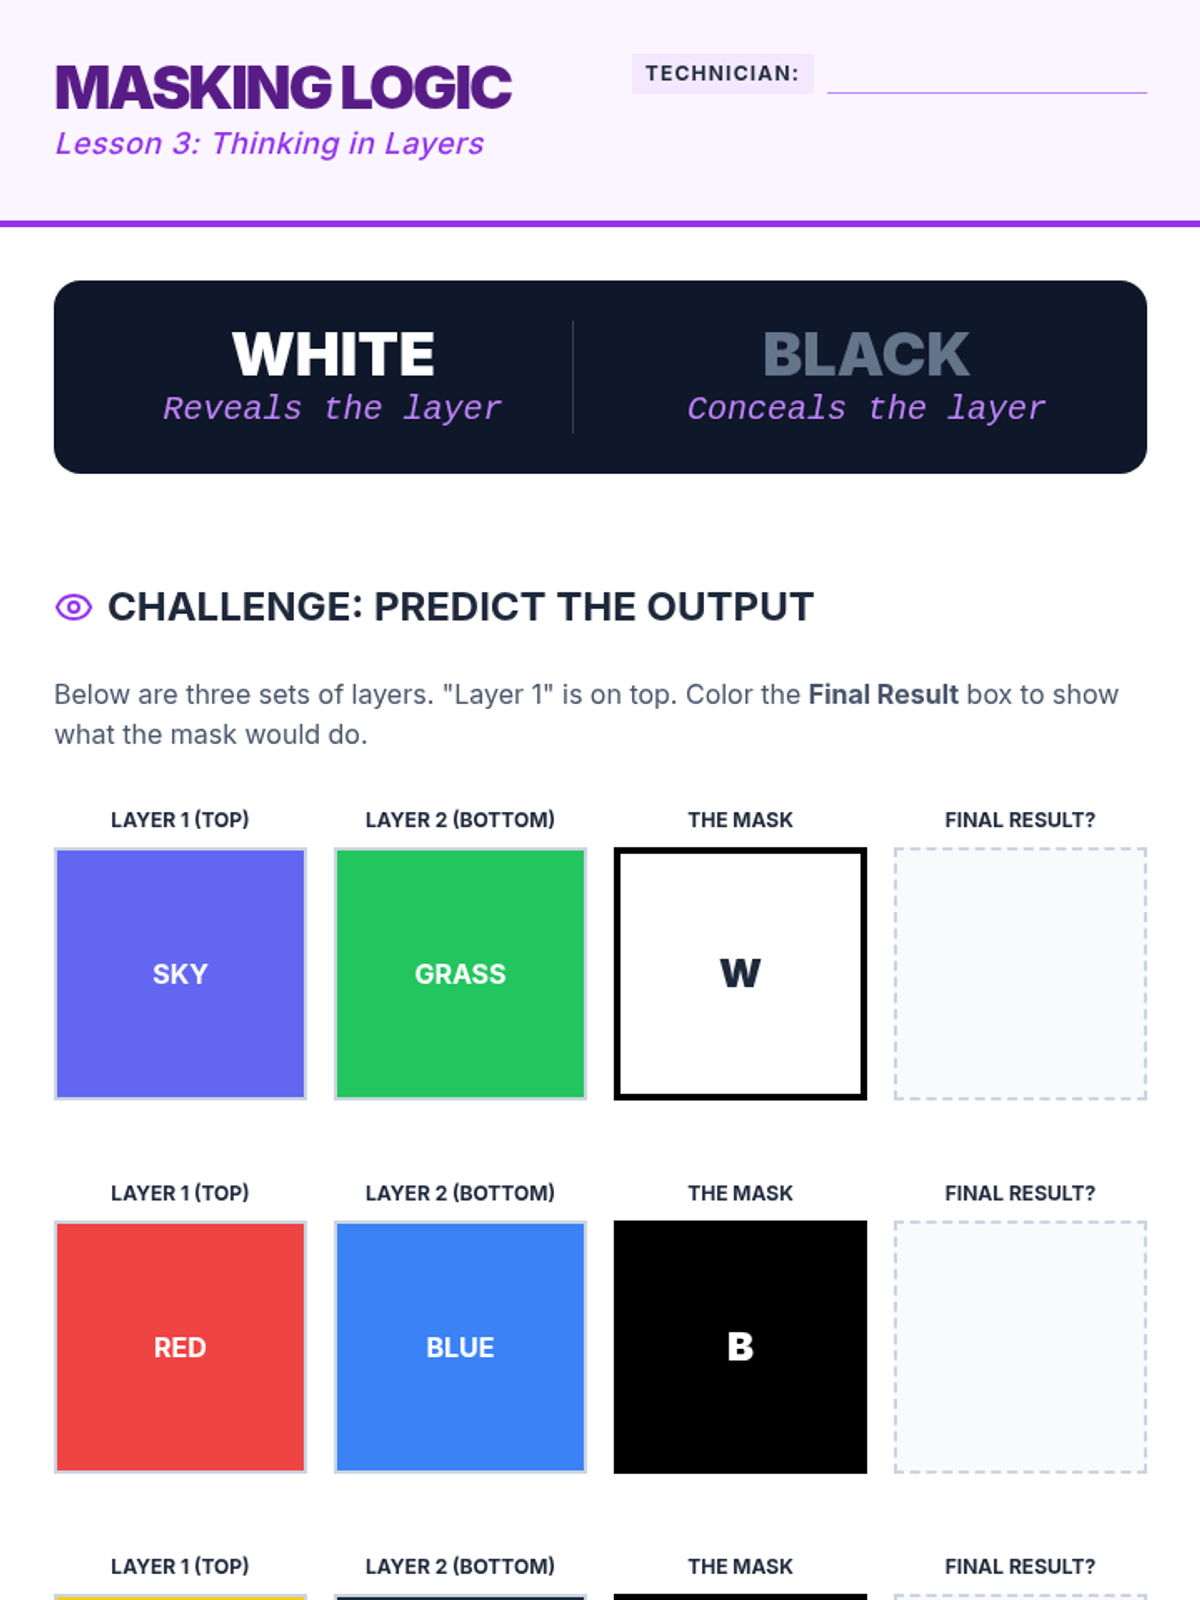
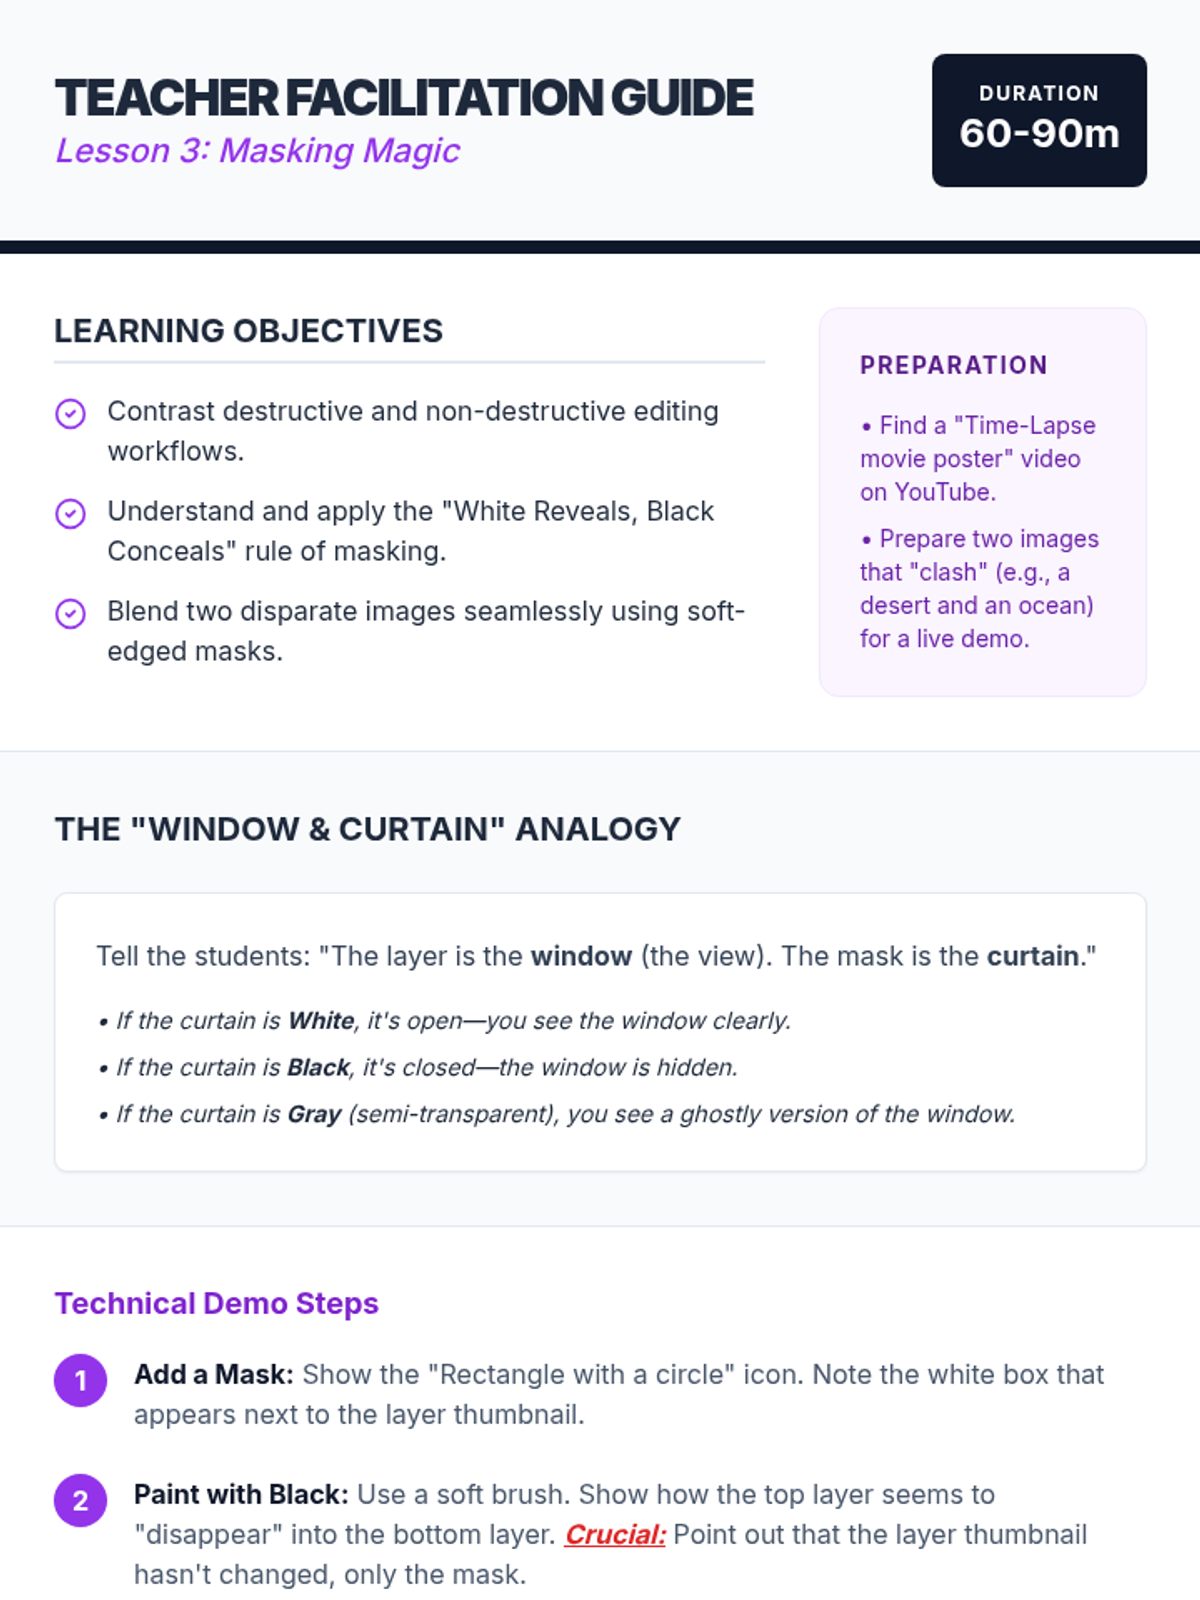
Introduces layers and non-destructive masking techniques for seamless image blending.
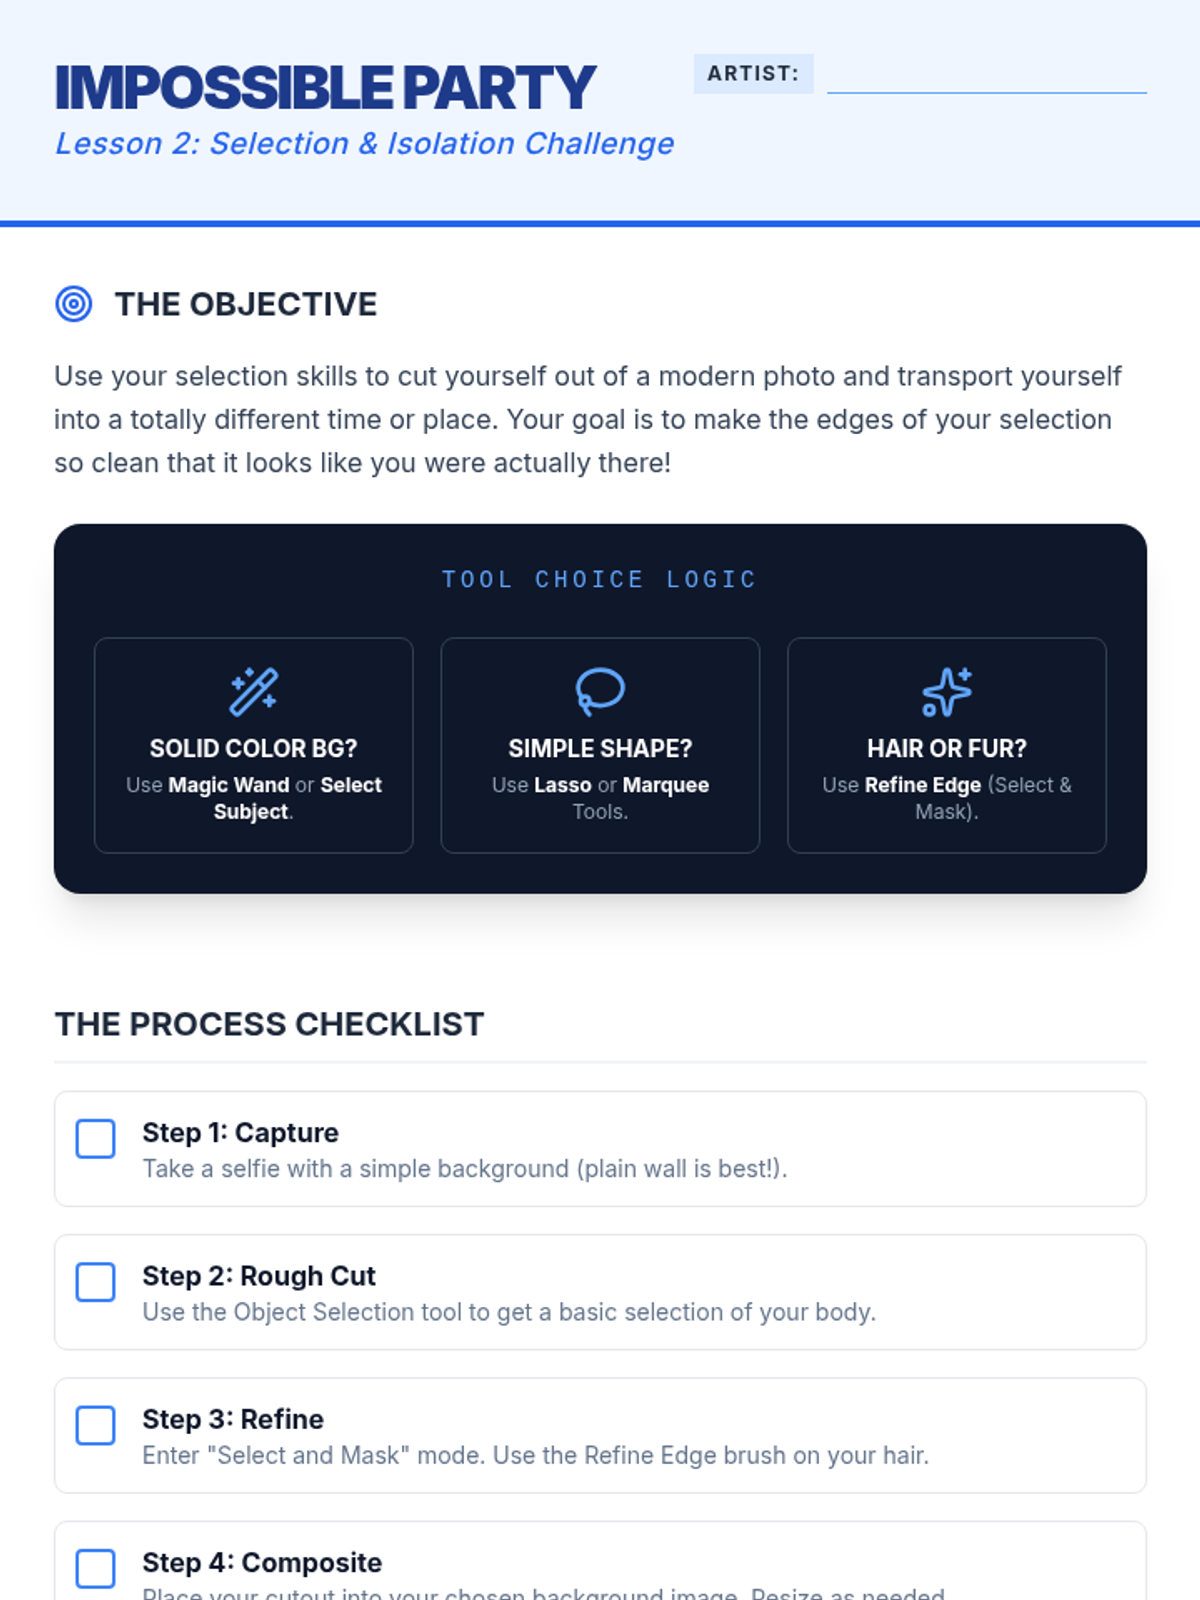
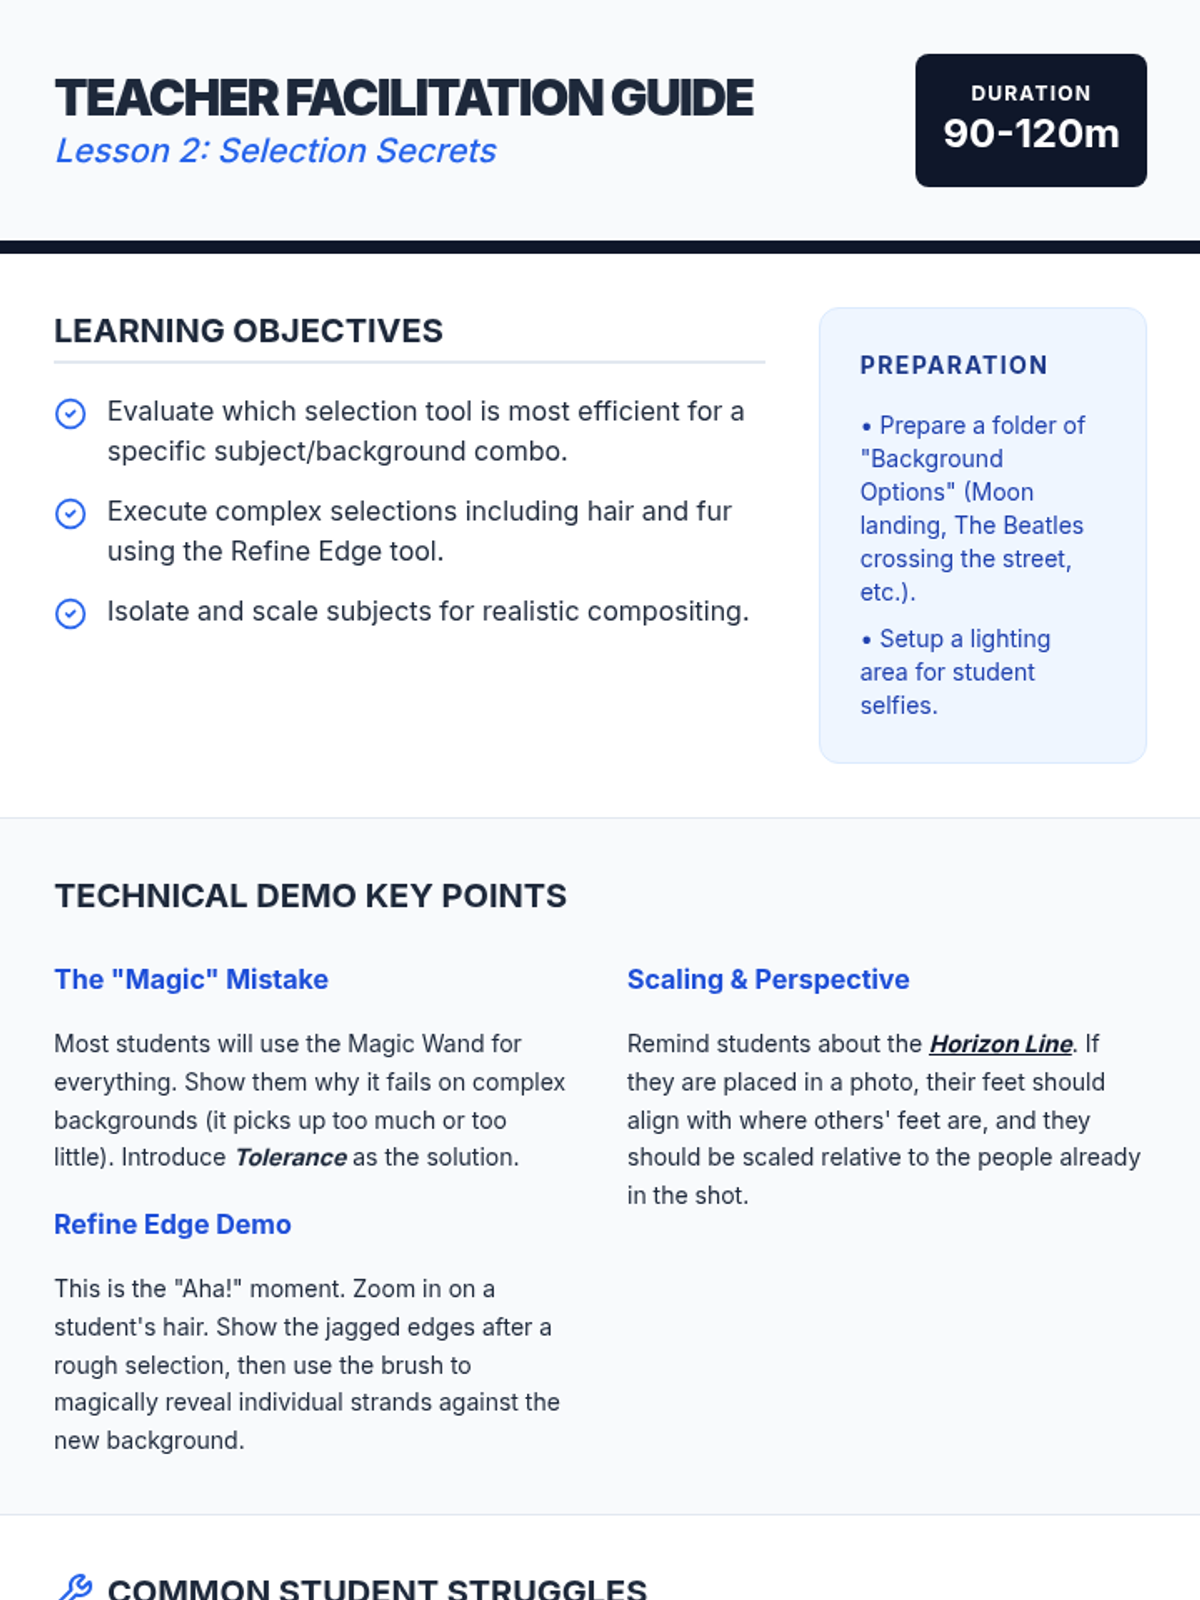
A deep dive into selecting and isolating objects from backgrounds to prepare for compositing.
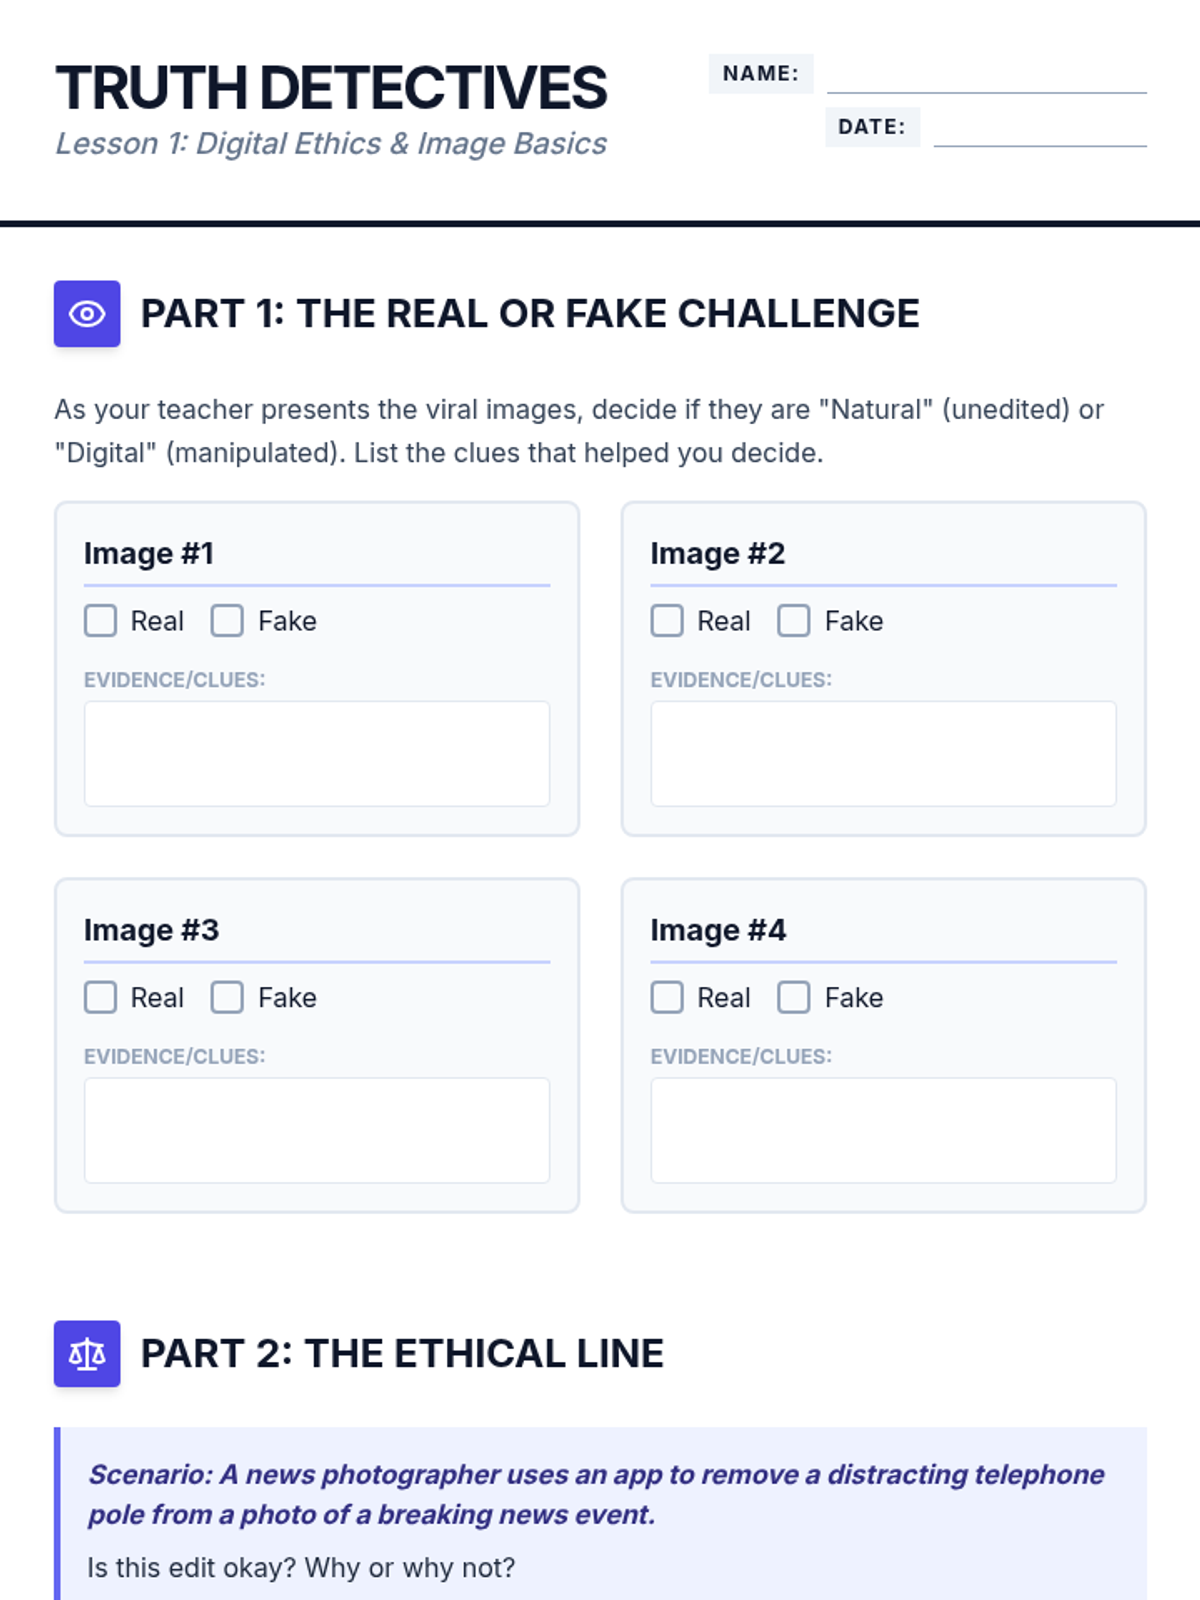
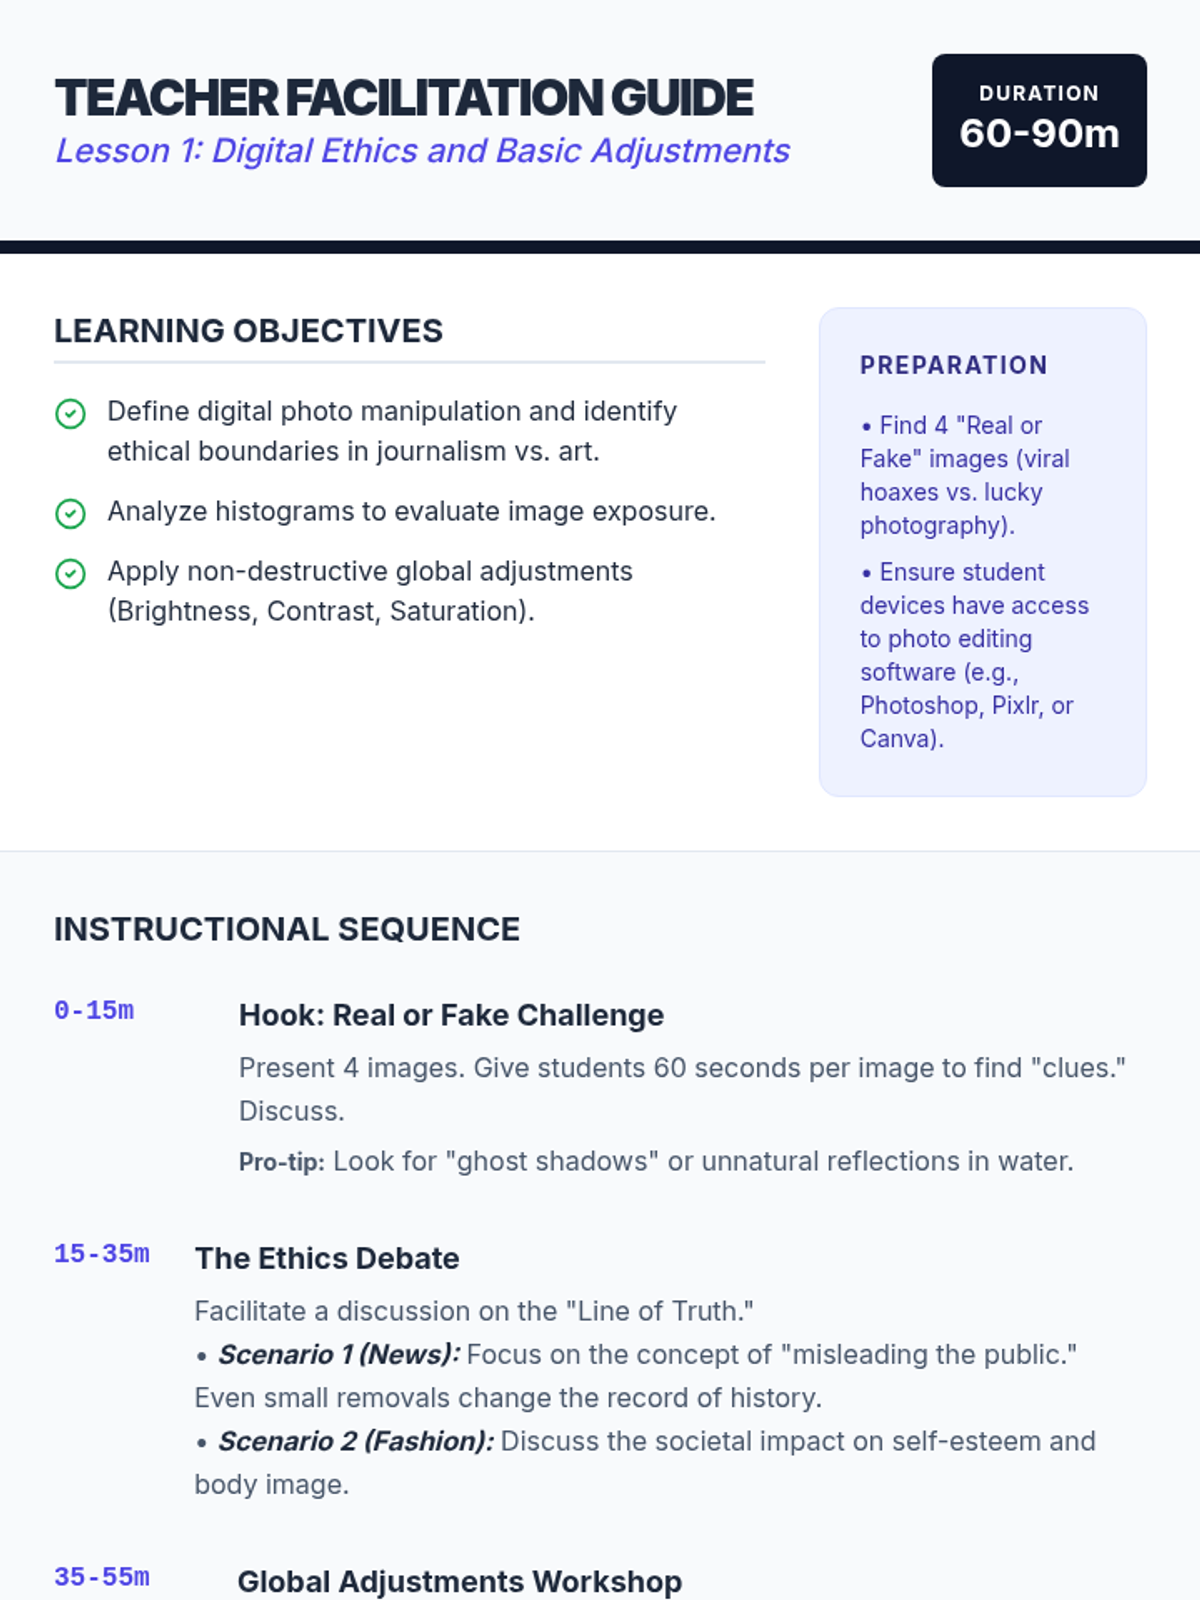
Students explore the ethical boundaries of photo manipulation and learn basic non-destructive image adjustments.
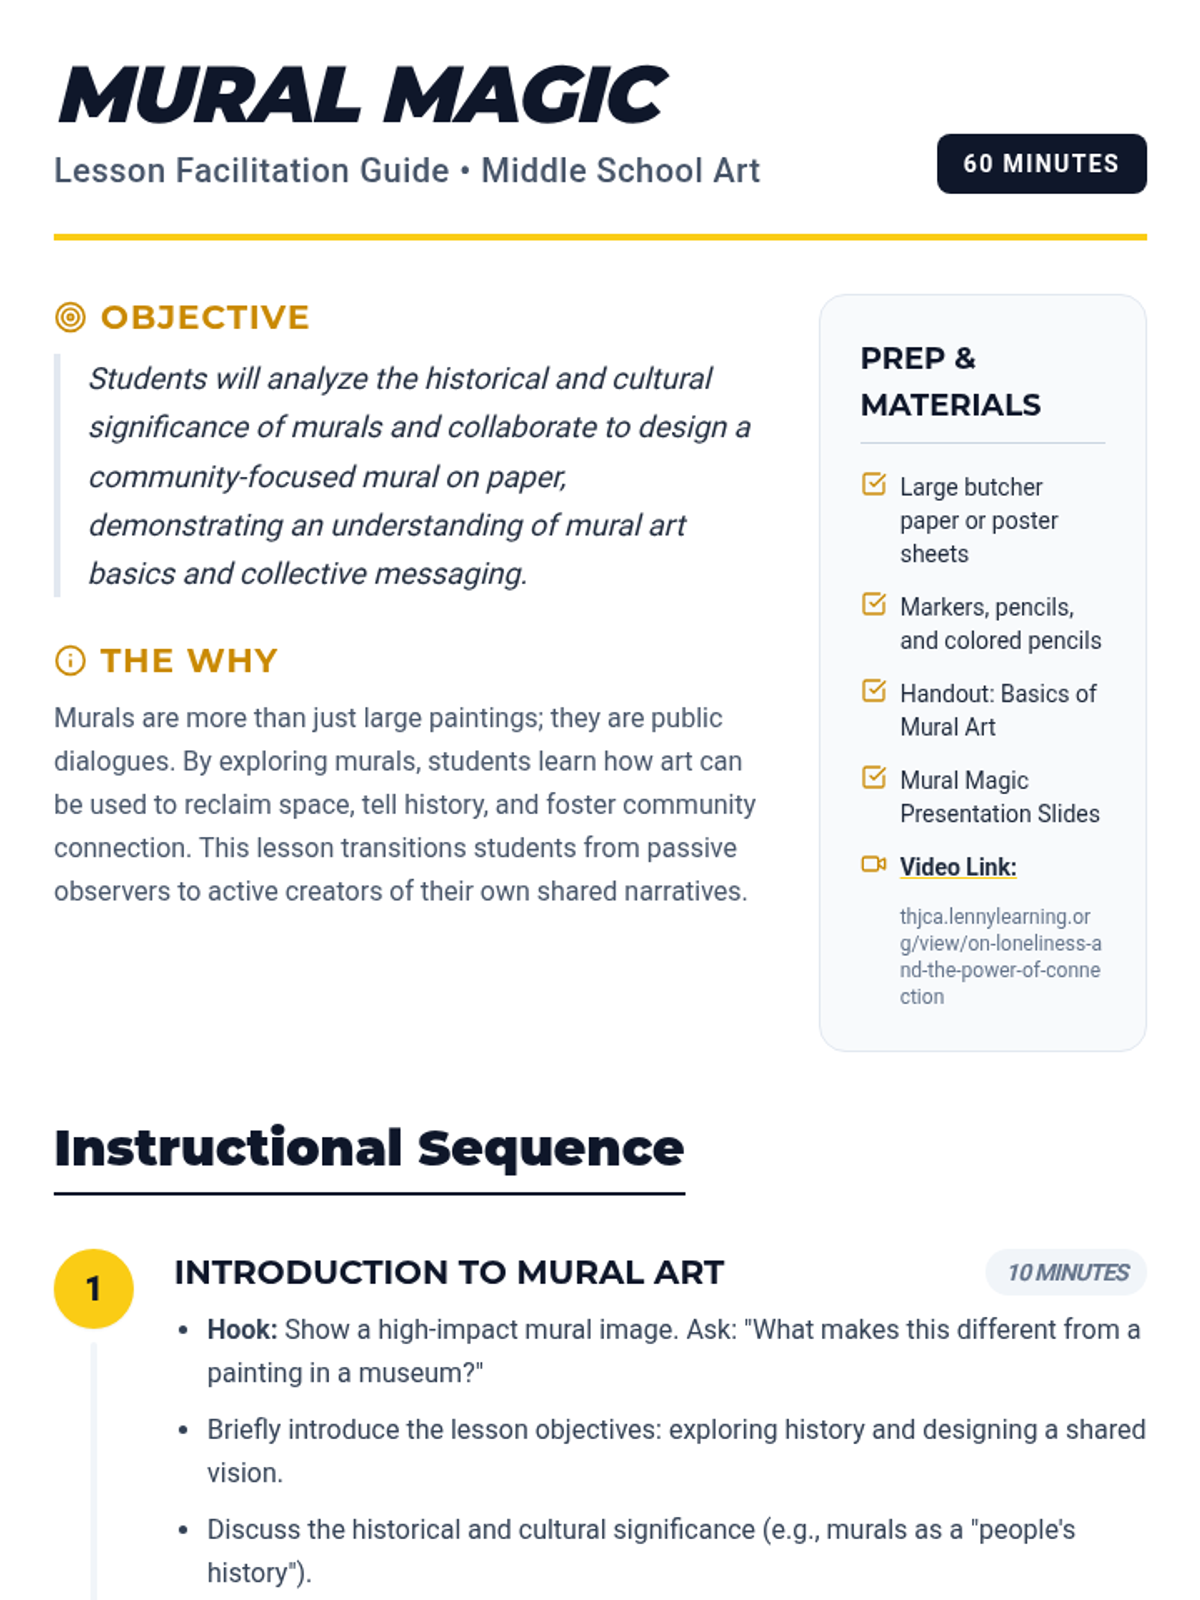
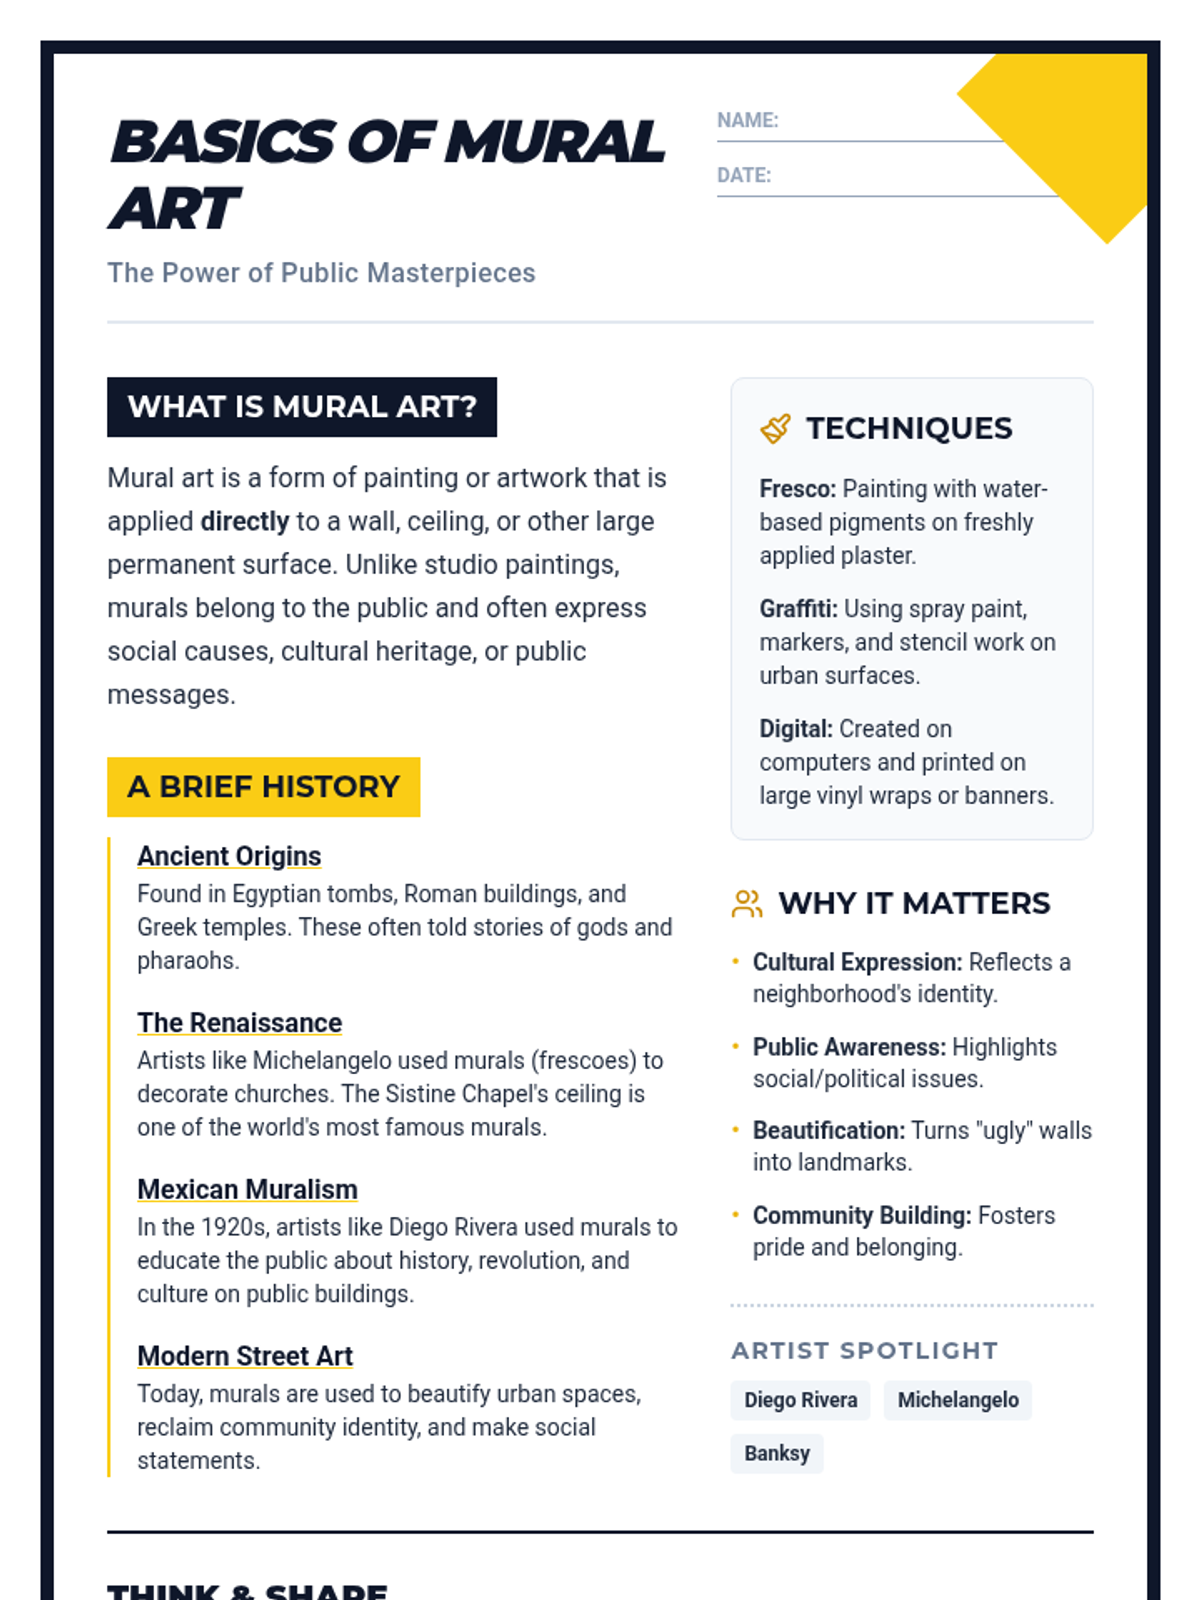
Students explore the history and cultural significance of mural art before collaborating to design their own community-themed mural.
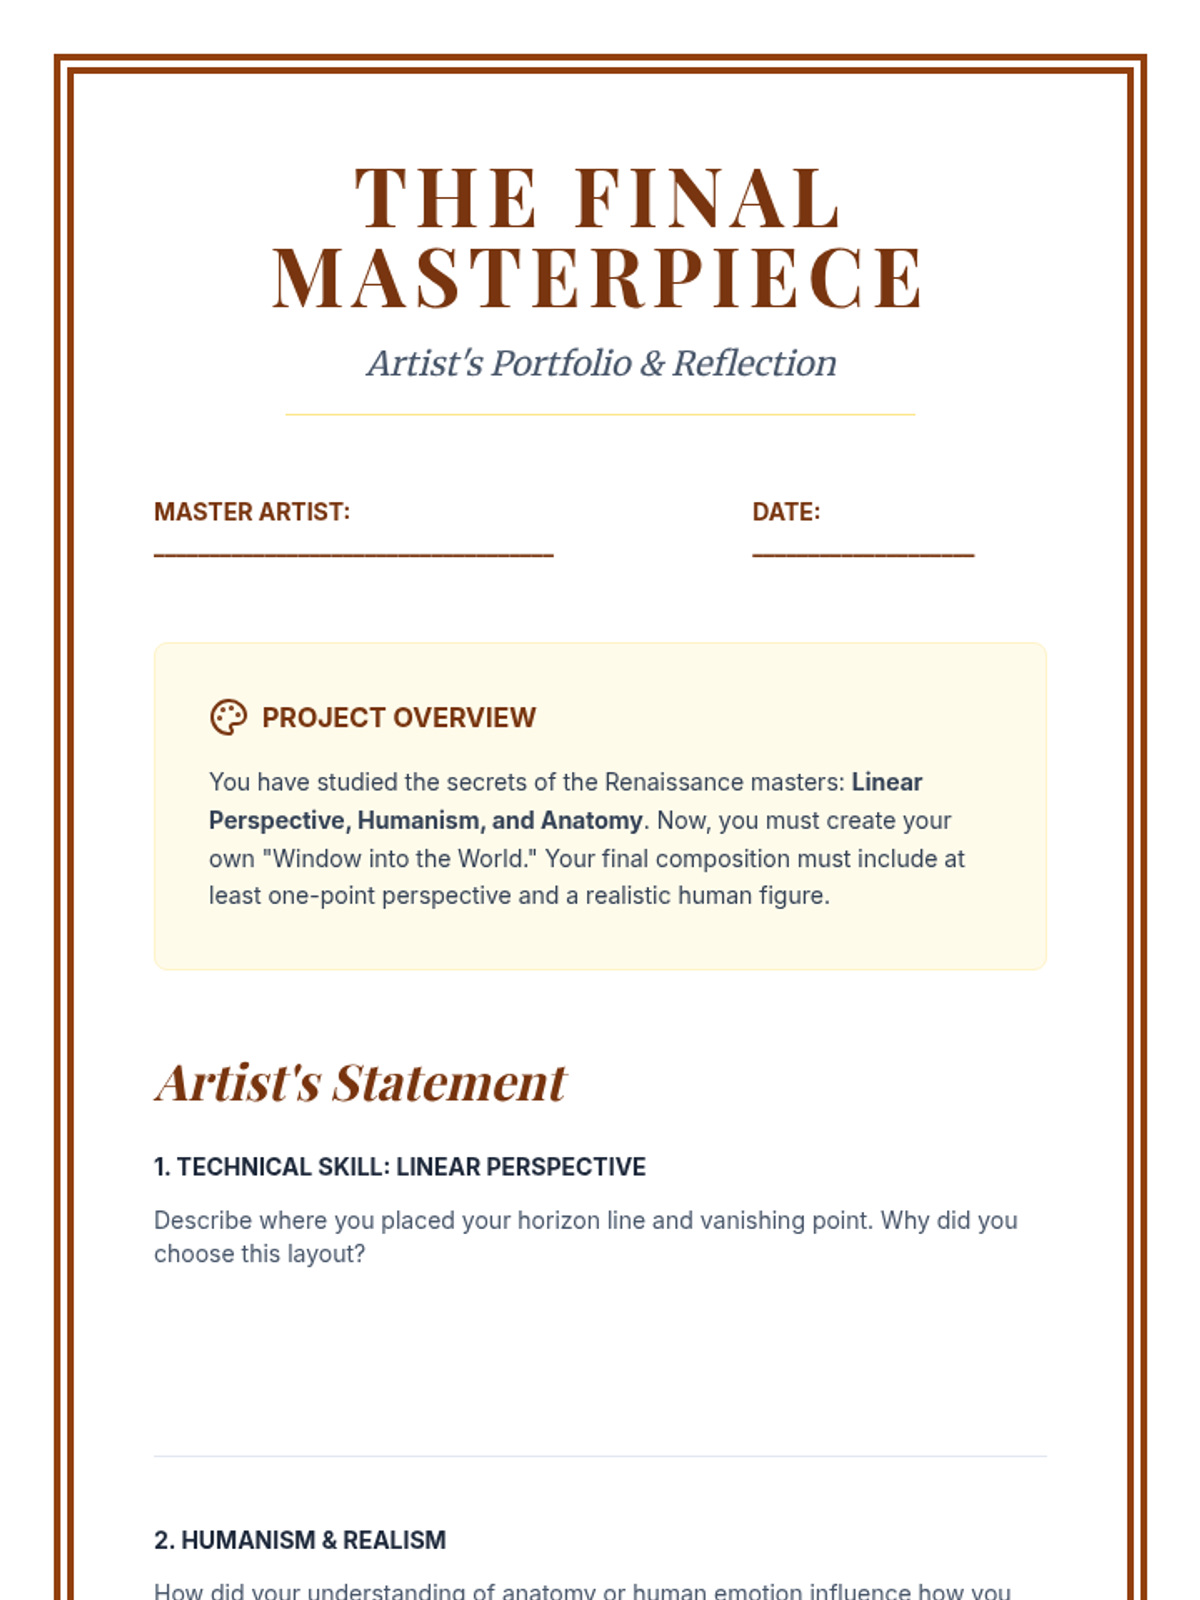
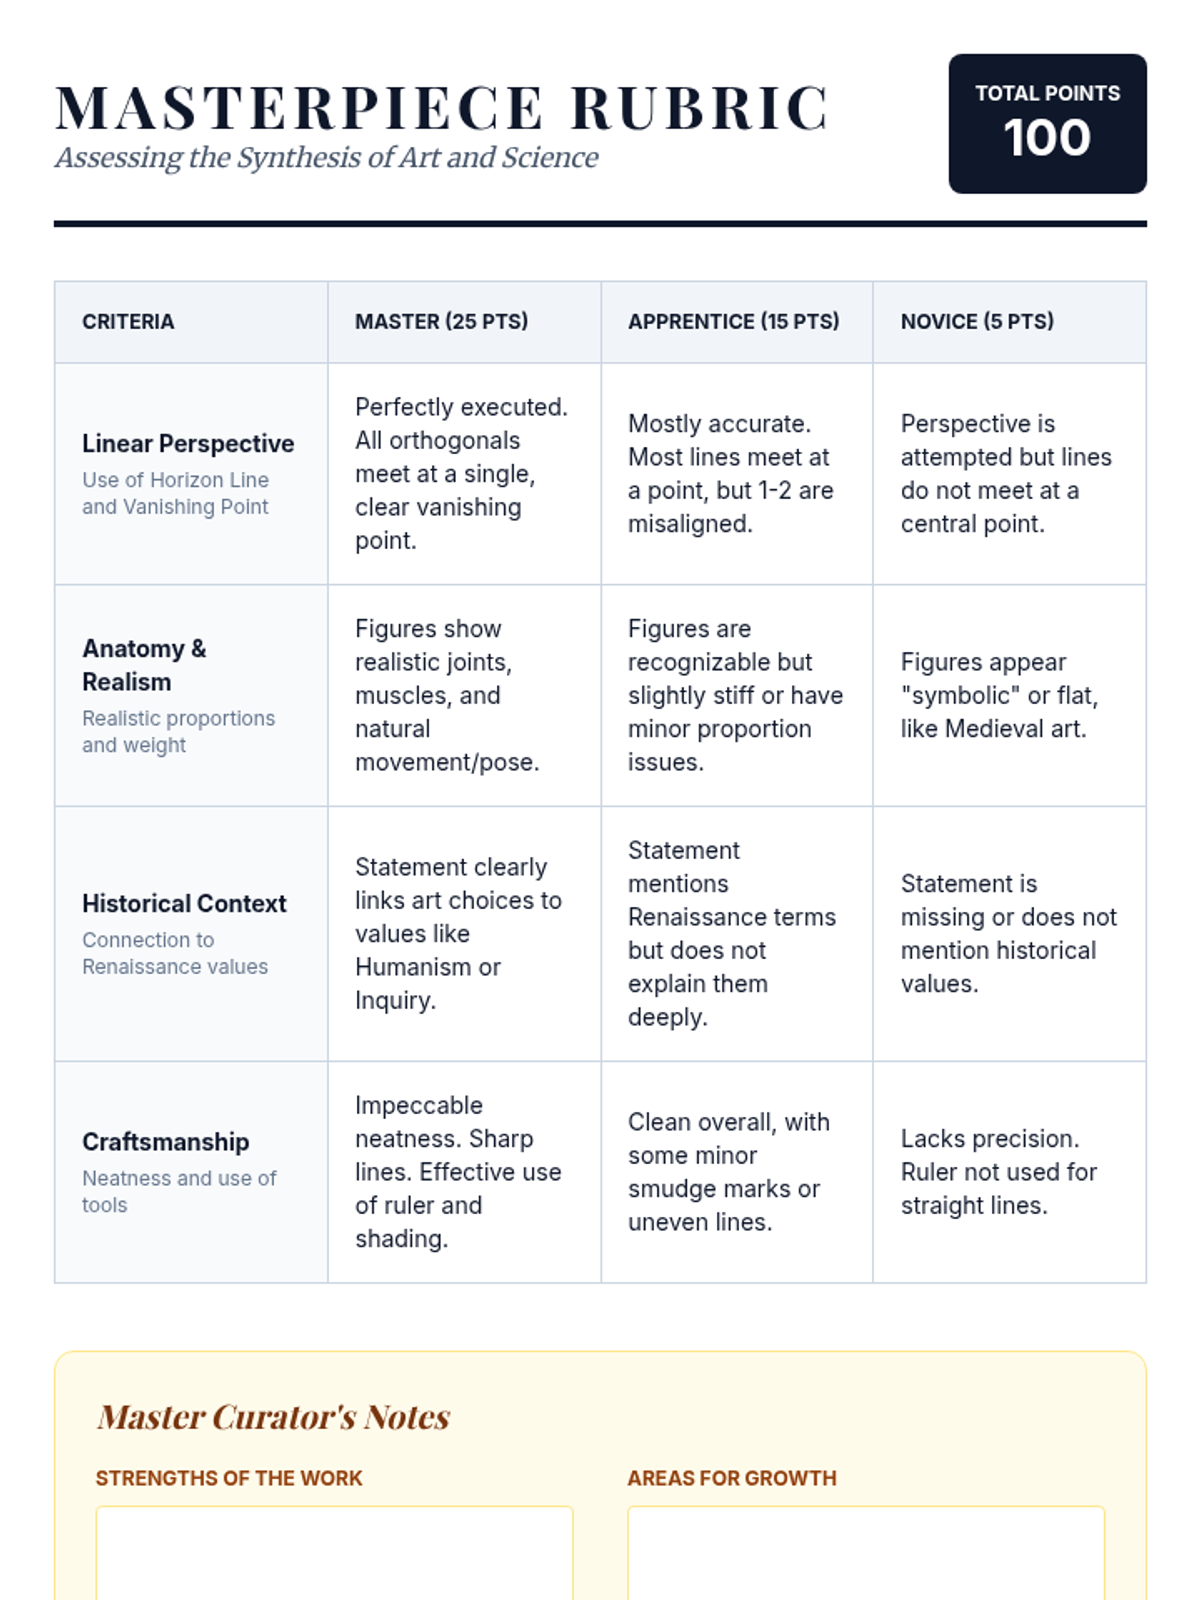
A culminating project where students create a perspectival composition and write a reflective artist statement.
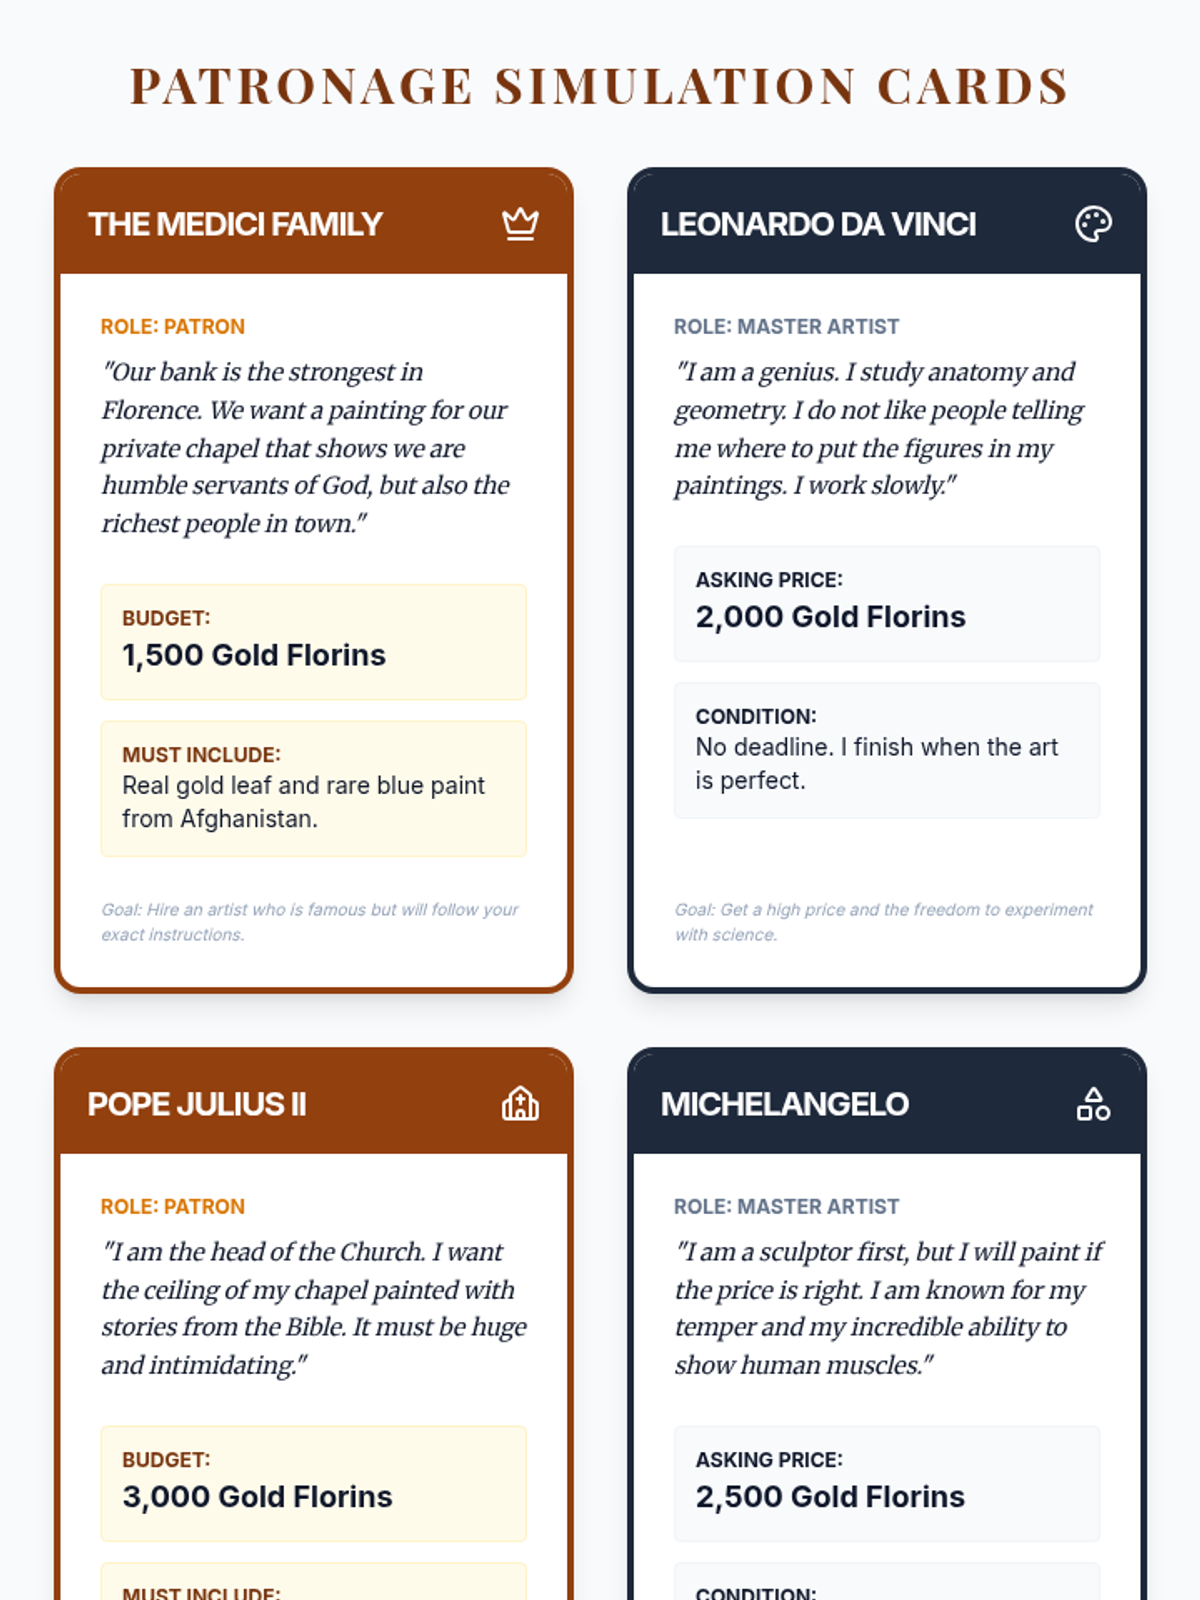
Students role-play as patrons and artists to understand the economic and social factors that drove the Renaissance art market.
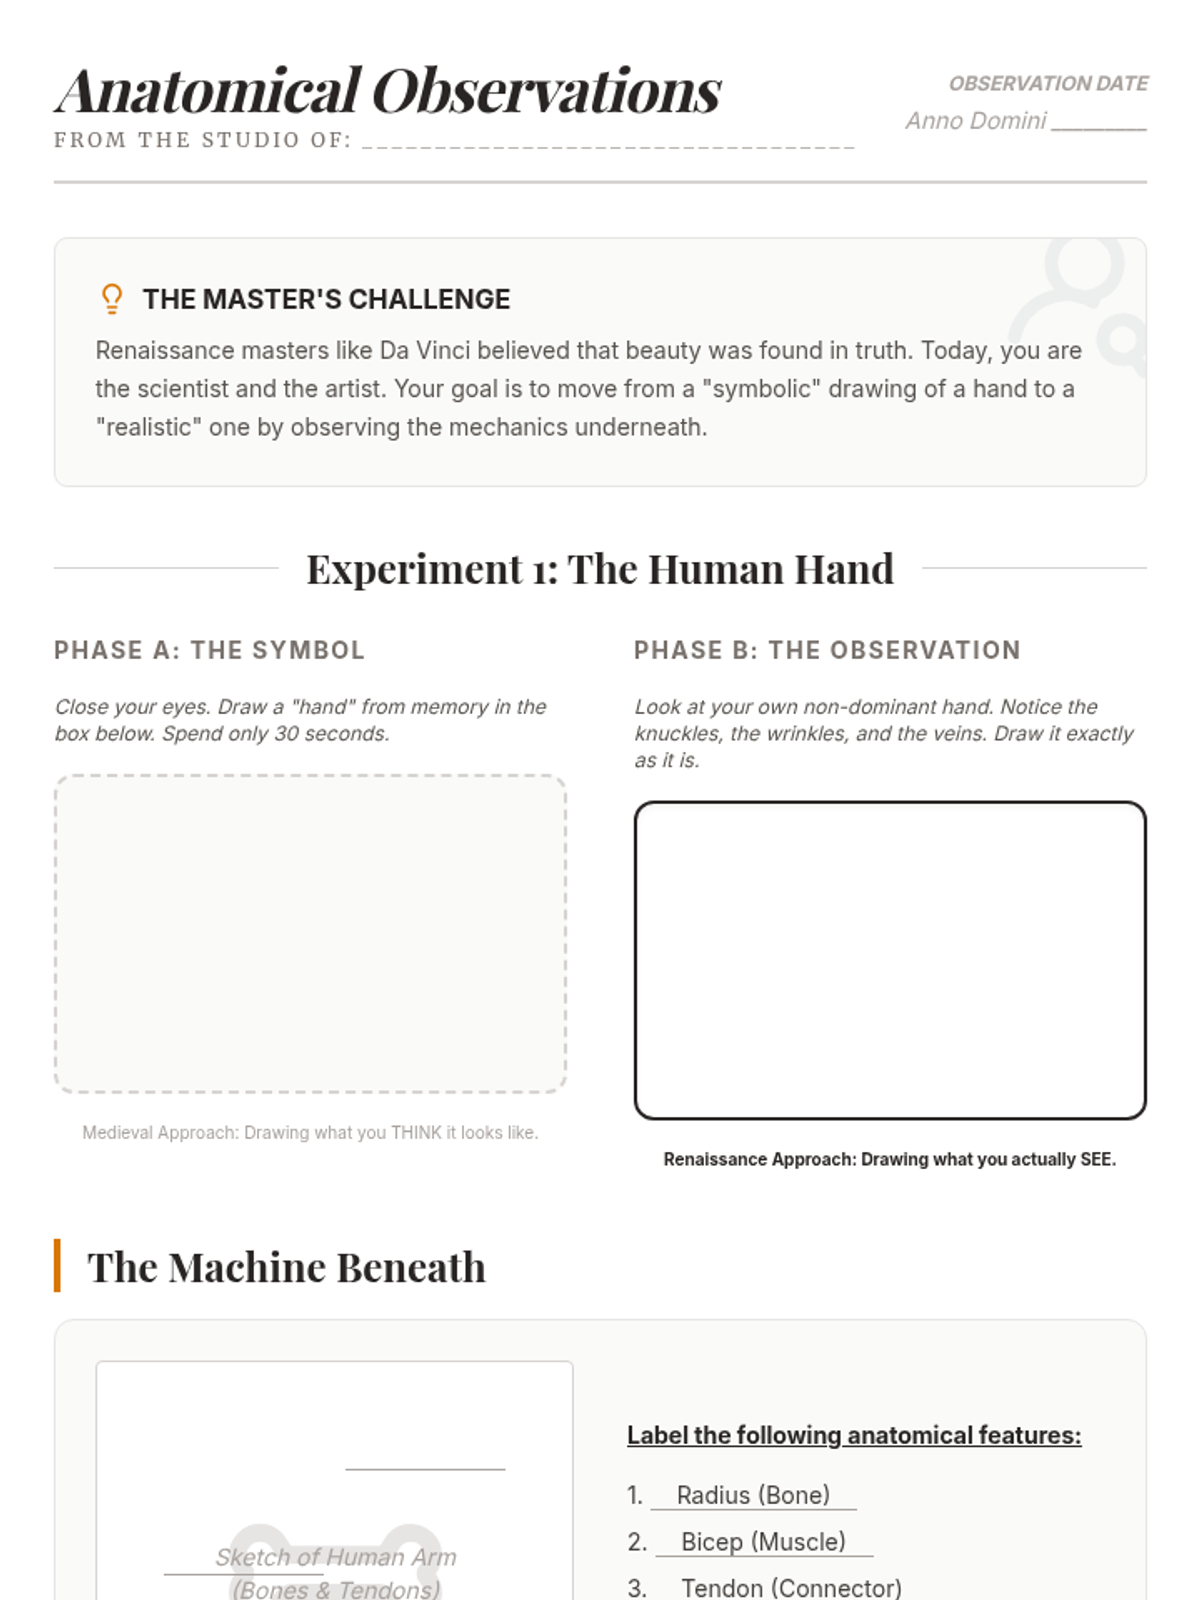
An investigation into how Da Vinci and Michelangelo used anatomical study to achieve unprecedented realism in their work.